Hello, steemians, and welcome to my page, eh!
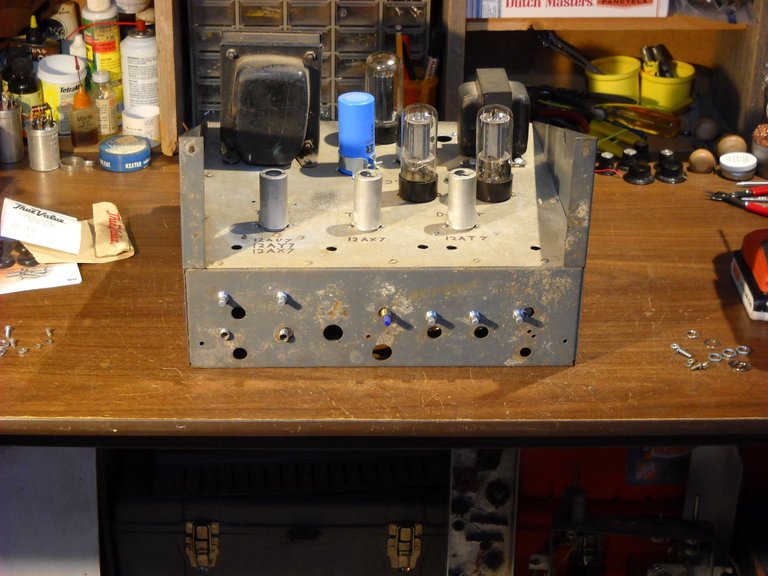
I rebuilt this tube amplifier last winter from parts that were given to me for the purpose. I like to refer to this amp as the "junkyard" amp now, I used to call it the ugly amp. I've written about this amp in the past and I did a little video to demonstrate the the sound of the amp a few months ago, I'll put the links to those posts at the bottom of this post. I've been looking at this amp for a while now, wondering how I could make it look better, and I decided to start by replacing the front face panel. So, let's take a look at the amp from before I started on this "facelift".
This is the way it looked with the old face panel. This had been someone's home made amp for playing music from a record player or tape deck, and the holes in the upper part of the face panel are where the controls were when I got it. I changed all of that in the rebuild, so I had the empty holes and the old decals for the controls left over from the original setup. Also, the old face panel is wider than the chassis so it stuck out a good inch on each side.
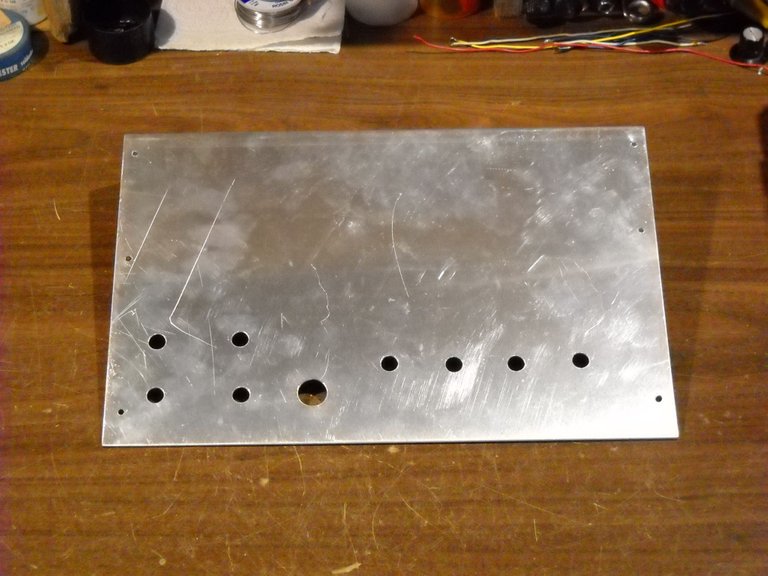
I went to the local sheet metal shop and had them cut and bend a new aluminum face panel for the amp. Once i got it home, I had to mark all the hole locations for all the controls, the power light, and the 6 screws that hold the face plate onto the chassis. I pulled the old face off the amp and used it as a template for the new face.
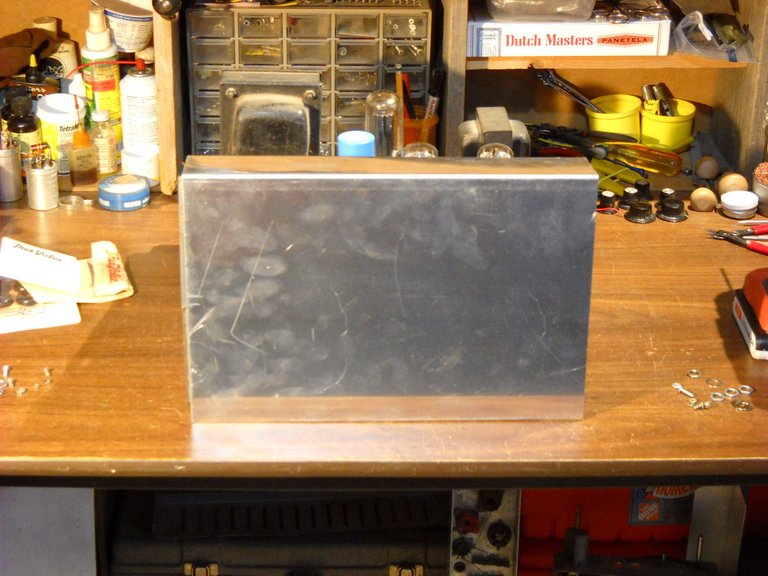
Of course, I had to see if the new face panel was made properly to fit the chassis, so I leaned it against the front of the chassis to check the fit.
It looked like it would fit the way I wanted it to, so the next step was to mark and drill the holes for the controls, the power light, and the screws. As you can see, there were a few scratches on the face plate when I picked it up from the metal shop, not much I can do about that.
Now that the holes are all drilled, time to test the fit and see where any adjustments might be needed to the holes. I was pretty happy with the holes that I drilled, I got them very close to right. I only had to take the round file to the chassis of the amp to adjust the position of the power light slightly for proper fit. A couple of the little screw holes didn't line up exactly, but that was easy enough to fix with the drill and the proper bit. Here is the panel with all the fasteners in place.
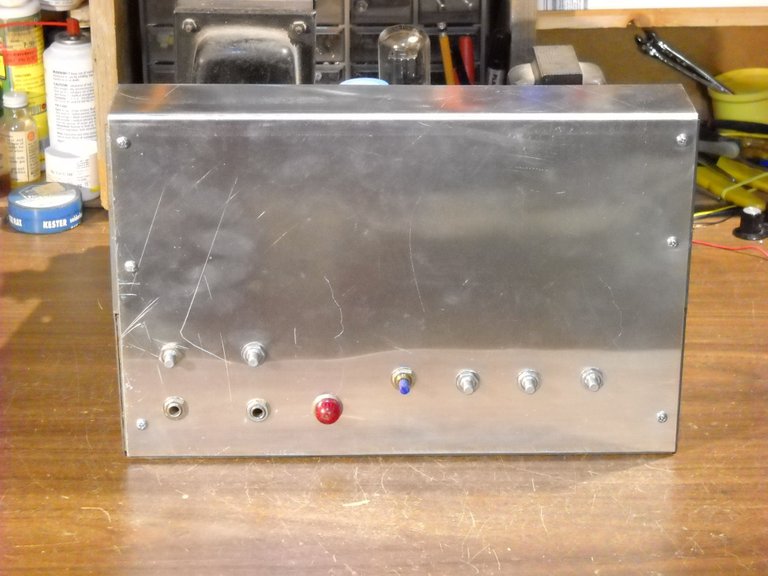
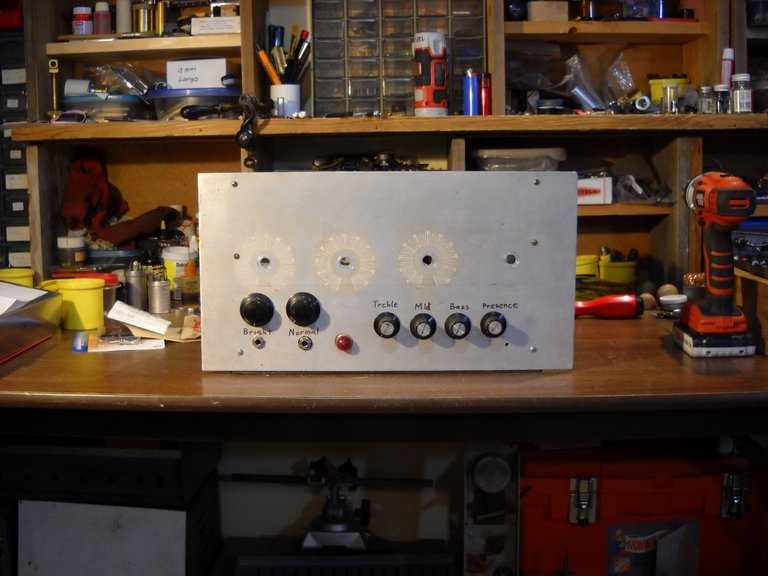
Now that I had it all assembled, all that was left to do was to put the knobs back on.
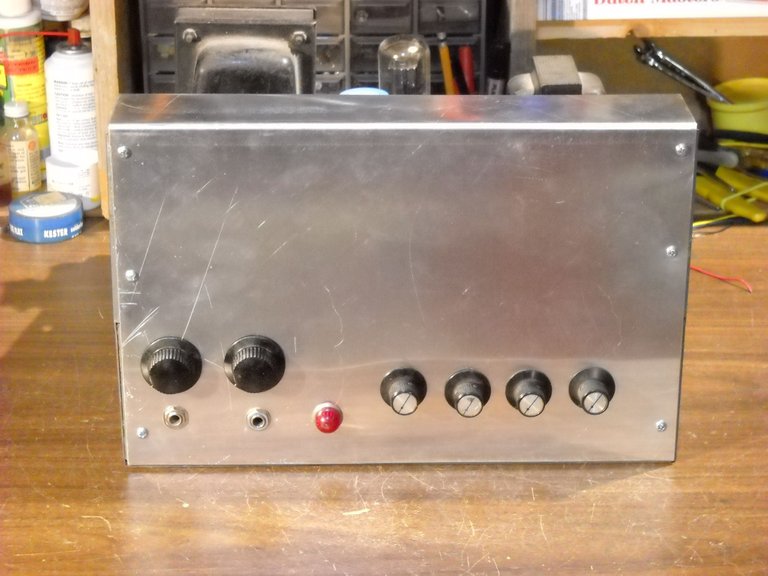
I still have to figure out if I want to leave the panel the way it is, or paint it, and I need to figure out how to label the controls. The magic marker worked fine on the old panel, but I'd like it to look a bit better for this panel.
The next step in this process will be wood side panels and some kind of a top panel. I don't know if I'm going to do a vented wood top panel, or a metal panel of some kind. I guess I'll figure that out once I have the side panels on.
Here's the link to the demo video that I did for this amp a couple of months ago, in case you'd like to watch it.
https://steemit.com/music/@amberyooper/demonstrating-another-amplifier-build-a-tweed-bassman-copy
Well, that's all I have for this post, I hope you found it interesting!

Thanks for stopping by and checking out my post, eh!
As always, feel free to leave a comment or a question if you would like.
May the Steem Force be with you!


That is so cool, @amberyooper!
Thank you! :-)
Congratulations! Your post has been selected as a daily Steemit truffle! It is listed on rank 22 of all contributions awarded today. You can find the TOP DAILY TRUFFLE PICKS HERE.
I upvoted your contribution because to my mind your post is at least 18 SBD worth and should receive 65 votes. It's now up to the lovely Steemit community to make this come true.
I am
TrufflePig, an Artificial Intelligence Bot that helps minnows and content curators using Machine Learning. If you are curious how I select content, you can find an explanation here!Have a nice day and sincerely yours,

TrufflePigEnjoyable read as always, ill always have a soft spot for rebuild gear :)
Whoa looks really nice. Wood side panels would be excellent.
Cool Stuff :)
You can see the preamp tubes labeled in the photo. What are the other tubes you used?
The amp has a pair of 6L6GCs and a 5U4 rectifier tube. I think the amp puts out somewhere near 45-50 watts of power. The circuitry is more or less a copy of the Fender Tweed Bassman 5F6-A chassis.
Nice. I have one of the Fender Bassman 10 silverface combos from the late seventies. My dad gave it to me years ago when I moved out. It is one of the ultra linear models, 70 watts. It doesn't have quite the bite that some of the other bassman models have but it still has its uses and I couldn't argue with the price (free). I mostly use it for bass and keyboards. It does also sound really good with a guitar through a Big Muff Pi, in my opinion or for clean jazzy stuff when your using the neck pickup with the tone rolled all the way back. Like Wes Montgomery style stuff. I guess a lot of people mod the bassman tens to mimic the blackface circuitry but I have always been happy with it. It is due to be re-capped and have the pots cleaned though.
That amplifier is starting to look good. Can't wait to see the finished product! Upvoted and resteemed :)
Thank you!