Hello, steemians, and welcome to my page, eh!
Today's post is a continuation of the process of rebuilding an old tube amp into a guitar amp. My first post dealt mostly with removing the unneeded circuit parts and the old power supply filter capacitors. In this post, I make a couple of modifications to the metal chassis as part of the rebuilding process.
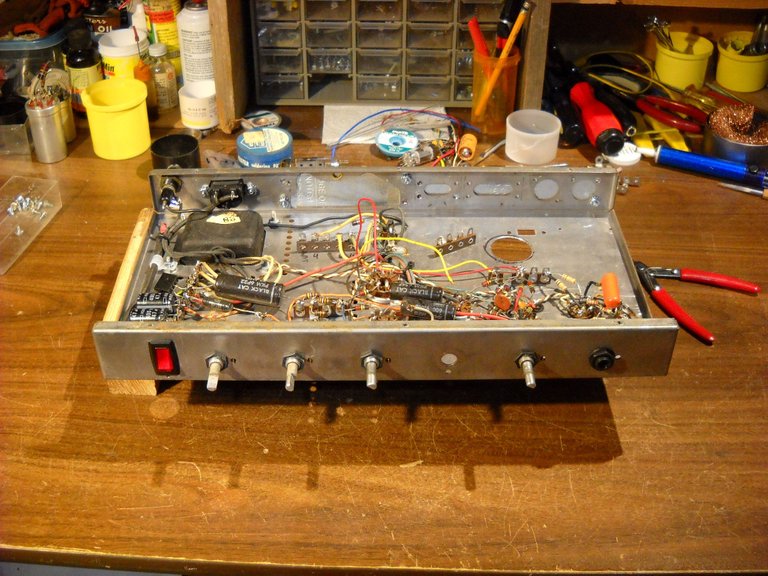
Let's take a look at where we left off last time. This is the point where I start adding parts into the build.

In order to accommodate the new power supply filter capacitor can, I had to cut a hole in the chassis to mount it through. I took the amp to the workbench in the basement and cut the hole in the chassis with a hole saw. I don't have any of the hole punches that the custom amp builders have for making holes, they're too expensive to have around for just occasional use, so I use hole saws for the job.

The next thing to do was to make a backplate to cover the holes in the back of the chassis. I used a piece of a galvanized strap normally used in constructing roof trusses and such, I cut it to length and then drilled the mounting holes.

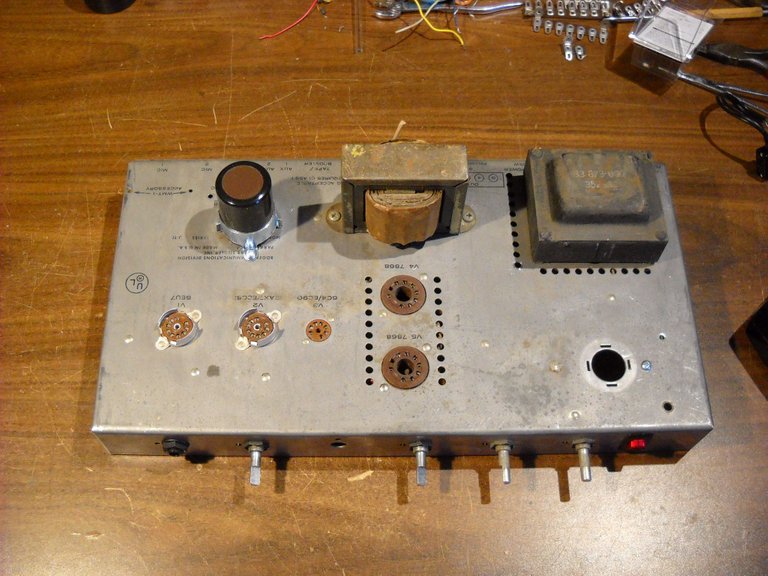
Here's what it looks like from the inside when it's mounted on the chassis.
Next, I put the power supply capacitors in place and wired them up. In this picture, the power supply is almost done. I still need to drill the new holes in the back plate and mount the standby switch to finish the power supply wiring. The autofocus on my camera wasn't quite right on this picture. Comparing this picture with the previous one will give you a good idea of what got put into the chassis.
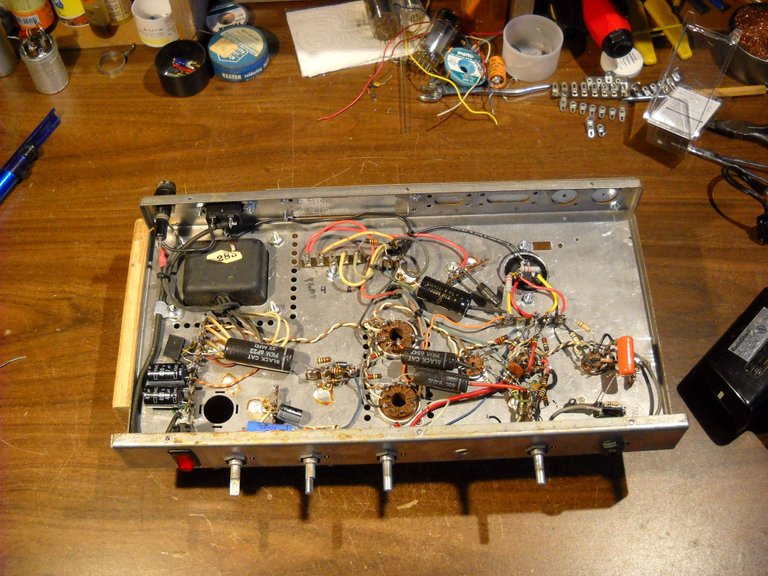
Here's a picture from the top of the chassis to show you the new power supply filter can mounted over the hole I drilled in the chassis. The hole in the chassis in lower right side of the picture is where the old filter can was mounted. Since the wiring setup is different, I chose to mount the new filter can in a more easily wired spot.
That's all I have for this post, I hope you found it interesting!
Stay tuned for part 3 of this series!
For part 1 of this series, click on this link.
https://steemit.com/music-equipment/@amberyooper/repurposing-an-old-tube-amp-part-1

Thanks for stopping by and checking out my post, eh!
As always, feel free to leave a comment or a question if you would like.
May the Steem Force be with you!

Oh no! Someone came and stole all the vacuum tubes!
They were there in the first pictures, and now... they are gone!
Yeah, I hate it when that happens! LOL
Cooool! I have an old tube stereo and the knobs are all scatchy ( the volume one is the worst, and its hard to find a spot where volume will even hold steady some times. I looked up how to fix it and it seems doable i just havent taken the time to try. This is amazing that you know how to do all this. Talent!
The first thing to try if you're going to attempt to fix the amp is to get a can of tuner cleaner spray and spray the inside of the volume control and the other controls. There's usually an opening on the cover where the wires are attached to control. Then just turn the control knobs back and forth a bunch of times to spread the cleaner, the turning action will clean the control if it's still good. Make sure the stereo is off and unplugged when you do this, there are some fairly high voltages in the amp when it's on.
If that doesn't work after a couple of times, then the control might have to be replaced to get the amp to work correctly again.
That's what I got! 😁 A few weeks ago I sprayed around the knob without taking the casing apart and it did help but I am waiting for a day where I don't have 900 things going on and a nice clear head before I take anything apart. I love tinkering but I like doing it when there isn't pressure to hurry or I won't get interrupted and leave it all sitting half done for a month haha
Wow, very nice work there! I'd probably electrocute myself just by staring at it too much time. I truly admire people that can get done what they want by their own hands and ideas. Looking forward to part 3 and to have a listen at the result!
Thank you!
Nice! I once almost bought an old fender twin in order to bring it back to life but I backed out since I'm really not into electronics... I didn't want to join the amp in it's deathbed either hahahaha. What amp are you repairing/adapting btw?
Its an old speaker amp from a five and dime (you know, "cleanup on isle 4")
He says where/what in the previous post
https://steemit.com/music-equipment/@amberyooper/repurposing-an-old-tube-amp-part-1
Oh! Missed that one! I'll go check it now :p. Thanks! :)
You wanna come rebuild my switchbay next? hah. You have a lot of well rounded skillz. Where'd you learn to bebuild tube amps? I inherited my dad's old amp from the 60s. I am not sure if its a tube amp or if it works (it might). Cool project Amber!
I learned a lot of tube amp work by doing. I used to fix TVs back in the 1980s and 90s, I went to school for that. I just had to learn how the tube amp circuits work, I already had the electrical knowledge from the TV work.
If your dad's amp is from the 1960s, it's likely that it's a tube amp.
That is gonna turn out to be a cool little unit :) stoked to see the continuation of the build!
Thank you!
Congratulations! This post has been upvoted from the communal account, @minnowsupport, by Amber-yooper (about that bass) from the Minnow Support Project. It's a witness project run by aggroed, ausbitbank, teamsteem, theprophet0, someguy123, neoxian, followbtcnews, and netuoso. The goal is to help Steemit grow by supporting Minnows. Please find us at the Peace, Abundance, and Liberty Network (PALnet) Discord Channel. It's a completely public and open space to all members of the Steemit community who voluntarily choose to be there.
If you would like to delegate to the Minnow Support Project you can do so by clicking on the following links: 50SP, 100SP, 250SP, 500SP, 1000SP, 5000SP.
Be sure to leave at least 50SP undelegated on your account.