
Today I want to share the creativity of handicrafts that are full of nostalgia with HIVE DIY friends, since I was little I really liked making creative works from 6x6 origami paper, today I want to make a creative work from this origami paper which I call Beautiful Bow Tie by @aquagelas.
To make this flower tie from origami paper, I only need 2 ingredients:

- red origami paper
- scissors
The following is a tutorial on how to make a bow tie from red origami paper and the scissors that we have provided above.
First fold the origami paper in half, after the first fold is complete, then continue folding it in half again from the opposite direction like the photo I share below.


After opening the origami paper again, take one end of the origami paper and fold it inward again until it meets the other end.

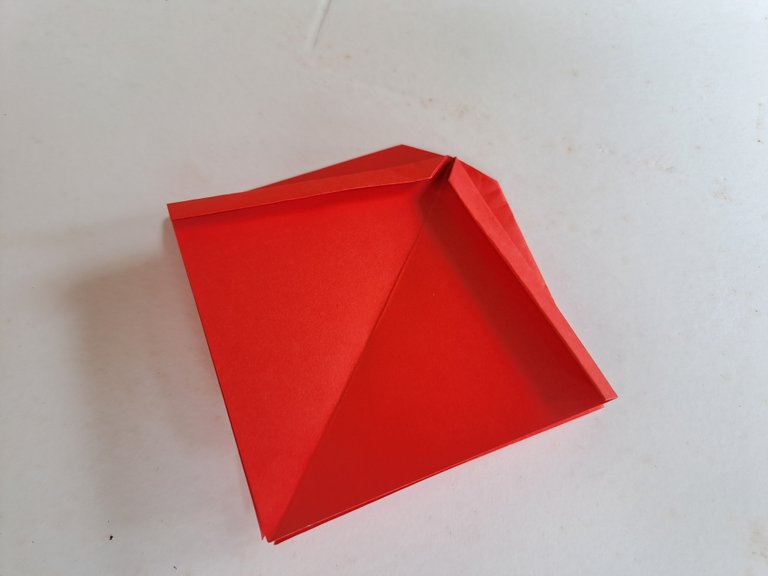
After several folds have been made above, now there are several fold lines on the origami paper, then bring the fold lines together until the origami paper takes the shape of a cone.


Then, fold the top edge of the origami paper slightly so that the inner pattern can be shaped like a box.

After the folds are opened again, there is a small box on the origami paper in the shape of a cone.

Then press the small box on top of the cone until it goes inside to make another pattern afterwards.

Then slightly fold the two ends of the top side of the origami paper so that when on the back the origami paper is shaped like a flower with a small box in the middle.


After that, take the four folded sides of the origami paper and cut them out so that the flower tie pattern can be further formed.


Then, fold in the part of the paper that has been cut using scissors.

Fold the two paper wings again neatly as shown in the image below.


Now his bow tie is starting to look perfect.

Then, turn the origami paper over again to fold the back of the paper again at the bottom end of the tie so that it looks like the legs of a person standing straight/straddling.


Then turn the paper over again, and now the shape of the bow tie is almost perfect, then take each right and left side of the end of the bow tie again to fold it in the middle and put the ends into the small box in the middle.


So, now the bow tie is complete, to perfect the shape of this bow tie, we can cut the bottom of the tie using scissors so that the bow tie is 100% complete and can be used for children to go to school. their Kindergarten (Kindergarten) school.


That's the tutorial and how to make a bow tie from origami paper, I learned to make a bow tie from origami paper from my kindergarten teacher when I was 6 years old.

This oarigami paper bow tie can also be used as decoration to stick on the mirror which will make the appearance of our mirror more aesthetic.
Thank you friends who have visited my creative crafts post today, see you in the next post.