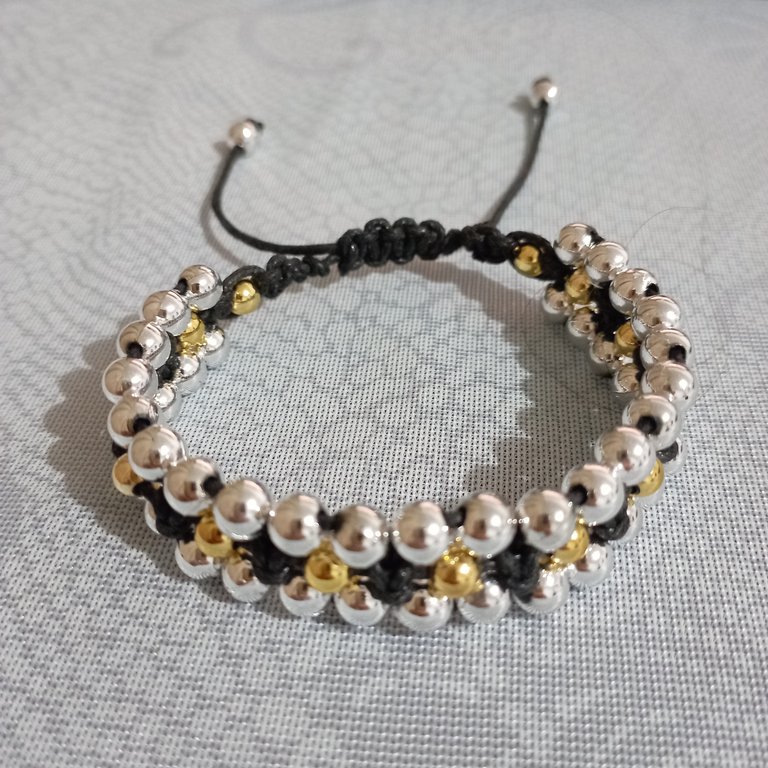

| Bracelet made of silver plated pellets and waxed thread. | Brazalete de balines plateados e hilo encerado. |
|---|---|
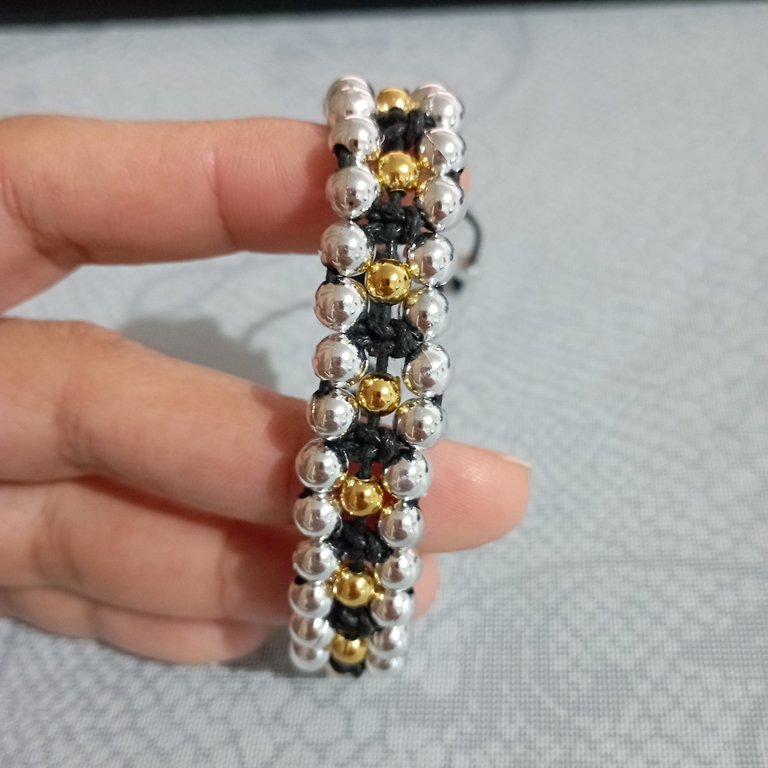
Greetings beautiful community. It is a pleasure to greet you again and share this new creation. It's a bracelet with silver balls and as a base I used a waxed thread of a very nice shine, it had more the appearance of leather than waxed thread and I thought it was ideal for this bracelet because I wanted a more elegant look. For the weave I made flat knots and in the center lower gauge gold plated balls. I had intended to make another bracelet for a set, but I think it would look great on its own. At first I didn't know how to start. I had the idea in my head but didn't know what knot to use. I tried a snake knot which I thought was beautiful, but I just couldn't get it right. I spent over an hour trying and my neck started to hurt, I felt stressed and gave up, so I resorted to my safe flat thread and after that in less than an hour I had the bracelet done. The materials for this design are: | Saludos hermosa comunidad. Es un gusto saludarlos nuevamente y compartir esta nueva creación. Se trata de un brazalete con balines de plata y como base utilicé un hilo encerado de un brillo muy bonito, tenía más la apariencia de cuerina que de hilo encerado y me pareció ideal para este brazalete ya que deseaba un aspecto un poco más elegante. Para el entramado realicé nudos planos y en el centro balines dorados de un calibre inferior. Tenía la intención de hacer otra pulsera para un set, pero creo que ella sola podría lucirse muy bien. Al principio no sabía cómo empezar. Tenía la idea en la cabeza pero no sabía que nudo utilizar. Intente con un nudo de serpiente que me pareció hermoso, pero no lo pude concretar. Estuve más de una hora intentando y me empezó a doler el cuello, me sentí estresada y desistí, así que recurrí a mi seguro hilo plano y después de ello en menos de una hora tenía hecho el brazalete. Los materiales para este diseño son: |
The materials used are:
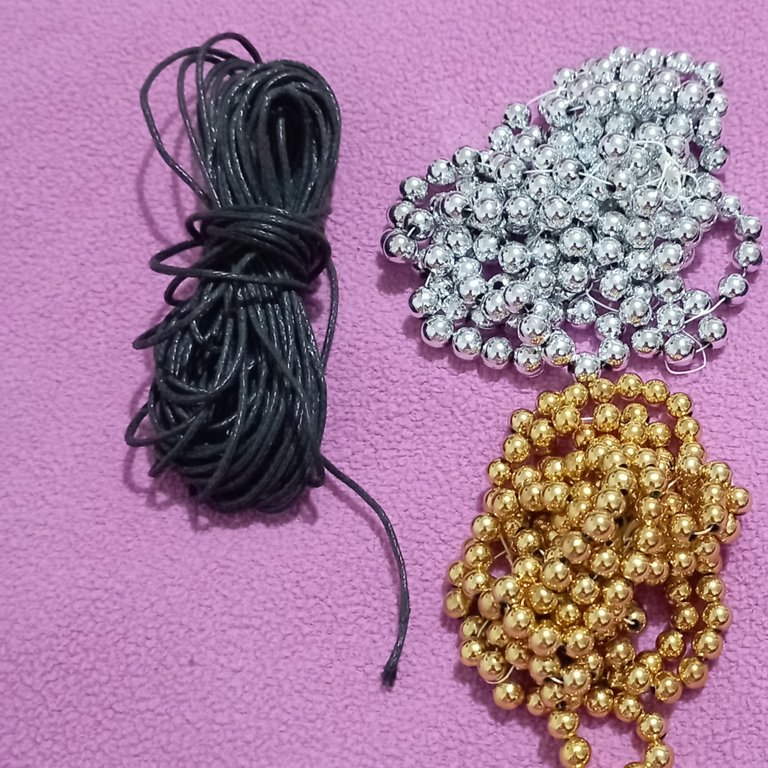
1 meter of black enclosed thread for the tie thread.
80 centimeters of waxed thread for the central thread.
Golden pellets 3mm.
Raised pellets 5mm.
Los materiales usados son:
5 metros de hilo chino multicolor.
Mostacillas doradas, cantidad necesaria.
Balines dorados, cantidad necesaria.
1 perla jumbo color aguamarina con colgante.
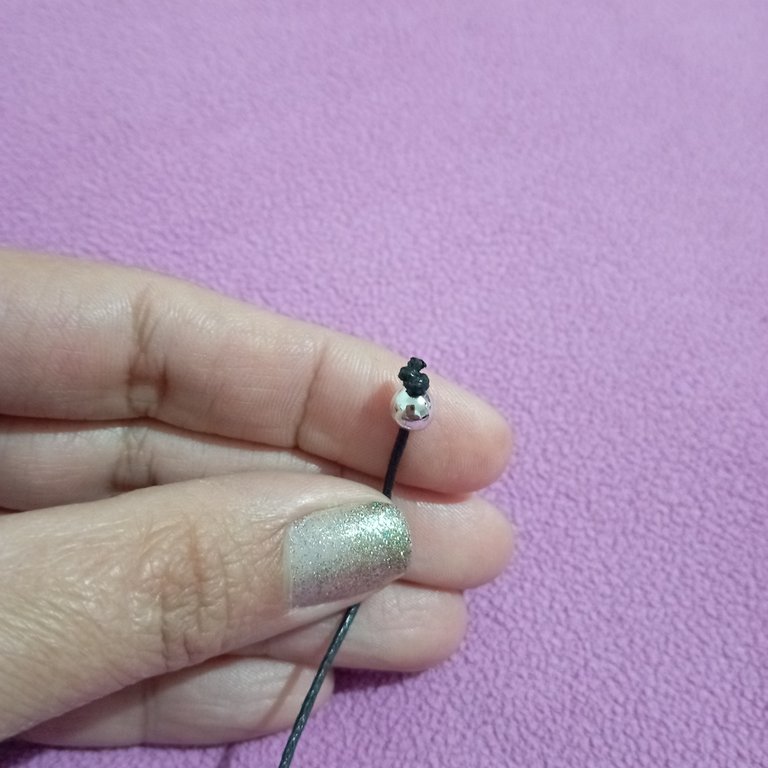
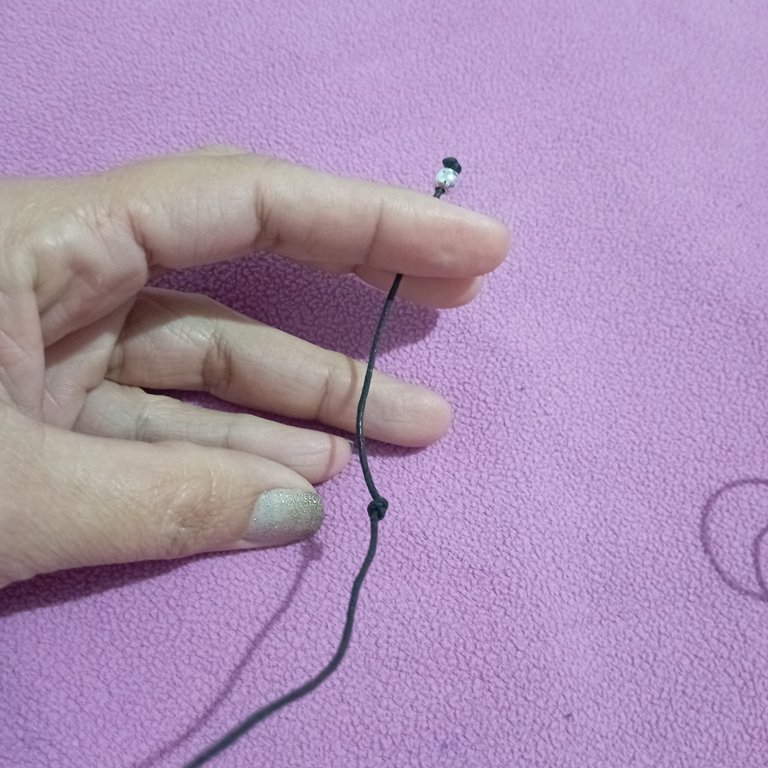
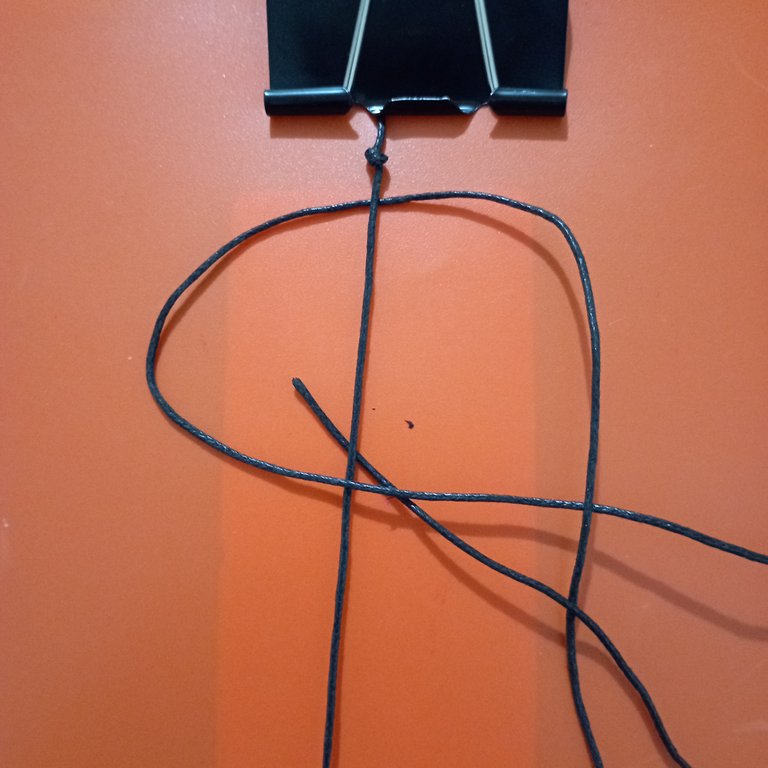
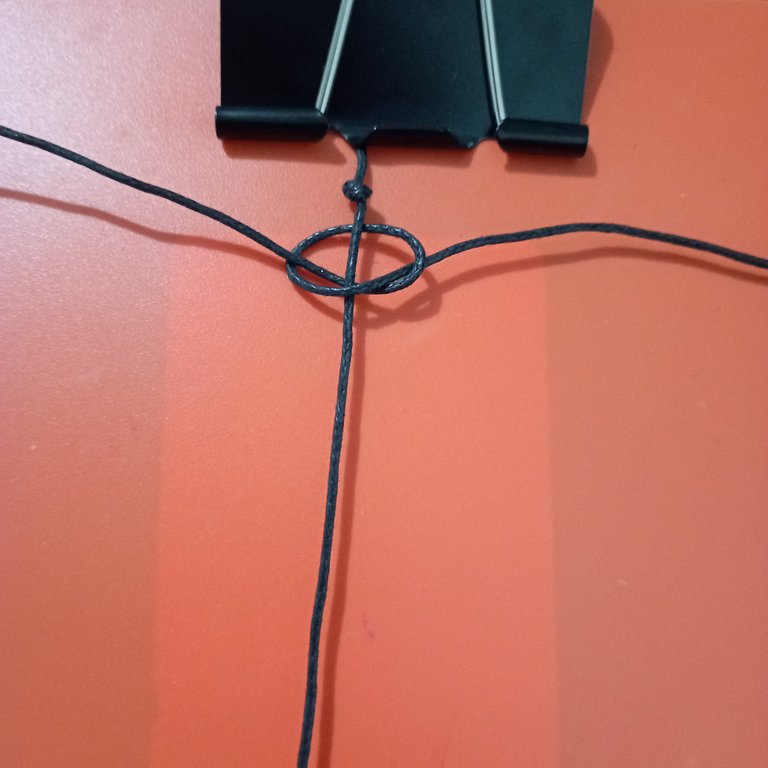
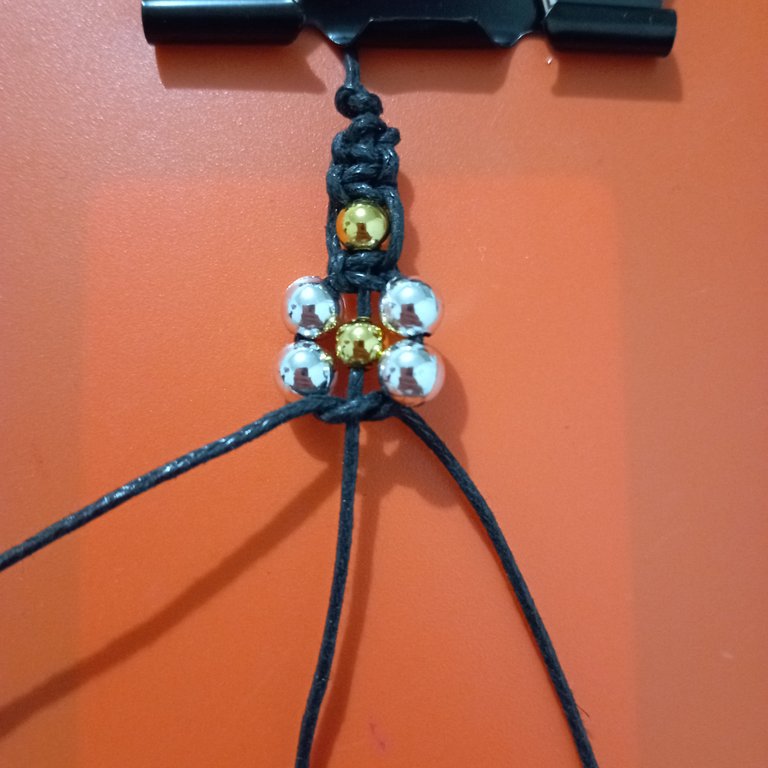
We take the central thread and we introduce a silver pellet, we pray a simple knot in the end of the thread to avoid that the pellet comes out and then another simple knot to 7 centimeters approximately of the end. Now with the tie thread, remember that it is the longest one, we make four flat knots. To make the flat knot we pass the tie thread behind the central thread and we place it in the middle. Pass the left end over the central thread and the right end over the left thread and behind the central thread, bringing both ends to the opposite side. Remember that if we have started the first knot with the left thread, we start the second knot with the right thread and so on. | Tomamos el hilo central e introducimos un balín plateado, rezamos un nudo simple en la punta del hilo para evitar que se salga el balín y luego otro un nudo simple a 7 centímetros aproximadamente del extremo. Ahora con el hilo de amarre, recordemos que es el más largo, hacemos cuatro nudos planos. Para hacer el nudo plano pasamos el hilo de amarre por detrás del hilo central y lo ubicamos a la mitad. Pasamos el extremo izquierdo por encima del hilo central y el extremo derecho lo pasamos por encima del hilo izquierdo y por detrás del hilo central, llevando ambos extremos hacia el lado opuesto. Recordemos que si hemos empezado el primer nudo con el hilo izquierdo el segundo lo empezamos con el derecho y así sucesivamente. |


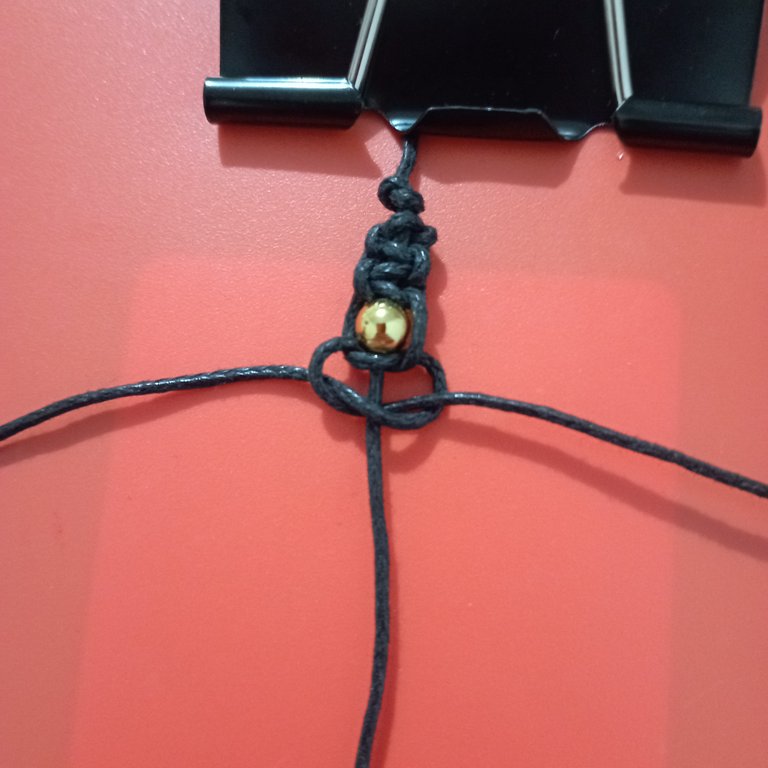
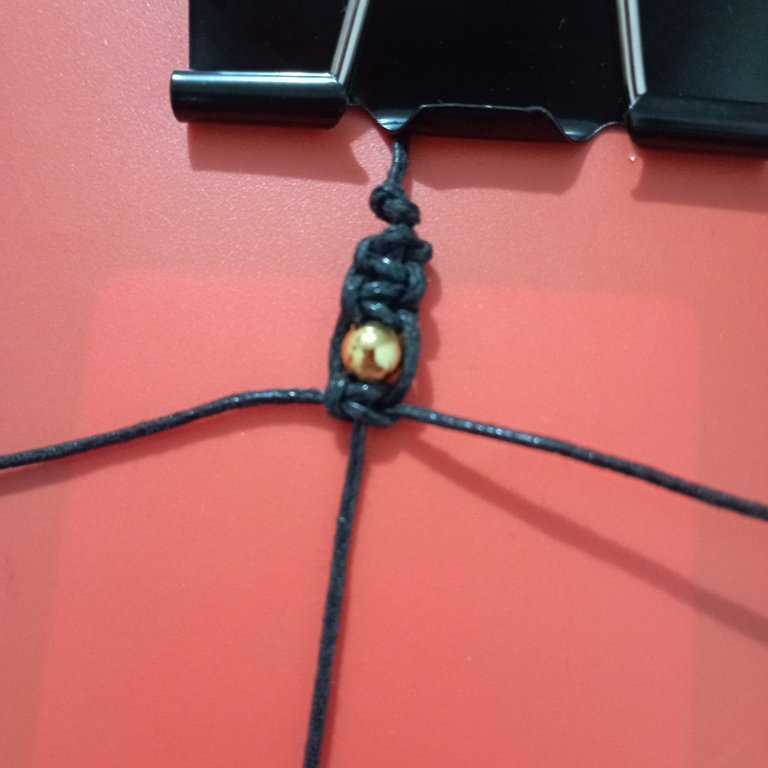
When we have made the four flat knots at the beginning we introduce a golden ball and tighten them with a flat knot that wraps around the ball, then we make two flat knots. | Cuando hemos realizado los cuatro nudos planos de inicio introducimos un balín dorado y los ajustamos con un nudo plano con envuelve el balín, luego realizamos dos nudos planos. |

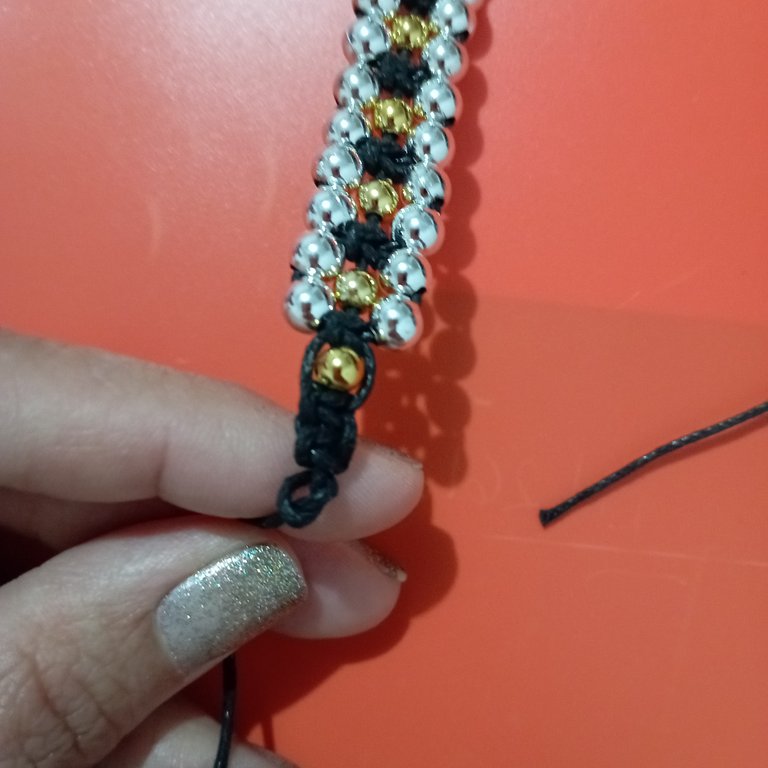
The next step we introduce a golden bead in the central thread and then two silver beads in each end of the tie thread, that is to say the first section of the bracelet will be constituted by a golden bead in the center and four silver beads, two at each end surrounding the golden bead. We close the first link with two flat knots and start again with a golden ball in the center and two on each side at the ends of the tie thread, then two flat knots and repeat the pattern of links. Always making two flat knots between each link and taking care to always start with the same side of the tie thread. | El siguiente paso introducimos un balín dorado en el hilo central y luego dos balines plateados en cada extremo del hilo de amarre, es decir el primer tramo del brazalete estará constituido por un balín dorado en el centro y cuatro balines plateados, dos a cada extremo rodeando el balín dorado. Cerramos el primer eslabon con dos nudos planos y volvemos a empezar con un balín dorado al centro y dos a cada lado en los extremos del hilo de amarre, luego dos nudos planos y repetimos el patrón de eslabones. Siempre realizando dos nudos planos entre cada eslabón y cuidando empezar siempre con el mismo lado del hilo de amarre. |


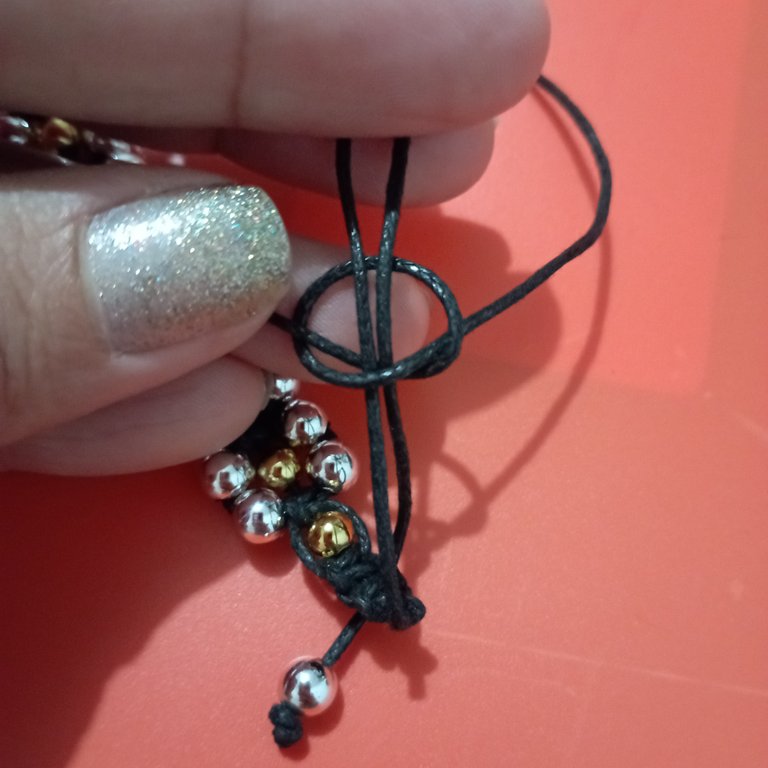
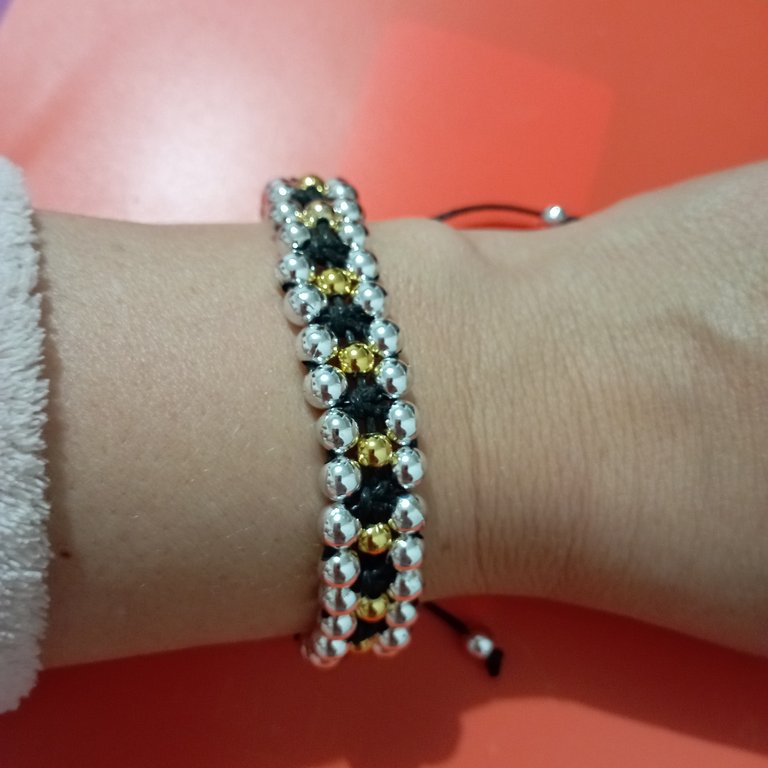
When we reach the size we want, depending on the size of the bracelet we are making, we finish with two flat knots and cut the excess of tie thread, we seal them with the lighter. We place a golden ball to finish off the other end of the central thread. The last thing we do is the way to close the bracelet and in this case make five flat knots to follow the weaving sequence. That's it folks, an eye-catching bracelet. I was happy to share it with you. Bye Bye. | Al llegar al tamaño que deseemos, dependiendo del tamaño de la pulsera que estamos realizando, terminamos con dos nudos planos y cortamos el sobrante de hilo de amarre, los sellamos con el encendedor. Colocamos un balín dorado para rematar el otro extremo del hilo central Lo últimos que hacemos es la forma de cierre del brazalete y para este caso realice cinco nudos planos para.seguir la secuencia de entramado. Esto es todo amigos, un llamativo brazalete. Me dió gusto compartirlo con ustedes. Chao Chao. |


Imágenes editadas en: itshot
Fotos tomadas con Redmi 10
Images edited in: itshot
Photos taken with Redmi 10

Awesome, this is beautiful 😍
Oh! Thank you. I'm glad you liked it.
☺️☺️☺️🙏
Bellísima amiga está pulsera sus colores van con todo... La combina y tejido me gustó mucho. Me encanta btu blog. Éxito amiga
Agradezco mucho tu comentario, tu apoyo y que visites mi blog. Eso es muy valioso para mí.
Gracias por tus buenos deseos.
🤗
Me encanta demasiado quedó hermosísima amiga✨✨✨
Gracias amiga. Lo aprecio mucho.
Abrazos, exitos y bendiciones para ti.
Te ha quedado maravillosa esa pulsera amiga, de verdad que no parece hilo encerado sino cuerina, los balines le dan un toque elegante, quedo preciosa, gran trabajo amiga @artsugar
Siiiii ..verdad...me lo vendieron como hilo chino, de hecho yo lo pedí así...pero apenas lo desaté me di cuenta que tiene un brillo diferente y es menos rígido. Lo cierto es que queda más lindo..lastima que solo tienen negro en ese tipo.
Amiga agradezco tu comentario.
Bendiciones.
LINDO TRABAJO...SALUDOS
Gracias por la visita a mi blog y por tu comentario.
Exitos. 🤗🤗🤗
Está hermosa la pulsera ❤️, mucho éxito 👍
Graciasssss...☺️☺️🤗🤗
Super elegante 🙂 sin duda la usaría y lo mejor de todo que por sus colores con varios look iría muy bien @artsugar
Gracias querida Mili. Creo que esta es una de las que más me ha gustado. Yo ya la quiero regalar a alguien especial. Es que soy una regalona. Jajaja. Ahora feliz porque tengo cosas lindas que darle a mis amigas.
Gracias por dejarme tu comentario.
Abrazos.