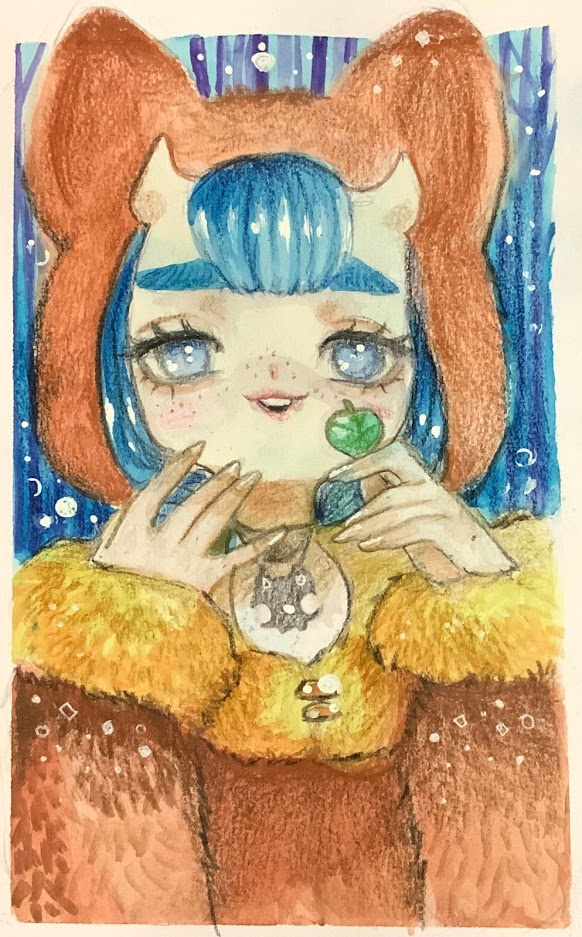
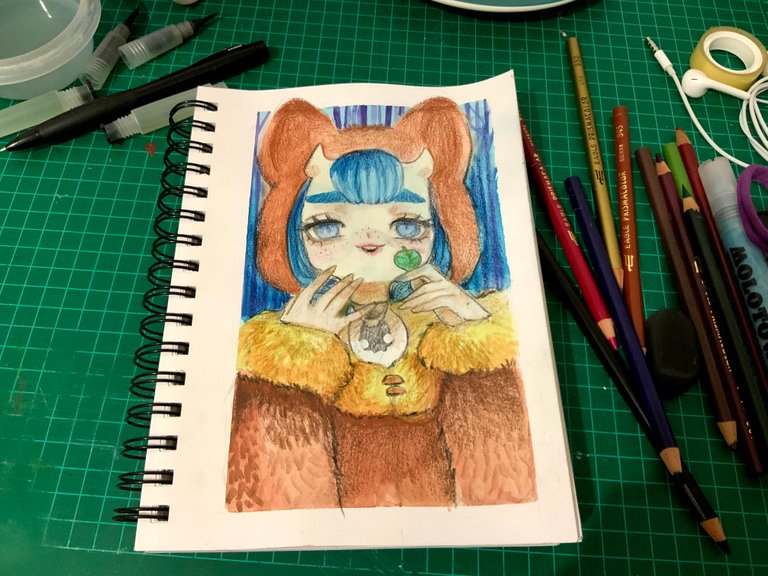
My little Hivers, today I want to share with you this watercolor that I did after much of not touching this traditional technique. It is a little sad to realize that I have lost some practice but I still liked the result. The main idea was to do everything with watercolors but with this loss of practice I decided to use colors to give effects that I was not going to be able to do with watercolors.
Materials:
- Canson watercolor paper
- Pencil
- Black rubber and pencil sharpener
- Molotow liquid mask
- AquaBrush Brushes
- Jovial watercolors
- Prismacolor Colors
- White Gelly Roll Ink
- White Pen Touch Ink
- Transparent tape
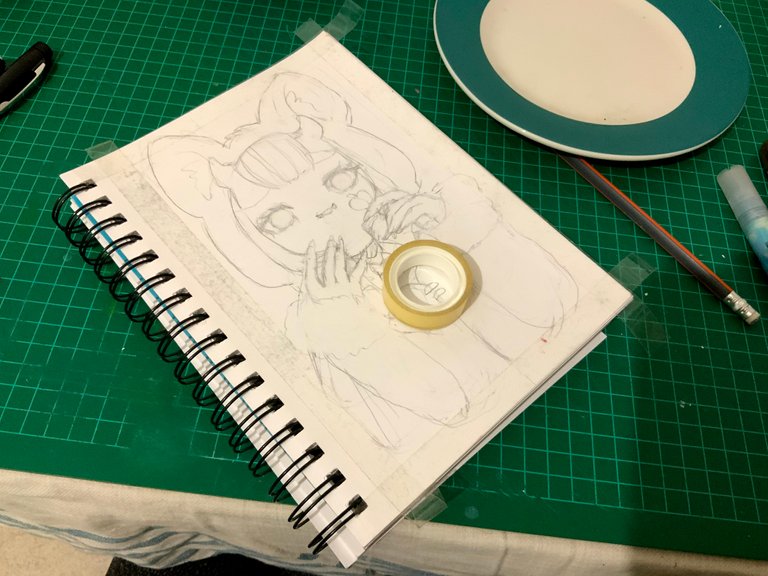
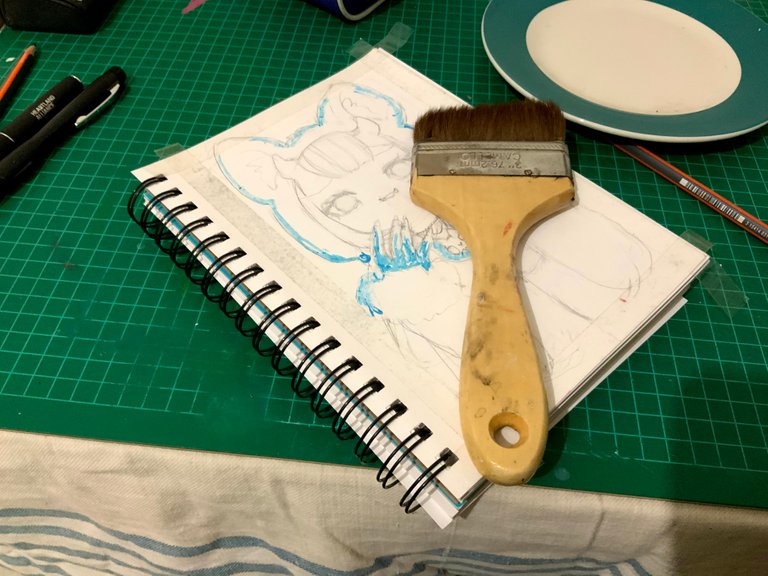
The first thing I did was let my imagination run wild, let go my hand and see what would come out. I liked the main line so I didn't make any more sketches. I defined my pencil line a little and then I went on to put color on it.
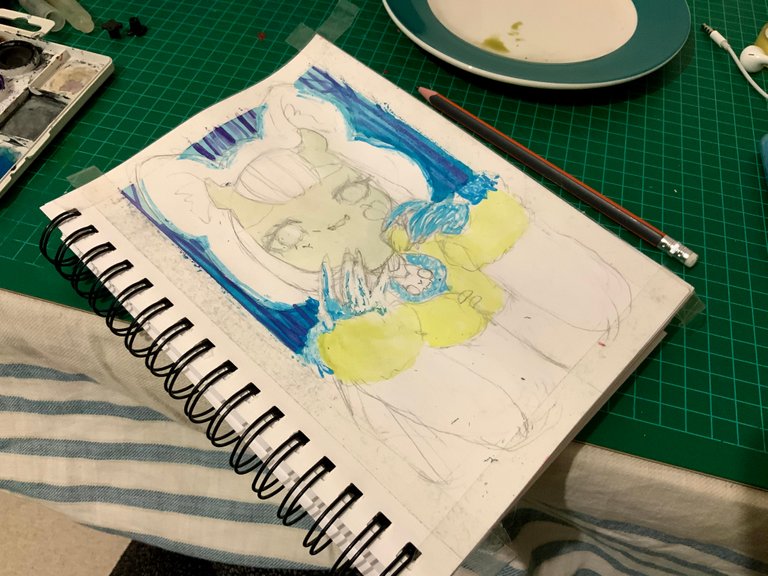
For the color I used these watercolors that are super cheap, they cost 100 Mexican pesos, around 5 dollars and I applied it with these AquaBrush that I bought about 4 or 5 years ago online. They were sent to me from China, so I had to wait almost 2 months for them to arrive. I got them super cheap, 60 Mexican pesos, about 3 dollars, so they were worth the wait 😁.
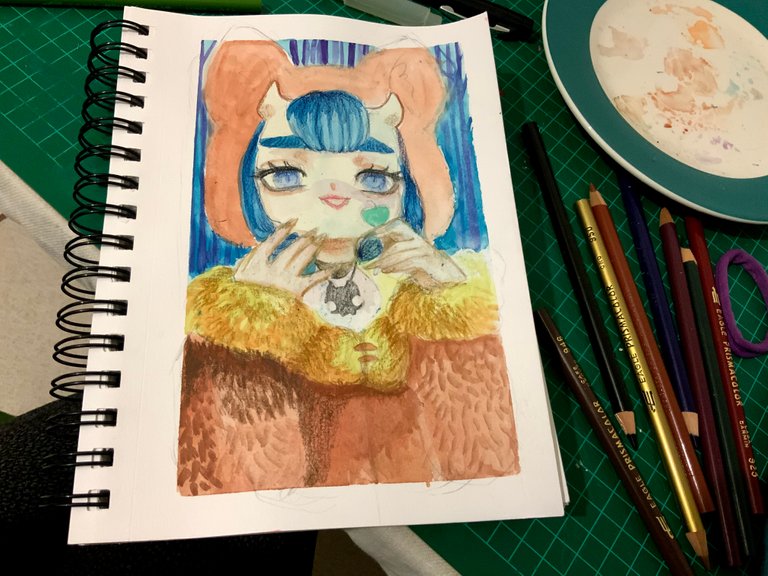
In the first sketch I was not going to bring my hands to the front but later I felt that it was very simple and I decided to put his hands as saying... (read with a shy tone) "Oh, look at this little leaf I found ❤️" tenderly 😍.
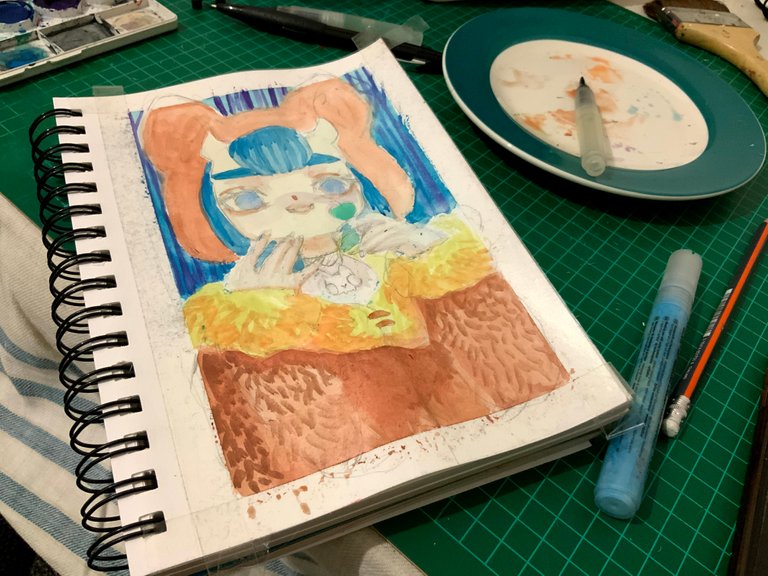
To begin I put the transparent tape to frame the drawing and make the outline look even. It should be noted that I normally use masking tape for this part but did not have at the moment, so I had to improvise. The first thing I painted was the background, so before doing this I put a little liquid Molotow mask so that the watercolor would not pass to the areas I wanted to leave blank. Then I painted the stuffed animal in his coat and the other parts of the drawing.
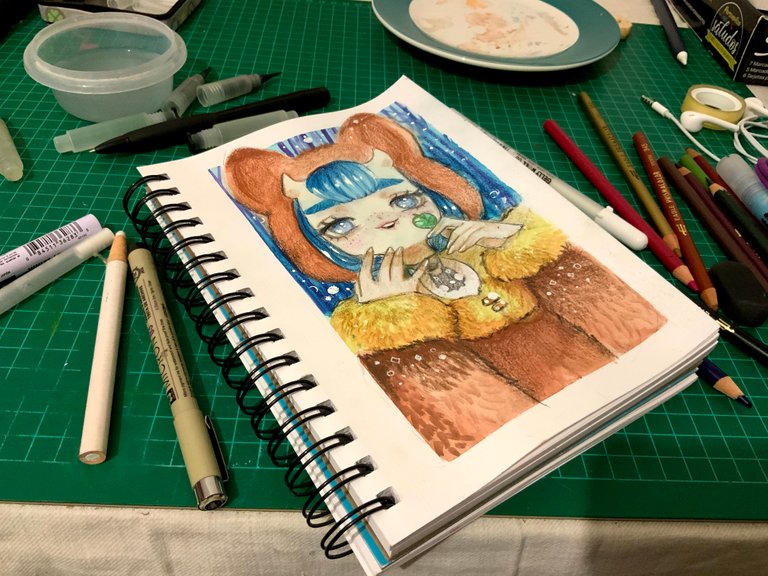
The idea was to get her ears out of the frame, so once I removed the transparent tape I could paint them with colors. To finish I added a lot of shadows and details with the colors and finished with some glitter (I love to put glitter) all over 😍.
I hope you like it! ❤️
Remember that practice makes us master our passions and perseverance leads us straight to success and to reach our goals.
I send you a big hug! We'll read each other again very soon!
Mis pequeños Hivers, el día de hoy les comparto esta acuarela que hice después de mucho de no tocar esta técnica tradicional. Es un poco triste darme cuenta de que he perdido bastante la práctica pero aun así me gustó el resultado. La idea principal era hacer todo con acuarelas pero con esto de la pérdida de práctica decidí usar colores para dar efectos que no iba a poder hacer con las acuarelas.
Materiales:
- Papel para acuarela Canson
- Lápiz
- Goma negra y sacapuntas
- Máscara líquida marca Molotow
- Pinceles AquaBrush
- Acuarelas joviales
- Colores Prismacolor
- Tinta blanca Gelly Roll
- Tinta blanca Pen Touch
- Cinta transparente
Lo primero que hice fue dejar volar mi imaginación, soltar la mano y ver que salía. Me gustó el trazo principal así que no hice más bocetos. Definí un poco mi trazo con lápiz y pase a ponerle color.
Para el color usé estas acuarelas que son super económicas, cuestan 100 pesos mexicanos, unos 5 dólares y lo apliqué con estos AquaBrush que compré hace como 4 o 5 años en línea. Los mandaron de China, tuve que esperar casi 2 meses para que llegaran. Salieron muy baratos, 60 pesos, aproximadamente 3 dólares, valió la pena la espera 😁.

En el primer boceto no iba a llevar las manos al frente pero después sentí que estaba muy simple y decidí poner sus manitas como diciendo: "(léase con tono tímido) Oh, mira esta pequeña hoja que me encontré ❤️” 😍.
Para empezar le puse la cinta transparente para enmarcar el dibujo y que se viera parejita el contorno. Cabe destacar que yo uso masking tape para esta parte pero no tenía, así que tocó improvisar. Lo primero que pinté fue el fondo, así que antes de hacerlo puse un poco de máscara líquida Molotow para que no se pasara la acuarela a las zonas que quería dejar en blanco. Después pinté el peluche de su abrigo y las de más partes del dibujo.
La idea era que sus orejas salieran del marco, así que una vez que quité la cinta transparente las pude pintar con colores. Para terminar agregue muchas sombras y detalles con los colores y remate con algunos brillos (amo poner brillos) por todos lados 😍.
¡Espero les guste!❤️
Recuerden que la práctica nos hace dominar nuestras pasiones y la constancia nos lleva derechito al éxito, y a alcanzar nuestras metas.
¡Les mando un abrazo enorme! ¡Nos leemos muy pronto!

Ahhhh me encanta mucho 💖
Curador: @Mariale07