💕 Hello Hive Community! 💕
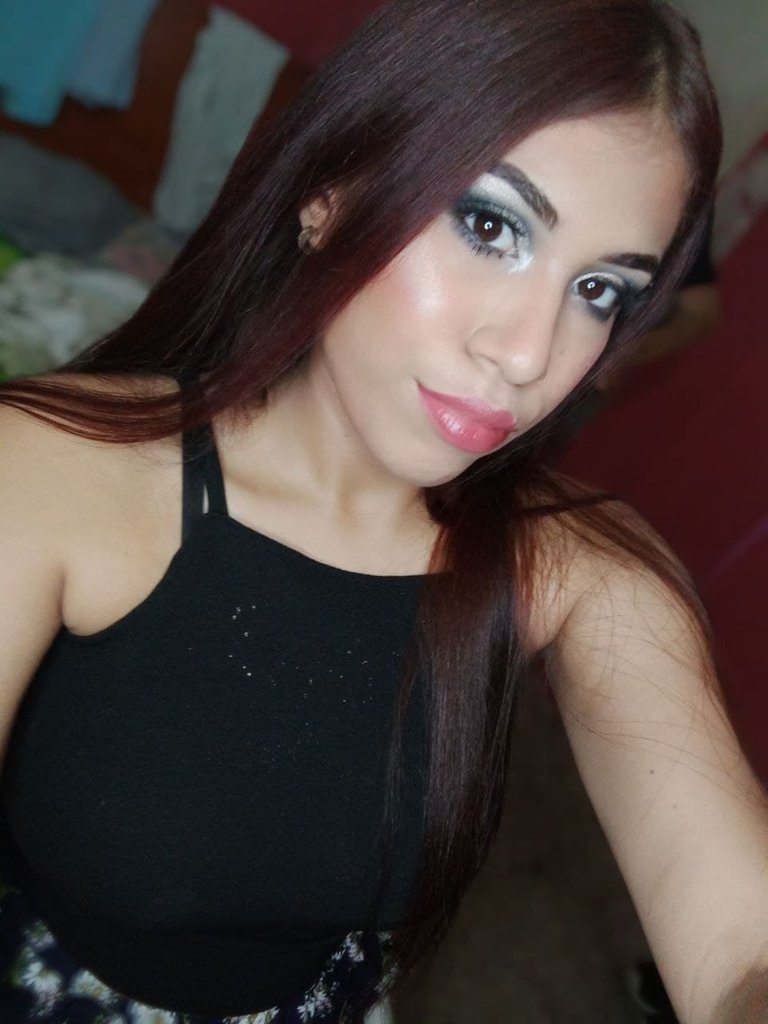
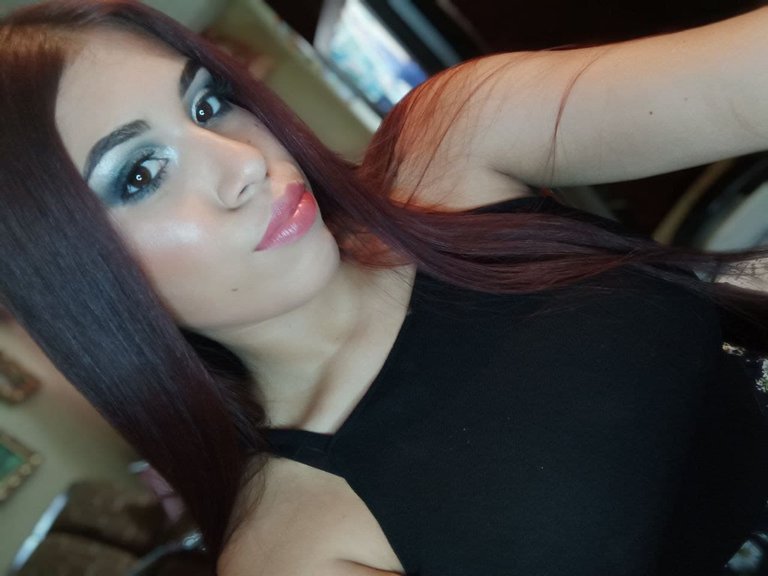
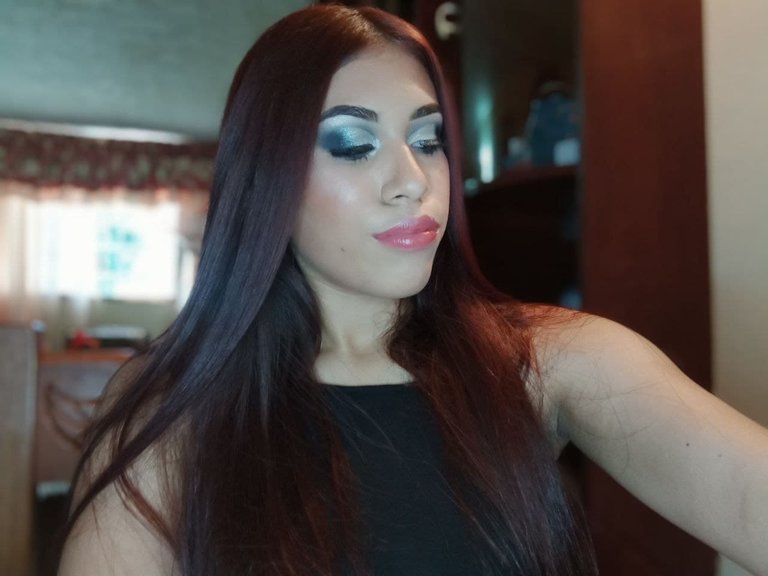
Aquí estoy con un maquillaje nuevo, retomando un poco los maquillajes oscuros que tanto me gustan. Aunque este en particular no es tan negro, es más azul pero de igual forma un color profundo. Me gusta llevar este tipo de maquillajes cuando voy a salir para alguna fiesta de noche, llevar este maquillaje en el día no es lo ideal ya que es bastante profundo, aunque todo depende del gusto de cada persona.
Here I am with a new make-up, taking up a little of the dark make-up I like so much. Although this particular one is not so black, it is more blue but still a deep color. I like to wear this type of makeup when I go out for a party at night, wearing this makeup during the day is not ideal since it is quite deep, although it all depends on the taste of each person.

Igualmente llevar un maquillaje con tonos fríos en una piel con subtonalidad cálida es algo complicado de hacer, de hecho no es recomendable. Pero en mi caso estoy acostumbrada a trabajar de esta forma porque lo he hecho en varias ocasiones sin ningún problema. Recordemos que podemos usar lo que queramos siempre y cuando nos guste.
Also take a makeup with cold tones in a skin with warm subtone is something complicated to do, in fact it is not recommended. But in my case I'm used to working this way because I've done it several times without any problem. Let's remember that we can use whatever we want as long as we like it.

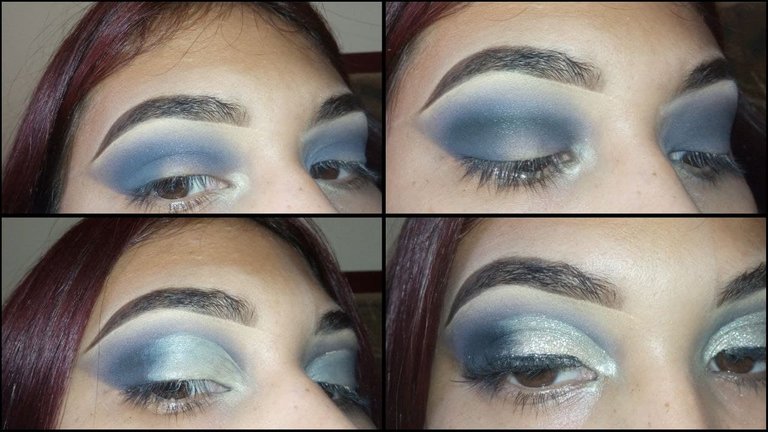
Primero comencé aplicando un tono azul frio por casi todo mi párpado, ese fue mi tono de transición. Para agregar profundidad coloque un negro en el pliegue de mi párpado y en la esquina exterior. Luego realice la técnica del Cut Crease con una brocha plana pequeña para detalles. Finalmente en el corte de cuenca apliqué el tono plateado y coloqué pestañas postizas.
I first started by applying a cold blue tone to almost all of my eyelid, that was my transition tone. To add depth I placed a black on the crease of my eyelid and in the outer corner. Then perform the Cut Crease technique with a small flat brush for details. Finally in the basin cut I applied the silver tone and placed false eyelashes.
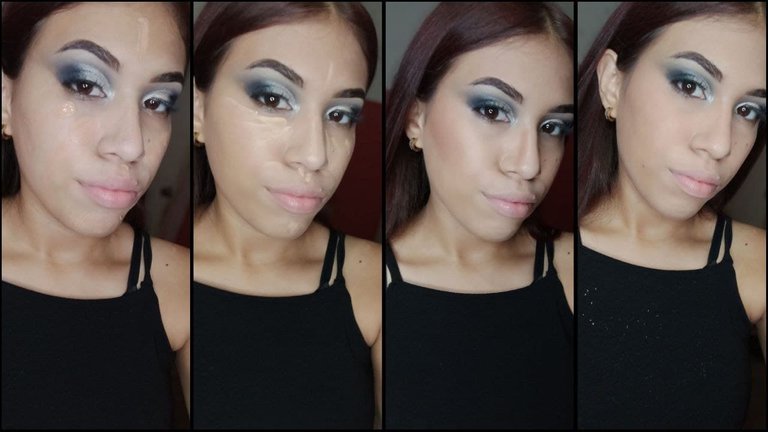
Para hacer mi piel seguí mis técnicas usuales, aplicar primer es un paso fundamental en un maquillaje para que este dure más tiempo. Luego viene el paso de la base de maquillaje, junto con el corrector para iluminar un poco y los contornos en crema. Todo esto lo sello con un polvo compacto el cual me gusta mucho ya que no aporta casi nada de cobertura a mi piel, simplemente se encarga de sellar y matificar.
To make my skin I followed my usual techniques, apply first is a fundamental step in a makeup to make it last longer. Then comes the step of the foundation, along with the concealer to lighten a little and creamy contours. I seal all this with a compact powder which I like a lot because it does not provide almost no coverage to my skin, it simply seals and matifies.
En los últimos pasos procedo a aplicar contornos en polvo para sellar la base que hice anteriormente en crema. Agrego un poco de rubor y seguido de esto viene el paso del iluminador, el cual va posicionado en los puntos altos de mi rostro. Finalmente después de aplicar mascara de pestañas coloqué un labial hidratante de la marca de maquillaje Cosméticos Valmy, en el tono Brandy Matte.
In the last steps I proceed to apply powdered contours to seal the base that I made previously in cream. I add a bit of blush and followed by the illuminator step, which is positioned in the high points of my face. Finally, after applying mascara, I apply a moisturizing lip balm from Valmy's Cosmetics brand, in the shade of Brandy Matte.
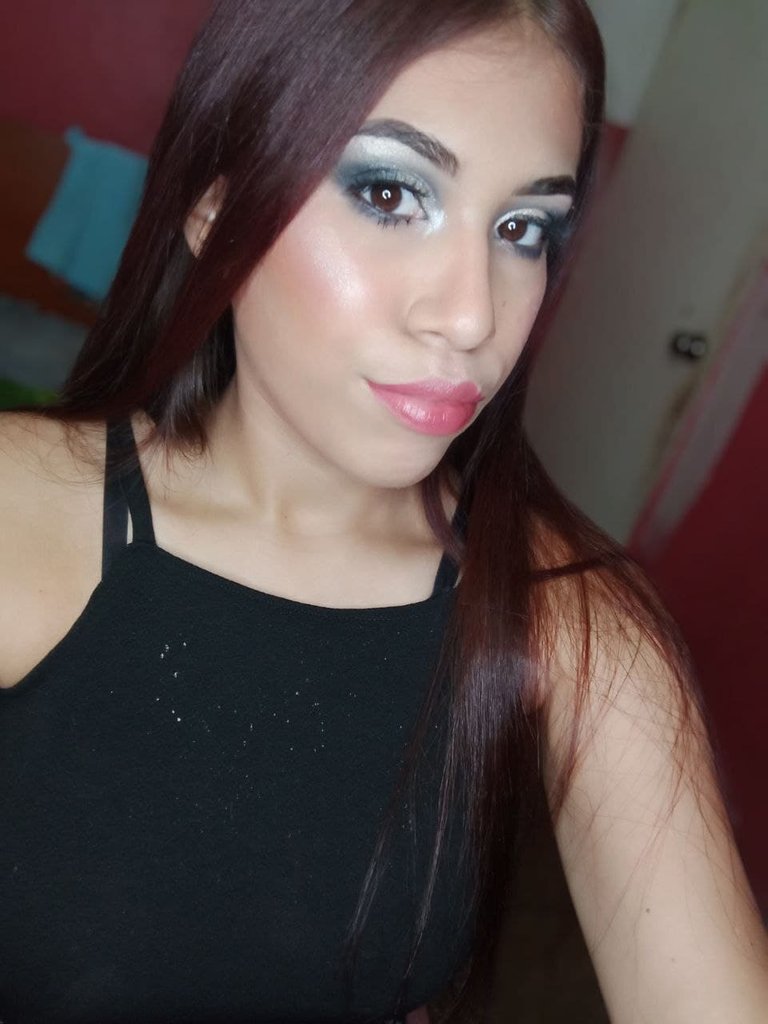
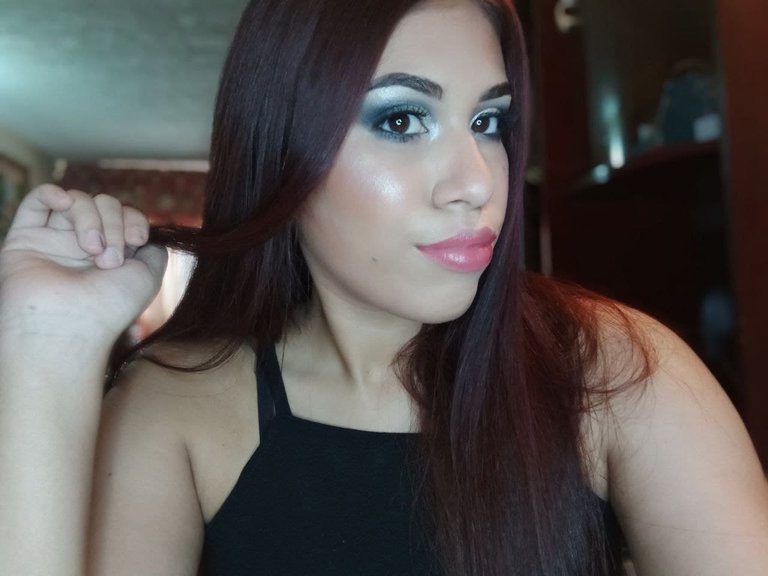
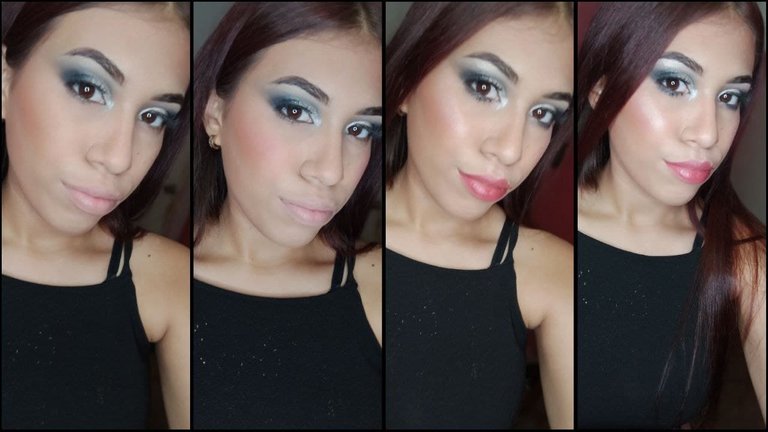
Con mi maquillaje listo en su totalidad procedo a tomarme varias fotos, creo que este es mi momento favorito a la hora de hacer un maquillaje, después de aplicar iluminador jajajaja. Fue un maquillaje fácil de hacer pero siempre tengo en cuenta todo el trabajo que significa maquillar. Espero que este maquillaje les haya gustado tanto como a mi, nos leemos próximamente en otro tutorial! ✨
With my makeup ready in its entirety I proceed to take several photos, I think this is my favorite time to make a makeup, after applying lighter hahaha. It was an easy makeup to do but I always take into account all the work that means makeup. I hope you liked this makeup as much as I did, we will read about it in another tutorial soon! ✨
Pictures of my property. Camera: CellPhone Xiaomi Redmi 9. Si te gusta el maquillaje, el mundo de la belleza o hacer arte en tu piel te invito a la comunidad y al Telegram: If you like makeup, the world of beauty or making art on your skin I invite you to the community and the Telegram:Makeup Power Telegram

Makeup Power

Ufff mana extrañaba ver esos maquillajes tuyos quedaste pero para conseguir un servicio de ron rápidamente. La verdad el tiempo y luego el alcohol me tenían lejos de poder comentar pero bueno aquí nuevamente uwu.
Pd: tus maquillajes oscuros son lo mejor <3.