It's Friday, let's close the week with something really creative ... ✨
✌️
I don't know if it happens to many, but I am a person who likes to work and create at the pace. That is, I imagine something and as I do it I add or remove; many times the result is not exactly what I first imagined. And the same thing has happened to me with the sewing activity that I will present to you today.
About the piece:
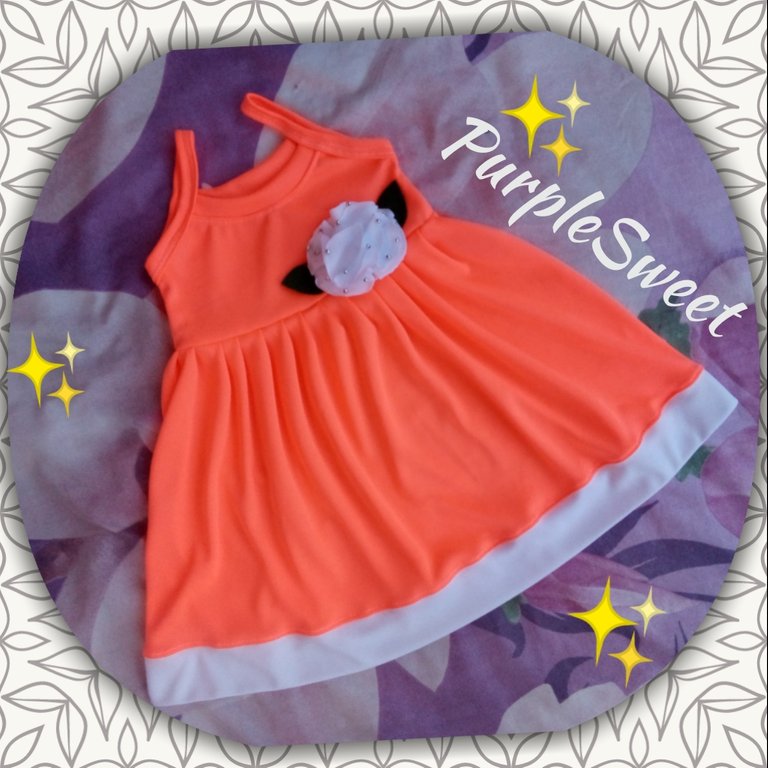
A nice and fresh dress, I have imagined it especially for my little Danna. It is a piece made entirely of Muslin fabric, so its elasticity is synonymous with comfort and total permanence of colors. Let's get to work! 🙌🙌
Materials:
- Muslin fabric, orange and white.
- Piece of felt.
- Metallic pearls.
- Silicone.
- Magical closing piece.
- Lighter.
- Scissors, tape measure, sewing machine.
Step by Step:
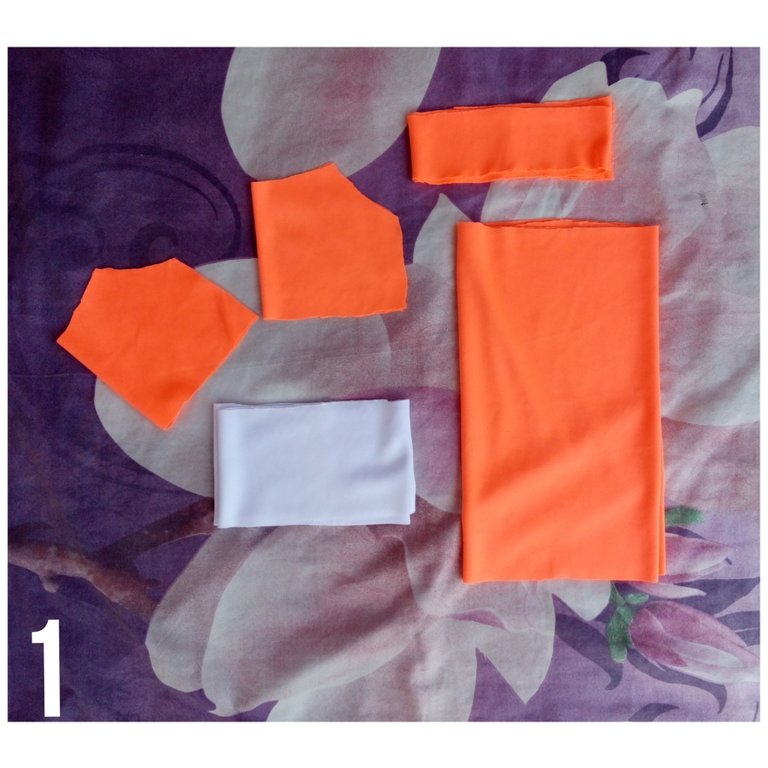
A.- The pieces to cut are those shown in figure 1. Keep in mind that the hem strip for the upper details measures 6 CM. And the bottom ribbon of the final detail of the dress measures 11 CM. Also, keep in mind that I made a steeper curve to the front piece.
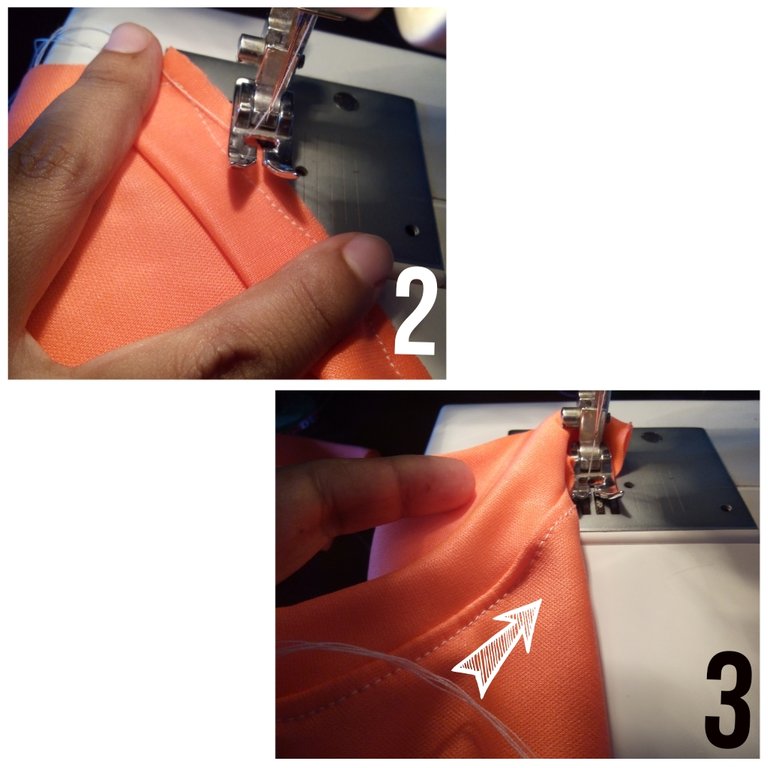
B.- For the assembly, first we will work the upper area. Where taking the ribbon, we make a fold and face the piece, we will sew by pulling a little. See figure 2. Then, on the right side of the piece, we will make a settlement seam. See figure 3.
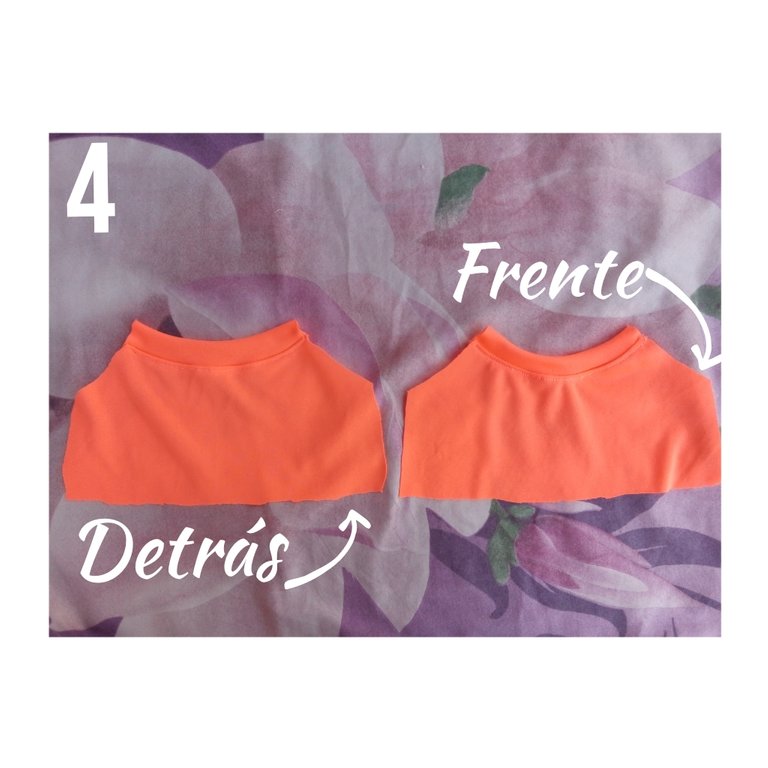
C.- The previous step must be repeated with both the front and back pieces. They should be as shown in figure 4.
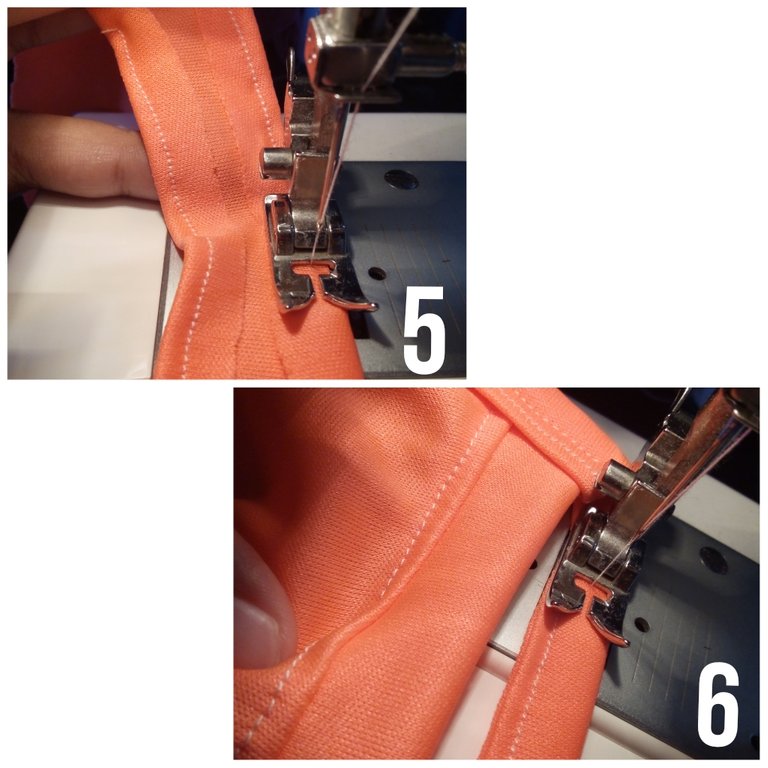
D.- Now, we prepare the 6 cm ribbon, making it a single hem on each side. And inside this hem the pieces would go front and back. See figures 5 and 6.
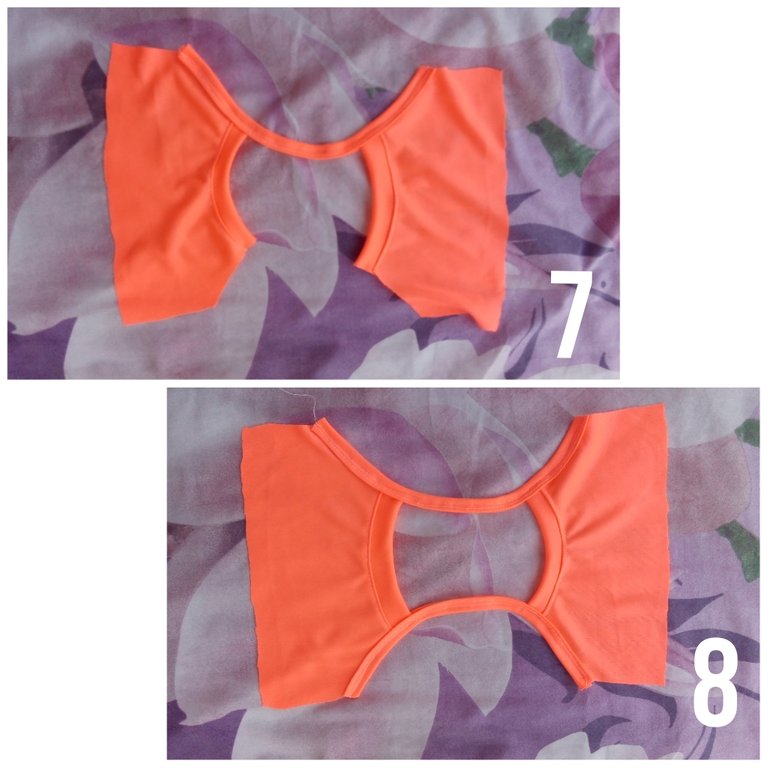
E.- First we close one side, then the other. See figures 7 and 8. Remember to measure well that both braces are at the same distance.
F.- We face the rights of the pieces and we sew the sides. See figure 9. Next, we sew the skirt. In this case, my skirt is 32 centimeters high. At the time of sewing, we will make folds. See figure 10.
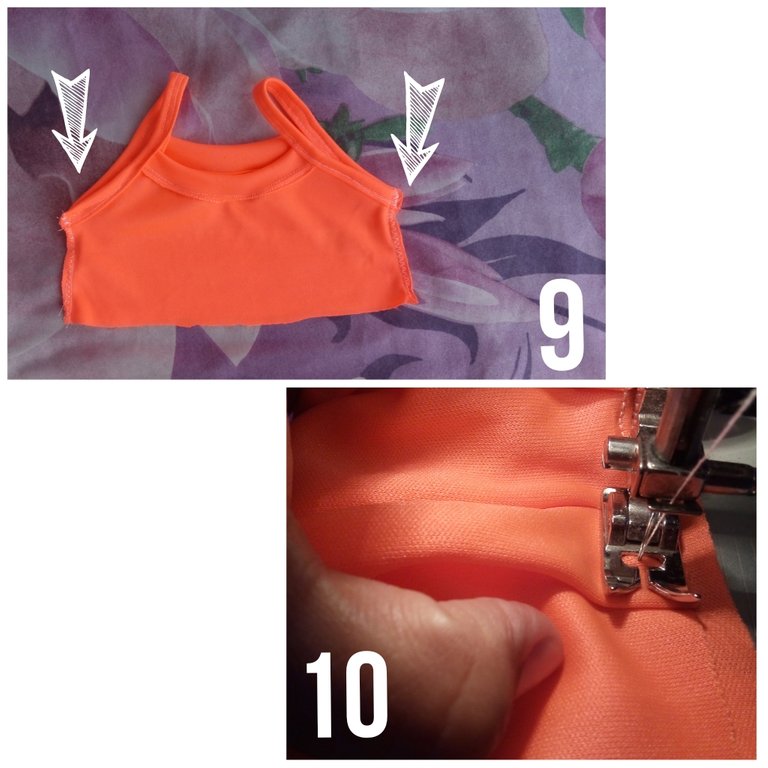
G.- When you finish sewing the skirt, our piece will be as seen in figure 11.
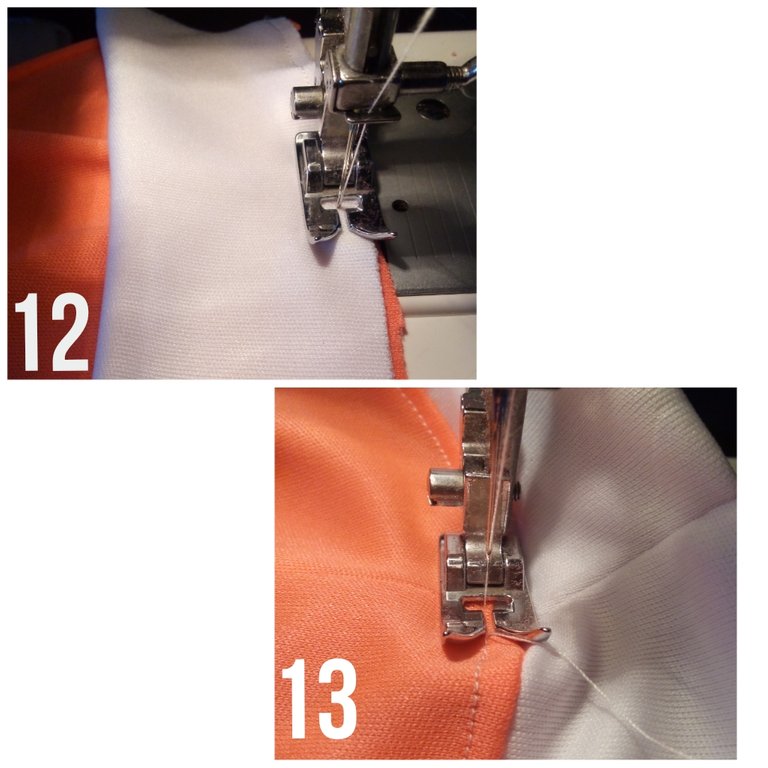
H.- We take the white ribbon, with a fold and facing the end of the skirt; we pass a straight seam. See figure 12. For better neatness, we made a settlement seam. See figure 13.
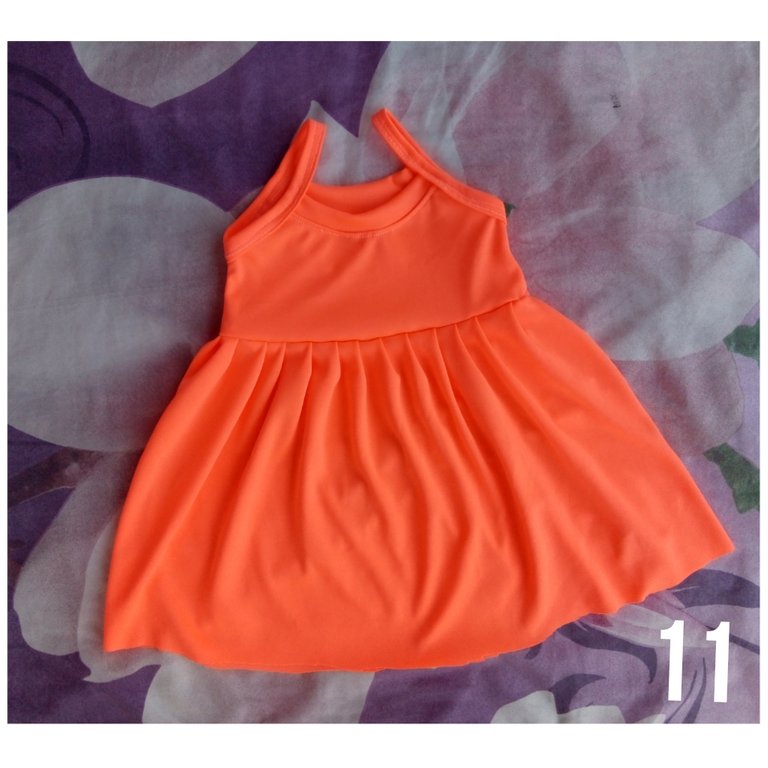
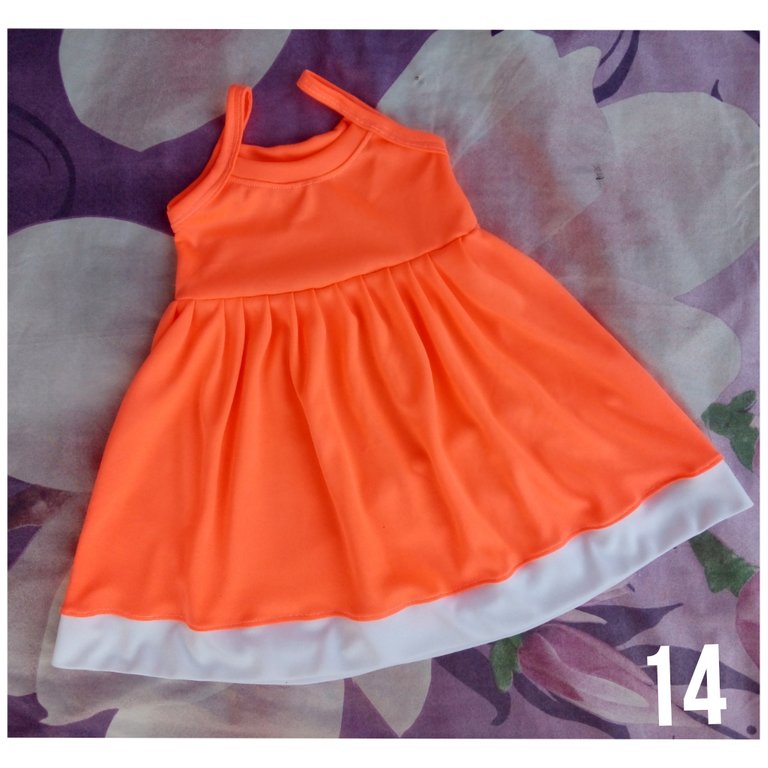
I.- Our dress is almost ready, at this point it is as shown in figure 14.
Decorated:
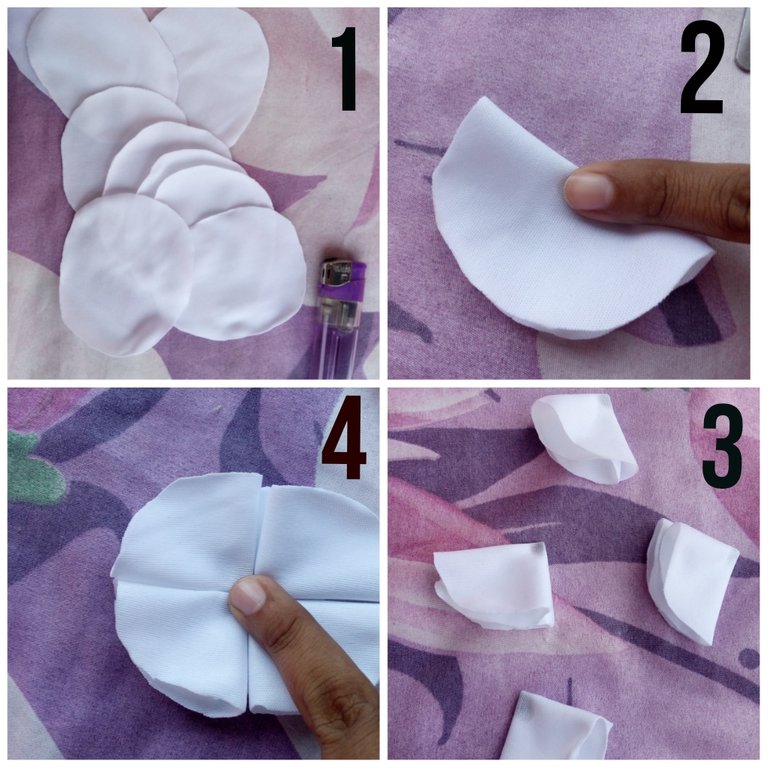
A.- We cut 9 circles in white fabric, and with a lighter we will close the selvages. This is to prevent the piece from fraying. See figure 1. Then, with a point of silicone in the middle of the circle, we fold in half. And again, we repeat the fold. See figures 2 and 3. Then, on a base like felt (more rigid) we will assemble with the petals. See figure 4.
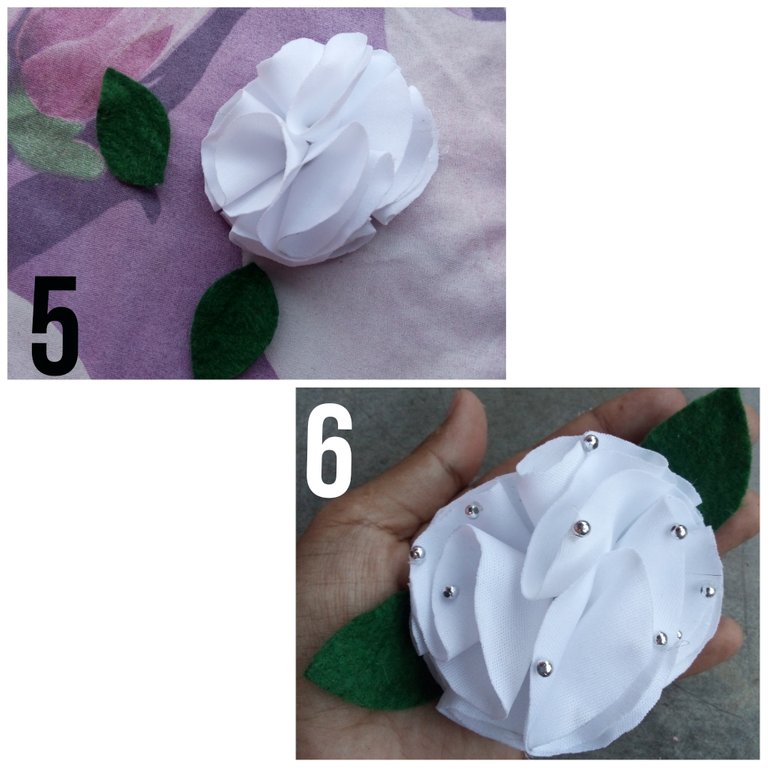
B.- After assembling the flower, we will cut some sheets of felt. And also, we will decorate with the metallic pearls. See figures 5 and 6.
The last thing to do is to put a magic closure on the dress and the flower. This, so that when it is washed, both pieces can be separated and not mistreat the flower.
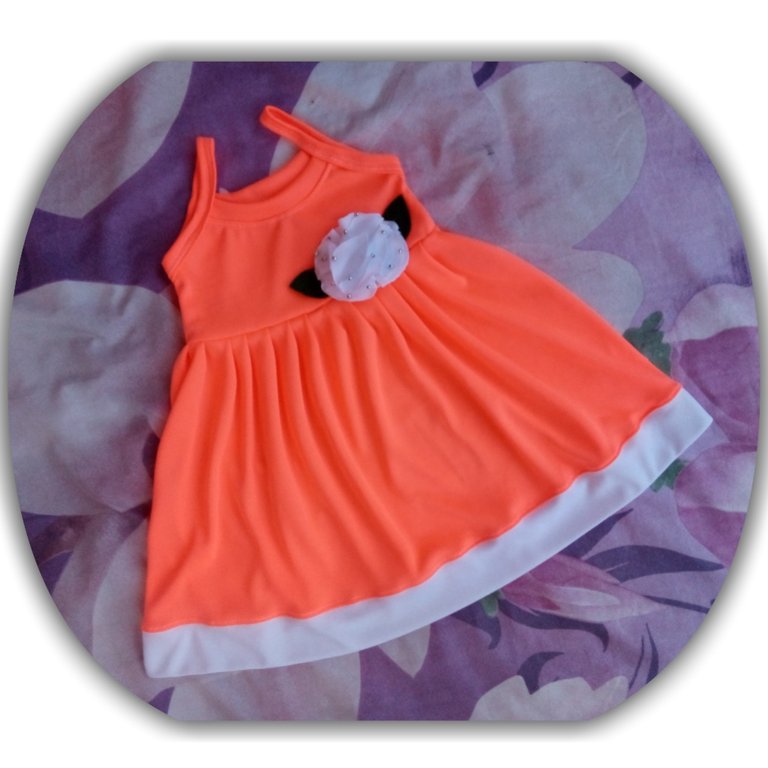
Our dress is ready, take a look:
Versión en Español:
Es viernes, cerremos semana con algo bien creativo...✨
✌️
No sé si a muchos les sucede, pero soy una persona que me gusta trabajar y crear al ritmo. Es decir, me imagino algo y al ir haciéndolo voy agregando o quitando; muchas veces el resultado no es exactamente lo que imaginé al principio. Y eso mismo, me ha sucedido con la actividad de costura que hoy les presentaré.
Sobre la pieza:
Un lindo y fresco vestido, lo he imaginado especialmente para mi pequeña Danna. Es una pieza elaborada totalmente en tela de Muselina, así que su elasticidad es sinónimo de comodidad y permanencia total de los colores. Manos a la obra.! 🙌🙌
Materiales:
- Tela de Muselina, color naranja y blanco.
- Trozo de fieltro.
- Perlas metalizadas.
- Silicón.
- Trozo de cierre mágico.
- Encendedor.
- Tijeras, cinta métrica, máquina de coser.
Paso a paso:
A.- Las piezas a cortar, son las que se muestran en la figura 1. Ten en cuenta que el listón del dobladillo para los detalles superiores, mide 6 CM. Y el listón inferior del detalle final del vestido, mide 11 CM. También, ten en cuenta que a la pieza del frente le hice una curve más pronunciada.
B.- Para el armado, primero trabajaremos el área superior. Donde tomando el listón, hacemos un doblez y enfrentamos a la pieza, coseremos tirando un poco. Ver figura 2. Luego, por el derecho de la pieza, haremos una costura de asentamiento. Ver figura 3.
C.- El paso anterior debe repetirse tanto con la pieza del frente y la trasera. Deben quedar como se observa en la figura 4.
D.- Ahora, preparamos el listón de 6 cm, haciéndole dobladillo sencillo a cada lado. Y dentro de este dobladillo irían las piezas de frente y detrás. Ver figuras 5 y 6.
E.- Primero cerramos un lado, luego el otro. Ver figuras 7 y 8. Recuerda medir bien que ambos tirantes, queden en la misma distancia.
F.- Enfrentamos los derechos de las piezas y cosemos los costados. Ver figura 9. Luego, cosemos la falda. En este caso, mi falda mide 32 centímetros de alto. Al momento de coser, haremos pliegues. Ver figura 10.
G.- Al terminar de coser la falda, nuestra pieza quedará como se observa en la figura 11.
H.- Tomamos el listón blanco, con un doblez y enfrentando el final de la falda; pasamos un costura recta. Ver figura 12. Para mejor prolijidad, realizamos una costura de asentamiento. Ver figura 13.
I.- Nuestro vestido está casi listo, en este punto está como se observa en la figura 14.
Decorado:
A.- Cortamos 9 círculos en tela blanca, y con un encendedor cerraremos los orillos. Esto para evitar que se deshilache la pieza. Ver figura 1. Luego, con un punto de silicón en medio del círculo, doblamos a mitad. Y nuevamente, repetimos el doblez. Ver figuras 2 y 3. Después, sobre una base como fieltro (más rígida) iremos Armando con los pétalos. Ver figura 4.
B.- Después de armar la flor, cortaremos unas hojas en fieltro. Y también, decoraremos con las perlas metalizadas. Ver figuras 5 y 6.
Lo último a hacer, es colocar cierre mágico en el vestido y en la flor. Esto, para que al momento de lavarlo, ambas piezas puedan separarse y no maltratar la flor.
Nuestro vestido está listo, da un vistazo:
Muy hermoso me encantó
Bueno como siempre hermoso, lo haces ver muy sencillo. Saludos.
Congratulations @pialejoana! You have completed the following achievement on the Hive blockchain and have been rewarded with new badge(s) :
You can view your badges on your board And compare to others on the Ranking
If you no longer want to receive notifications, reply to this comment with the word
STOPTo support your work, I also upvoted your post!
Do not miss the last post from @hivebuzz:
Congratulations, your post has been upvoted by @dsc-r2cornell, which is the curating account for @R2cornell's Discord Community.
Enhorabuena, su "post" ha sido "up-voted" por @dsc-r2cornell, que es la "cuenta curating" de la Comunidad de la Discordia de @R2cornell.
GREAT POST!!!
Thank you for publishing it to our community feed!
Compliments of the PHC founder @jaynie...
We have tweeted, upvoted and reblogged it for you.
❤ MWAH!!! ❤
JOIN OUR DISCORD COMMUNITY
SUBSCRIBE TO OUR COMMUNITY FEED
FOLLOW US ON TWITTER