I thought it would be fun to make a how-to post showing how I roll cone-style joints. It's a way that requires no tools or machines. If you do this like I did, you will have a decent little self-rolled cone with a durable crutch and screen built-in.
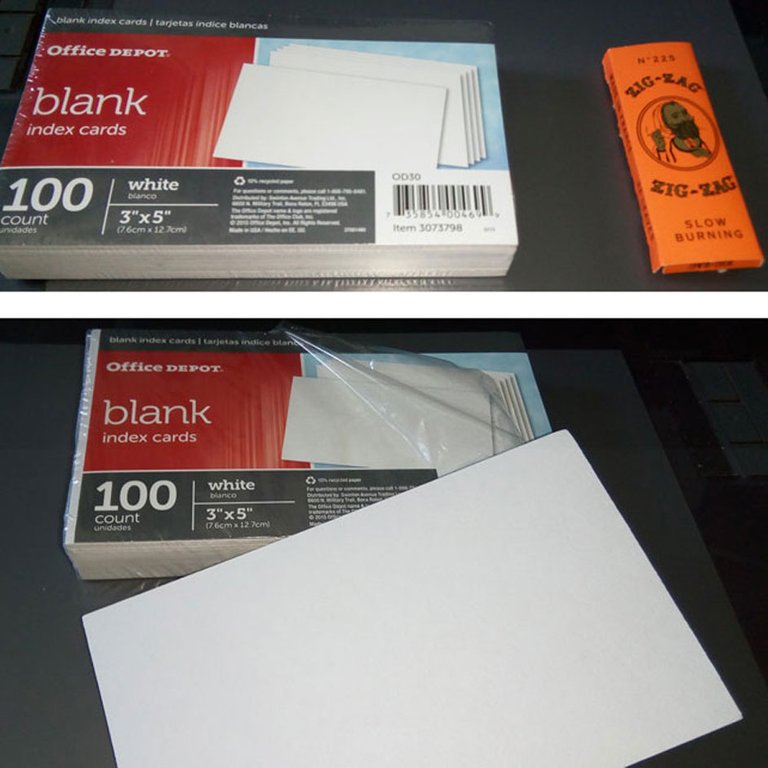
What you need is some rolling papers, an index card and if you want, a little bit of dab.
Here are my materials.
Zig-zag papers and a pack of index cards. Now while I don't think that Office Depot would endorse what I am doing with this product, I am pretty sure that the Zig-zag people are fine with it.
I put the papers aside and I remove one card from the deck, putting the rest of the cards aside.
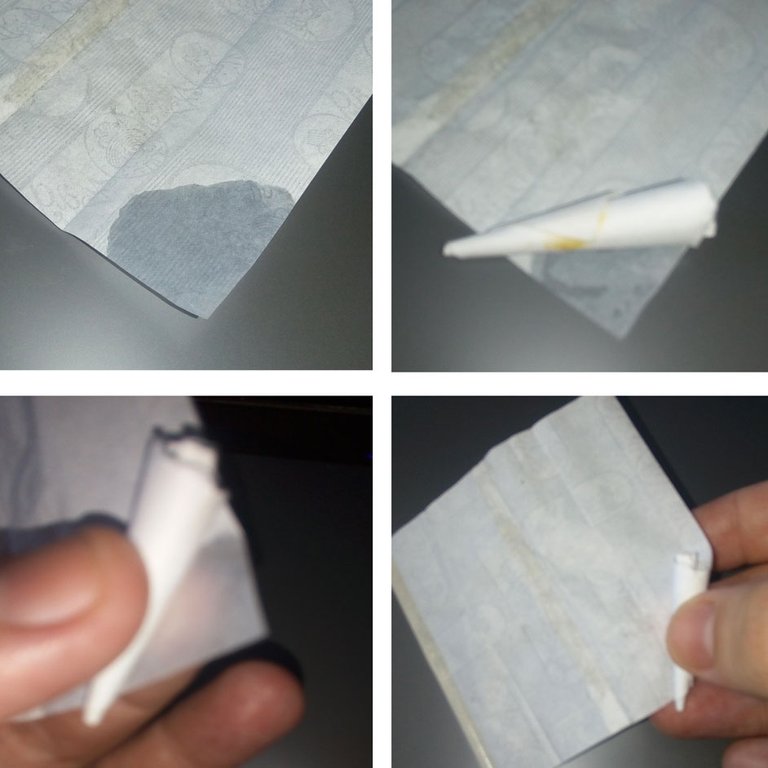
Here I fold the card in half, then in half again, so that it is divided into quarters.
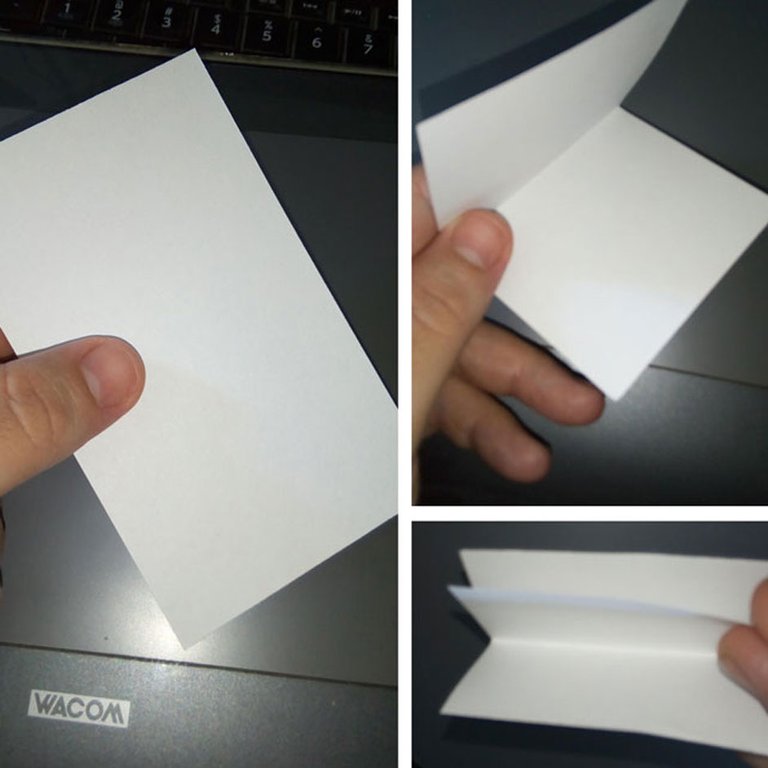
See? quarters.
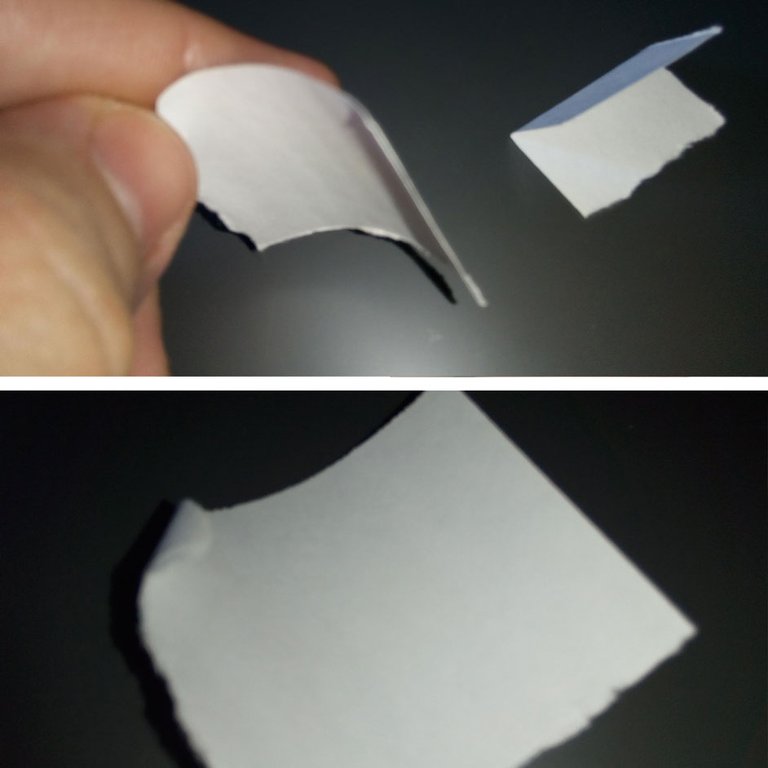
Now carefully tear one of the quarters off.
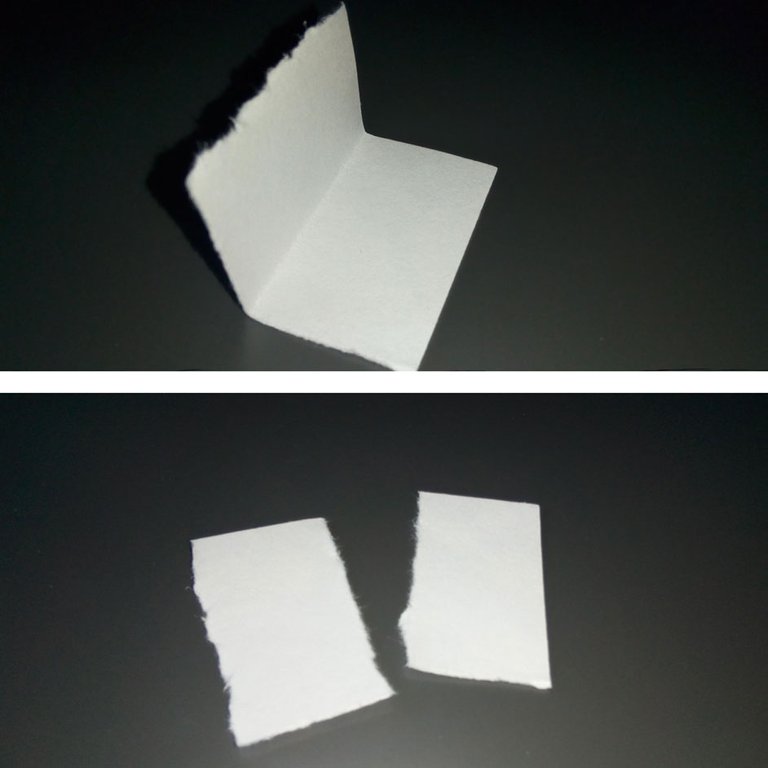
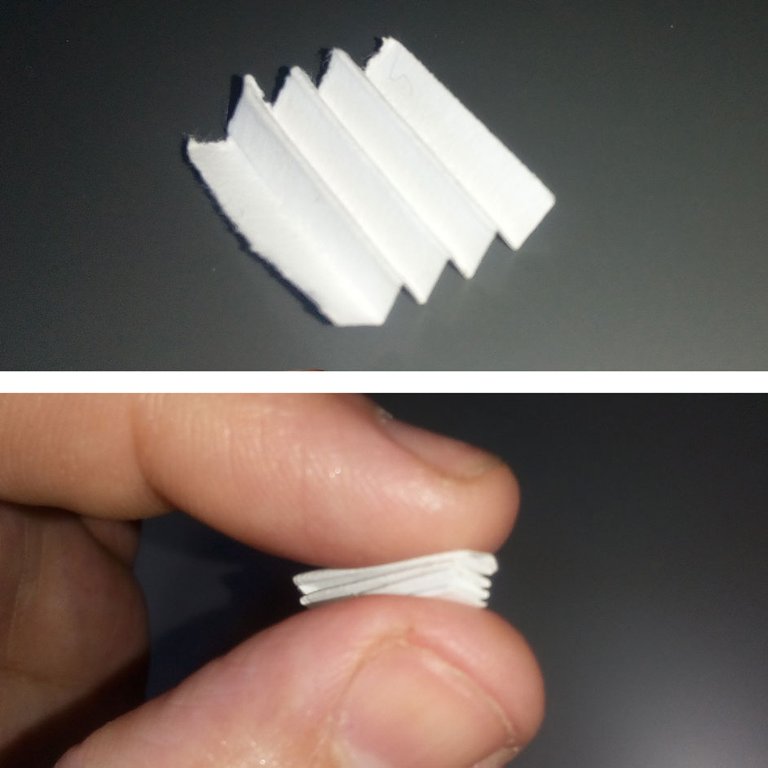
Now take that quarter of an index card and fold it in half.
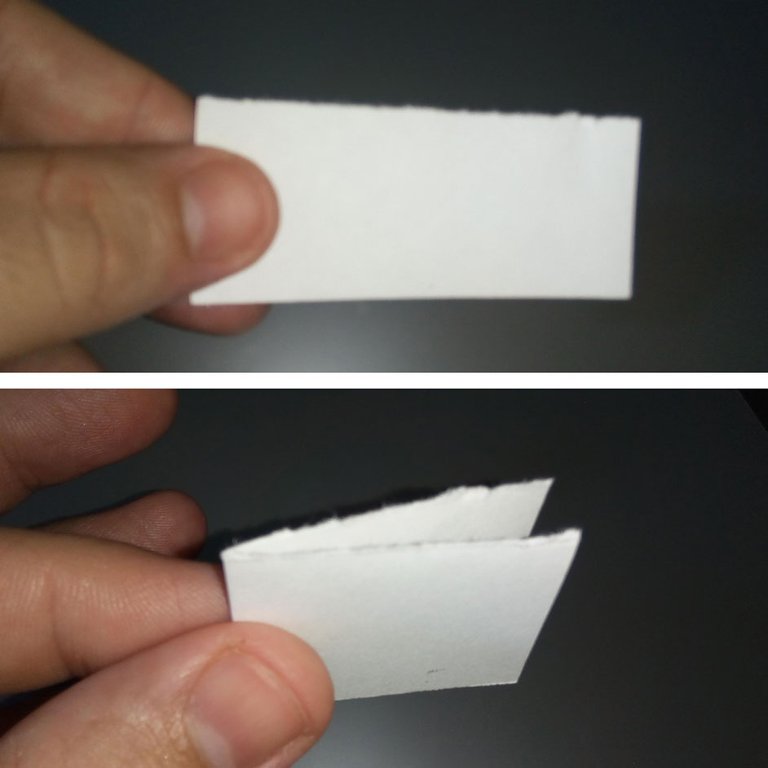
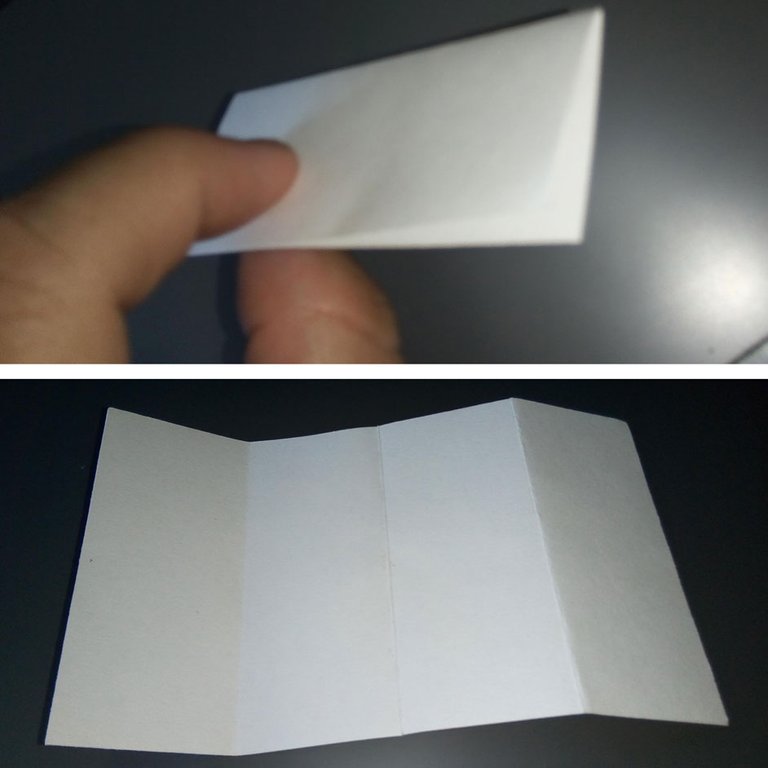
Now take one side of that folded quarter and bend it in on itself so that the outer edge meets with the center crease.
Then flatten it out.
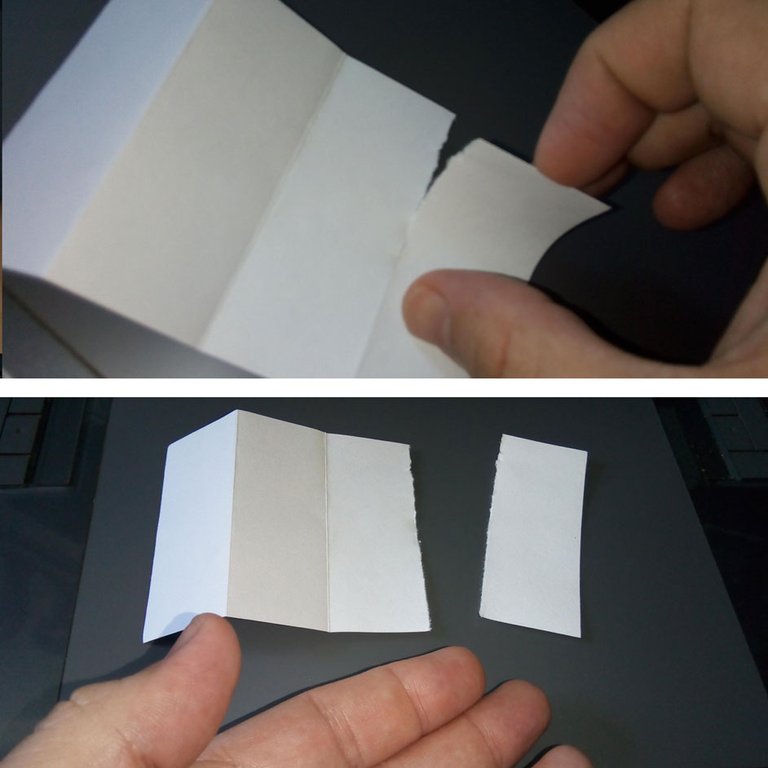
Now carefully tear that in half so that you have a flat half and a folded half. as shown :-)
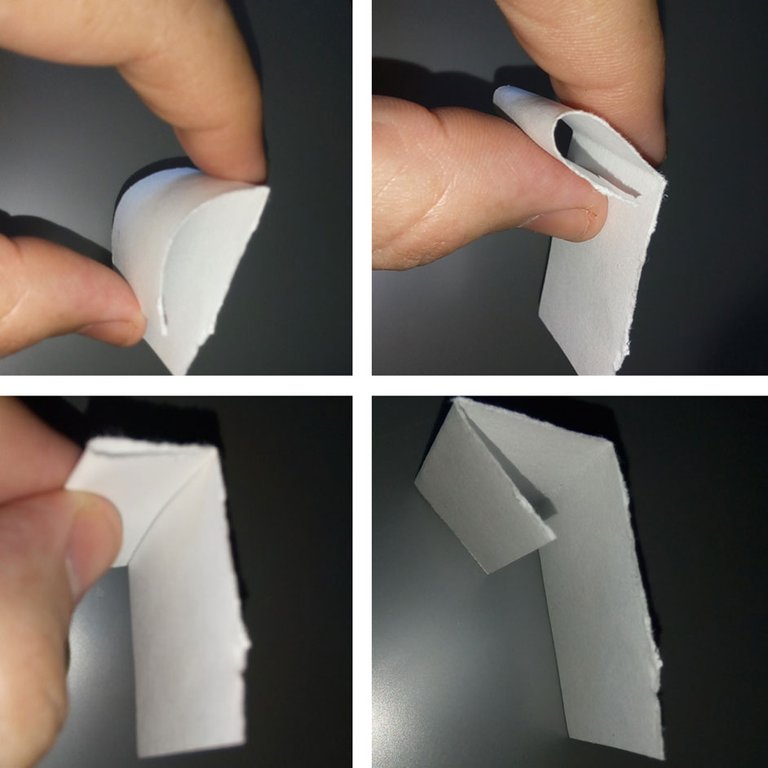
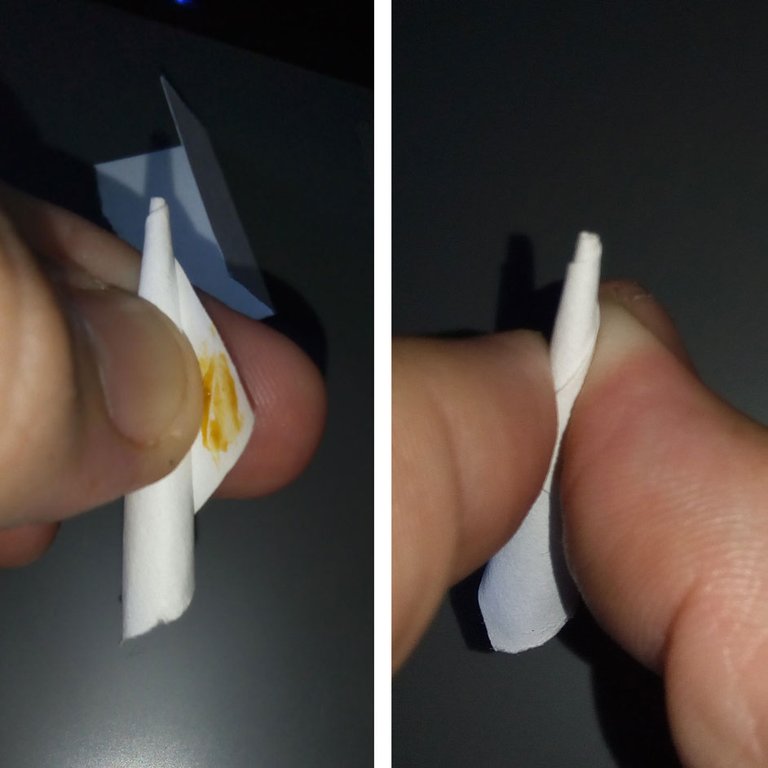
Put the folded half aside for now and take the flat half and roll it firmly in your fingers as shown so that the paper holds that curved shape.
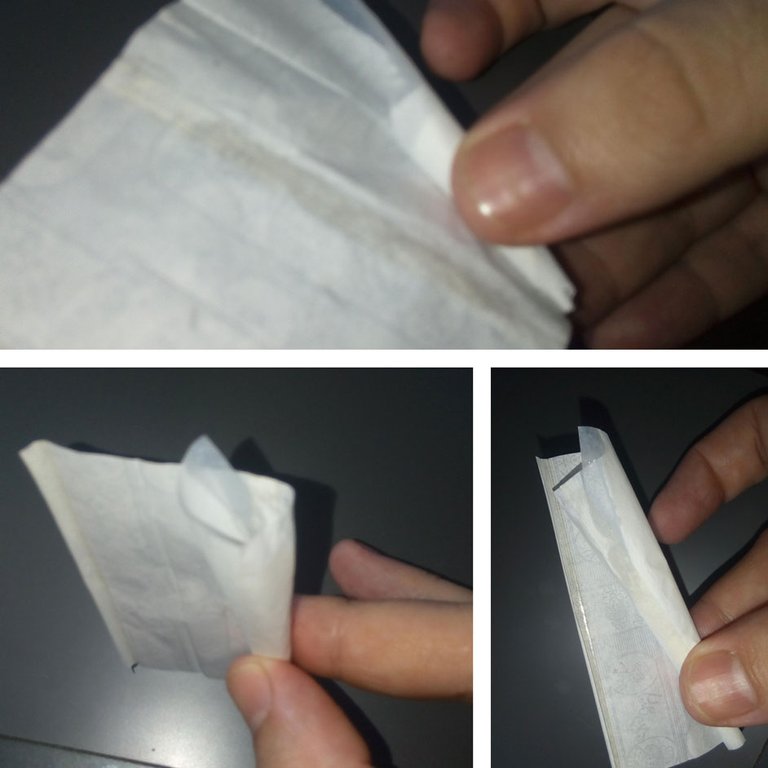
Now, open that roll so that it is slightly curved and then you want to go into a corner and begin rolling from the corner.
Now this is the tricky part.
You want to put more force on one side of that rolling action you are doing with your fingers so that it will skew the roll on one side, causing that cone shape to happen.
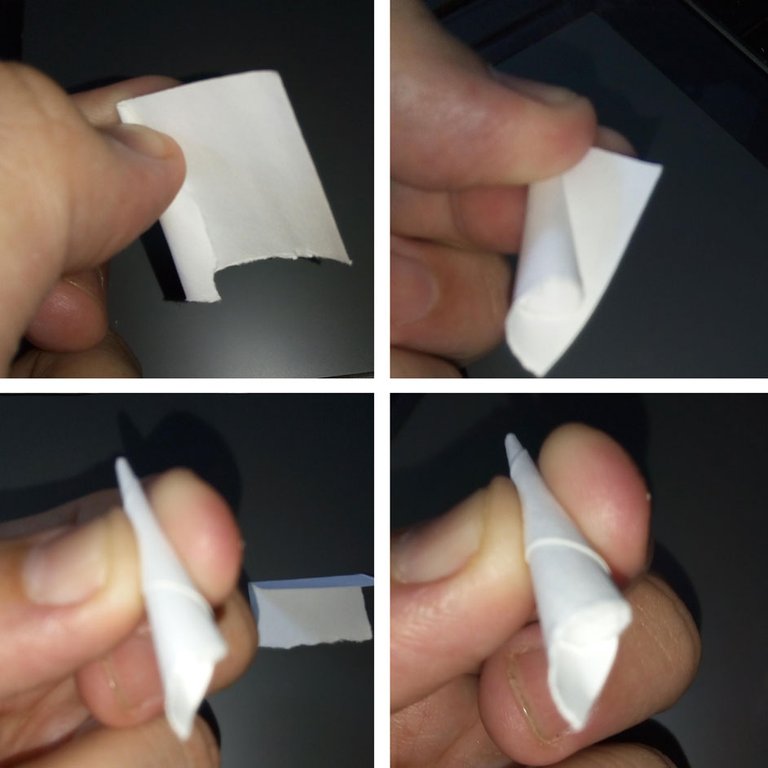
It won't be even on the open end of this cone but that's ok.
We will come back to that part.
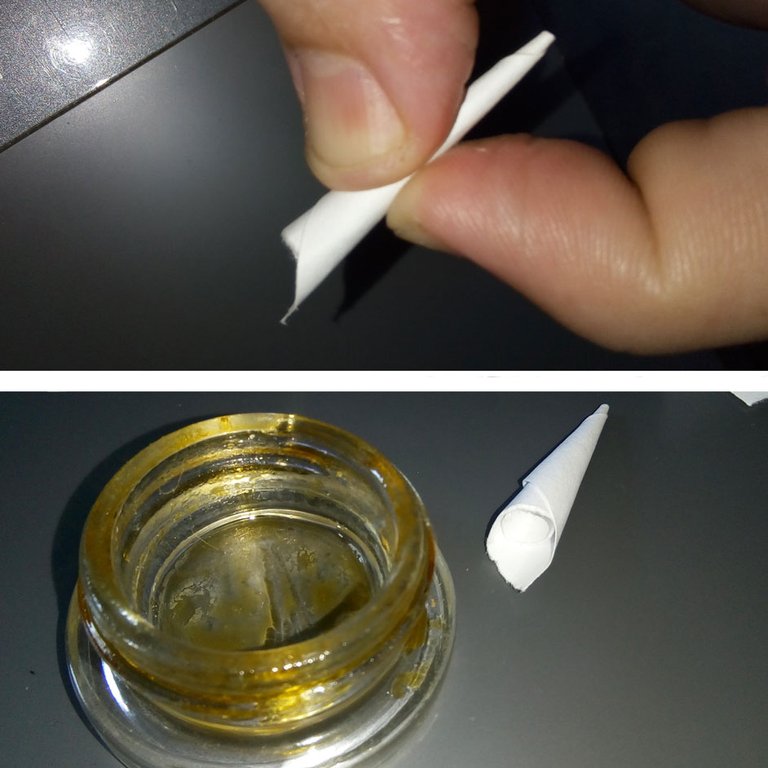
As an option, you can use a little concentrate to hold the cone together. If you don't have any or if you don't wish to use it, you can also use a small bit of resin or reclaim as it is also sticky.
You could lick the flap but index card doesn't really stick as well as the rolling paper.
But what I like to do is use a little concentrate. If you are looking at this, then I assume you have a little wax or sauce laying around, preferably the tackier and stickier variation of dab. Get a little bit and put it in the flap.
Get a little smear on there and roll it back up firmly.
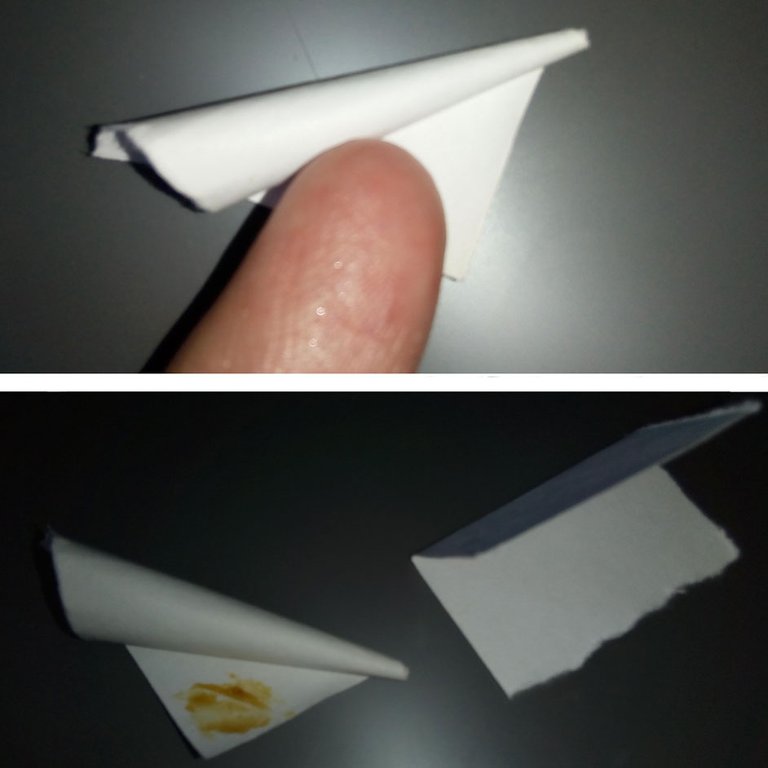
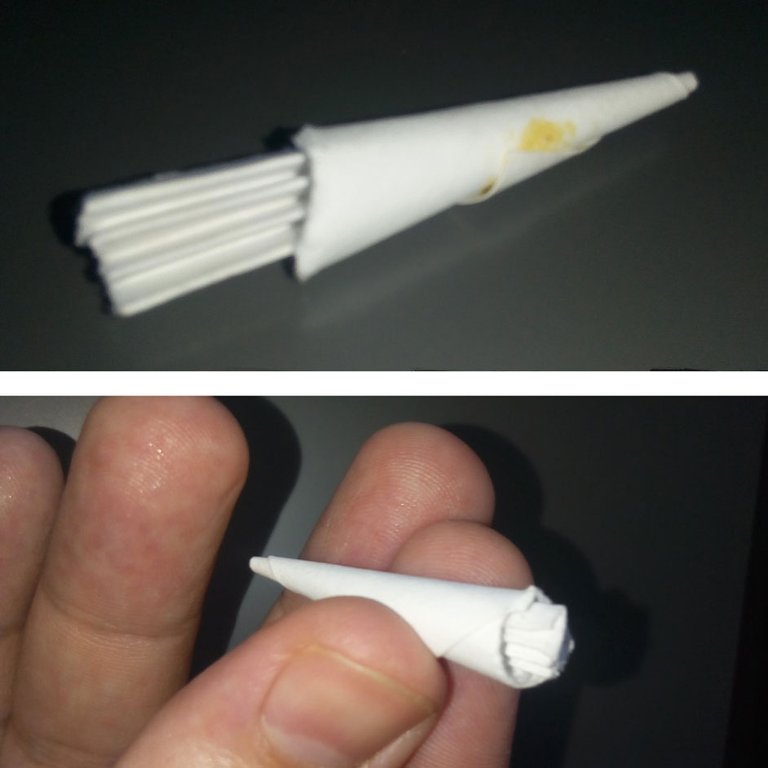
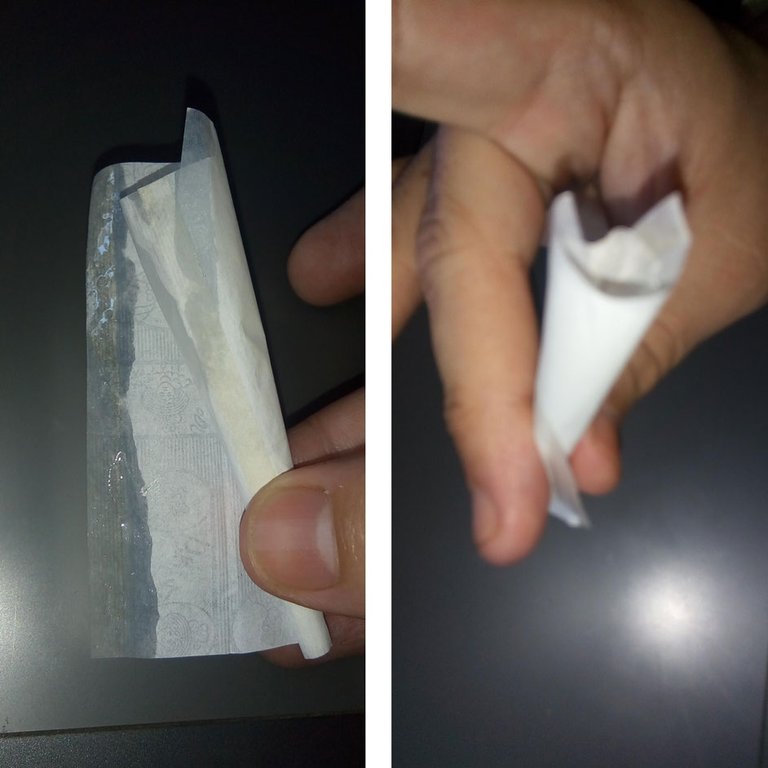
As for that uneven top end? Just fold the excess over and carefully tear it off.
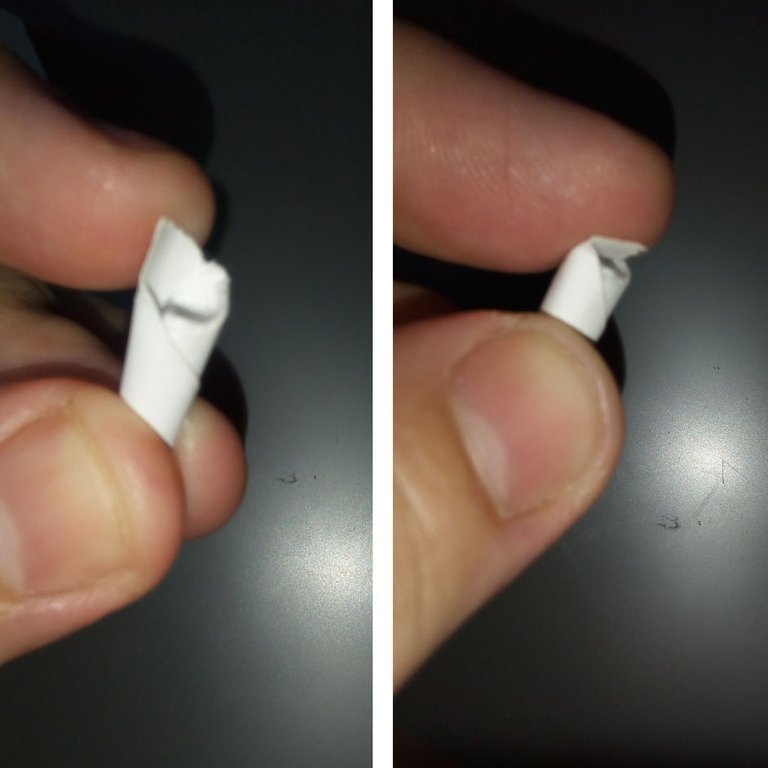
Boom. There you go.
Now, if we don't put a screen in there, you may suck in some bits of what you don't want to suck in. Also, you may pack some herb into this part and you don't want any herb inside this part. We want it to be as clear as possible so that smoke and air can go through.
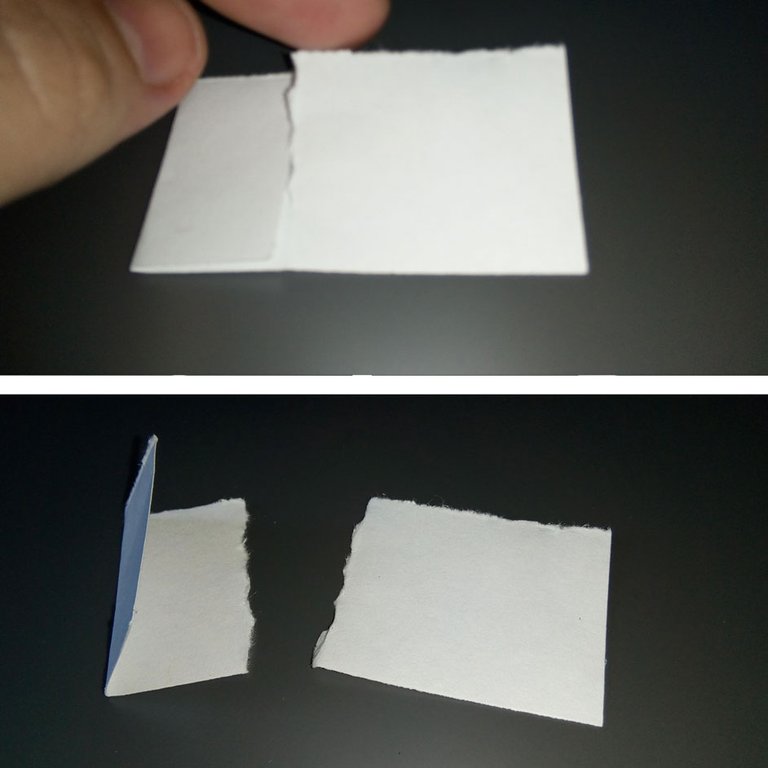
Now go back to that other half of the quarter of an index card. Nice how it's already folded, huh? Yeah it is nice. That shows you right where you need to tear that in half, so go for it. Tear it in half!
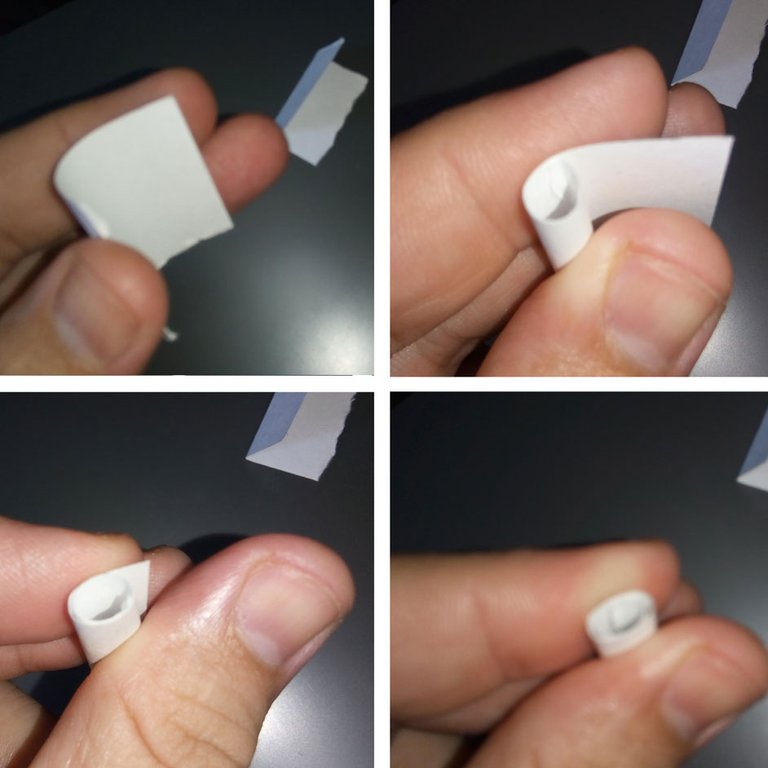
Now pick the better looking side to keep and toss the shittier one aside, or if you aren't a wasteful fucker, you can save it for the next time you roll. With that piece you kept, you will fold it in such as way that it comes out all evenly crimped, like so...
Clamp it down with your fingers and if you did it right, it should fit snugly into the hard cone you made.
Next take 2 leaves of the rolling paper, and then combine them.
Lick it and stick it.
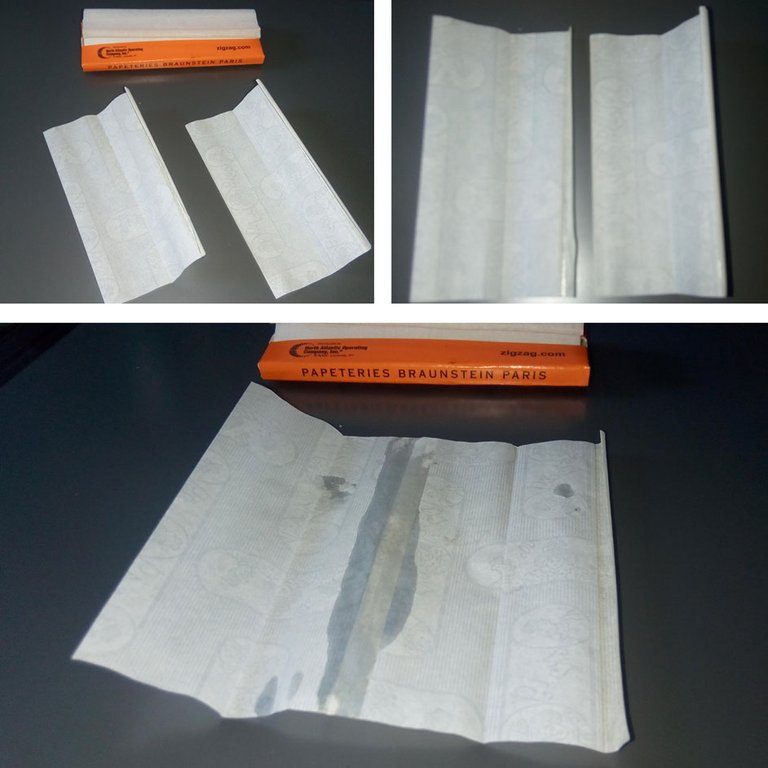
Maybe give it a few minutes to dry if you licked it a little too much. But now that your paper is combined, you will want to add the hard cone, which will be the filter/crutch for the joint.
You will arrange it into the corner of the paper like shown and roll the paper over the cone along the slant of the cone, which will cause the paper to mimic the shape of the hard cone. Lick that corner first, so that the initial contact will stick enough to help pull the cone through the roll you are about to do.
That leading edge off the open end of the cone should also be licked. This will help it grab onto the paper and help seal it as you roll the cone and that moist edge comes into contact with a layer above it. Be gentle and careful as you roll, making sure not to let the paper crumble, fold, tear or basically do anything else that isn't being rolled smoothly into this joint.
--
At this point the moistened edge has cleared the height of the joint and you are coming to the end of the roll with the only edge left being the gummed edge of the paper.
Yup, you guessed it. Lick that edge too. Maybe not as much as I did though...
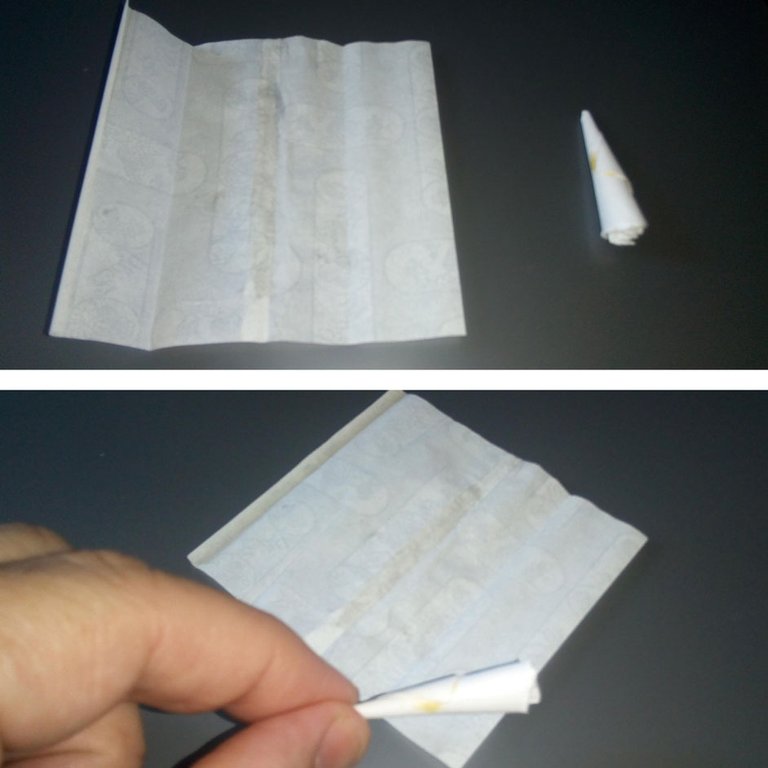
Now carefully complete the roll through. The edge will wrap around the joint in a diagonal-like manner, helping to seal the paper into this cone shape.
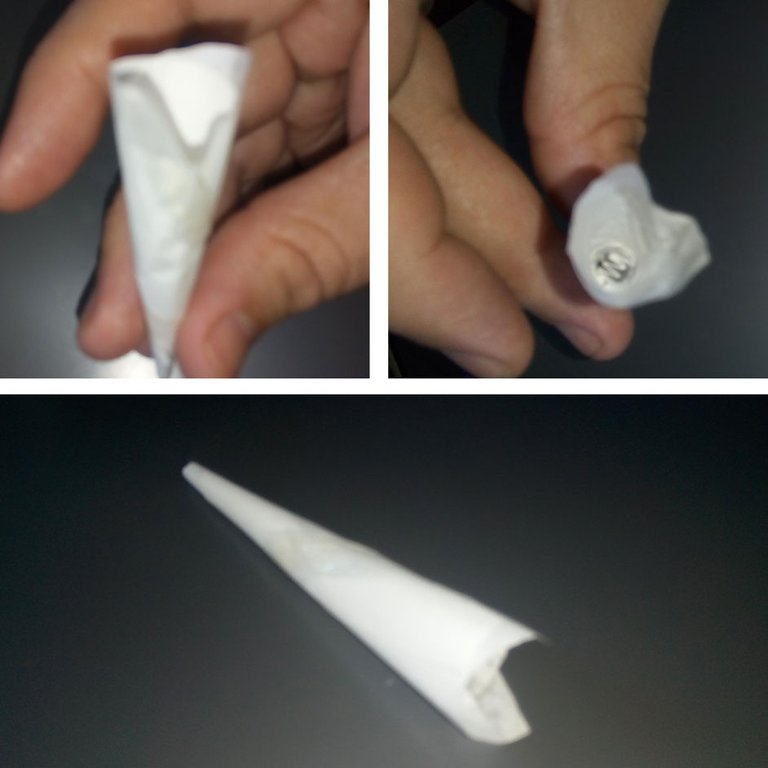
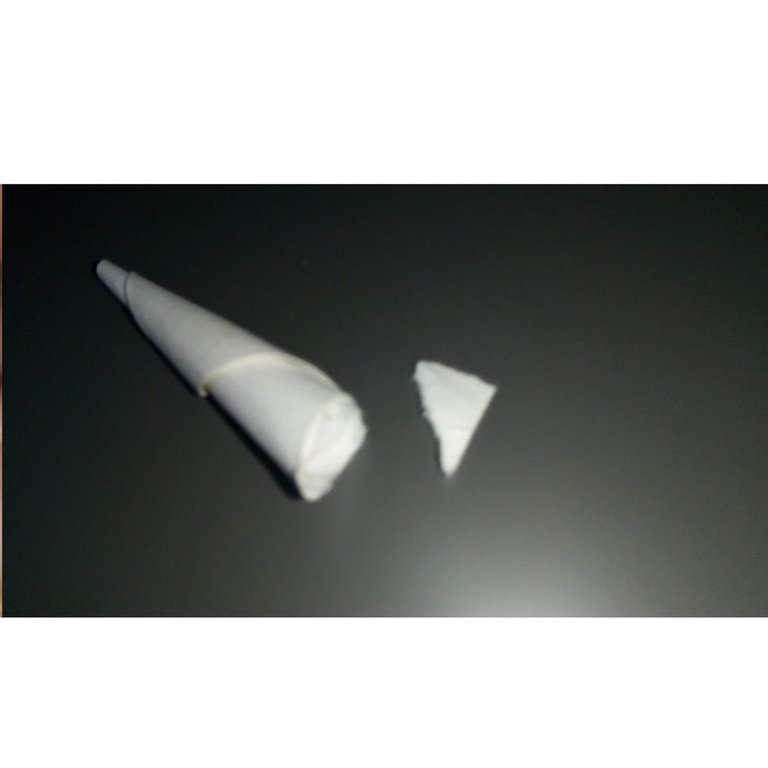
What you are left with is a cone with a couple of ears on the top. Those being the corners of the paper. That's okay, because when you pack this joint, you will twist off the end.
Get a finger or something like a pen or pencil in there and carefully firm it up. Lick and press in any needed areas. Put it aside and let it dry. If you did it like I did, you can then pack it and twist it.
That's all for now. Perhaps in another post, I will show you how to pack it, just in case you aren't sure. ;-)
Upvotes, Follows, Resteems and Comments are welcome!
@SaintChristopher

Wow, very detailed. That must've taken a lot of time. Upvoted with 100%!
It took plenty of time haha. Thanks for the comment and vote!
Well done. I upvoted your post, keep steeming good content so we can promote to the world and bring new users to this platform.
Thank you,
@Yehey [ Witness ]
Please vote @Yehey as one of your Witness. Join us at https://SteemChat.com steem community.
Use @automation chat bot for a fun conversation.
Posted using https://Steeming.com condenser site.
Thanks for the comment. I need to learn more about the witness stuff. I'm not really sure how it works yet.
Congratulations @saintchristopher! You have completed the following achievement on the Steem blockchain and have been rewarded with new badge(s) :
Click on the badge to view your Board of Honor.
If you no longer want to receive notifications, reply to this comment with the word
STOPTo support your work, I also upvoted your post!
Do not miss the last post from @steemitboard: