Painting Alla Prima
One of my favourite practices as an artist, is to paint from a live model in one session ‘Alla Prima’. The term alla prima means to finish a painting in one sitting, or in one session.
Painting the figure from life forces us to make positive, deliberate decisions. We have a time limit. The model, a living breathing human being, is right in front of us, and is skilfully and patiently, and sometimes even strenously, holding a still pose for the other artists in the room, for a set period of time, usually co-ordinated by the group organiser. It is our job as artists to capture some kind of unique expression, essence or resemblance of the model that we find interesting, unique or attractive. Such as capturing the gesture, mood, emotion or feeling, and record that unique moment in time through our decision-making and mark making.
We often do this through meticulous calculation, constantly measuring body proportion, distances, paint mixing, light & shadow, warms and cools, combining our discovery and knowledge with creativity and skill, with the physicial materials we have in our posession.
In this blog post, I am going to show you how I approach painting the figure from life alla prima.
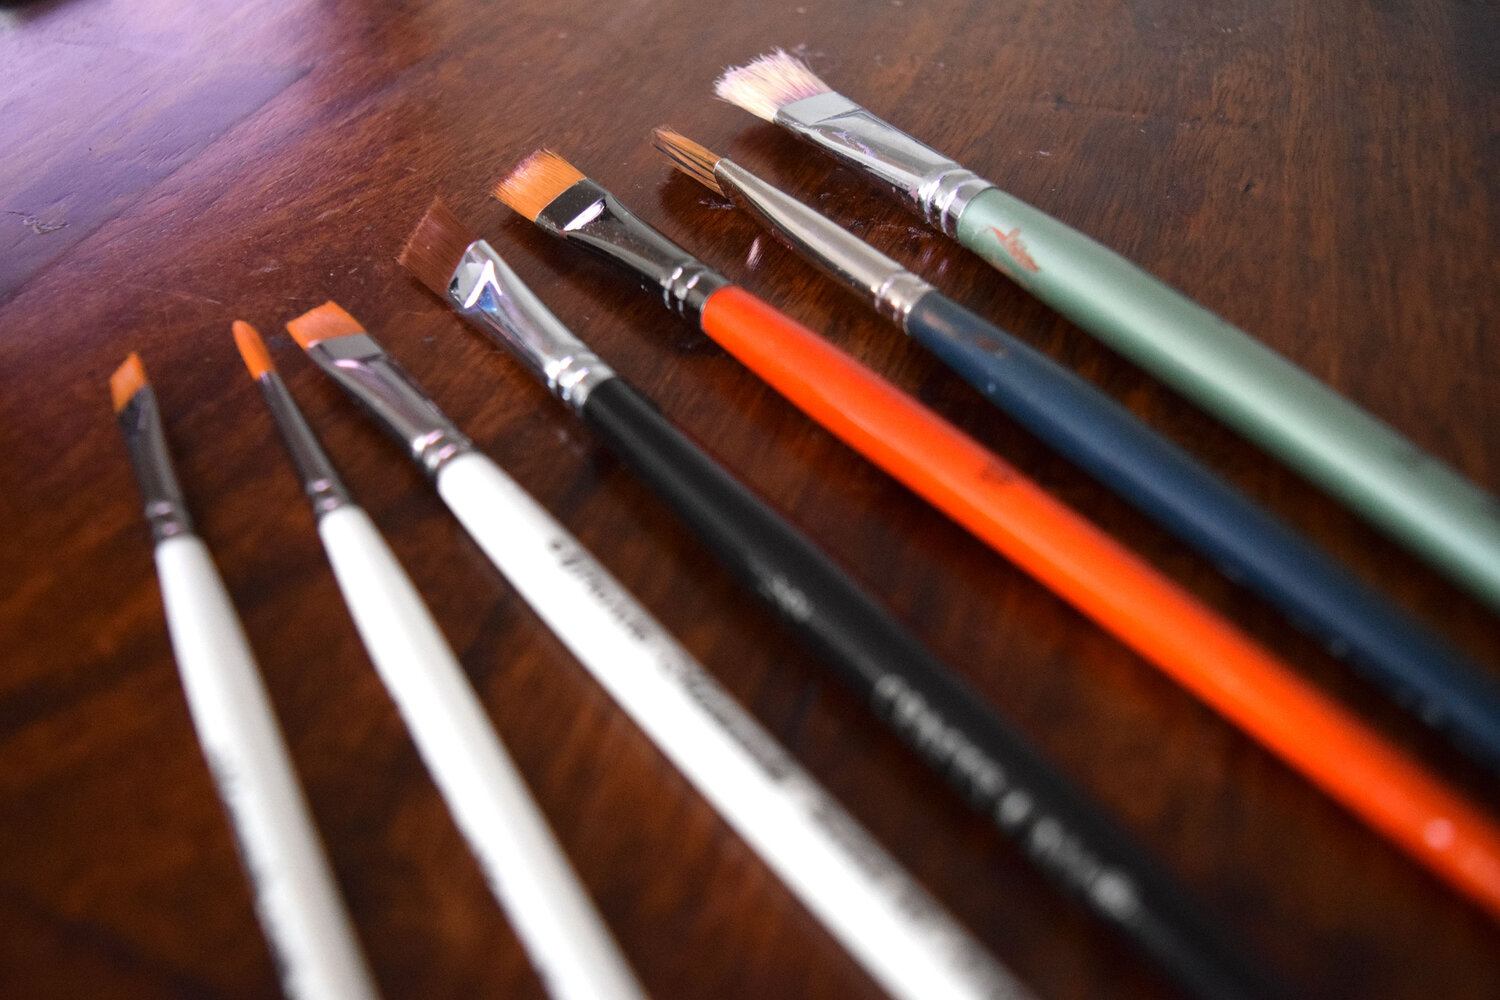
Above image: A photo I took of some of my brushes that I used for this painting
Choose Your Brushes
Imagine you are about to go into battle, you must select your best weapons to face your opponent. You must do this every time you decide to show up at your easel. You must choose your materials wisely, imagine what moves and strikes you will make, visualise yourself executing a hand, an eye or an earring with a few bold strokes, and then bring the chosen brushes to your easel, ready to paint.
“Do not just pick up the brushes you used and cleaned yesterday because they are there. Put those back, look at all of them, and then choose your weapon, like a type of gun or a certain type of sword. You are going into battle and you want the best weapon for the job.”
— Richard Schmid
The Underpainting
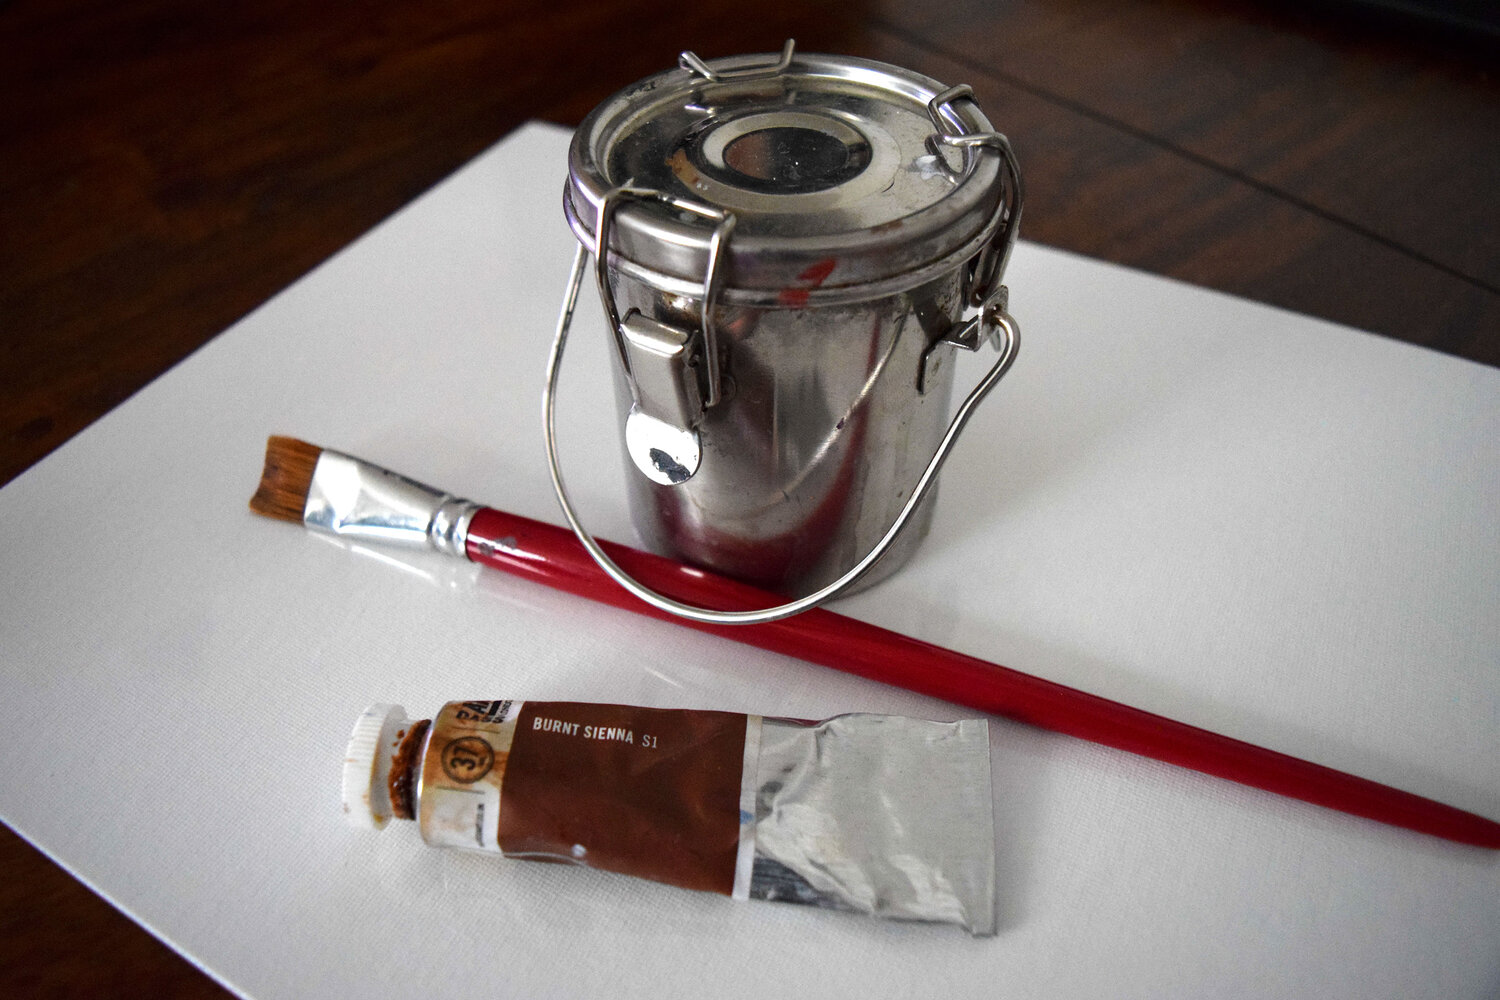
Above image: Usually I paint a light coat of burnt sienna, thinned down and diluted with odourless mineral spirits, which is contained inside the metal brush cleaner. But for this painting, I used a thin black wash, which gave the appearance of grey on the canvas panel. Depending on if you want the entire surface area painted, or just a section in the center, you can use a large or medium brush to spread the paint around. Then apply a paper towel to dry and push the paint on the surface.
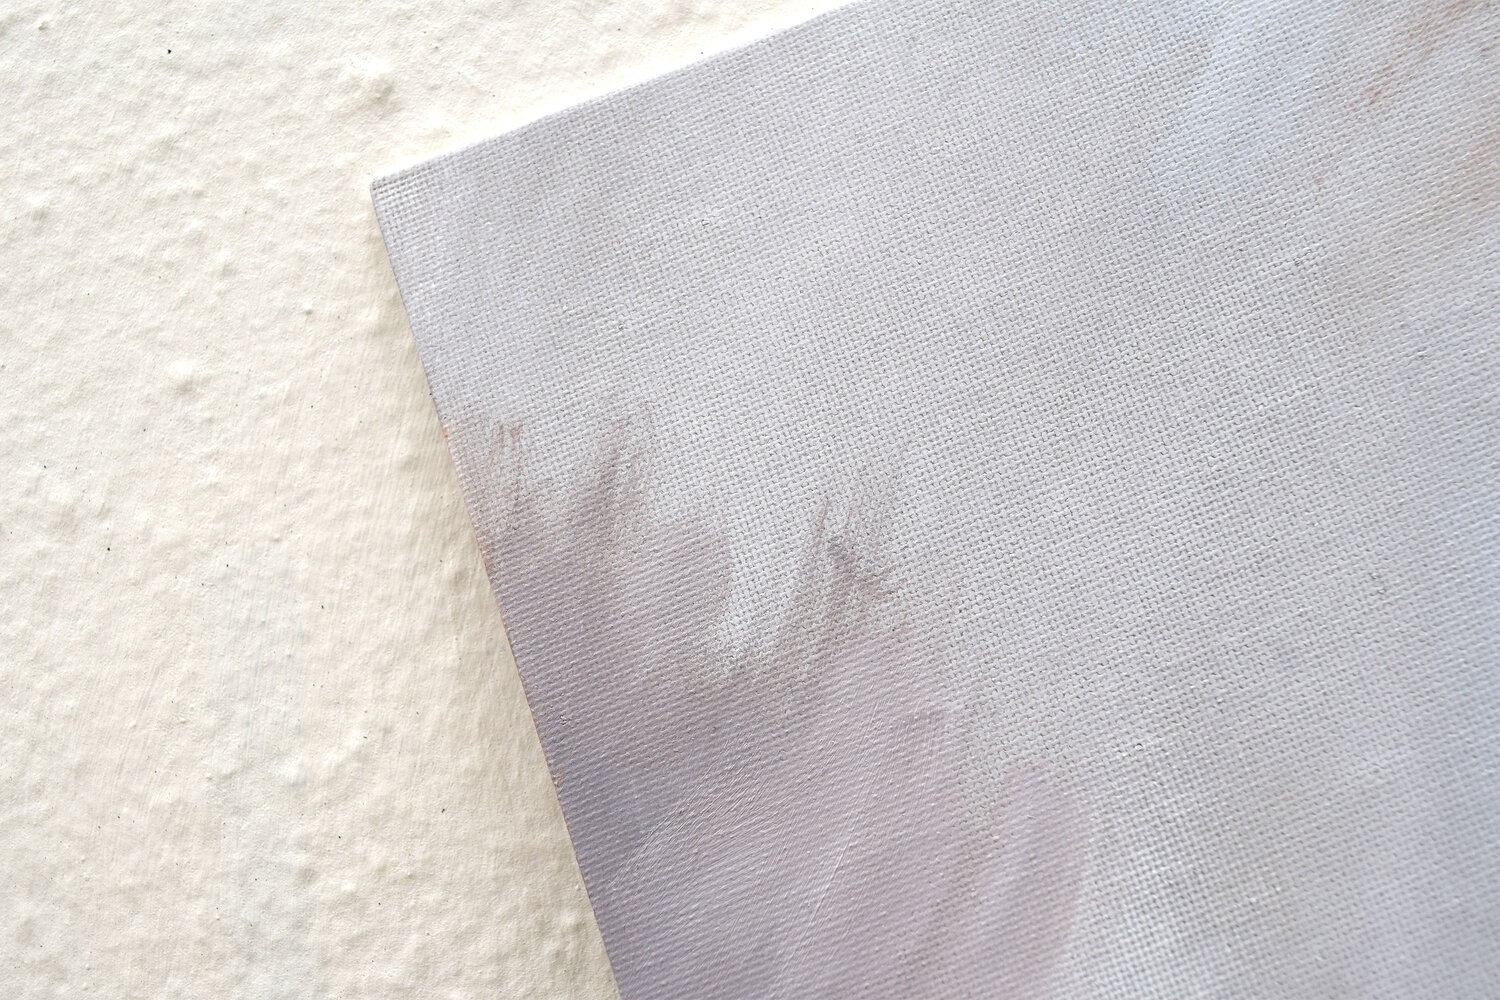
Above image: Close up shot of the thin, grey background I painted on the panel before starting to paint the model.
Background Wash
A background wash is optional, depending on your personal preference. Sometimes I will paint a thin layer of diluted burnt sienna mixed with paint solvent, however I usually do this for landscape paintings. Sometimes for a portrait or figure study, I will paint a thin wash of black on the canvas panel, thinned out with the solvent, which gives an appearance of a grey tone. I then take a paper towel and smear the paint around the canvas, taking off most of the moisture so I can continue to paint back on top of it within minutes, and sometimes, seconds.
You can always paint directly on the already primed surface of the canvas.
A Limited Palette
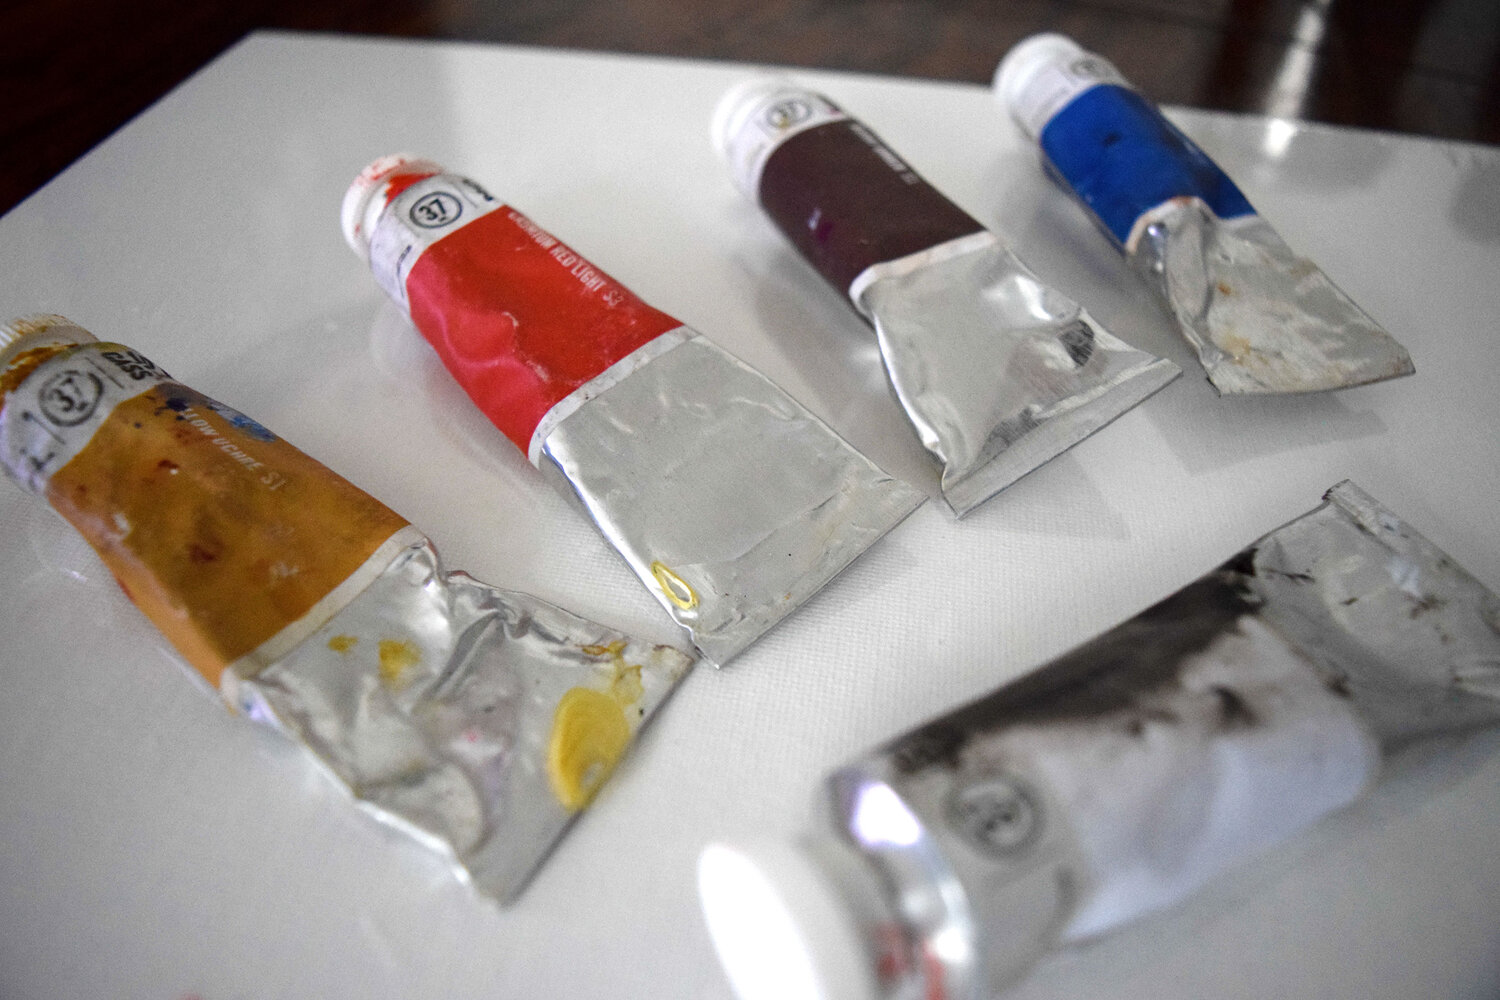
Above image: This was my limited palette selection for this painting study. It is very similar to the Zorn palette, except I swapped the Ivory Black for a Burnt Umber. From left to right these colours include: Yellow Ocre, Cadmium Red Light, Burnt Sienna, Cobalt Blue and Titanium White.
Additional Paints
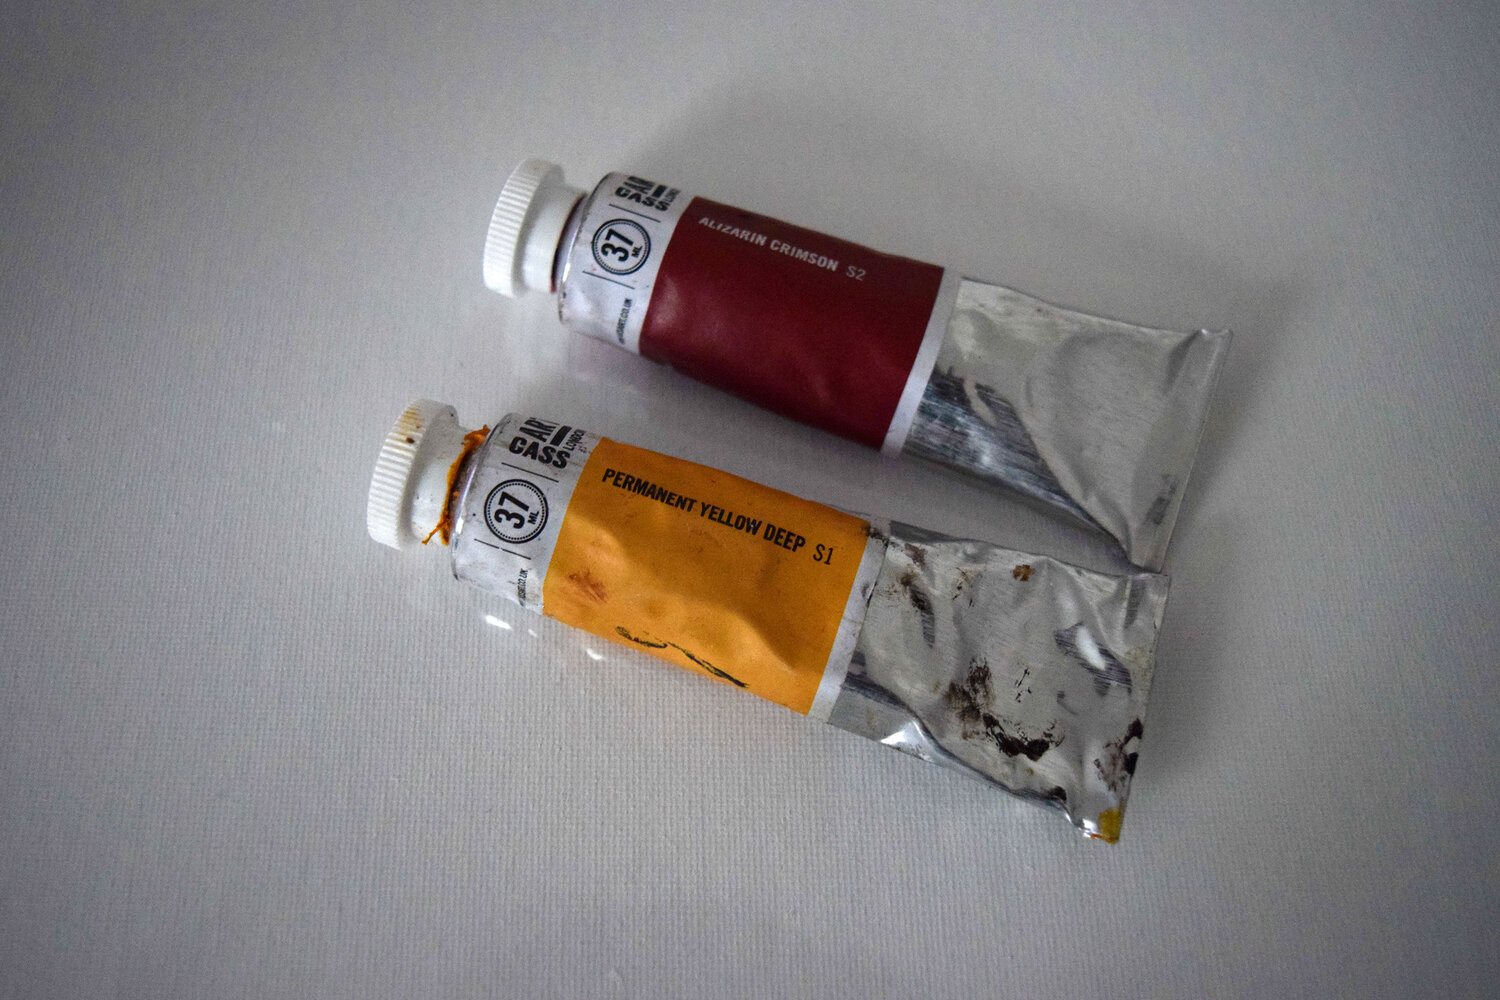
Above image: I also introduced two additional colours for this study, to paint vibrant colours in the models red dress. I chose Permanent Yellow Deep for a more saturated yellow/orage which I used as some of the reflected light on the models red dress, and Alizarin Crimson, to get some vibrant darks in the models dress.
Mixing Your Skin Tones (Limited Palette)
Why the limited palette?
From my experience so far, I like to keep things simple with portraits and figure paintings, especially when it comes to mixing skin tones, and when I know I need to be quick. By using a limited palette of around 4 colours, you will be surprised at the amount of variety of Hues (colours) and colour saturation you can create through mixing on the palette. I usually stick to the Zorn palette, using Cadmium Red, Yellow Ocre, Ivory Black (a cool black which can give the appearance of blue when placed against warm tones), and Titanium White.
I begin by mixing my mid-tone, I establish this by first checking my values.
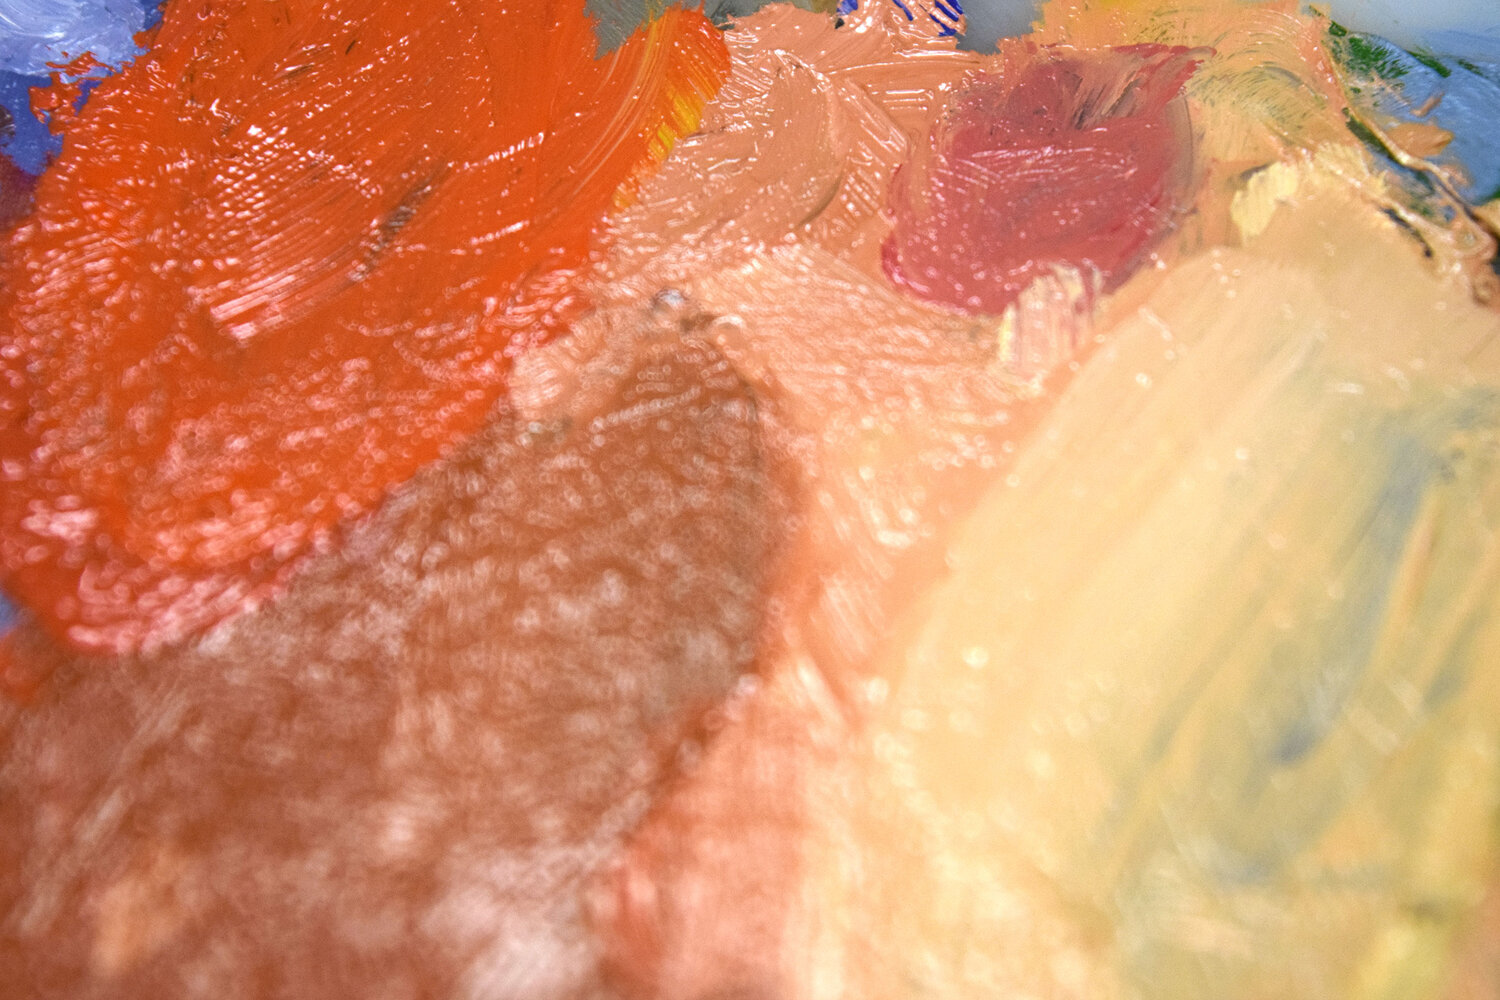
Above image: This is a close up shot of my skin tone paint mixtures.
For the mid-tone I used about 30% Cadmium Red Light, about 20% Yellow Ocre, and about 50% Titanium White.
For the dark-tone I used Burnt Umber, mixed with a little bit of Cobalt Blue. You can get very dark, darks with this combination, to decrease the value and increase the temperature, I would mix either some additional Yellow Ocre, or Cadmium Red Light, or simply mix in with the mid-tone mixture I previously made.
For the light tones, I add more Titatanium White with small amounts of Yellow Ocre/Cadmium Red Light.
Titanium White will ‘cool down’ and desaturate the paint mixtures, and will also make them lighter in value. You can always add additinal red/yellow to a light/desaturated mixture to increase it’s saturation.
Squint For Correct Values
Squinting is a simple way of establishing the values (lights & darks) of an object, person or scene quickly. When you squint all the way down, colour information is reduced, which enables you to detect the correct light and dark relationships, and local value (how dark or how light) of whatever it is you are looking at.
Sketch The Outline Proportions of The Figure
To start with, roughly sketch the outline and larger masses of the model using either a diluted Burnt Umber or Burnt Sienna. I usually sketch this initial outline with a flat brush, using only the sharp tip of the brush, almost vertically against the canvas. I find that this is very similar to sketching with a pencil. If you make a mistake, just take a rag and scrape of the paint, then try again. Details are not important at this stage, focus on the larger masses, the correct angles and proportions, and try to get done the outline of the sketch in as few strokes as possible.
The Block-In
After establishing the sketch outline of the figure on canvs, the next step is to begin the ‘block-in’, where we establish the darks, lights and mid-tones of the figure. When painting the block-in, paint thickly, mix plenty of paint, use the biggest brush you can, and focus on the larger shapes.
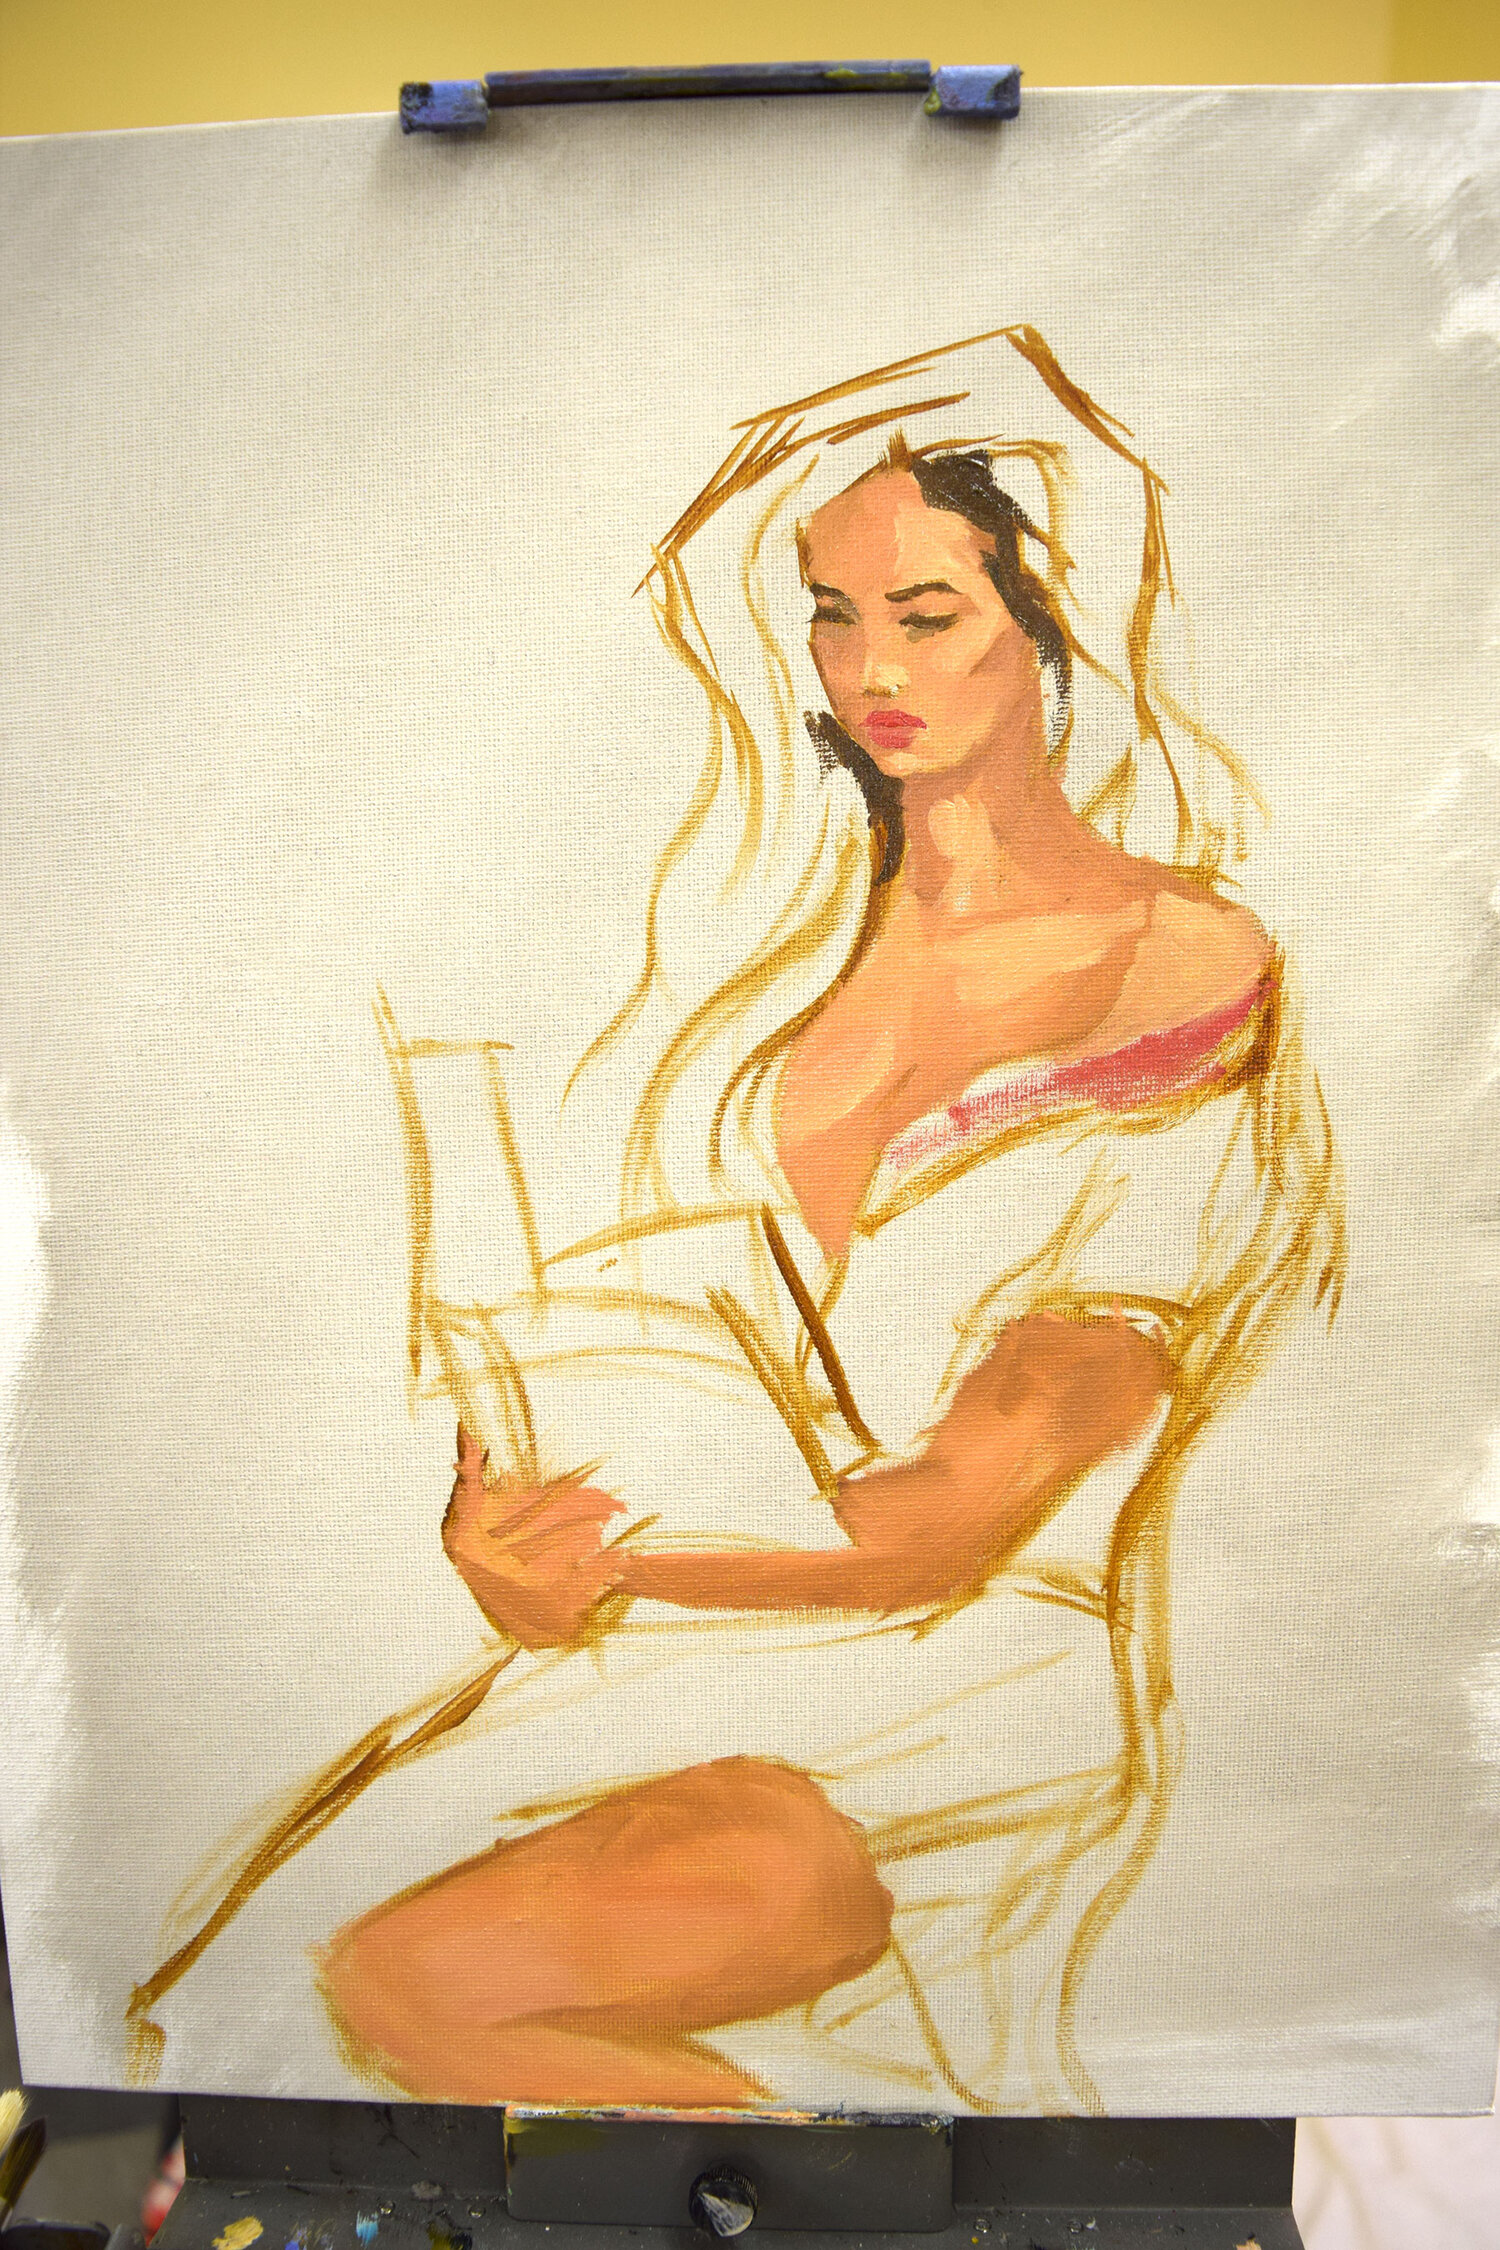
Above image: You can see at this early stage of the painting, where I sketched the outline and proportions of the figure using a thin wash of burnt sienna. Some of thee initial sketch lines I left in the ‘finished’ painting, as you will see at the end of this post.
Paint The Mid-Tone First
Many artists will advise that you to begin by painting with the shadows. I also sometimes start by painting the shadows first, but I find that with the figure, I have an easier time determining the correct darks and lights in relation to each other, once I have first established the mid tone. In this case, the models skin tone gave the appearance of a light, golden brown, which is what you would expect to find in a slghtly olive-skin complexion (the model was part Portuguese), combined with indoor warm lighting.
As a side note, I recommend you paint with a cool light bulb shining on both your canvas and your palette, which is similar to daylight, or your colours will look different from the studio light of night, to the natural light of day.
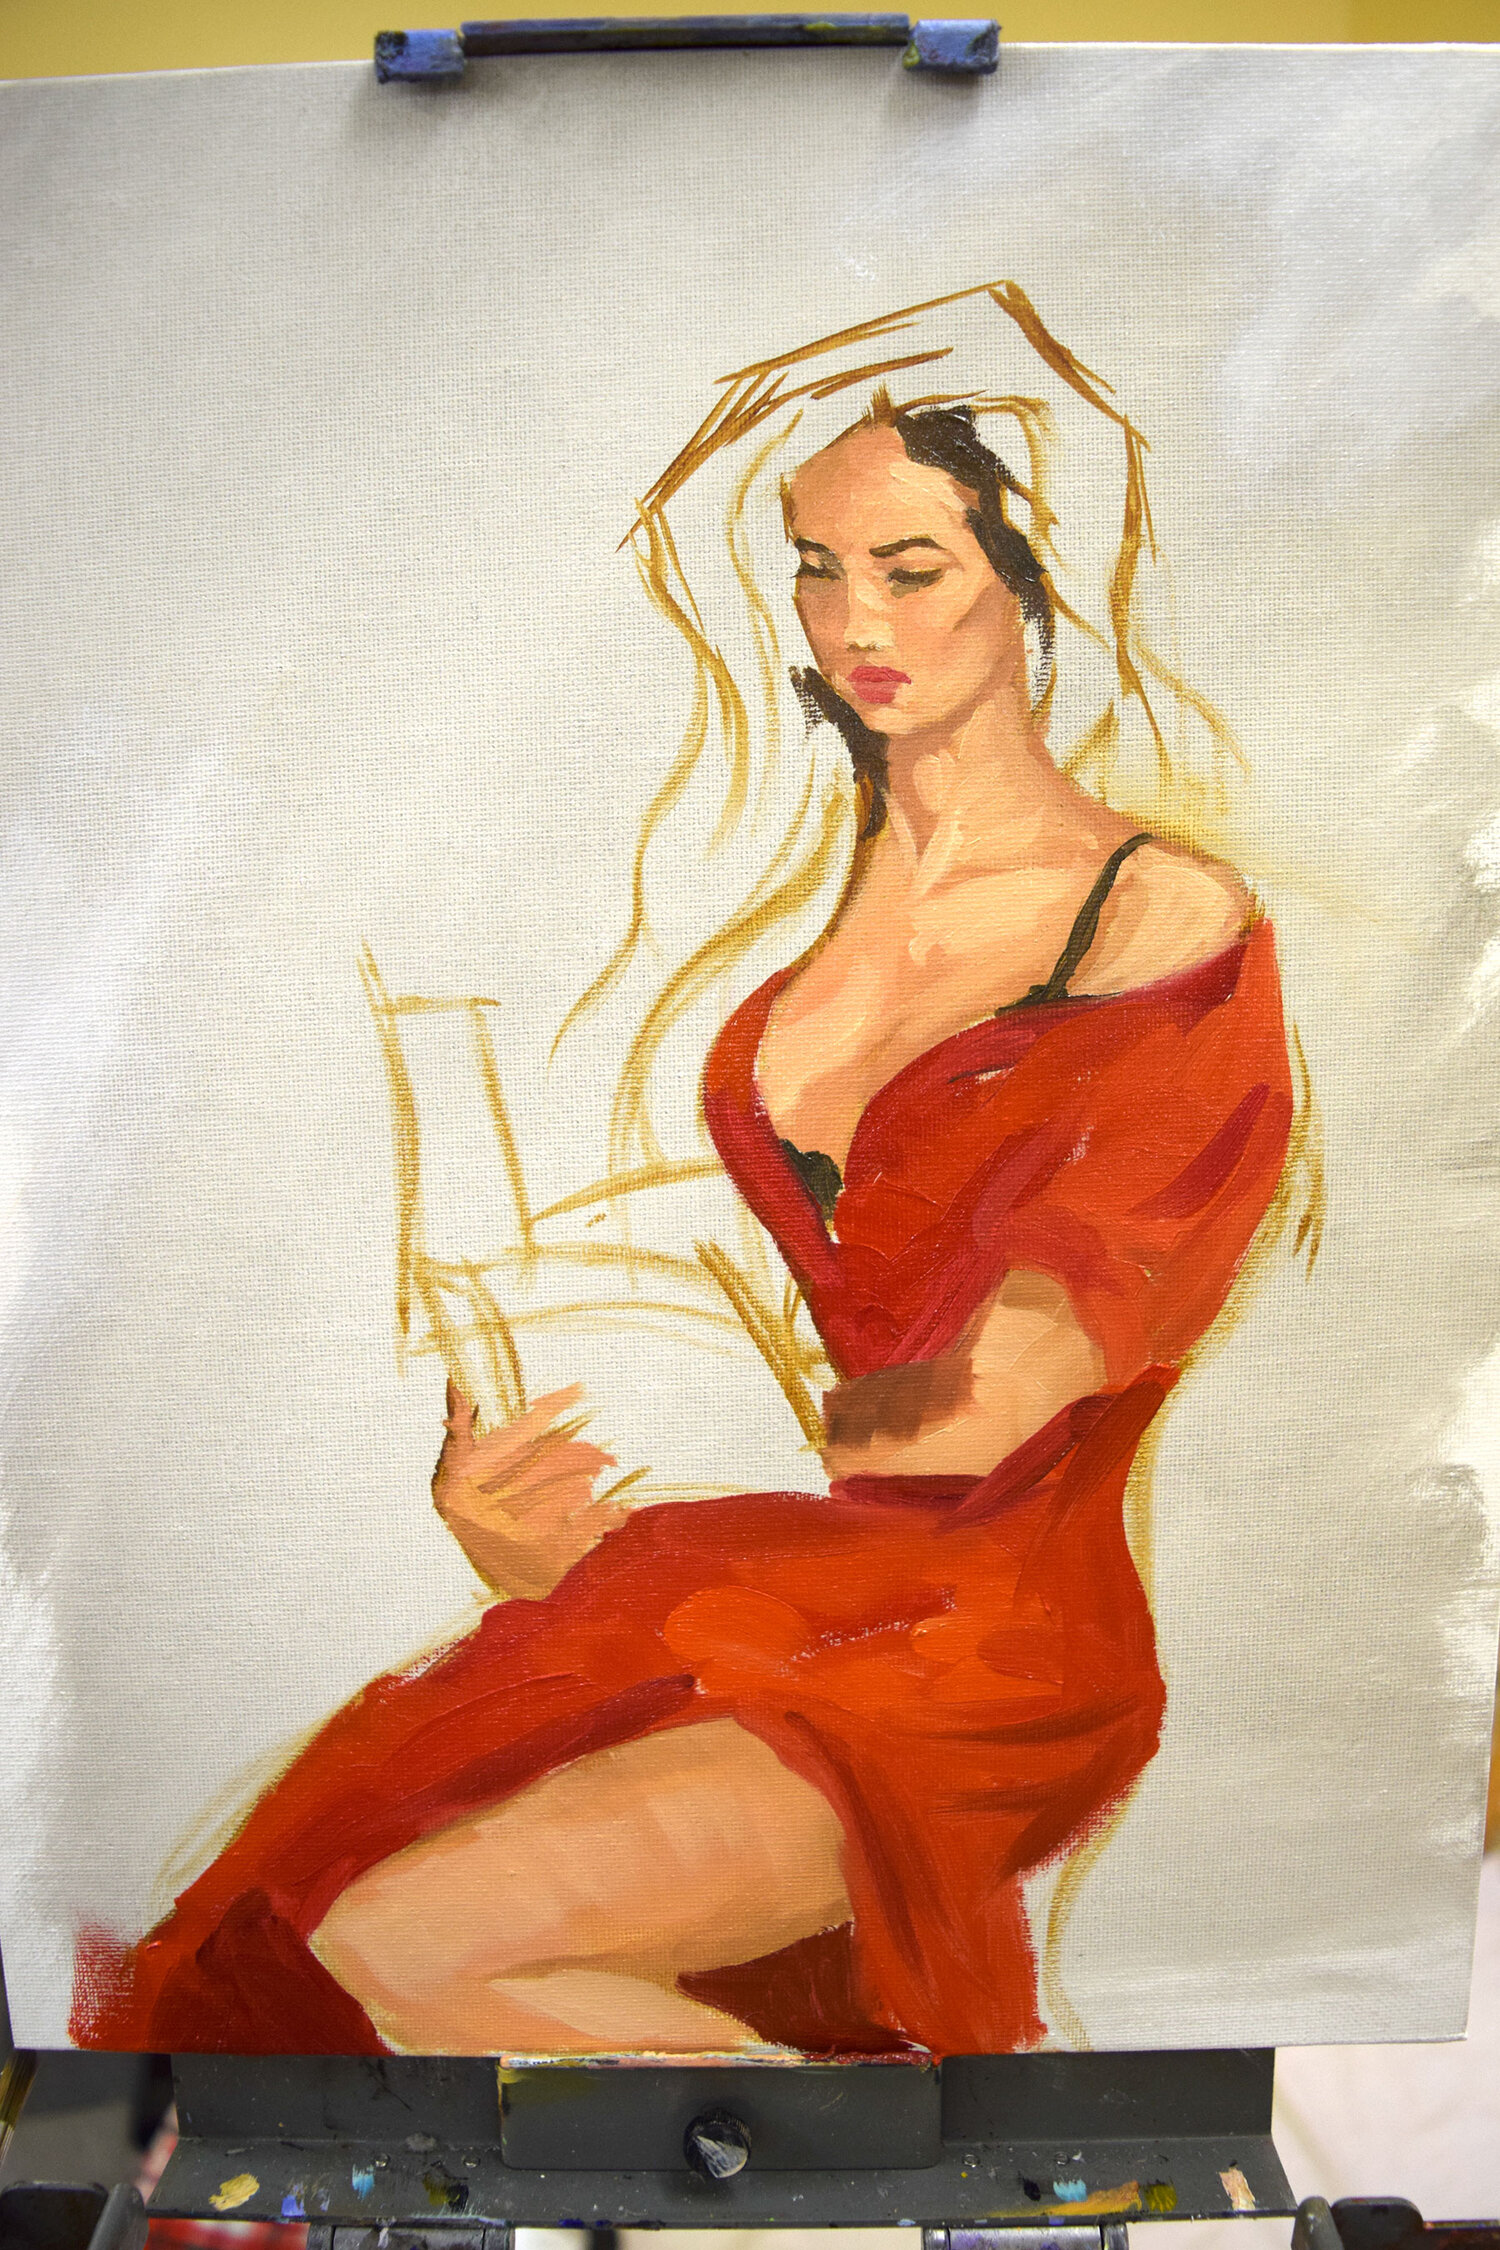
Above image: After establishing the skin tones and light/shadow areas of the skin, I begin blocking-in the models vibrant red dress. You can see my thick, impressionisitic-like brush strokes here, I also used a little bit of Liquin Impasto to give a thicker appearance and brush-like texture quality to the paint, which can often get lost when blending.
After placing the mid-tone, I begin blocking in the dark tones, and then progress towards the lighter tones whilst leaving the brightest highlights, usually placed in the focal areas for contrast, towards the end. I blend only a few select edges for an alla prima painting, but not all of them.
Seize The Moment
You should keep in mind that you need to paint in a relaxed state, but also relatively quickly and decisively, as the model is only in front of you for a while. Paint in a calm, sharp, and focused state of mind, seize the moment, and make every stroke count!
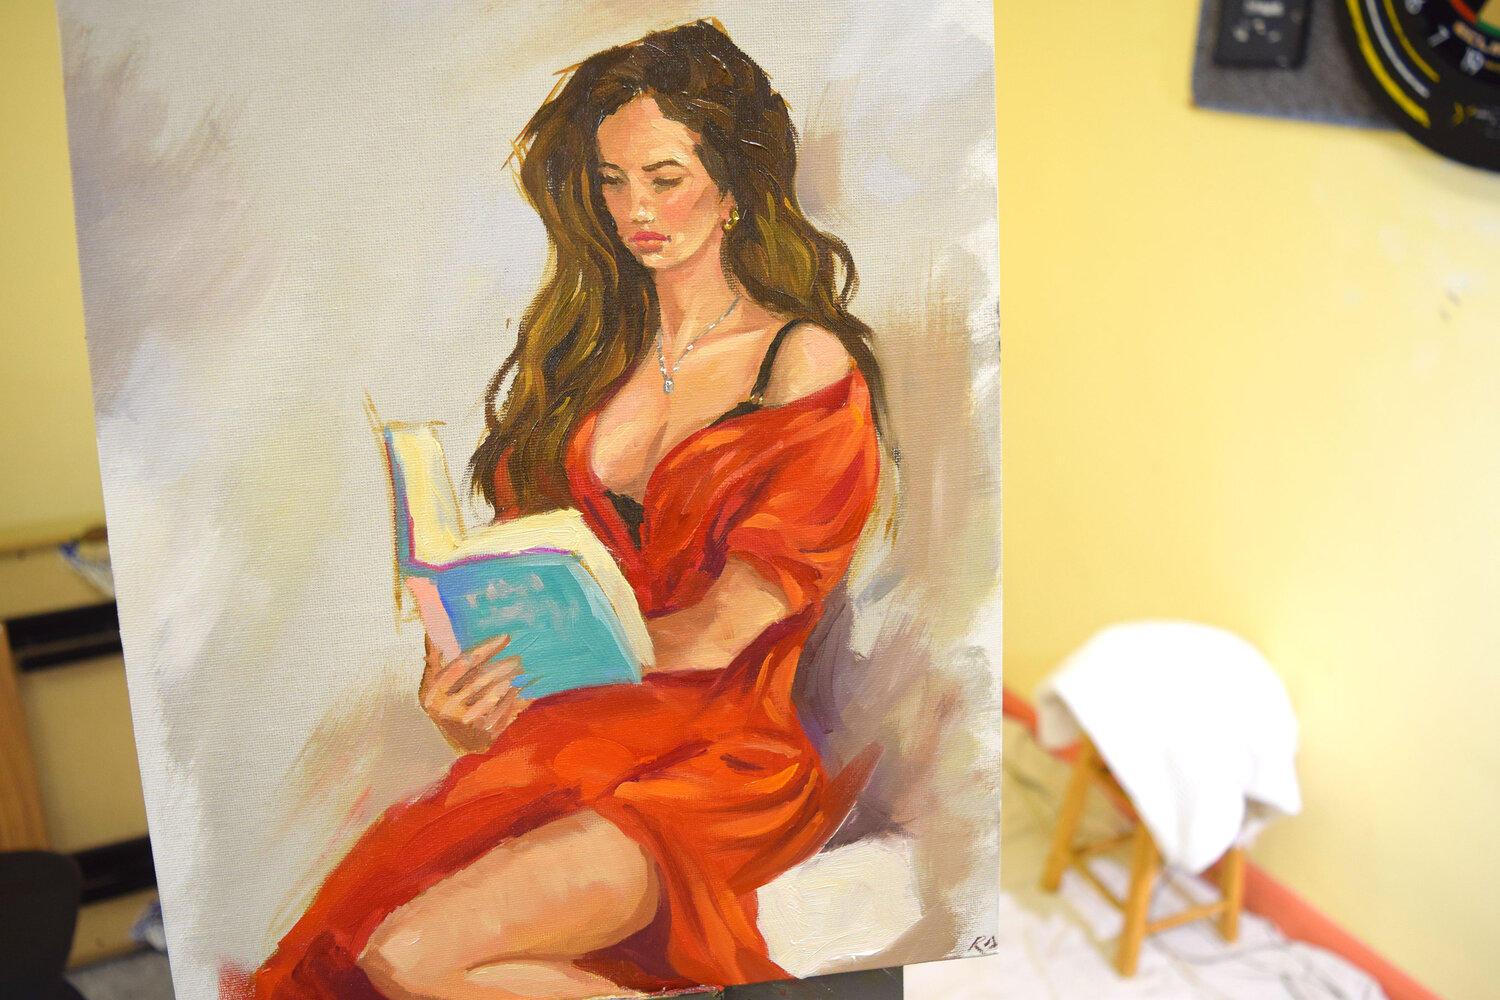
Above image: Towards the end of the painting, I introduce the additional colours for the warm highlights and shadows of the models dress, I also introduce a mixture of Cobalt Teal, Alizarin Crimson, and Cobalt Blue for the models book. I keep the paint strokes thick, loose and painterly, I also add a few additional warm grey tones to the background, and a few more white strokes on top.
Practice Your Footwork
Painting at the easel, the physical movements involved is a little bit like fencing, or dancing. I think it pays to be light and swift on your feet when painting alla prima, to move away from the canvas often to get the bigger picture, and not to get caught up in the details. The process is almost akin to a lightening fast martial artist such as Bruce Lee, and how he used to practice his forward/backward lunging steps. You will want to dart in and out at a rapid pace, brush in hand, ready to make your best possible stroke, or correction, as if you were lunging with a sword. But of course, you can still do this effectively by moving slowly, if you prefer.
And you should do this often, because the moment you step back away from the canvas, you can more easily see and determine what’s going right and what isn’t. The temptation is to sit still and get lost in the details, try not to do that, especially early on. Practice your footwork, and be light as a feather.
The painting process at the easel is exciting and exhilarating at times, embrace it, and use it to its strengths.
Hold Steady
Now almost like an archer, who has pulled back the string, holding himself as still as possible, who is now set to release the arrow when the exact moment is right, you must also hold your brush as still as you can (and maybe also your easel), to make the brush strokes in the area of interest/focal area are accurate and as close to the mark as you had intended.
As the painting progresses, and you find that the time has come to paint smaller areas or details, especially in the face, hold steady. Sometimes I will even hold my breathe for a few seconds as I paint the finer details in the face as I find I can keep my hand held in the air more still. You can also try to hold your little finger against the canvas, balanced on the tip of your finger nail, or use a mahl stick, which I personally haven’t tried yet.
Finish
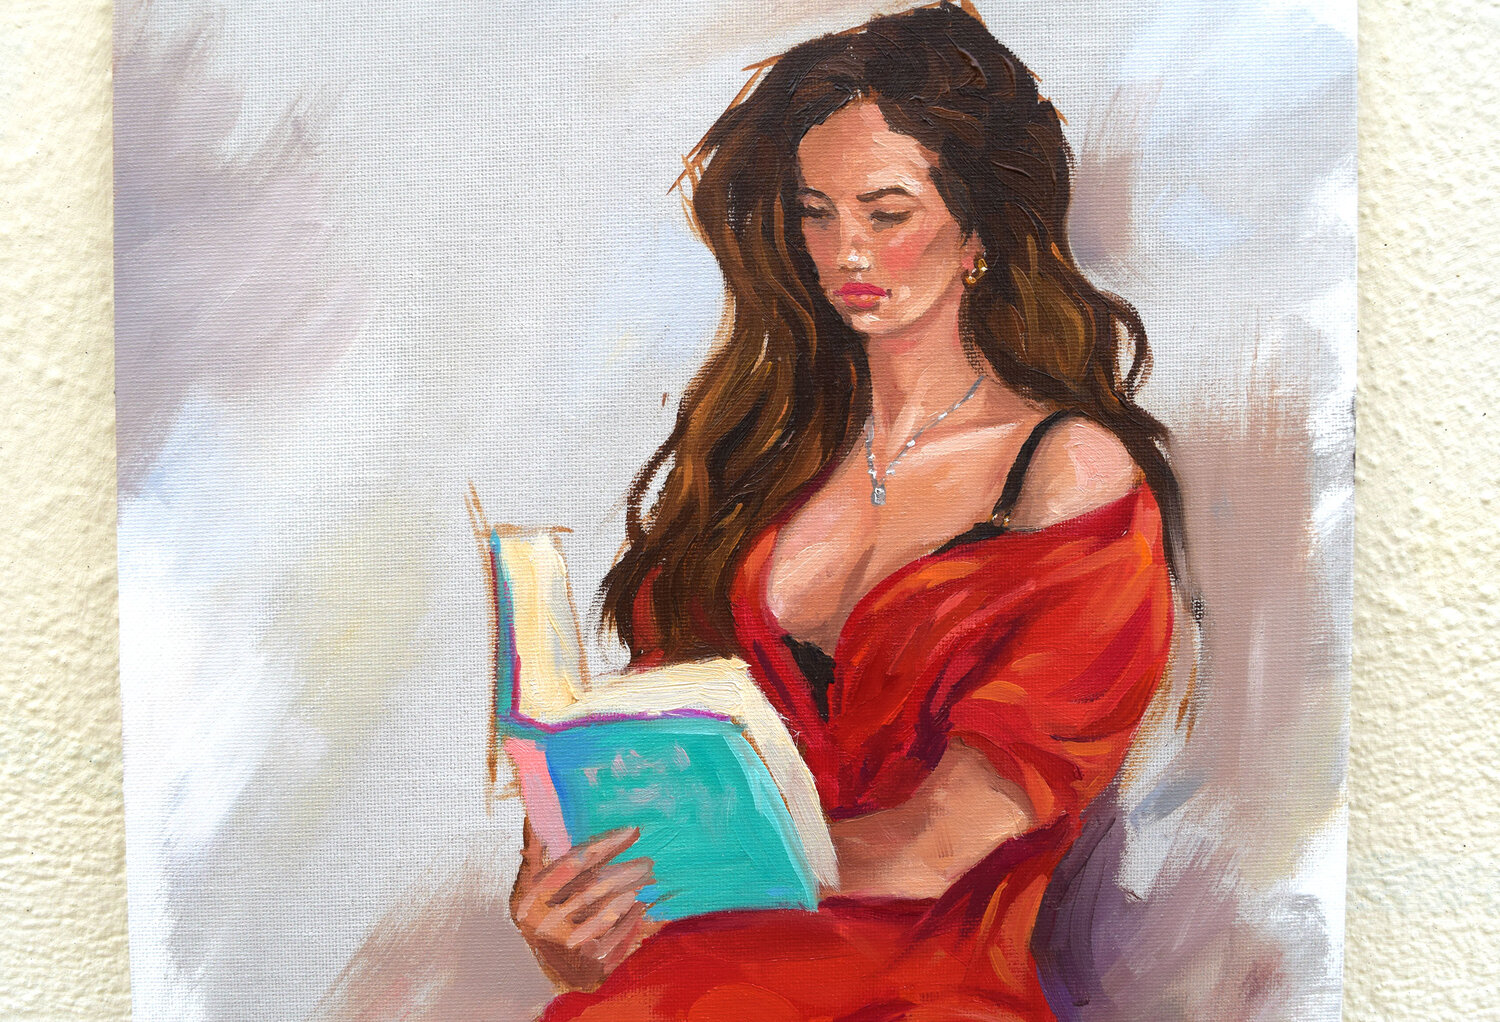
Above image: As the painting comes to an end, go in for your final few marks, leaving some of the original sketch-like quality behind, take a step back, breathe, and call it an alla prima painting study, done.
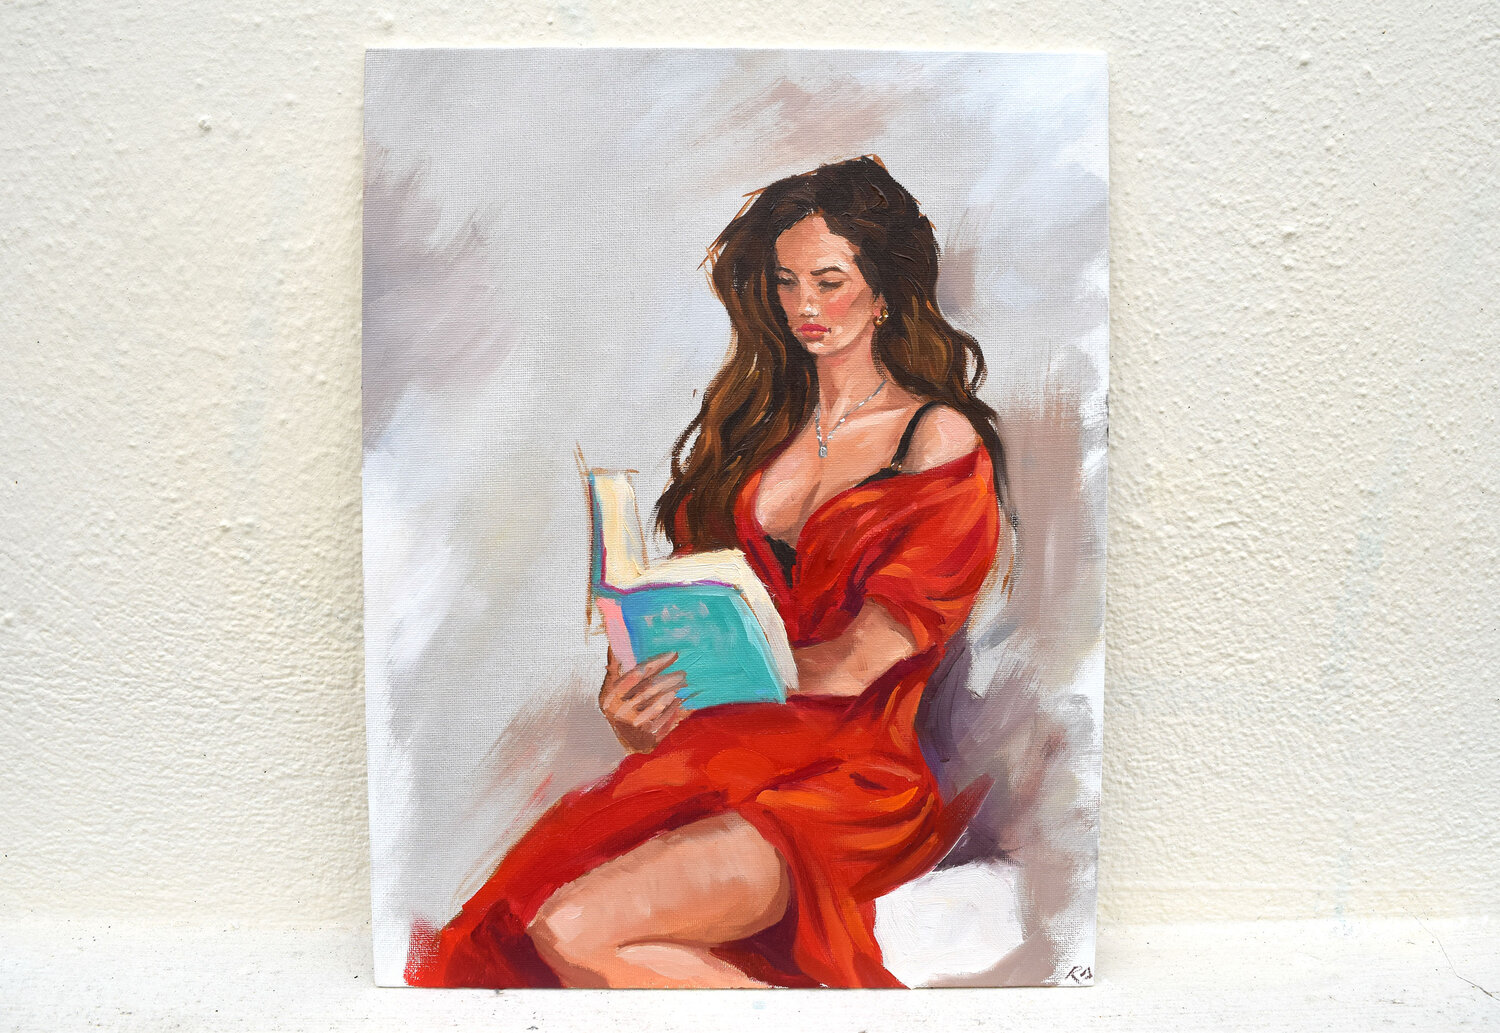
Above image: Apply the finishing touches, sign your initials or signature, and frame. And your alla prima painting study, is complete.
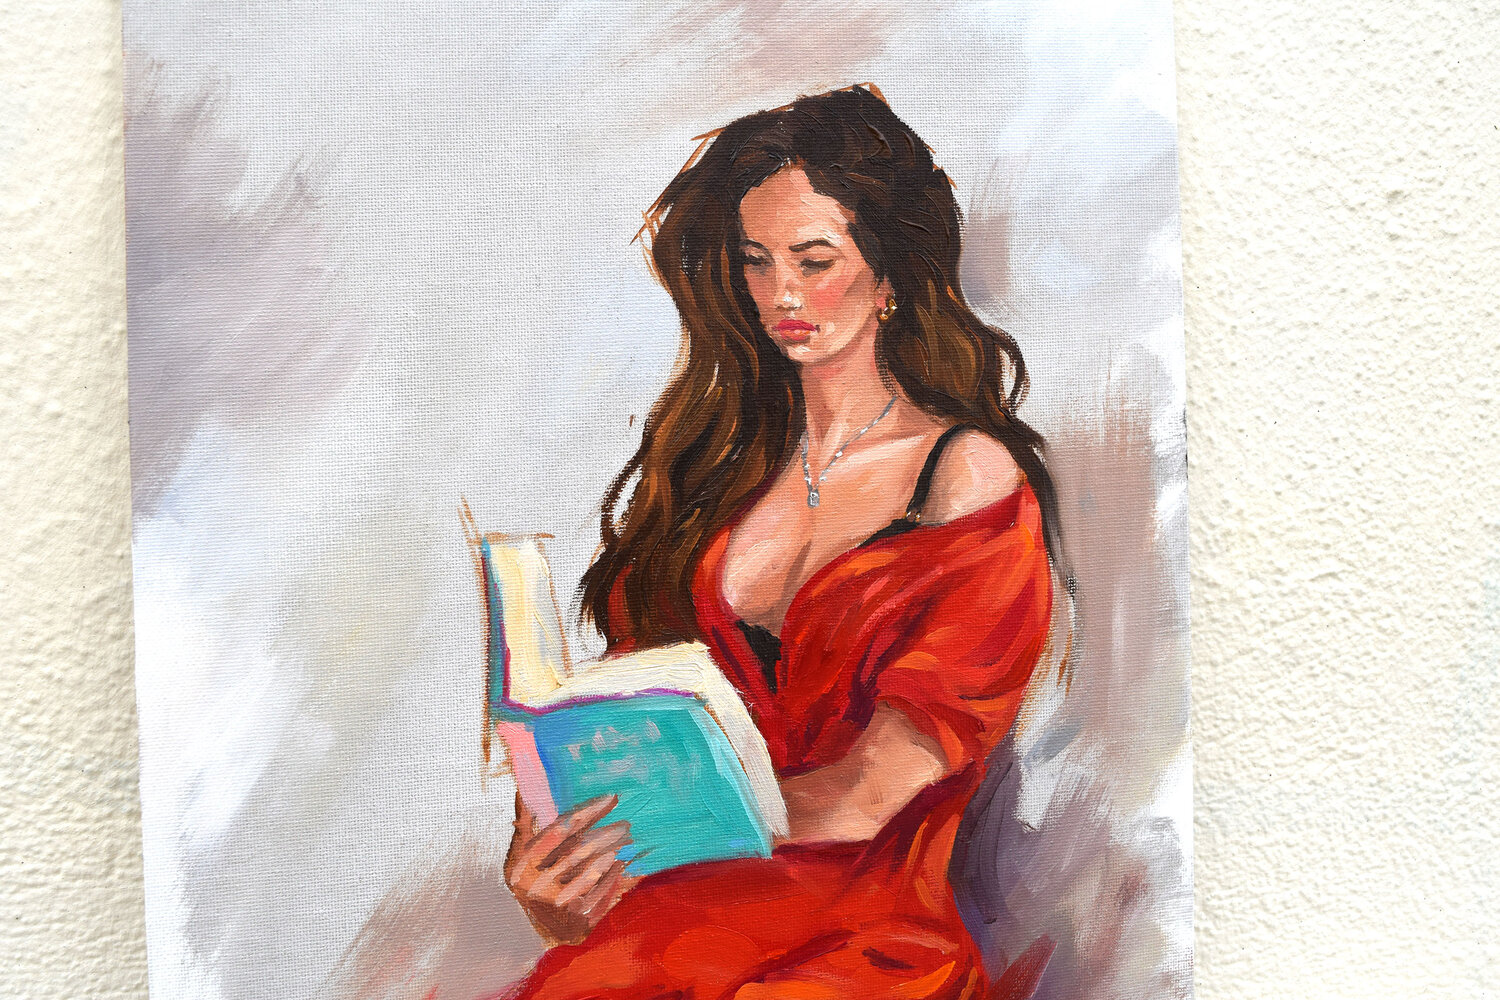
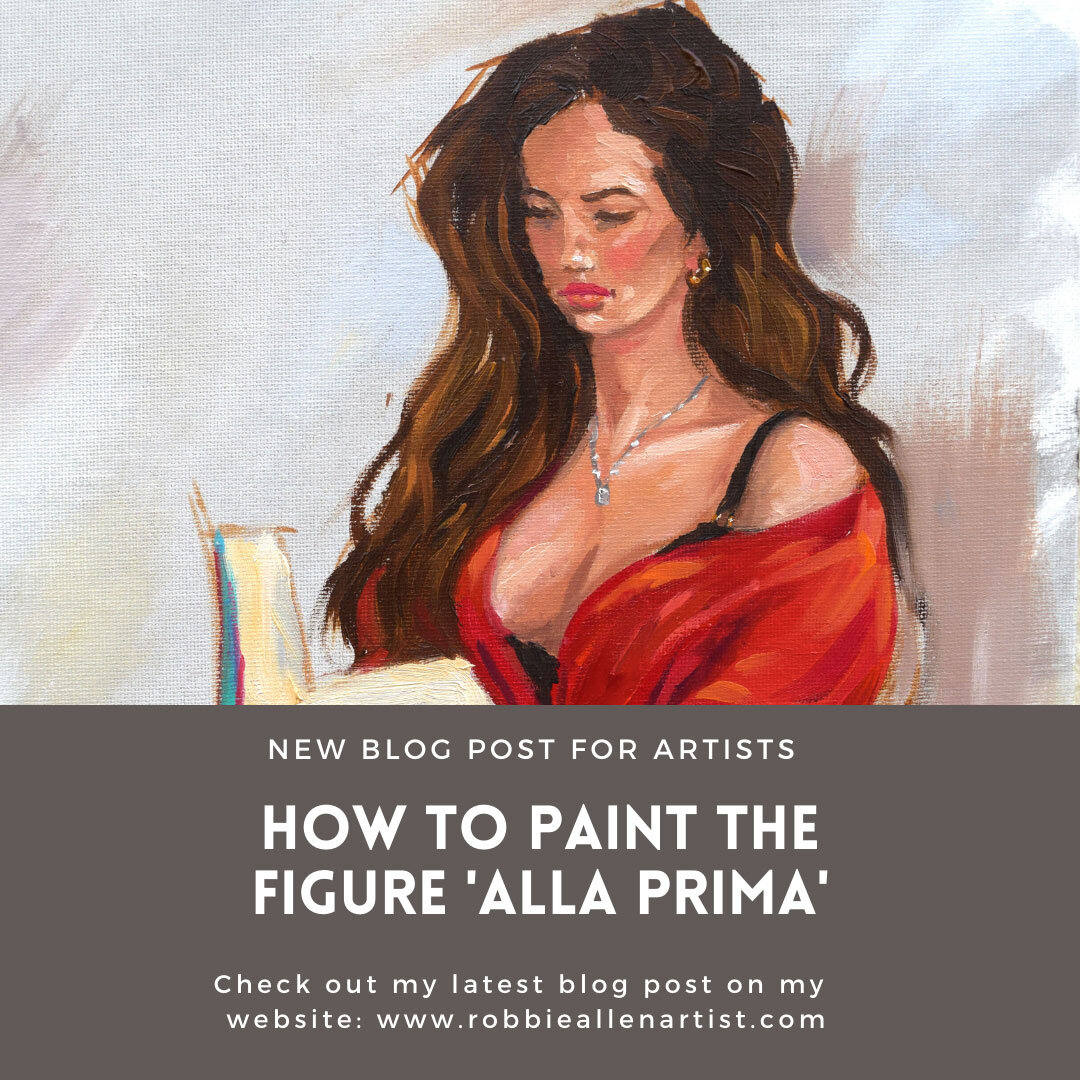
Above image: Portuguese Lady In Red close up.
Above image: Close up 2.
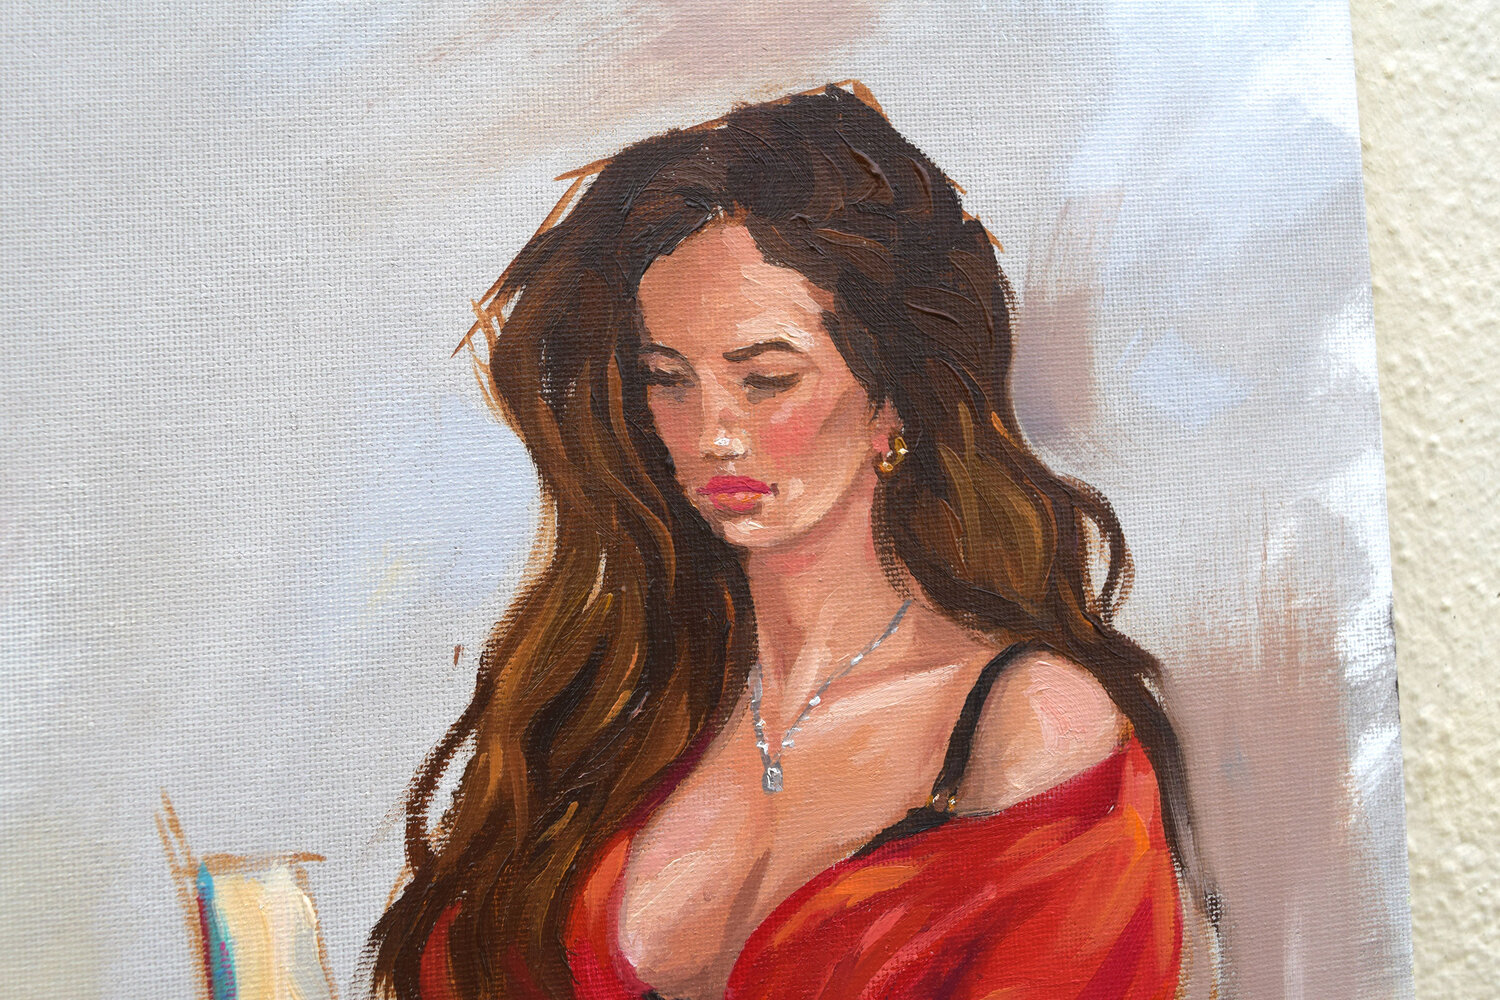
Above image: Close up 3.
Thank you for reading my post. I hope you found some value in it.
@qurator thank you!
Never thought of painting as a battle before XD
You must be able to work pretty damn quick by now if you managed to pause no matter how briefly for photos on a time limit O_O