I just finished a project that I'd been working on for a long time, and I'm so happy that it turned out as well as I had hoped. I really enjoyed working on it, and I'm enjoying the finished product too! Allow me to share it with you!
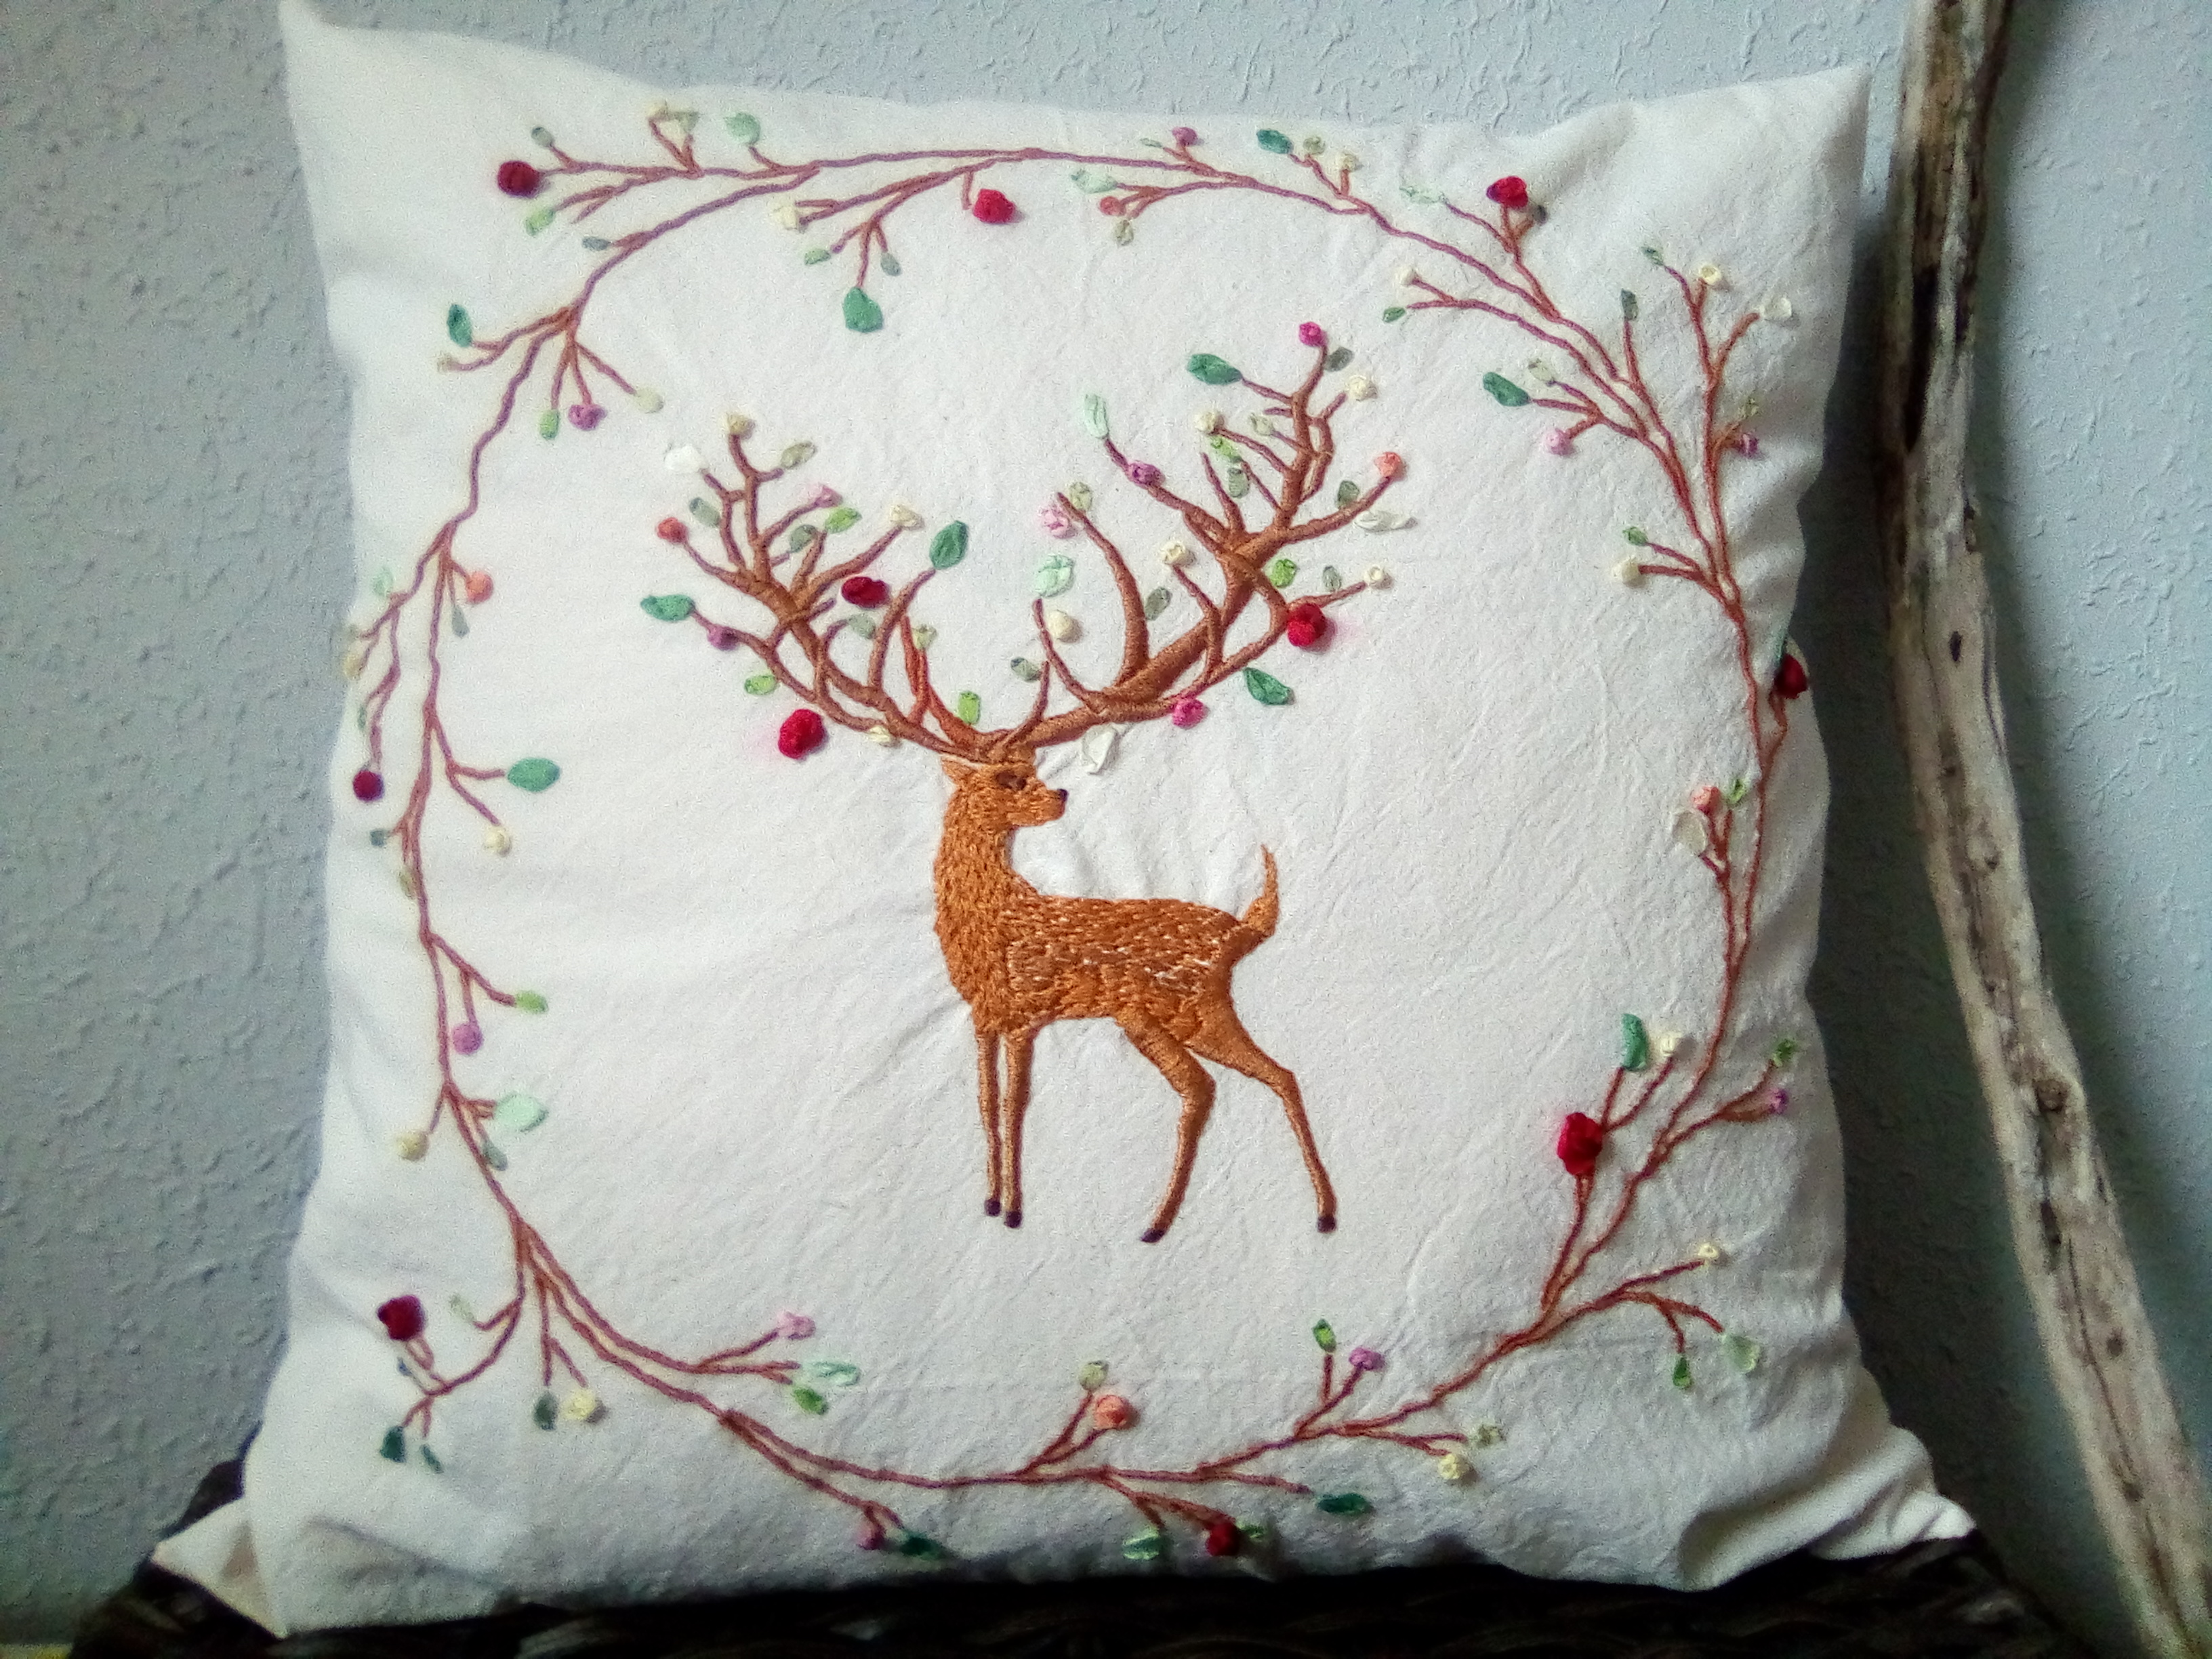
I started making this pillow cover during my last few days in Germany, and when I needed to pack up and leave for Spain, taking only one suitcase with me, it was something I chose to bring. I still remember working the satin stitch in the antlers while I was waiting to start my first job in Spain, and how it calmed me after all the stress of moving around and looking for work.
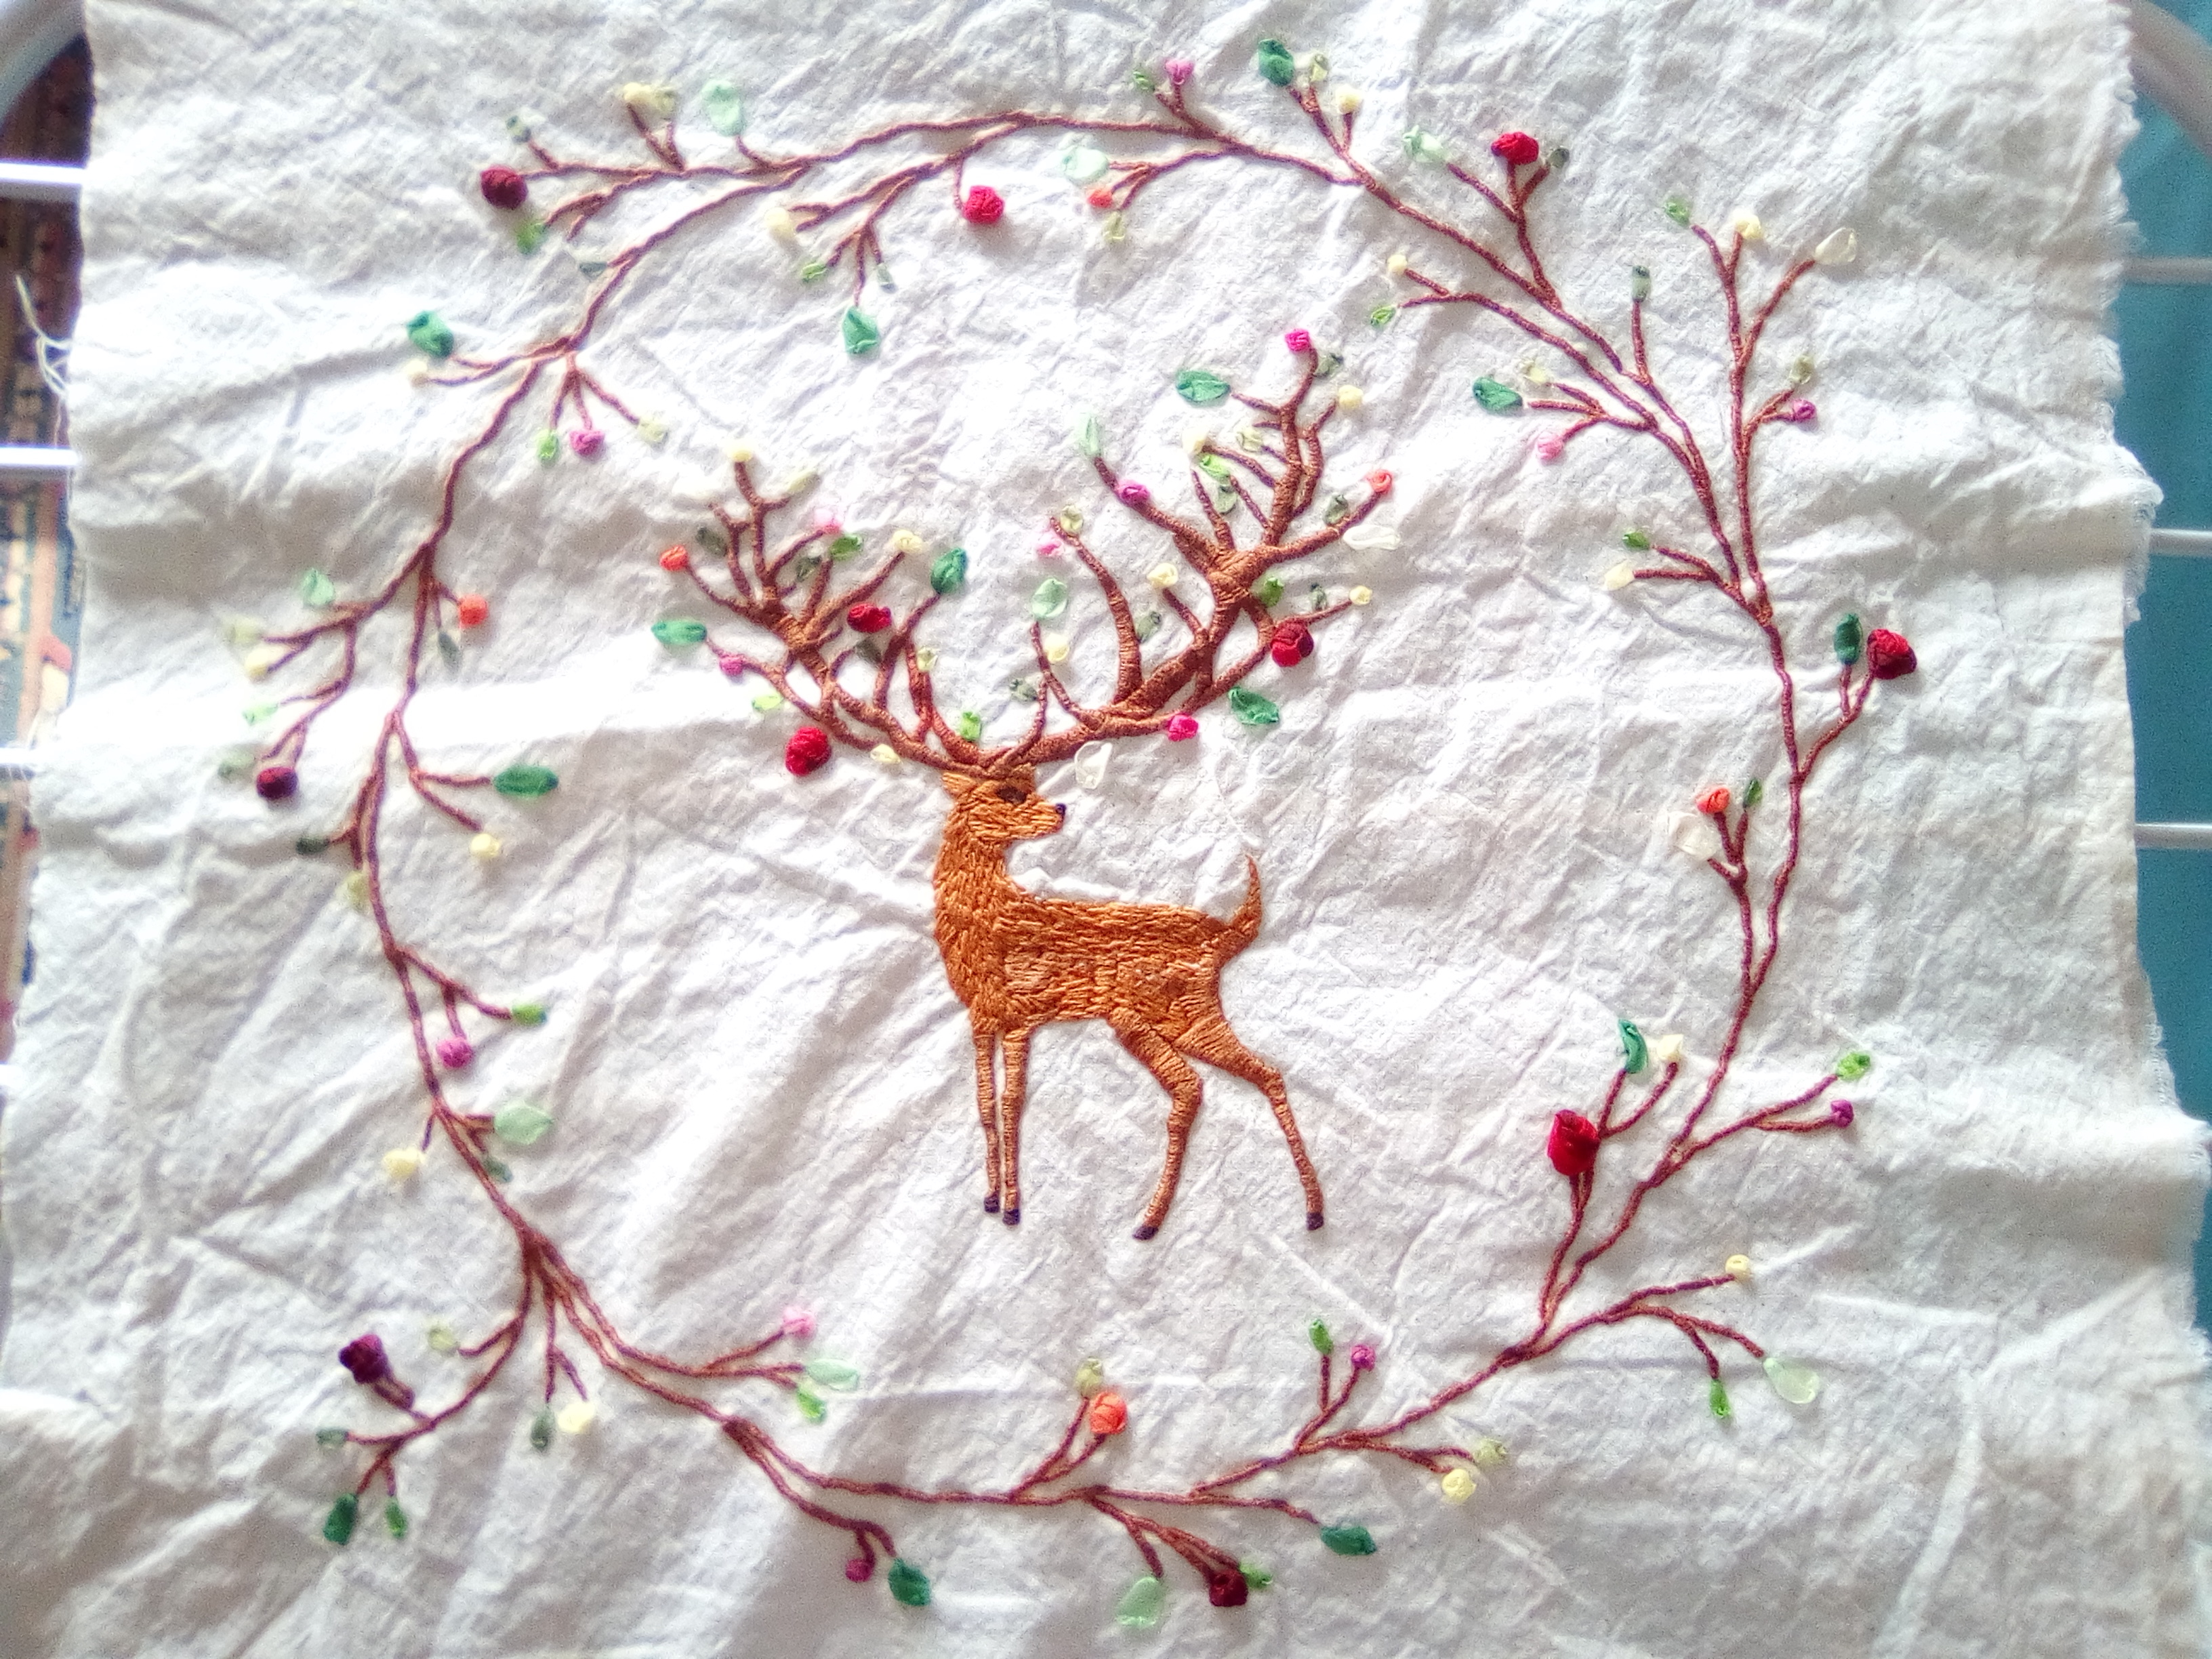
I laid the project aside for a long while, because I got overwhelmed by the thought of doing all the branches. Normally in embroidery, branches are done with some kind of simple stitch that goes in the same direction as the lines, but I had chosen to do them in tiny perpendicular stitches, a much more time-consuming process. But I recently got it back out and finished it.
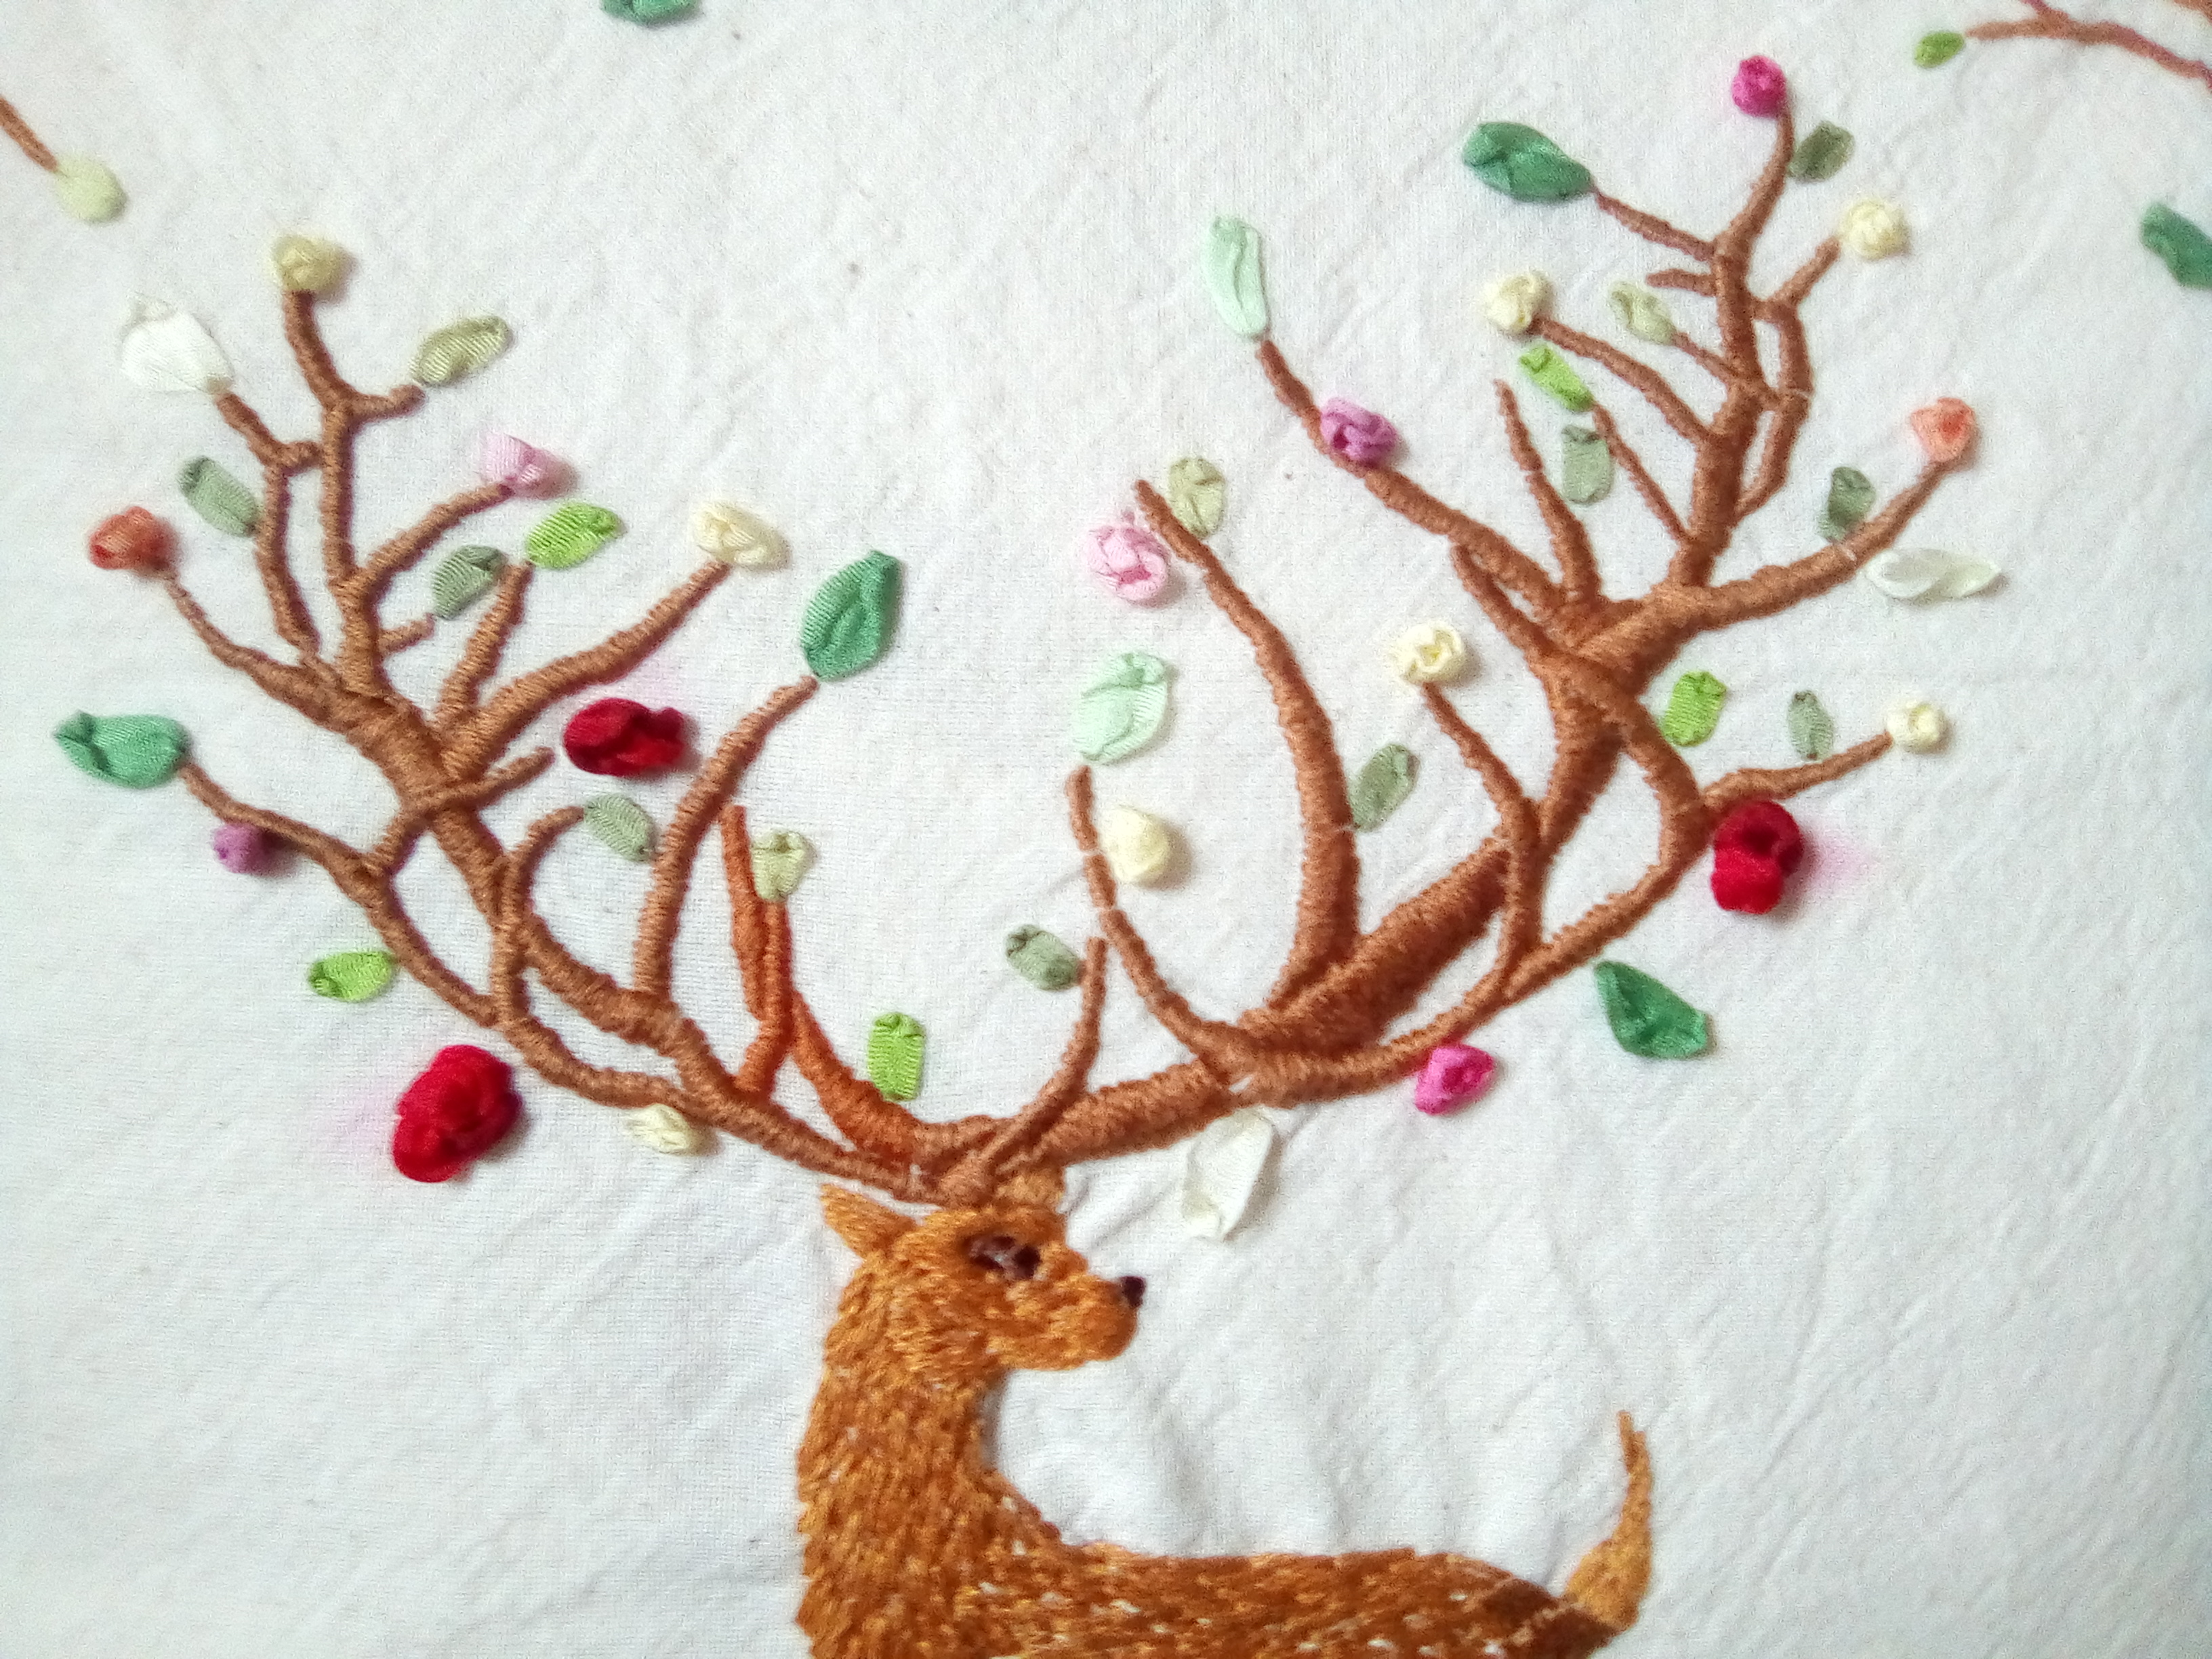
Next I added the flowers and leaves. The design was at least a little bit inspired by the Forest Spirit in Princess Mononoke. I wanted the antlers to have the same sort of feeling as the branches, as if the deer and the trees somehow shared one spirit. I used silk ribbon, working the flowers using French knots and the leaves with ribbon stitch, a special stitch only used in ribbon embroidery.
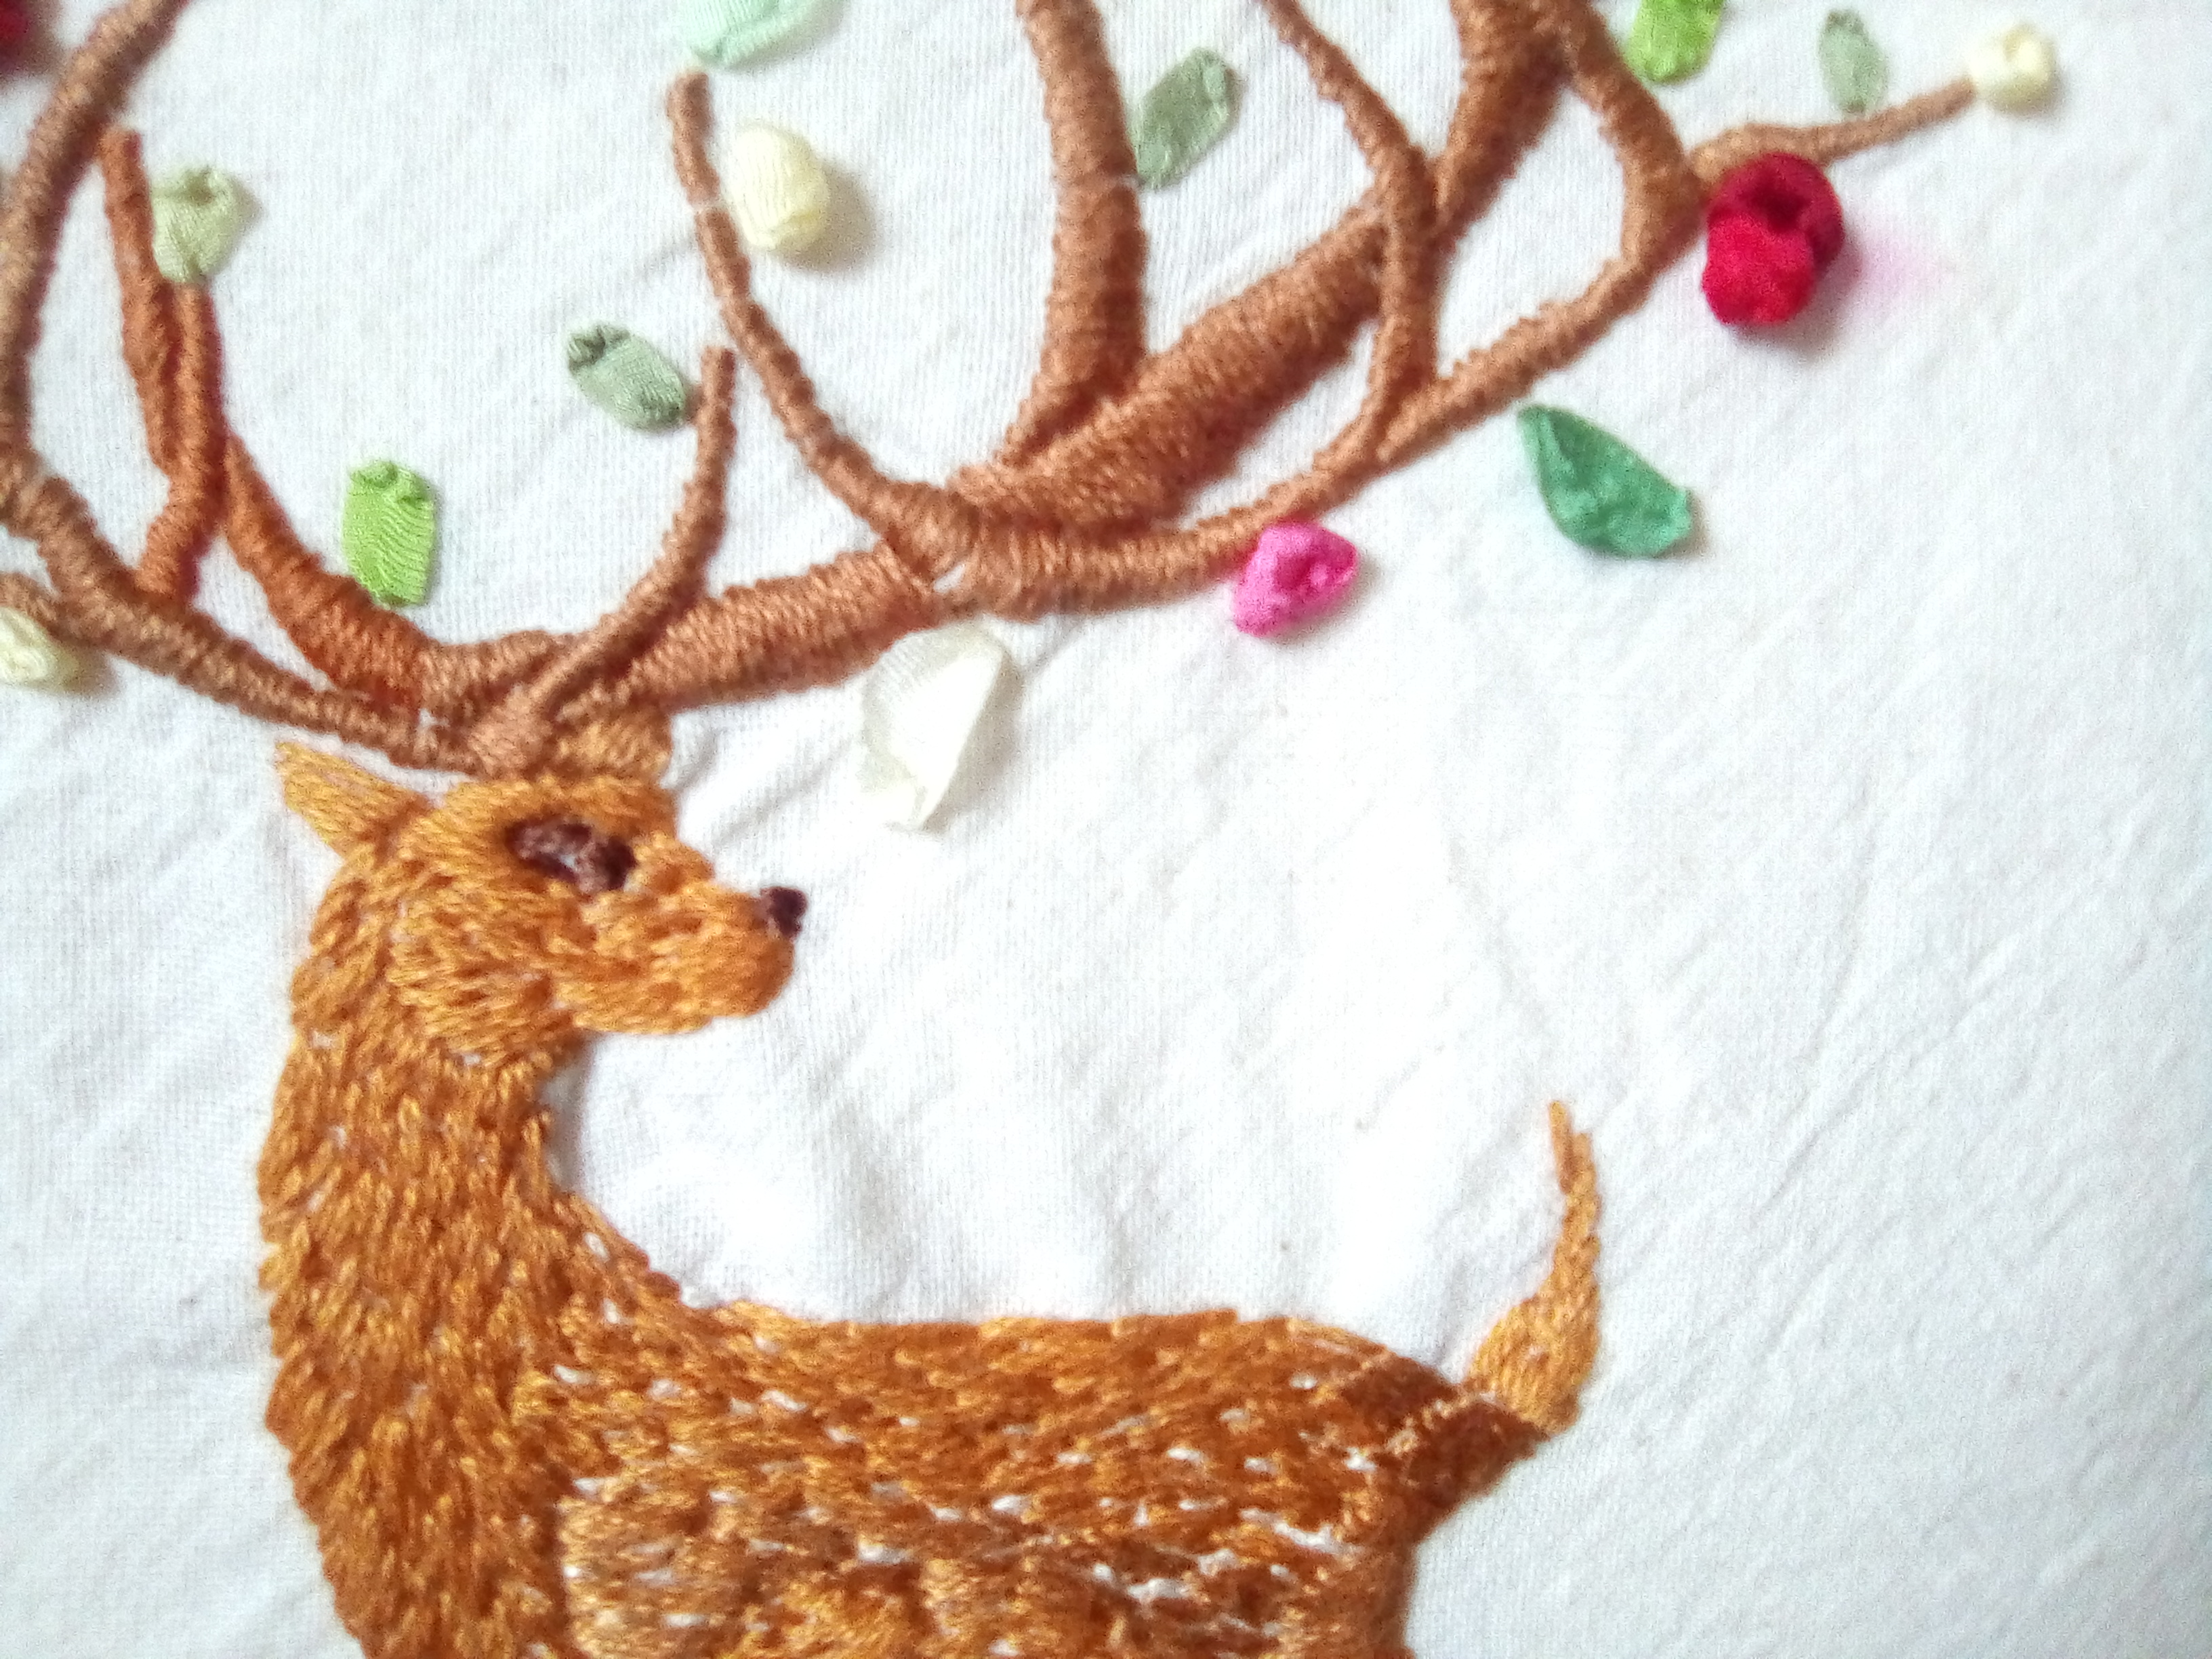
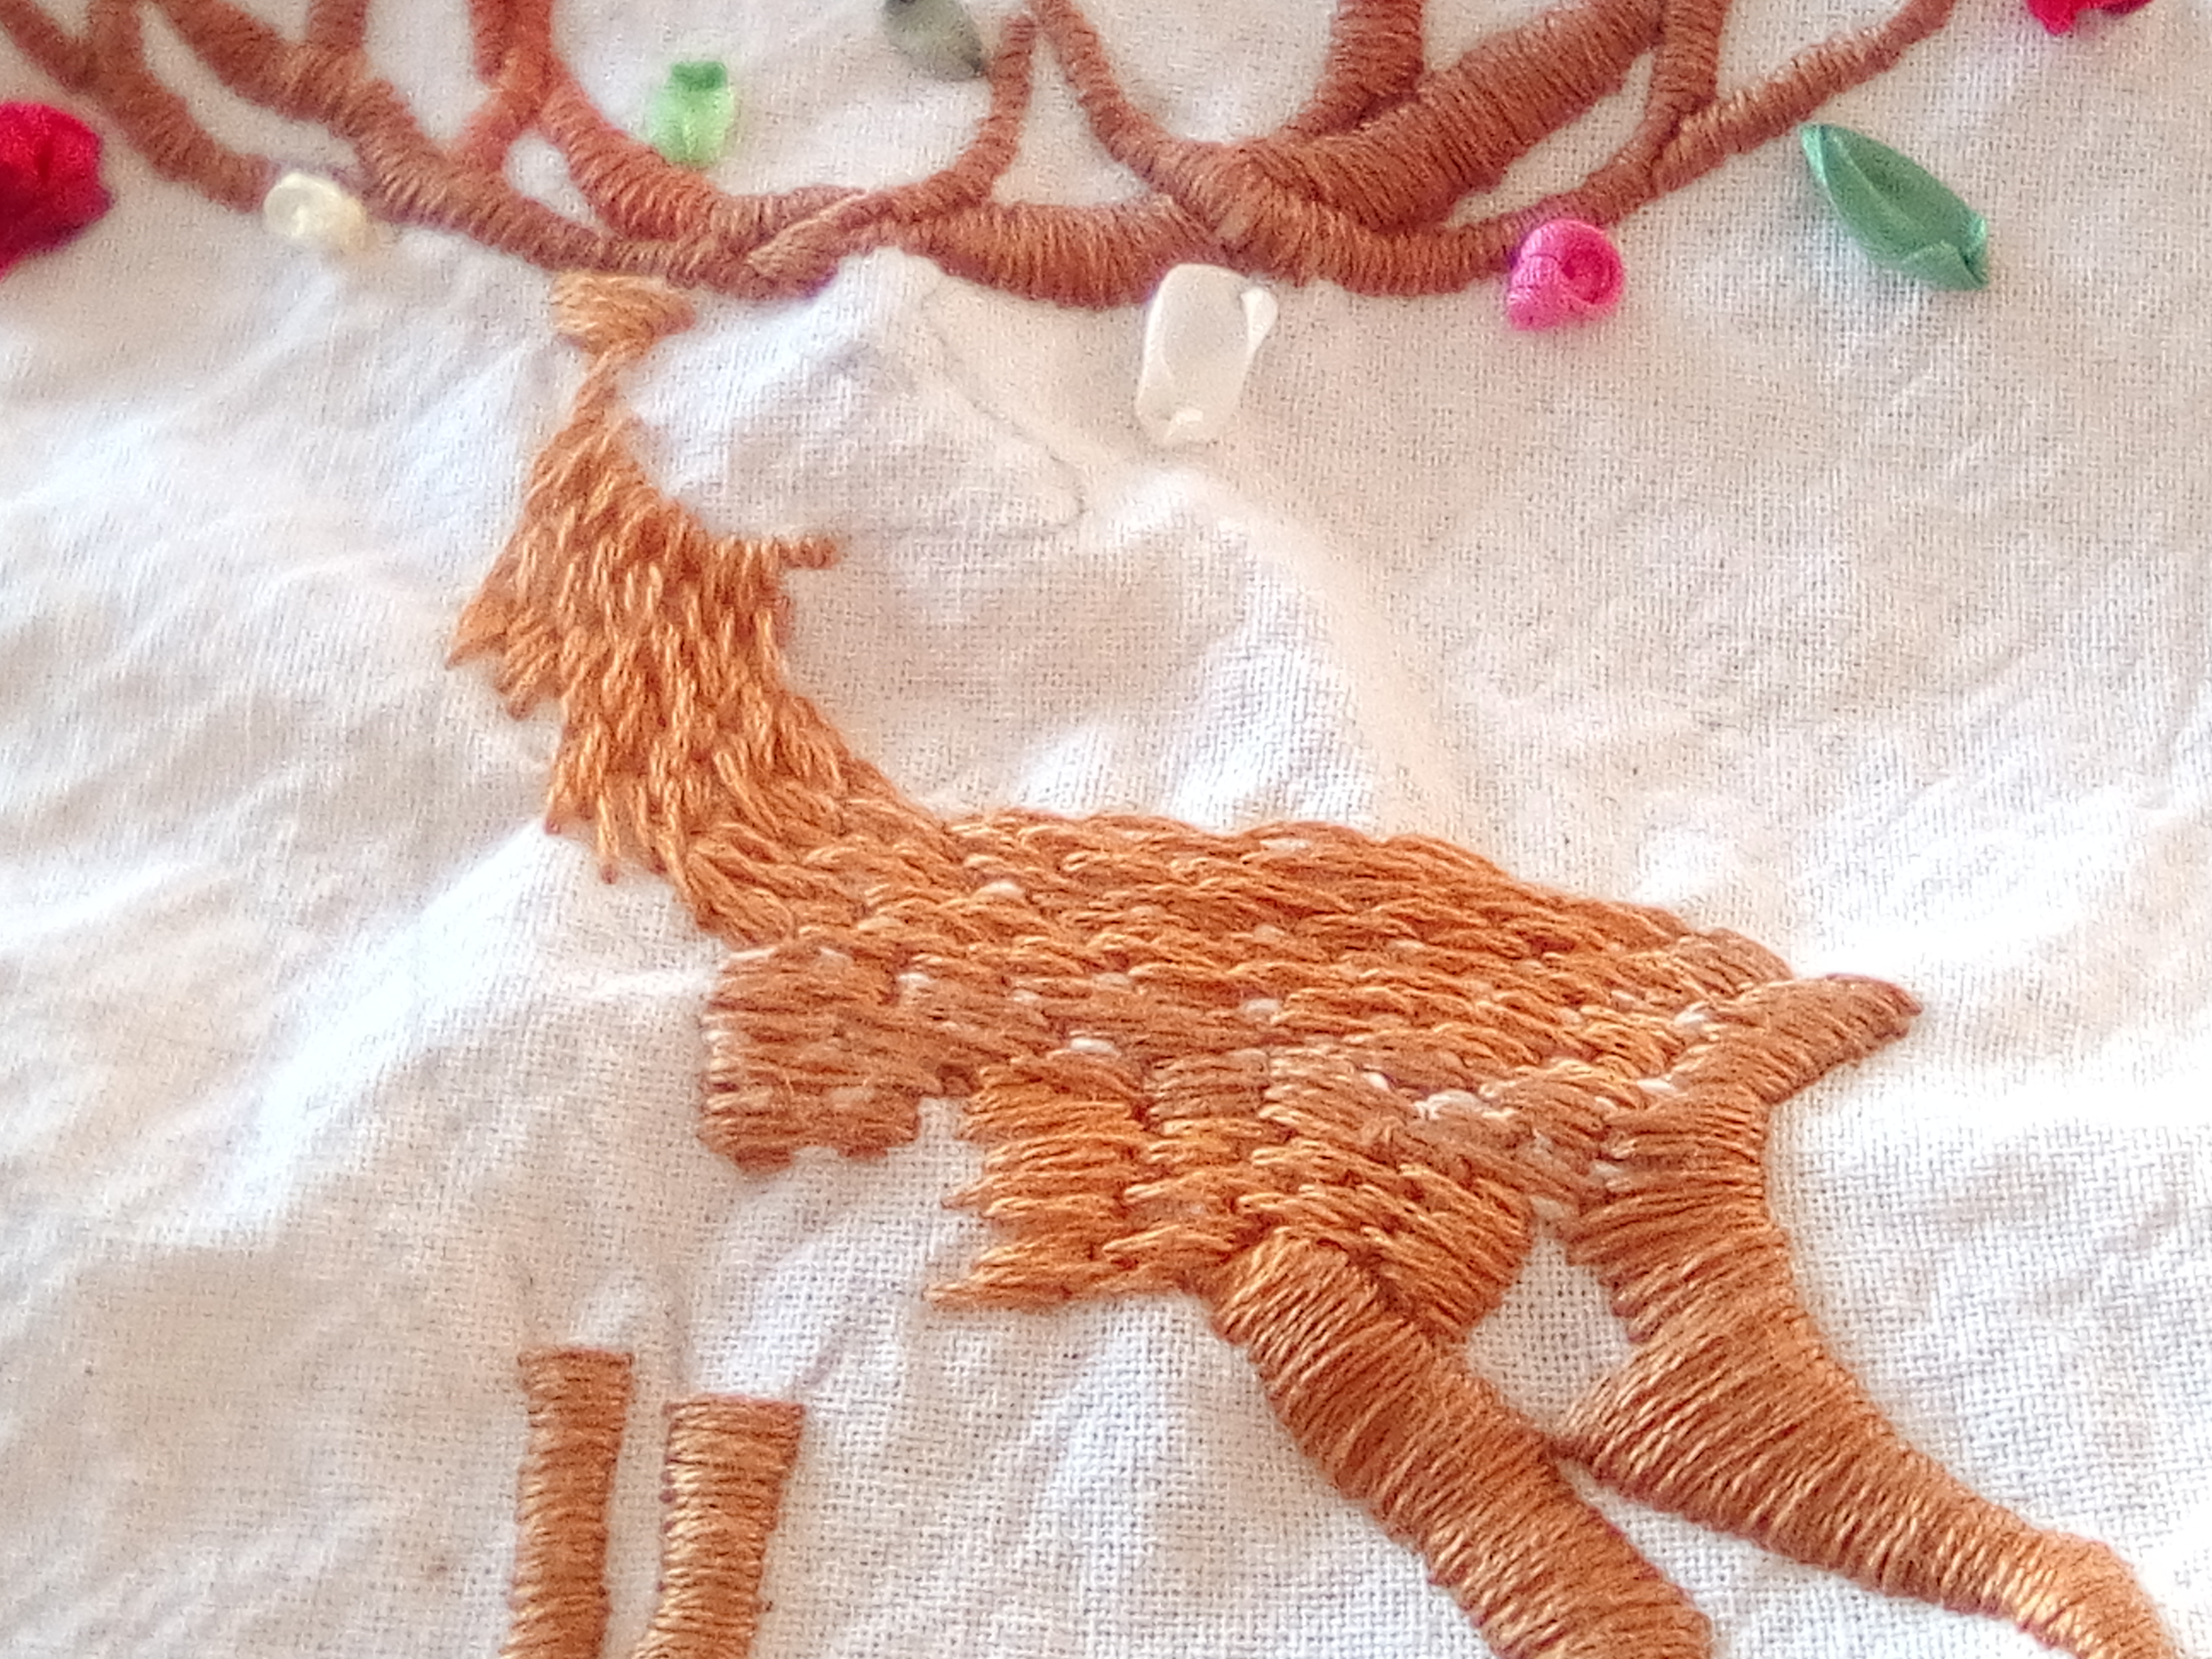
My next challenge, which again caused me to lay the project aside for a few weeks, was figuring out how to fill in the area of the deer's body. It was too big to use satin stitch, but I didn't want to break it down into areas that would look separated. I had already added some white spots using running stitch, and finally discovered a solution called long-and-short-stitch, which works to stagger the thread ends and at the same time creates a pleasant texture.
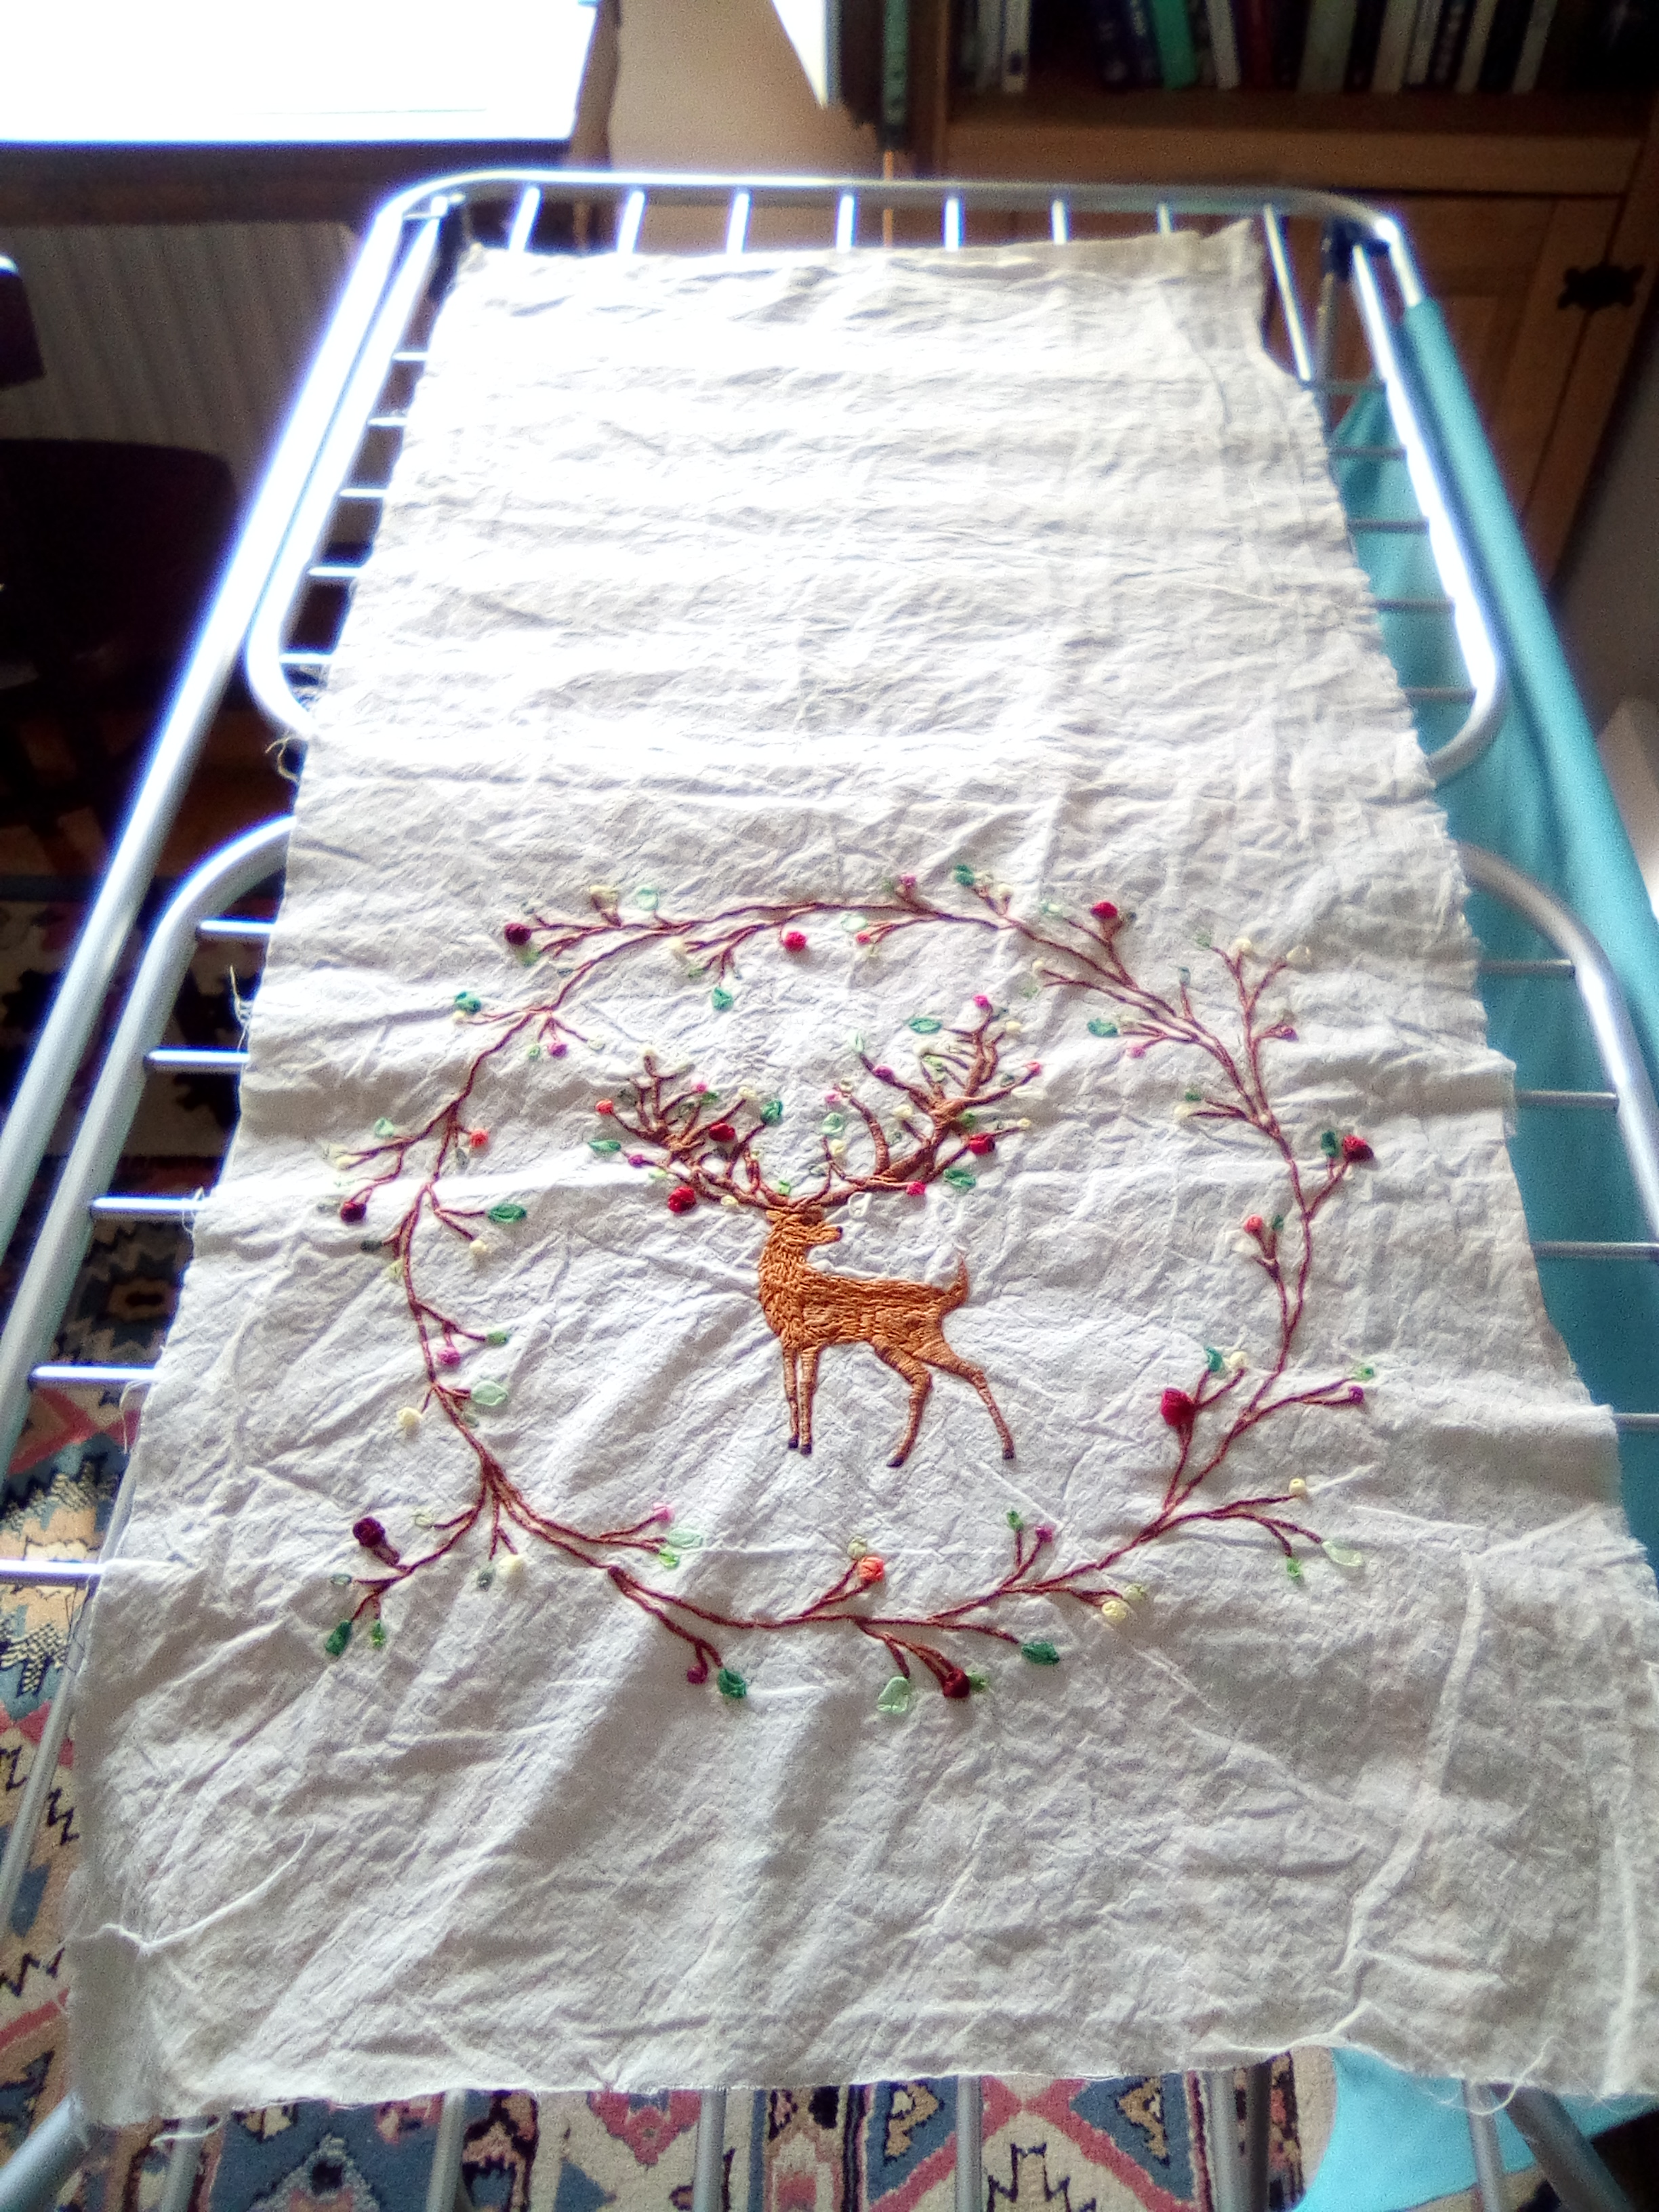
Putting in the last stitches was a proud and happy moment for me. Next I hand washed the unbleached cotton and lay it out to dry.
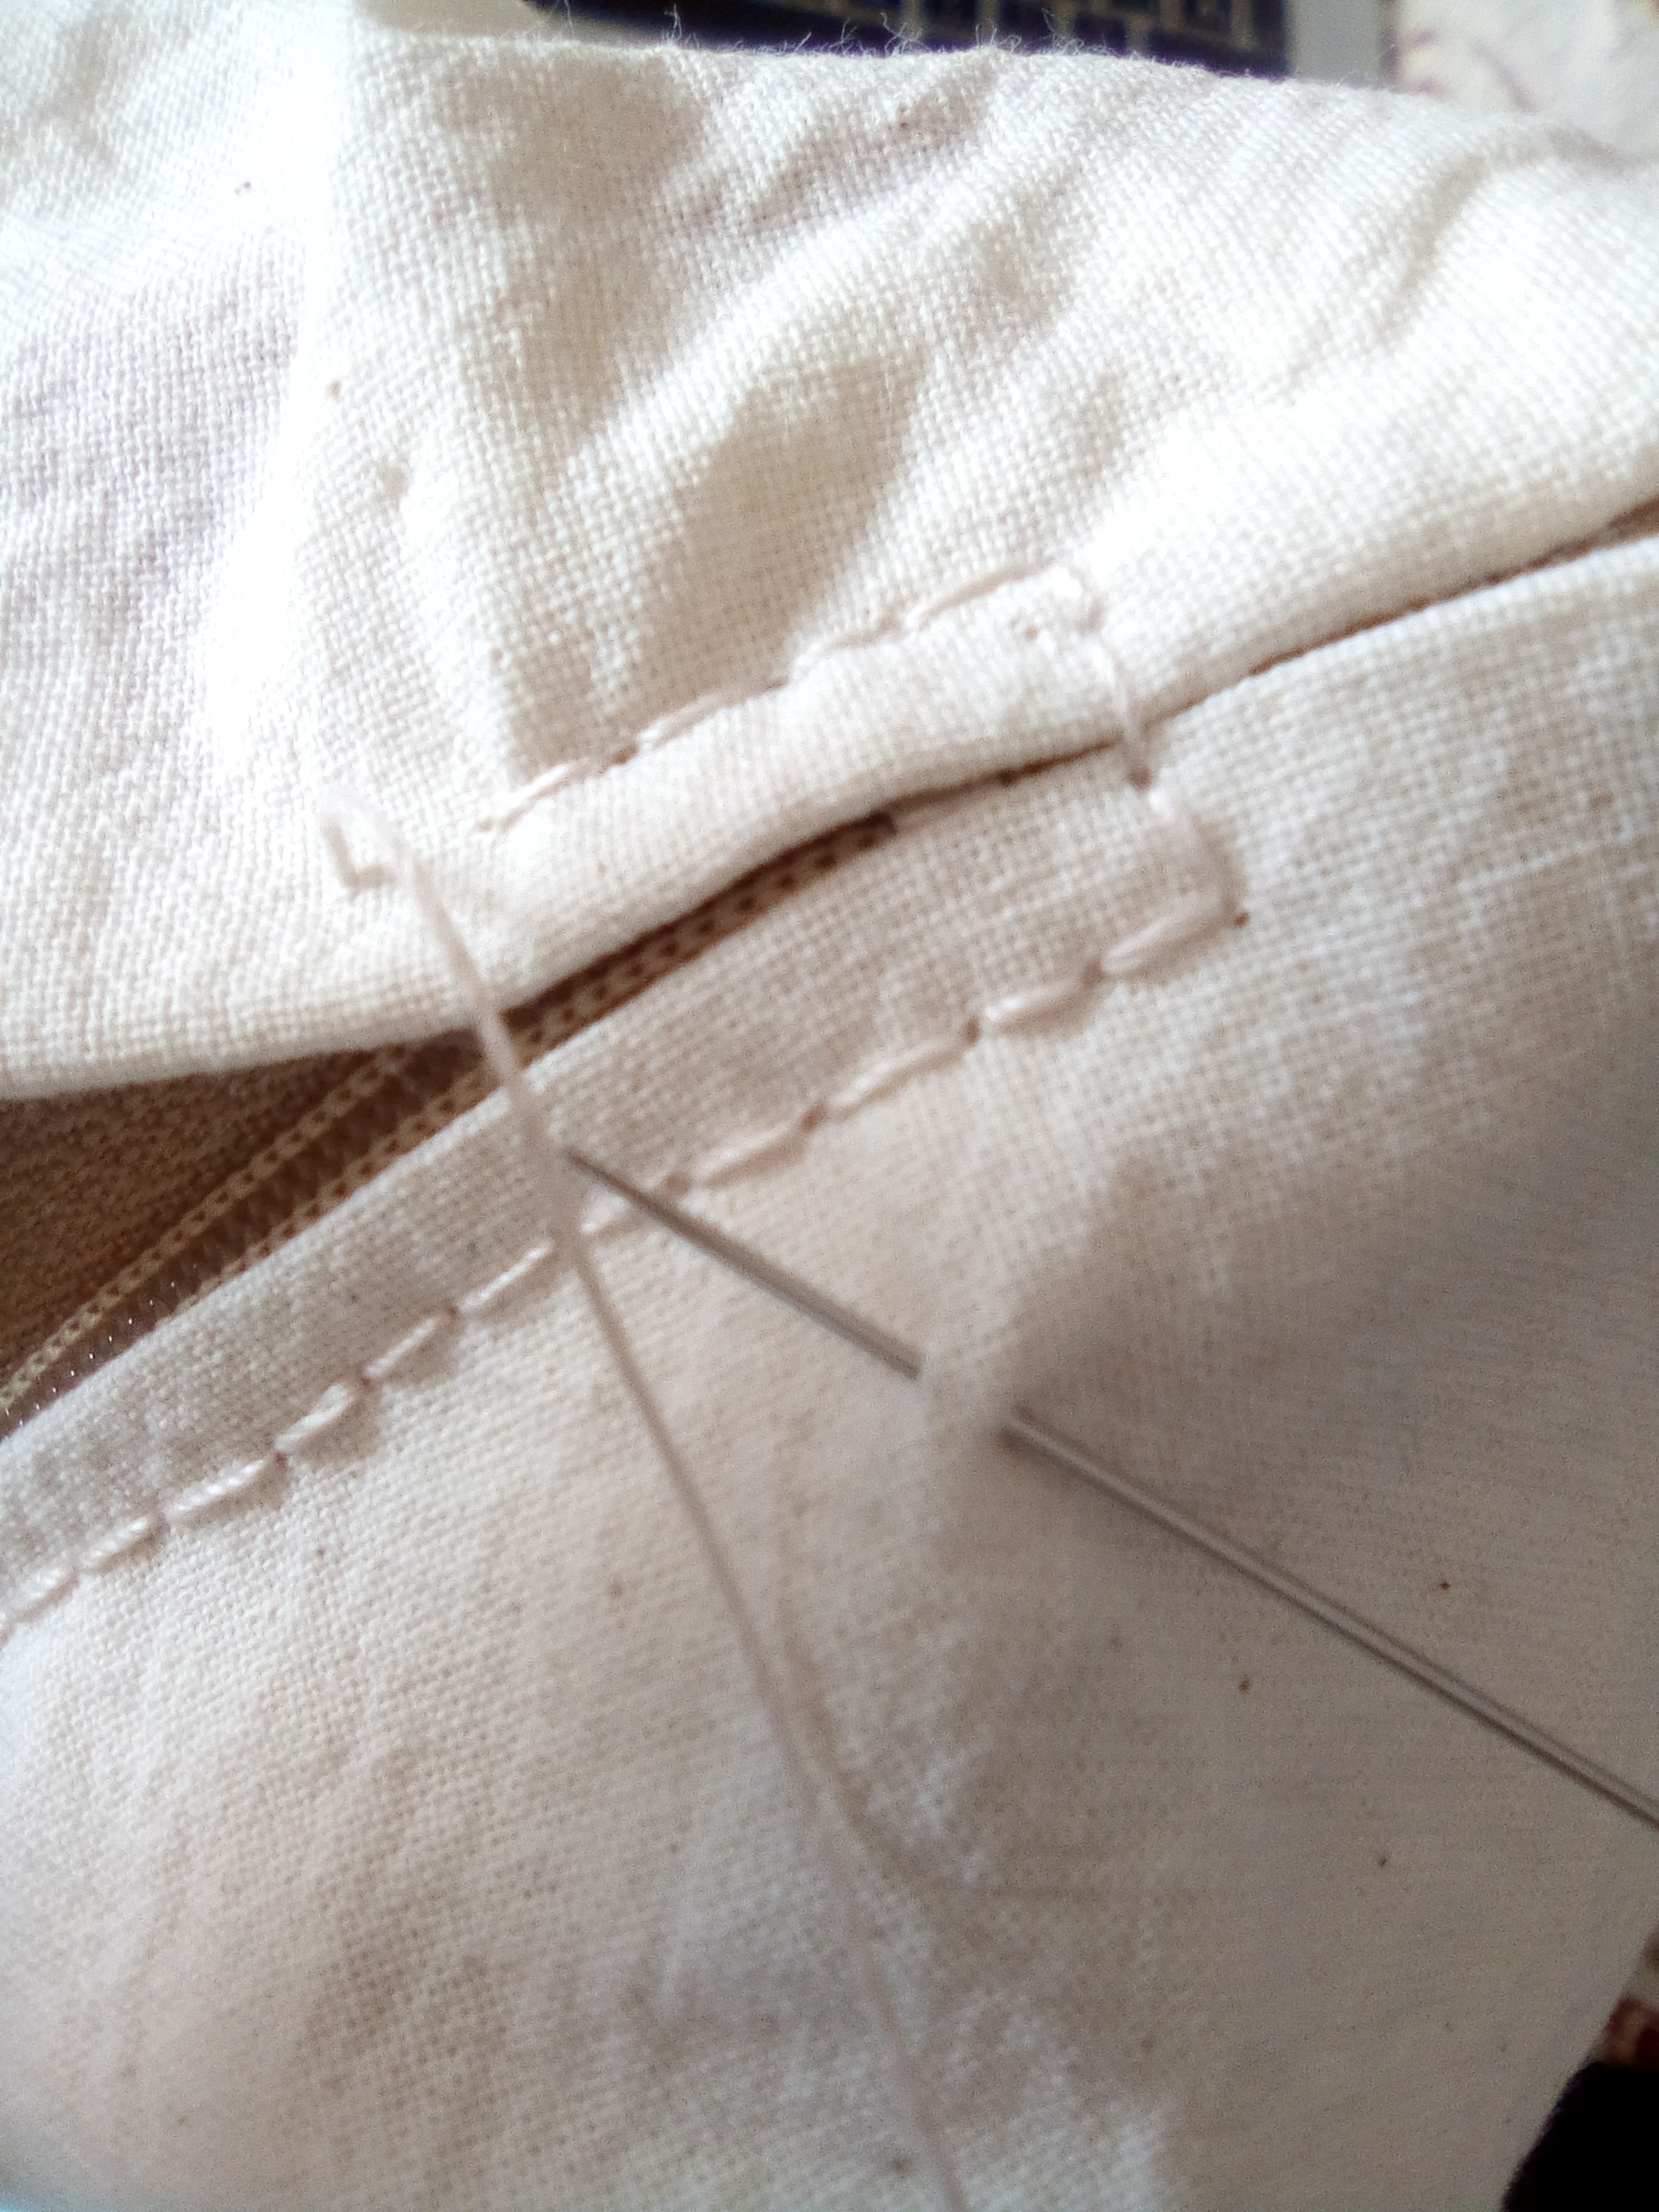
After that, I trimmed the edges, sewed the seams, and put in the zipper. All the stitching was done by hand, which is just the way I like it.
So here's the finished piece. It's for sale in my Etsy store, but I don't mind if it hands around for a while. :) www.etsy.com/shop/TheMermaidIsland

Hello @stephie.spicer! Your embroidery work is so awesome! The perpendicular stitch you used really gave it more texture and made it even more lifelike. I love the technique you used for the leaves. You should be very proud of your work. Work that takes a long time to complete is very rewarding in the end. ☺️
Thank you for sharing some of your process photos. We love seeing a piece of needle art come to life.
On Monday’s we use the #needleworkmonday tag and on all other days only the #needlework tag. I invite you to Subscribe and share all things needlework directly to the NeedleWorkMonday Community! If you would like to know more about what we do please visit our FAQs.
Thank you for sharing ~ 😊
Thank you so much for the encouraging words! I didn't know that about the hashtag, I'll check out the FAQs. ;)
You are very welcome ;)
Awesome thank you!
Hello @stephie.spicer! Your post was selected by our staff on behalf of the OCD Community Incubation Program and has received an OCD upvote! Congratulations!!! Please keep sharing these quality posts :)
Written by @crosheille for the NeedleWorkMonday Community ~
Thank you!
Great embroidery!! I really like deers!!! And I understand you when you say it's okay if your pillow stays with you a little bit more :)
Thank you @curie and everyone who upvoted my post! Love you guys!