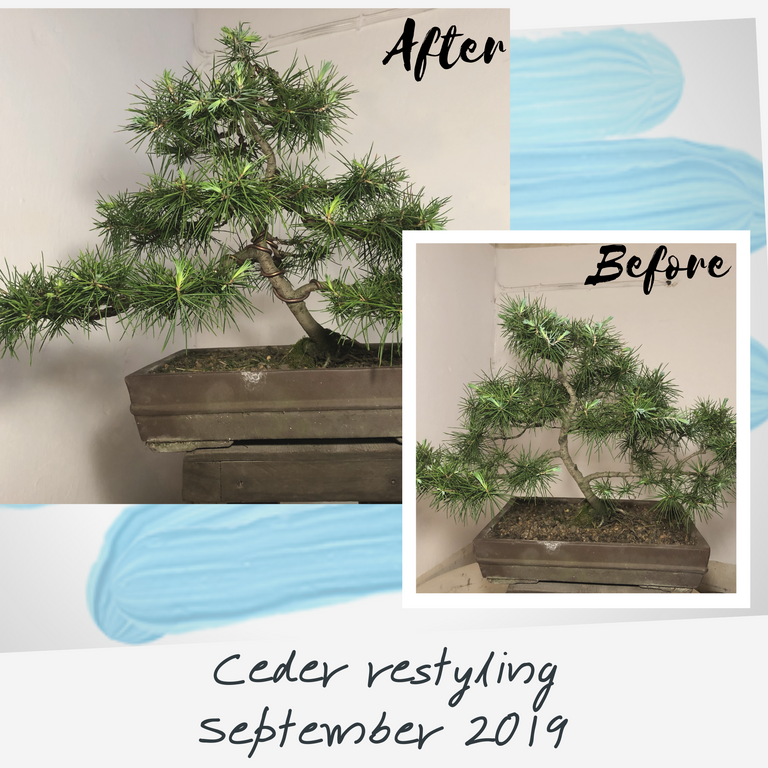
This past weekend I made time to work on my trees. I trimmed a few trees and cleaned a few of the bonsai benches. As I was working on my trees I saw this Ceder that started to show signs of grow. I wanted to trim the tree back just to encourage new growth in weaker areas. As is took a closer look at the tree I saw that the tree was in need of being styled back shape instead. Not all the problems in the tree could be solved by just trimming this tree. In this blog I will be taking you through the process I followed to restyle this tree.
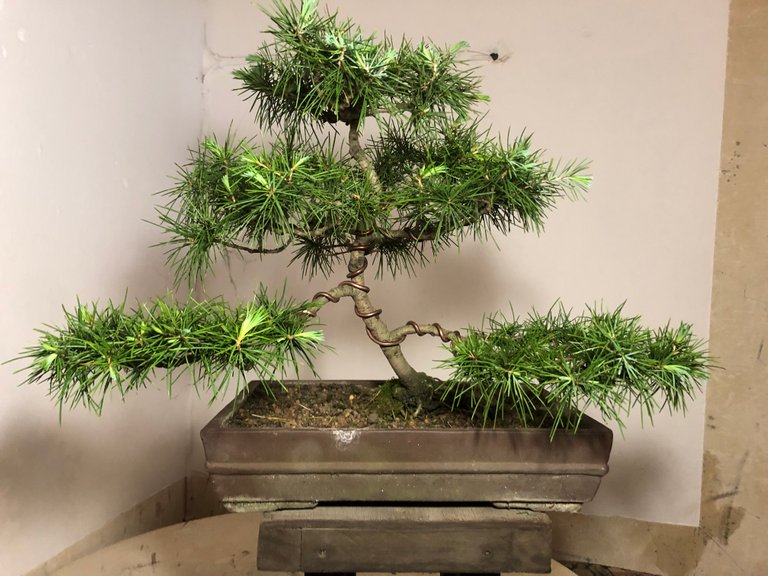
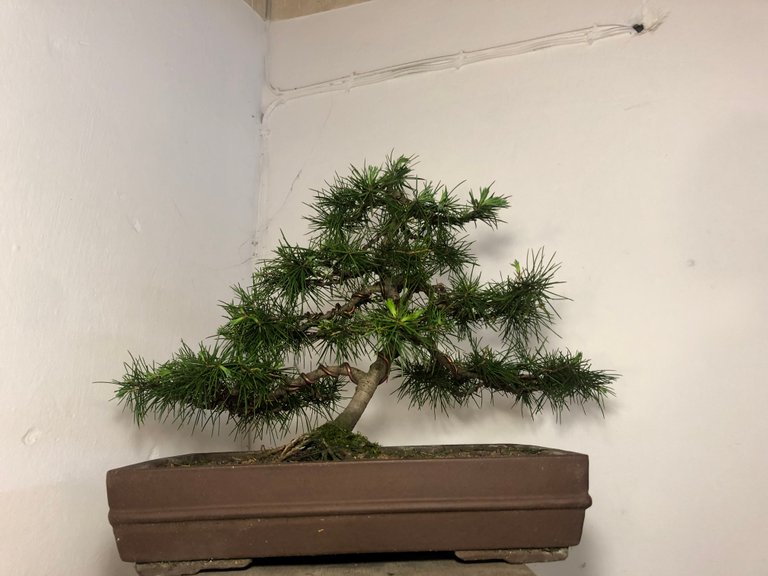
Before I show you how I worked on the tree. Here is a photo of the tree "pre-styling".
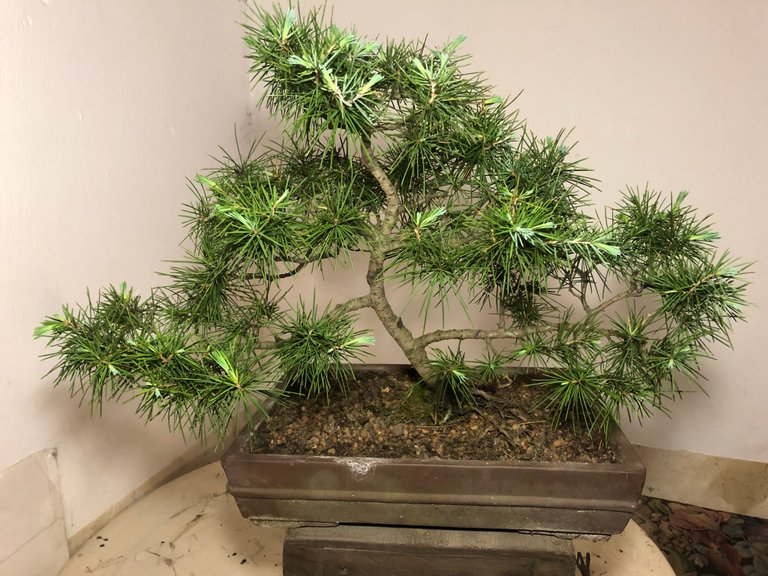
As you can see the tree was doing very good and was growing strong. All my trees were fertilized about two weeks ago so most of them are just bursting out in new growth. The shape of the trunk is already styled and in place I only needed to work on the branches. The new growth tend to grow towards the sunlight. This in turn causes the tips of the brunches lift. It is then time to take out the wires and start shaping the branches and placing them. I removed all the wires off this tree about a year ago. There are no wire bite marks from the previous styling and the tree has had plenty of time to recover.
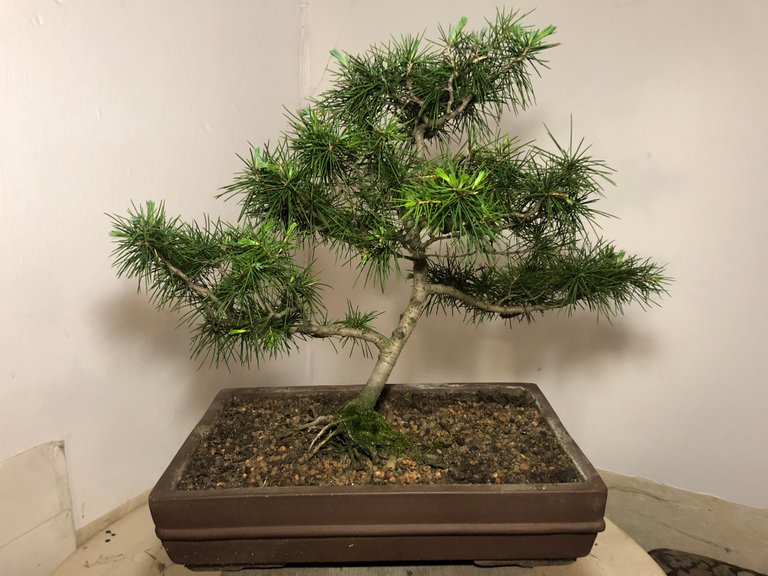
I applied the thick wires to the main branches that stem directly out of the thunk first before I moved on to the smaller branches. It's at this point that I would like to mention that it is important to wire all the branches first before shaping the tree. The last thing you want is for a branch to break off because your trying to wrap wire around a branch that is already bend or in a awkward position.
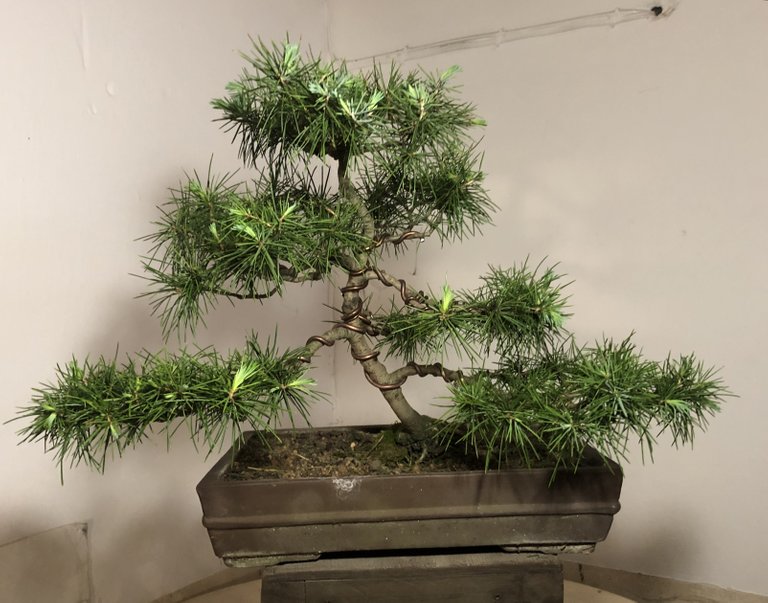
I worked on this tree in a few different stages. I first did the lower section then I did the middle and finally I wired the top section. I then continued to placed the branches in the same order I wired then (Lower, middle and top section). Here is a photo of the tree after the lower section was wired.
I then placed the first an second branch.
I started to pile up the branches one after the other.
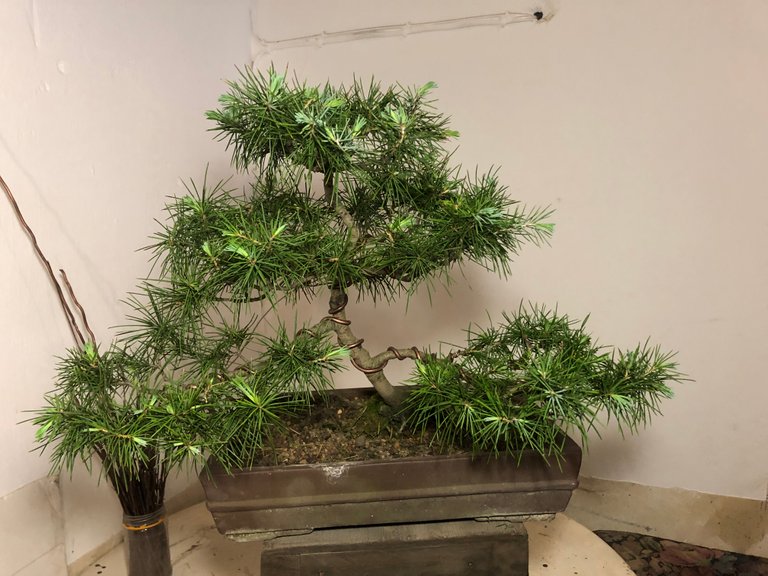
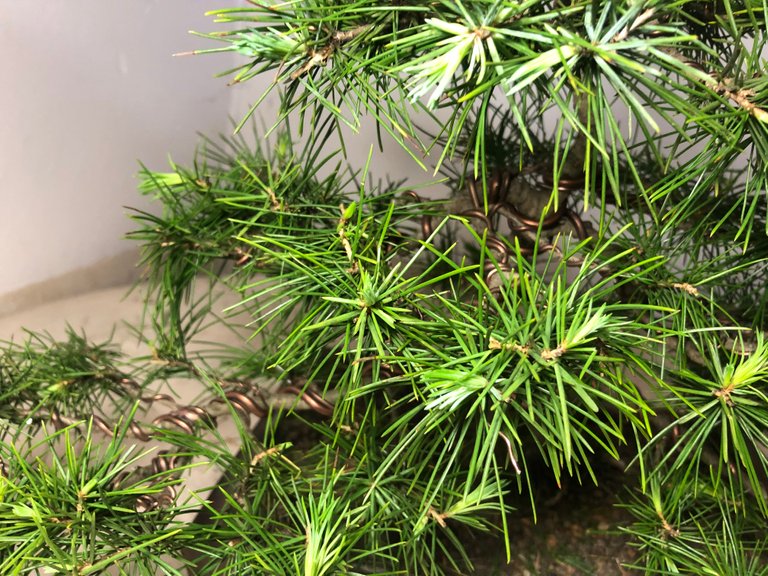
Pretty soon the tree started to take shape by just applying the simple techniques and by starting from the bottom working your way up. This tree's branches are placed right, left and back. Each one of the branches in it's own space if you look from the front but also if you look from the top. Each branch is placed in such a way that all the needles receive the maximum amount of sunlight. As the foliage pads thickens up the smaller buds on the inside of the brunch structure will die off. If you allow light to shine through it will stimulate the buds and allow then to grow. Once the branches are in place you can always trim back a few shoots here and there. Keep this in mind when styling a tree rather leave on the new shoots and style the tree before trimming back. You take any unnecessary grow but you can not add shoots that were cut off.
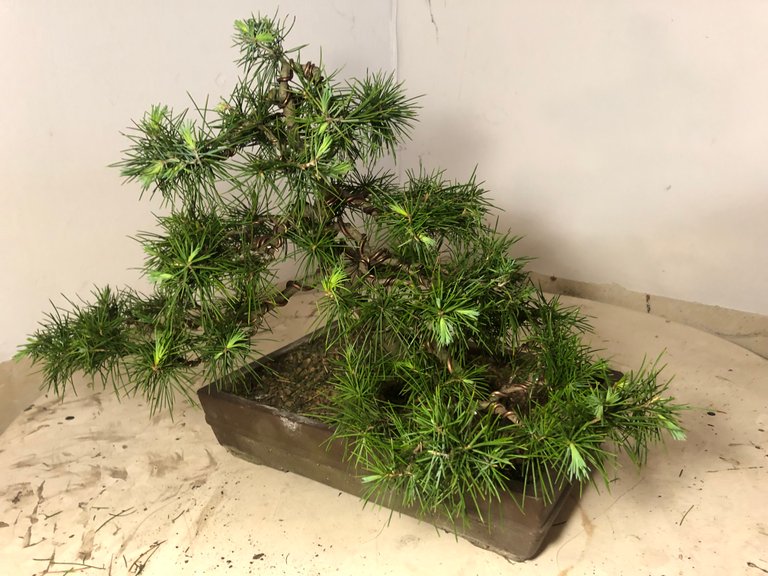
Here is the tree after all the branches were placed.
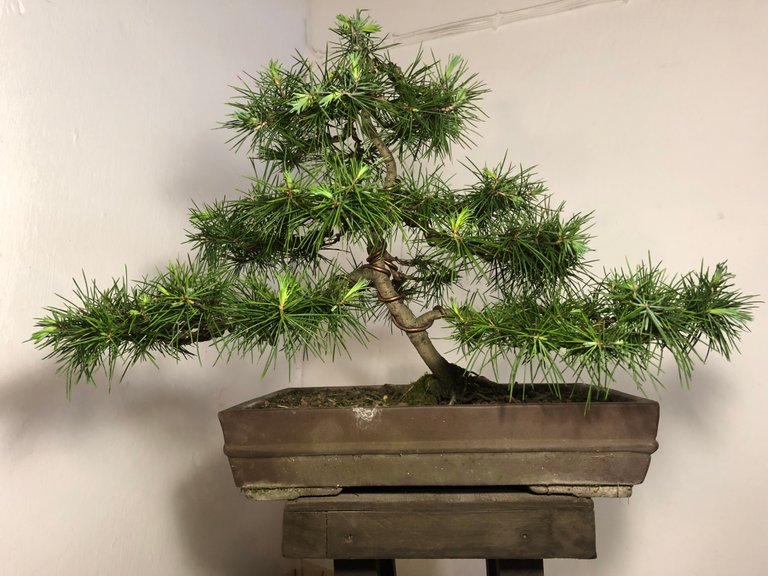
As you can see the triangular share of the tree is more visible. I took a few photos of the tree from the left and right as well as the back of the tree so that you can see the tree from all angles.
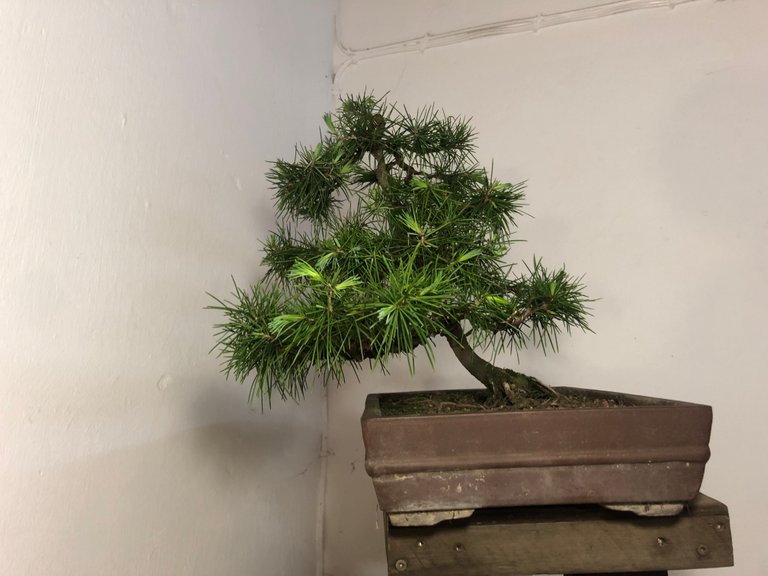
Left
Right

Back
If you look at the tree from the left and right you can clearly see that the tree is leaning forward. If you look from the back the tree looks further away from you. This is all part of the illusion that you want to create. If you look at a bonsai tree from the front you will feel like the tree is bigger than it really is this is because the tree is leaning into you and the left and right branches are extended towards you. Some one once explained it in a meeting I attended that the tree looks like it wants to embrace you by extending the branches towards you so that you can feel welcomed into it's space. It just sums it up so perfectly that till this day then I need to explain why the branches are placed like they are I use this example.
Here is a top few of the tree.
If you look at the tree from the top you should be able to see all the branches. They stem out of the center of the tree like spokes on a bicycle's wheels. The other important thing to keep in mind to to ensure that the length of your trees branches reduces in size as you go up the trunk. The higher the branch is placed on the trunk the shorter it is.
Here is a photo of the tree from another angle just to mix things up a little! I like taking lots of photos of my trees when working on them so that I can have options later on if I need them for blogs or articles.
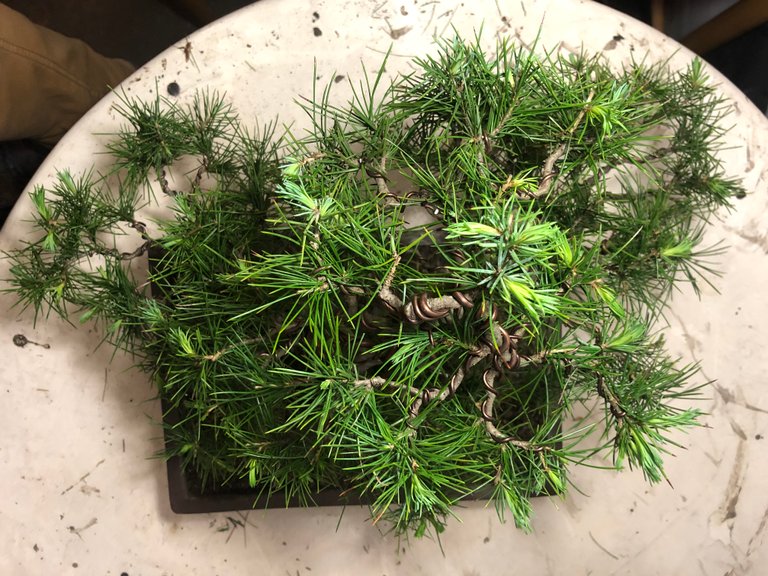
In the photo below you can see how much wire goes into such a project.
The work done on this tree kept me busy for the better part of Sunday. I took a break just before lunch and got back at it after lunch. What makes it so hard to work on these types of trees are the needles. They are all over and you want to avoid getting any caught under the wires. If you look carefully at the photos you will not see any needles caught up in wires. It is very time consuming but it well worth the effort not getting needles stuck under wire.
Hope you enjoyed the blog. Please feel free to leave you comments and questions in the section provided below.
This post was shared in the Curation Collective Discord community for curators, and upvoted and resteemed by the @c-squared community account after manual review.
@c-squared runs a community witness. Please consider using one of your witness votes on us here
Interesting stuff. I'd love to have some bonsai trees in my house some day!
I found this post thanks to @miti-blog work, and his Curation Project: Undervalued Deserving Contents. Your work deserves way better, I'm happy to give you my upvote.
Bonsai... 😍😍😍😍
Cheers, Nicola @knfitaly
Coltellinaio per passione e non solo...
Trentino - Italy

Hello, @romanolsamuels! We heartily appreciate the time and effort you put towards your DIY/How-to article. It is, for this reason, we built a frontend/condenser known as Build-it, where your efforts are fairly rewarded. At Build-it we welcome all sorts of DIY, How-to, and Lifehack articles.
Build-it is a tribe on the steem that sharpens your #diy and #how-to skills, in an attempt to save more money for yourself.
The recommended tags required when creating a DIY article are #diy, #build-it. #how-to, or #doityourself. You'll get rewarded with BUILD tokens from our @build-it.curator account upon every valid post/project which can also be exchanged for steem on steem-engine when you use any of the recommended tags as well as posting via our website.
Need help? Live technical support on Discord or Telegram
This project is run and supported by our witness @gulfwaves.net. If you think we're adding value to the steem platform, your witness vote will be appreciated! Click here to vote for us
This article has been selected and voted by @omnesplantae Content Curator. You have received 3 OmnesPlantae Token (OP)
Visit the discord server for a 360 ° travel experience! https://discord.gg/zd7vFSz
Congratulations @romanolsamuels! You have completed the following achievement on the Steem blockchain and have been rewarded with new badge(s) :
You can view your badges on your Steem Board and compare to others on the Steem Ranking
If you no longer want to receive notifications, reply to this comment with the word
STOPDo not miss the last post from @steemitboard:
Vote for @Steemitboard as a witness to get one more award and increased upvotes!