In Part 1 I showed disassembly of the front end on the truck, and next I had to actually swap out gears and address the sloppy ball joints. The following is the conclusion of this job
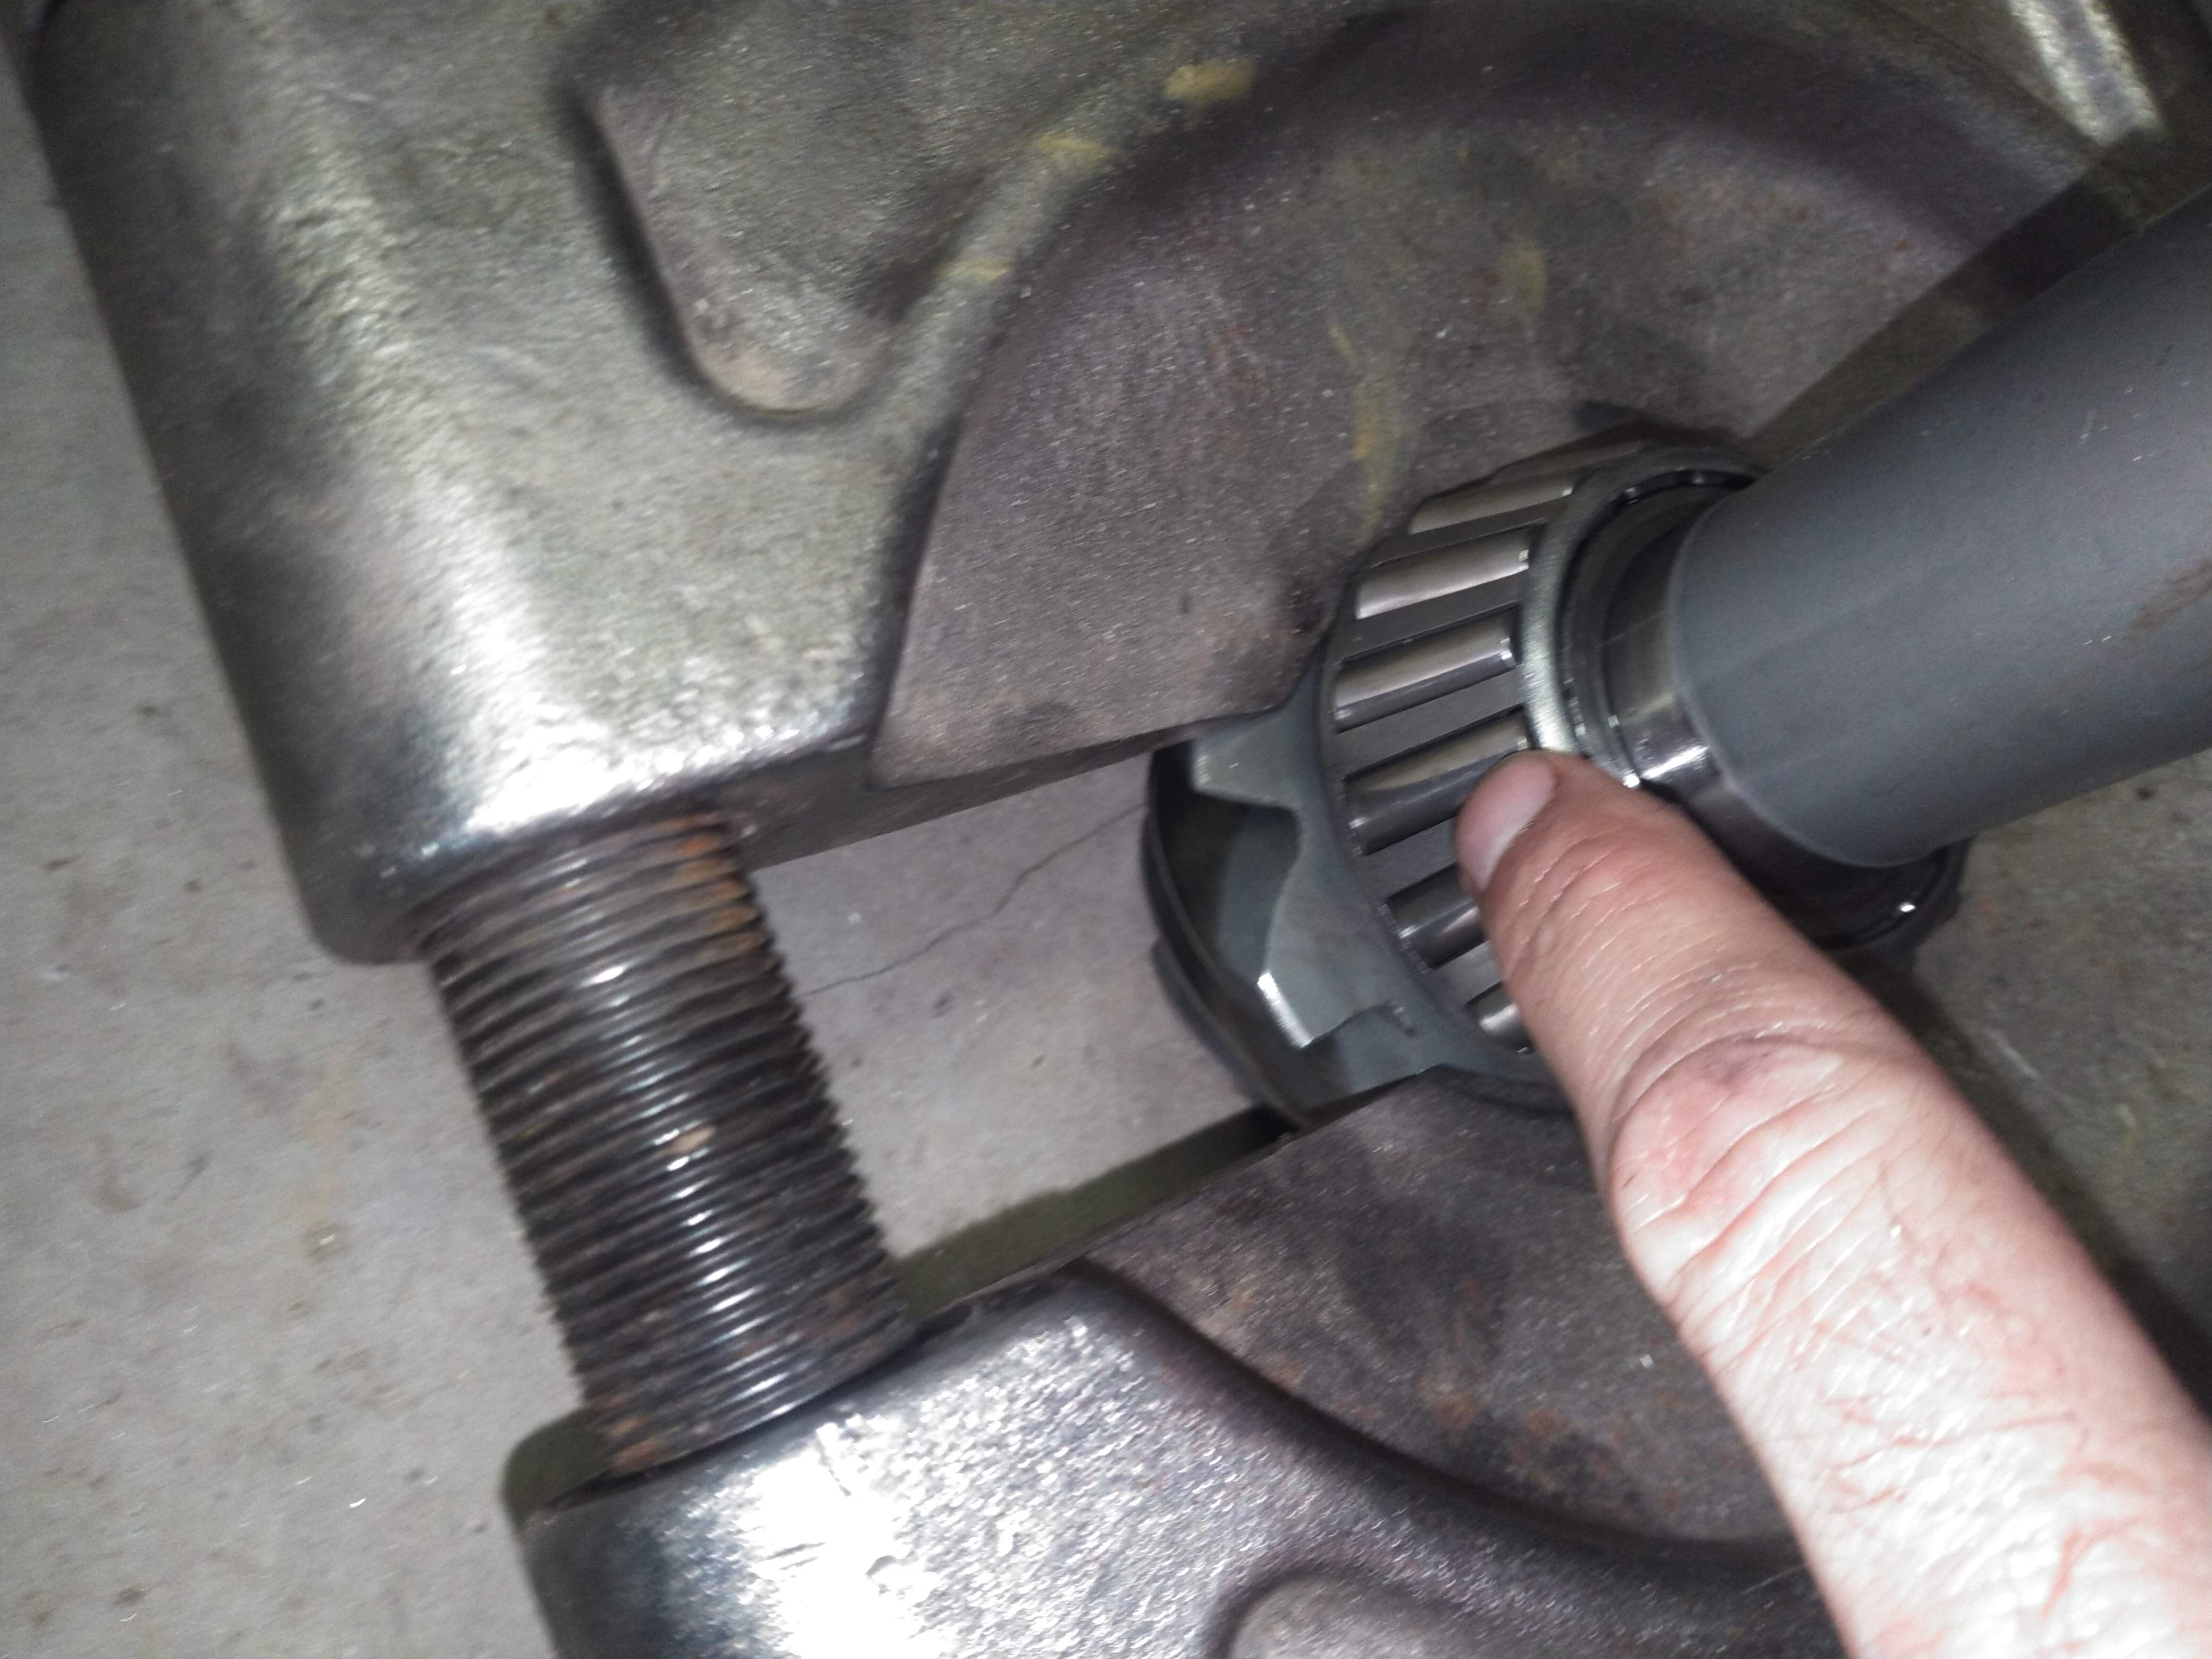
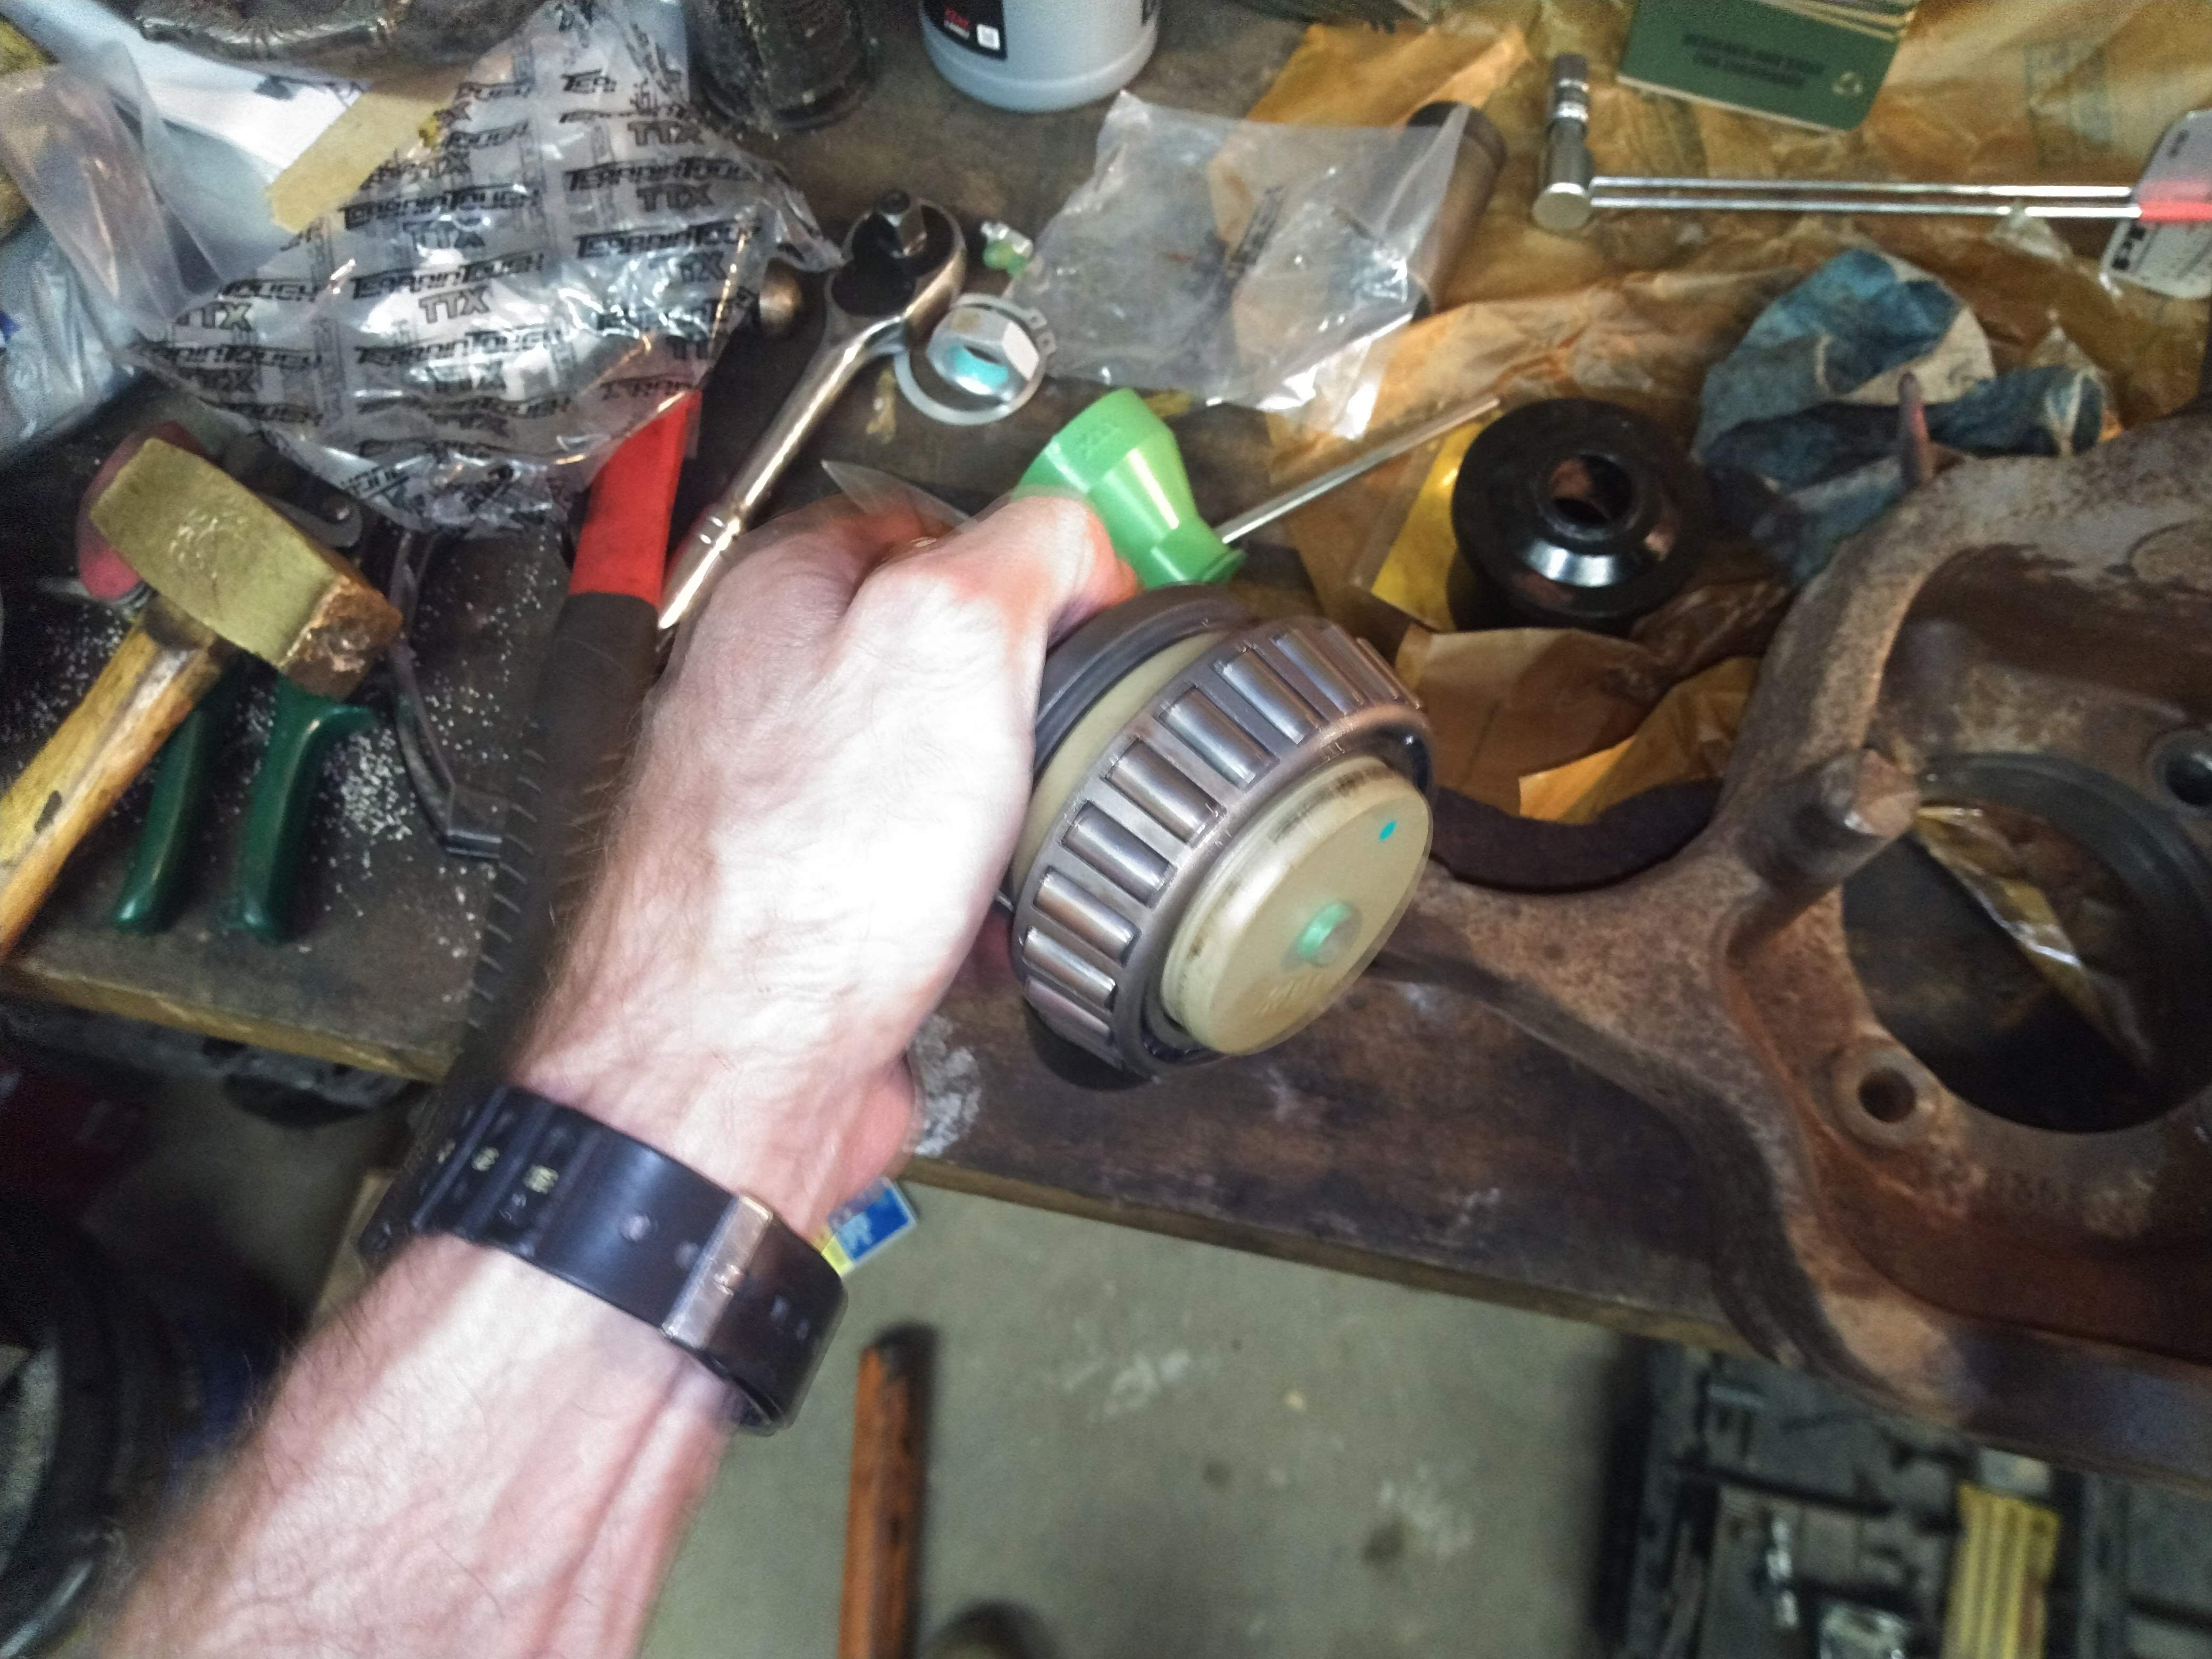
The front end on a 4wd truck generally doesn't see highway use. In my opinion it should never be driven on the road in 4wd unless it's covered in snow due to the nature of these systems and the danger of gear bind. The u-joints at the wheels tend to wear very quickly as well if you go too fast with the hub locks engaged. I'm not sure why they wear so much quicker than a driveshaft u-joint, but it may have something to do with the extreme angles seen while steering. At any rate, this is the reason that I'm not rebuilding this with new bearings. The ones that were in there couldn't possibly have enough miles on them to have worn out, so I needed to press this pinion bearing off without damaging the cage holding the rollers in place. This huge bearing separator is a little on the large side for this application but I was able to squeeze it in under the bearing race without crushing the cage. This can be tested once everything is in place by rotating the cage with your hand. If it still spins, you're good to go. If it starts to bind up as you press, the separator is going to slip up over the race an destroy the bearing in the process, so stop and start over again.
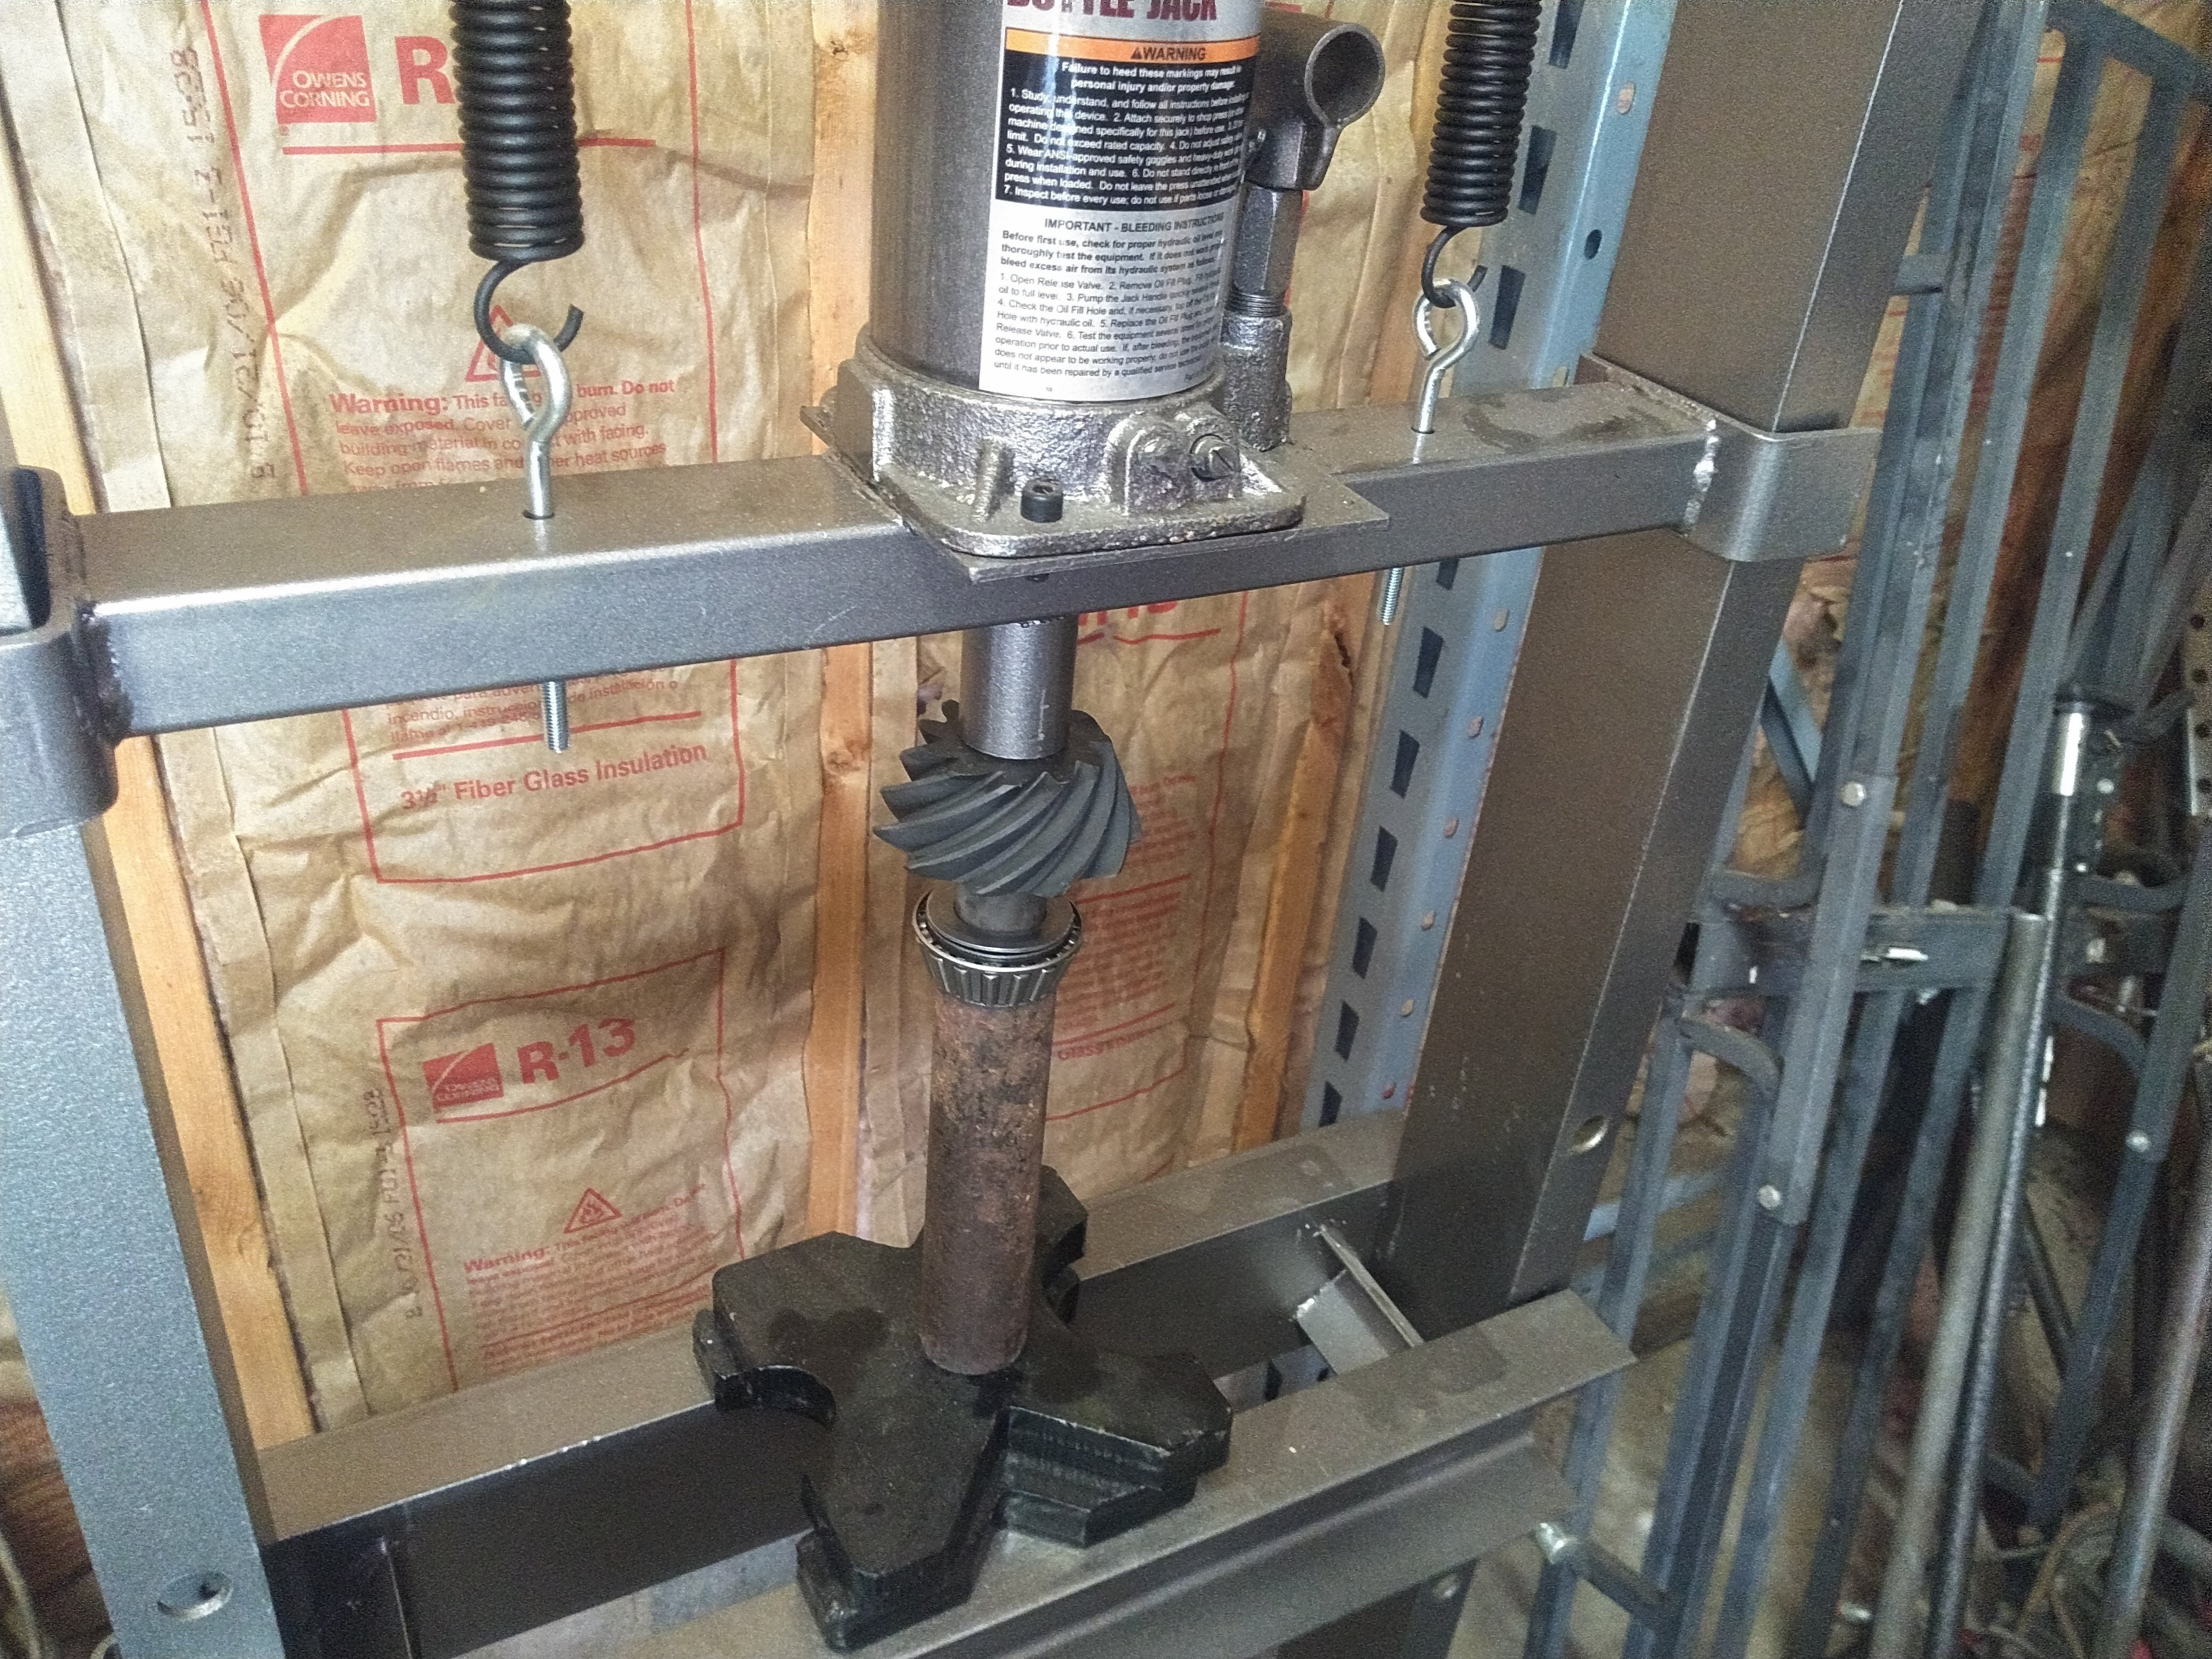
Here's the bearing and its shim going right back on to the new pinion gear. Same as coming off, it's important to press only on the center race of the bearing without making contact with the roller cage around the outside. Lucky for me the previous owner left behind this length of chromoly tubing half buried in a pile of leaves and dirt. Cut to length it made a nice little arbor to press this bearing into place.
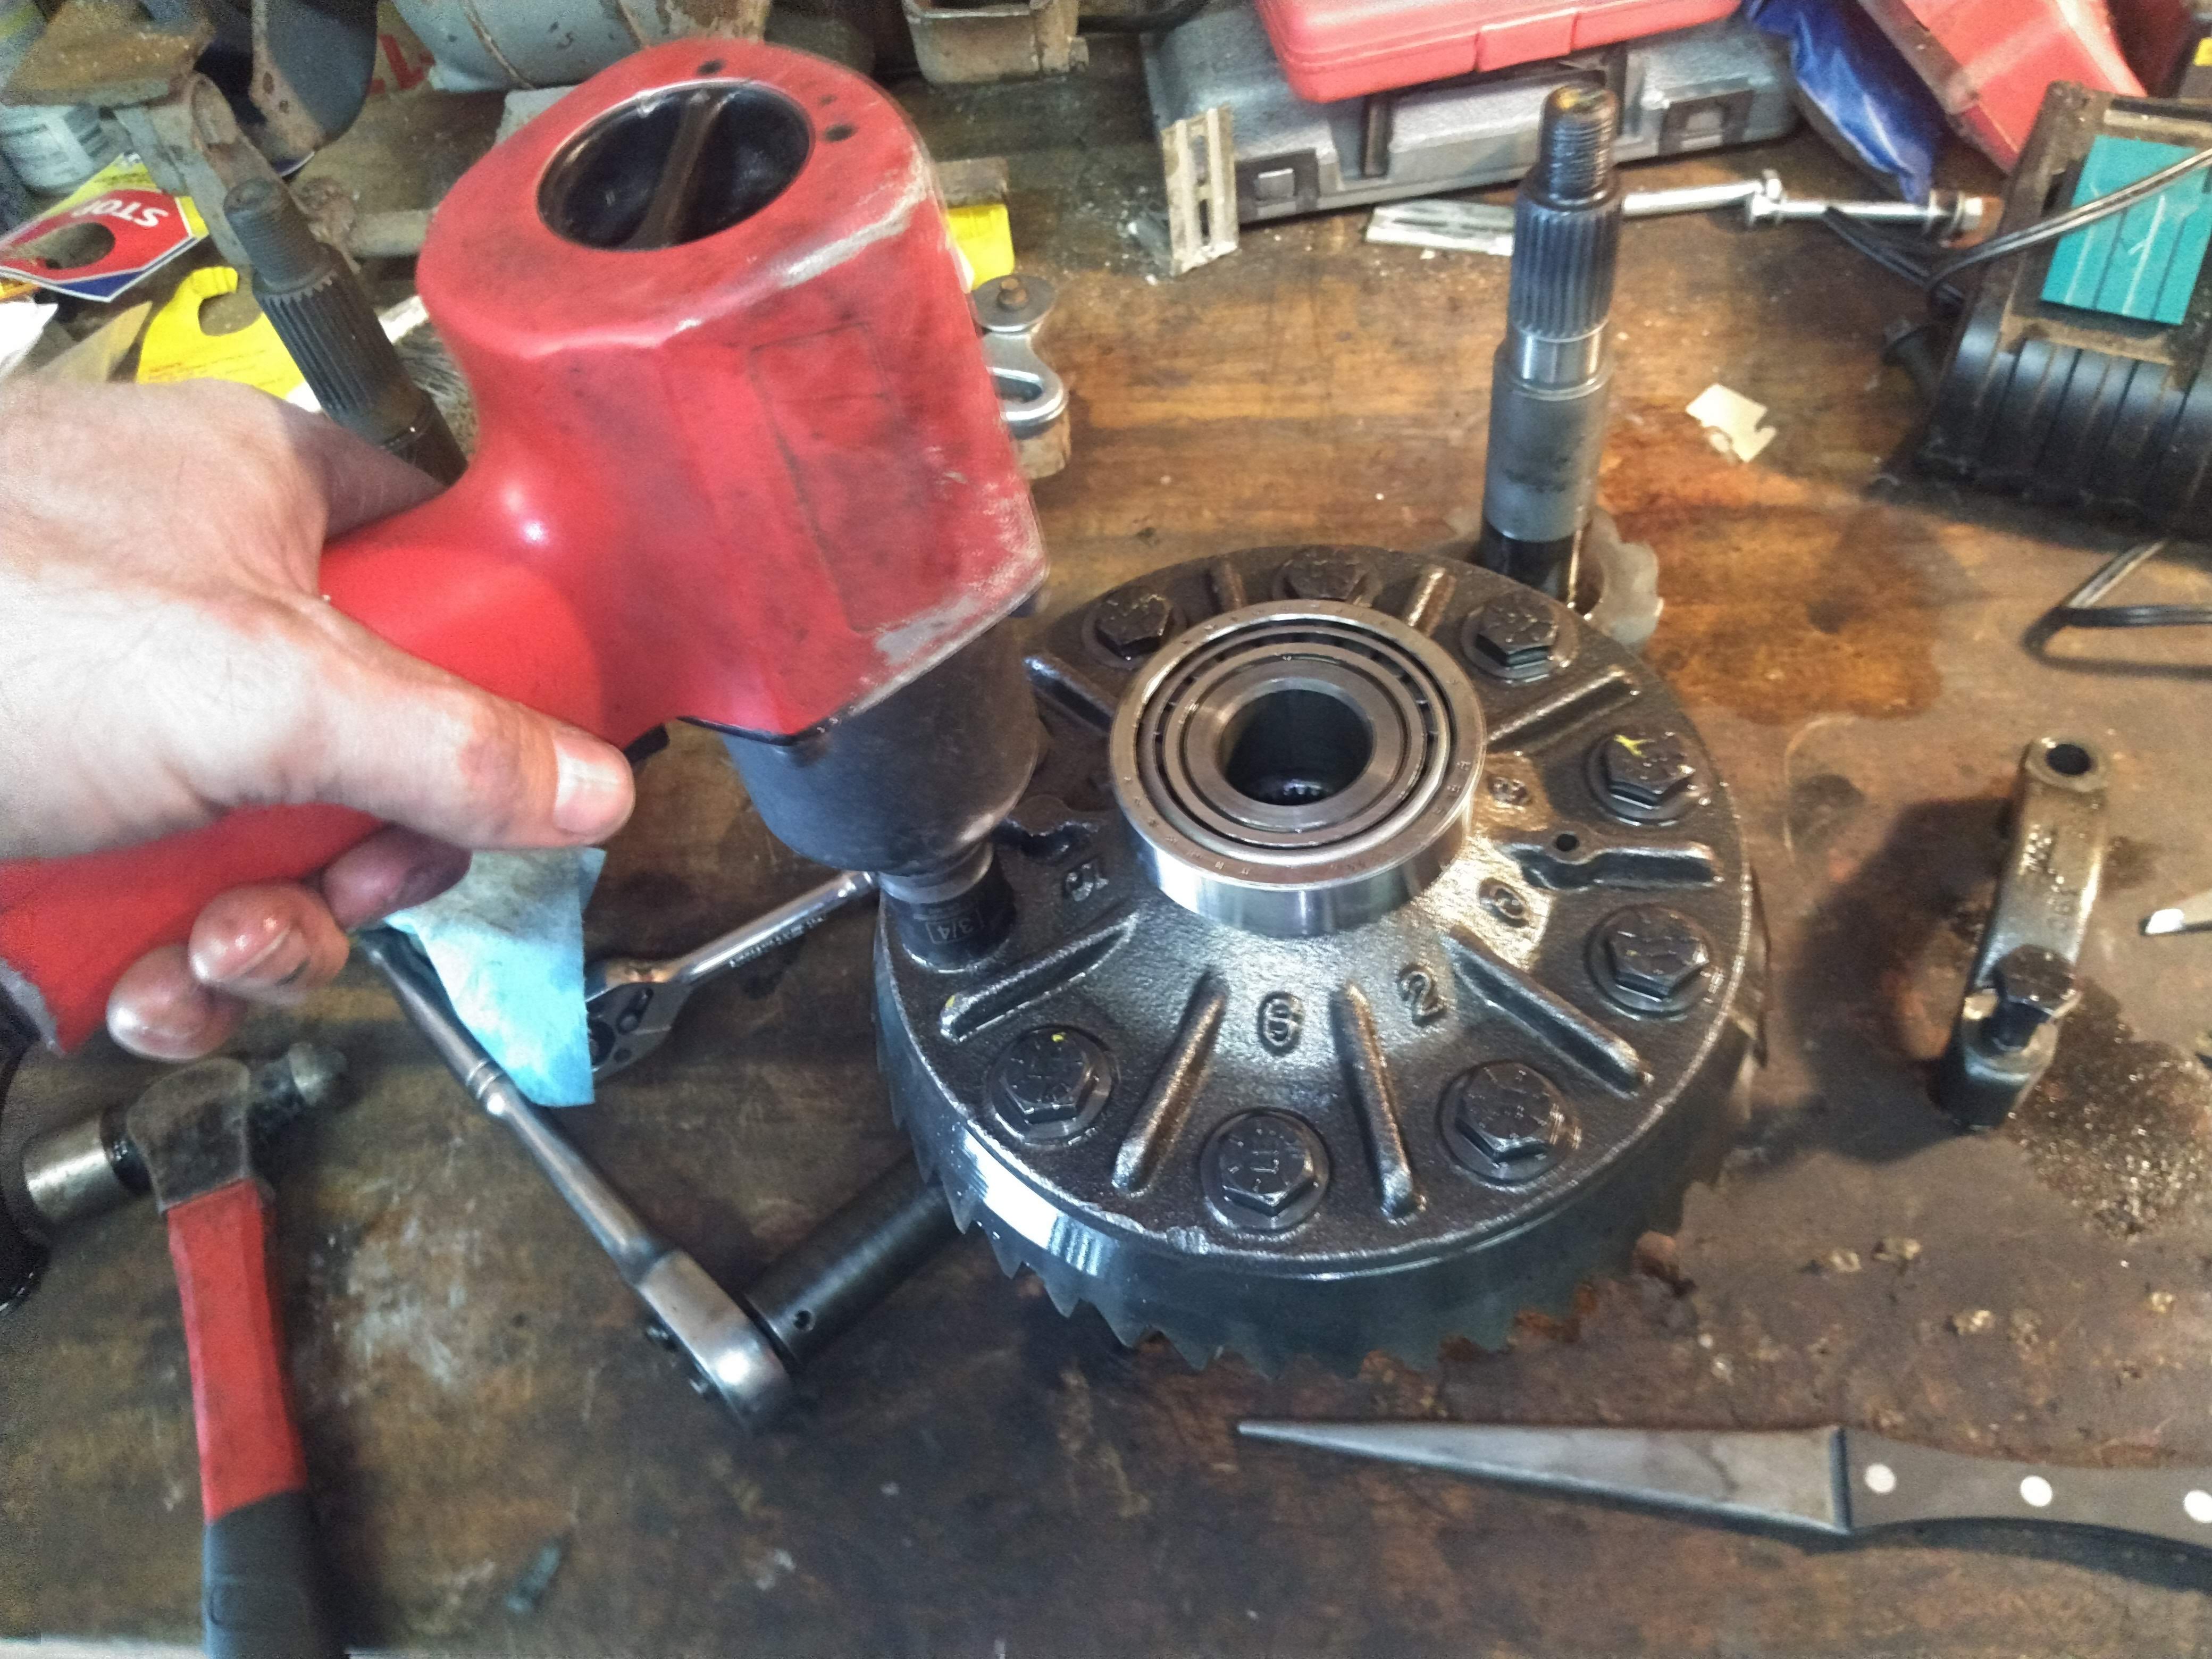
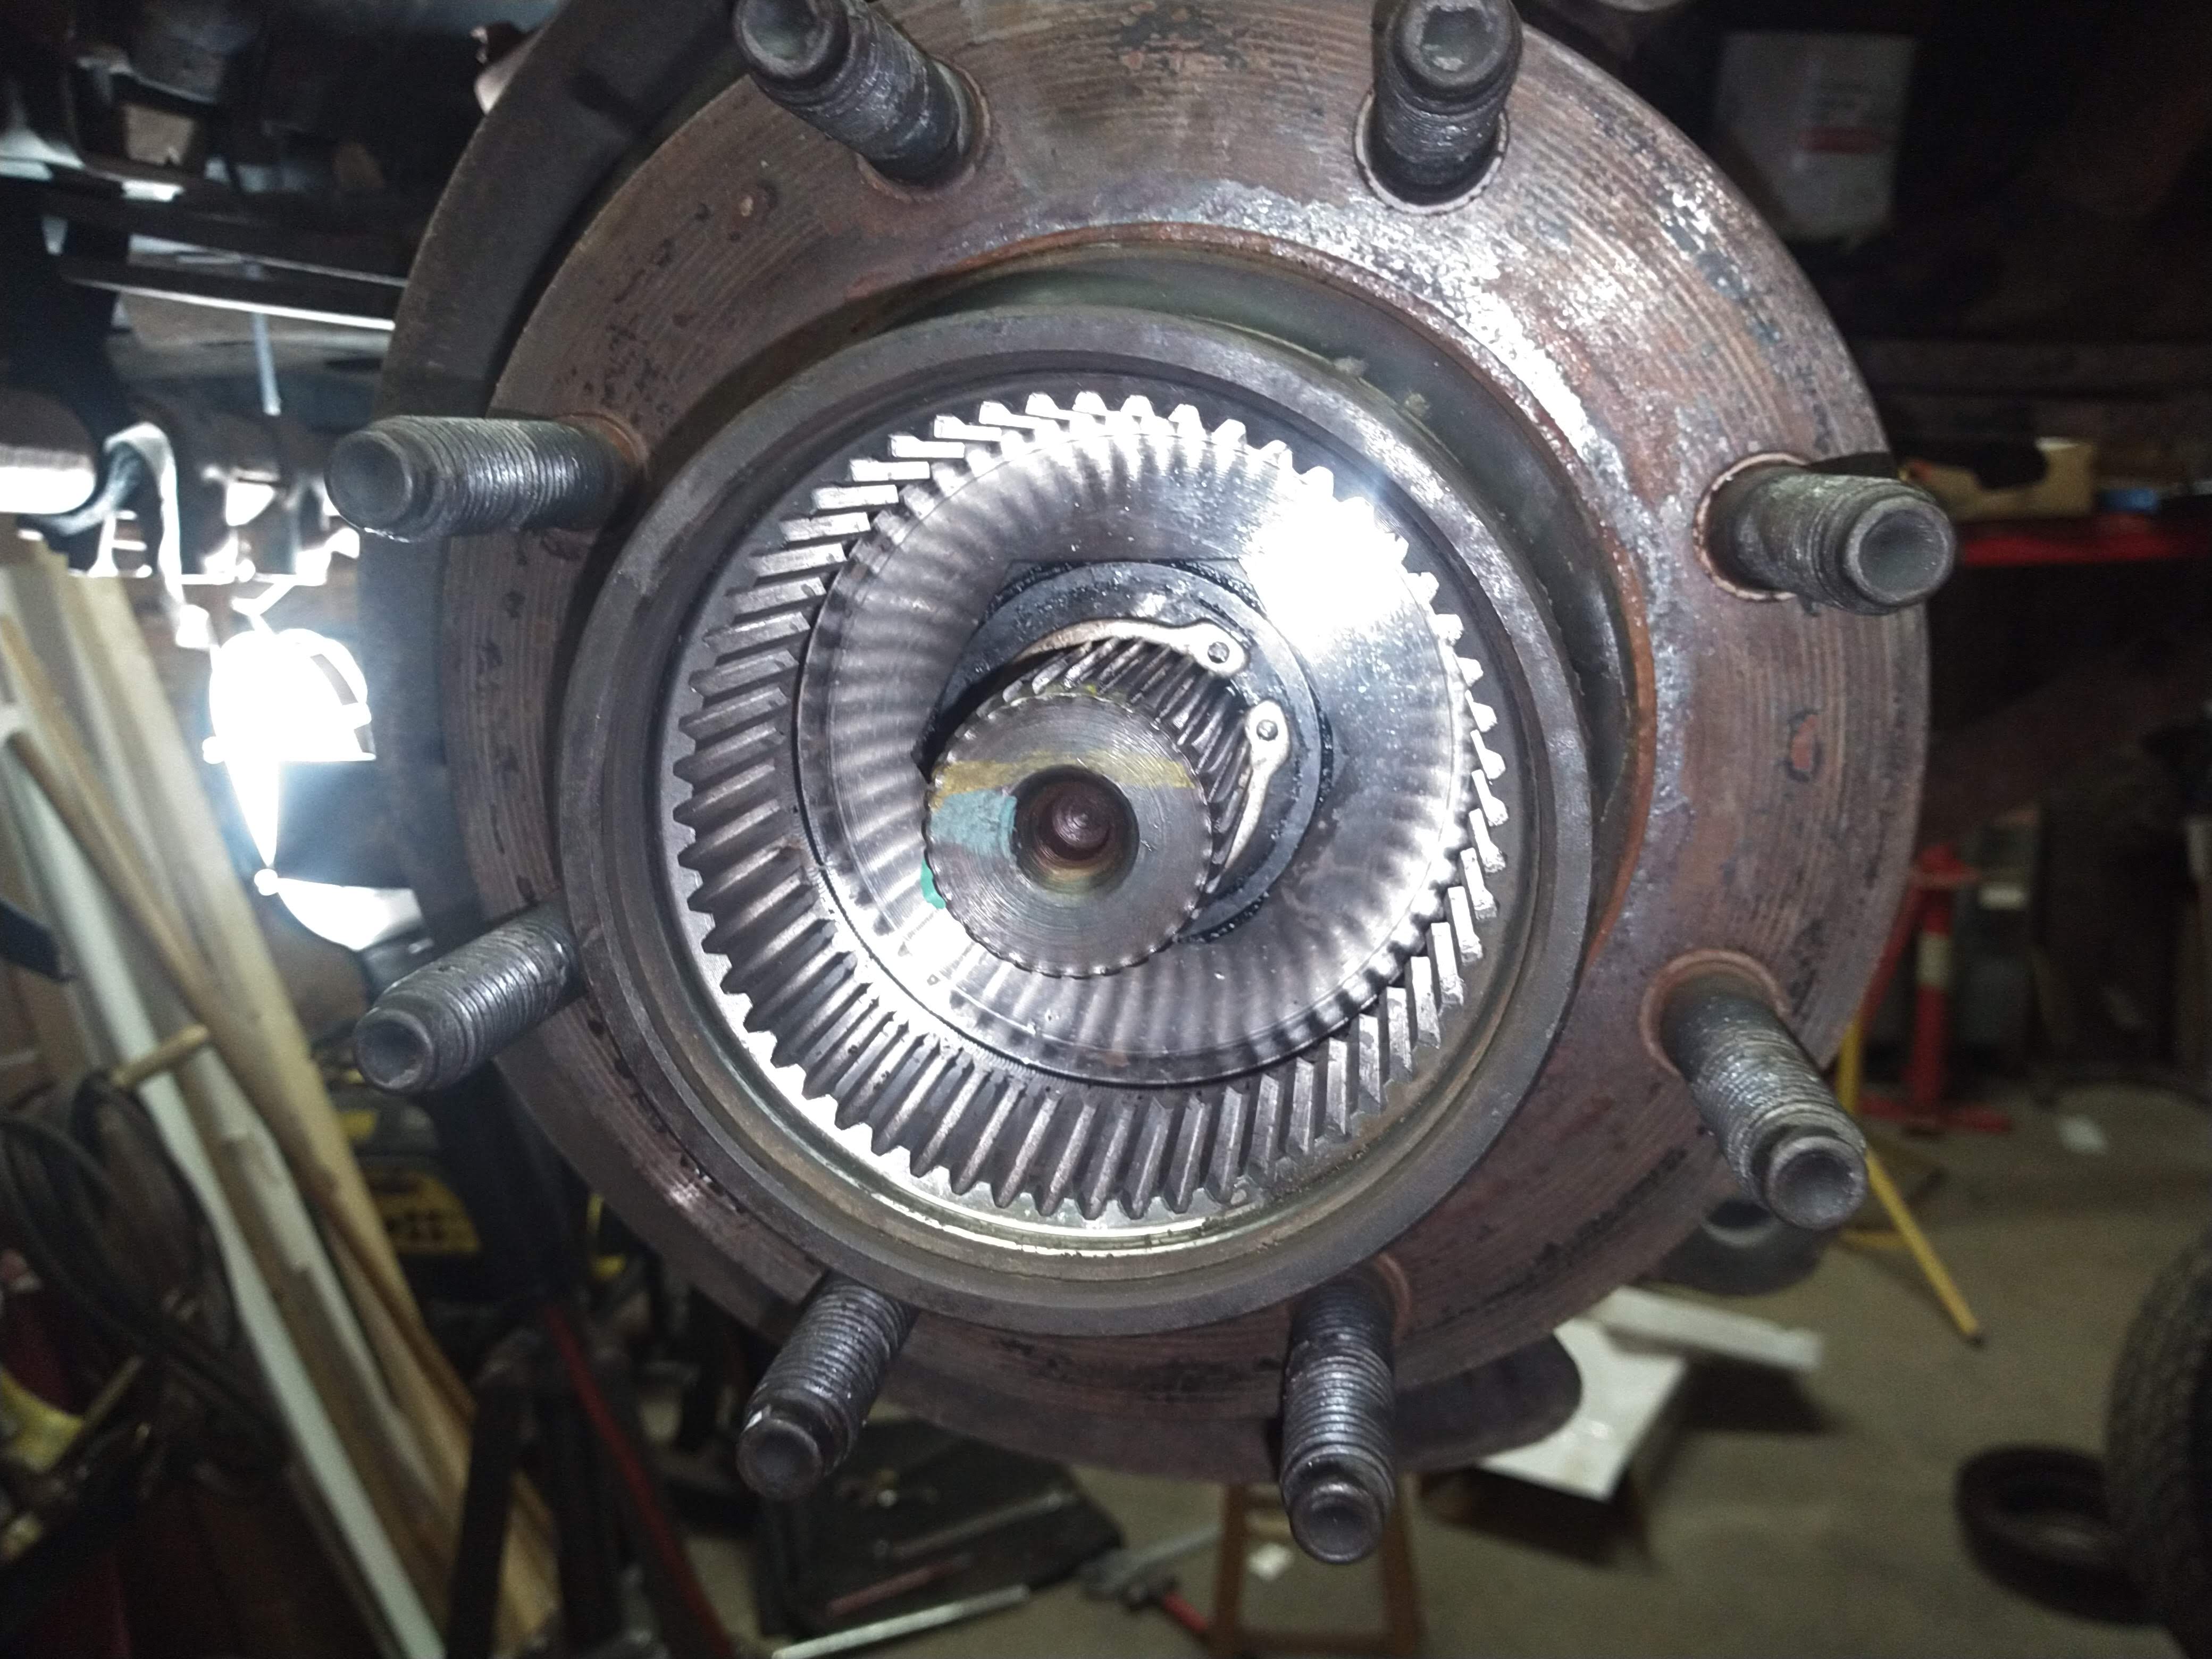
Next was the ring gear bolts and ring gear removal from the differential carrier. This is relatively easy. The bolts were removed with the impact. Two bolts were put partially back into place opposite each other and the ring gear was removed by gently tapping on those two bolt heads alternately until the ring gear fell free.
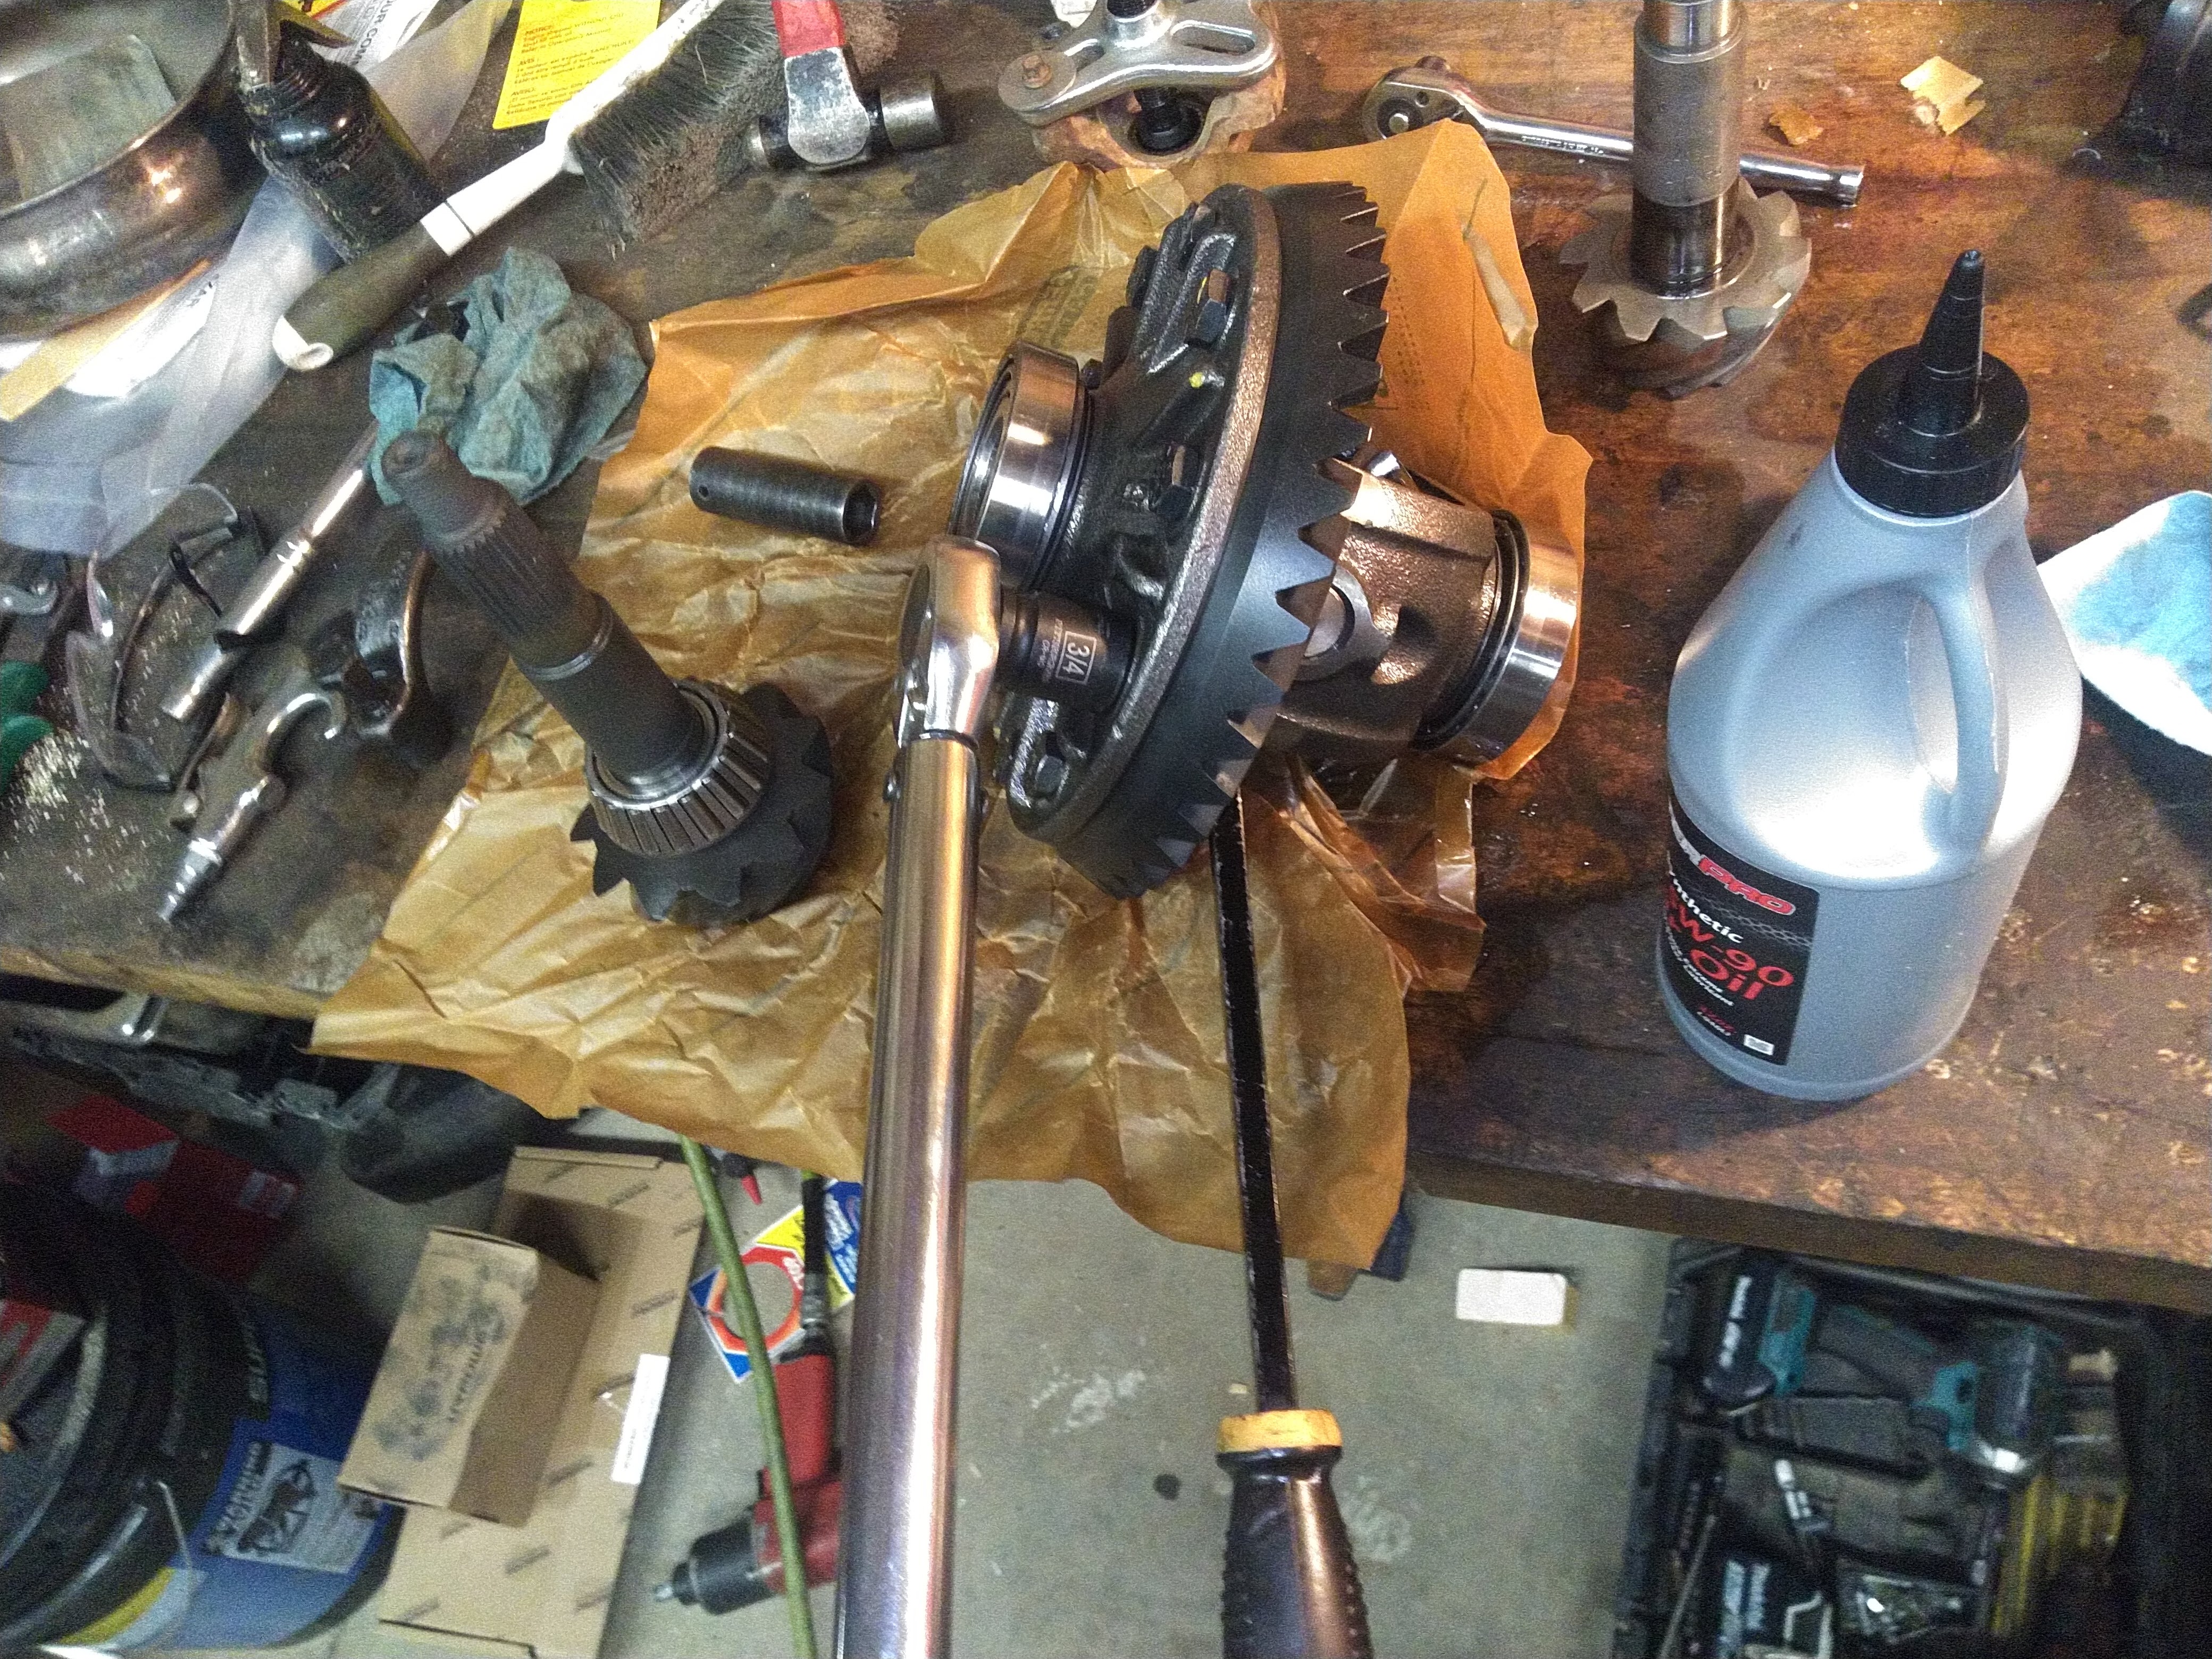
Here is the new ring gear going back into place. This is pretty straight forward. Since there's a near-interference fit on the two parts, I like to put these on by tightening all of the bolts in a star or crisscross pattern to ensure that the gear doesn't get cocked sideways and bind on the housing journal. Once the ring gear is all the way in the bolts can be torqued down, again in a criss-cross pattern to ensure that nothing warps.

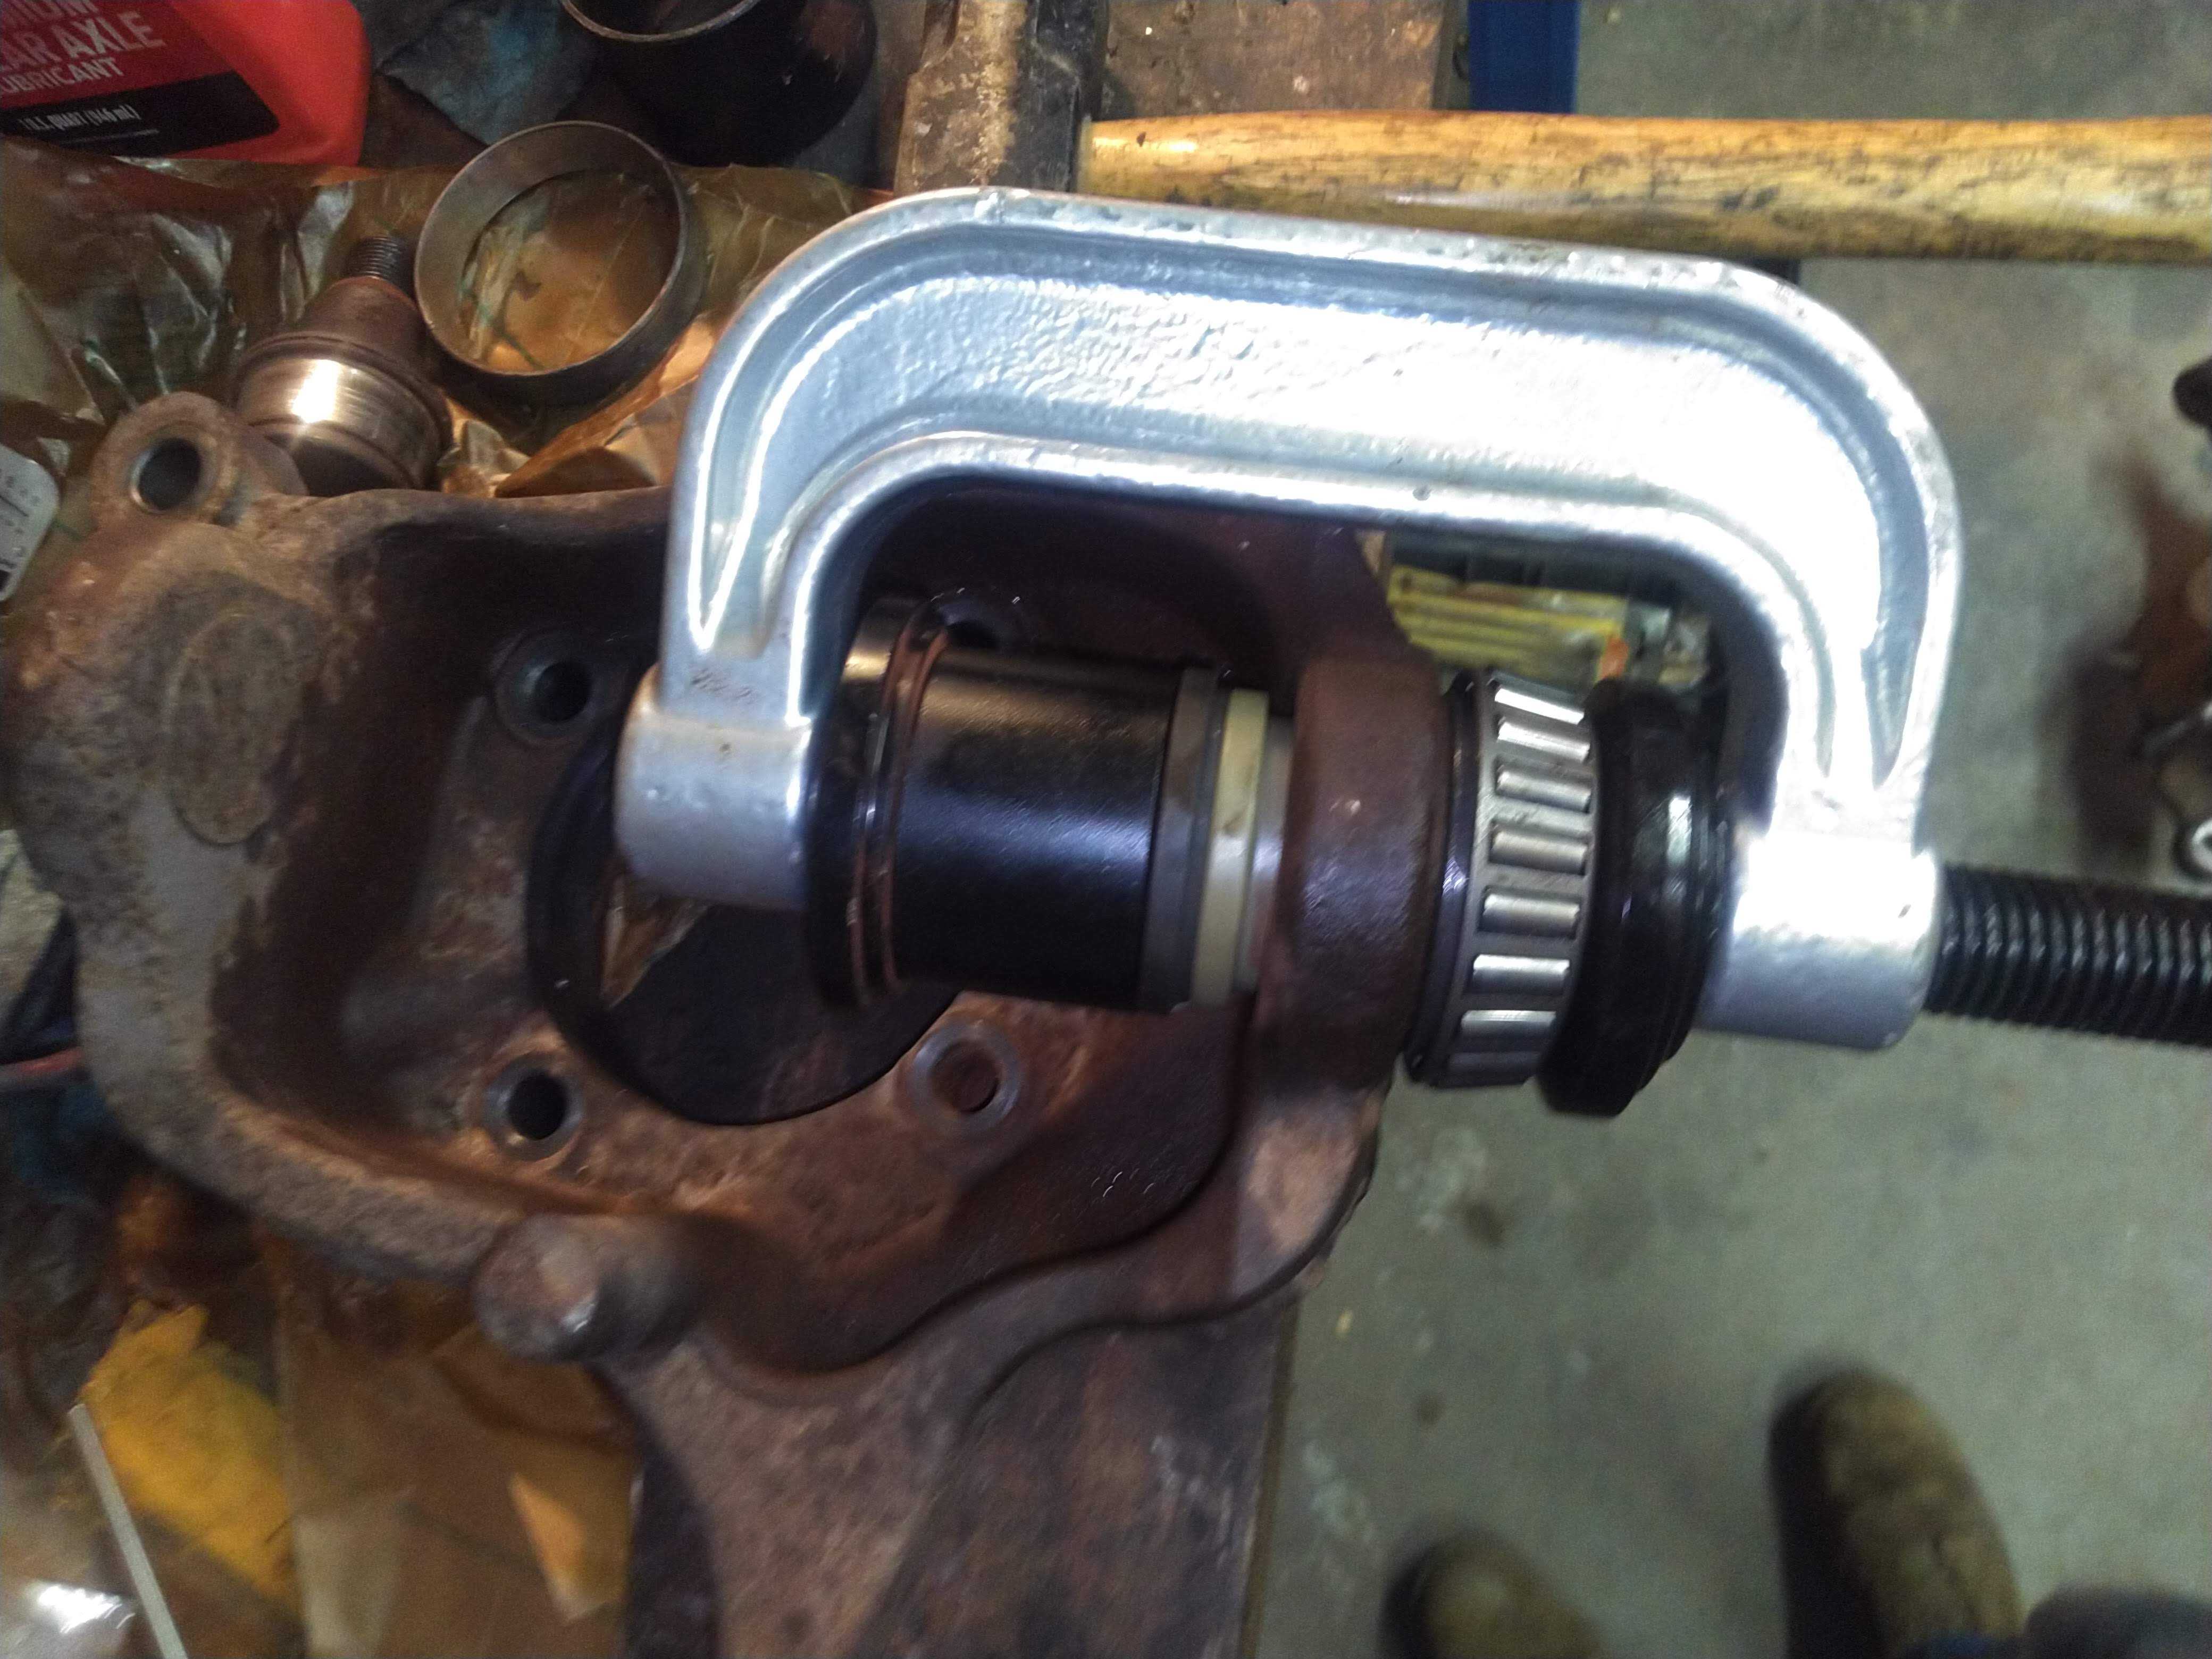
Here's the pinion gear getting torqued back into the housing. On these differentials, there's a crush sleeve that gets squished until a certain amount of bearing preload is achieved. What this means is that the bearings are tight enough to have no play during use, but not too tight that damage is done to the bearings or races. This tightness or preload is measured by using an inch-lb torque wrench to see how much torque is required to rotate the pinion from its center. Since I was trying to reuse all the original stuff, I left the old crush sleeve in place and began to tighten it with the impact wrench. Little by little, it was tightened down until the bearings required the desired amount of torque. According to Ford's service manual, when reusing the old crush sleeve, the bearings should be preloaded 5 in-lbs more than they were when they came off. Since I failed to measure this value when I disassembled, I just went to the max preload, which was 30 in-lbs required to rotate it.
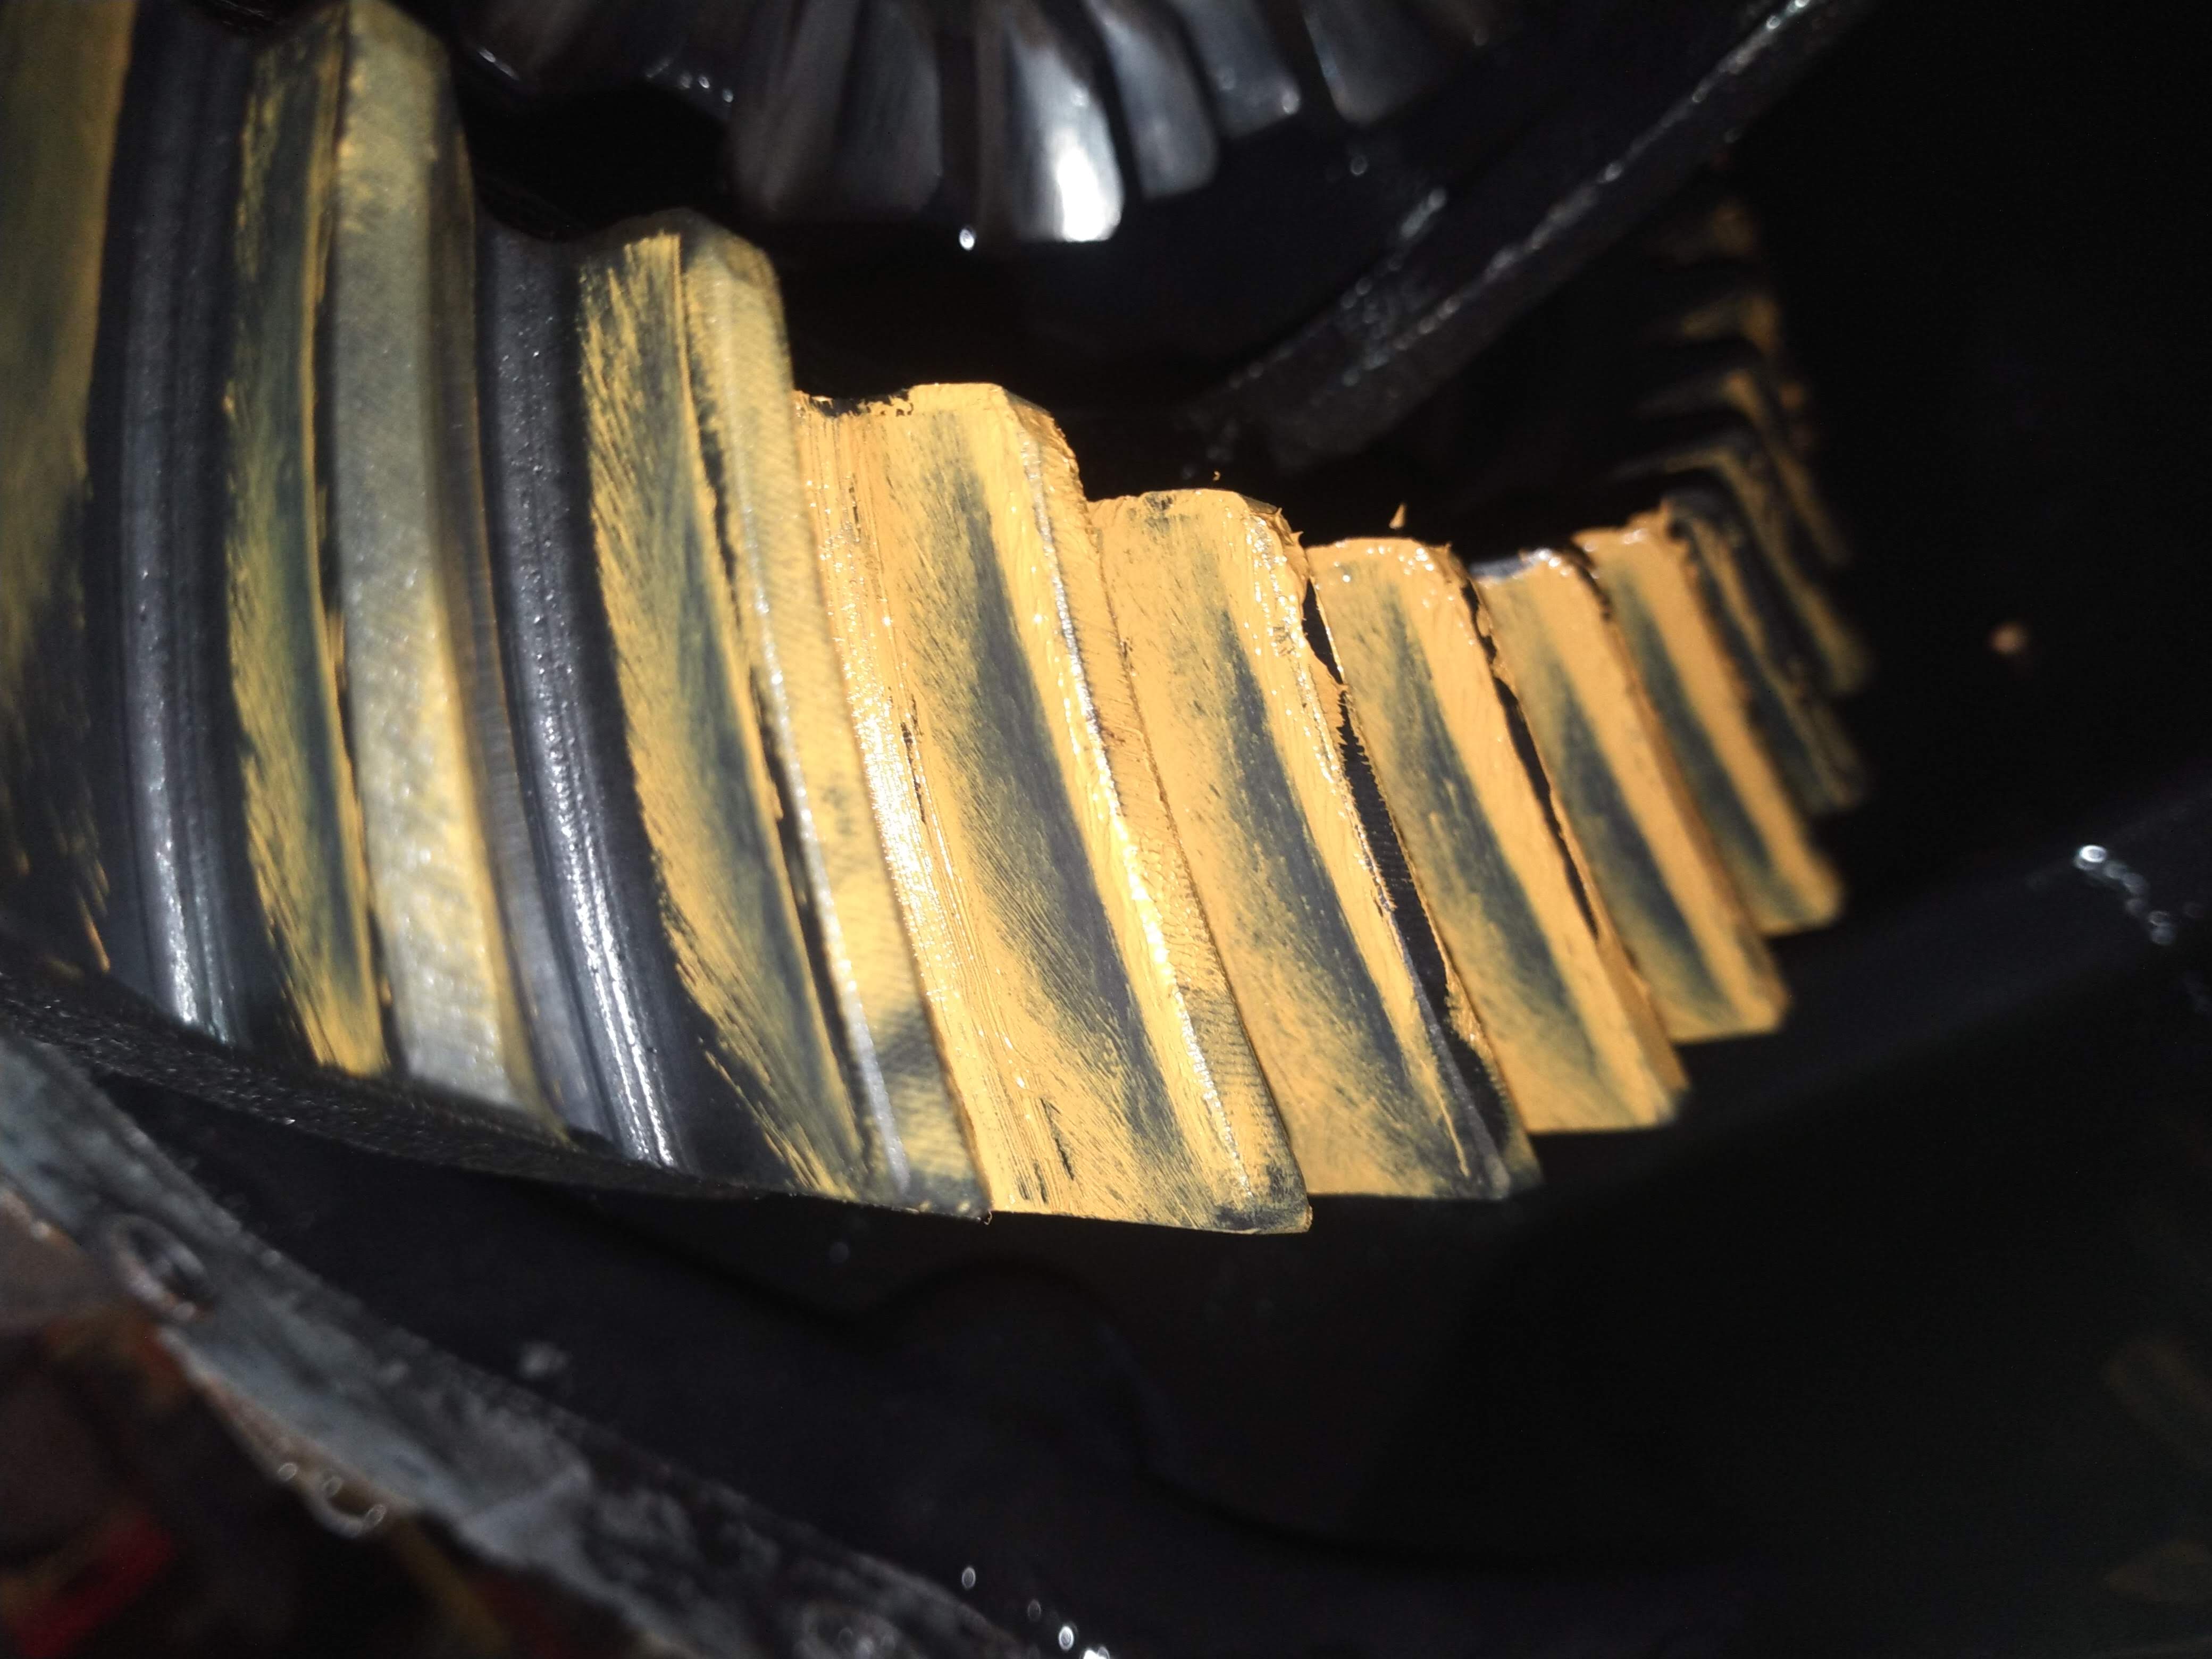
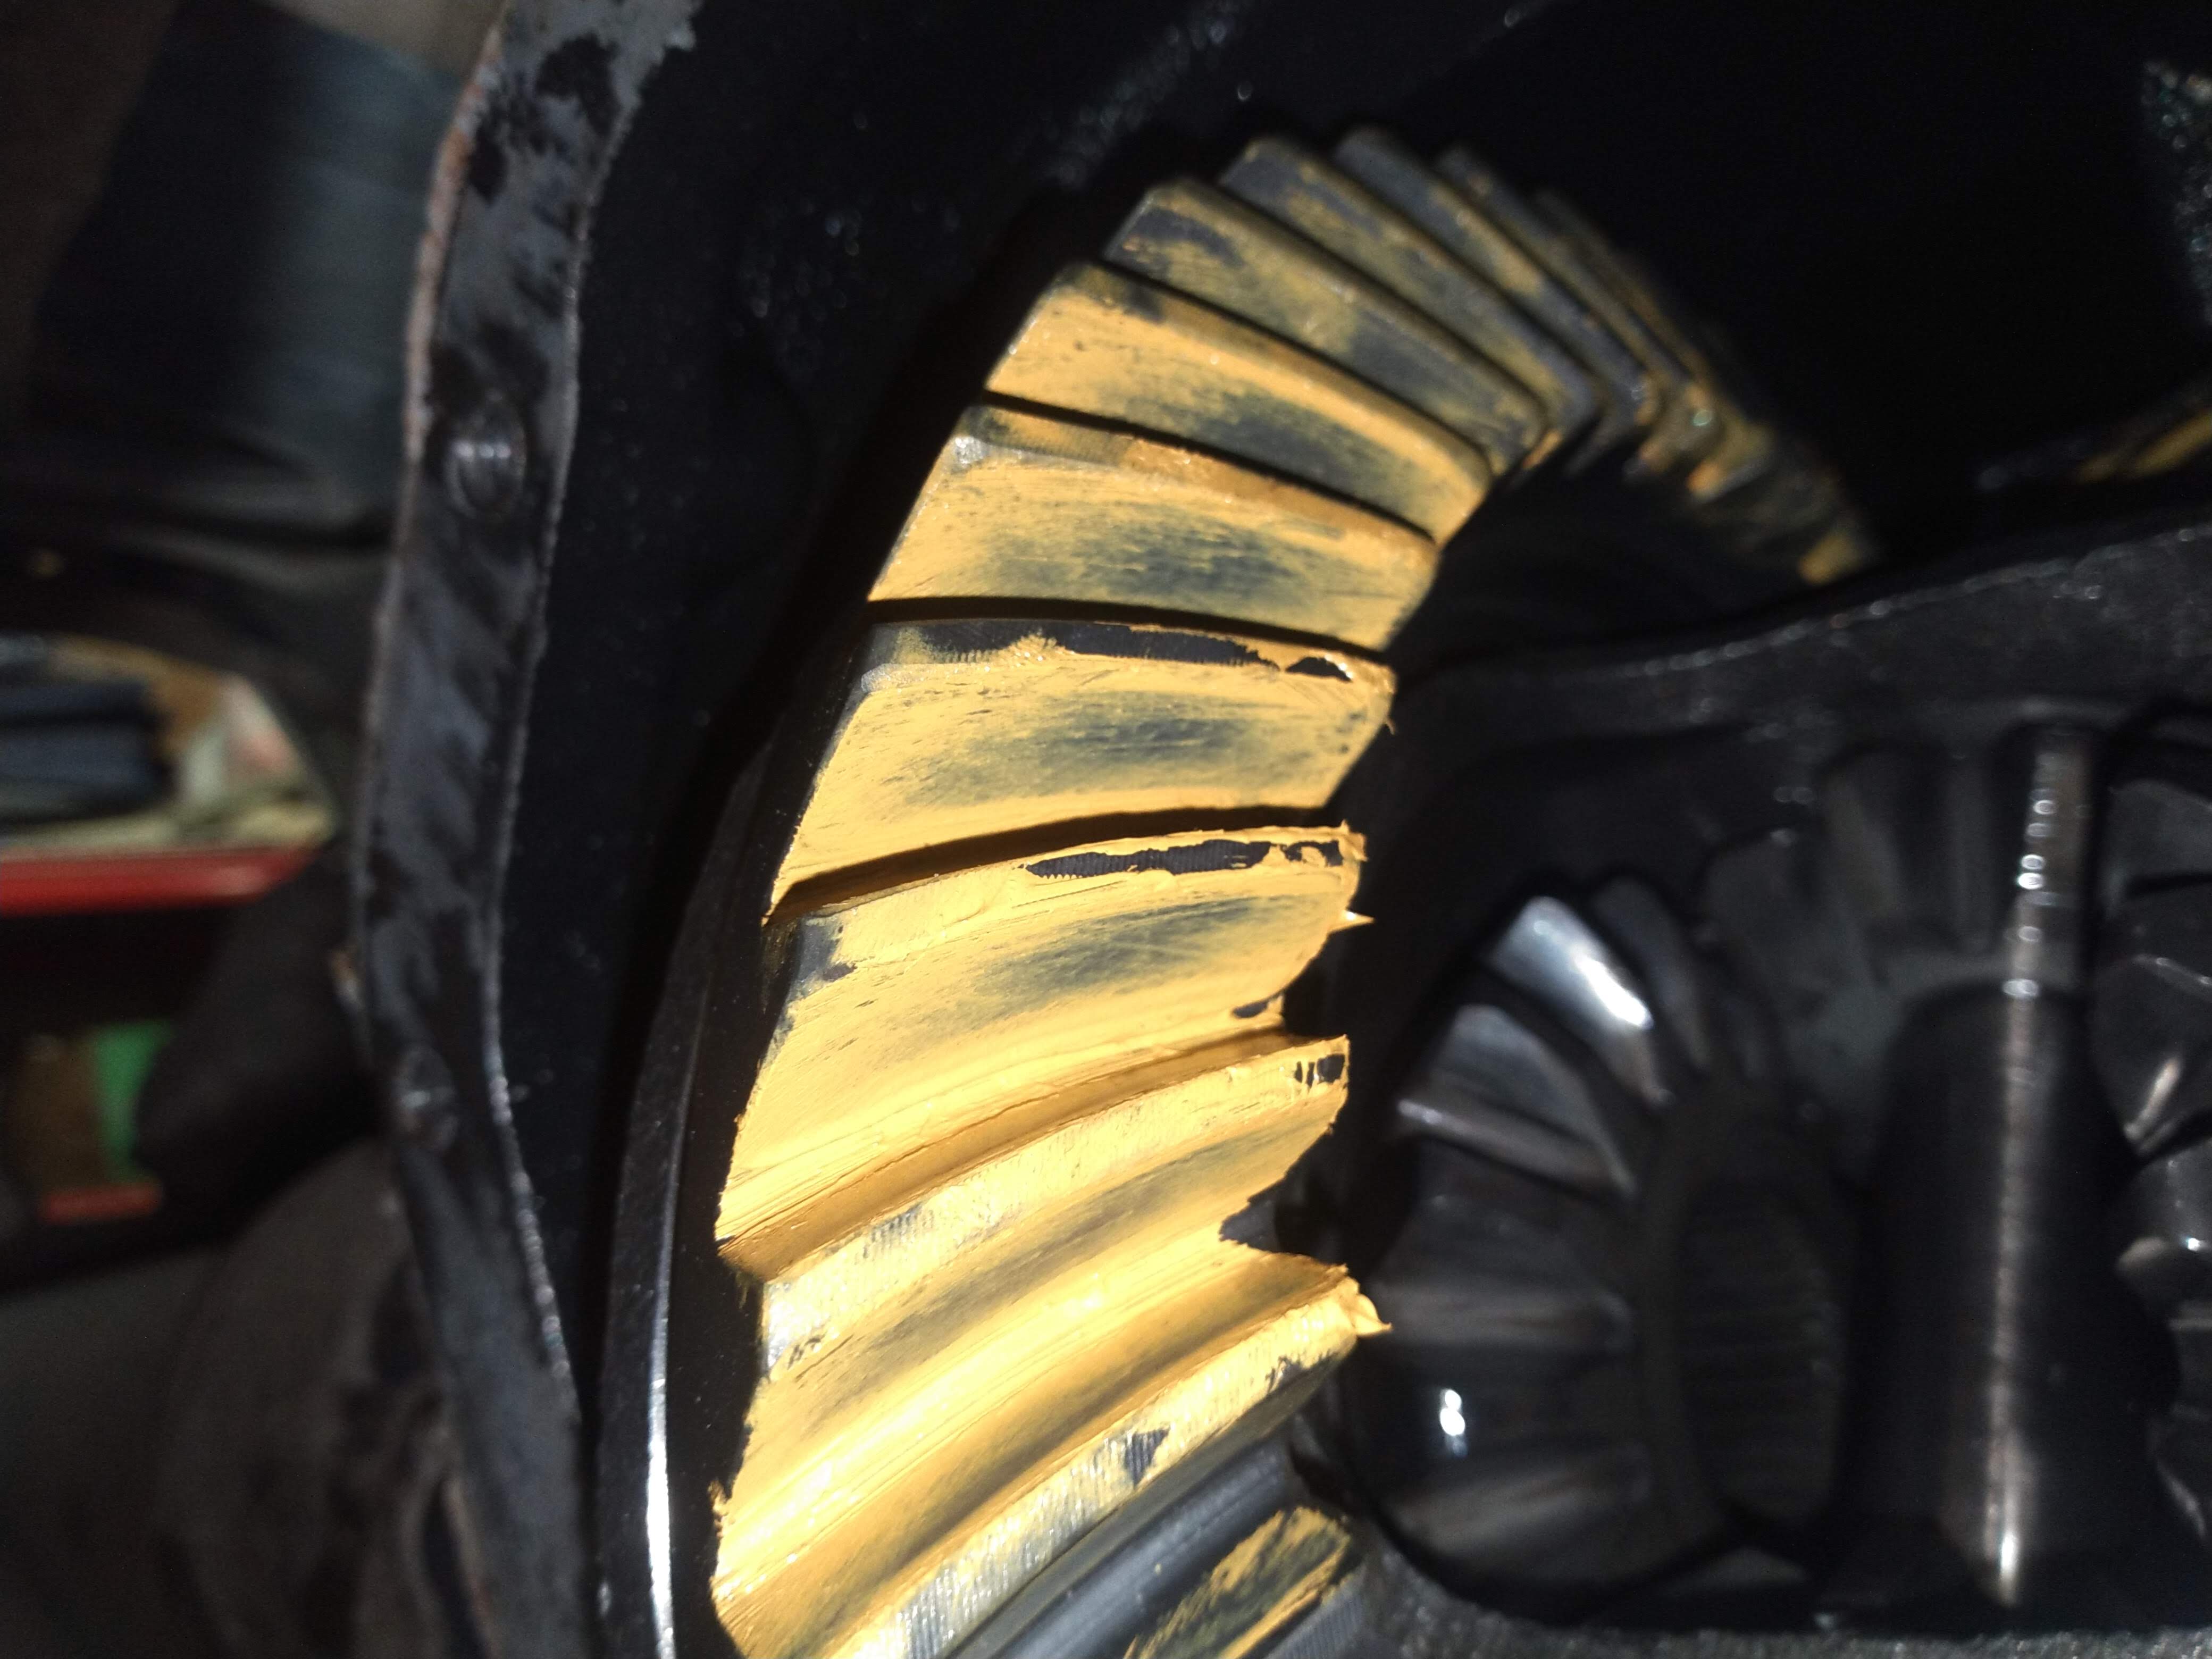
The differential carrier was simply bolted back into place with the old bearings and races. Just to make sure I wasn't going to cause instantaneous failure, I checked the contact pattern using the paint from the rear gear setup kit. The above is the result. My measured backlash is a bit tight due to the increase in size of the pinion gear with the lower numerical ratio, but it's not binding and I'm happy with that pattern. The contact is at the center on both the drive and coast sides of the ring gear. I don't recommend running an out-of-spec backlash like this, but I'm calling that good enough for my application. If this was a rear end or a full time all-wheel drive front differential, I would be worried about heat buildup with that tight backlash. It would almost certainly result in premature failure in those circumstances, but on something that will only see slow speed off-road use, I doubt I'll ever have a problem with these gears overheating. They'll never see highway speeds and I'd say max 10-15 mph.
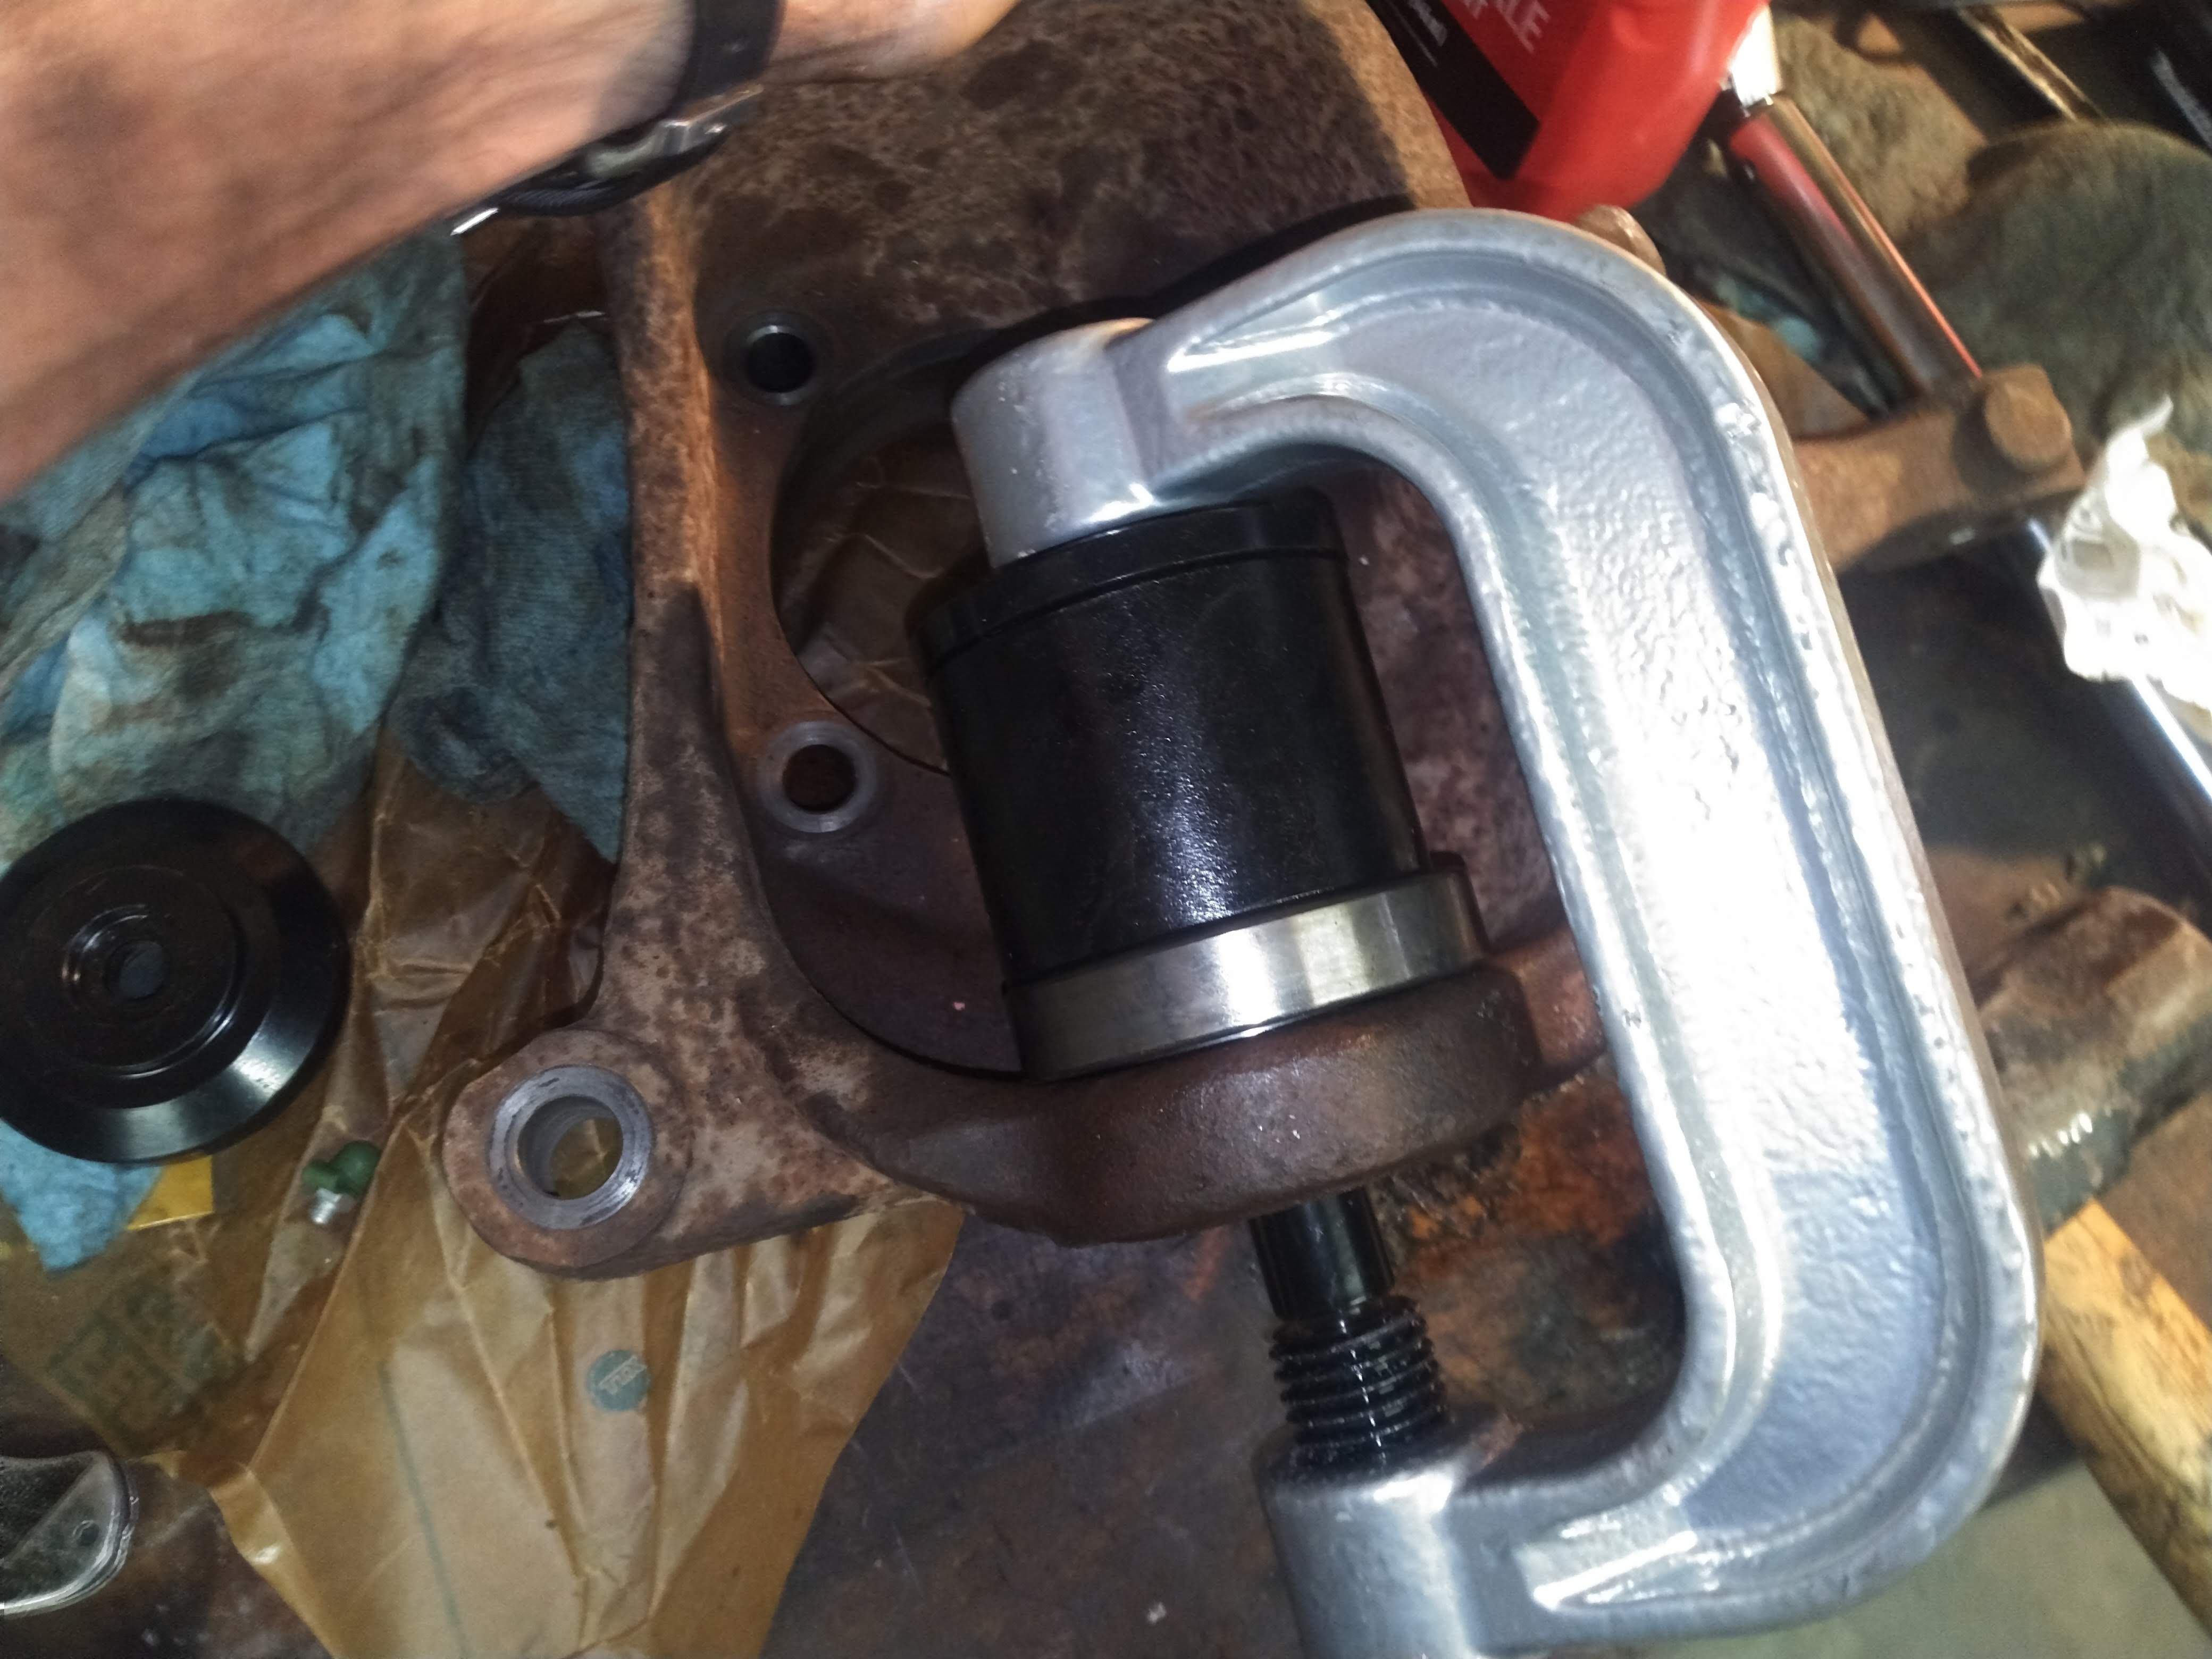
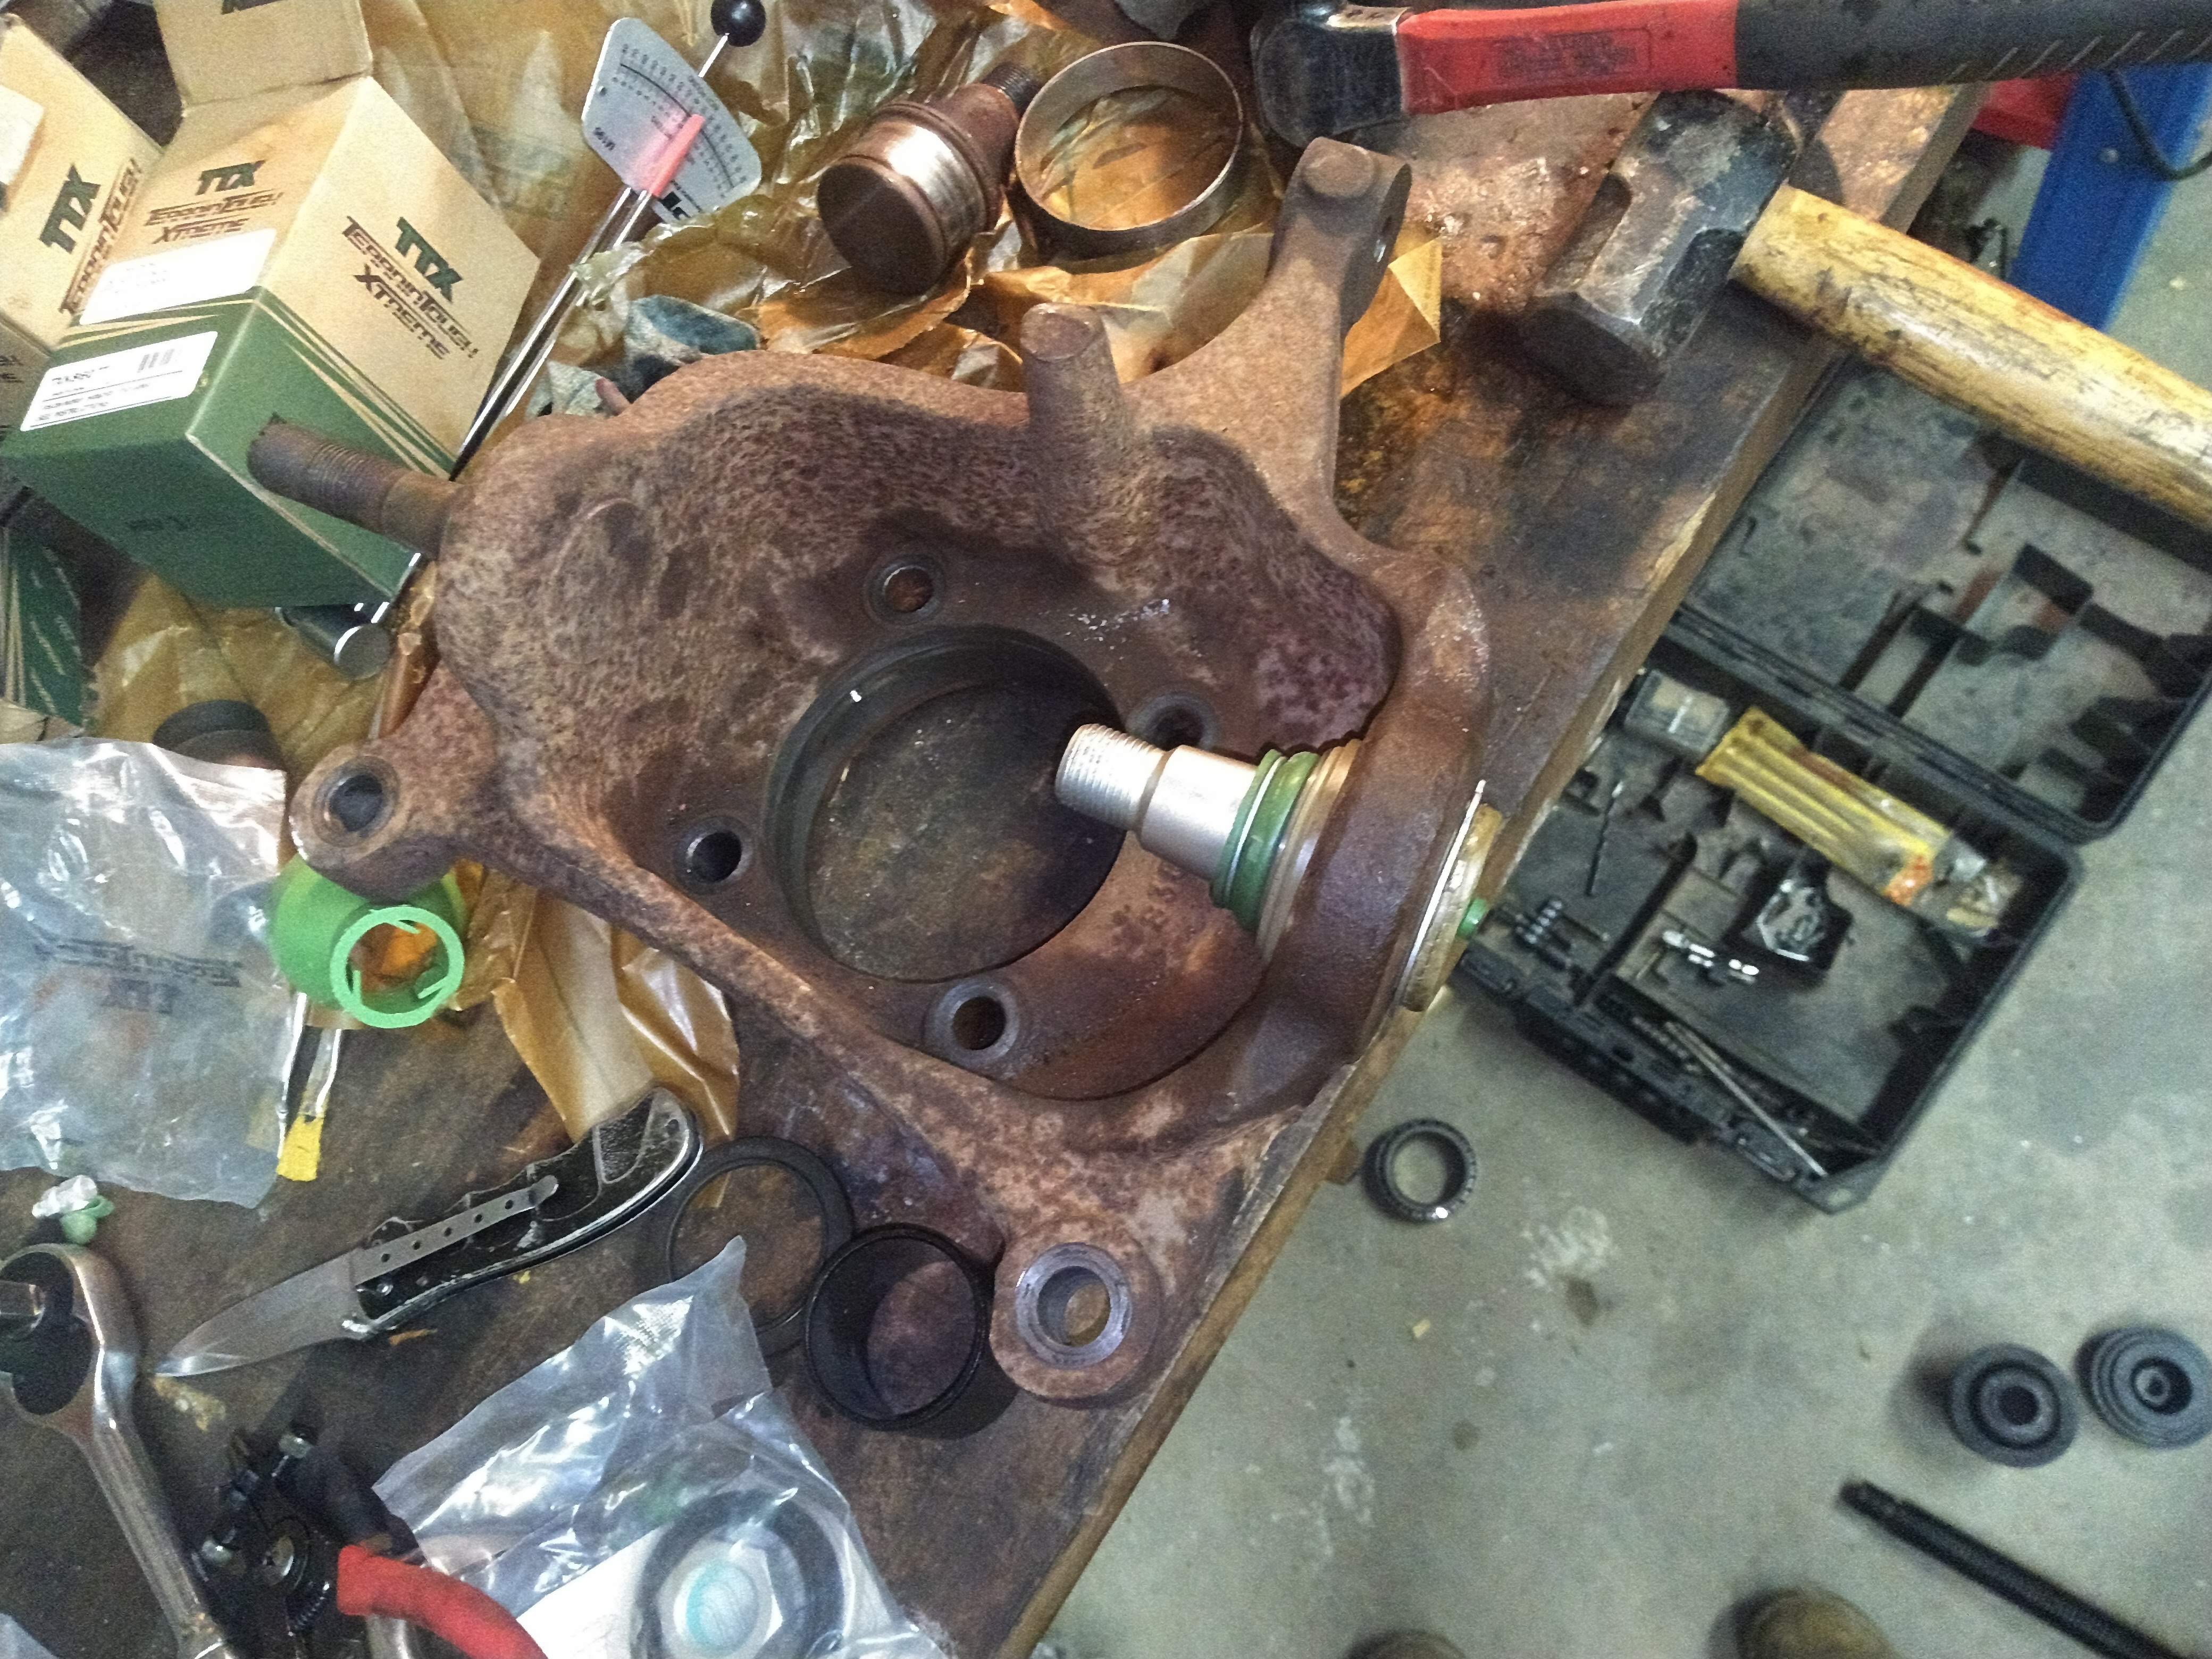
Here's the ball joint press stack up. Note that these lower ball joints were soaked in penetrating oil for a couple days before attempting this. I'm using a cheap press tool and any little bit helps. Also, this kit was designed for car ball joints, so this arbor wasn't quite tall enough to get the ball joint all the way out of this steering knuckles. Those lower ball joints are huge. Fishing around the shop, I found the old wheel bearings from the rear end rebuild. The outer race was just the right size to slip over the outer edge of the ball joint and give the press tool enough room to press it all the way out.
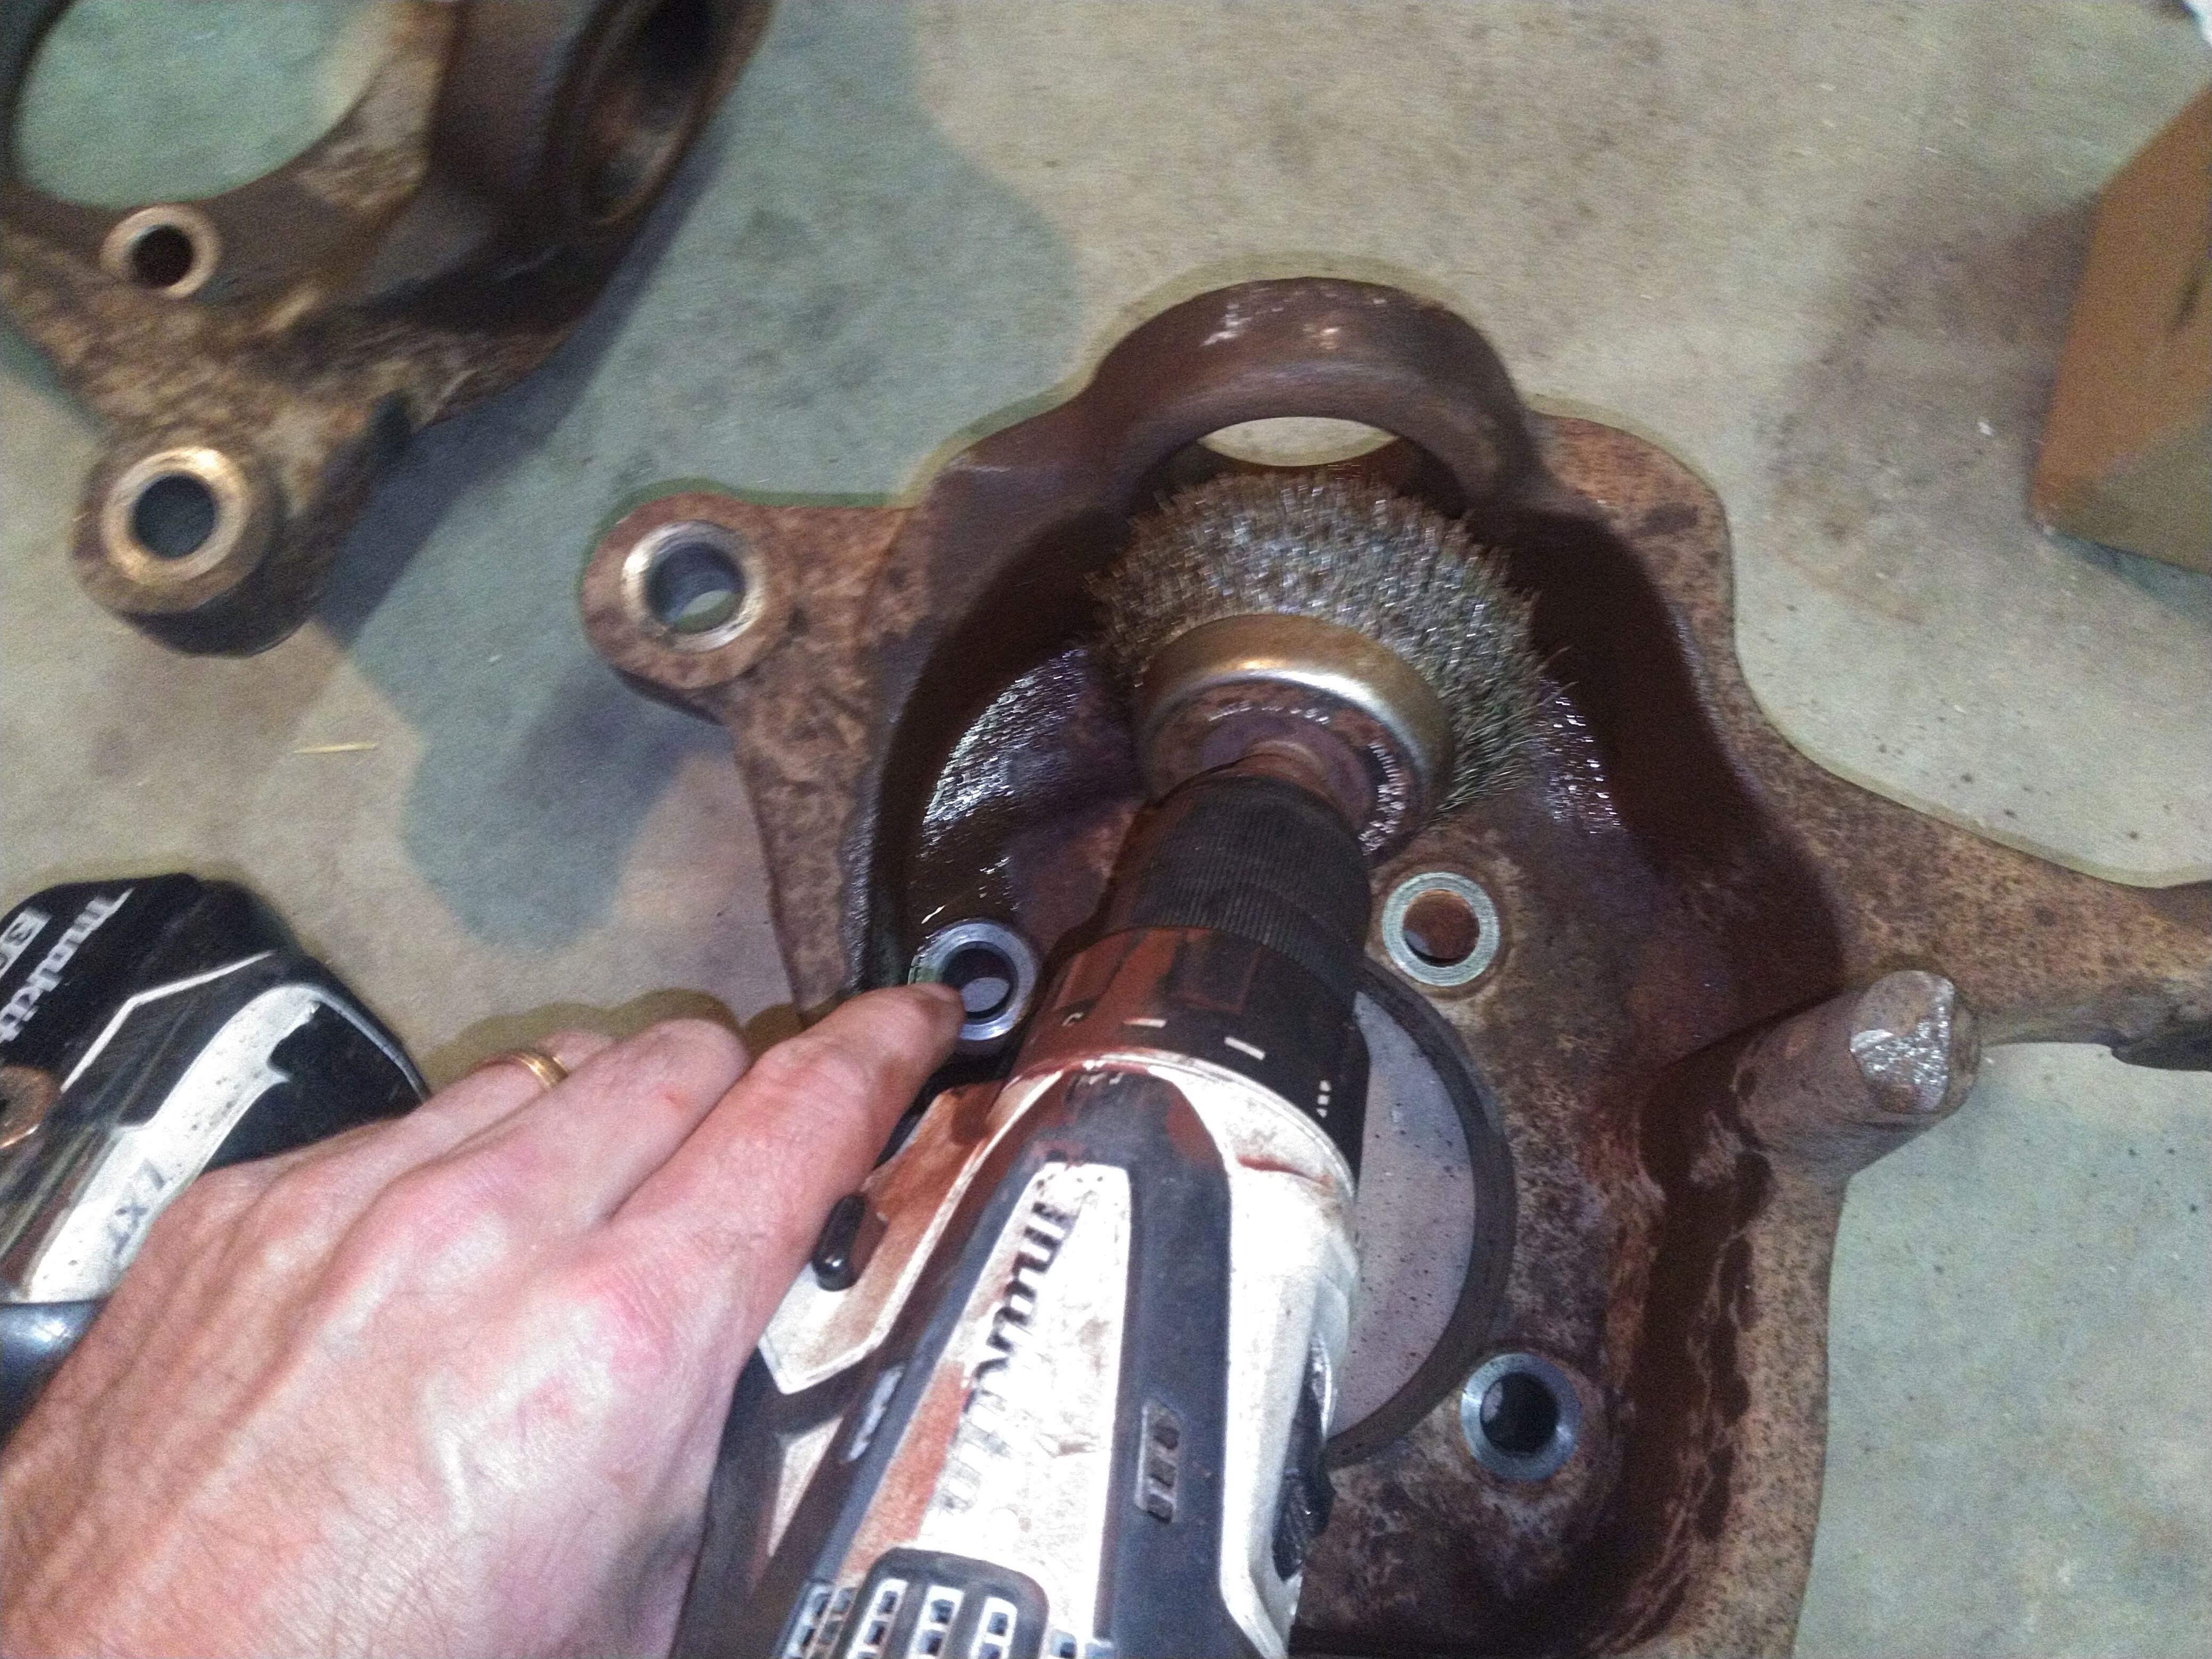
According to the instructions on the new ball joints, to avoid binding and memory steer (from deformation of the metal), the inside of this journal on the steering knuckle needs to be immaculate before pressing the new ball joint into place. This drill mounted wire brush worked great for cleaning out all the rust and dirt.
In keeping with the superb luck I had on finding press arbors laying around the shop on this job, the inner race on the rear wheel bearing was found to fit around the smaller diameter of the ball joint with a slip fit. This was needed since the arbors in the kit would have stacked up too tall for the opening on c-clamp.
The stack up while pressing back on.
The new lower ball joint installed with the snap ring in place. Now on to reassembling the front end.
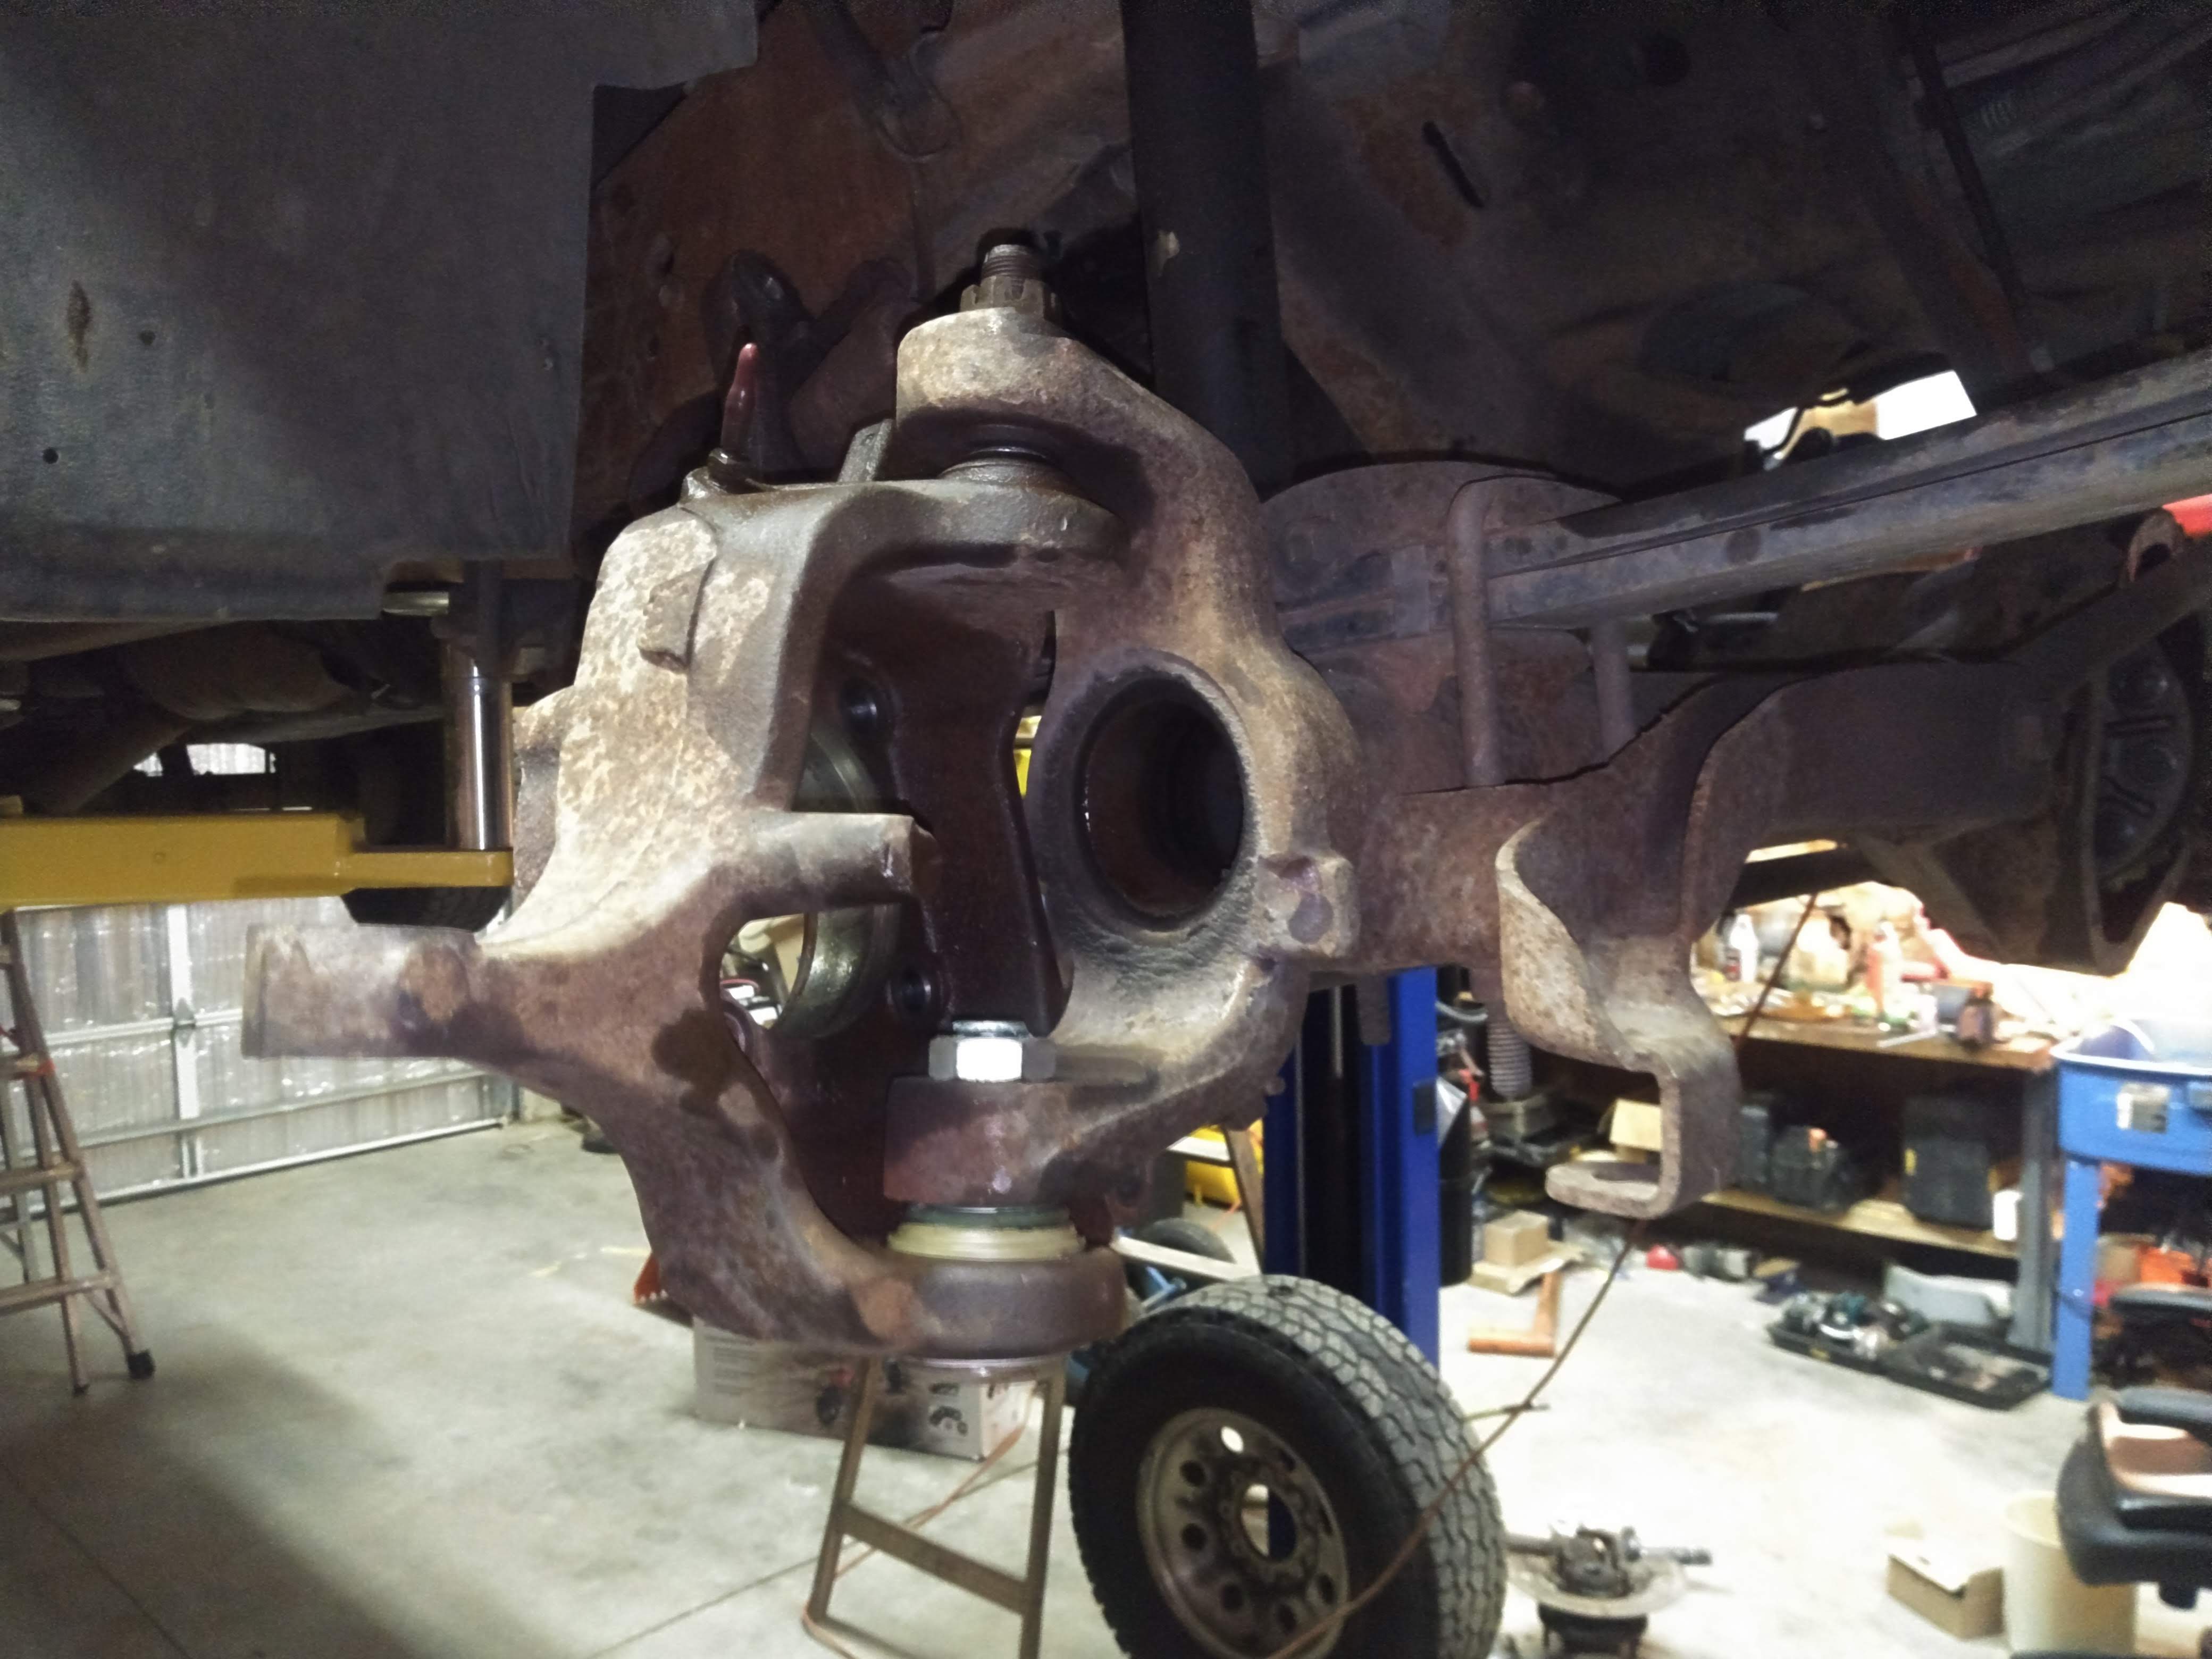
The knuckle bolted back into place on the axle. I have to admit I always enjoy looking at shiny new parts installed. There's just something about it.

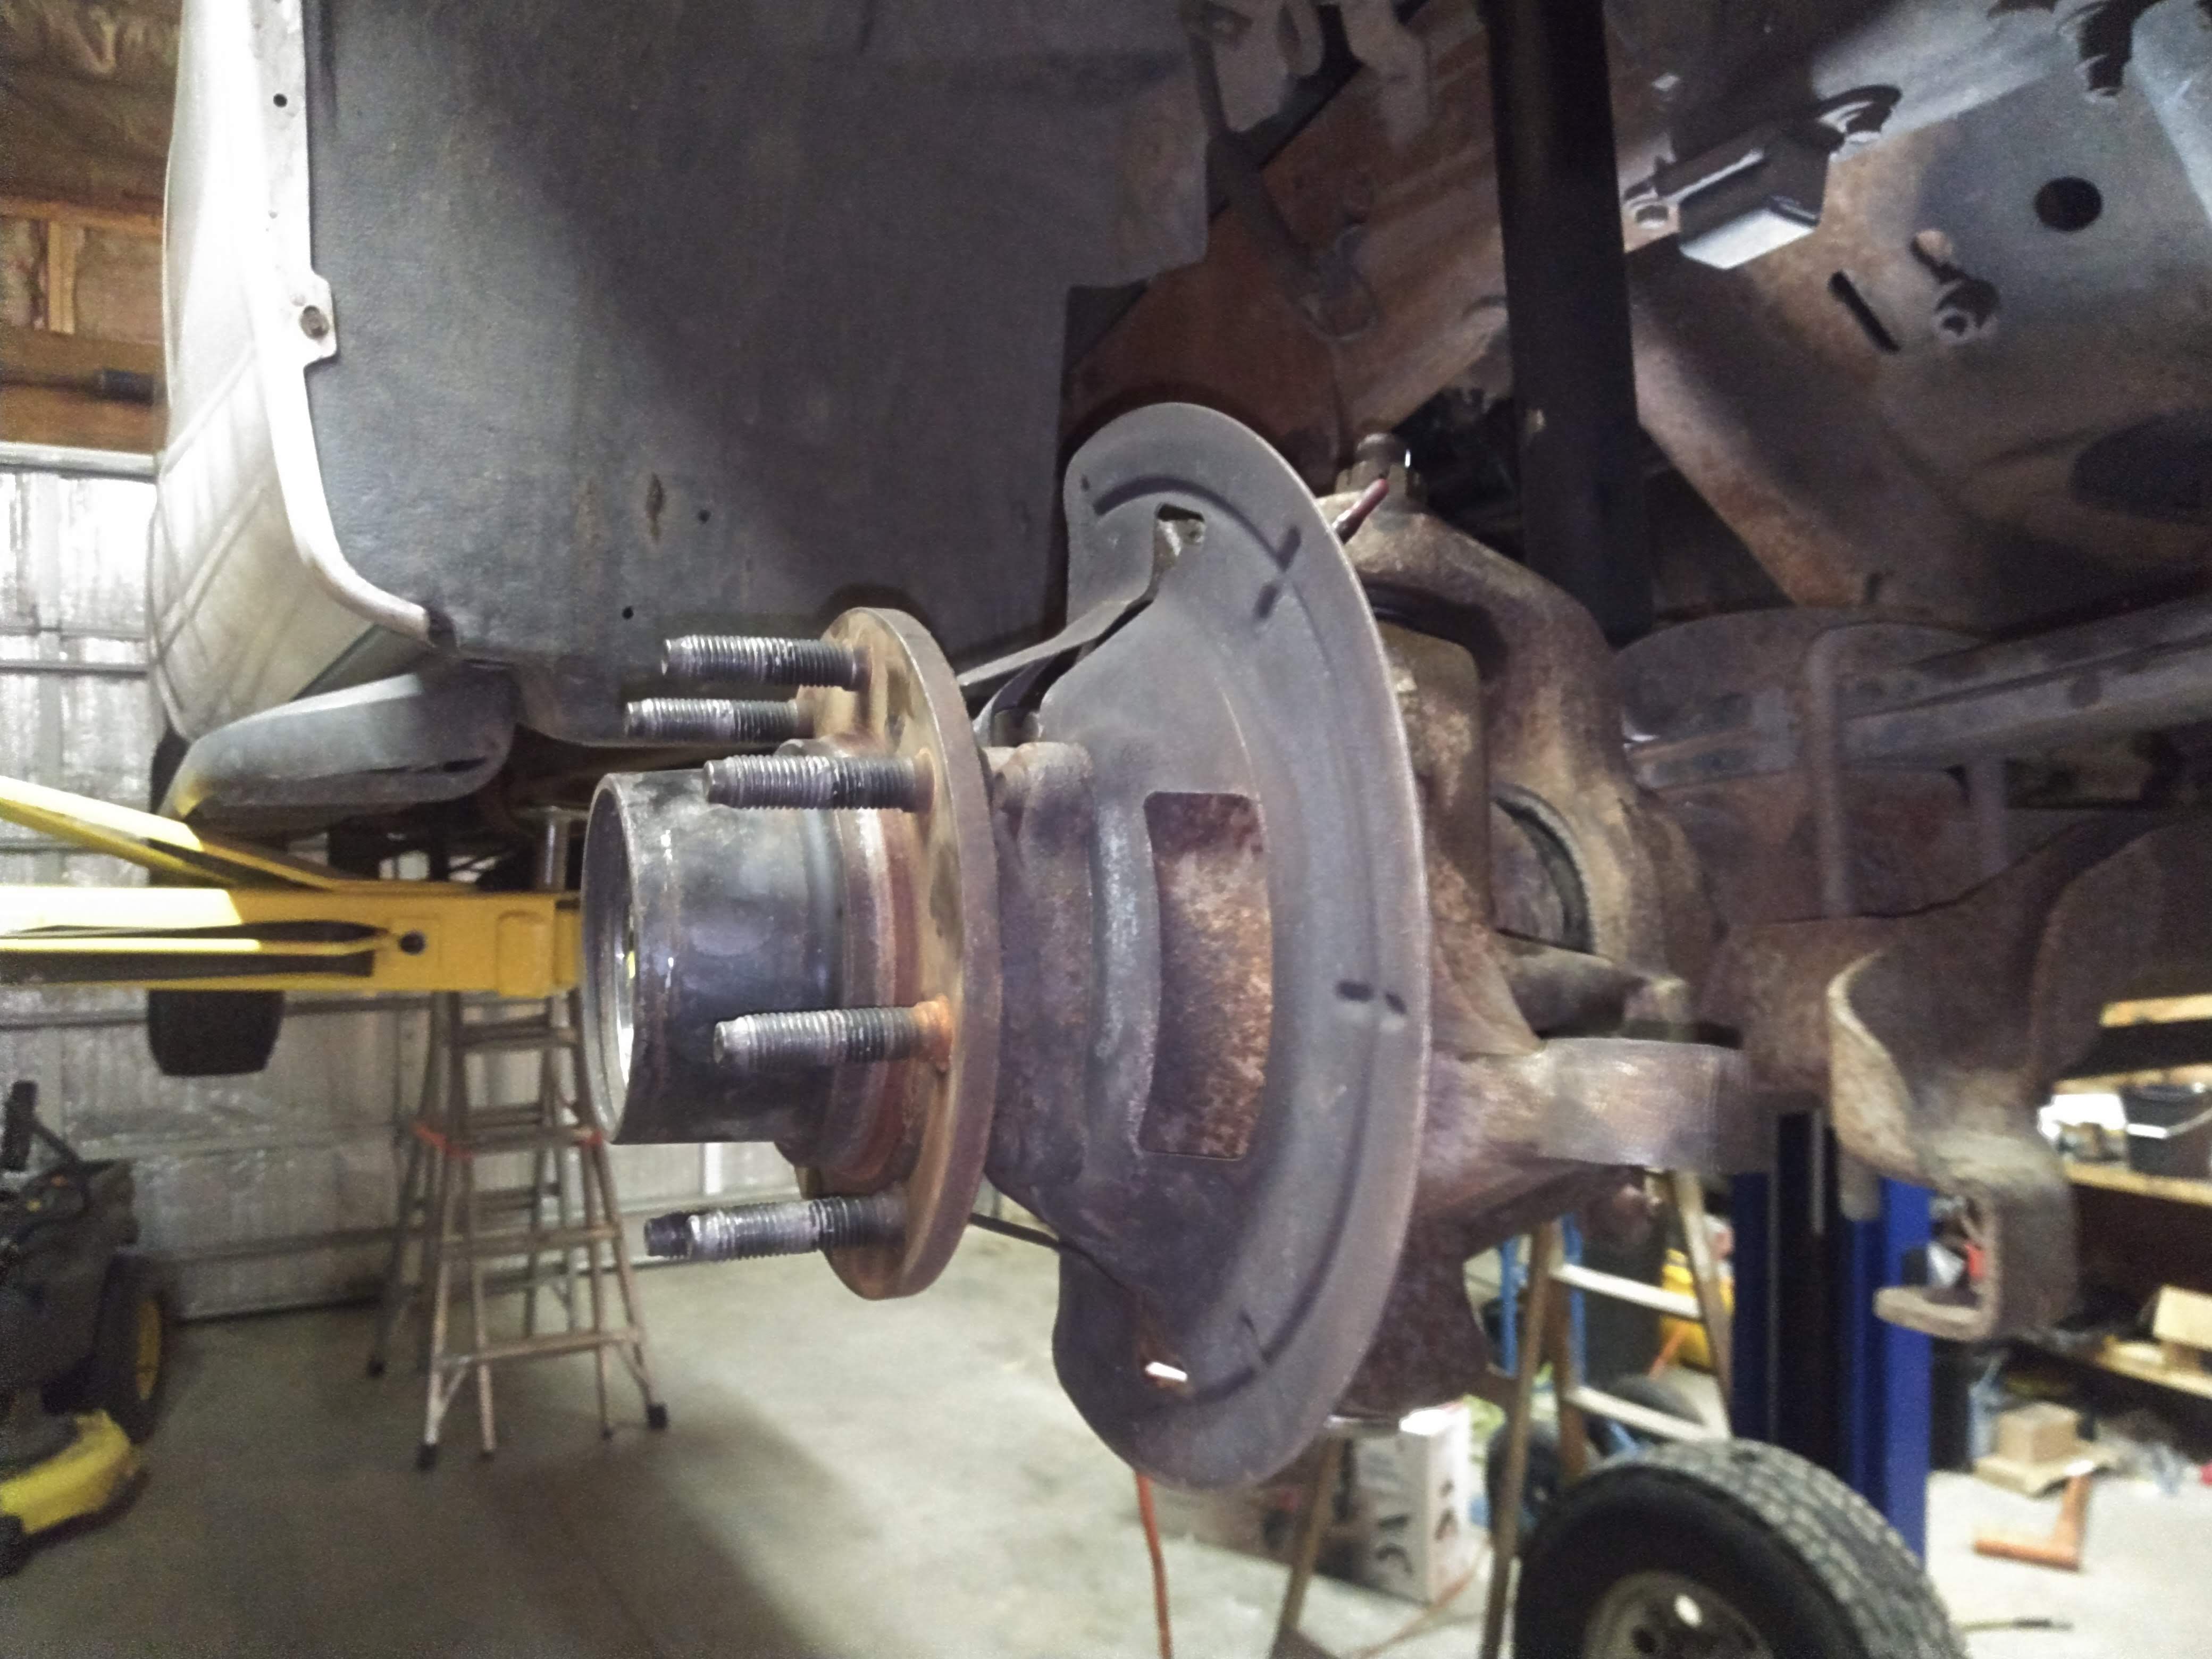
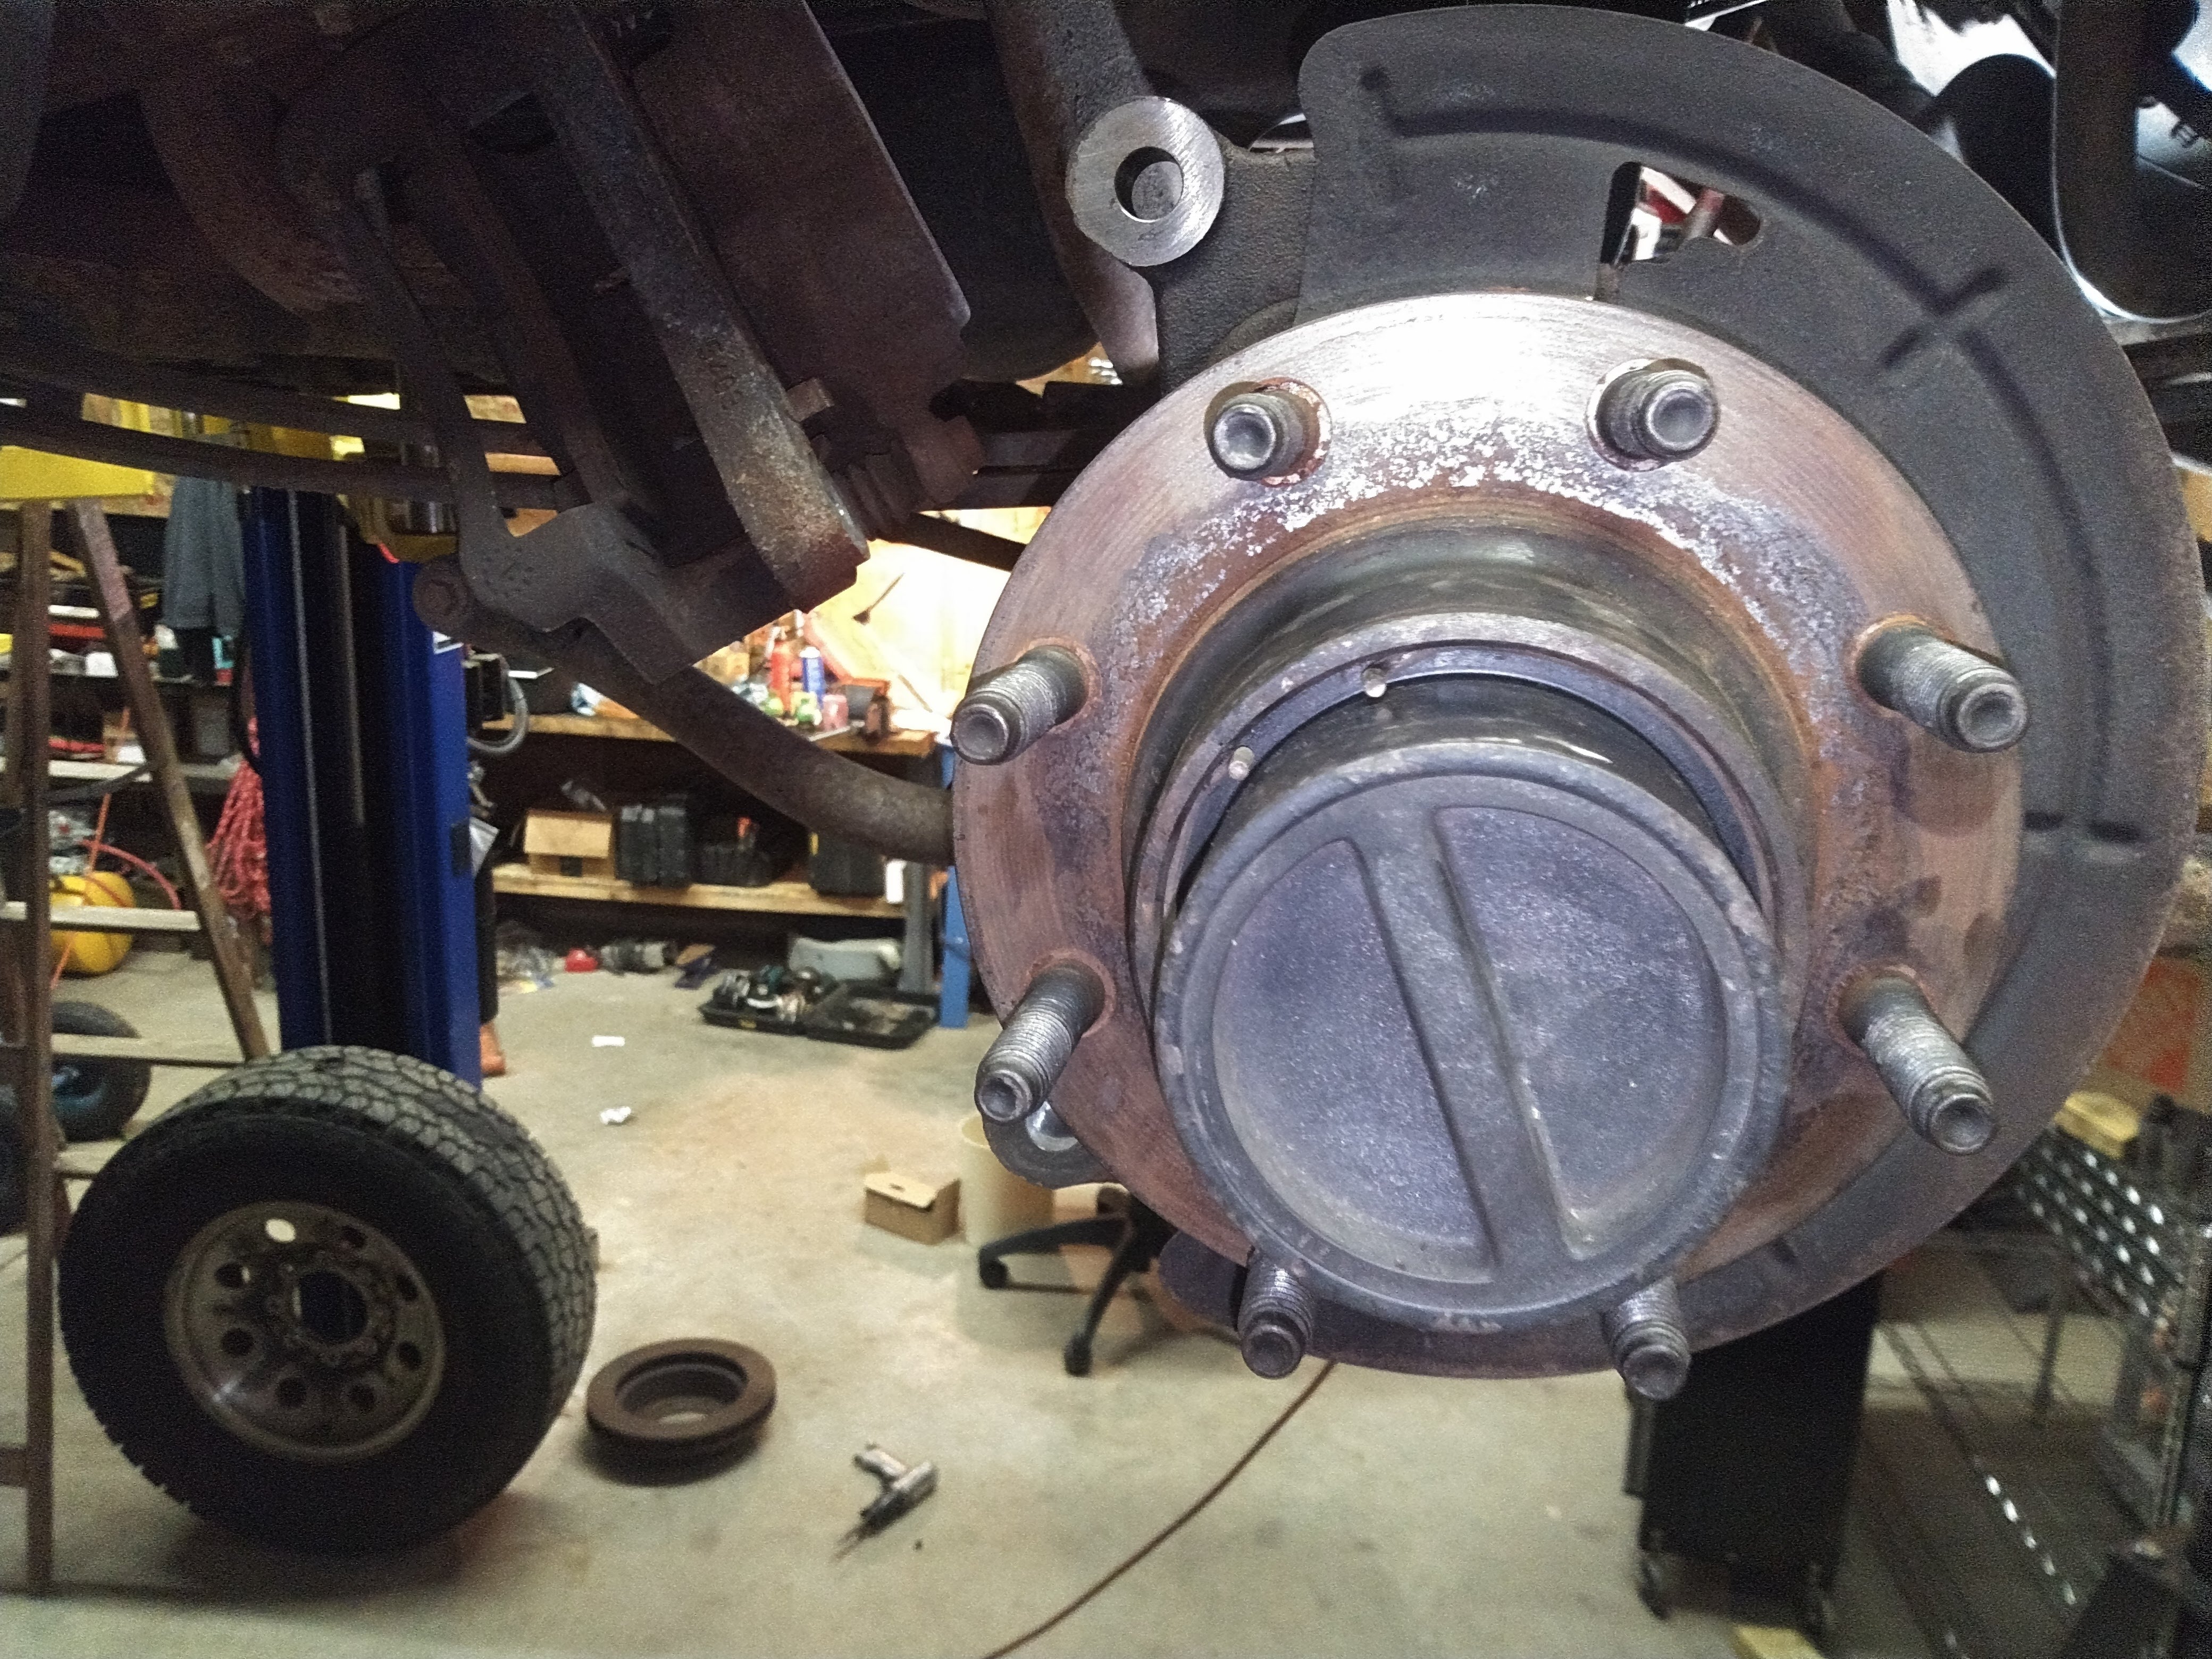
Axles were slid into place, hubs bolted on and the hub locks were re-assembled.
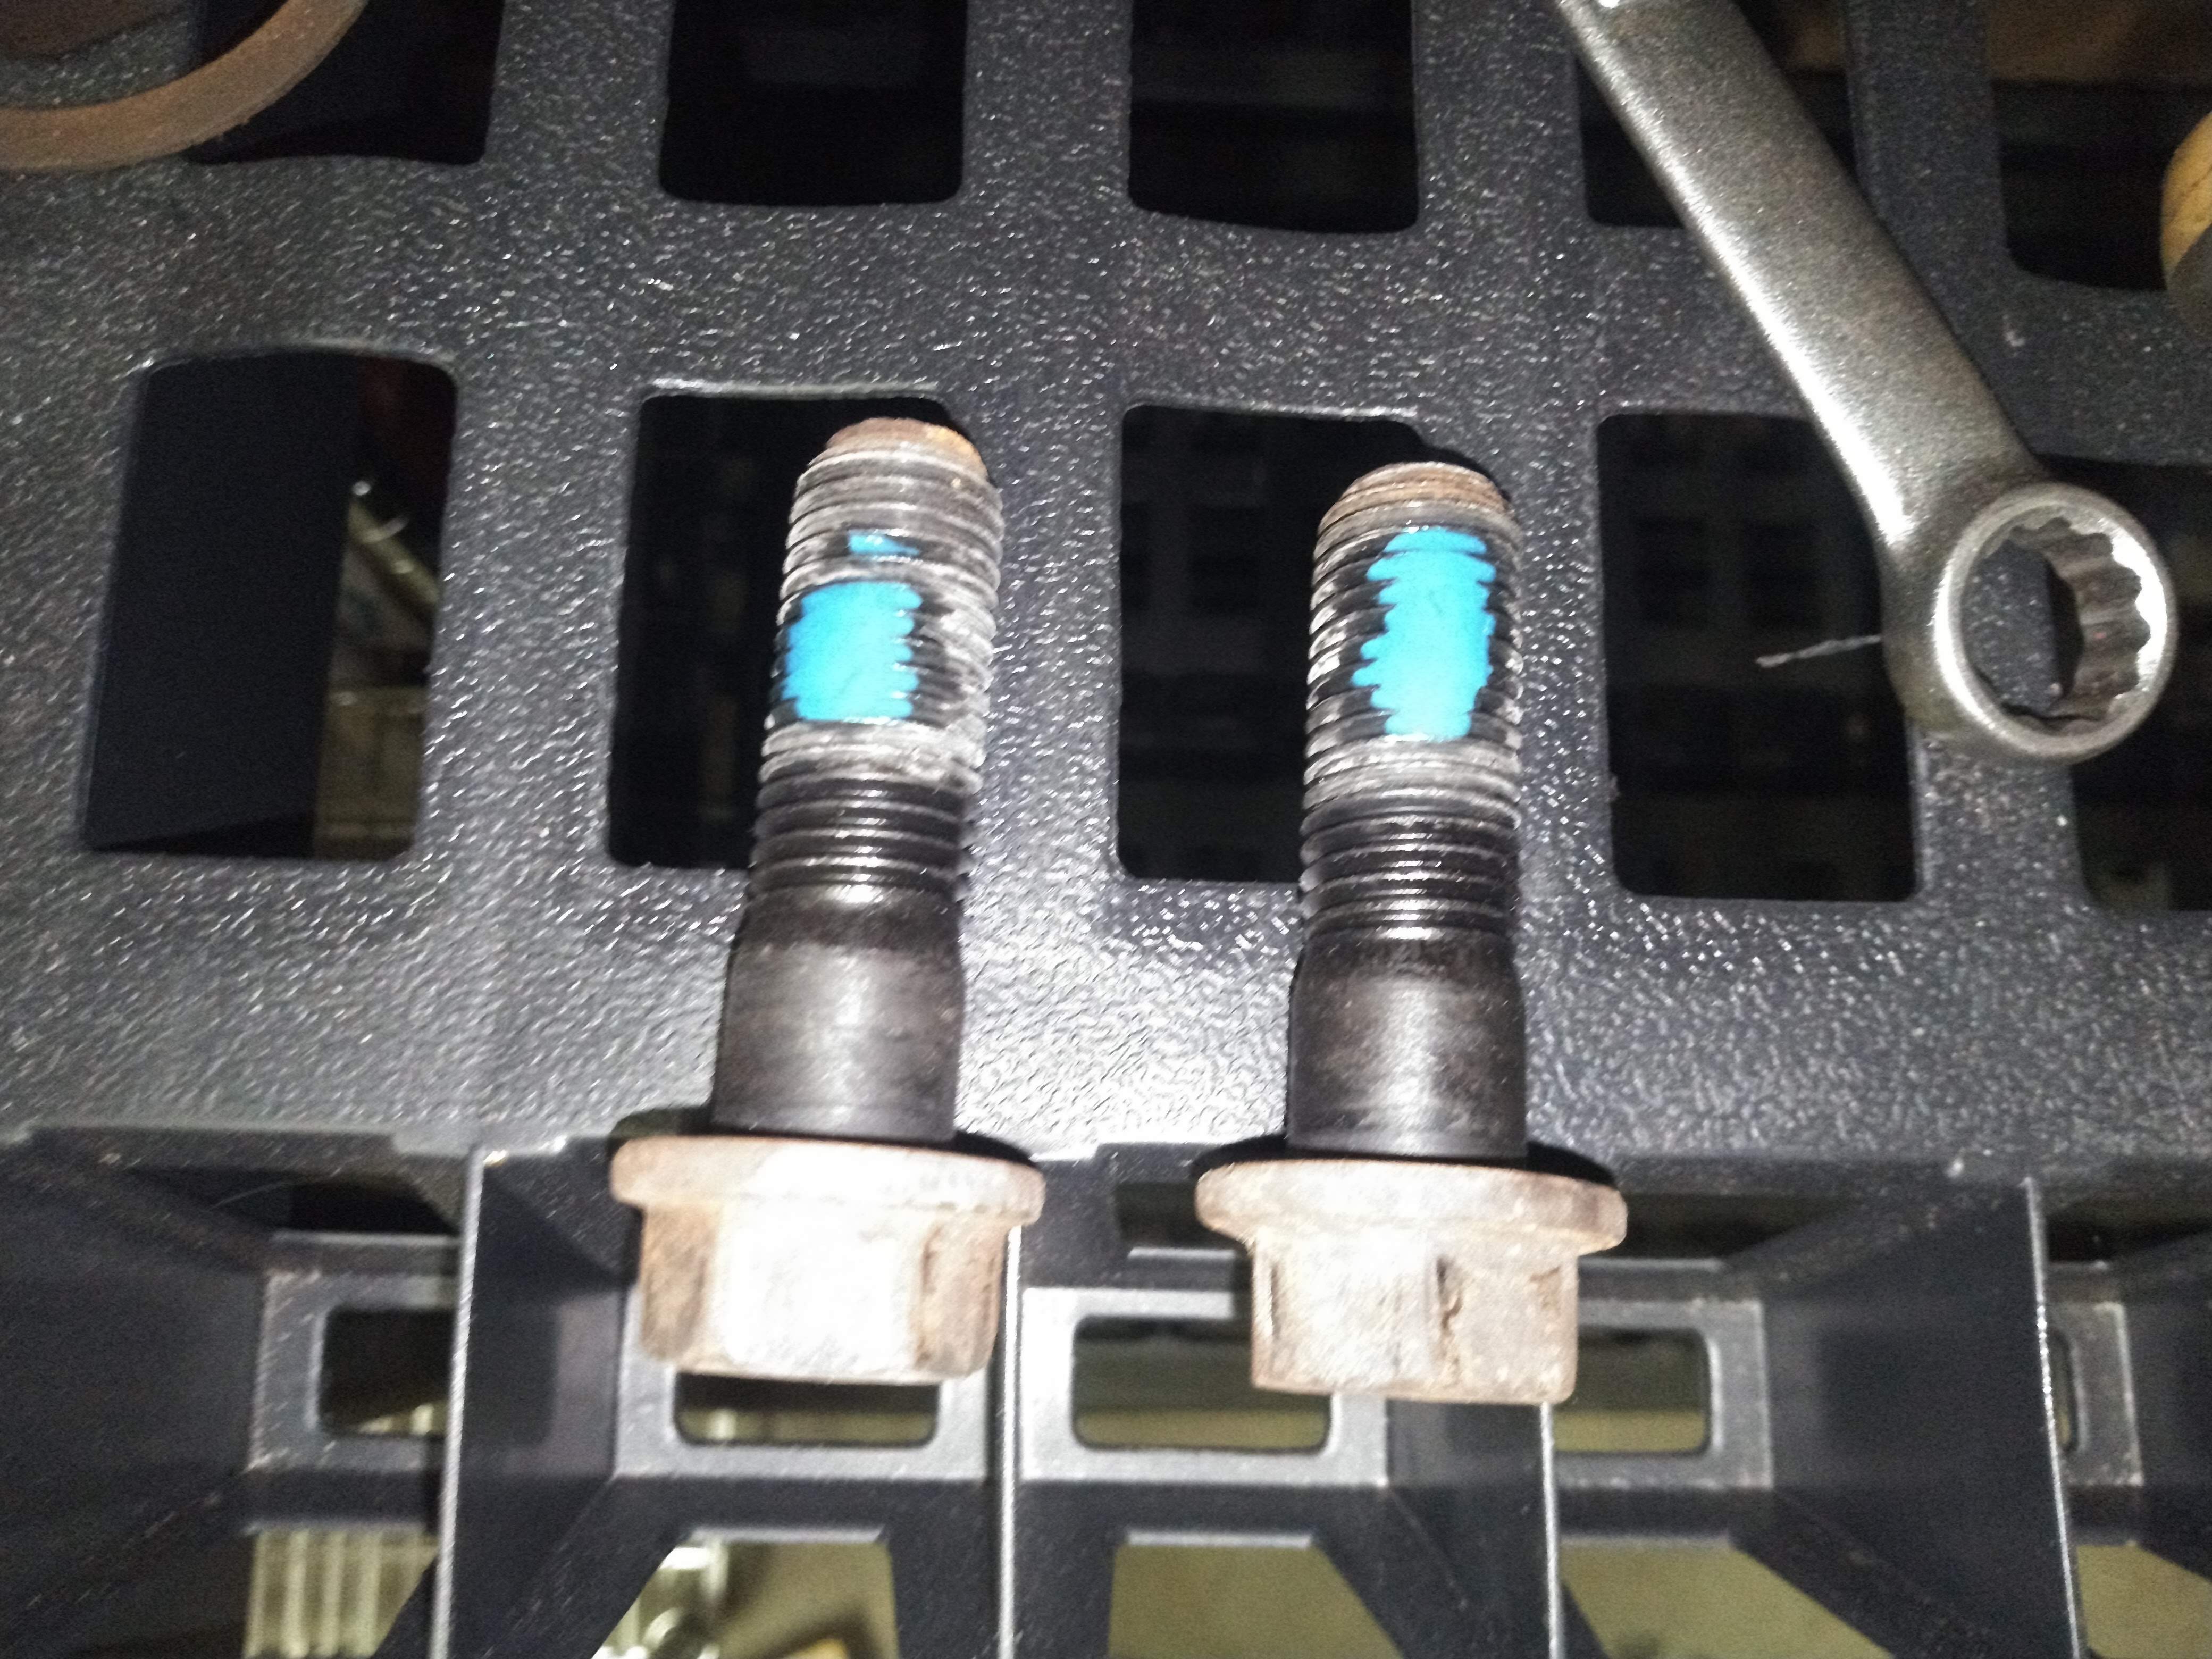
Since brake operation is so critical, I always dab a little blue loctite on the threads of these bracket bolts during reassembly. This will keep these bolts from vibrating free and will even help keep corrosion out because it has a sealant effect. The rotors were cleaned and put into place, then the calipers were bolted back into place.
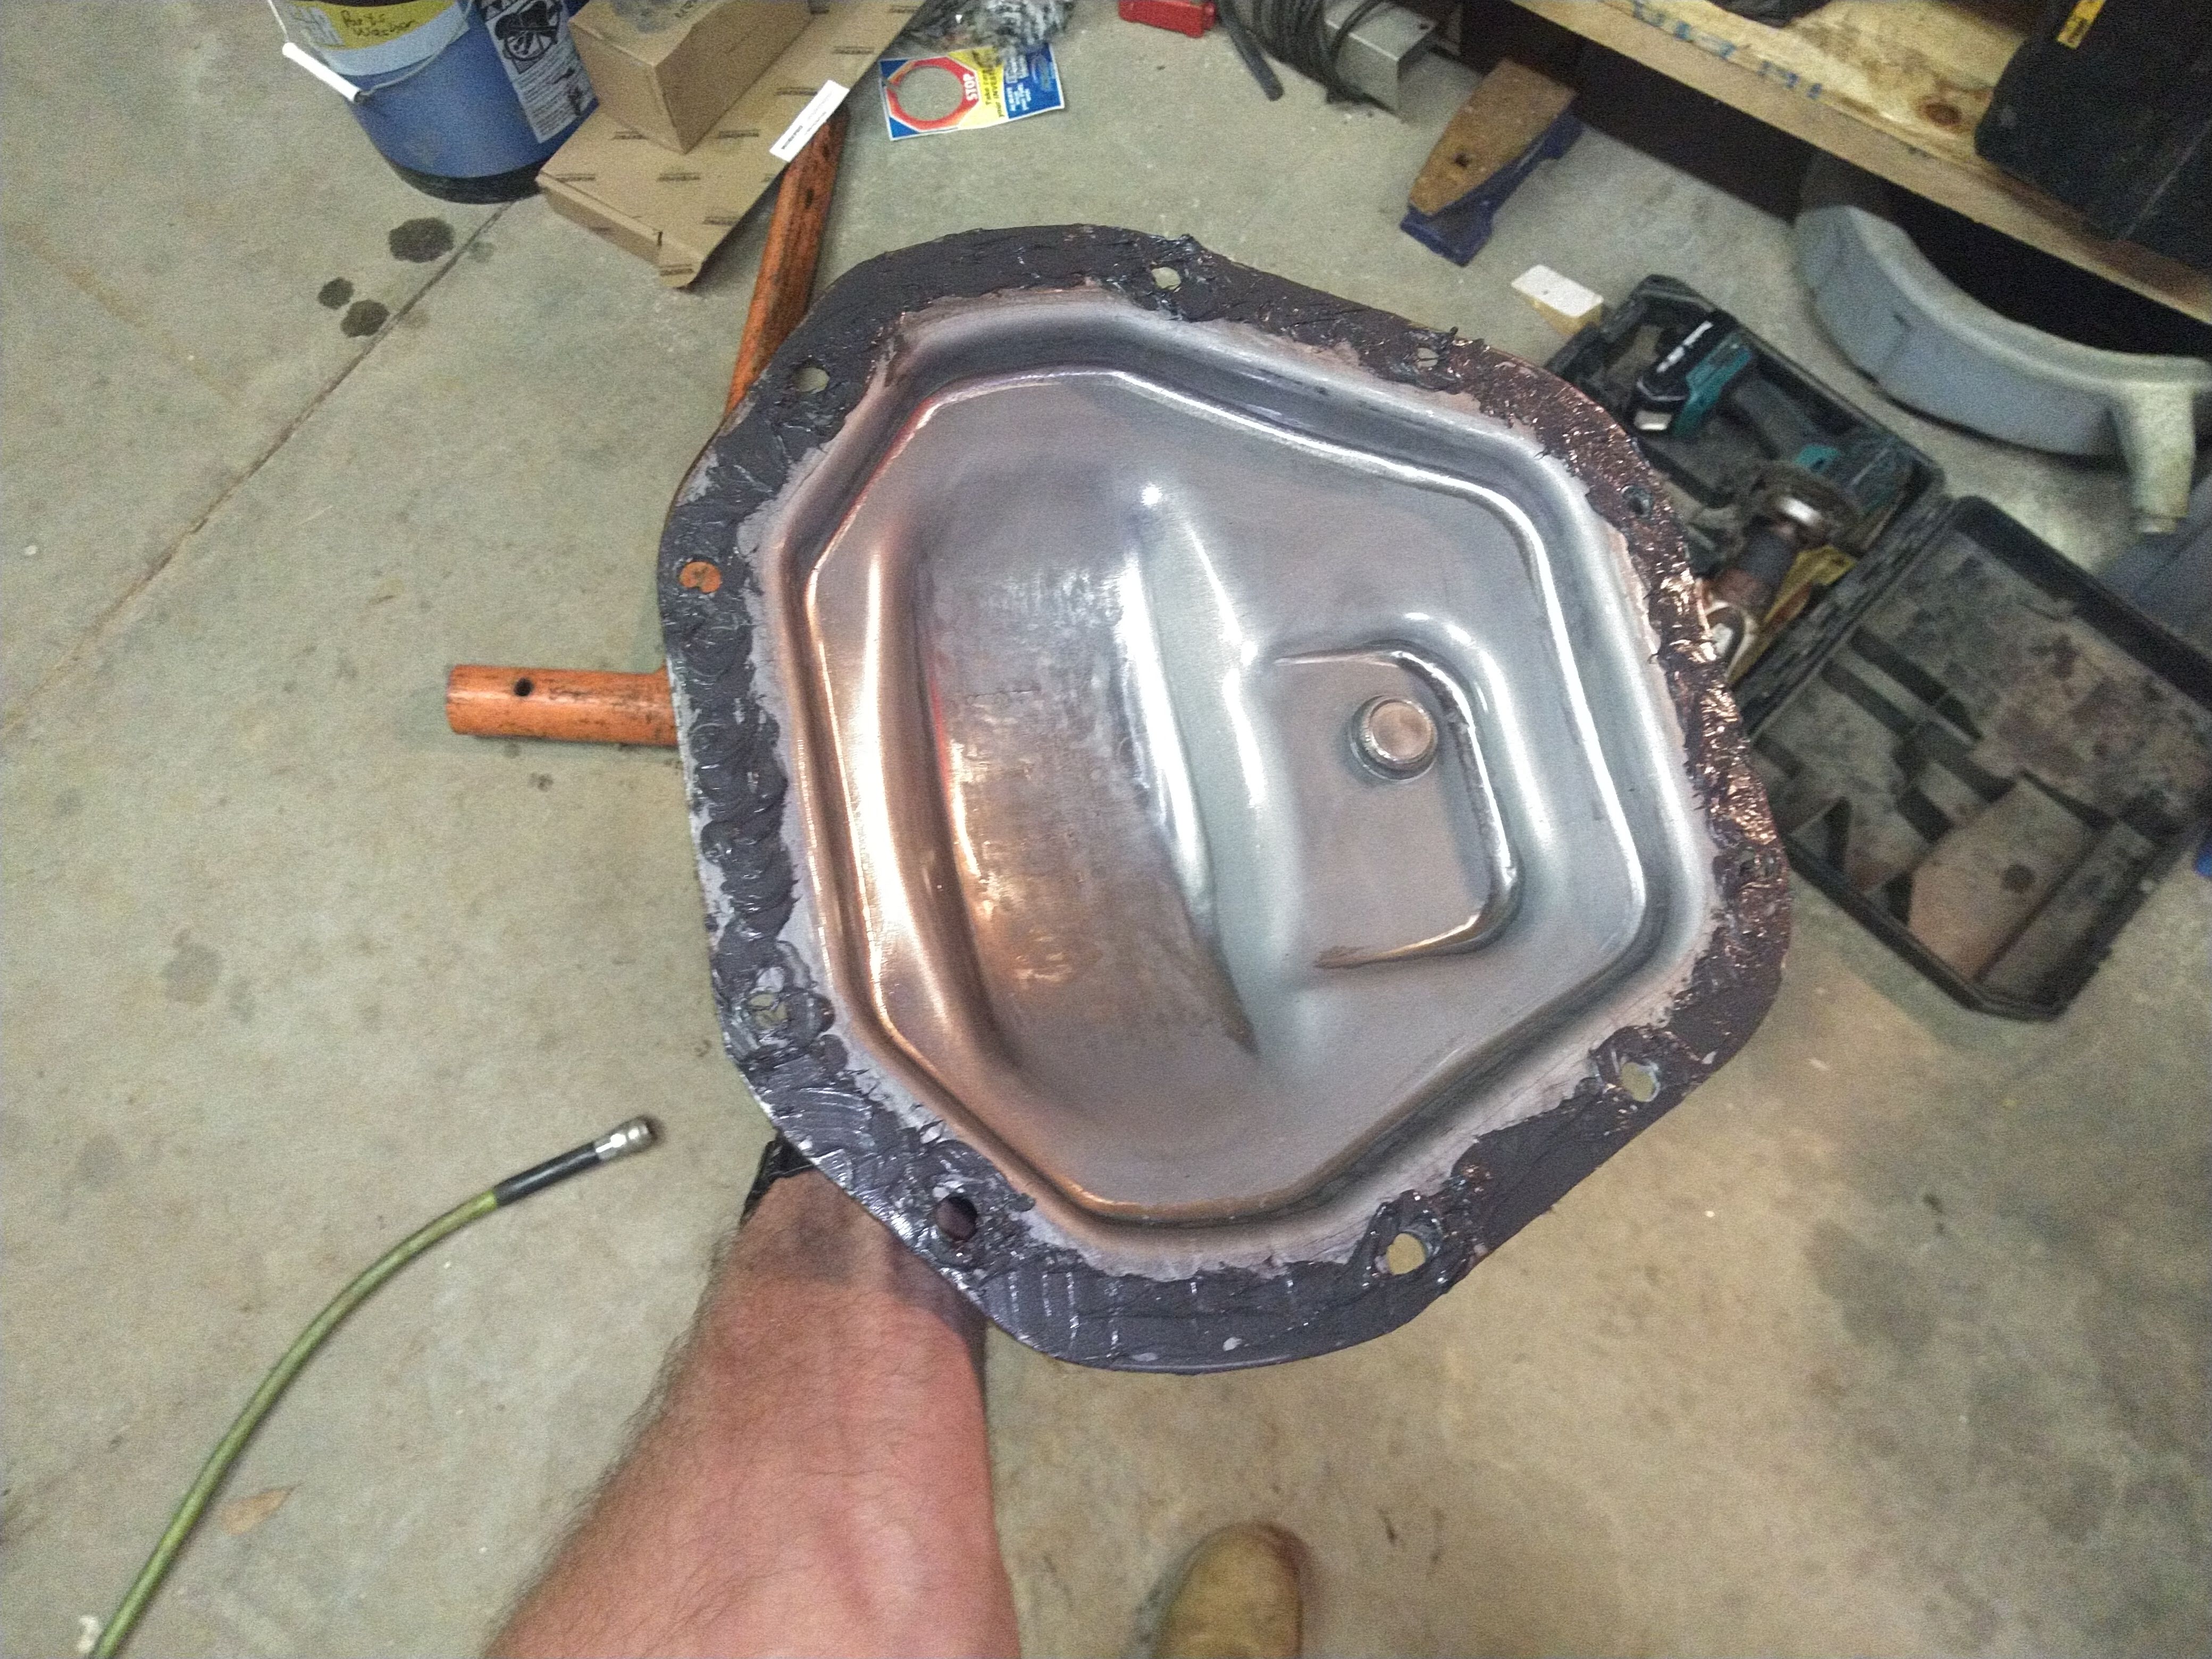
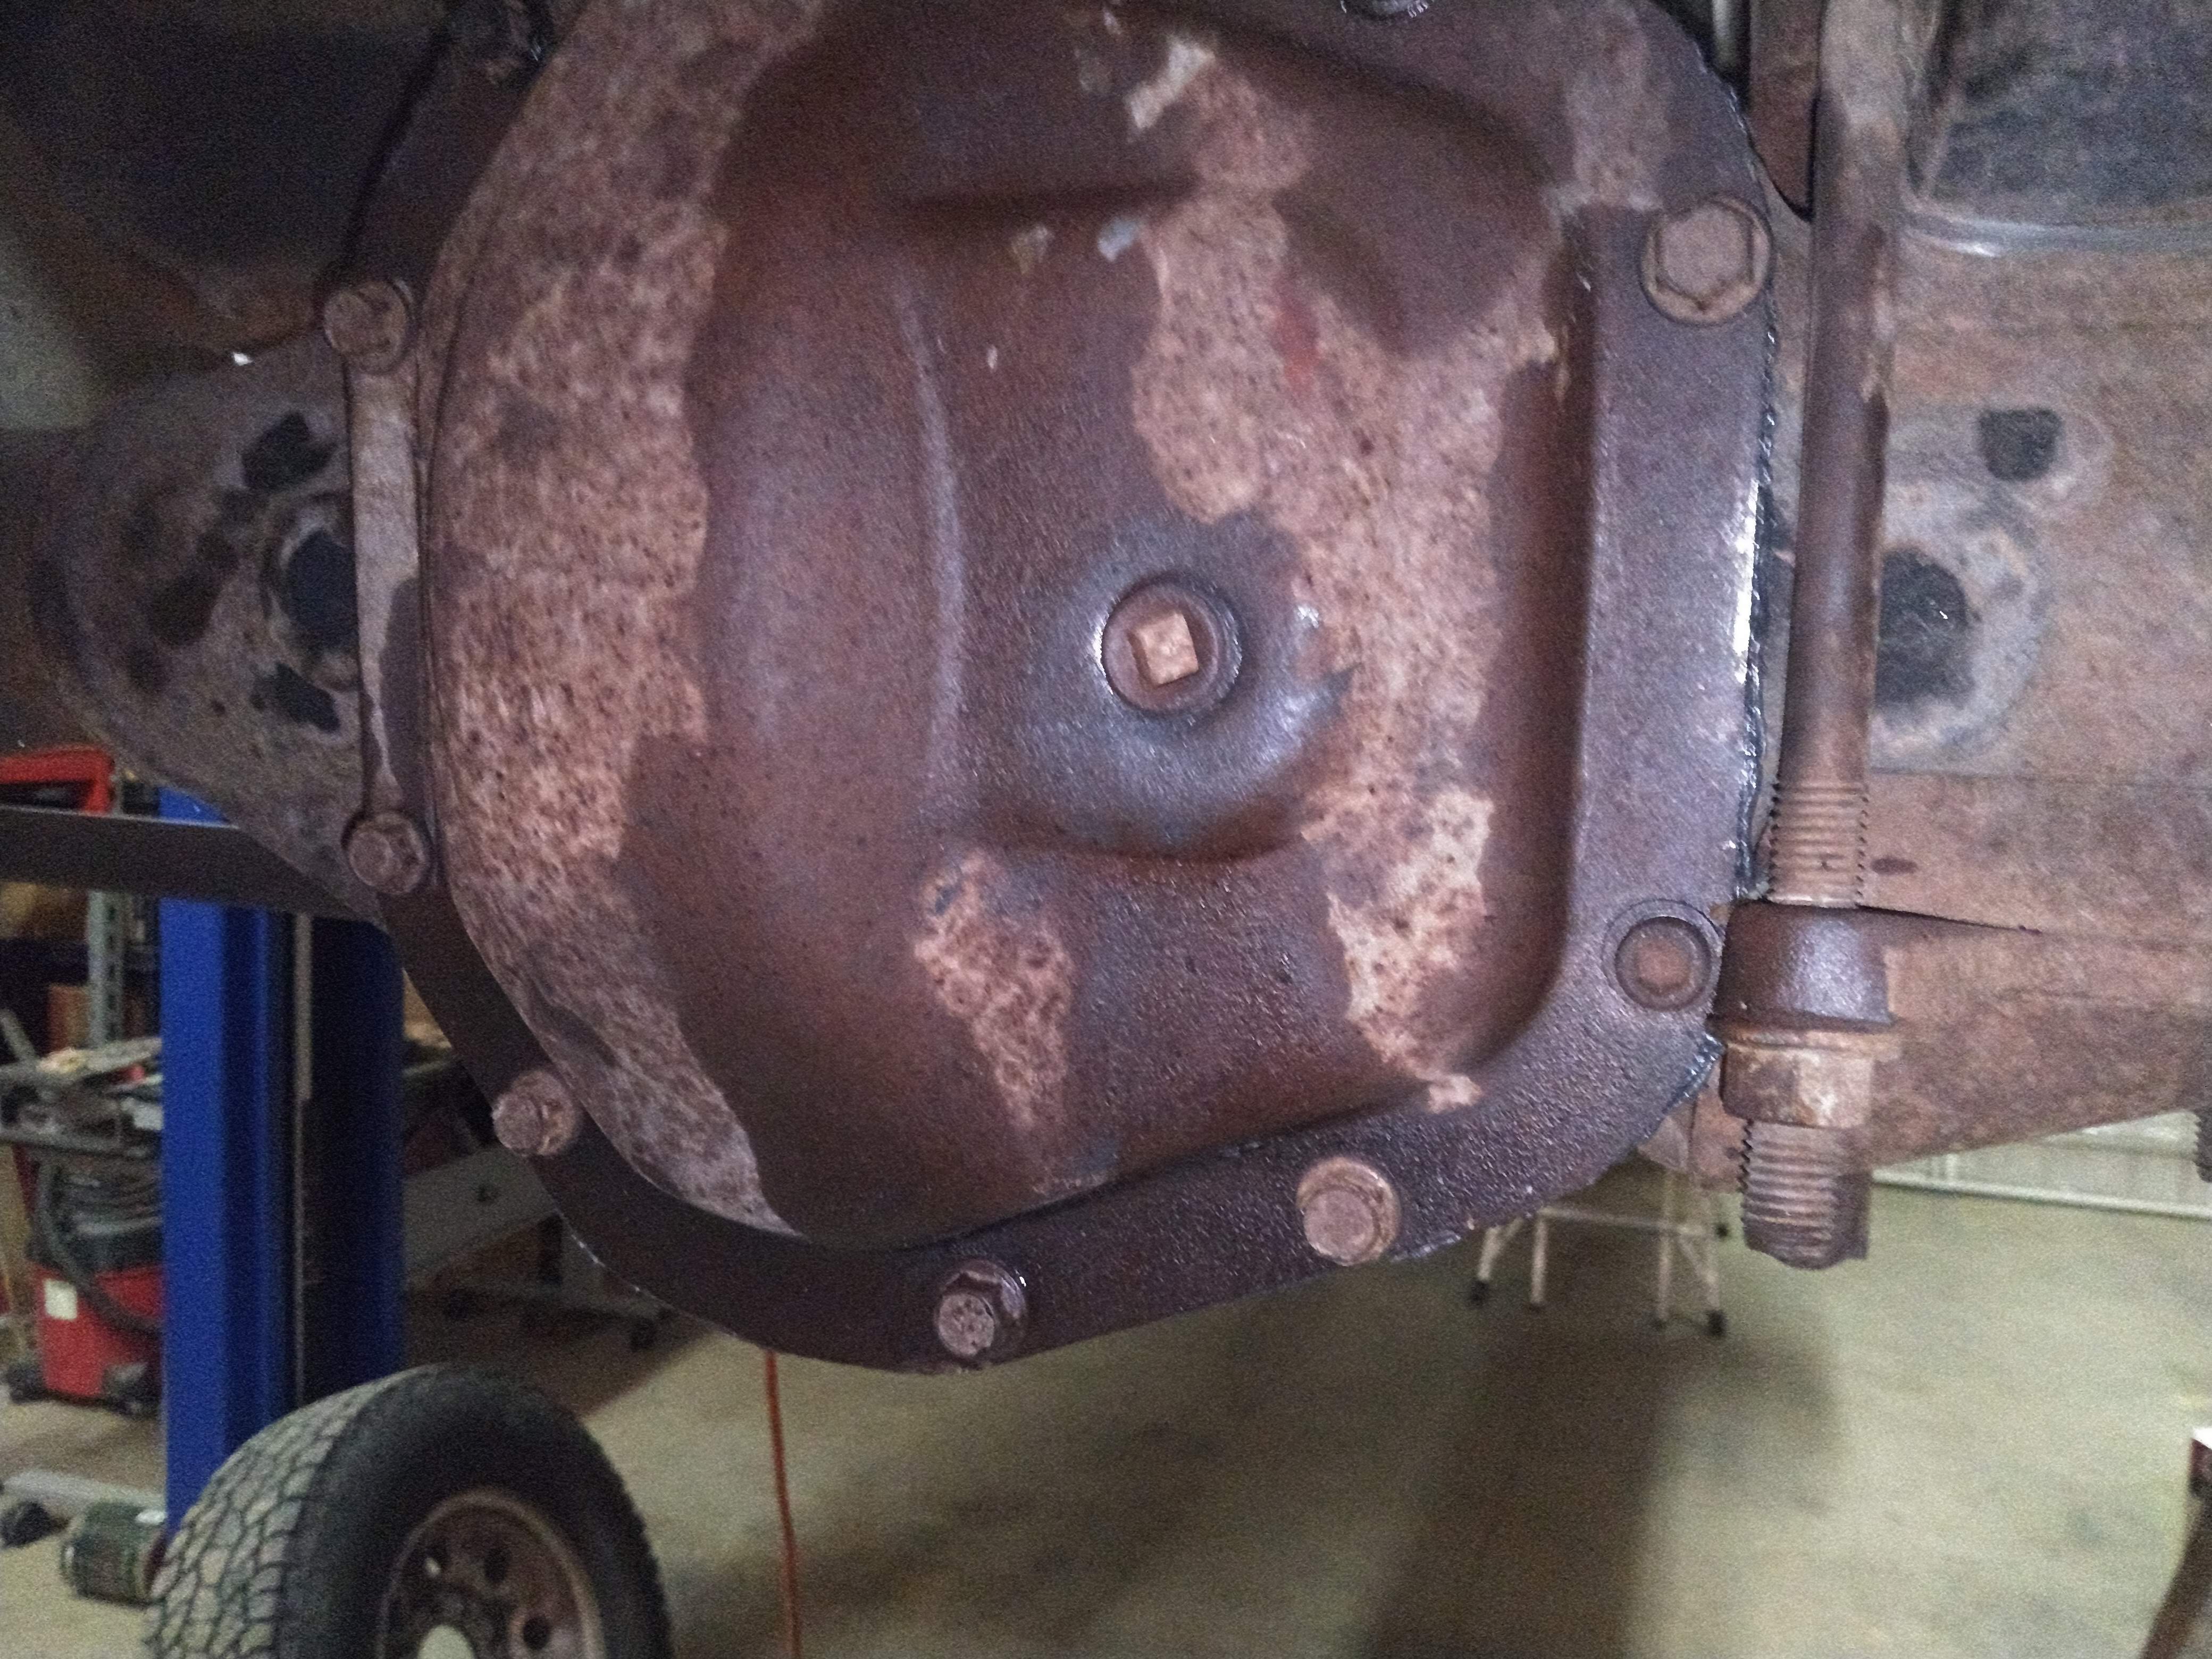
The RTV silicone gasket for the diff cover was remade with stuff I had on hand. After the axles were in, before I did any assembly, the RTV was applied and the cover was put on finger tight to let the silicone cure up a bit. This helps with sealing because the silicone will have a bit more meat to it. The bolts were torqued down on the diff cover and it was filled with gear oil right before the steering arms went together.
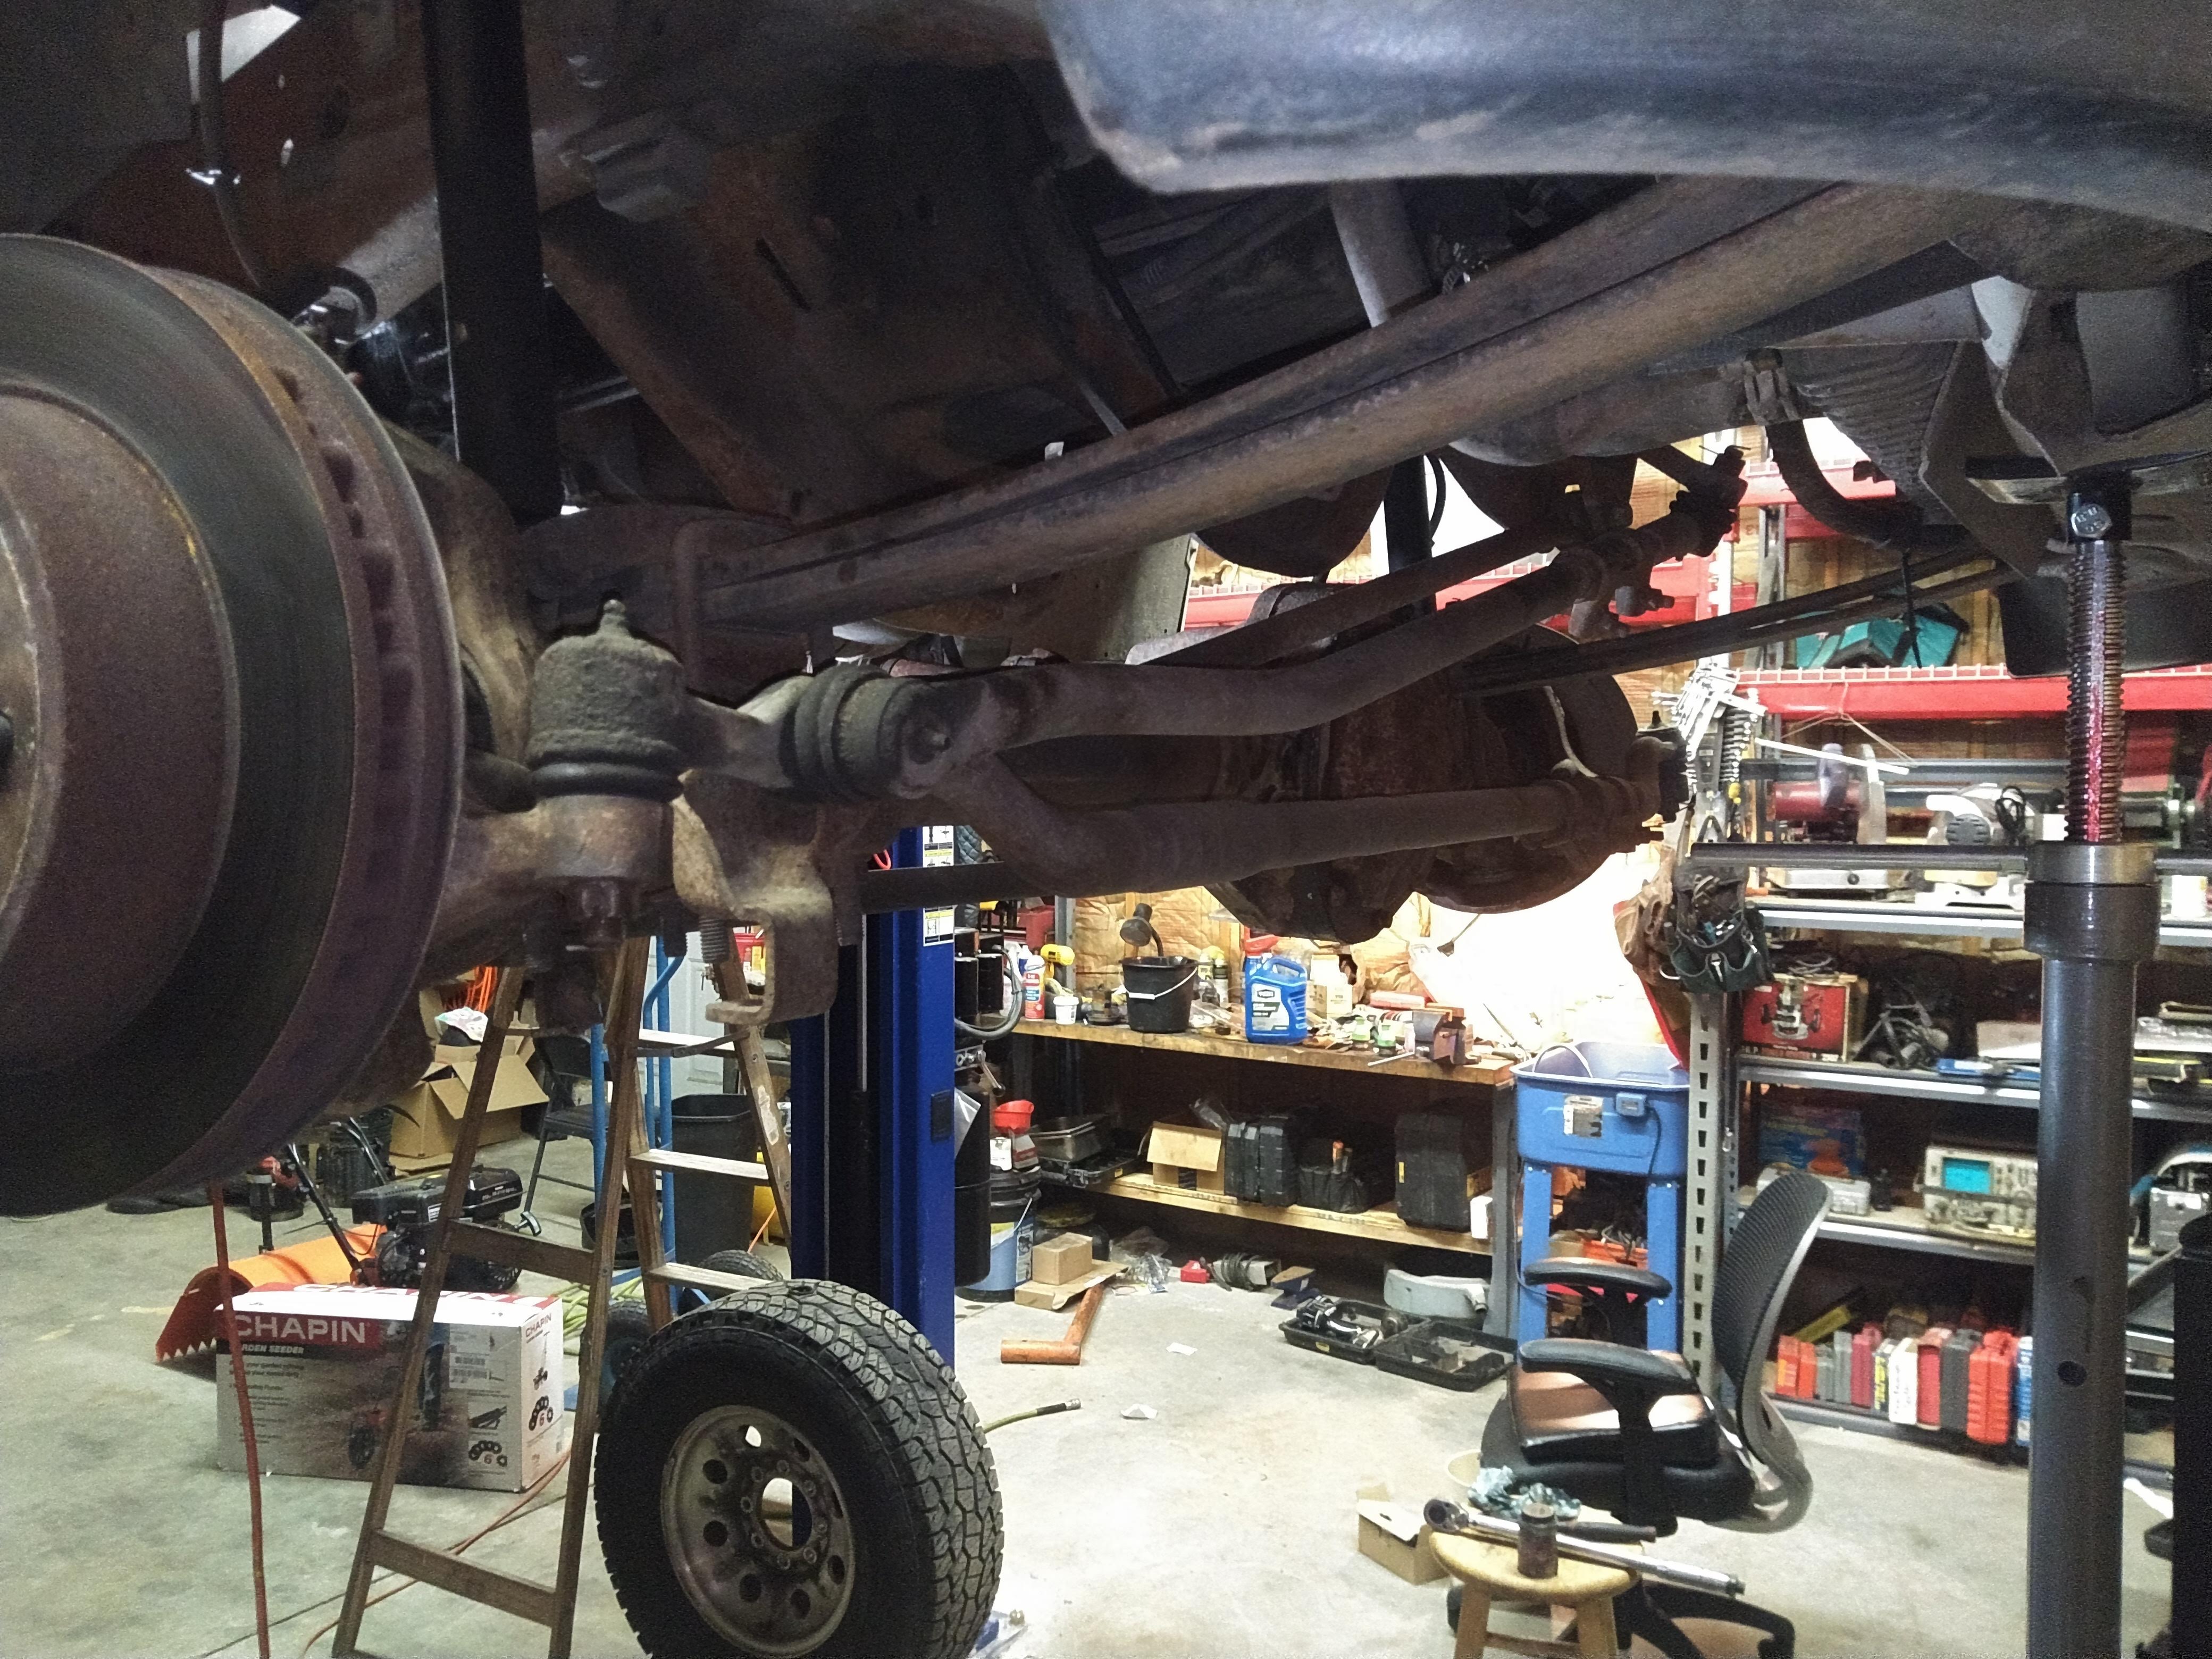
With the steering arms on all that was left after putting the wheels on was to test this baby out.
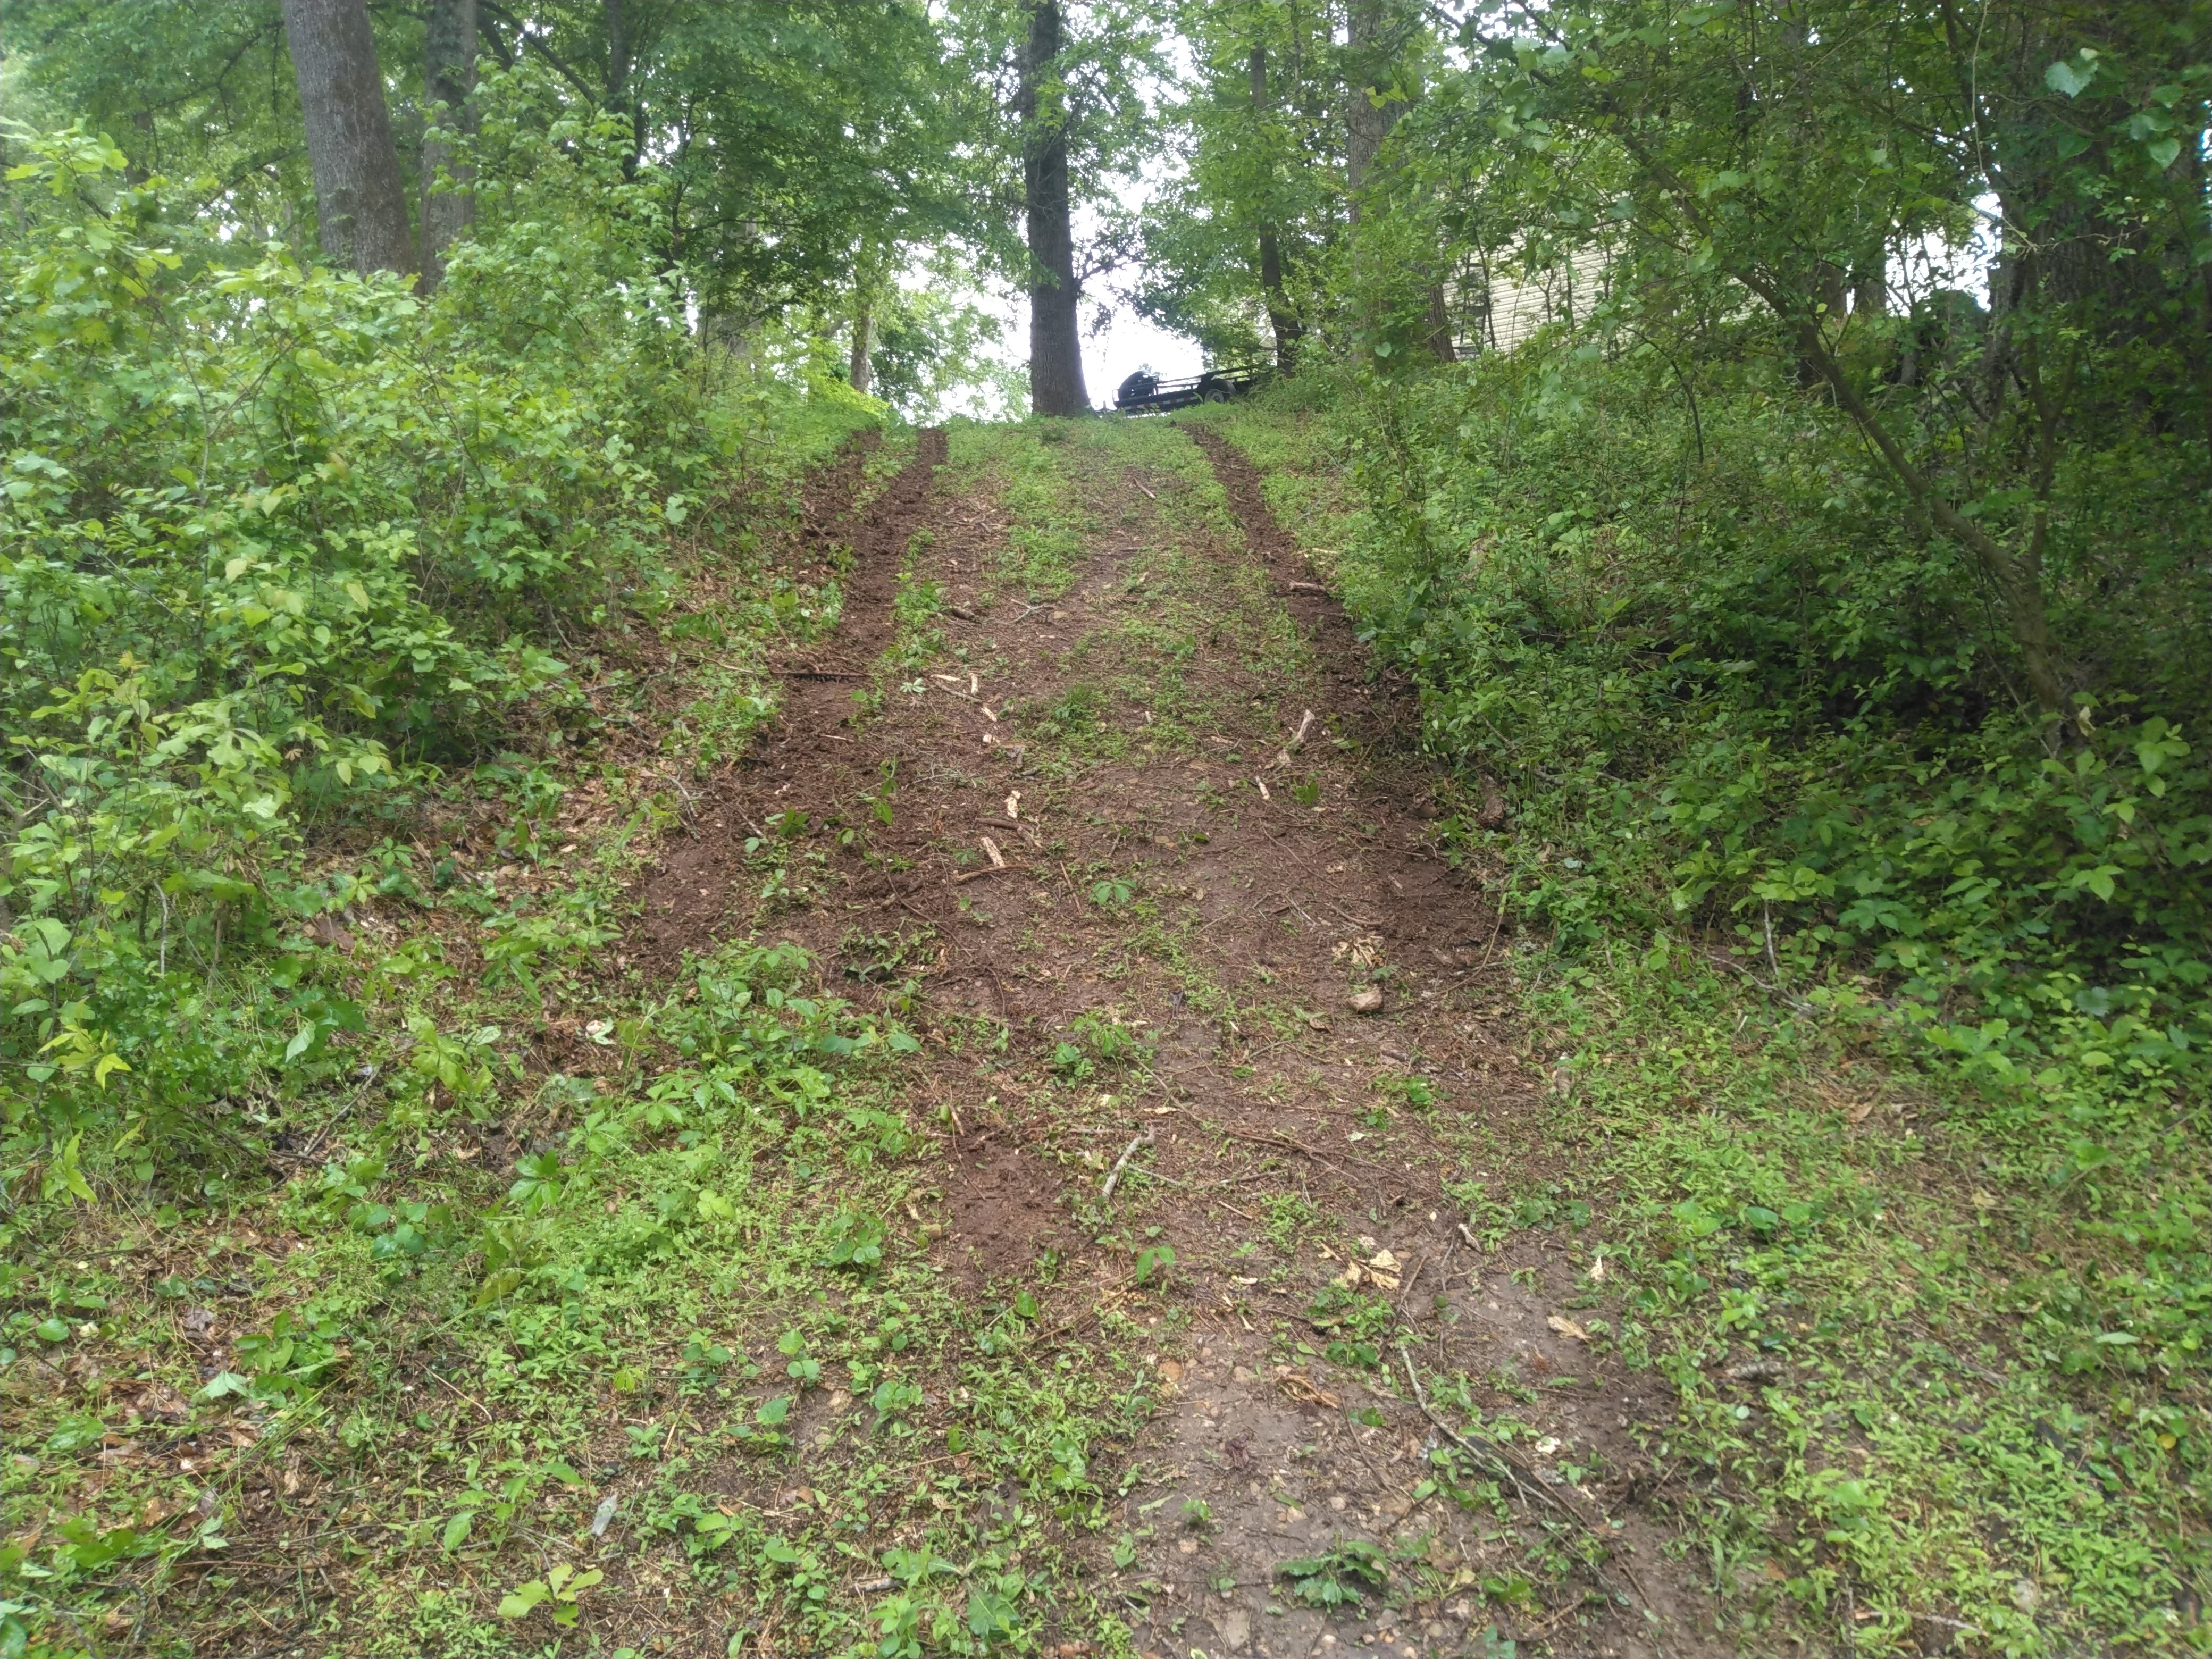
This is probably the steepest hill on my property. I chose it because my little lawnmower with turf tires on it won't make it up this when it's wet even without the trailer behind it. I took the truck down near the creek bed for the first time now with the 4x4 working, and turned it around for this hill climb. During the maneuvering down there in that soft sand, the tires never even thought about spinning with the limited slip rear combined with 4x4 engaged. About halfway up this hill I noticed that the truck was having zero issues climbing, so I goosed the throttle for a little bit of fun. The tires did spin up but I was surprised with how well it maintained traction, and it zipped right up. I'd call that a successful test.
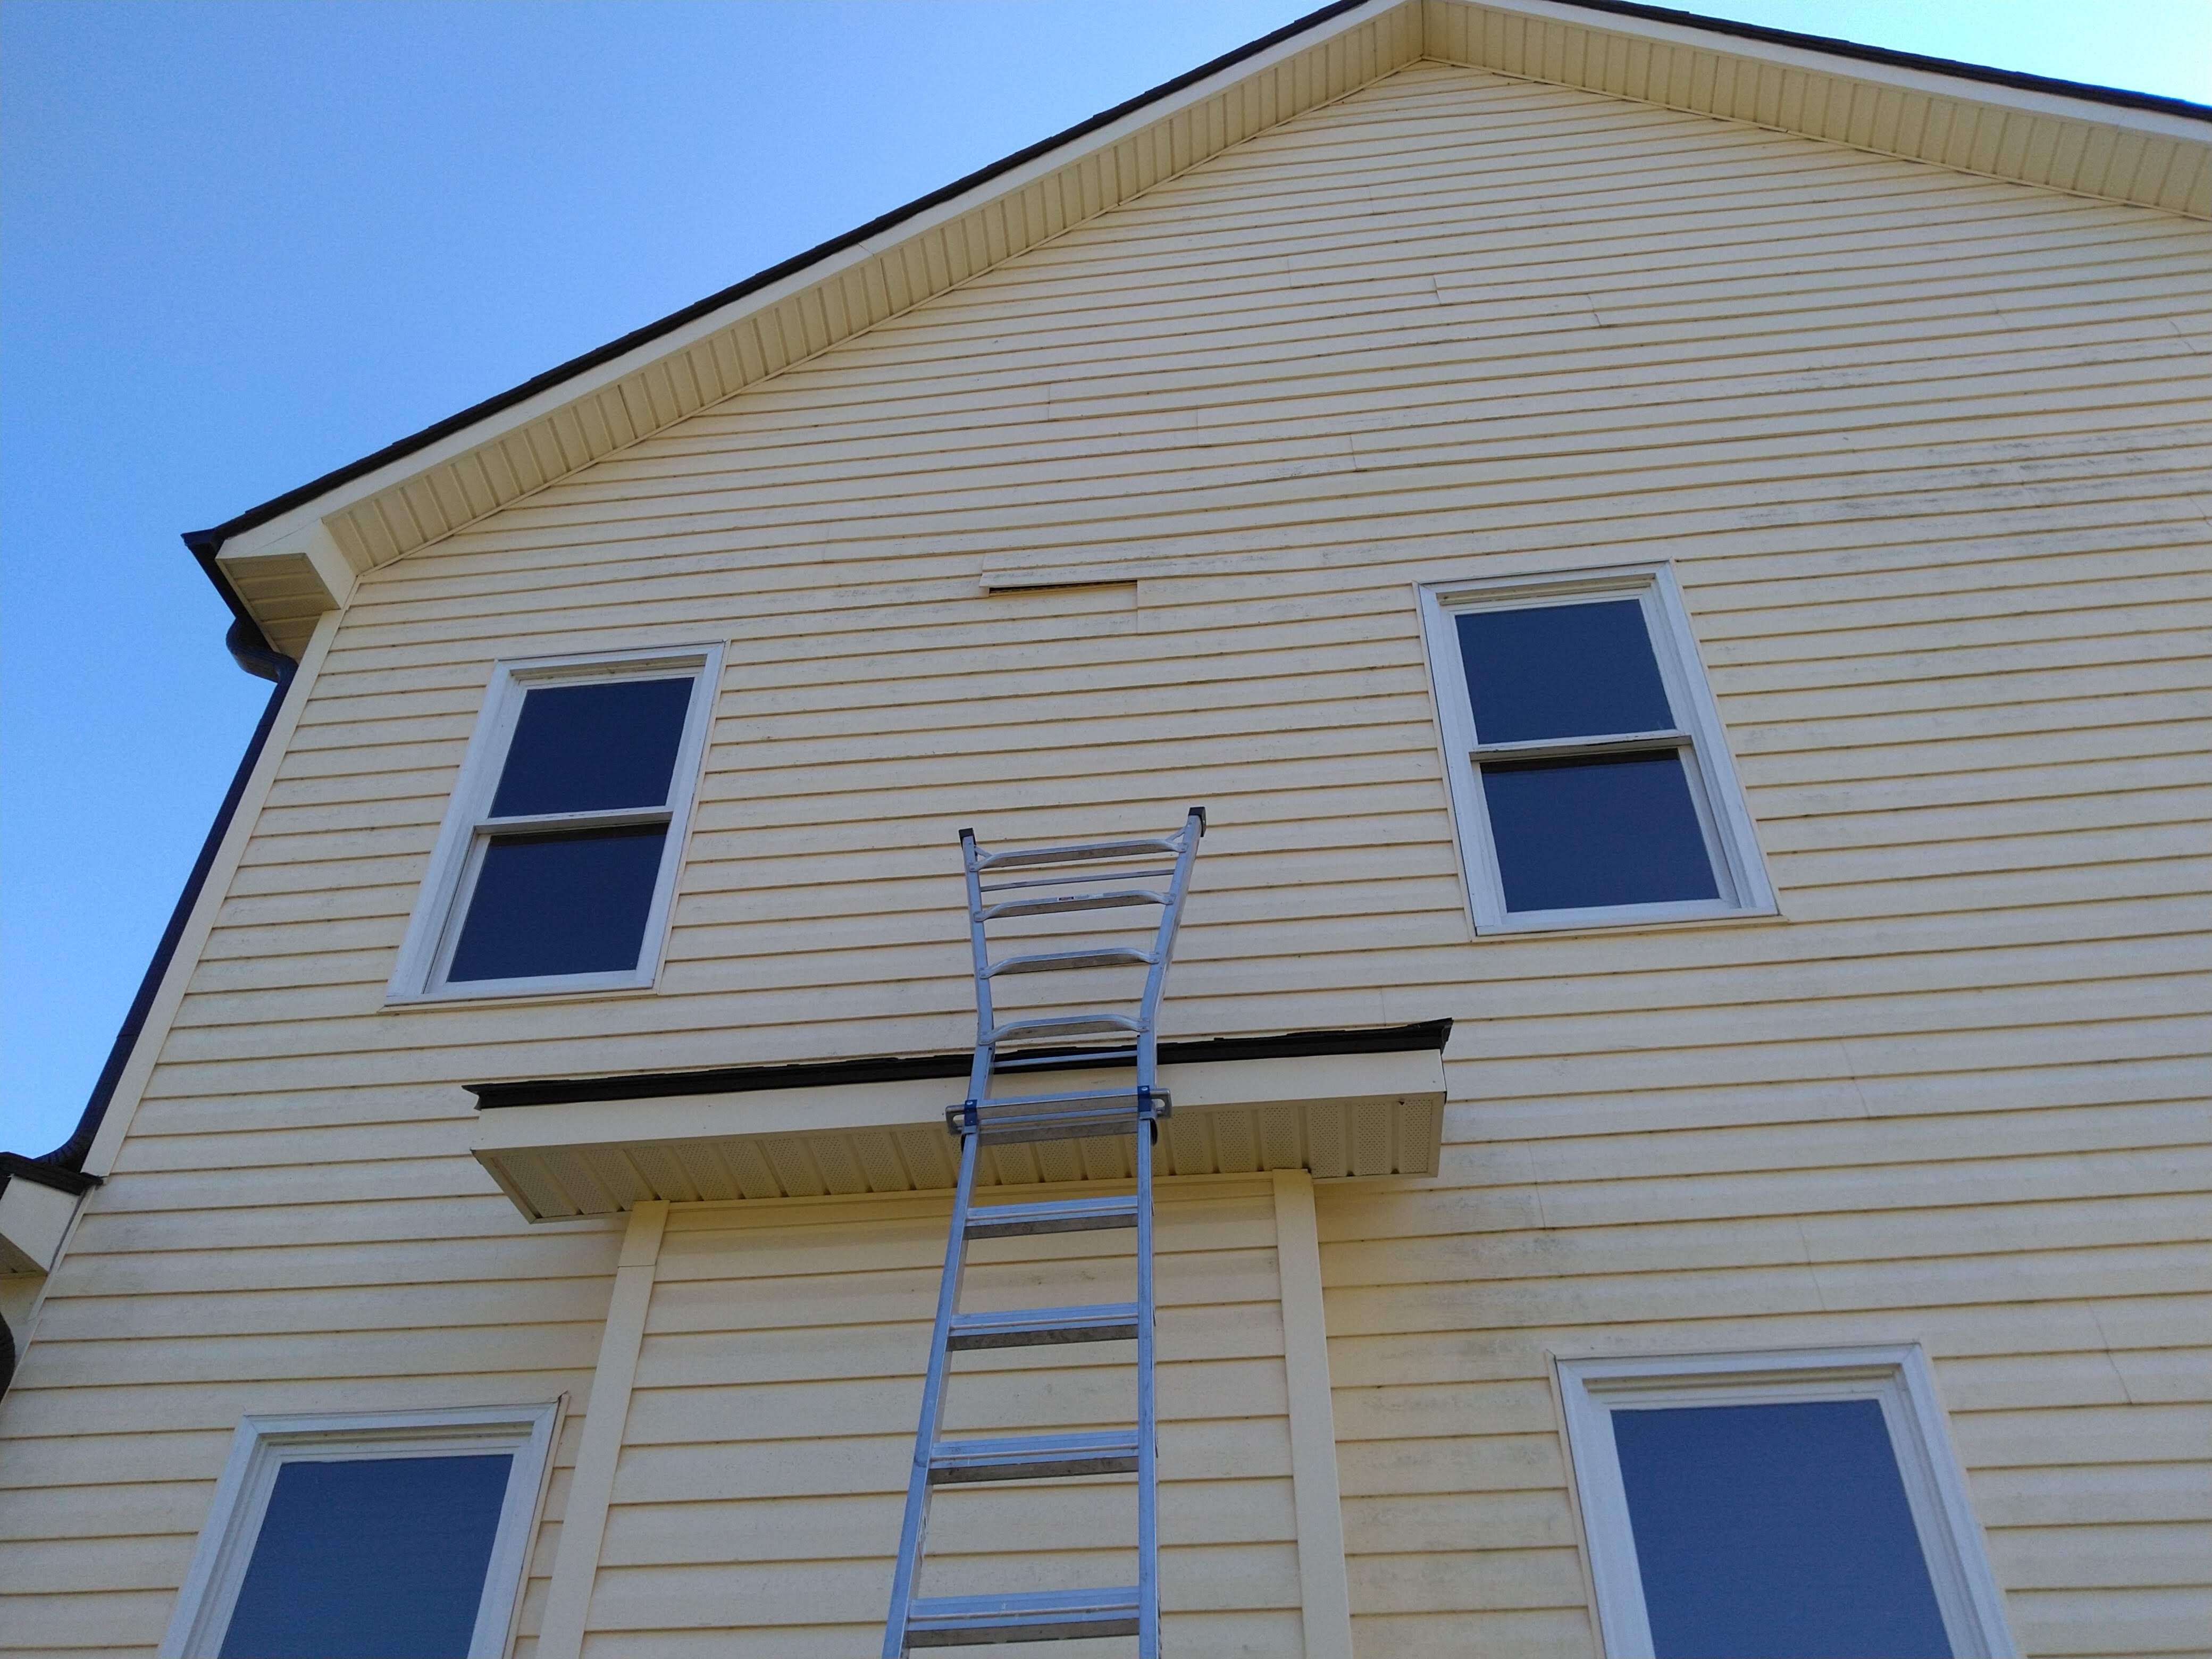
Now for the real reason I got this working. The whole coronavirus thing and my need to protect my pregnant wife from it are keeping me from going to the store and buying a taller ladder than this one. The siding blew off in a wind storm recently and this last piece was just out of reach for the ladder. The siding needed to be fixed to keep it shedding water during the frequent rainstorms here.

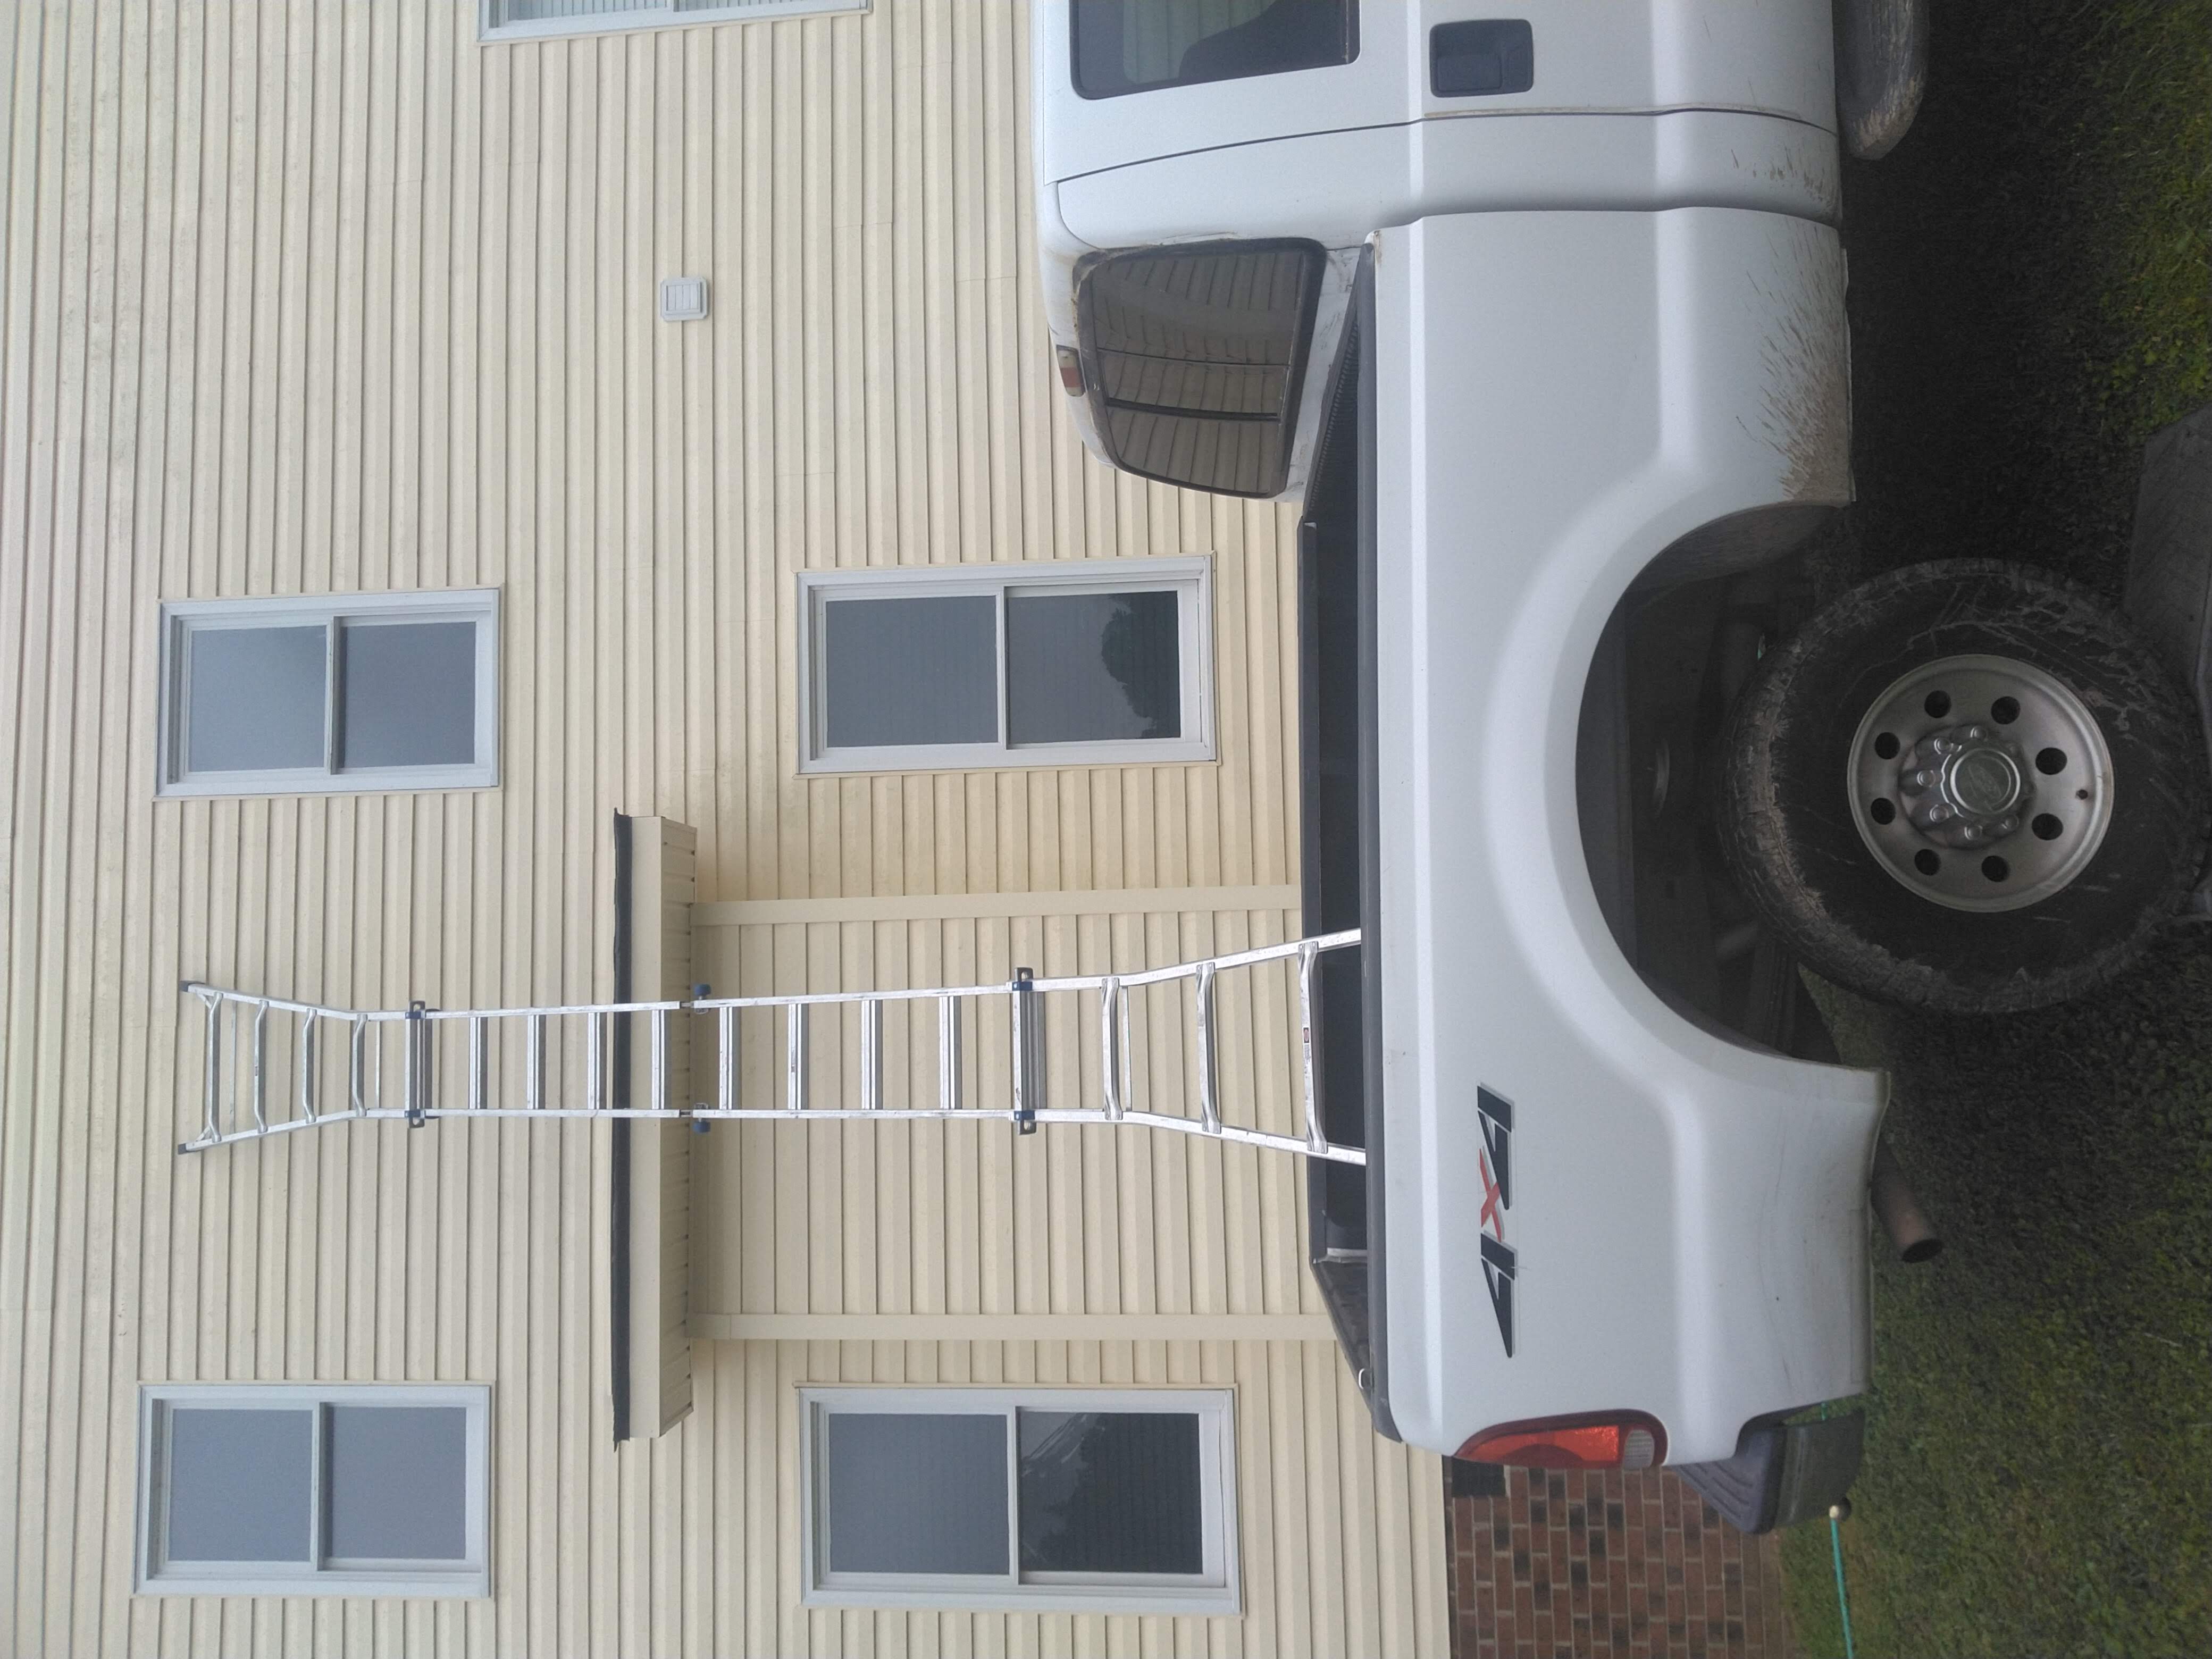
My whole yard is on a slope and I needed to take the truck to the one side of the house to use it as a platform like this, except the 4x4 wasn't working and it would have probably tore up the yard. Solution? Fix the 4x4 on the truck, take it over there, level it on ramps, set the ladder, strap it down so it doesn't kick out, and go to work. It took me all of about 5 minutes to nail everything into place once the ladder was set. All that preparation for such an anticlimactic even.
Until next time, keep the HIVE buzzing!
Disclaimer: The ladder usage depicted in the images above is definitely not recommended. Many things could go wrong with that setup, and ladders should always be set on firm level ground before climbing on them. I only did this out of the necessity precipitated by the exigent circumstance of a viral plague, one that potentially awaited me at the hardware store via some oblivious and asymptomatic Typhoid Tommy. Otherwise I'd just go out and buy or borrow a ladder that can get the job done properly.
POSH
That was a serious rebuild! It has been many years since I have done anything like that and I never had the correct tools to do the job. I think the last engine rebuild was in a 1986 Mustang GT.
Great job!
Thanks for the kind words. I've always wanted to do a fox body project.
I actually still have it, junk heap haha. I liked it because the 86 was the last year of T-Tops and the first year of fuel injection. Perhaps I will get back to is some day.
One man's junk is another man's treasure ;)