¡Hola, Mundo!
Vamos a preparar un sencillo "packaging" (un envoltorio) para presentar los muñecos Waldorf que terminamos ayer.
Hi, World!
We are going to prepare a simple packaging to present the Waldorf dolls we finished yesterday.

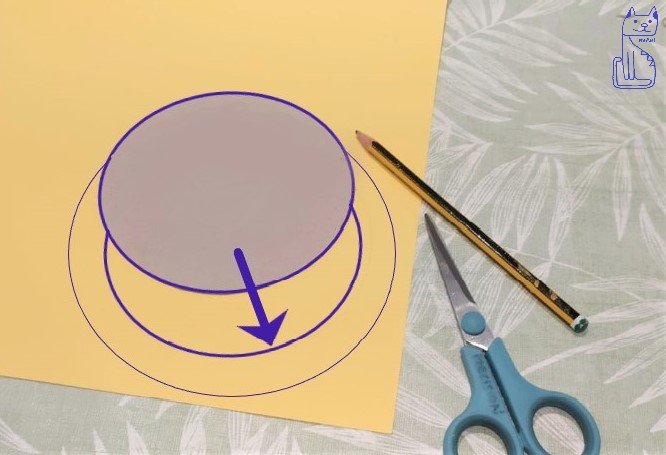
Las situamos sobre la mesa formando un círculo, para calcular aproximadamente el tamaño del cartón que necesitamos. He cogido de la cocina un cuenco con esa dimensión. Un compás hubiese sido más profesional (jeje) ¡pero a veces es tan fácil valerse de cualquier objeto que tengas a mano!
We place them on the table in a circle, to calculate approximately the size of the cardboard we need. I took a bowl of this size from the kitchen. A compass would have been more professional (hehe) but sometimes it's so easy to use whatever you have at hand!
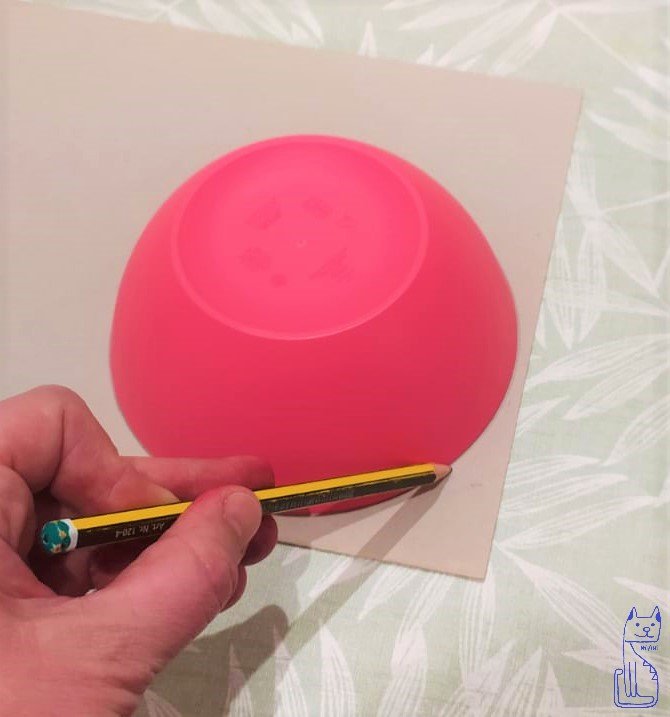
Cuando coloco las figuritas encima comprobamos que podemos apurar más la medida, por lo que decidimos reducir unos milímetros el diámetro.
When I place the figurines on top of it, we see that we can make it a little smaller, so we decide to reduce the diameter by a few millimetres.
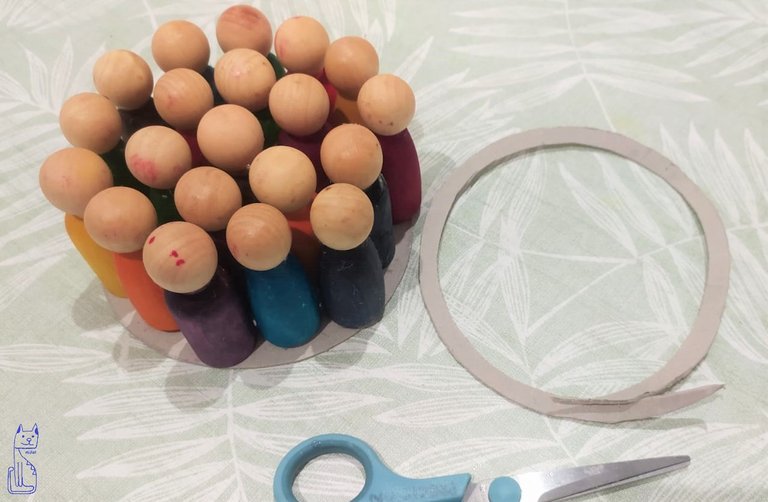
Recortamos la nueva forma y ahora sí, nos parece adecuada. Veamos los pasos para cubrir este feo cartón gris que hemos aprovechado de una libreta usada:
We cut out the new shape and now it seems to fit. Let's take a look at the steps to cover this ugly grey cardboard that we have taken from a used notebook:
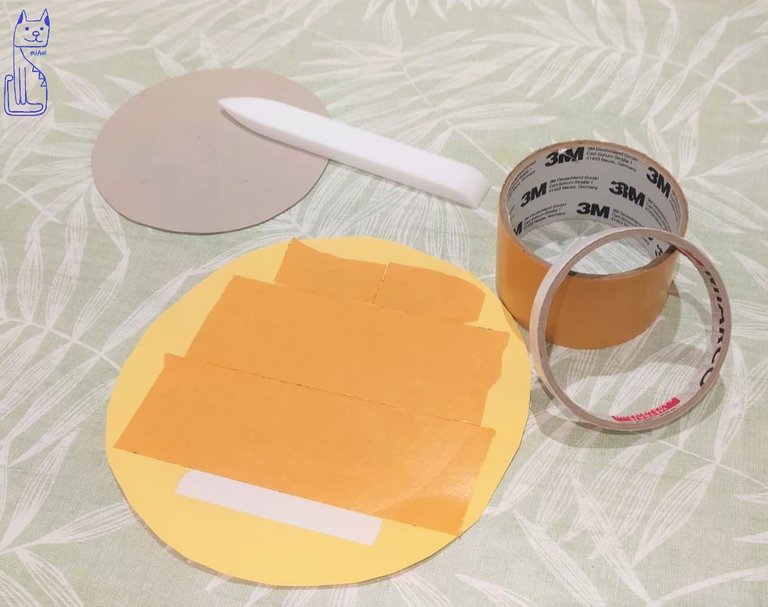
Vamos a cubrir este cartón con un papel de un color claro y vistoso, el amarillo. Debemos dejarle antes de cortarlo un margen para cubrir todo el borde, con un par de centímetros es más que suficiente.
We are going to cover this cardboard with a light and brightly coloured paper, yellow. Before cutting it out, leave a margin to cover the entire edge, a couple of centimetres is more than enough.
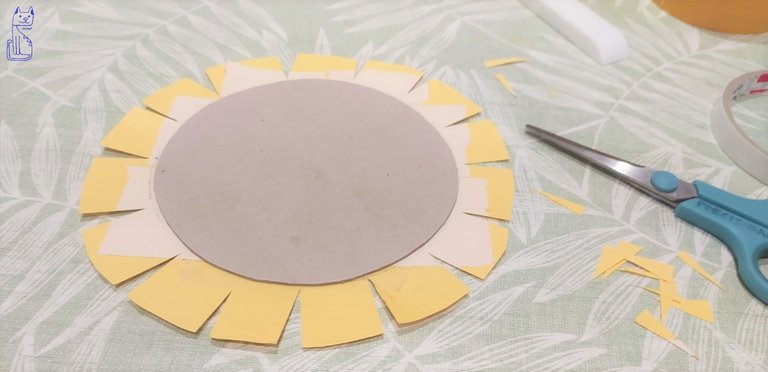
Con cinta de doble cara pegamos este papel al cartón, y efectuamos unos cortes creando unas cuñas, que nos faciliten el plegado hacia el interior del círculo. Con ayuda de la plegadora pegaremos bien el papel al cartón. Un nuevo círculo de papel nos cubrirá este dobladillo.
Using double-sided tape, we stick this paper to the cardboard and make some cuts to create wedges, which will make it easier to fold the circle inwards. With the help of the folding machine we glue the paper to the cardboard. A new circle of paper will cover this hem.
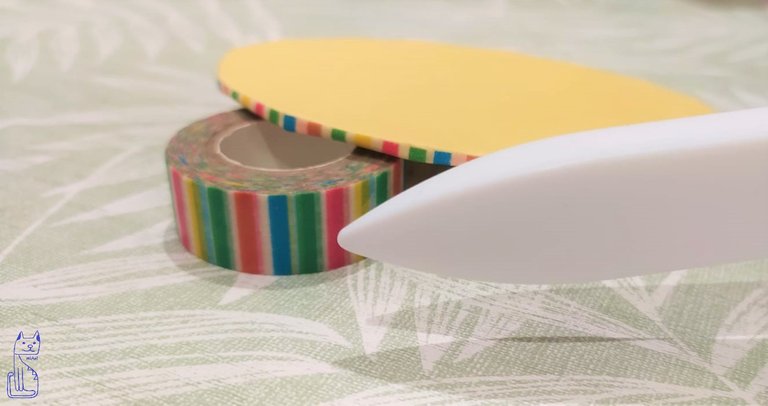
Para darle un toque de color, con washitape (cinta de papel decorada) cubrimos el canto de esta base, que apenas tiene un par de milímetros. La cinta sobrante la doblamos hacia abajo y nos ayudamos nuevamente de la plegadora, para fijarla bien.
To give it a touch of colour, we cover the edge of this base, which is only a couple of millimetres long, with washitape (decorated paper tape). We fold the excess tape downwards and use the folding machine again to fix it well.
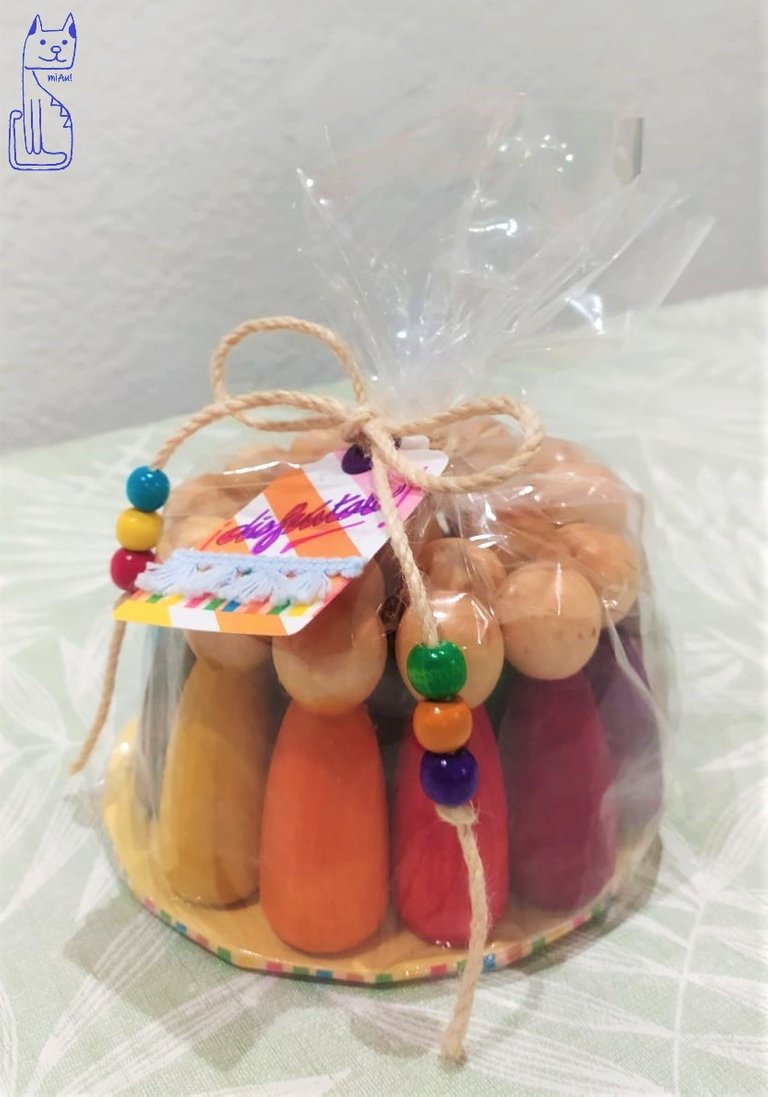
Ya podemos introducir esta base circular dentro de un envoltorio transparente, son ideales las bolsas que se usan para preparar las de cumpleaños.
Vamos colocando poco a poco las figuras de madera sobre nuestra base y procedemos a cerrar la bolsa. Para ello vamos a usar una cuerda de cáñamo, para seguir con esta filosofía en el uso de materiales naturales tan propio de estas pedagogías (Waldorf, Montessori, Pickler,...).
Como no puede faltar el toque alegre de los colores del arcoiris, le añadimos unas bolitas de madera en los extremos, y terminamos los cabos con un sencillo nudo. No sin antes haberle introducido una bonita etiqueta, para poder incluir unas palabras de cariño a quien vaya a recibir el regalo.
Now we can put this circular base inside a transparent packaging, the bags used to prepare the birthday bags are ideal.
Little by little we place the wooden figures on our base and proceed to close the bag. To do this we are going to use a hemp rope, to continue with this philosophy in the use of natural materials so typical of these pedagogies (Waldorf, Montessori, Pickler,...).As the cheerful touch of the colours of the rainbow could not be missing, we added some little wooden balls at the ends, and finished the ends with a simple knot. But not before adding a pretty label, so that we can include a few words of affection for the person who is going to receive the gift.
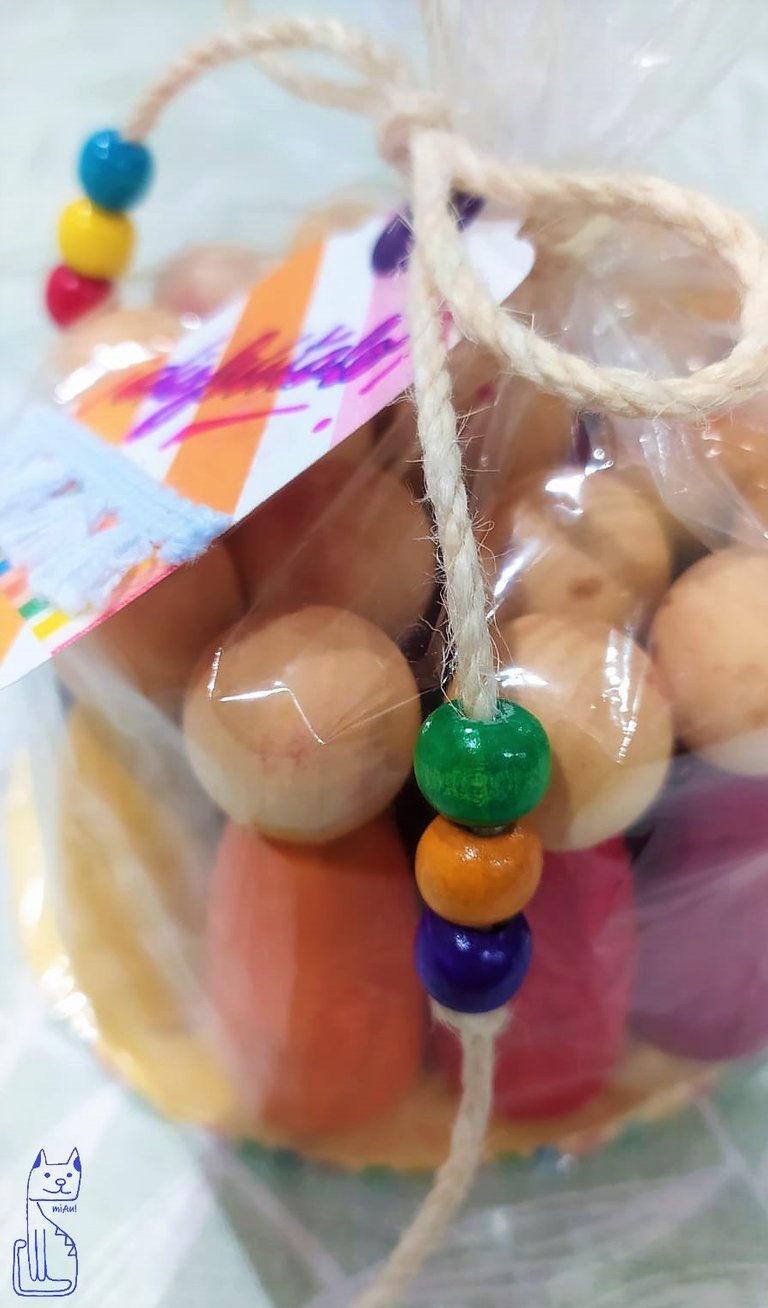
Todo el conjunto ha quedado coordinado: por un lado los materiales, porque hemos usado madera y yute (excepto el plástico de la bolsa, que lo necesitábamos así para poder exponer el producto). Por otro los colores: la gama del arcoiris en las piezas y en la decoración de la base y las bolitas de madera.
The whole set has been coordinated: on the one hand the materials, because we have used wood and jute (except for the plastic bag, which we needed in order to display the product). On the other hand, the colours: the rainbow range in the pieces and in the decoration of the base and the little wooden balls.
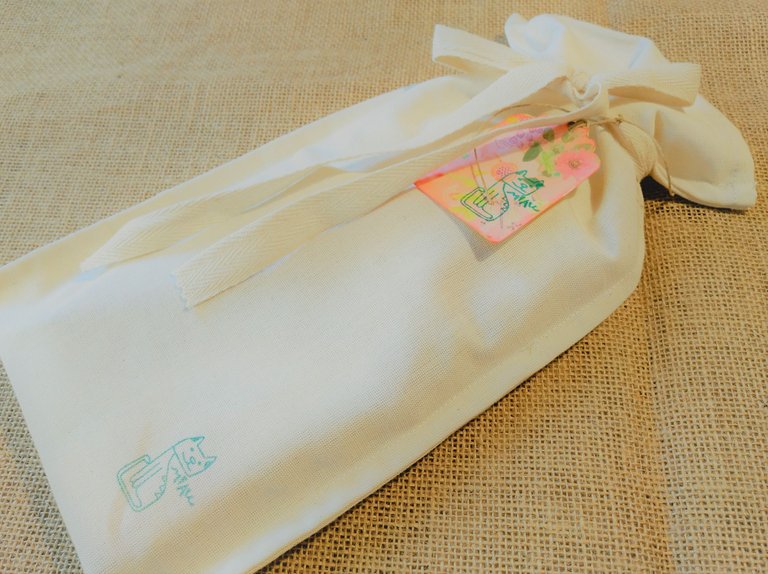
Añadir que me hubiese encantado confeccionarle una bolsita de algodón, con un cierre en el mismo tejido (como la de la imagen superior). Esto hubiese servido como packaging y luego hubiese resultado muy útil para guardar el juguete. Sin embargo, en este caso tuve que optar por una salida rápida, un envoltorio fácil de realizar, con materiales que tuviese disponible en mi taller.
I would have loved to have made a little cotton bag for him, with a zip in the same fabric (like the one in the image above). This would have served as packaging and would have been very useful for storing the toy. However, in this case I had to opt for a quick way out, an easy-to-make packaging, with materials I had available in my workshop.
Gracias por leerme. Encantada de tenerte por aquí 💛
Te doy la bienvenida a miAu!
Thank you for reading me. Nice to have you around.
I welcome you to miAu!
Traducido gracias a la versión gratuita de www.DeepL.com/Translator
Translated with www.DeepL.com/Translator (free version)

Interesante como a un empaque tan sencillo en apariencia, se le puede dar pequeños detalles que lo hagan especial. De destacar tu atención al detalle. Buen post. Saludos!
Muchas gracias por tus palabras y tu tiempo ¡Saludos!
Congratulations @marguimiau! You have completed the following achievement on the Hive blockchain and have been rewarded with new badge(s):
Your next target is to reach 15000 upvotes.
You can view your badges on your board and compare yourself to others in the Ranking
If you no longer want to receive notifications, reply to this comment with the word
STOPCheck out the last post from @hivebuzz:
Support the HiveBuzz project. Vote for our proposal!
¡Felicidades! Esta publicación obtuvo upvote y fue compartido por @la-colmena, un proyecto de Curación Manual para la comunidad hispana de Hive que cuenta con el respaldo de @curie.
Si te gusta el trabajo que hacemos, te invitamos a darle tu voto a este comentario y a votar como testigo por Curie.
Si quieres saber más sobre nuestro proyecto, acompáñanos en Discord: La Colmena.
Gracias por vuestro apoyo
Your content has been voted as a part of Encouragement program. Keep up the good work!
Use Ecency daily to boost your growth on platform!
Support Ecency
Vote for new Proposal
Delegate HP and earn more
Gracias por apoyar mi publicación
Gracias, @la-colmena, por compartir mi post
@gasaeightyfive, gracias por compartir mi publicación
@cribbio, gracias por compartir mi publicación
@marcocasario, gracias por compartir mi publicación
@gasaeightyfive, gracias por compartir mi publicación