Would you believe it? I took my Lincoln into the dealership for them to repair a recall, and when I picked it up, they gave me a litany of things they would love to do to my car, for a bunch of money.
Who knew car dealerships operated this way? I'm flabregasted.
Besides two new tires, there was one line item that they wanted $302.93 for...
Radiator Hose Replacement - UPPER RADIATOR HOSE LEAKING
Well that would explain the small mess in my driveway and why I would only get heat when the car was physically moving.
Which brings me to a great question...
How important is it to have heat in your car, in the winter, in Minnesota???
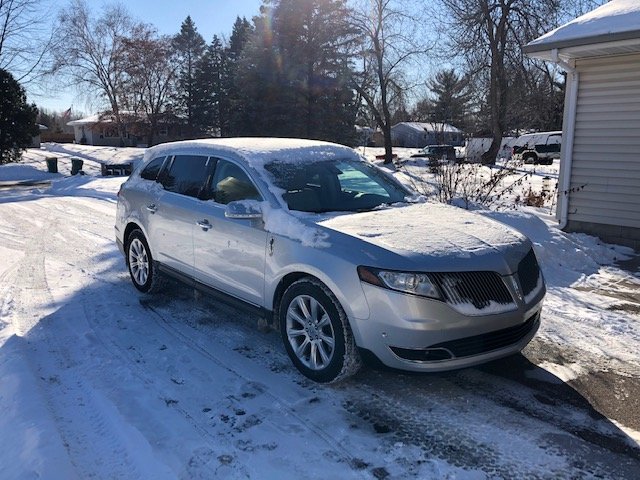
If you couldn't already tell from the main pic...
Current conditions:
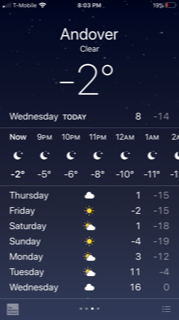
Sooooo, pretty important I'd say.
I had just been driving the Burban for a wee bit, but it was time to get this Lincoln back in gear.
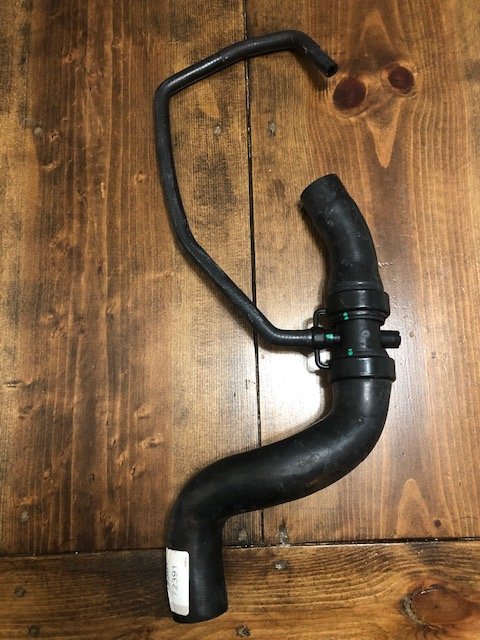
I googled the part, this one:
But, ya know when you online shop for an article of clothing, let's say, a pair of jeans...they show up to your house, you're all excited to put them on for your night on the town, and then they hit 3 inches below your waist and you realize you should have ordered the next size up cause your big ass has been chilling on the couch watching Netflix eating popcorn the past year? Well that happens with car parts too.
Even though the website clearly stated this would fit my car, it didn't. Not even close, and you'll see for yourself because luckily the next one I bought, from a different online company, sent one that fit just right.
But before I could put the new one ON, I had to get the old leaky one OFF.
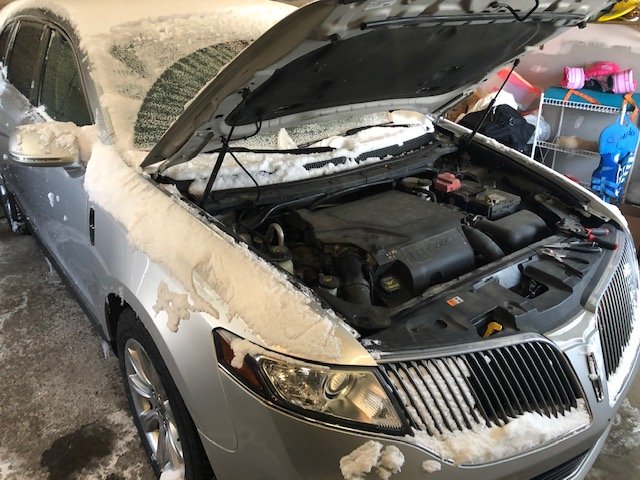
Figured I'd pull it in to the garage where it's slightly less freezing.
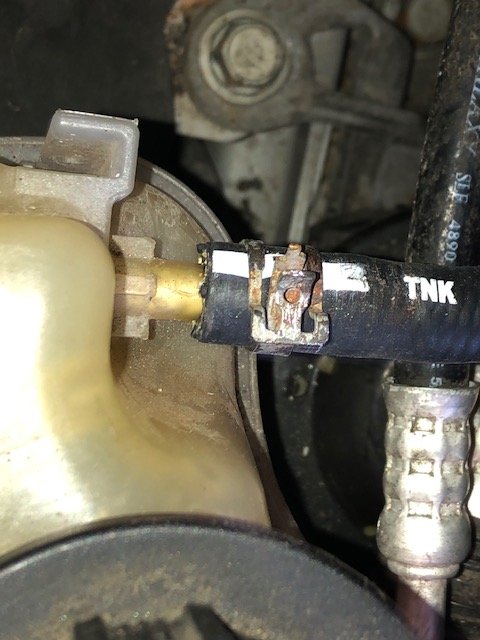
Here is the new upper radiator hose.
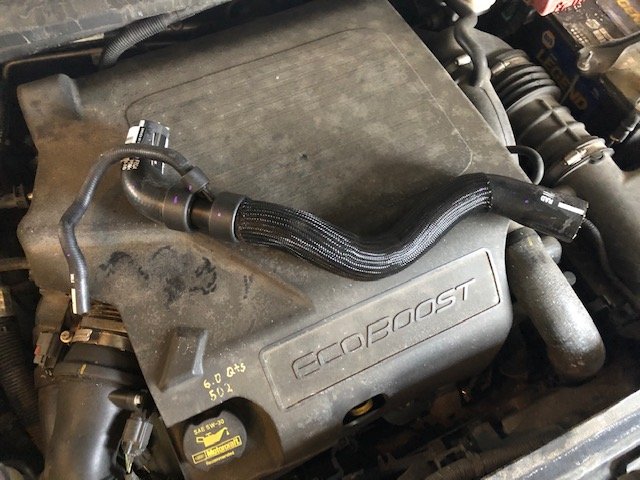
Each end of the hose will connect to it's corresponding spot and tightened with a circle clamp.
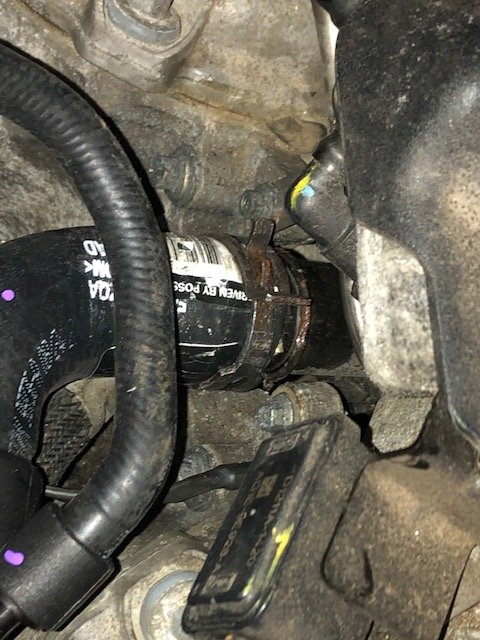
Below you can see the old, leaky, hose. I used a a locking pliers to loosen the clamps which freed my hand to use a flat head screw driver to pry the hoses off.
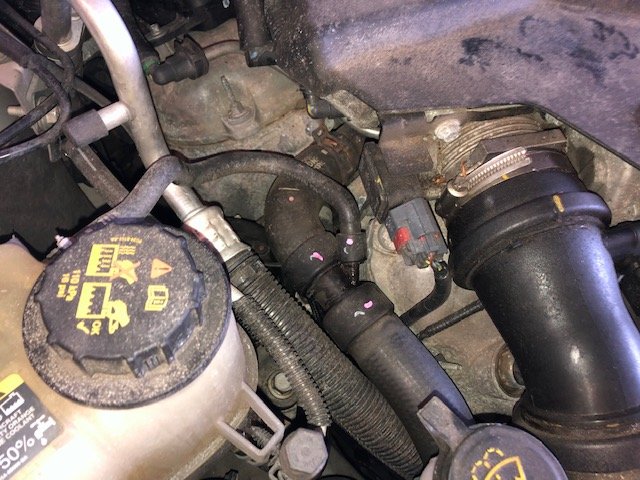
The only one that gave me a real problem, was this one, located more in the center of the engine, underneath the engine cover, and facing away from me, which meant I could only pull the hose out.....which had been sitting there for almost a decade.
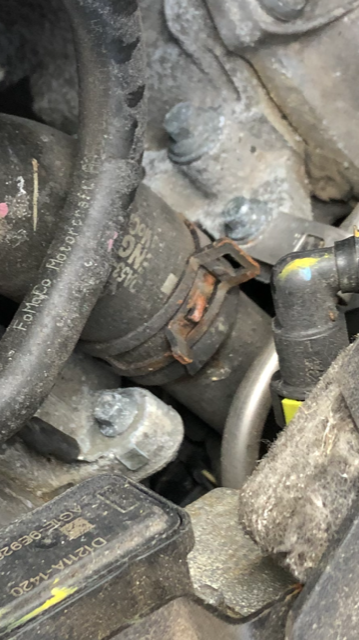
Needless to say, it was on there and it didn't want to come off.
I drove down to the local Ace and picked up a brand spankin' new Dewalt utility knife, one that I knew would be able to cut through this thick rubber hose.
It took some elbow grease, but once I had two cuts made, I just worked my way forward and eventually that thing came apart. It was a joyous occasion and I may have screamed in victory...ok, I definitely did.
Did I mention I'm not really a handy guy? This was a total crapshoot if I could actually do this. But I'm always up for a challenge and I like saving money ;)
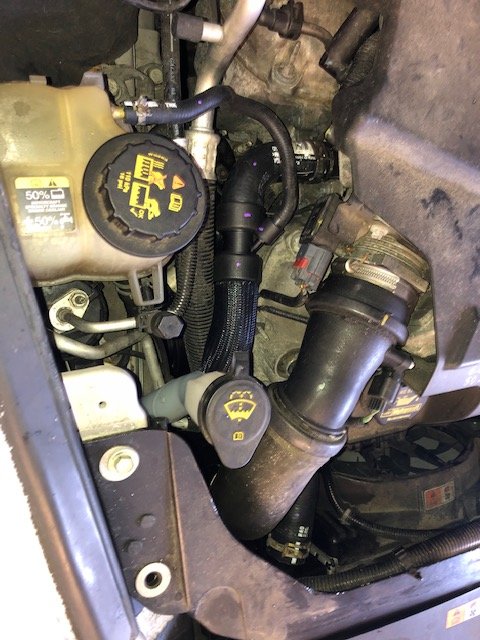
And there she is. Install was much easier than uninstall. I will admit that my new tubes are not on 100%, but the clamps are holding the connectors together and there was no leaking, so I'm calling it a success.

Last was to refill the reservoir with coolant and crank up the heat.
Or so I thought.
You'd think just replacing the part would be enough. But nooooooo....
There has to be an air bubble in your line so you have to go watch another YouTube video on how to fix that.
Well I did, and it worked, and now I have heat.
IN MINNESOTA!
60 bucks for the part, a few hours of my time, a good learning experience, and 240 dollars saved.
Thanks for following my #diy, if I can do it, so can you.
Thank you for sharing this amazing post on HIVE!
Your content got selected by our fellow curator @solominer & you just received a little thank you via an upvote from our non-profit curation initiative!
You will be featured in one of our recurring curation compilations and on our pinterest boards! Both are aiming to offer you a stage to widen your audience within and outside of the DIY scene of hive.
Join the official DIYHub community on HIVE and show us more of your amazing work and feel free to connect with us and other DIYers via our discord server: https://discord.gg/mY5uCfQ !
If you want to support our goal to motivate other DIY/art/music/homesteading/... creators just delegate to us and earn 100% of your curation rewards!
Stay creative & hive on!
Thanks a lot! I'll check out that community for sure!
I joined :)
Although...
I think there's a word in there that needs replacing ;)
I am looking forward to a lot of cool DIY posts!
Awesome! I am glad that you were able to get it fixed. We were at -3 this morning on the drive in to work. The other day my wife and I were heading in to work in her car and we couldn't figure out why it wasn't getting warmer. After the half hour drive we decided the heater was broken. On the way home I tried turning it all the way to cold and then back up and it started working. I am guessing the flapper must have just been stuck. Nice job on getting things fixed!
Thanks @bozz.
Lucky for you! Hopefully it was just the flapper being stuck. I wish my fix was that easy, lol.
You can do a wide range of repairs, regardless of your technical skill.
Yup, just takes some YT'ing to learn how to do it right.