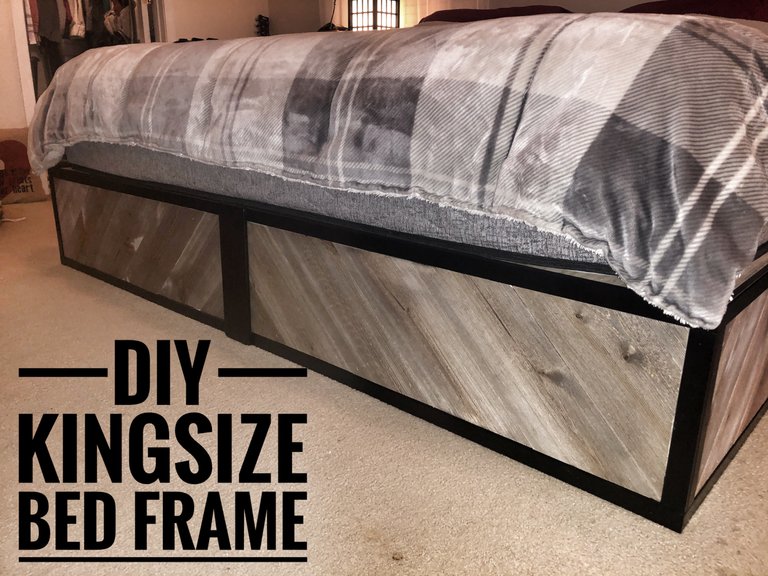
If you think mattress prices aren’t fun to look at, wait until they tell you how much they want for their king size box springs!! The king size mattress requires 2 full size mattress box springs. Each box spring is priced at $140. Don’t forget they want to get you a metal bed frame for another $60. So you are telling me I am gonna e spending around $350 for a box spring and cheap metal frame?!?! Nope not this guy!! The box spring is basically a wooden box covered in plain fabric and I am actually really surprised that they even last as long as they do. The time finally came when we needed to purchase a new king size mattress. I kindly declined the box spring and frame. I knew good and well I could build something much nicer and more durable for less than that amount of money. Alright, so Let’s build a king size mattress frame shall we?
Even before we left the furniture store I had ideas scrolling through my head. I knew it needed to be in 2 separable pieces in order to move it in and out of the house easy. Having a background in building houses, I have a feeling this bed frame is gonna be pretty stout. Not by accident but that is just how I build things. I build the to last. If you want something to support a person, I will make it support and elephant. :wink:wink The frame isn’t too big of a deal for me but it is what I am gonna put on the outside that requires the 110% approval from Mama Splatts.
I didn’t want to use 2X4’s, they just seemed too big, so I went with 2X3’s. They are a little smaller which should help with the weight a little bit. Plus they are good and thick which gives them strength also.
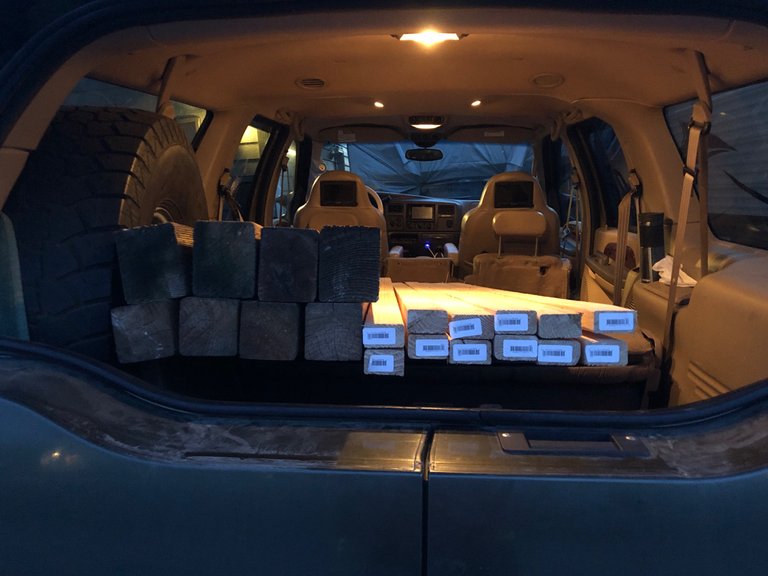
The Ford Excursion has no problem taking a load of old cross arms and 4X4’s, so I might as well pick up some 2X3’s on my way home.
The dimensions of a king size bed are 76 inches wide X 80 inches long. We didn’t want a very tall bed, we went for the low-rider style bed. So this frame is only going to be 12 inches tall. Which when you add the height of the mattress really isn’t too low... in our minds.
Here is a cut list in order to make a full size bed frame that is 12 inches tall. You can make the height whatever you like. So in order to make a king size you will just have to double the amount of pieces.
- 4 x 80 inches
- 8 X 33 inches
- 24 X 9 inches
- 3 X 4’X8’ sheets of 1/4” plywood

Now that I have this old compressor I picked up, I can finally use my framing nail gun that was given to me about 10 years ago. It was short lived. After shooting about 10-3 inch nails, I think the internal seals blew out from years of sitting. So off to Harbor Freight to scoop up another for around $100.
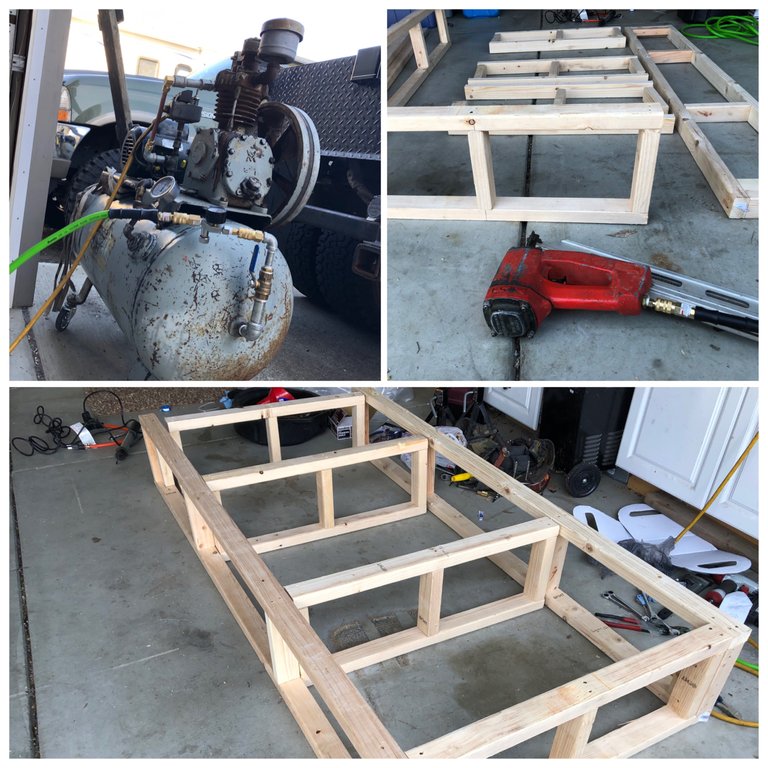
My technique for connecting the corners to make them good and strong is the same way you do a house. Nail 2 of the 9 inch block together to form a 90 degree angle. This gives you a big surface area to nail the joining piece to it.
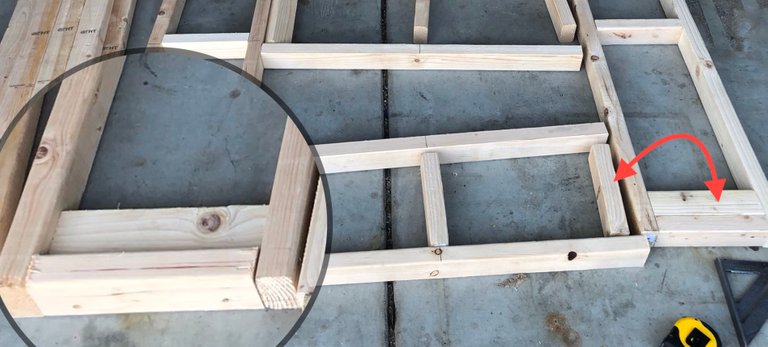
In order to make all the sides good and solid and ensure that this rectangular cube is square, I used 1/4 inch plywood to cover 3 sides. I covered the top, the foot of the bed and one of the long sides. I didn’t put any plywood on the side that will go against the wall or the side that will be touching the other half. There is just no need for it. Plus it gives you a handle when moving it around.
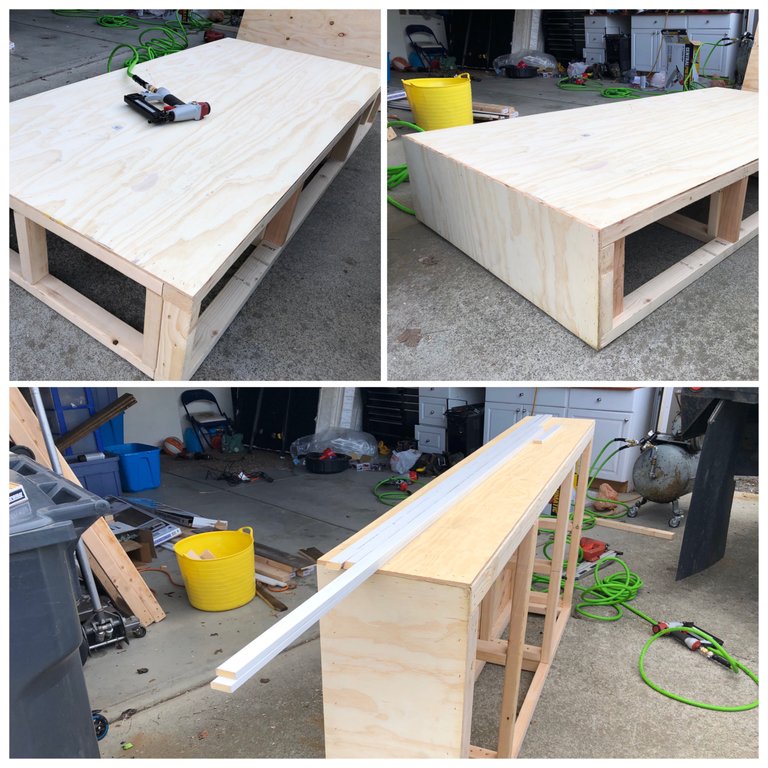
Now that one is complete, give me a couple seconds and I will whip out the second one.
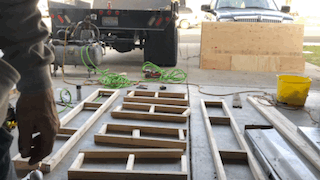
Both halves are framed up and ready for the finishing touches. Well it’s far from finished, let’s call it the half way mark. This is were things get a little complicated. I am not what people call a finish work kind of guy. All the small details and the patients just isn’t my thing. I want a design that is relatively easy to do, looks good and isn’t loaded with a bunch of intricate designs that take forever. Yet I don’t want some “Plain Jane” looking thing either. I need to find a happy medium.
I had an idea in mind so I headed to Home Depot to check out options for the kind of wood I am goin to be “wrapping” this bed frame with. I just went with my gut and chose the one on the right. This could be good or Mama-Splatts is gonna make me return them. Lol.
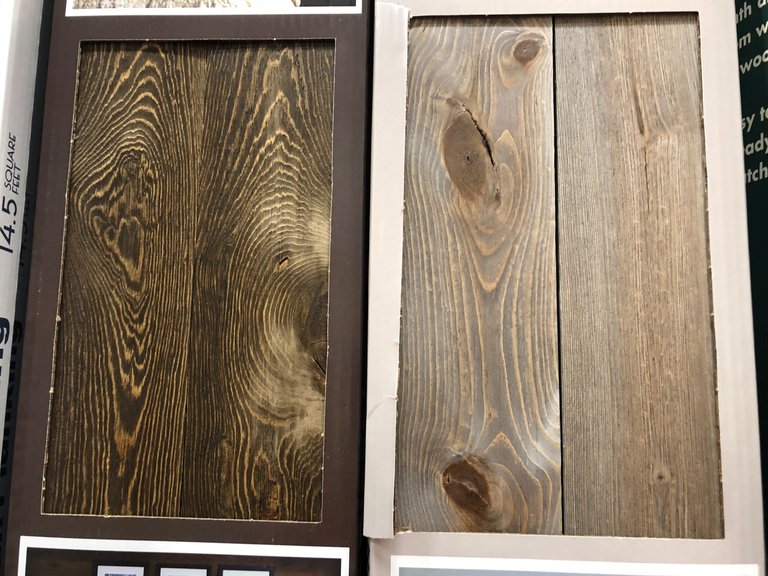
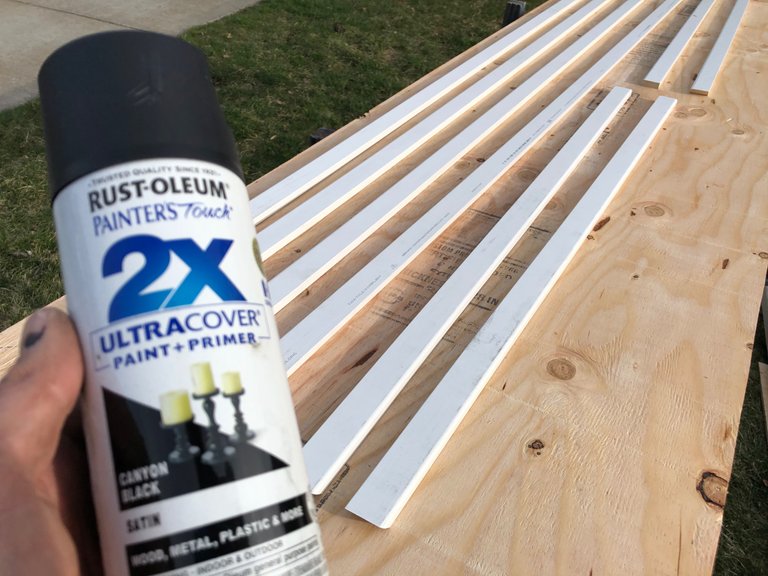
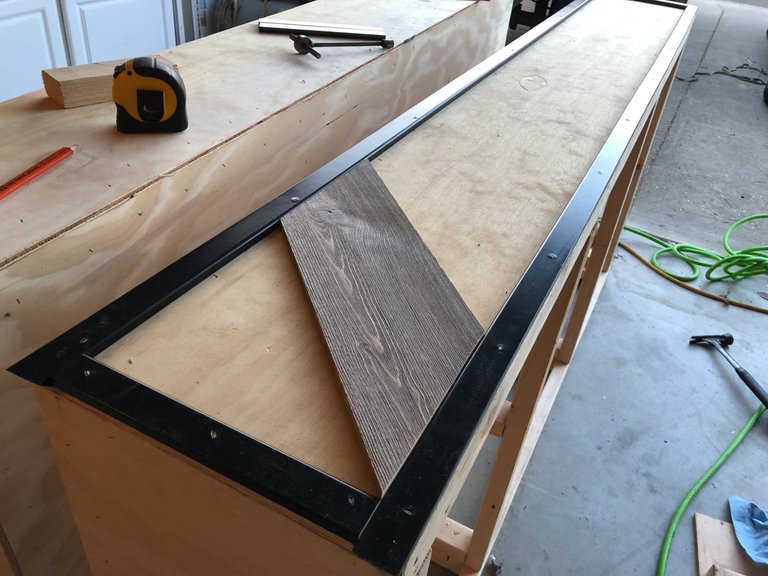
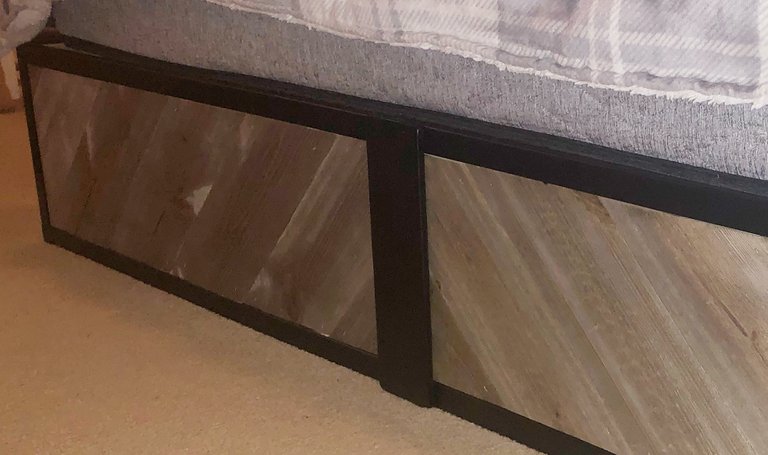
So my idea is to take these “grey” looking boards and staple them to the foot and side of each bed frame. First I trimmed out each side with this 1-1/2 inch trim that I ended up painting black.
I held the upper trim piece above the edge about 1/2 inch to kind of help keep the mattress from sliding off when my kids come flying in the room acting like Superman. Then instead of just laying the fancy grey stained wood either vertically or horizontal, chose to put them at a 45 degree angle.
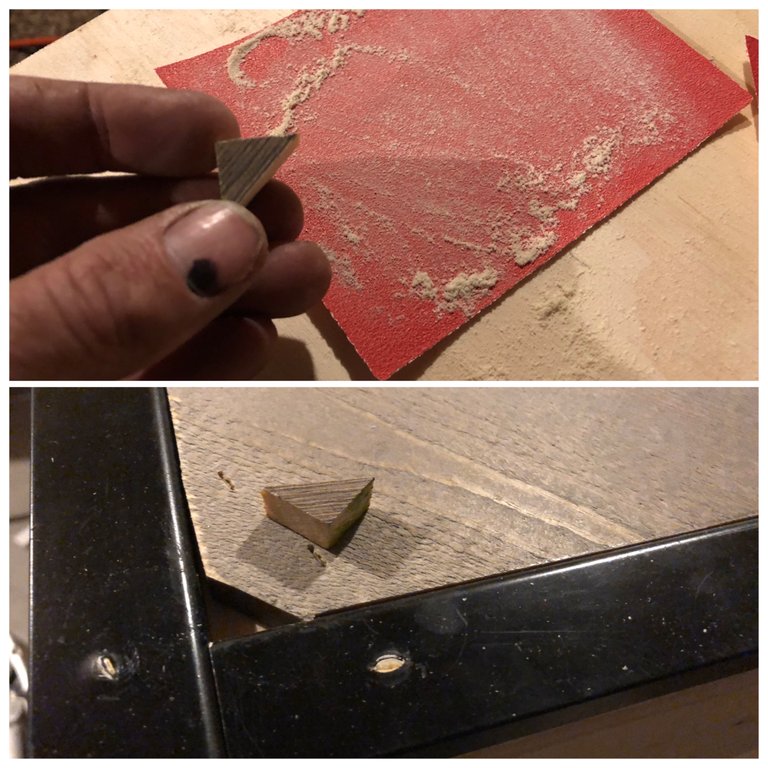
I did end up with some pretty small pieces that I needed to fit into place. I cut them close, then used some sand paper to get them to fit just right.
Now one thing I didn’t really like was how the trim I bought kind of bubbled up when I shot a staple into it. I was expecting to fill the holes but I didn’t think I would have to use the head of a nail to flatten the staple holes out. This trim has some sort of “plastic” coating on it. If I was going to to it again I wouldn’t use this stuff. Even though it paints really nice, the way it reacts to stapling I didn’t care for one bit.

Every now and again the 45 degree cuts seemed to get a little off. Creating some small gaps that I didn’t really like. Then I got to thinking...
”What if instead of putting the trim pieces on first, I did them at the end over the top of all those 45 degree cuts?”
It would hide any small variation in the cuts. But it would make a bigger gap between the bed and trim which would look kind of goofy in my mind. Well it is too late for that.
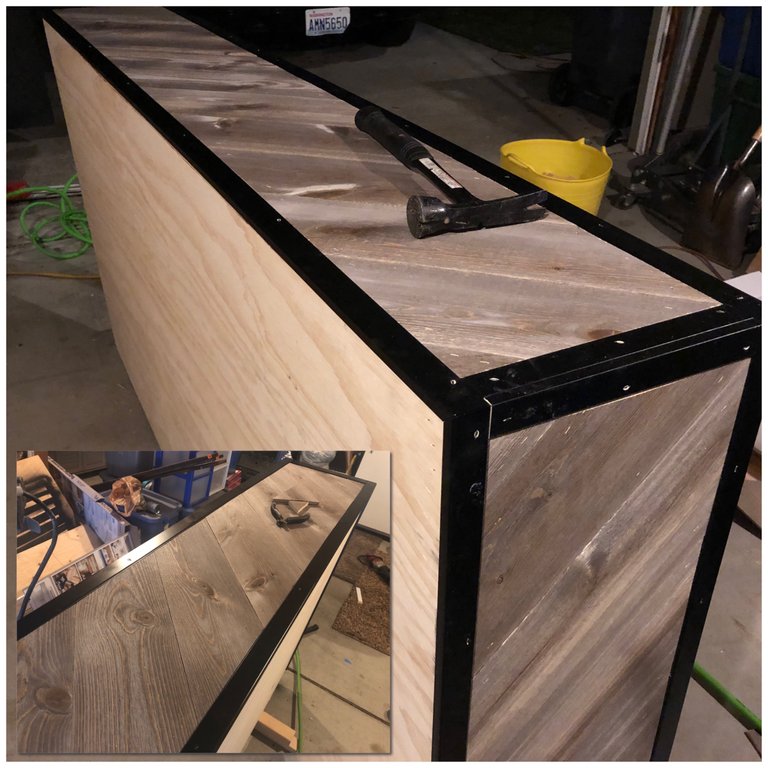
After filling the staple holes on the trim and doing a little touch up painting, this project was near completion. All I had to do is figure out a way to tie the two pieces together at the foot of the bed. I wanted it to look somewhat like it was one big piece. I am really liking how this is turning out. Here are a couple pics of the first half completed.
This is when I gotta give credit where credit is due.
Just at the time I started thinking of ideas of how to tie the 2 pieces together, Mama Splatts came into the garage. So I told her about the little issue. She said,
“Just nail a piece on one side that overhangs evenly to the other to cover the seem.”
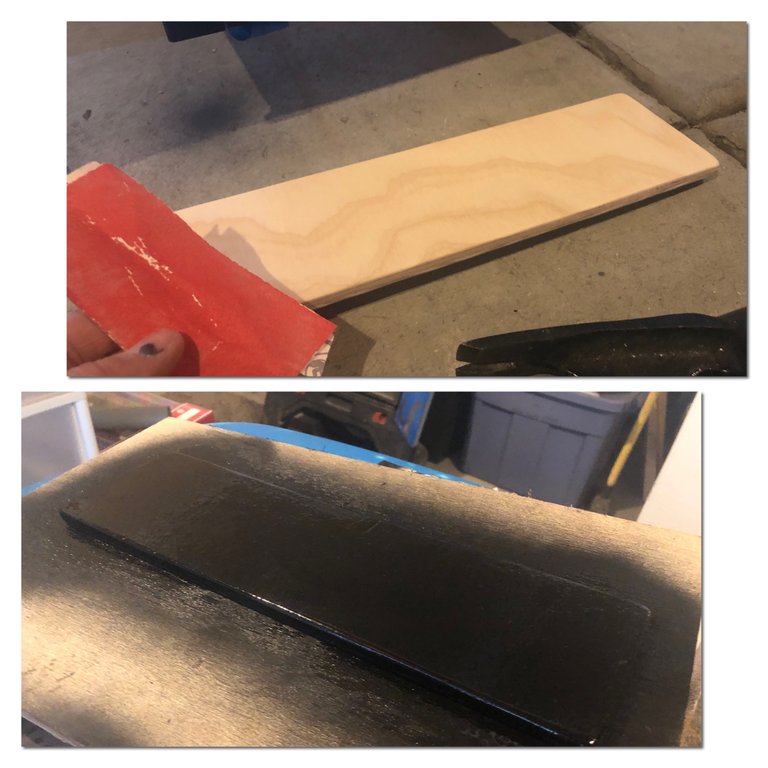
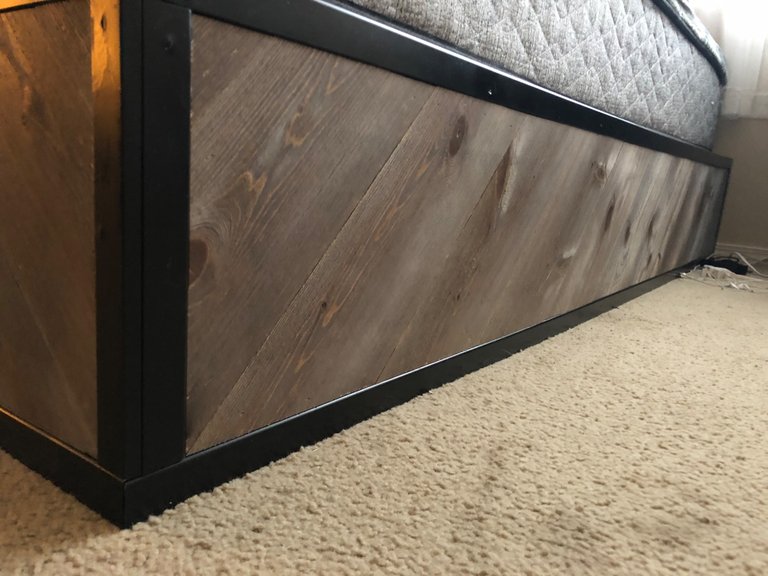
Gee... why didn’t I think of that?!?! Instead I was trying to get all fancy and all it took was a piece of 1/4 scrap plywood cut to about 3 inches wide, sanded down and corners rounded. Spray painted it black and Ta-Da it was done.
After stapling that piece on it was ready to haul these two pieces inside and see how they look and fit together.
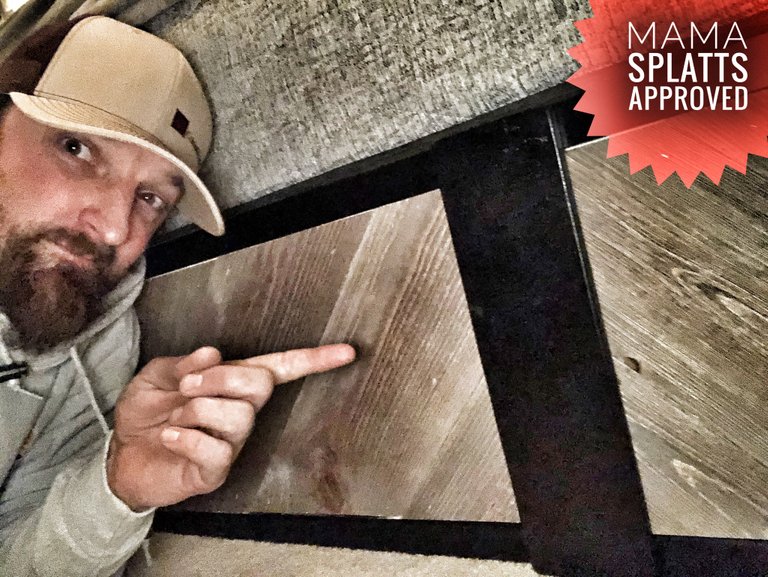
I do have to say I like how that simple pieces made that seem disappear and tied them together nicely. Here is a couple photos of the finished product. I hope these photos can do it some justice. And No we haven’t bought new sheets yet. Lol
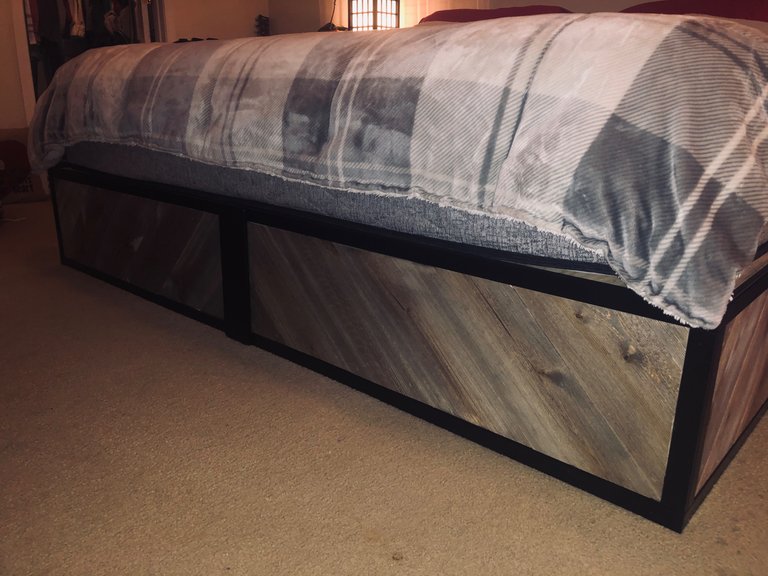
I am really happy with how it turned out and so is Mama Splatts. So I guess this one is a Win Win. I build all this for about $225 dollars and it looks way better that a fabric wrapped box on a metal from.
Thank you all for checking out another one of my DIY projects and I hope it sparks the desire and imagination to start creating things yourself and building them yourself.

Steem On
and
Yep, That is
Mama Splatts Approved!!


Don’t forget to mention @splatz
when you encounter a post that deserves a good Splattin’
by the @splatz trail

Join the @splatz trail
On Steemauto.com
Where we catch those
Splatworthy Posts
Hot off the Press
If you could do it over, would you add drawers to the frame?
I really thought about doing drawers but I don't have the right tools to make them. Well make them "right" anyway. Maybe I should have left holes in the sides and just used some flat rate boxes from the post office as drawers. Now that would have been easy and... classy 😜
Don't mind me, I'm just the type of guy that likes to utilize all the space available.
Me too trust me. At least make A spot to hide a stash of candy from my kids. Lol
That is sick dude! Nice work!! I would have measured wrong and a quarter of the king mattress would be hanging off each end.
I am just glad that I didn’t go with my measurements at the start. I actually brought a board in the house and laid it under the bed. I still have a little 1/2 to 3/4 gap on each side. I would have liked it a little more snug but hey you can’t win them all.
Thanks for stopping by.
Look on the bright side @intothewild, the box springs that you built may have been to short...but at least it would be even!
This post was shared in the Curation Collective Discord community for curators, and upvoted and resteemed by the @c-squared community account after manual review.
@c-squared runs a community witness. Please consider using one of your witness votes on us here
Congratulations @jlsplatts!
Your post was featured on our daily build newsletter. We've sent 250 liquid BUILD tokens from our @build-it.funds account to your wallet upon which you can sell, trade or buy on steem engine or SteemLeo.
Build-it is a central hub for DIY and How-To projects. It's an opportunity to find and share the latest in DIY, and How-To tutorials. The recommended tags required when creating a DIY article are #diy, #build-it. #how-to, or #doityourself. Please subscribe to our community here and use at least one of our tags to earn some extra upvotes.
Chat with us on our discord and telegram channels Discord, Telegram.
Hola @jlsplatts.
Tu Publicación Ha Sido Votada Manualmente Al 5%.
Thank you for using the recommended tag/s. This post has been manually rewarded with BUILD tokens in the form of an upvote. You can buy, stake, and exchange our "BUILD" tokens for steem on steem engine or SteemLeo
Build-it is a central hub for DIY and How-To projects. It's an opportunity to find and share the latest in DIY, and How-To tutorials. The recommended tags required when creating a DIY article are #diy, #build-it. #how-to, or #doityourself. Please subscribe to our community here
Chat with us on our discord and telegram channels Discord, Telegram.
The work that you done looks nice!
My two questions are: What does a box springs do (I have heard of it), and my second question is about the air nailer that you bought...what size nails does it take?
10 points goes to you for design!