This is an image heavy post, no apologies made.
I felt under a lot of pressure to get the shower done, so much of the progress is missing. At least I stopped to take photos periodically!
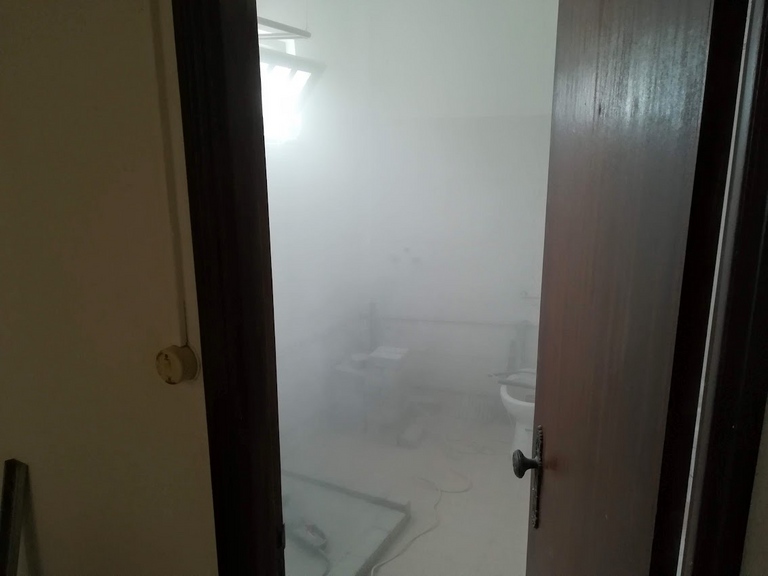
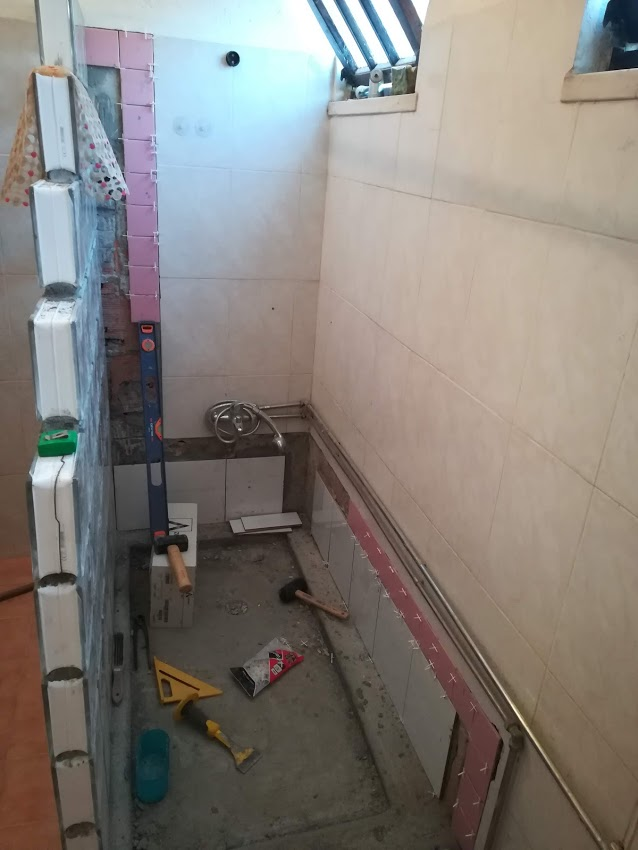
Dusty haze and clean beginnings
I wanted to remove the tiling cement from the section where I had chopped tiles off of the wall. Unfortunately chipping it away led to me breaking holes in the wall, no matter how slow I went. I thought it might work better if I were to cut grooves into the tiling cement to make it weaker and easier to chip pieces off.
Using my large angle grinder and the same disc I used in the kitchen to cut the bricks, I proceeded to cut a number of grooves in the tiling cement. Here you can get an idea of the dust that is kicked up whilst cutting with that disc. Before I opened the door and took the photo I could hardly see past my hand, it's insane!
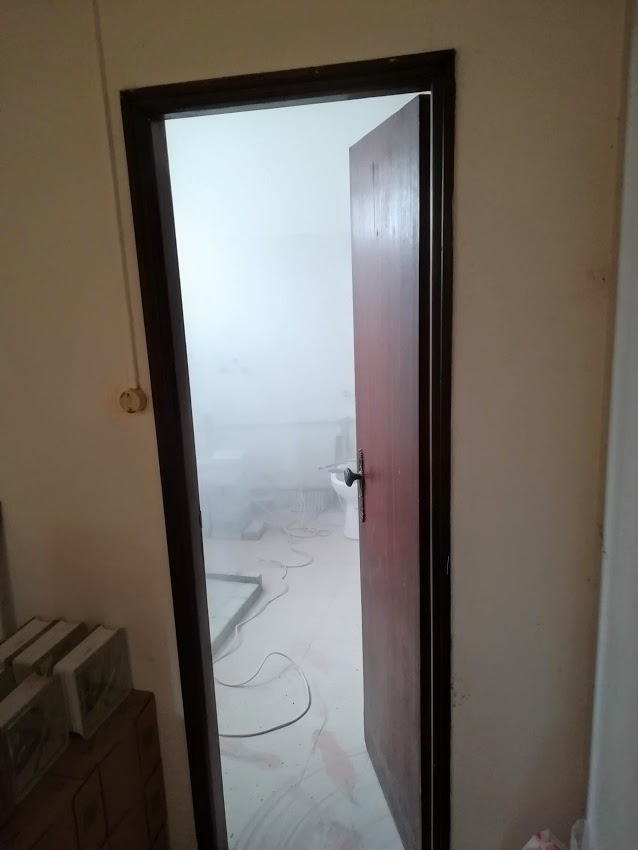
The floor was swept clean before I started, but now you can get an idea of the amount of dust, just look for my footprints. I did not even cut that much!
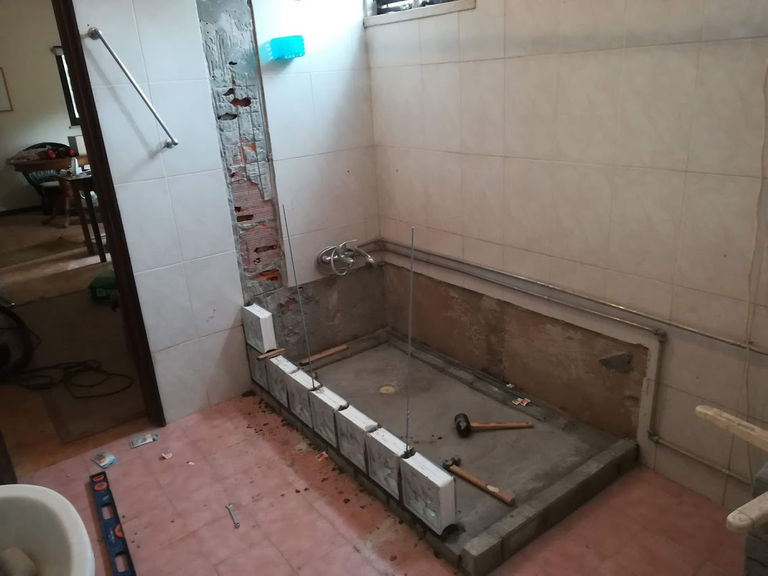
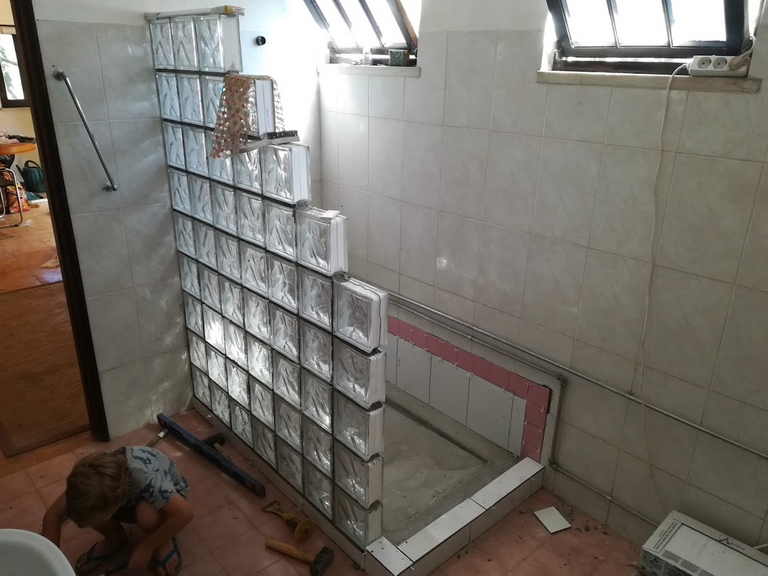
Even with the grooves I was breaking through the bricks, so I stopped and checked that I would at least be able to match the tiles I had with the existing tiles. It looked like I would so I decided to start on the wall of glass bricks.
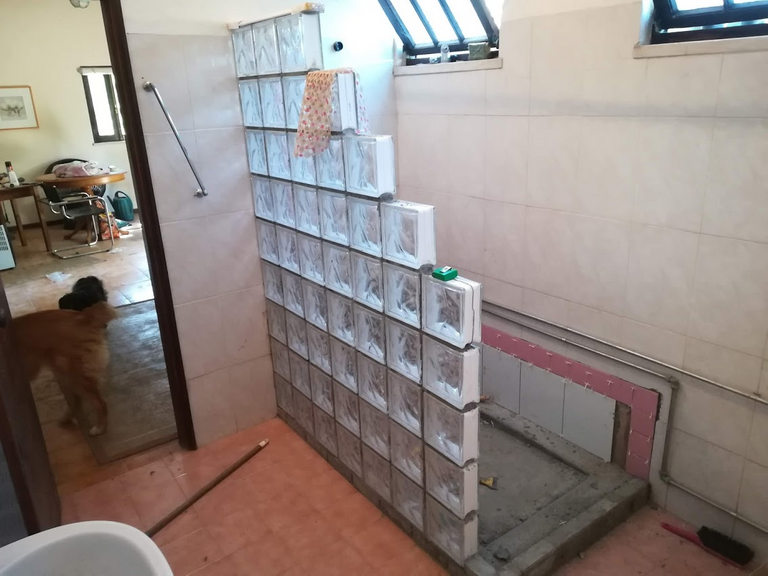
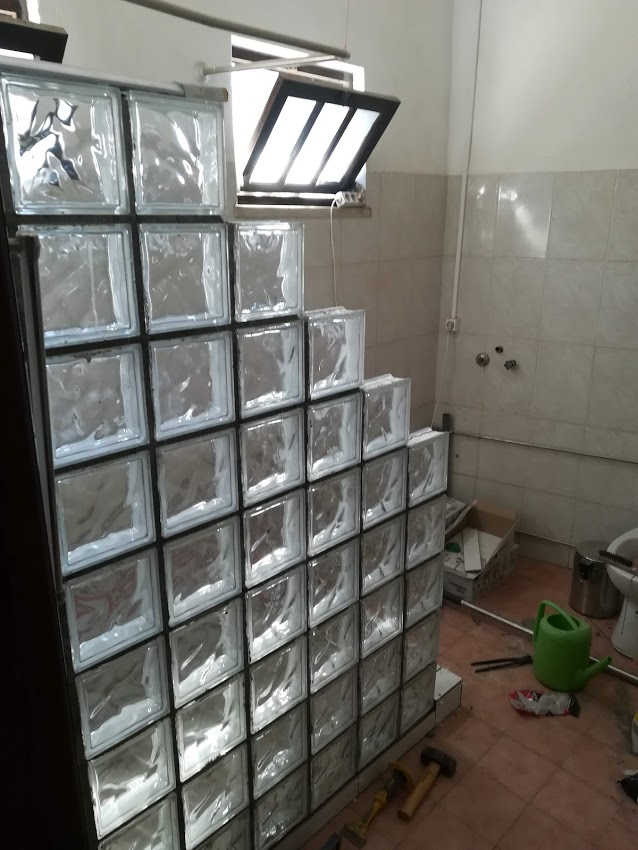
Look closely at the photo and you will see two metal rods poking up between the glass blocks. I drilled holes into the layer of bricks and fixed those rods in there to provide a bit of extra strength for the wall. Would it help? I don't know, but it's my wall so I will do as I please ;)
Walls up!
I do wish I had taken more photo's, but was running between the kitchen and bathroom at this point trying to get more than one room done concurrently.
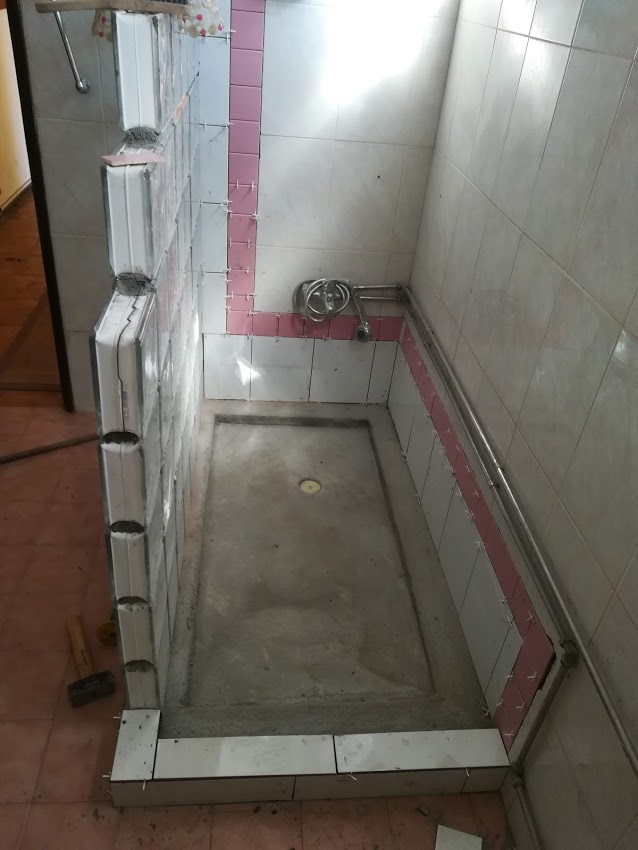
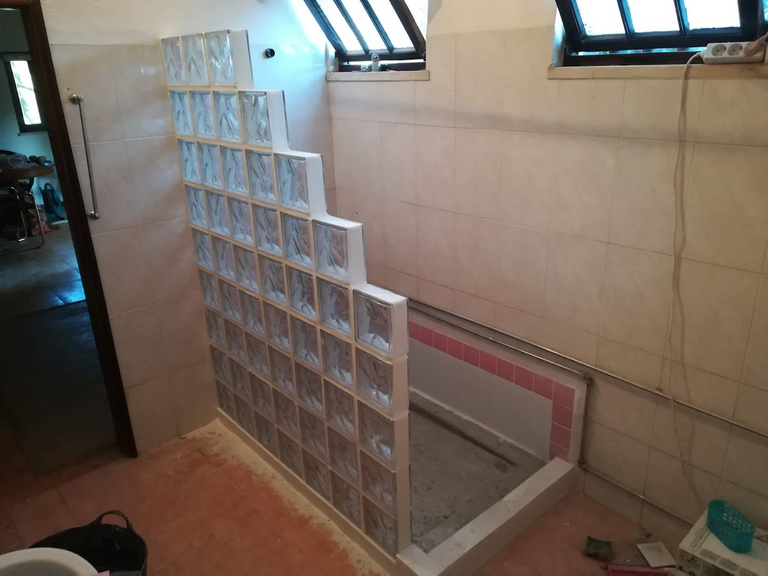
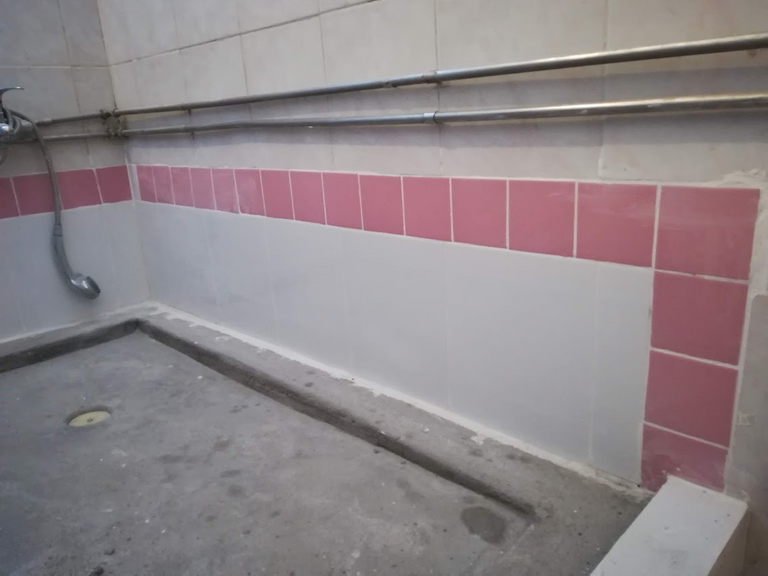
As you can see above, I started and almost completed the tiling at this point.We decided to highlight the difference in tiles rather than trying to hide it. It would have been impossible to match the tiles on the wall anyway, so we added a border of pink tiles. Not my first choice but it matches, kind of, the rest of the bathroom floor.
So you should tile bottom up, for the vertical tile I started at the top, meaning the tiles wanted to slide down pulled down by their weight and gravity. I had expected this and did it like that anyway, so that I could be absolutely sure that the top tile matched perfectly.
I could cut a slim piece off of the tile near the bottom and it would not look out of place, but it would look terrible if I did it near the top.
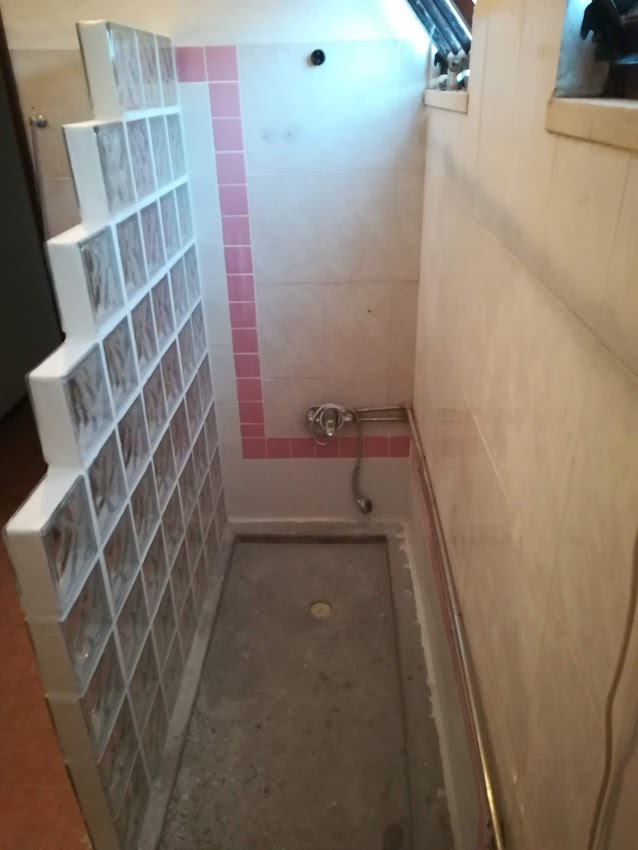
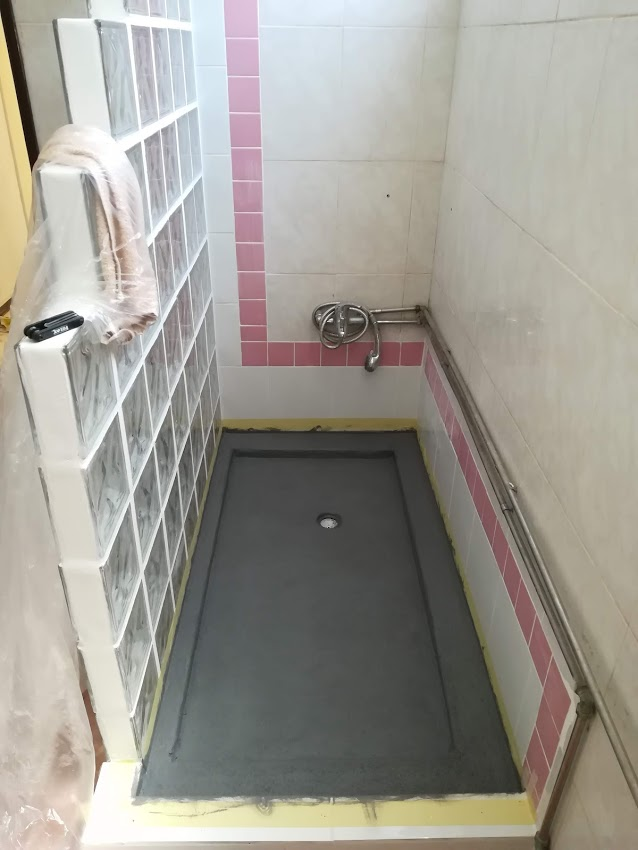
It's a wide shower but holy cow it felt tight working in there!
Tiling done...
With all of the tiles on the wall I could turn my attention to getting it all grouted up.
I could have sworn I held the phone straight for this shot, anyway, look at the top of the vertical line of pink tiles and you will see why I started at the top. It would be hard to hide any smaller tiles there.
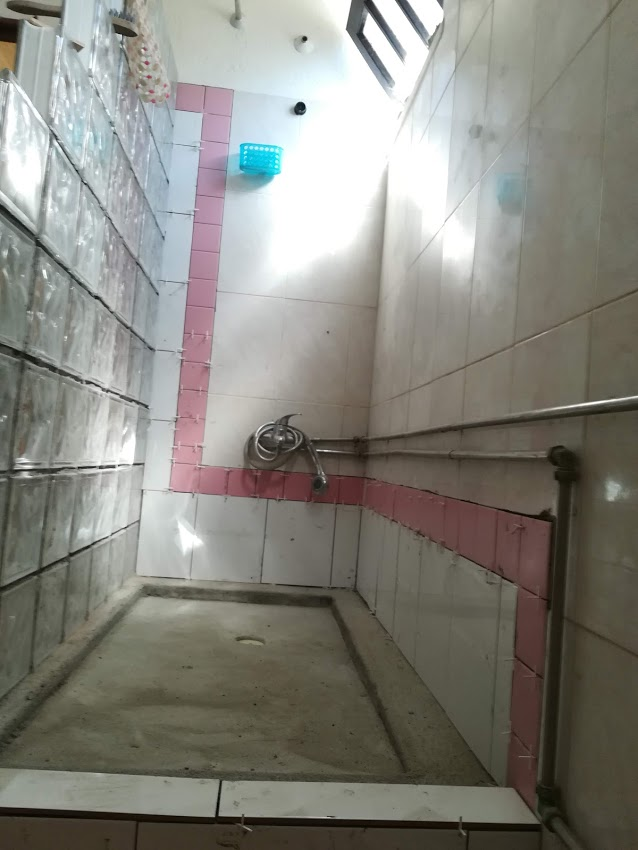
Just another view showing the entrance too, I tiled the step into the shower as well, it looks more finished like that.
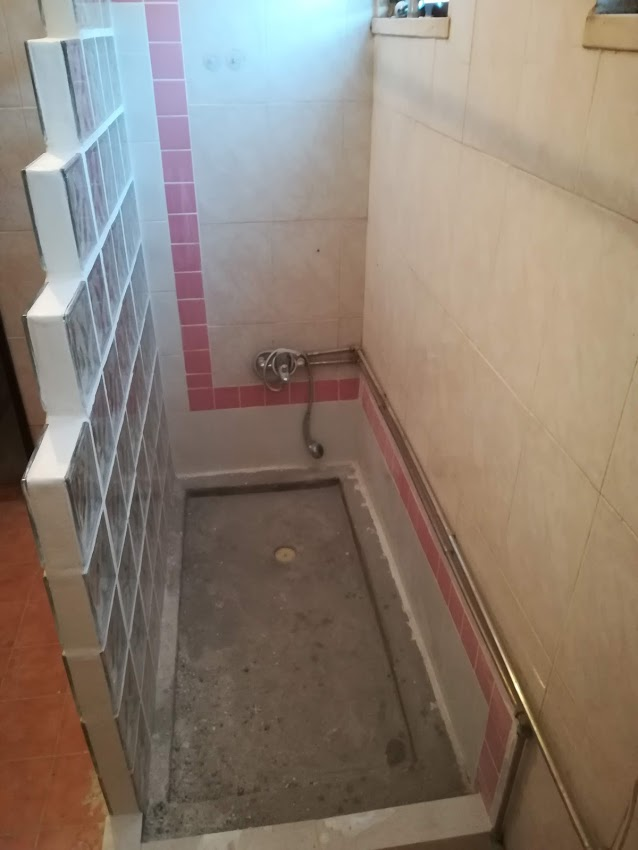
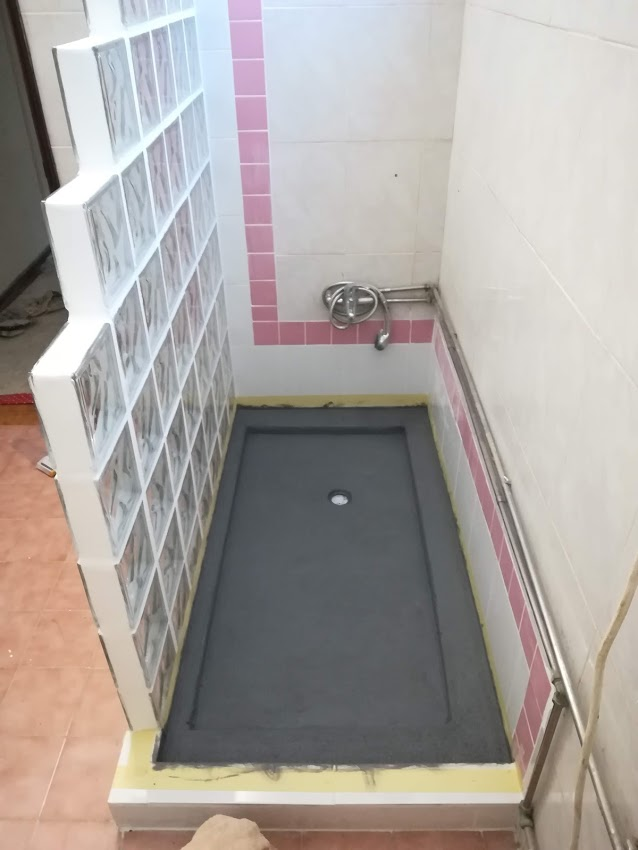
Not the best lit shot, but I like that some light makes it through the blocks, with a solid wall it would have made the bathroom too dark I think.
... let's get grouty!
No photo's taken unfortunately, here is the almost finished product.
Eeeeek I can see how poorly I matched those glass blocks, the grout really highlights it :(. This is just post cleaning the extra grout off, I realised a wire brush was super effective at removing the excess grout from the glass block and did no damage to them at all. That's all the dust lying on the floor there.
The walls still need a wash but looking tons better! Only the floor lets it down now.
More of the same, slightly different angle. It's been a hectic journey so I am but chuffed it's almost done.
Not too shabby considering my day job involves sitting behind a screen all day?
Paint, the, floor?!?
Yes, It would have been nicer tiled, but we thought that using the kind of paint you use to seal cement water tanks etc. would work well and not be slippery when wet.
It also does not look too bad, it's hardly even noticeable when you are in the bathroom. It did cover well, though I gave a few coats. I tried to apply more thin coats so that it would cover the cement, but not become too smooth.
Same photo, sans all the stuff. I only pulled the masking tape off a few days later as we were preparing other stuff too.
And so this journey comes to an end, I still have a ton of stuff to do around the house (thats a good thing, I enjoy these projects!).
I hope, if you read this far, that you actually enjoyed it.
Posted from my blog with SteemPress : https://scrips.io/blog/shaunmza/diy-replacing-a-bath-with-a-shower-dusty-mess-to-success/
I love the renovation! Well let me tell you that it was a disaster before, it was all dusty but now ... Now it's great! It looks great, congratulations on your effort :)
Thank you very much, it took a lot of work but it's quite rewarding in the end to see it done.
Hey, good job!
I liked your step by step.
You used the leveling ruler to hold the mosaic line. (Photo 5)
Very creative.
Congratulations on a Curie vote. Enjoy it!
Thank you!
I have made quite a few pots with no comments at all, this one gets 2!
Yes, a level, a box of tiles on its side and a hammer to stop the hammer from sliding. Basically just using what I could reach as the tiles were sliding down quicker than I had anticipated.
The Curie vote makes a big difference, even better to know someone read the post ;)
Hahaha, you set a whole trap.
I have men in the family who love this kind of work, so I will be sharing this tutorial with them.
Yes, Curie makes a big difference!
Hi shaunmza,
Visit curiesteem.com or join the Curie Discord community to learn more.
Congratulations @shaunmza! You have completed the following achievement on the Steem blockchain and have been rewarded with new badge(s) :
You can view your badges on your Steem Board and compare to others on the Steem Ranking
If you no longer want to receive notifications, reply to this comment with the word
STOPVote for @Steemitboard as a witness to get one more award and increased upvotes!