Nice easy crochet cactus and fun // Lindos cactus a crochet fácil y divertidos.
Hello friends of the Hive community, today June 13 is the feast of St. Anthony of Padua also known as St. Anthony of Lisbon the Priest, venerated in the world as the saint and doctor of the church. All over Venezuela the Tamunangue day is celebrated in honor of Saint Anthony of Padua. Many faithful people go to this saint to find lost objects or to intercede to find a good husband or wife.
Hola amigos de la comunidad Hive, hoy 13 de junio se celebra la fiesta de San Antonio de Padua conocido también como San Antonio de Lisboa el Sacerdote, venerados en el mundo como el santo y doctor de la iglesia. En toda Venezuela se celebra el día del Tamunangue en honor a San Antonio de Padua. Muchos fieles acuden a este santo para encontrar objetos perdidos o para que interceda para hallar un buen esposo o esposa.
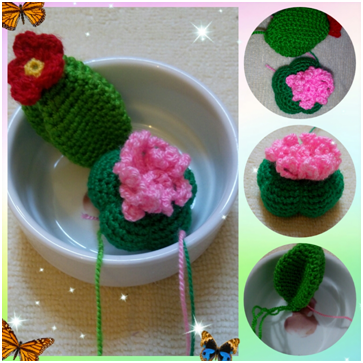
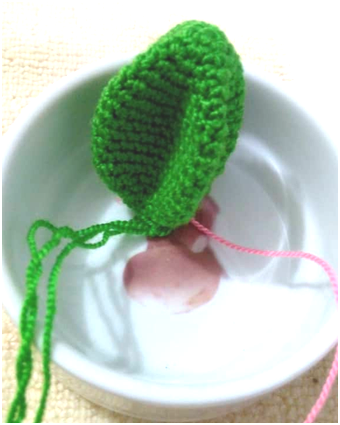
Without further ado, continuing with the cactus line, today I bring you three models to brighten up and decorate the house. They are very simple and fun to make, you can make them to your liking, change the color of the flowers, you can create them to your imagination. For these cactus I used a small cup that was to distribute candy as a base for the cactus.
Sin más preámbulos siguiendo con la línea de cactus hoy les traigo tres modelos para alegrar y decorar la casa. Son muy sencillos y divertidos de hacer, puedes hacerlos a tu gusto, cambiar el color de las flores, puedes crearlos a tu imaginación. Para estos cactus he usado un tasita que era para repartir dulce como base para los cactus.


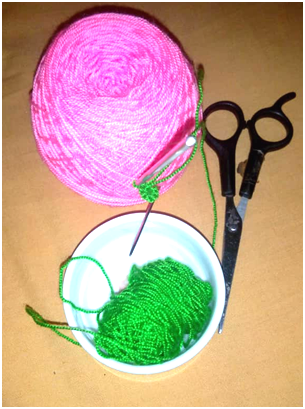
Materials green crochet thread in two shades, red, yellow and pink, 3m needle, scissors, wadding and wool sewing needle.
Materiales hilo crochet de color verde dos tonalidades, rojo amarillo y rosado, aguja de 3m, tijeras, guata y aguja lanera para coser. envase en este caso utilice una tacita para dulce.
Source: Photo taken by the author @xeliram on a cell phone.

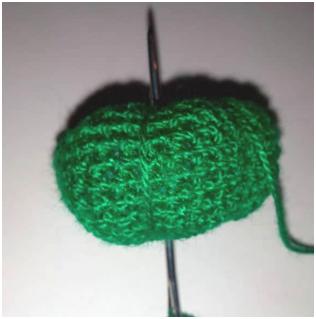
From lap 7 to the 13 low points at each point.
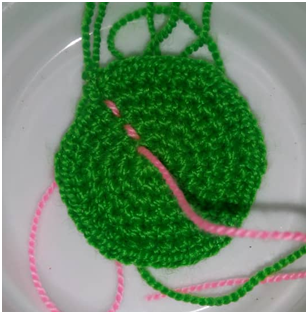
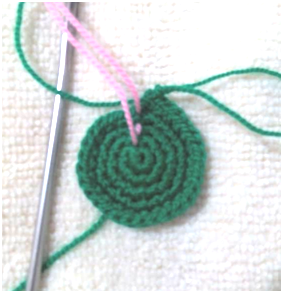
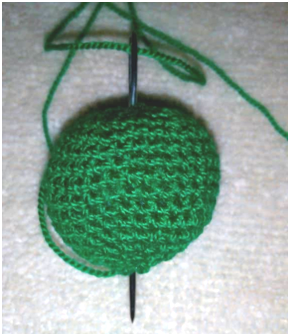
- Make a ball just like we've worked with the amigurumis. As the container where I am going to place them is small the cactus is small in size. Making spiral tissue we have until the turn has 36 stitches, that would be the turn 6 where we make four low stitches and an increase. Check out my previous posts on how to make an amigurumi head.
Realizaremos primero el cactus de la rosa roja con amarilla.
Realizar una pelota igual como hemos trabajado con los amigurumis. Como el envase donde los voy a colocar es pequeño el cactus es de pequeño tamaño. Realizando tejido en espiral tenemos hasta que la vuelta tenga 36 puntos, esa seria la vuelta 6 donde se realiza cuatro puntos bajos y un aumento. Revisas mis publicaciones anteriores como hacer una cabeza de amigurumi.
Source: Photo taken by the author @xeliram on a cell phone.
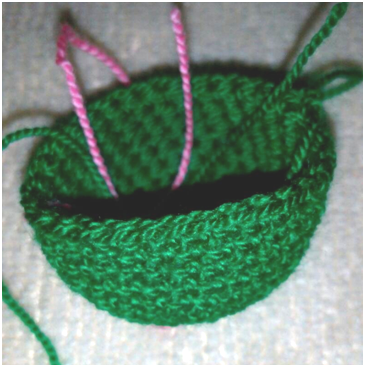
- From lap 7 to the 13 low points at each point.
De la vuelta 7 a la 13 puntos bajos en cada punto.
Source: Photo taken by the author @xeliram on a cell phone.
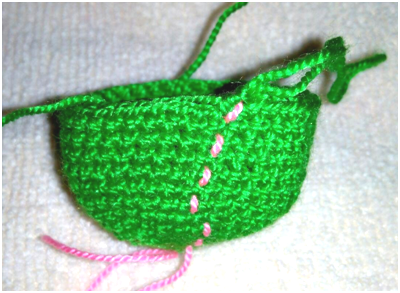
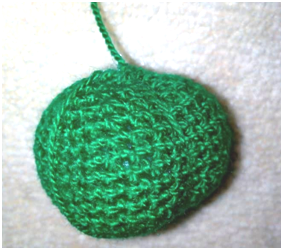
We make the decreases as we have done in the other posts with the amigurumis but in this case we do not put filler. We shape it and at the end we close it and leave thread. As we see in the image
Hacemos las disminuciones como hemos realizado en los otros post con los amigurumis pero en este caso no le colocamos relleno. Le damos forma y al final cerramos y dejamos hilo. Como vemos en la imagen
Source: Photo taken by the author @xeliram on a cell phone.
Round Cactus // Cactus Redondo
To make the round cactus we do the same procedure but a little bit smaller in this case until the turn has 30 points
Para realizar el cactus redondo hacemos el mismo procedimiento pero un poco mas pequeño en este caso hasta que la vuelta tenga 30 puntos, dándole otra tonalidad de verde.
Source: Photo taken by the author @xeliram on a cell phone.
- From lap 6 to lap 12 we made a low point at each point.
De la vuelta 6 a la vuelta 12 realizamos un punto bajo en cada punto.
Source: Photo taken by the author @xeliram on a cell phone.
- We make decreases, fill in and close leaving thread to make.
Realizamos disminuciones, rellenamos y cerramos dejando hilo para hacer.
Source: Photo taken by the author @xeliram on a cell phone.
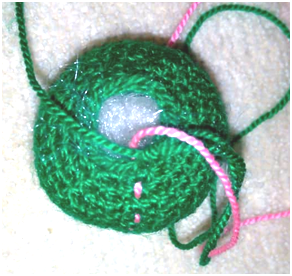
- To make the segments with the sewing needle we thread and go through the center, from the center of the top to the center of the bottom and pull the thread to form the slit. Make 5 to 8 segments, close them and leave some thread behind.
Para hacer los gajos con la aguja de coser enhebramos y vamos pasando por el centro, desde el centro de la parte de arriba hasta el centro de la parte de abajo y tirar el hilo para formar la hendidura. Hacer de 5 a 8 gajos, cerrar y dejar hilo para coser.
Source: Photo taken by the author @xeliram on a cell phone.
Flower // Flor
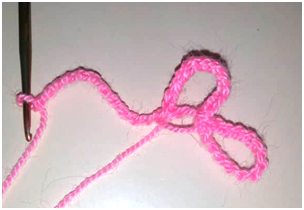
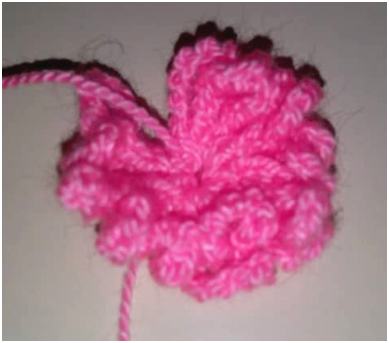
- For the flower make a magic ring and make 12 chains, in the center of the ring make sliding stitch or race stitch. Make 15 or 18 times to close with slider stitch.
Para la flor realizar un anillo mágico y hacer 12 cadenetas, en el centro del anillo hacer punto deslizado o punto razo. Realizar 15 o 18 veces cerrar con punto deslizado.
Source: Photo taken by the author @xeliram on a cell phone.
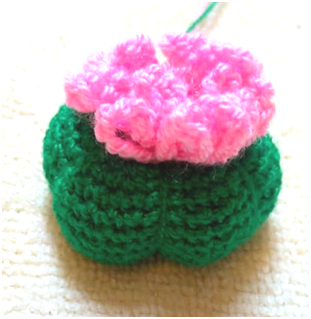
- we sew the flower to the captus
Cosemos la flor al captus
Source: Photo taken by the author @xeliram on a cell phone.
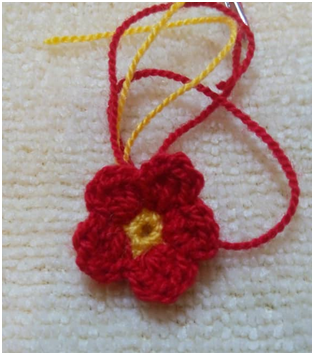
For the other cactus we made the yellow and red flower with the same steps of the post: Tutorial : Tutorial: Cactus a Crochet
Para el otro cactus realizamos la flor de color amarillo y rojo con los mismo pasos del post: Tutorial : Tutorial: Cactus a Crochet
Source: Photo taken by the author @xeliram on a cell phone.
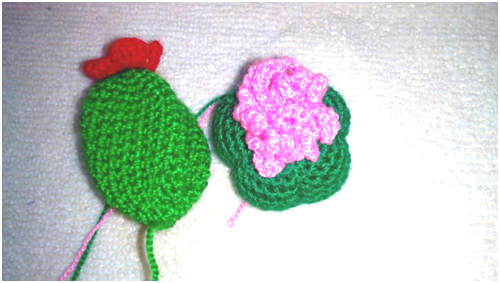
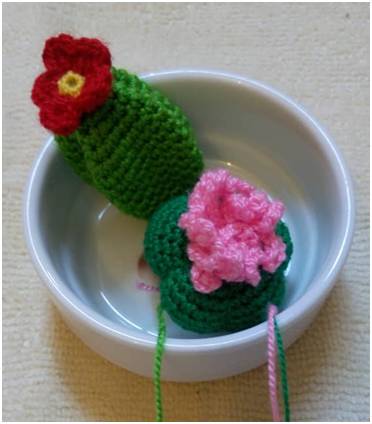
And that's how we ended up with these two cactuses. In the next post we will continue with this beautiful cactus pot.
Y así culminamos con estos dos cactus. En el siguiente post continuaremos con esta linda maceta de cactus.
Source: Photo taken by the author @xeliram on a cell phone.
Espero que les haya gustados estos sencillo cactus de crochet. Que tengas un feliz fin de semana, disfruntando de tus seres queridos. Puedes seguirnos también por Instagram: tiendaxeliram creacionesmar_fa*

Soy Marilex Porteles profesora de Matemática, investigadora, soñadora, me gusta tejer, nadar y soy madre de una hermosa niña.
Dale UPVOTE si te gusto, COMENTA y RESTEEM para que otros se enteren GRACIAS

Dale UPVOTE si te gusto, COMENTA y RESTEEM para que otros se enteren GRACIAS
¡Felicidades! Esta publicación obtuvo upvote y fue compartido por @la-colmena, un proyecto de Curación Manual para la comunidad hispana de Hive que cuenta con el respaldo de @curie.
Si te gusta el trabajo que hacemos, te invitamos a darle tu voto a este comentario y a votar como testigo por Curie.
Si quieres saber más sobre nuestro proyecto, acompáñanos en Discord: La Colmena.
This post was shared in the #spanish-curation channel in the Curation Collective Discord community for curators, and upvoted and reblogged by the @c2-spanish community account after manual review.
@c-squared runs a community witness. Please consider using one of your witness votes on us here
Congratulations @xeliram! You have completed the following achievement on the Hive blockchain and have been rewarded with new badge(s) :
You can view your badges on your board And compare to others on the Ranking
If you no longer want to receive notifications, reply to this comment with the word
STOPTo support your work, I also upvoted your post!
Support the HiveBuzz project. Vote for our proposal!