
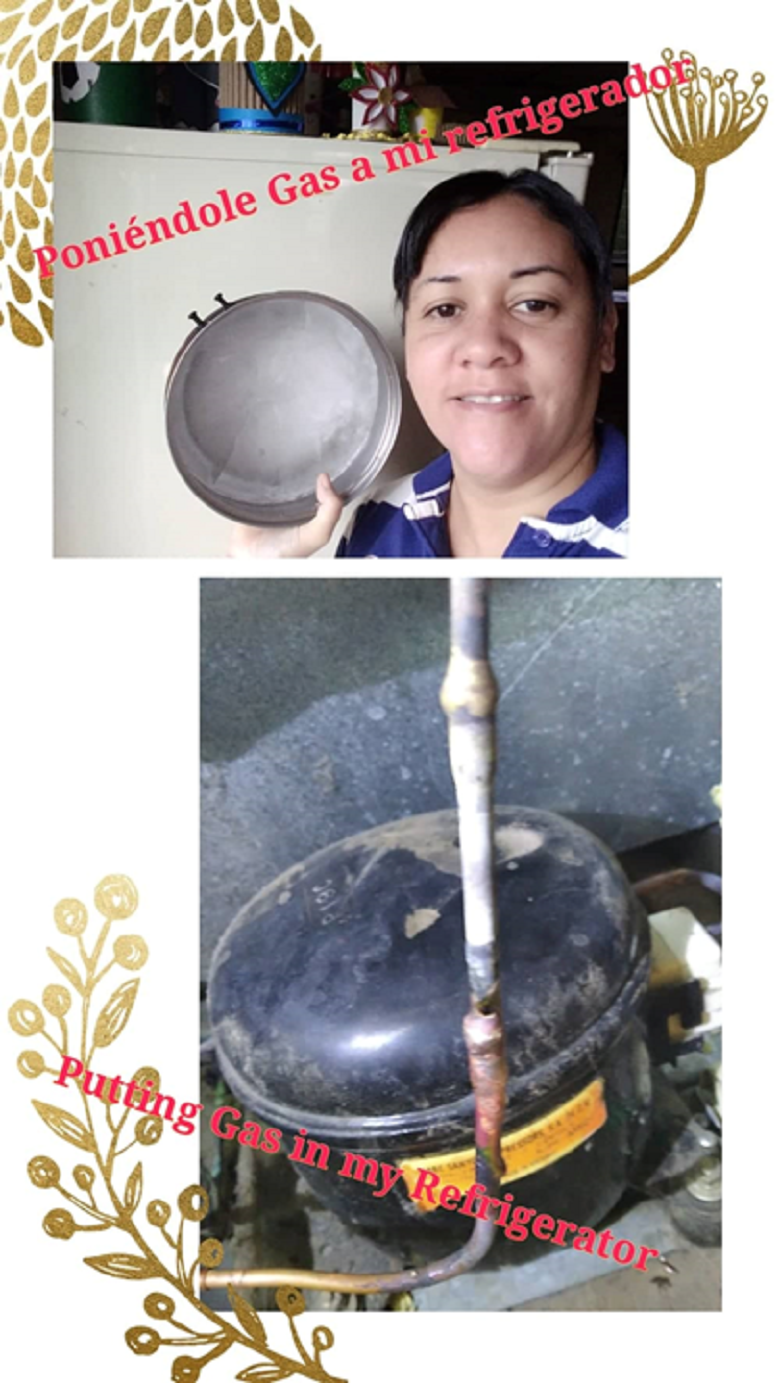
Hello my #HiveMotors friends, it is a pleasure to greet you and to present my publication in this community where I will tell you how the technician repaired my refrigerator that was not cooling. When he did the review he realized that the refrigerator had lost gas, he says that the internal pipe rots over time and therefore the gas leakage occurs in older refrigerators.
My refrigerator has been with me for years, I remember I bought it when I was pregnant with my last son who turned 14 this August. Since I bought it, it had never failed me, I always say that it was good for me (laughs) because in so many years with me it cooled perfectly and made the best ice cubes, it never failed. But as nothing lasts forever, the pipe rotted and I had to call a specialist to repair it.
Next, I tell you how the technician made the repair, I was attentive to be able to explain excuse me as I do not know the technical words they use I just watched to learn a little of the subject.

STEP BY STEP
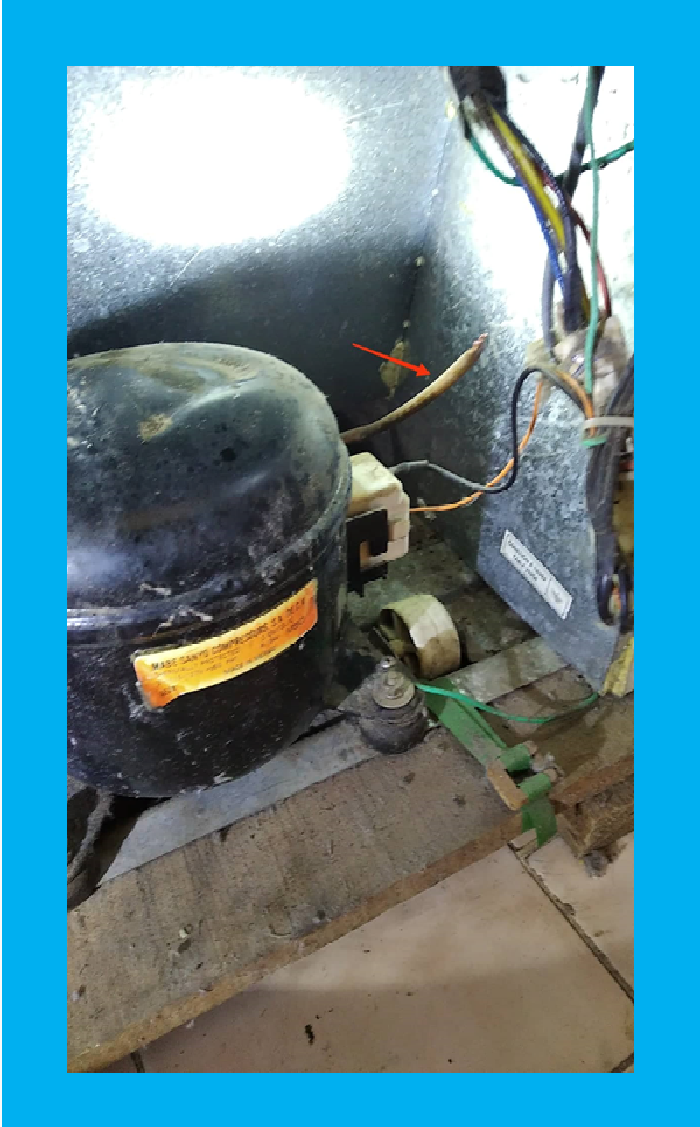
He explained to me that to place the gas, first had to remove the external grill and place the internal grill, to perform this step the first thing he did was cut with the pliers the tube that is attached to the compressor of the refrigerator and there came out a little gas that was what was left, for that reason was that the refrigerator did not cool because it lacked gas.
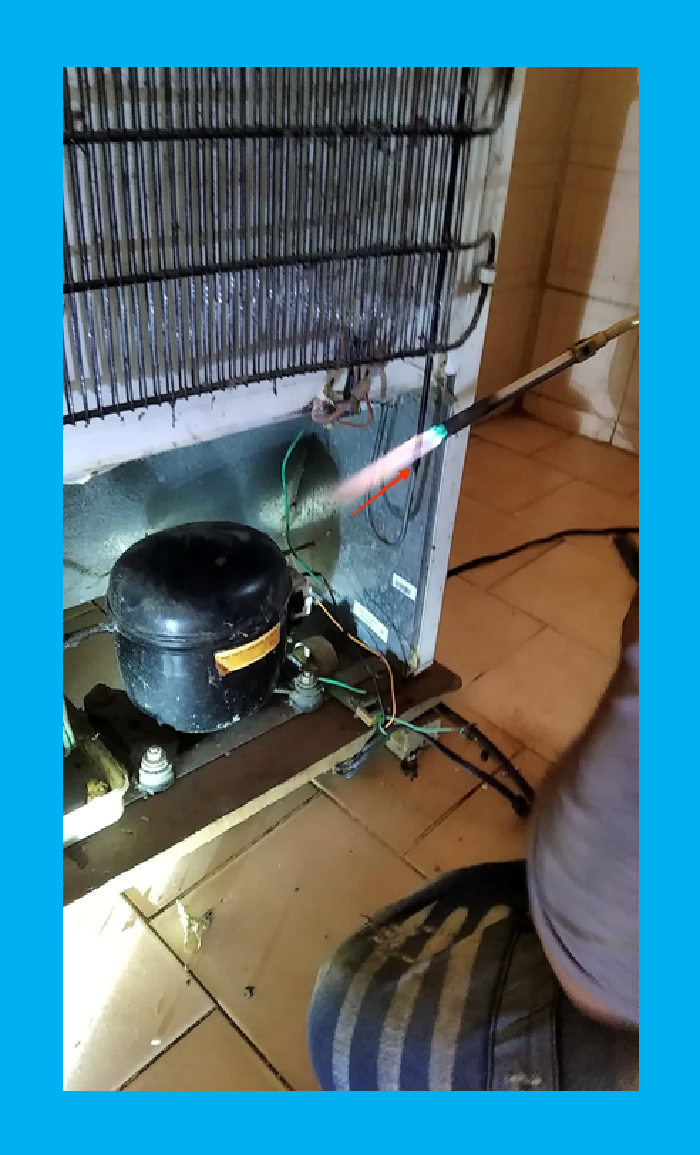
Then he cut the pipe behind the refrigerator grill and lit the torch with a tinderbox and set the pipe on fire so that the heat would allow it to be cut easily.
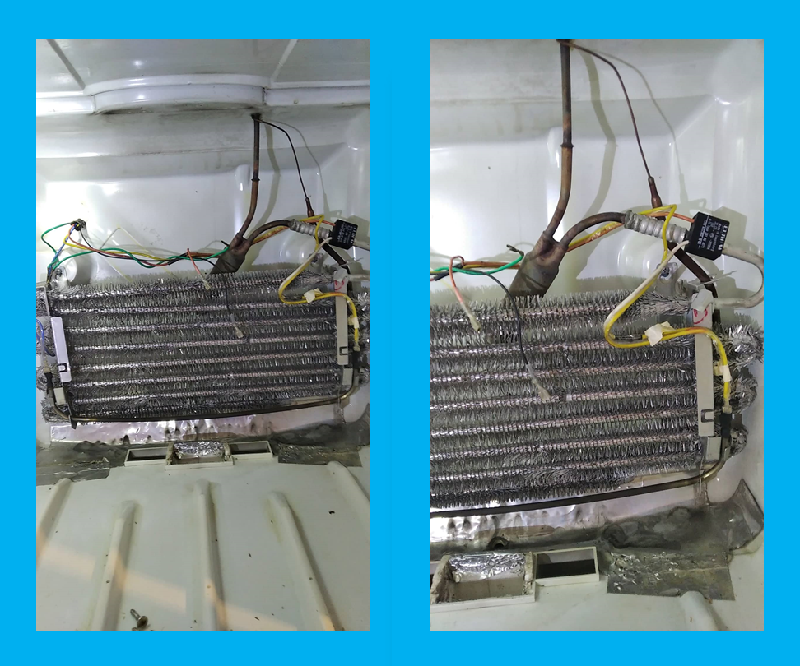
Once cut the tube took the pipe that is in the plate where the water falls which can be seen in the image on the bottom left marked by an arrow.In this plastic plate is the pipe and when heated evaporates the water, from there stretched the tube to reach and to match it with the tube that is observed in the upper right image.He took a small piece of pipe and inserted it between the two parts to make it even longer and could reach the ends.
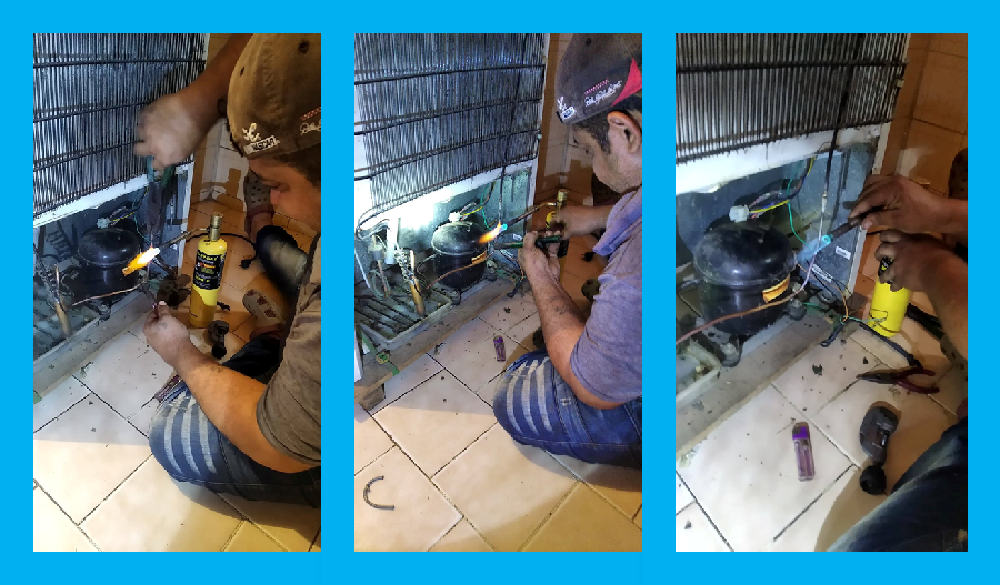
In this part you can see how the technician is heating with the torch the tubes to join them to the ends.
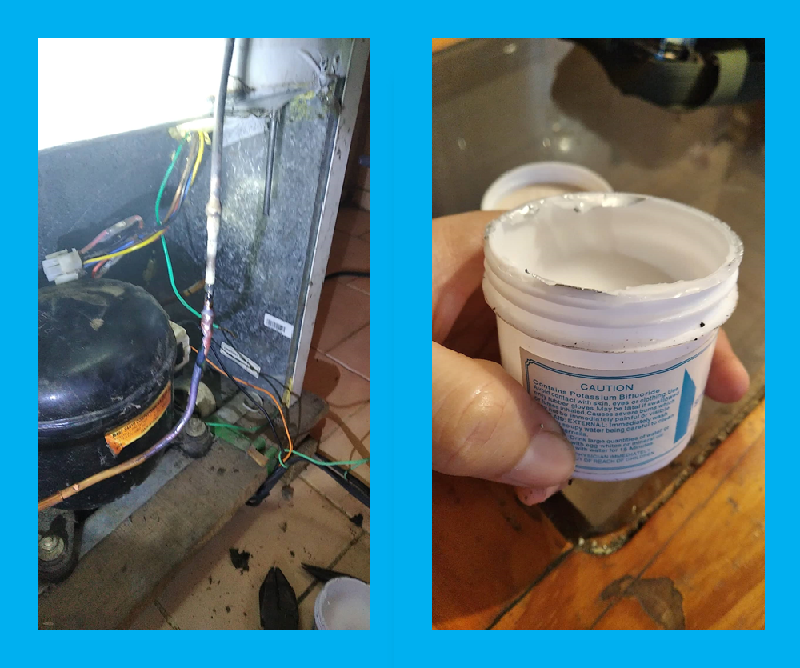
To tie the pipe remember that a small piece of iron was taken, then at the time of welding they were different metals, one was copper and the other iron, so in order to weld these two we used Bora which is a flux which is used to clean the pipe of grease and sanitize the pipe so that the iron and copper can be joined. The Bora is the white cream that can be seen in the image.
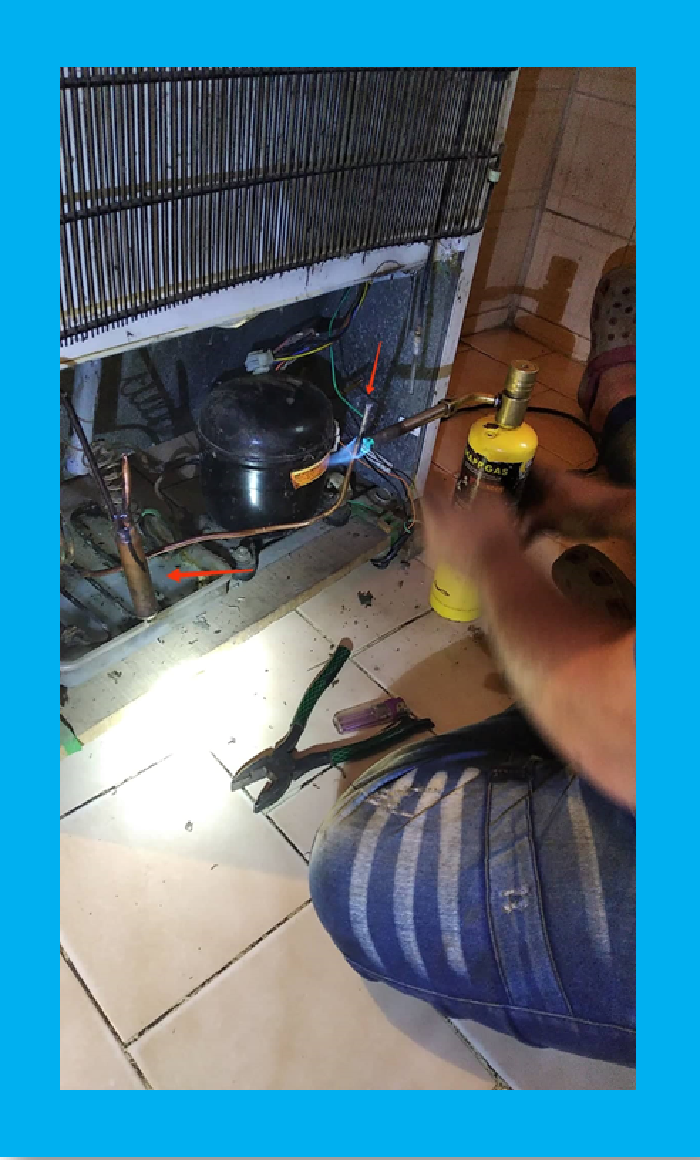
To solder I use the torch, a rod and the Bora. Once the torch is lit I place the Bora on the pipe, when it was sanitized and clean of grease I proceed to solder with the rod.
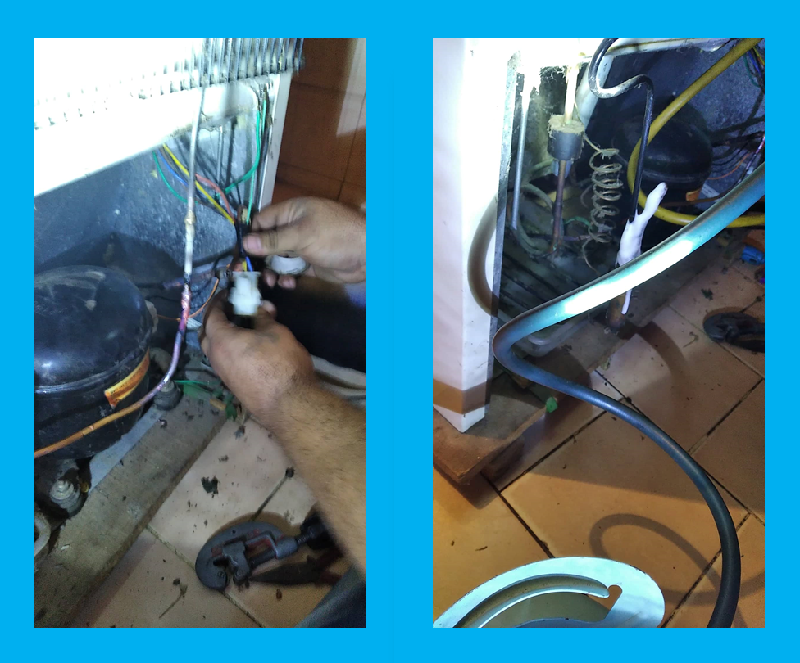
In this part the refrigerator wires are organized, they will be amaran so that they are not hanging.Finally foam is placed to the pipes to verify that there is no gas leakage.
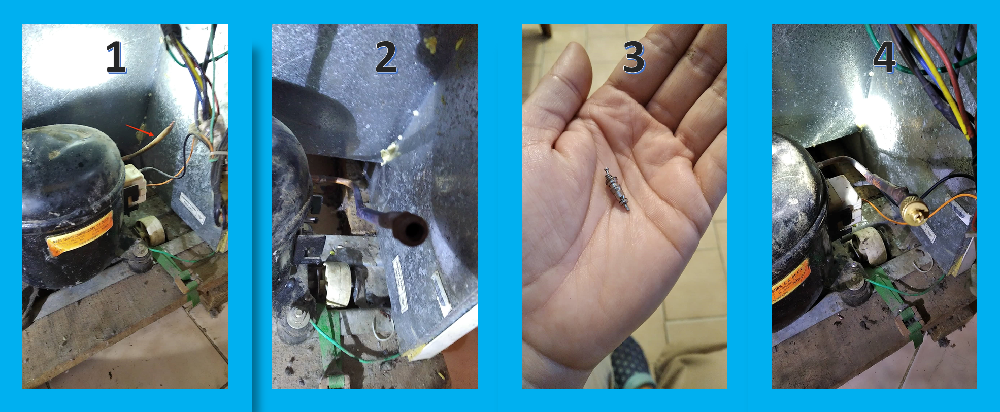
Remember the image where the technician cut the pipe coming out of the compressor, well almost at the end welded that pipe and when it was well cooled introduced the worm and that part of the pipe was sealed.

The pressure gauge is connected, first a vacuum is made to remove the air inside the compressor, the refrigerator is plugged in and the tube is sealed when there is no air.
Put the gas cylinder upside down (I didn't understand this part very well, why put the cylinder upside down?). Then the cylinder is placed upside down and then the gas is placed in the gas.
After this we waited a few minutes until the refrigerator started to cool down we checked inside and the tubes were already freezing how exciting!!!!
While we wait I am going to tell you a curious fact, the technician told me.
- The compressor holds between 8 to 10 pounds of gas, which is approximately 300 to 350 grams.
- A refrigerator lasts on for 6 hours and off for 26 minutes.
- The Bimetalic makes it turn on the grill inside the refrigerator and it gets red hot so that the ice melts.
FINAL RESULT OF THE REPAIR
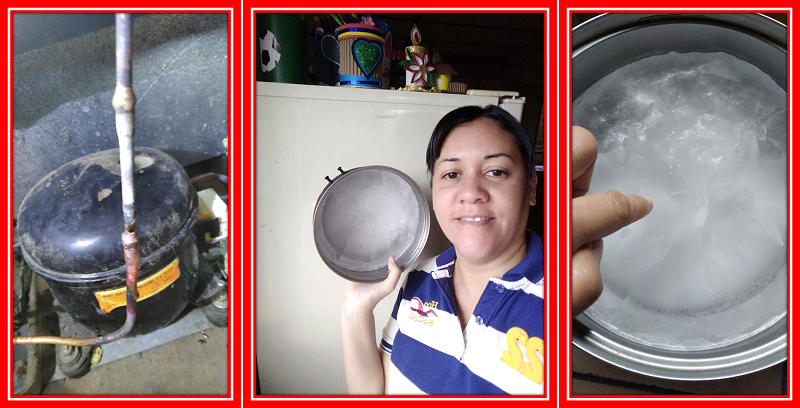
The end result was this huge chunk of ice that made my refrigerator, after placing the gas the technician told me NOT to open the refrigerator for two hours and so I did, this so that it would work well and when I opened it after the two hours, success! Water well cold.

The photos are my own and were taken with my Xiaomi Redmi 7A cell phone.
I edited the photos with PowerPoint
Translated with www.DeepL.com/Translator (free version)
Separators @brume7
Thanks for reading I appreciate your comments.

Hola mis amigos de #HiveMotors , es un placer saludarles y poder presentar mi publicación en esta comunidad en donde les contare como el técnico reparo mi refrigerador que no enfriaba. Cuando le hiso la revisión se dio cuenta que el refrigerador había perdido el gas, él dice que la tubería interna con el tiempo se pudre y por ello se presenta la fuga de gas en las neveras antiguas.
Mi refrigerador tiene años conmigo, recuerdo que lo compre cuando estaba embarazada de mi último hijo quien cumplió 14 años en este mes de agosto. Desde que lo compre nunca me había fallado, yo siempre digo que me salió bueno (risas) porque en tantos años conmigo enfriando a la perfección y hacia los mejores cubitos de hielo, nunca falló. Pero como nada es eterno, la tubería se pudrió y tuve que llamar a un especialista para que lo reparara.
A continuación, les cuento como el técnico realizo la reparación, estuve atenta para poder explicar me disculpan ya que no conozco las palabras técnicas que ellos utilizan yo solo observe para aprender un poco del tema.
PASO A PASO
El me explico que para colocar el gas, primero tenía que eliminar la parrilla externa y colocar la parrilla la interna, para realizar este paso lo primero que hizo fue cortar con el alicate el tubo que está pegado al compresor del refrigerador y por allí salió un poquito de gas que era lo que le quedaba, por ese motivo era que la refrigerador no enfriaba ya que le faltaba gas.
Luego corto el tubo que encuentra detrás de la parrilla de la nevera para ello encendió el soplete con un yesquero y puso fuego al tubo para que el calor permitiera que se pudiera cortar con facilidad
Una vez cortado el tubo tomo la tuberia que se encuentra en el plato donde cae el agua la cual se puede observar en la imagen el la parte inferior izquierda señalada por una flecha.En este plato de plastico se encuentra la tuberia y cuando se calienta evapora el agua, de alli estiro el tubo para que alcanzara y poder empartarlo con el tubo que se observa en la imagen superior dereccha.Tomó un trozo de tubo pequeño y lo introjujo entre ambos partes para que fuera aun mas largo y pudiera llegar a los extremos.
En esta parte se puede observar como el técnico está calentando con el soplete los tubos para unirlos a los extremos.
Para empatar el tubo recuerden que se tomó un trozo pequeño hierro, entonces al momento de soldar eran diferentes metales, uno era cobre y el otro hierro, así que para poder soldar estos dos se utilizó Bora que es un fundente el cual se usa para limpiar de grasa y sanitizar el tubo para que se puedan unir el hierro y el cobre. La Bora es la crema de color blanco que se observa en la imagen.
Para soldar utilizo el soplete, una varilla y la Bora. Una vez que encendió el soplete coloco la Bora en el tubo, cuando estuvo sanitizado y limpio de grasa procede a soldar con la barilla .
En esta parte se organizan los cable del refrigerador, se amaran para que no queden colgando.Por último se coloca espuma a las tuberías para verificar que no haya ninguna fuga de gas.
Recuerdan la imagen donde el técnico corto el tubo que sale del compresor, bueno ya casi al final soldó ese tubo y cuando estuvo bien frio introdujo el gusanillo y esa parte de la tubería quedo sellada.
Se conecta el manómetro, primero se hace vacío para sacar el aire que tenga adentro el compresor,se enchufa el refrigerador y al no tener aire se sella el tubo.
Se pone la bombona de gas boca abajo (esta parte no la entendi muy bien ¿para que colocar la bombona boca abajo?). Luego se coloca la bombona boca arriba después se coloca al gas.
Después de esto esperamos unos minutos hasta que el refrigerador comenzara a enfriar ¡¡revisamos dentro y los tubos ya se estaban congelando que emoción!!
Mientras esperamos les voy a contar un dato curioso, me lo dijo el técnico
- El compresor agarra entre 8 a 10 libras de gas, que equivalen aproximadamente entre 300 a 350 gramos
- Una nevera dura encendida 6 horas y apagada 26 minutos
- El Bimetálico hace que encienda la parrilla que está dentro del refrigerador y se ponga al rojo vivo para que el hielo se derrita
RESULTADO FINAL DE LA REPARACION
El resultado final fue este enorme tozo de hielolo que hizo mi refrigerador, después de colocar el gas el técnico me dijo que NO abriera el refrigerador por dos horas y así lo hice, esto para que el trabajara bien y cuando lo abrí pasadas las dos horas ¡¡Éxito!! Agua bien fría.
Las fotos son de mi autoría y fueron tomadas con mi celular Xiaomi Redmi 7A
Edite las fotos con PowerPoint
Separadores @brume7
Gracias por leerme aprecio tus comentarios
Que chévere, que bueno que nos compartieras tu experiencia, y que arreglar una nevera puede ser complicado así que tienes un buen técnico!! 😁😁
Gracias por explicar el paso a paso
¡Saludos, brume!
Hola @luis96xd, es verdad el técnico es muy bueno son 17 años de experiencia arreglando neveras agradezco su servicio.
Gracias por detenerte en mi blog, lo agradezco
Si que observó bien el trabajo para explicarlo tan bien 👍. Y que bueno que le puso sacar palabra al técnico muchos no dicen mucho o no les gusta que le hagan preguntas🤭. Que bueno que tuvo arreglo. También buen detalle que después de colócale el gas y ponerlo en marcha no se se abra por dos horas, esa sugerencia no la había escuchado, pero ellos son los que saben 😁. Éxitos 👋.
Gracias a Dios el técnico fue bastante conversador y respondió a todas mis preguntas sin ningún problema. Es cierto lo que dices, hay mucho que le gusta que le hagan preguntas, tal vez les cuesta responder, o más bien no quieren decir sus secretos jajaja
Me encanta que el trabajo está descrito paso a paso y a profundidad, lo único que lamento es que las imágenes no se pueden ver muy bien en mi pc, pero en el cell si se ven bien, no sé porque sucede, un abrazo y mis saludos cordiales, bienvenida a Hivemotors :)
Hola amigo @jesustiano, gracias por la bienvenida. Tantas cosas que uno manda a reparar en casa como electrodomésticos y yo sin saber de esta maravillosa comunidad.
Saludos que tengas un excelente inicio de semana
¡Felicitaciones!
Estás participando para optar a la mención especial que se efectuará el domingo 4 de septiembre del 2022 a las 8:00 pm (hora de Venezuela), gracias a la cual el autor del artículo seleccionado recibirá la cantidad de 1 HIVE transferida a su cuenta.
¡También has recibido 1 ENTROKEN! El token del PROYECTO ENTROPÍA impulsado por la plataforma Steem-Engine.
1. Invierte en el PROYECTO ENTROPÍA y recibe ganancias semanalmente. Entra aquí para más información.
2. Contáctanos en Discord: https://discord.gg/hkCjFeb
3. Suscríbete a nuestra COMUNIDAD y apoya al trail de @Entropia y así podrás ganar recompensas de curación de forma automática. Entra aquí para más información sobre nuestro trail.
4. Visita nuestro canal de Youtube.
Atentamente
El equipo de curación del PROYECTO ENTROPÍA