
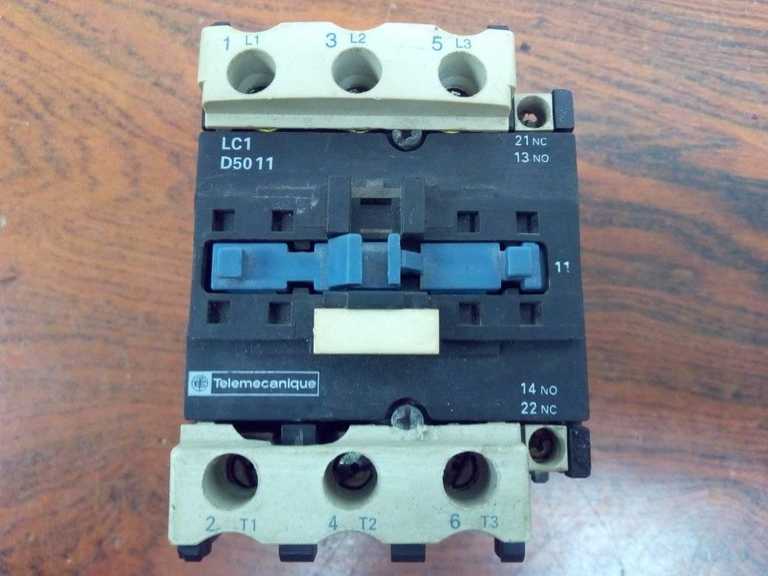
Hola buenas tardes quería comunidad de hive, espero que estén todos muy bien, En esta ocasión les quería mostrar una especie de tutorial paso a paso, de como desarmar y realizar un mantenimiento a un contactor Telemecanique LC1D5011 dañado, para reparar sin más que agregar comencemos.
Hello good afternoon wanted hive community, I hope you are all very well, This time I wanted to show a kind of step by step tutorial, how to disassemble and service a damaged Telemecanique LC1D5011 contactor, to repair without further ado let's start.
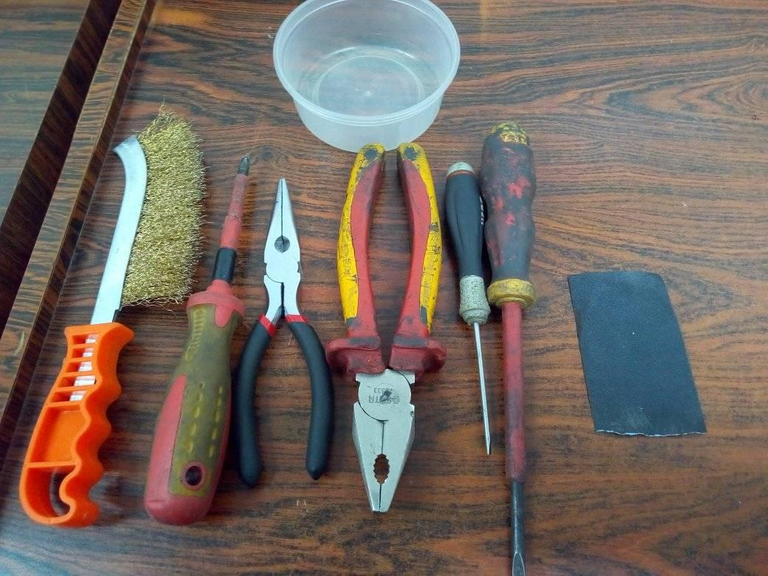
Paso 1: ubicar la mesa de trabajo, limpia y ordenada con un espacio amplio para colocar las herramientas y las partes del contactor una vez ya este desarmado. se procede a colocar las herramientas que serán necesarias, tales como son. Alicate, destornillador de borneras, destornillador dieléctrico estría y pala, cepillo de alambre, lija, químico dieléctrico, brocha, multímetro.
Step 1: place the work table, clean and tidy with ample space to place the tools and parts of the contactor once it is already disassembled. proceed to place the tools that will be necessary, such as. Pliers, terminal screwdriver, dielectric screwdriver, wire brush, sandpaper, dielectric chemical, brush, multimeter.
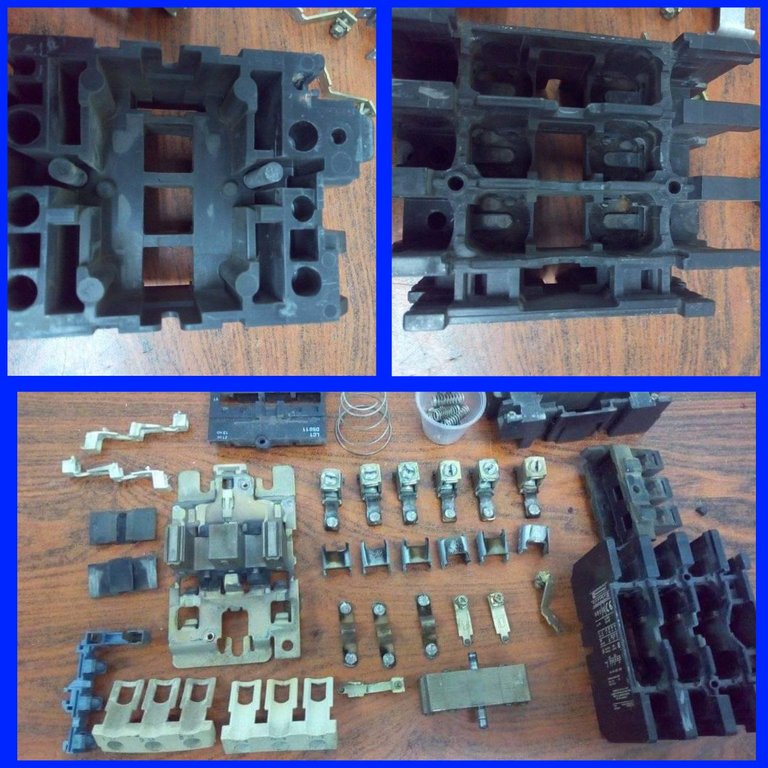
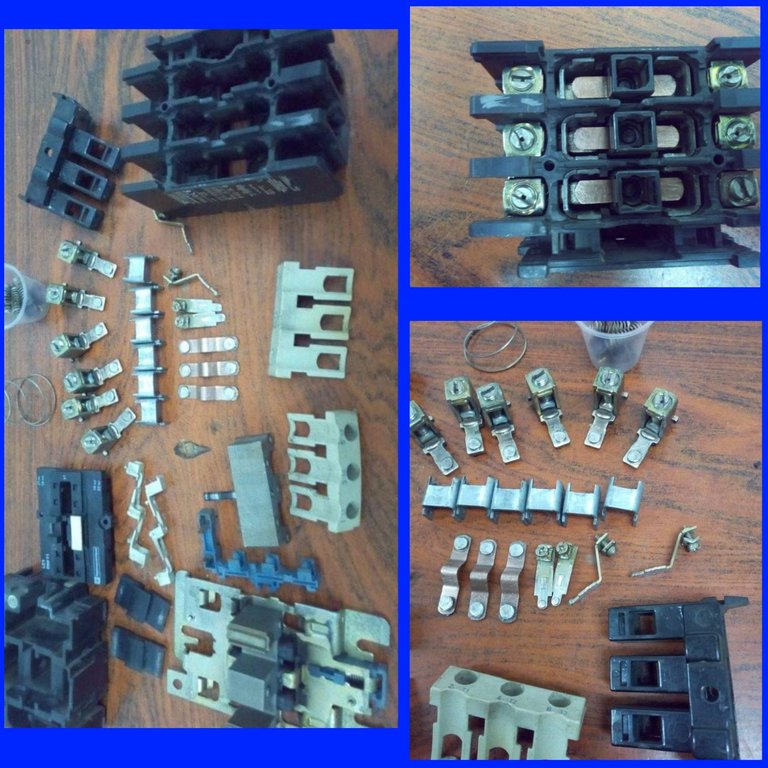
Paso 2: desarmar el contactor LC1D5011 empezando por la parte superior, quitando las tapas, luego quitar los contactos, guardando y enumerando todos las partes, para luego armar de la misma forma.
Step 2: disassemble the LC1D5011 contactor starting from the top, removing the covers, then remove the contacts, saving and numbering all the parts, then reassemble in the same way.
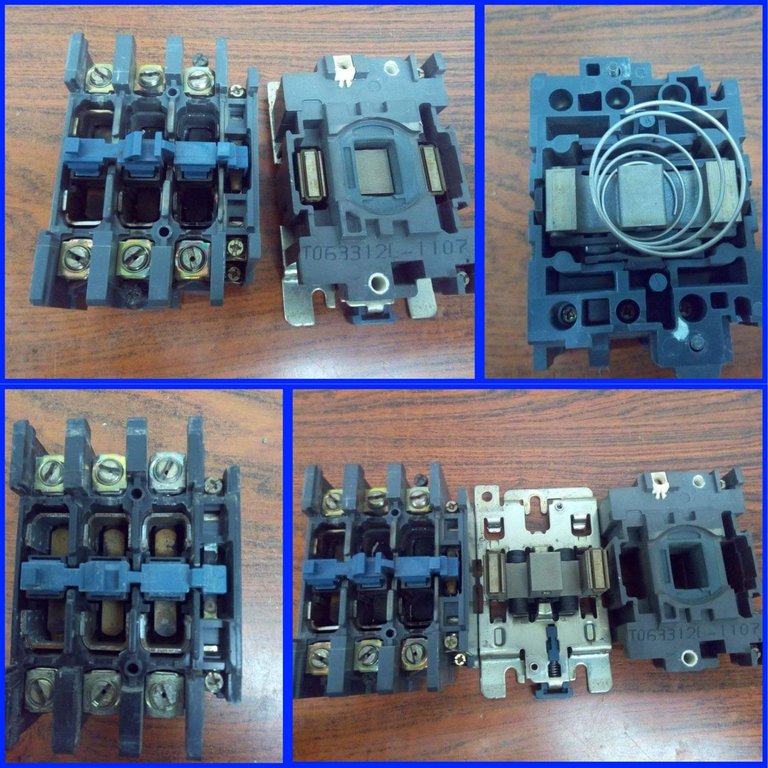
Paso 3: limpiar con la brocha todas las partes que contengan polvo y con la lija junto al cepillo de alambre pasarlos por las partes de cobre del contactor.
Step 3: clean with the brush all the parts containing dust and with the sandpaper together with the wire brush pass them through the copper parts of the contactor.
Pasó 4: una vez lijado y pulido con el cepillo de alambre, se procede armar de la misma forma que se quitaron las piezas anteriores.
Step 4: once sanded and polished with the wire brush, proceed to assemble in the same way as the previous parts were removed.
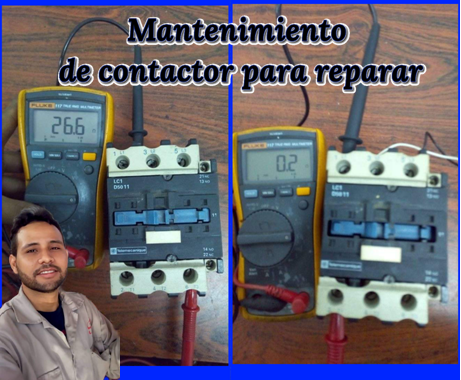
Paso 5: con la ayuda del multímetro realizar las siguientes medidas, primero la bobina del contactor para apreciar su impedancia y luego los contactos auxiliares y de potencia.
Step 5: with the help of the multimeter make the following measurements, first the contactor coil to appreciate its impedance and then the auxiliary and power contacts.

Espero les haya gustado y les pueda servir de ayuda, gracias y hasta la próxima.
I hope you liked it and that it can help you, thank you and see you next time.
TRADUCTOR DEEPL
IMAGENES DE MI PROPIEDAD