Greetings,
Dear friends a few days ago I published several repairs that accumulated in my wife's car, well I tell you that the car liked the affection and now asks for more 🤣.
In this opportunity I come to talk about the seals or service plugs of the engine block as one of them expired and began to leak coolant.
First of all my recommendation is to always use coolant for the engine of our cars, I know that many people choose to use tap water and others say they use the water that discards the air conditioning of our homes to be demineralized water.
But the truth is that it is best to use coolant because it is specially designed for the work it does, among these is the temperature changes, another thing that brings the coolant is lubricating agents that extend the life of the water pump and prevent corrosion of engine parts or cooling system.
A few days ago I began to observe that the coolant level was leaking, as is normal in the Chevrolet the cap of the container tends to expire and fail, then every time we turn off the engine of the car she ceases to exert the regulatory pressure and leak.
But this was not the case because I started to evaluate to see where the leak was and it was not there, at the moment I kept looking for the leak but had no results, for a moment I thought that the electric fan was failing causing the engine to work hotter and was consuming by evaporation, but it was not the case.
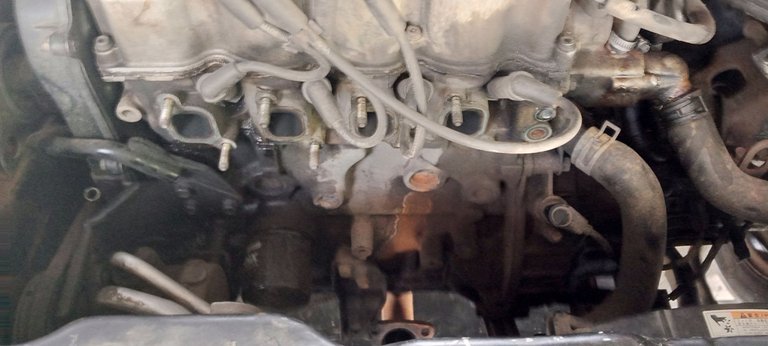
A few days ago I had to come home from a race and when I turned off the engine I heard a drop falling and evaporating, the sound is very similar to heating an oil with water in the kitchen, when I open the hood to see where the drop was falling I realized that the leak was hot because the hole that was being made to the service seal dilates with heat and generated the leak.

On Monday I took matters into my own hands and went to the rectifier to buy the seal, this time I bought it in bronze so that it does not suffer from corrosion.
The tedious thing about this leak apart from the fact that if you are careless you can overheat the engine by running out of coolant, is all the parts that must be removed to access the seal and be able to replace it.
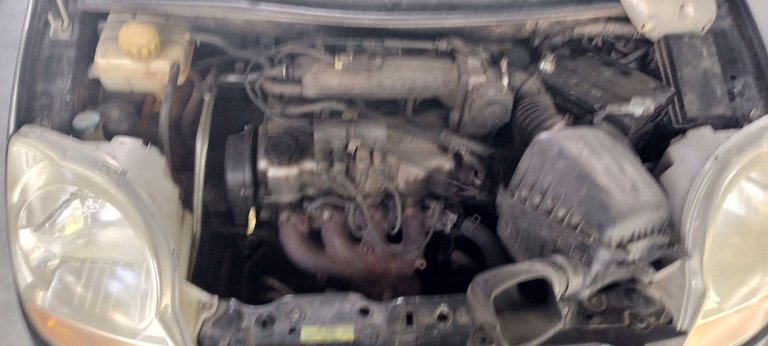
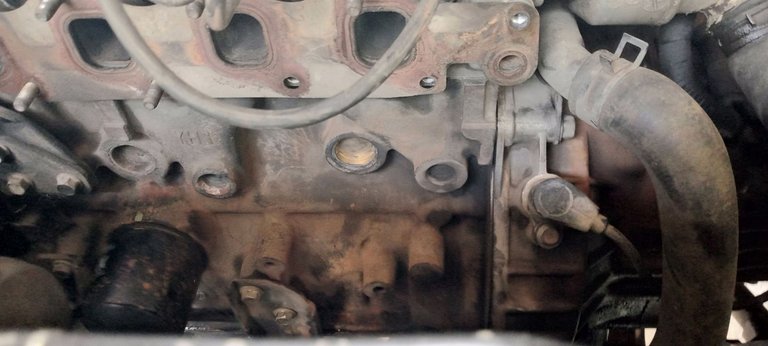
The first thing to do is to work the engine cold, then we start with disassembling the air filter box and then remove the exhaust system to just where the pipe begins, that is to remove the exhaust manifold and catalyst.
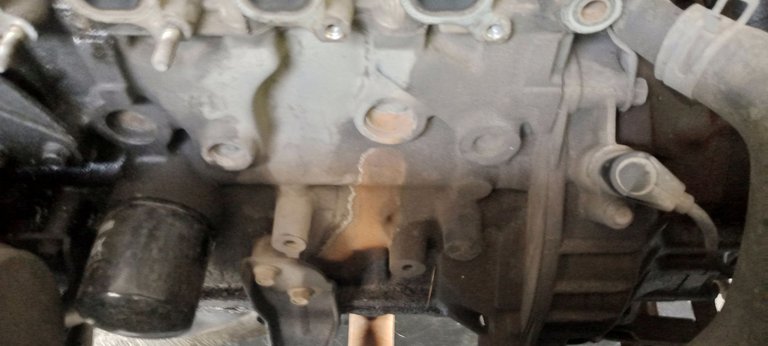
Once we have access to the seal we disassemble the damaged one to replace it, as it is already damaged we can remove it with a thin chisel and a hammer, being very careful that it does not go to the internal part of the engine, my advice is to always hit on one side only so that the seal is oscillating and once it rotates 90° we can pry it with the chisel or use a pressure pliers and pull it.
Once removed the old seal only remains to pass a coarse sandpaper through the contact area to remove any traces of corrosion or particles that remained from the old seal, when we finish this we place the new seal, if you have as you can freeze the seal to make it easier to be contracted, then we place it with a flat wood we will hitting it until it is in contact with the engine block and is flush, remember that if you use something metal you can deform the seal and damage it.
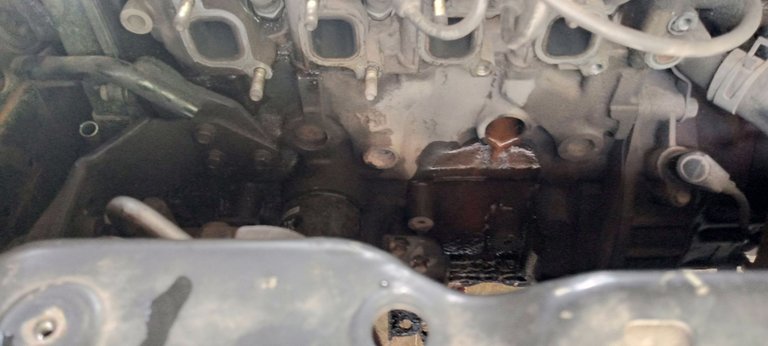
Before placing the exhaust system I took advantage of having access to non-visible parts of the engine and gave it a wash, then dry it with compressed air to avoid failure to turn it on.
When placing everything is its respective place we put the coolant to the proper level, I recommend leaving the car on for a while for the thermostat to make its cycle and then cold check the coolant level.
Finally I tell you that this work is done in this way by not having the right tools because the ideal is that these seals are replaced when we restore the engine, in the rectifier when they perform the work of chemical bath and rectification of the cylinder is that we must make this replacement, but as the car has not yet gone through this process and the seals that brings plant were iron did not last so long.
Thank you for reading my lines and God bless you greatly, the photos are my property taken with the Infinix Hot 10 i cell phone.
SPANISH
Saludos,
Queridos amigos hace unos días publique varias reparaciones que se me acumularon en el carro de mi esposa, bueno les cuento que el carro les gustó el cariñito y ahora pide más 🤣.
En esta oportunidad les vengo a hablar de los sellos o tapones de servicio del bloque del motor ya que uno de ellos se venció y empezó a fugar líquido refrigerante.
Primero que nada mi recomendación es siempre utilizar líquido refrigerante para el motor de nuestros autos, se que muchas personas optan por utilizar agua del grifo y otros dicen que utilizan el agua que desecha el aire acondicionado de nuestras casas por ser agua desmineralizada.
Pero la verdad es que lo mejor es utilizar líquido refrigerante porque este está diseñado especialmente para el trabajo que realiza, entre estos está los cambios de temperatura, otra cosa que aporta el líquido refrigerante es agentes lubricantes que alargan la vida de la bomba de agua y evitan la corrosión de las partes del motor o el sistema de refrigeración.
Hace unos días empecé a observar que el nivel de refrigerante estaba presentando perdidas, como es normal en los Chevrolet la tapa del envase tiende a vencerse y fallar, entonces cada vez que apagamos el motor del auto ella deja de ejercer la presión reglamentaria y fuga.
Pero este no era el caso ya que empecé a evaluar a ver por dónde era la fuga y ahí no era, de momento seguí buscando la fuga pero no tenía resultados, por un momento pensé que el electroventilador estaba fallando haciendo que el motor trabaje más caliente y estaba consumiendo por evaporación, pero tampoco fue el caso.
Hace unos días me tocó venir de carrera a la casa y cuando apague el motor del auto escuché una gota caer y evaporarse, el sonido es muy similar al de calentar un aceite con agua en la cocina, cuando abro el capot para ver dónde estaba cayendo la gota me di cuenta de la fuga era en caliente ya que el agujero que se le estaba haciendo al sello de servicio se dilata con el calor y generaba la fuga.
El día lunes tome cartas en el asunto y me fui a la rectificadora a comprar el sello, está vez lo compre de bronce para que no sufra de corrosión.
Lo tedioso de esta fuga aparte de que si te descuidas puedes recalentar el motor al quedarte sin líquido refrigerante, es todas las partes que hay que retirar para tener acceso al sello y poder reemplazarlo.
Lo primero que debemos hacer es trabajar el motor en frío, luego empezamos con desmontar el cajón del filtro de aire y luego retirar el sistema de escape hasta justo donde empieza la tubería, es decir toca retirar el múltiple de escape y el catalizador.
Una vez tenemos acceso al sello desmontamos el dañado para reemplazarlo, como ya está dañado podemos sacarlo con un cincel delgado y un martillo, con mucho cuidado de que no se vaya a la parte interna del motor, mi consejo es siempre golpear por un solo lado para que el sello vaya oscilando y una vez que gira 90° podemos hacer palanca con el cincel o utilizar un alicate de presión y halarlo.
Una vez retirado el sello viejo solo queda pasar una lija gruesa por el área de contacto para eliminar algún rastro de corrosión o partículas que quedaron del sello viejo, al terminar esto colocamos el sello nuevo, si tienes como puedes congelar el sello para que sea más fácil por estar contraído, luego que lo ubicamos con una madera plana la vamos golpeando hasta que está haga contacto con el bloque del motor y quede al ras, recuerda que si utilizas algo metálico puedes deformar el sello y dañarlo.
Antes de colocar el sistema de escape aproveche que tenía acceso a partes no visibles del motor y le di una lavada, luego lo seque con aire comprimido para evitar fallas al prenderlo.
Al colocar todo es su respectivo lugar colocamos el refrigerante hasta el nivel adecuado, les recomiendo dejar el auto encendido un rato para que el termostato haga su ciclo y después en frío chequear el nivel del refrigerante nuevamente para que no quede incompleto.
Por último les digo que este trabajo lo realice de esta manera por no contar con las herramientas adecuadas ya que lo ideal es que estos sellos sean reemplazados cuando restauramos el motor, en la rectificadora cuando realizan el trabajo de baño químico y de rectificación de los cilindro es que debemos realizar este reemplazo, pero como el auto aún no ha pasado por este proceso y los sellos que trae de planta eran de hierro no duraron tanto tiempo.
Gracias por leer mis líneas y que Dios les bendiga grandemente, las fotos son de mi propiedad tomadas con el celular Infinix Hot 10 i.
The rewards earned on this comment will go directly to the people( @soychalbed ) sharing the post on Twitter as long as they are registered with @poshtoken. Sign up at https://hiveposh.com.
Excelente hack el de congelar el sello antes de montarlo y aprovechar su contracción, buena esa.
Si aveces uno aplica técnicas y olvida compartirlas y resulta que hacen gran diferencia
JAJAJAJ me dio risa esta introducción:
Esto me hizo acordar a un meme de que el auto no puede ver que el dueño tiene dinero nuevo por que de un se daña jejejej
Siempre pensare igual que tu Las cosas son diseñadas para su correcto uso.
Siempre rio con ese vídeo, para eso están los ingenieros para crear cosas que mejoran el funcionamiento