

🌈¡Hola hivers!🌈 me había perdido esta semana un poco por diversos factores en principal el internet, había salido y en los sitios que iba el internet era cada vez peor. Sin embargo desde el martes fui a casa de una amiga y no desaproveche la oportunidad para maquillarme y mostrarles tanto el paso a paso cómo el resultado final. De paso que era la primera vez que maquillaba con aro de luz y quedé enamorada, necesito uno urgentemente😥.
Hello hivers! 🌈 I was a bit lost this week due to several factors, mainly the internet, I was out and the internet was getting worse and worse in the places I went to. However since Tuesday I went to a friend's house and I didn't miss the opportunity to do my make up and show you the step by step and the final result. By the way, it was the first time I made up with a light ring and I was in love, I need one urgently😥.
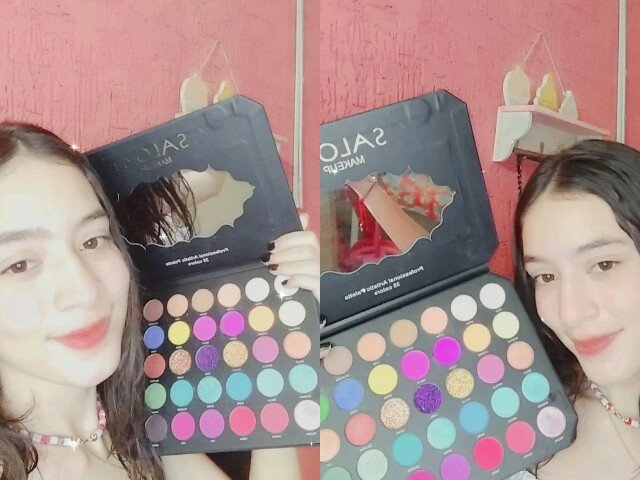
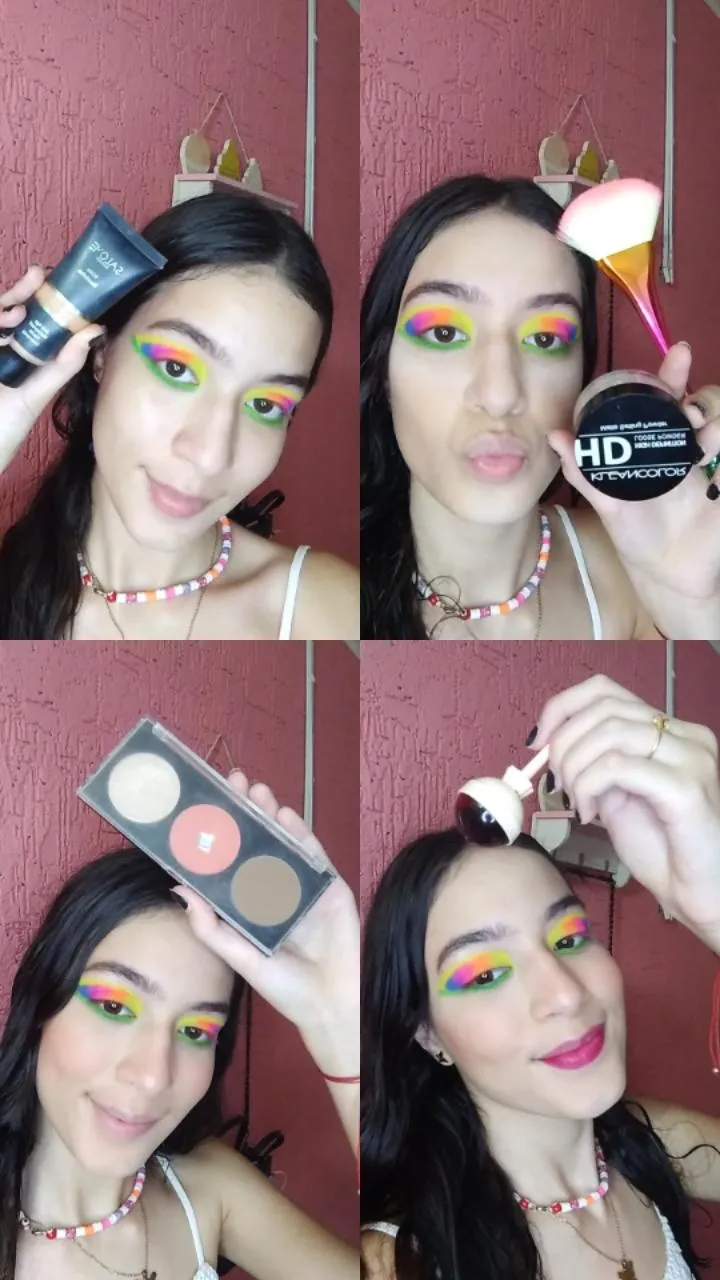
Primero que todo cabe acotar que la paleta que utilicé es de mi amiga, pero es que no me pude resistir al ver esos tonos neón. Esta paleta es la de Salomé Makeup con 35 colores.
La verdad es de muy buena pigmentación, nada más necesitas aplicar una prebase o algo en tu párpado para que el color agarre mucho más.
First of all, it's worth mentioning that the palette I used is my friend's, but I couldn't resist when I saw those neon tones. This palette is from Salomé Makeup with 35 colors.
The truth is very good pigmentation, you just need to apply a primer or something on your eyelid for the color to grab much more.
Bueno los pasos de este maquillaje fueron bastante sencillos y no tardé mucho en su realización.
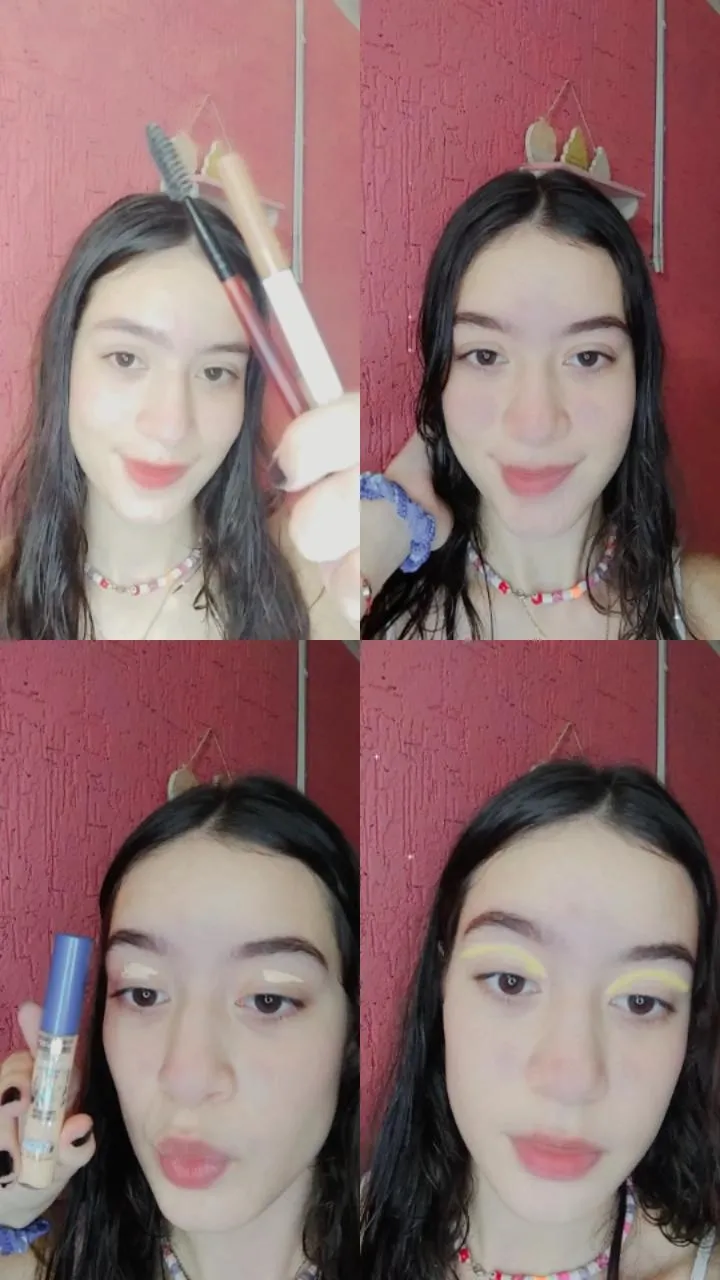
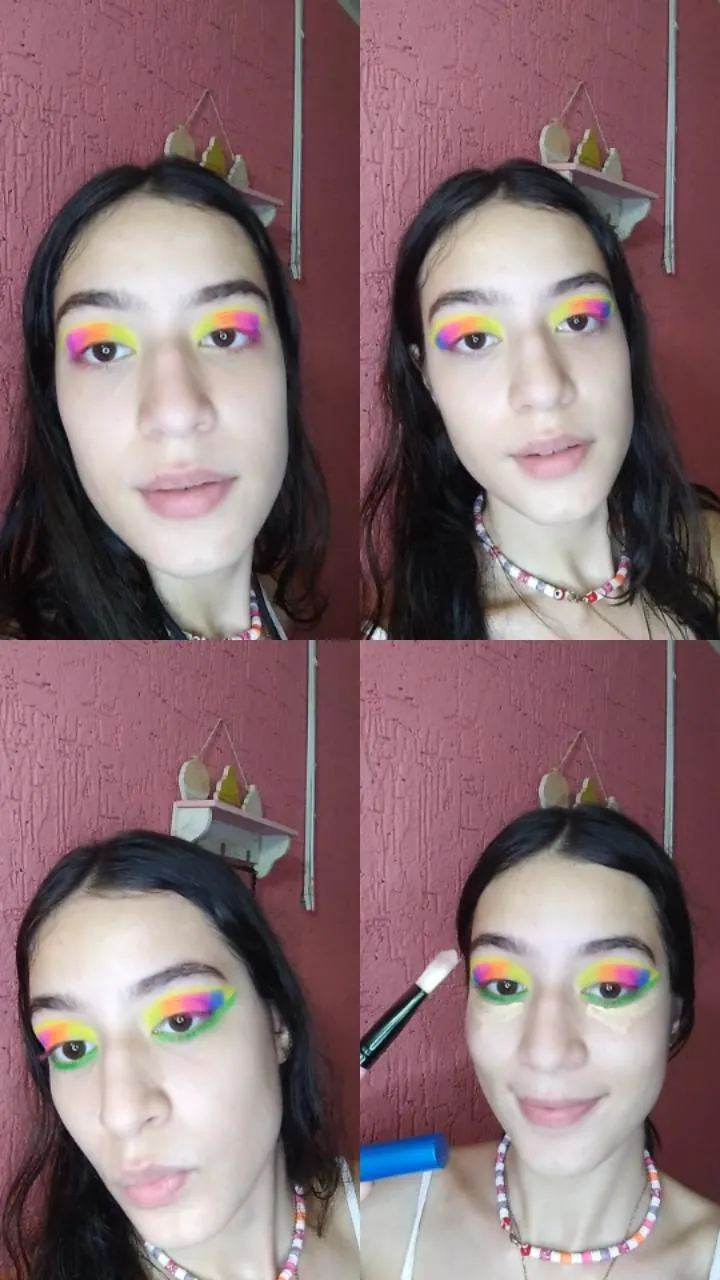
1er paso: Hice mis cejas peinandolas primero un poco y rellenándolas con este lápiz que hace simulación de los peliitos al pintar.
2do paso: Al tener las cejas listas, apliqué corrector en mis párpados cómo prebase para las sombras.
3er paso: Cómo tercer paso aplique una sombra amarilla normal (no neón), en la parte de la cuenca solamente extendiéndolo un poco más allá de la V externa del ojo. Cómo si fuera una especie de delineado,para definir por arriba el límite de las sombras.
4to paso: Luego de que apliqué el primer tono de amarillo en la cuenca, pude empezar a aplicar los tonos progresivamente desde el lagrimal hasta lo último de mi párpado. Es así como apliqué los tonos amarillo neón, naranja y fucsia sucesivamente.
Well, the steps of this makeup were quite simple and it didn't take me long to do it.
1st step: I did my eyebrows by first combing them a bit and filling them with this pencil that simulates the hairs when painting.
2nd step: Once the eyebrows were ready, I applied concealer on my eyelids as a pre-base for the shadows.
3rd step: As a third step I applied a normal yellow shadow (not neon), in the part of the eye socket only extending it a little bit beyond the external V of the eye. As if it were a kind of eyeliner, to define the upper limit of the shadows.
Step 4: After I applied the first shade of yellow in the socket, I was able to start applying the shades progressively from the tear trough to the last of my eyelid. This is how I applied the neon yellow, orange and fuchsia shades successively.
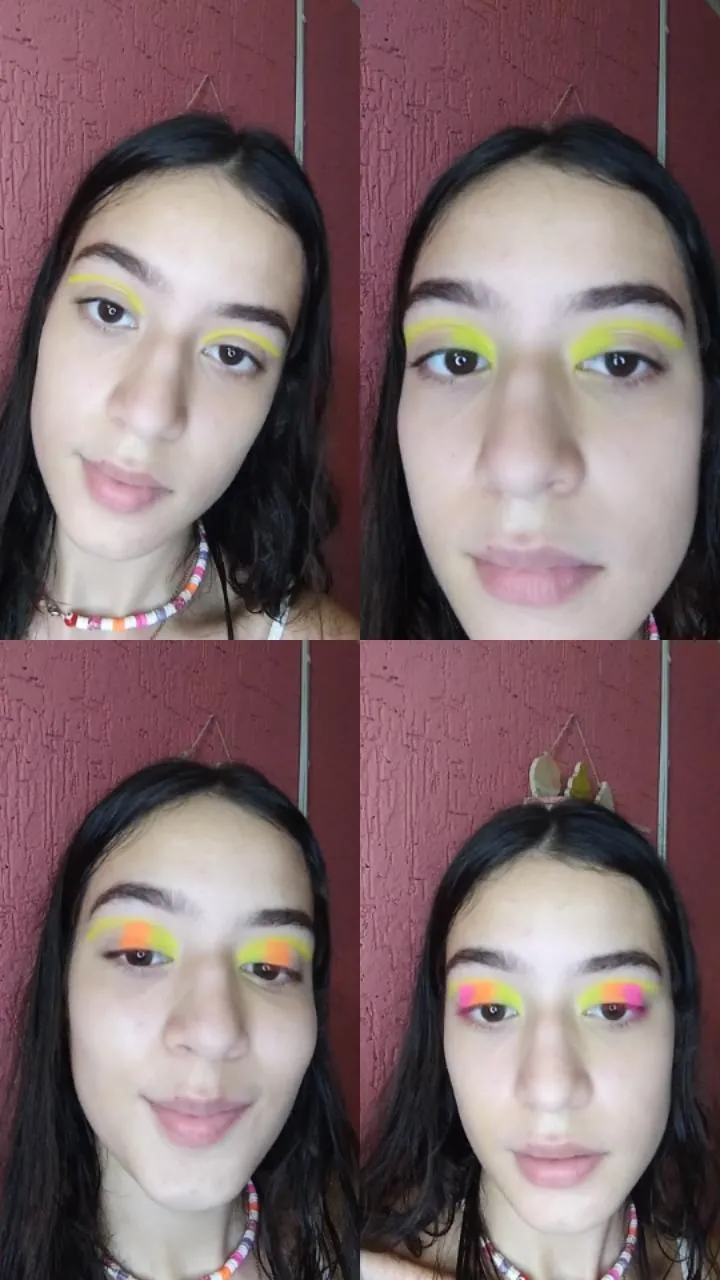
5to paso: Apliqué el tono morado y el azul para completar la diversidad de tonos en la parte del párpado. Y con una brocha limpia difumine para unir cada uno de esos tonos.
6to paso: Por último en la parte inferior de mi ojo apliqué un tono verde neón, que es el ultimo de los que tenía, así que decidí darle un poco más de protagonismo y extenderlo igual que el tono amarillo que apliqué en un inicio, así que también lo hice cómo una especie de delineado por debajo.
7to paso: Apliqué corrector por toda la parte de la ojera pero también de esa manera corregí mi maquillaje de los ojos con una brocha lengua de gato para que se viera mucho más limpio e impecable.
8vo paso: Maquillé todo mi rostro, apliqué base, polvo suelto, rubor, contorno, iluminador y por último tinta de labios.
Step 5: I applied the purple and blue shades to complete the diversity of shades on the eyelid. And with a clean brush I blended each of these shades together.
6th step: Finally on the lower part of my eye I applied a neon green shade, which is the last one I had, so I decided to give it a little more prominence and extend it just like the yellow shade I applied at the beginning, so I also did it as a kind of eyeliner underneath.
7th step: I applied concealer all over the under eye area but I also corrected my eye makeup with a cat tongue brush to make it look cleaner and more flawless.
Step 8: I applied foundation, loose powder, blush, contour, highlighter and finally lip tint.
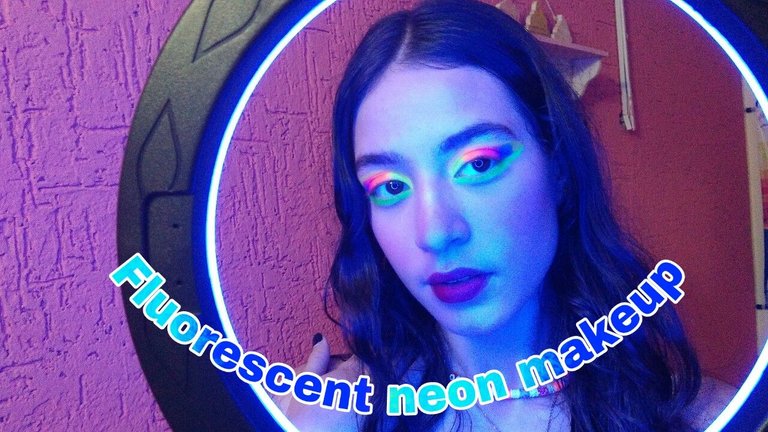
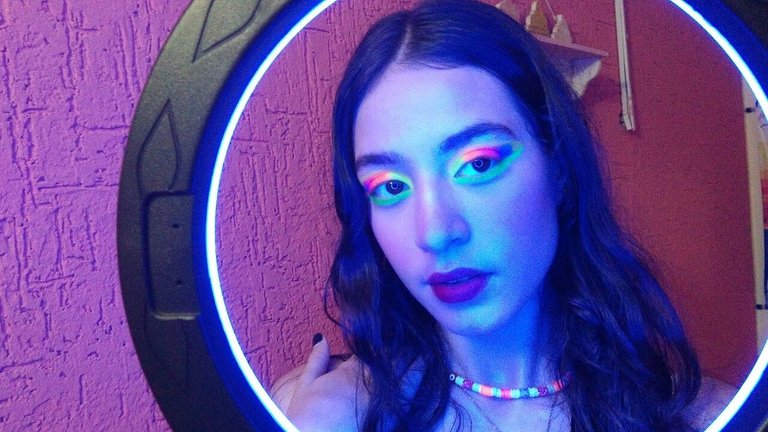
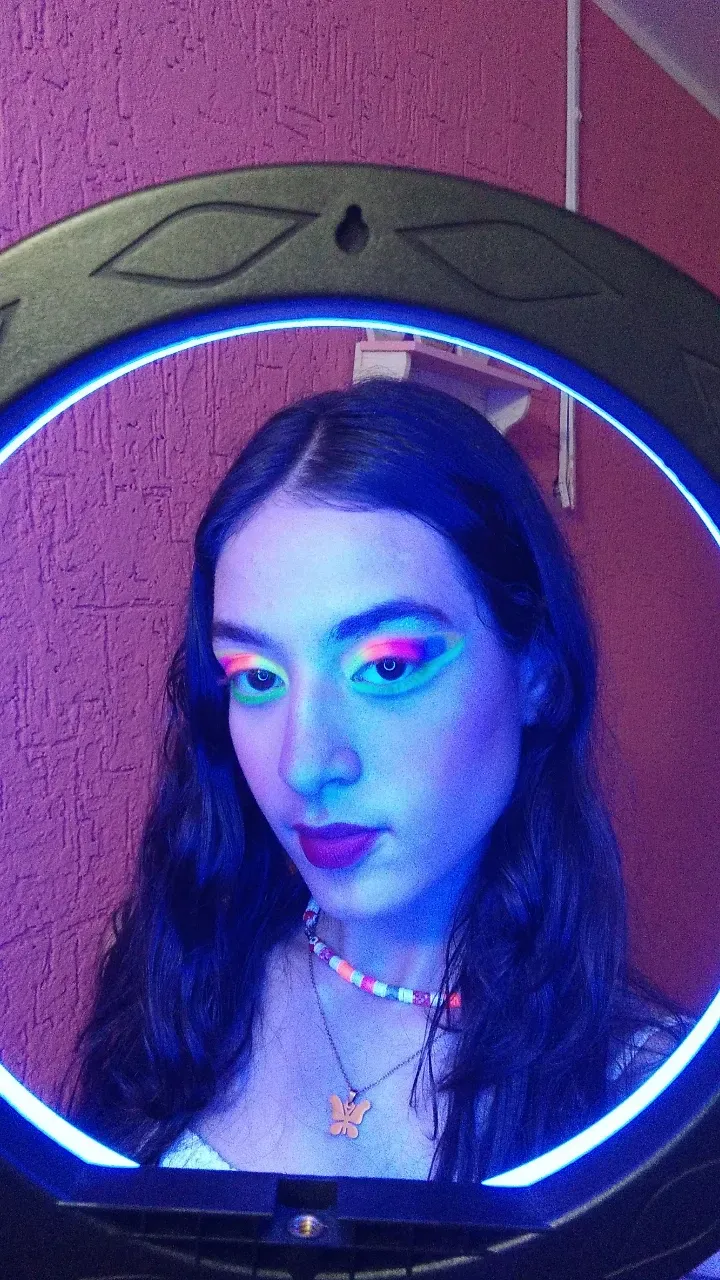
Y por último teniendo mi maquillaje listo, probé la luz RGB azul del aro, y derrepente wow mi maquillaje brillaba perfectamente en la oscuridad y se veía espectacular el resultado. Por aquí les compartir fotos del resultado
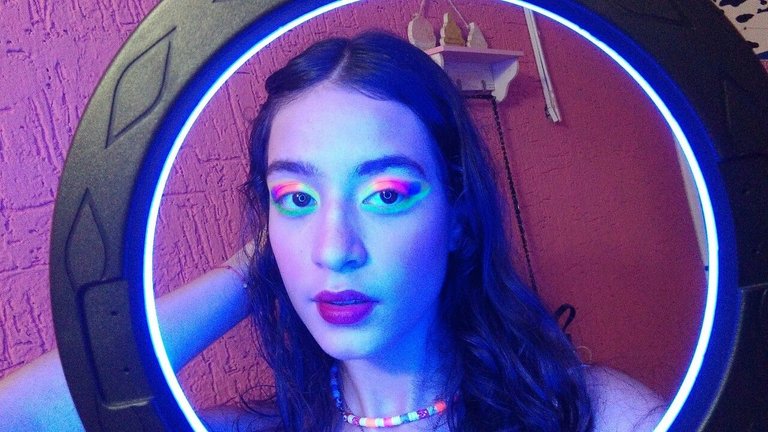
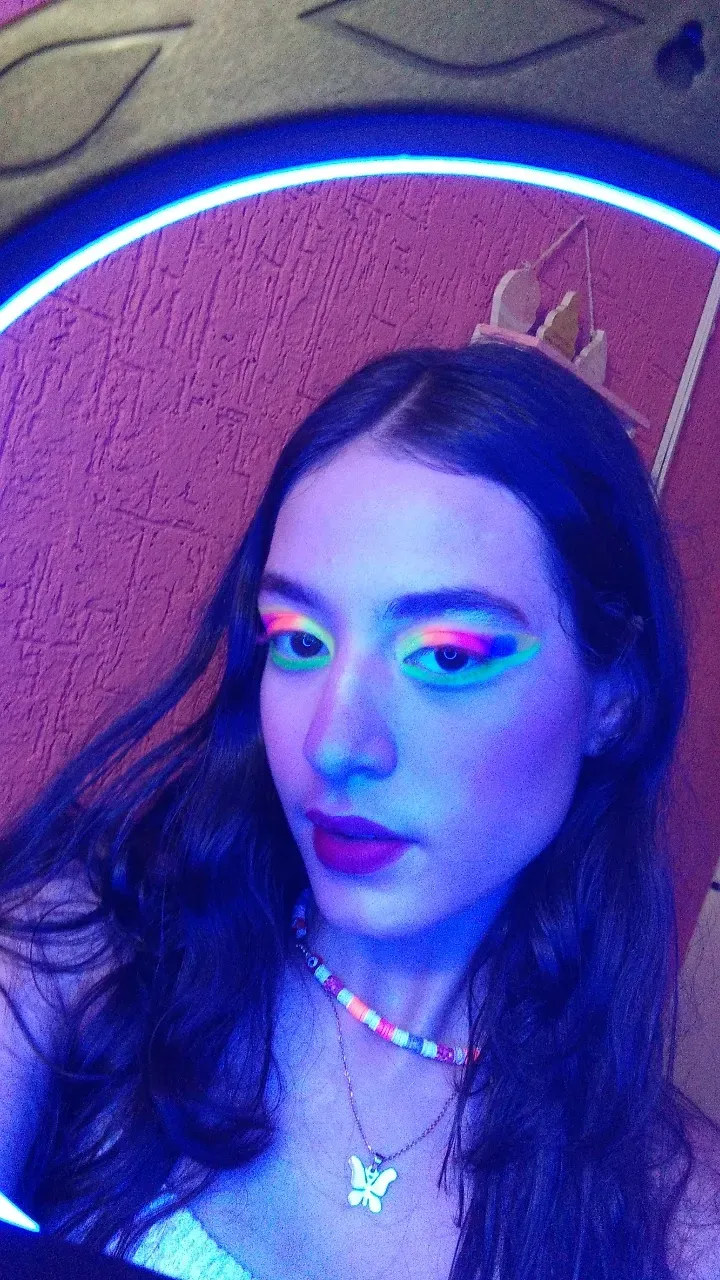
Finally having my makeup ready, I tried the blue RGB light in the ring, and suddenly wow my makeup glowed perfectly in the dark and the result looked spectacular. Here are some pictures of the result
¡Gracias por leer!
Thanks for reading!

Todas las fotos son de mi propiedad y mis diseños hechos en Canva y PicsArt
Congratulations @andrea.carolina! You have completed the following achievement on the Hive blockchain and have been rewarded with new badge(s) :
Your next target is to reach 50 upvotes.
Your next target is to reach 3750 upvotes.
You can view your badges on your board and compare yourself to others in the Ranking
If you no longer want to receive notifications, reply to this comment with the word
STOPTo support your work, I also upvoted your post!