🌸🎨💚
Hello everyone, I send you my greetings with much affection, wishing you all a very prosperous day in everything.
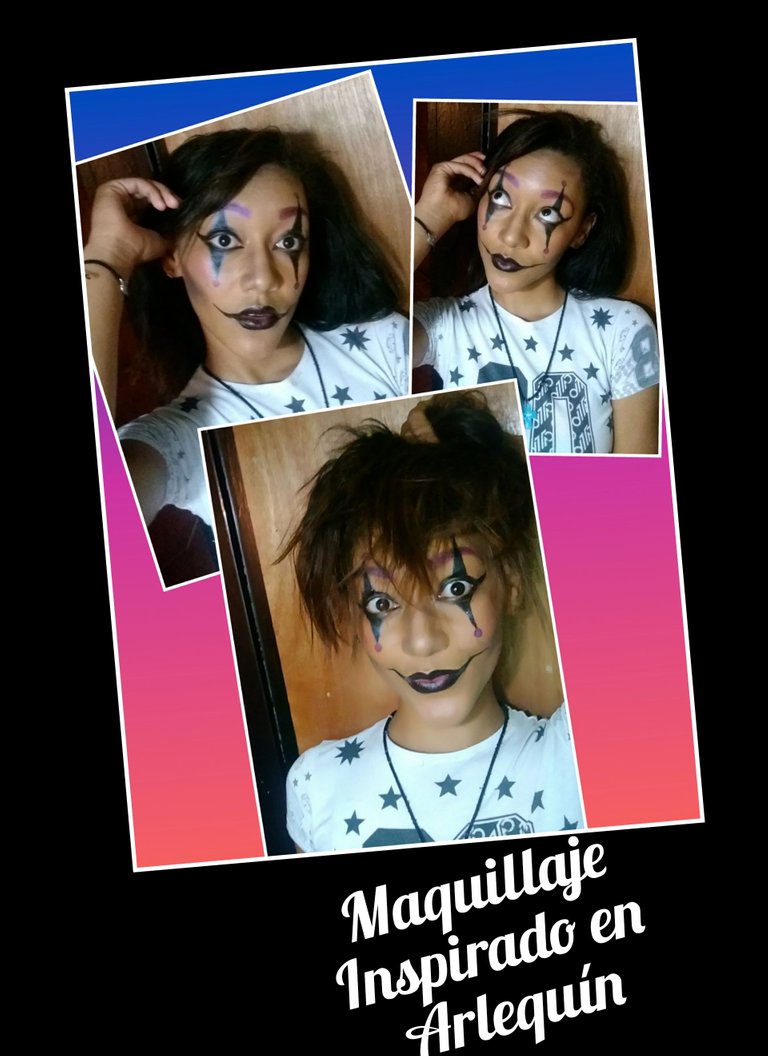
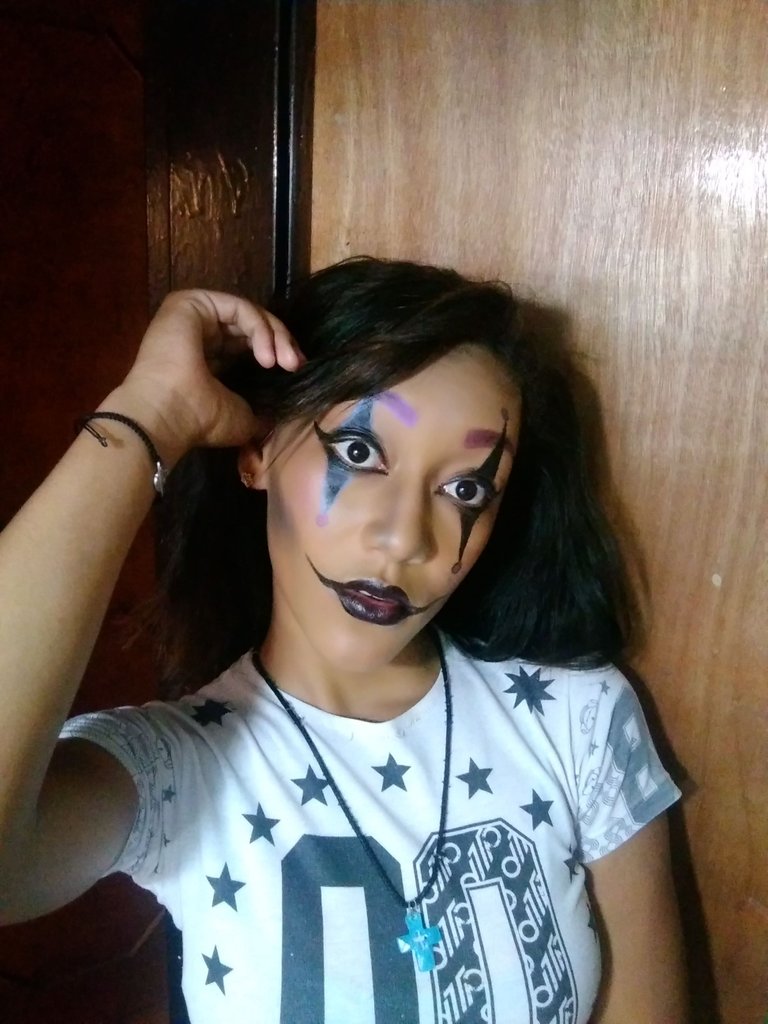
Today was a day of sharing and enjoying with the family, where I made a makeup for my niece inspired by harlequin, which she herself chose and I did not refuse to fulfill a promise made a long time ago. That is to make her an artistic makeup.
Hola a todos, les envio mis saludos con mucho cariño, deseándoles a todos un día muy próspero en todo.
Hoy fue un día de compartir y de disfrutar en familia, en donde he realizado un maquillaje a mi sobrina inspirado en arlequín, que ella misma eligió y no negué en cumplir una promesa hecha desde hace mucho. Que es realizarle un maquillaje artístico.
🌸🎨💚🌸🎨💚🌸🎨💚🌸🎨💚🌸🎨💚🌸
Makeup steps
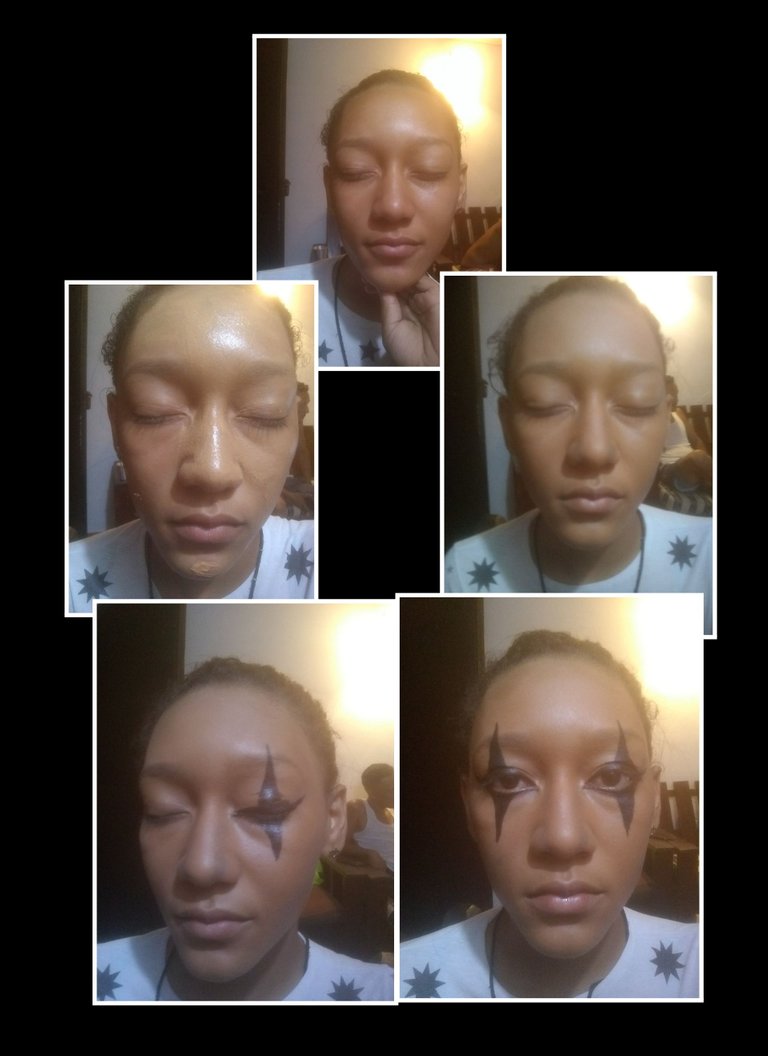
First of all, as with all makeovers, I did a facial cleansing. Then I applied some primer to smooth her skin and applied liquid foundation with a silicone sponge, followed by compact powder applied with a brush to seal.
Once I had the face in an even tone I took a very fine brush and took cream shadow and drew on each eye a vertical peaking shape towards the forehead and towards the cheeks, I also did an eyeliner horizontally.
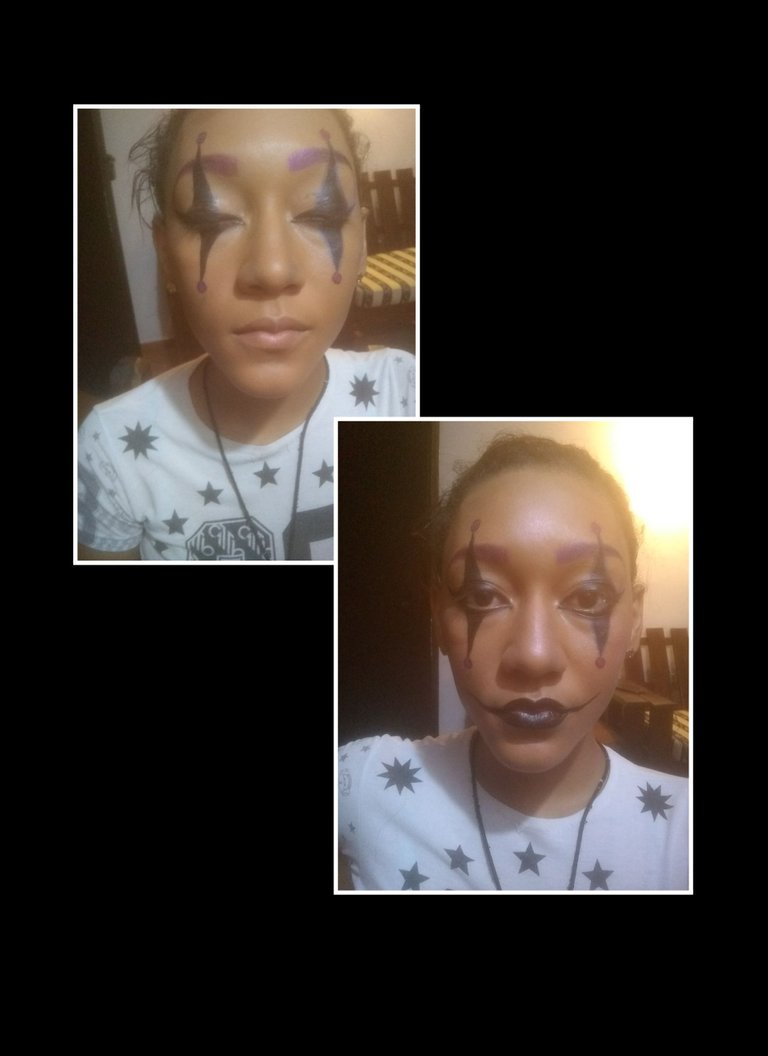
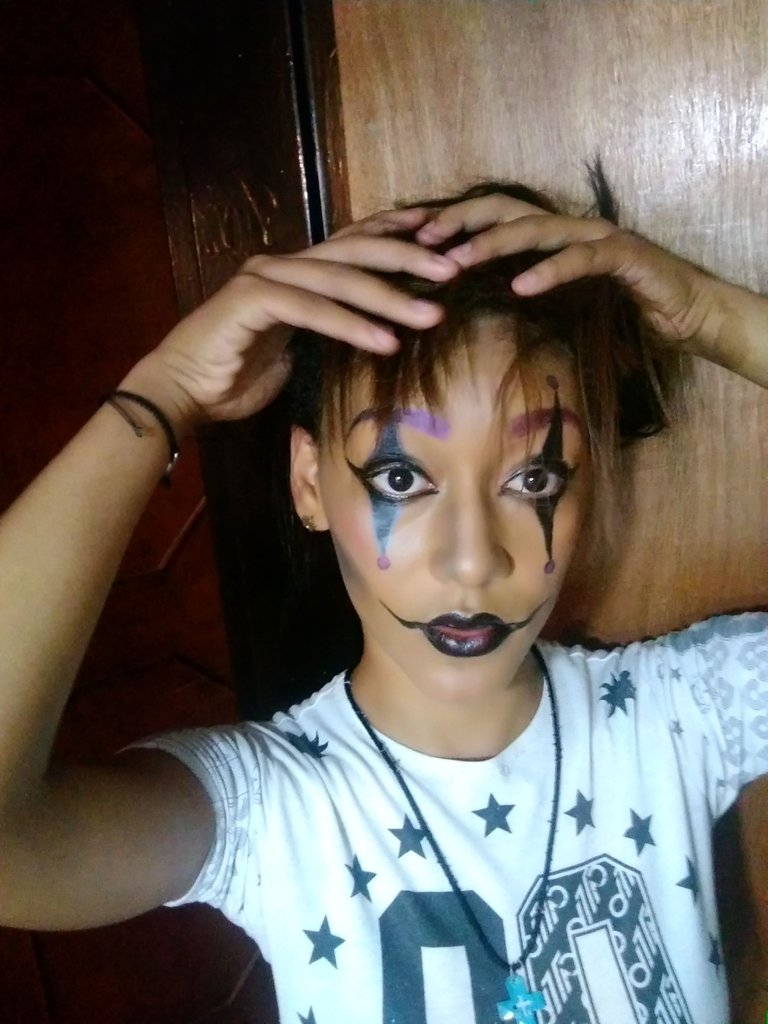
Then I did the eyebrows where I used a fine brush and outlined and shaded one with a purple shadow and the other with a fuscia shadow, I also drew some small circles at the tips of the peaks that I had done in black tone along the edges and in the center of them I applied the purple and fuscia tones these tones were placed in inverted form.
Then with a small brush I applied black shadow on the edges of the nose to outline and under the cheeks, then I applied pink blush on my cheeks.
Lastly I applied the same black cream shadow on her mouth outlining and making it bigger.
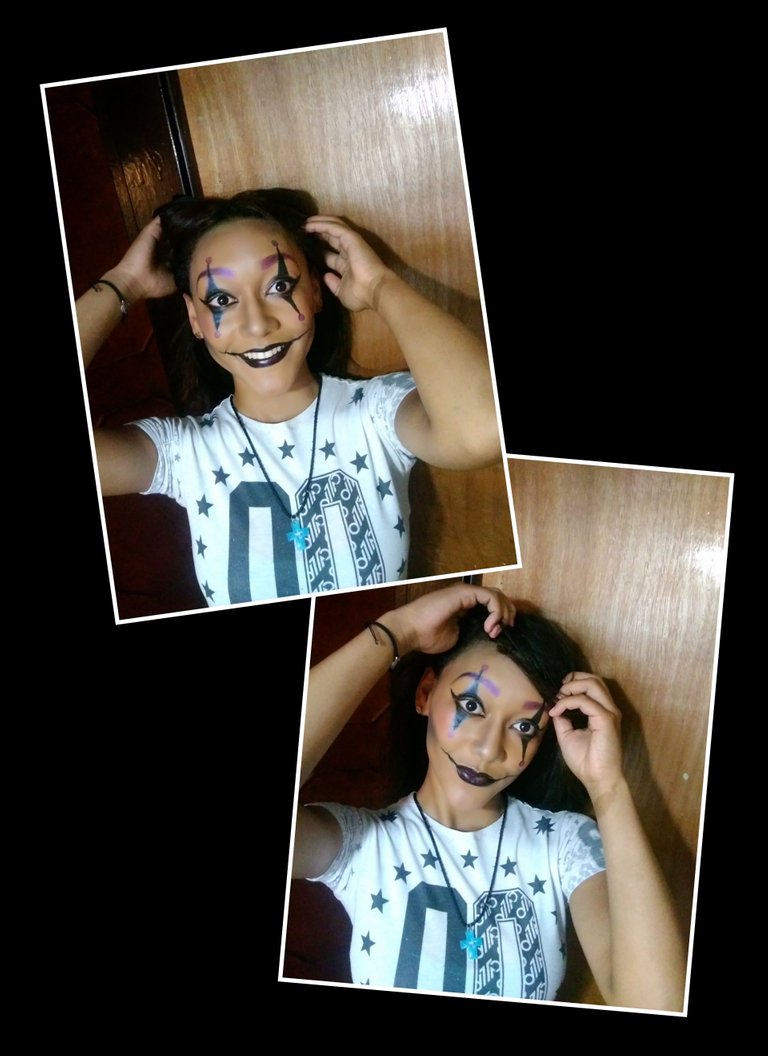
This is how I finished the harlequin inspired makeup. We really enjoyed doing this makeup artistry and we loved the result and I hope you like it too.
Thanks for reading my post see you another time.
Pasos del maquillaje
En primer lugar, como en todos los maquillajes, le hice una limpieza de cara. Luego apliqué un poco de imprimación para suavizar su piel y apliqué la base de maquillaje líquida con una esponja de silicona, seguida de polvos compactos aplicados con una brocha para sellar.Una vez que tuve el rostro en un tono uniforme tomé un pincel muy fino y tomé sombra en crema y dibujé en cada ojo una forma de picos verticales hacia la frente y hacia las mejillas, también hice un delineado en forma horizontal.
Luego le hice las cejas donde utilicé un pincel fino y delineé y sombreé una con una sombra morada y la otra con una sombra fuscia, también dibujé unos pequeños círculos en las puntas de los picos que había hecho en tono negro por los bordes y en el centro de ellos aplique los tonos de colores morado y fuscia estos tonos fueron colocados en forma invertidos.
Luego con una brocha pequeño aplique sombra negra en los bordes de la nariz para perfilar y debajo de las mejillas, luego aplique colorete rosado sobre mis mejillas.
Por ultimo aplique la misma sombra negra en crema en su boca delineando y haciéndola más grande.
Así es como terminé el maquillaje inspirado en el arlequín. De verdad que disfrutamos mucho haciendo este maquillaje artístico y nos encantó el resultado espero que a ustedes también les guste.
Gracias por leer mi post nos vemos en otra oportunidad.
🌸🎨💚🌸🎨💚🌸🎨💚🌸🎨💚🌸🎨💚🌸
🌸🎨💚🌸🎨💚🌸🎨💚🌸🎨💚🌸🎨💚🌸
thanks for your support
Si les gusta mi trabajo me pueden seguir.
Gracias por su apoyo.
Images of my property.
Imagenes de mi propiedad.
Has sido votado por
PROYECTO ENLACE
'Conectando Ideas y Comunidades'
PROYECTO ENLACE es un proyecto de curación de habla hispana enfocado en recompensar contenido de calidad y apoyar autores en su proceso de crecimiento en HIVE.
Creemos y apostamos por el futuro de esta gran plataforma, y estamos muy emocionados de poder hacerla crecer junto a esta comunidad. Así que te invitamos a usar nuestra etiqueta ENLACE y estar atento a todas las actividades que tenemos preparadas y que estaremos publicando en breve.
¿QUIERES AUTOMATIZAR TUS GANANCIAS DE CURACIÓN? SE PARTE DEL PROYECTO ENLACE APOYANDO A NUESTRO TRAIL EN HIVE.VOTE INGRESA AQUÍ PARA CONCOCER LOS DETALLES.
¿QUIERES INVERTIR ENLACE? DESCUBRE COMO HACERLO Y GENERAR INGRESOS DE FORMA SEMANAL MEDIANTE TU DELEGACIÓN DE HP AQUÍ TE EXPLICAMOS COMO.
Te invitamos a participar en nuestro servidor de Discord: https://discord.gg/3S9y7BbWfS
Atentamente
EQUIPO ENLACE 2021
¡Felicitaciones!
1. Invierte en el PROYECTO ENTROPÍA y recibe ganancias semanalmente. Entra aquí para más información.
3. Suscríbete a nuestra COMUNIDAD, apoya al trail de @Entropia y así podrás ganar recompensas de curación de forma automática. Entra aquí para más información sobre nuestro trail.
4. Creación de cuentas nuevas de Hive aquí.
5. Visita nuestro canal de Youtube.
Atentamente
El equipo de curación del PROYECTO ENTROPÍA