¡Hola, Comunidad de Hive!
Hello, Hive Commnunity!
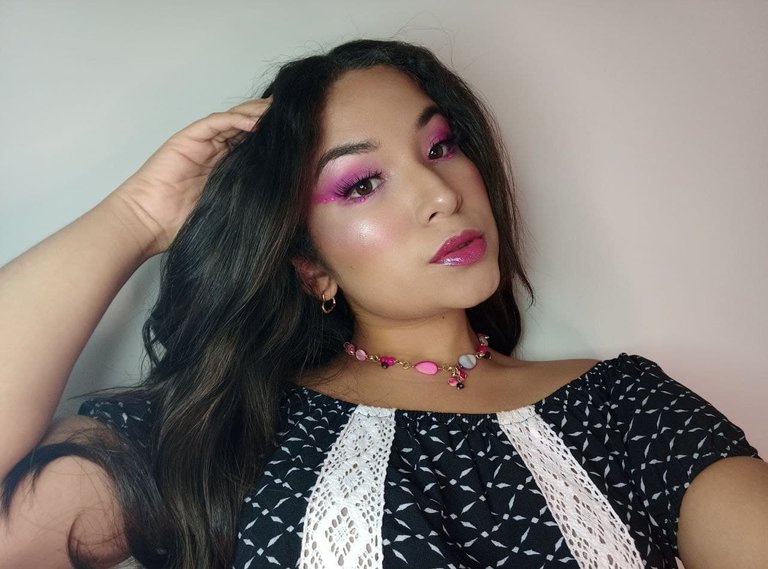
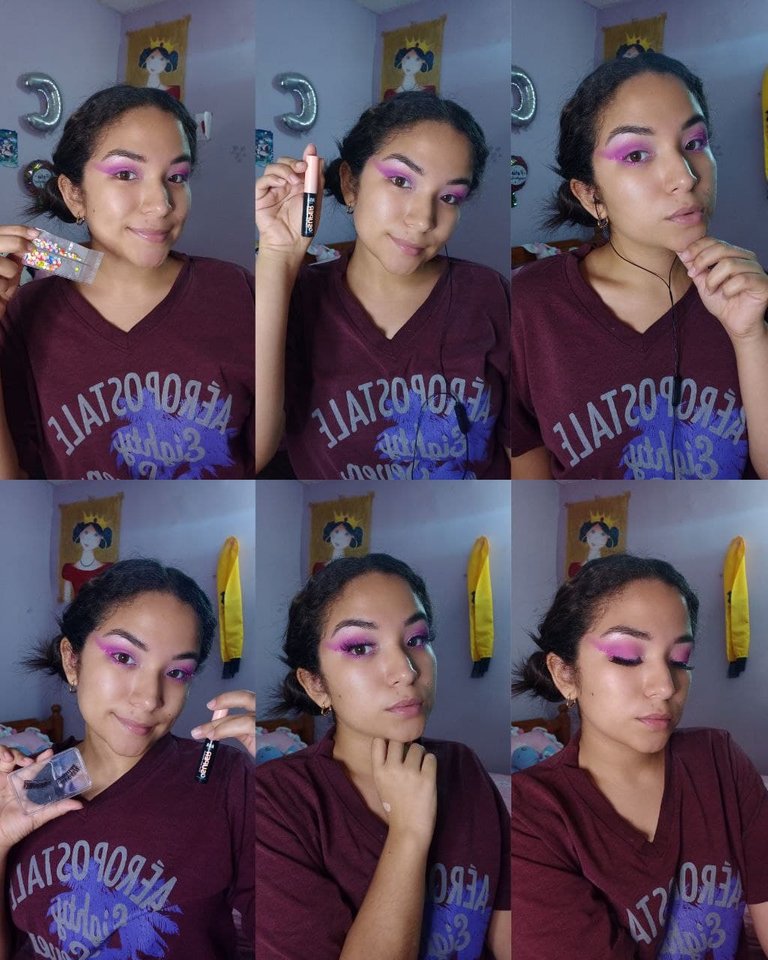
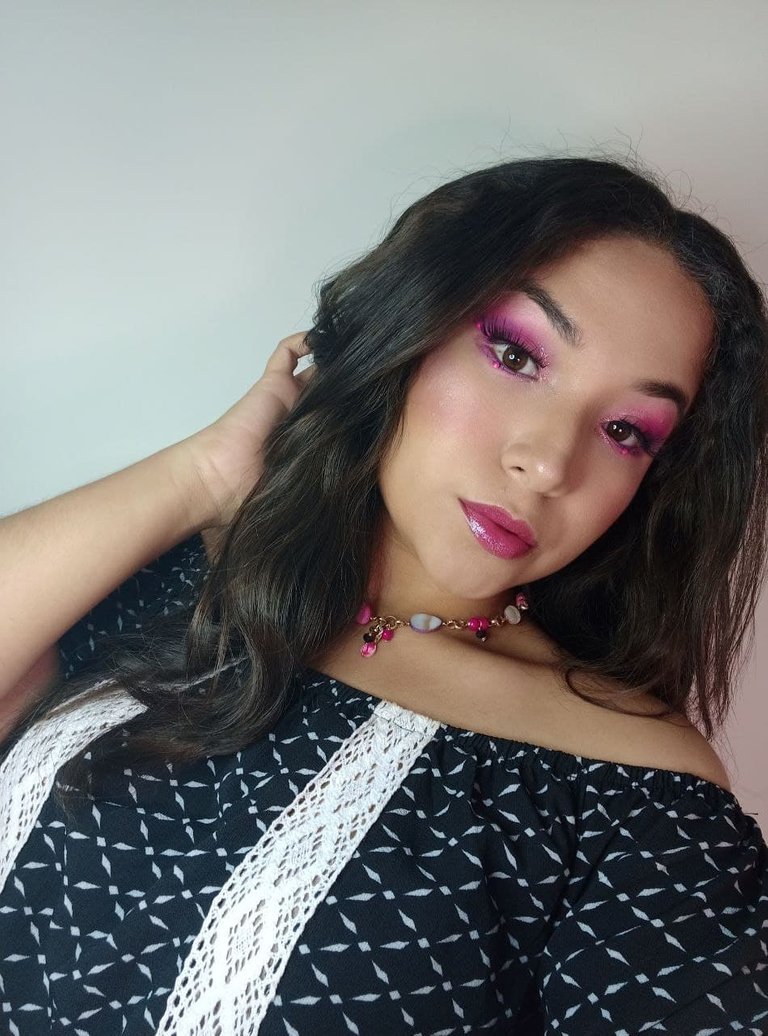
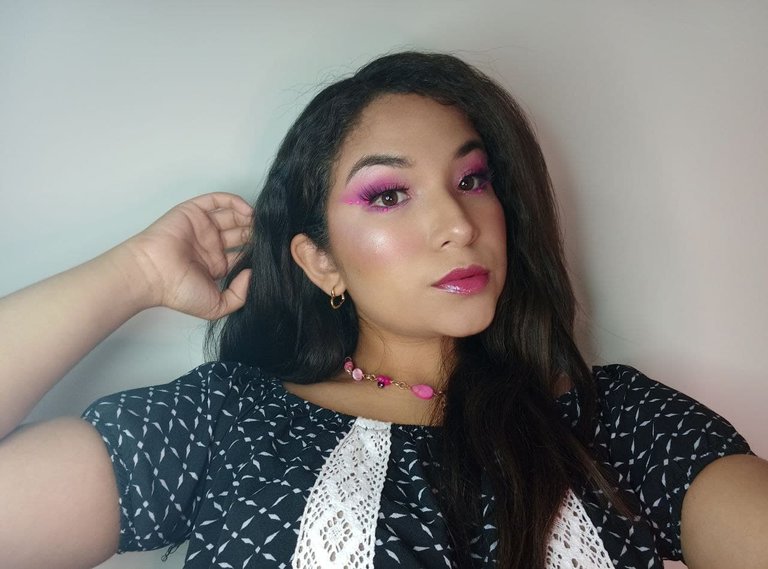
Este maquillaje es uno de esos donde la verdad improvise porque tenía una idea en mi cabeza y me fui completamente por otro extremo. Mi idea era hacer un degradado colorido pero comencé por el rosa, me deje llevar por la inspiración y bueno termine bien rosa rosa JAJAJAJA, en este maquillaje también incorporamos piedritas por primera vez, así que veamos este detenido paso a paso.
This makeup is one of those where the truth is that I improvised because I had an idea in my head and I went completely to another extreme. My idea was to do a colorful gradient but I started with pink, I got carried away by inspiration and well I ended up well pink pink pink HAHAHAHAHAHAHA, in this makeup we also incorporated pebbles for the first time, so let's see this step by step.
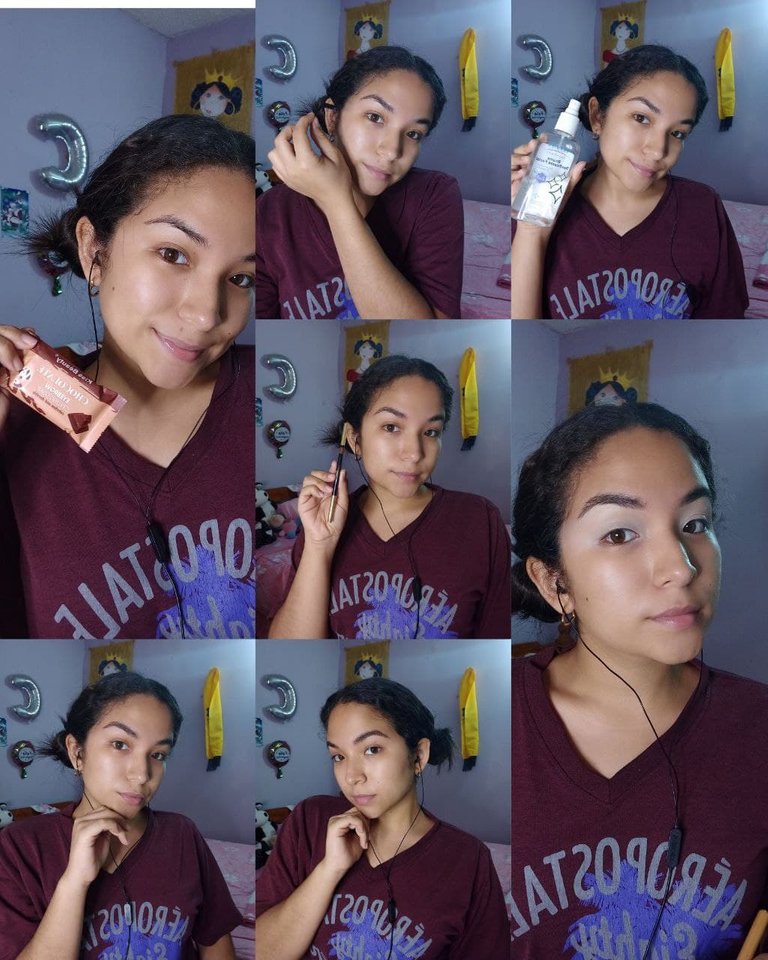
Para realizar mis cejas estuve comprando este mismo día un jabón de cejas de la marca Kiss Beauty, entonces estuve activando el jabón con la bruma tonificadora de Dernier y con el cepillito que trae el mismo jaboncito estuve peinando, es primera vez que hacia esto así que tenía un poco de miedo pero bueno me atreví, de primera instancia me gusto porque no se hace grumos, no se siente pesado y es realmente transparente. Con el lápiz de cejas de salome estuve rellenando mis cejas y luego preparé mi parpado con corrector.
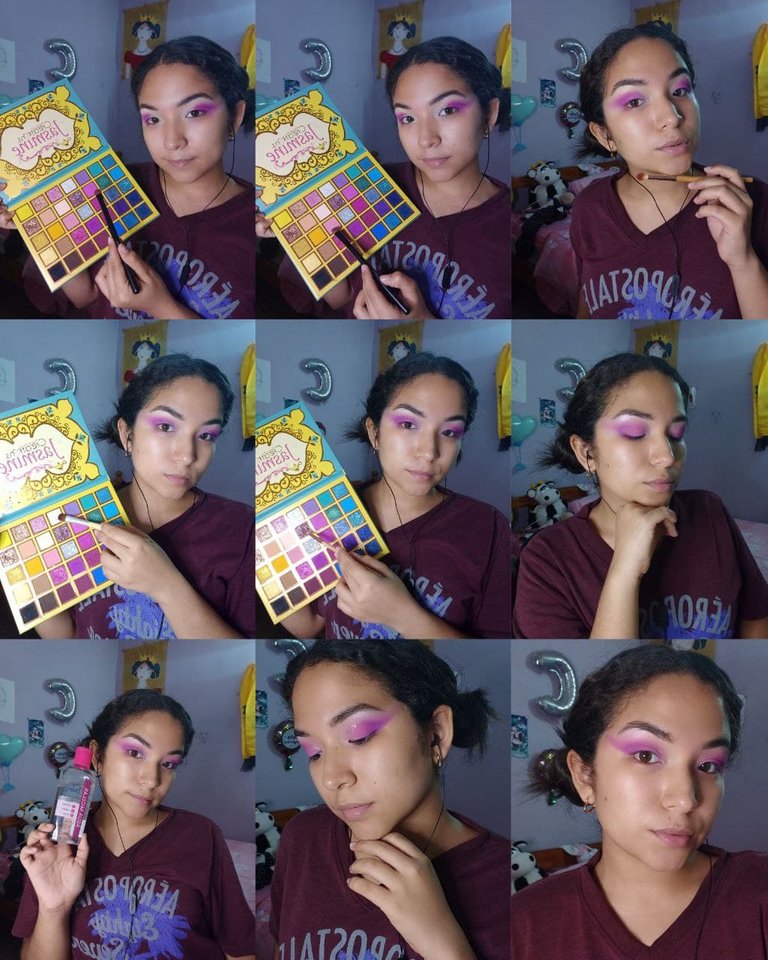
Entonces con una brocha plana y un morado-rosa de la paleta Jasmine estuve comenzando este maquillaje en el extremo de mi parpado, el secreto es: saturar de color y luego difuminar. Con otra pelta de Beauty Creantions tome un rosa más neón y lo incorpore con el pesado haciendo la misma técnica. Finalmente estuve mezclando los rosas más claros que vi en la paleta Jasmine para terminar con el degradado.
To make my eyebrows I was buying this same day a Kiss Beauty eyebrow soap, then I was activating the soap with the Dernier toning mist and with the brush that comes with the same soap I was combing, it is the first time I did this so I was a little scared but well I dared, at first I liked it because it does not make clumps, it does not feel heavy and it is really transparent. With the salome eyebrow pencil I was filling in my eyebrows and then I prepped my eyelid with concealer.
Then with a flat brush and a purple-pink from the Jasmine palette I was starting this makeup on the end of my eyelid, the secret is: saturate with color and then blend. With another Beauty Creantions palette I took a more neon pink and incorporated it with the heavy one doing the same technique. Finally I was mixing the lighter pinks I saw in the Jasmine palette to finish with the gradient.

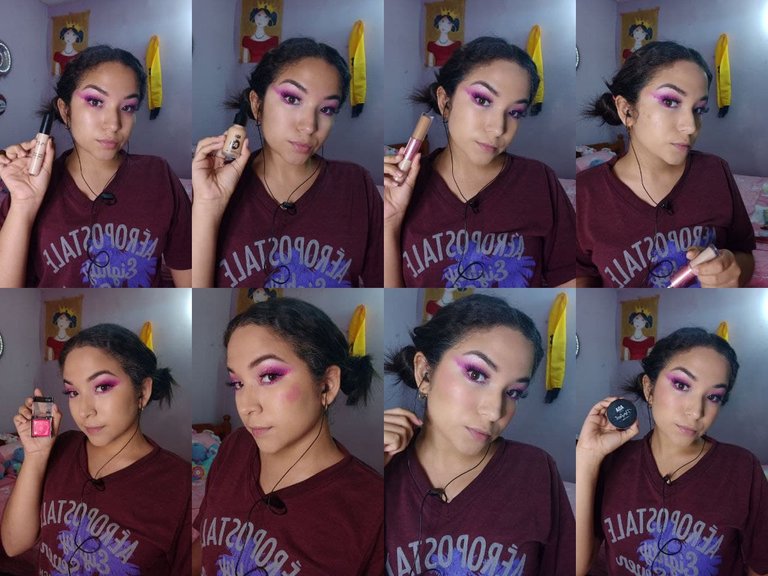
Después vinieron los detalles: como iluminar el hueso de las cejas, y coloque glitter en mi lagrimal, además con el agua micelar estuve limpiando y perfeccionado el acabado; entonces llegado el momento de las piedras, la pega que use para pegarlas fue la misma que uso para mis pestañas postizas. En esta oportunidad decidí hacer el trabajo en el parpado inferior para colocar una piedra también ahí. Luego coloque las pestañas postizas y listo el look de ojos.
Then came the details: how to illuminate the eyebrow bone, and I put glitter on my tear trough, also with micellar water I was cleaning and perfecting the finish; then it was time for the stones, the glue I used to glue them was the same I use for my false eyelashes. This time I decided to do the work on the lower eyelid to place a stone there as well. Then I placed the false eyelashes and the eye look was ready.
Para la piel comencé con el corrector hidratante de Salome trepando mis ojeras; luego tome la base de A+ porque tenía ganas de una piel con cobertura un poco más ligera, así que por esa misma razón difumine la base con mi esponja de maquillaje. Luego coloque 3 puntitos de contorno en crema y más rubor en crema de lo habitual. Luego selle el maquillaje en crema con polvo suelto.
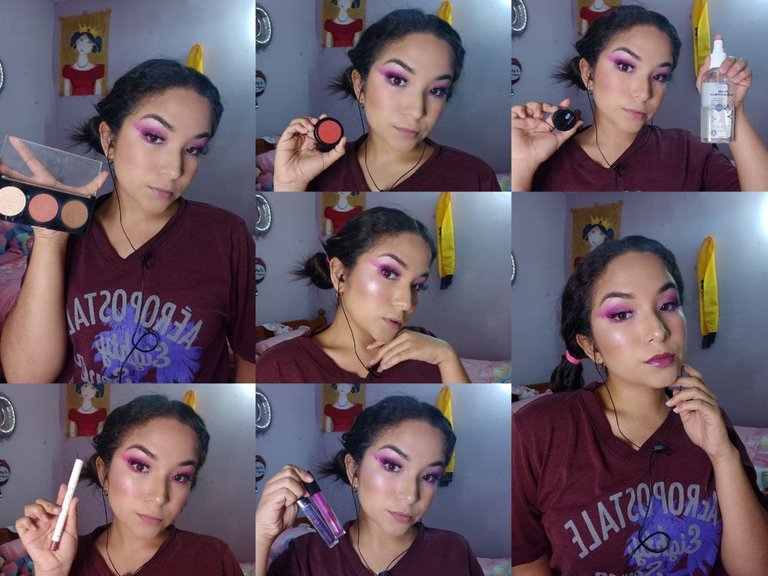
Para reforzar el contorno en crema me apoye del trio de salome, y para resaltar más el rubor de uno de AOA; para el iluminador decidí antes refrescar el maquillaje con la Bruma Tonificadora y entonces le agregue bastante glow a este maquillaje. Para finalizar: los labios, escogí delinear con el lápiz de salome y mezclar mis dos gloss favoritos de Maybelline, uno morado y uno rosa para resaltar mis labios.
For the skin I started with Salome's moisturizing concealer creeping my dark circles; then I took the A+ foundation because I was in the mood for a little lighter coverage skin, so for that same reason I blended the foundation with my makeup sponge. I then applied 3 dabs of cream contour and more cream blush than usual. Then I sealed the cream foundation with loose powder.
To reinforce the cream contour I used the Salome trio, and to highlight the blush more I used the AOA one; for the highlighter I decided to refresh the makeup with the Toning Mist first and then I added a lot of glow to this makeup. To finish: the lips, I chose to outline with the salome pencil and mix my two favorite glosses from Maybelline, one purple and one pink to highlight my lips.
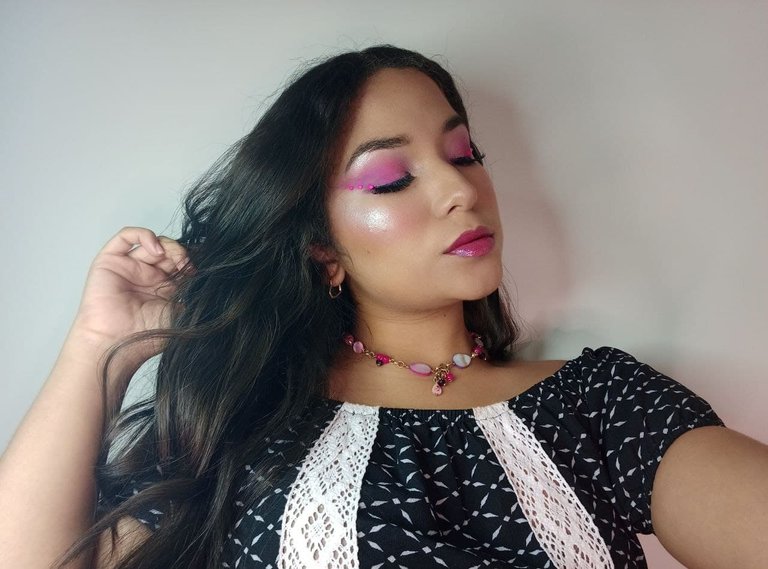
Este es uno de mis maquillajes favoritos en definitiva y quizá tenía mucho tiempo que no me hacía un maquillaje que fluyera de forma tan lindo y la verdad necesitaba ese grado de relajación; me encanto el toque de las piedras en rosa y colocarlas no fue tan complicado como yo pensé. Así que unos de mis maquillajes favoritos por siempre.
This is definitely one of my favorite makeup looks and maybe it had been a long time since I had a makeup that flowed so beautifully and I really needed that degree of relaxation; I loved the touch of pink stones and placing them was not as complicated as I thought it would be. So one of my favorite makeup looks ever.

Muy bonito quedó tu maquillaje, saludos