¡Hola, Comunidad de Hive!
Hello, Hive Commnunity!
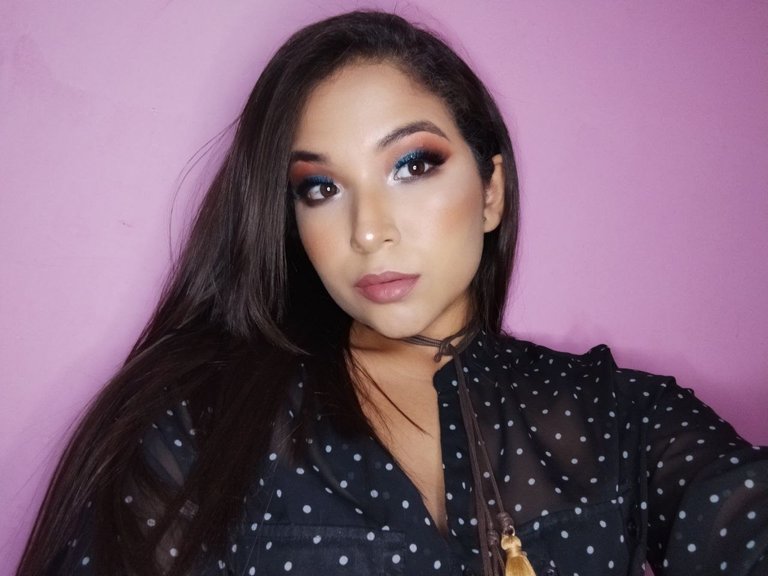
Hoy vengo muy feliz porque al fin pude usar Azul en algún maquillaje, la verdad es que tenía mucho tiempo queriendo hacer algo en con azul; y este maquillaje tenía rato esperando porque me decidiera a hacerlo; la verdad es que tenía algo de miedo porque no quería terminar frustrada, pero me complace ver los resultados, el paso a paso lo verán a continuación.
Today I am very happy because at last I could use Blue in some makeup, the truth is that I had a long time wanting to do something with blue; and this makeup had been waiting for a while because I decided to do it; the truth is that I was a little afraid because I did not want to end up frustrated, but I am pleased to see the results, the step by step you will see below.
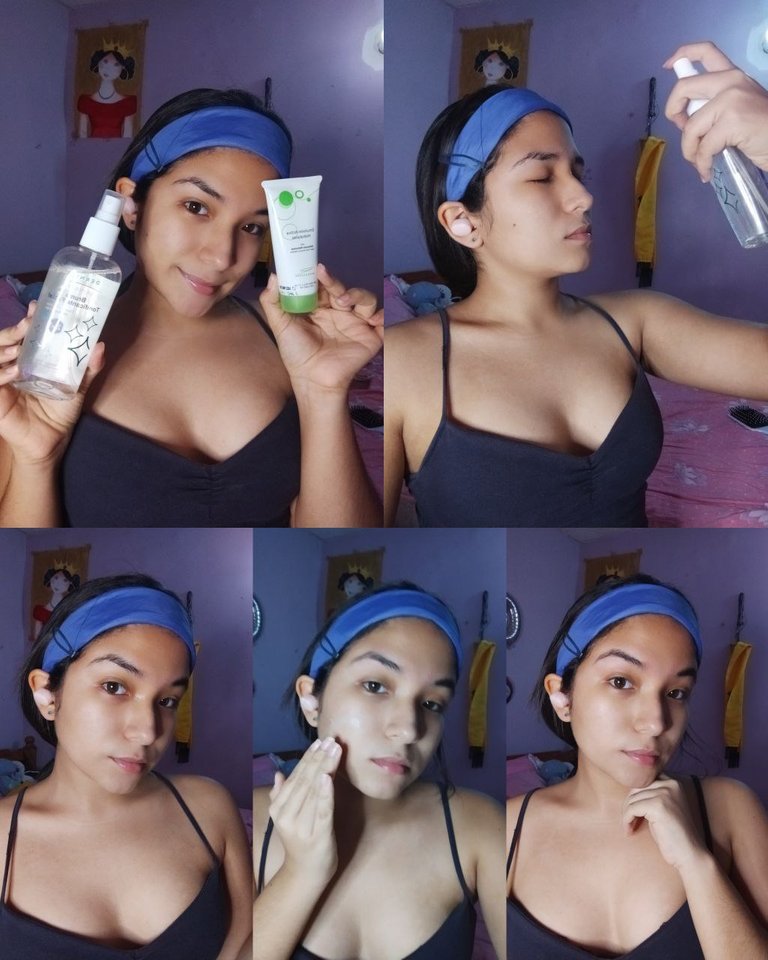
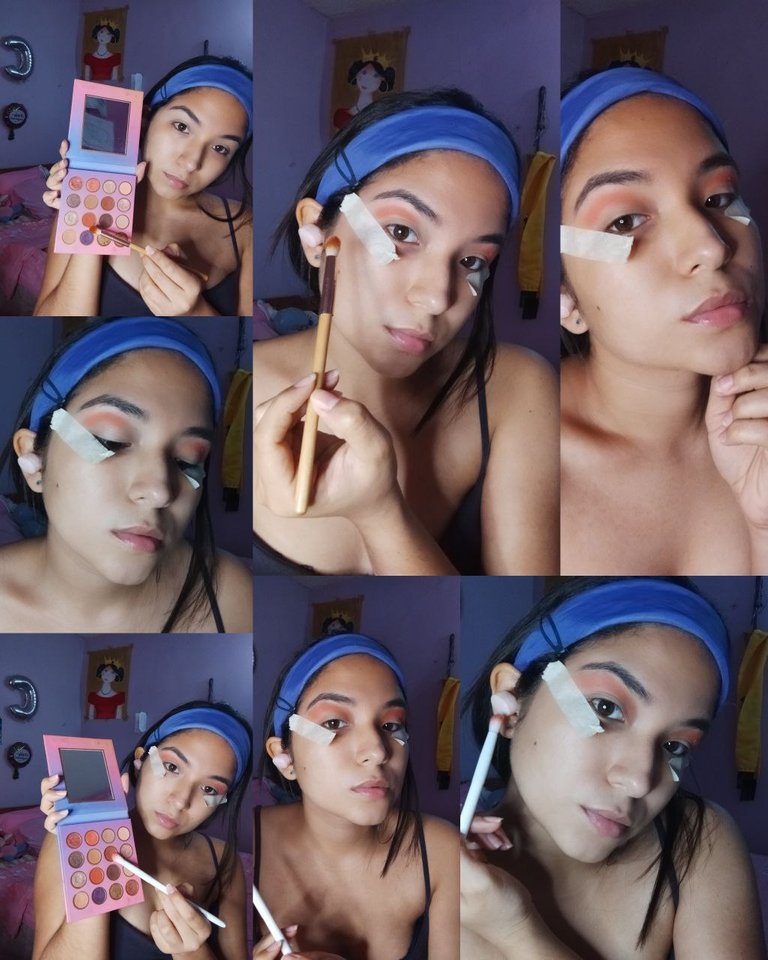
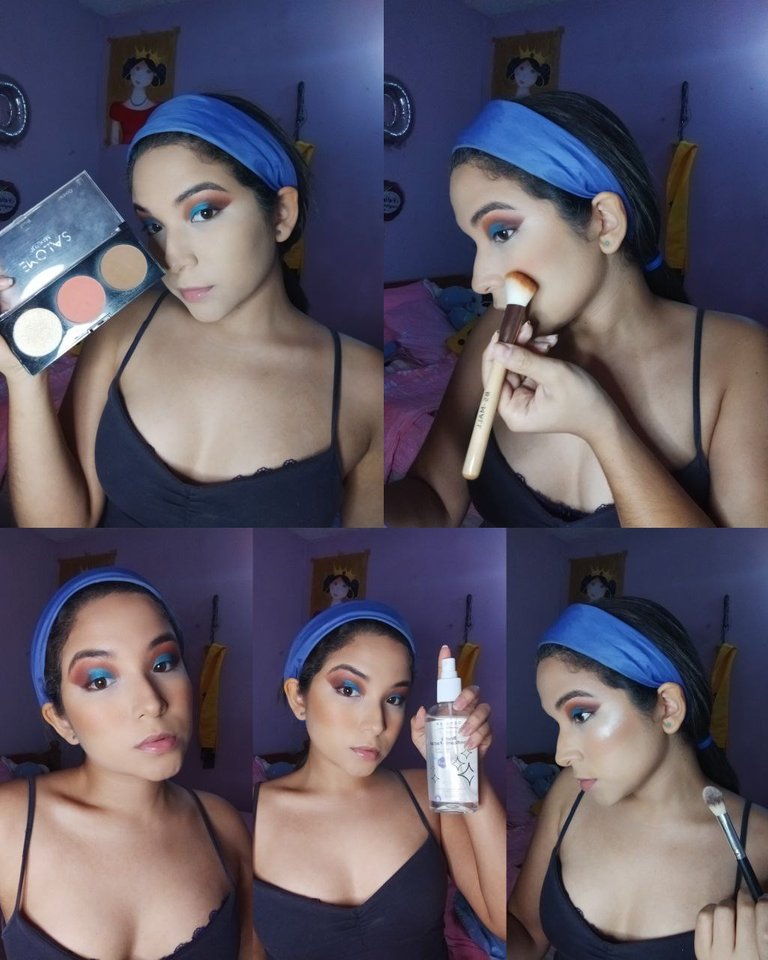
Como saben nunca comienzo un maquillaje sin preparar la piel, aquí la tengo recién lavada con limpiador, aplico tónico y crema hidrante; una rutina básica pero que hace la diferencia.
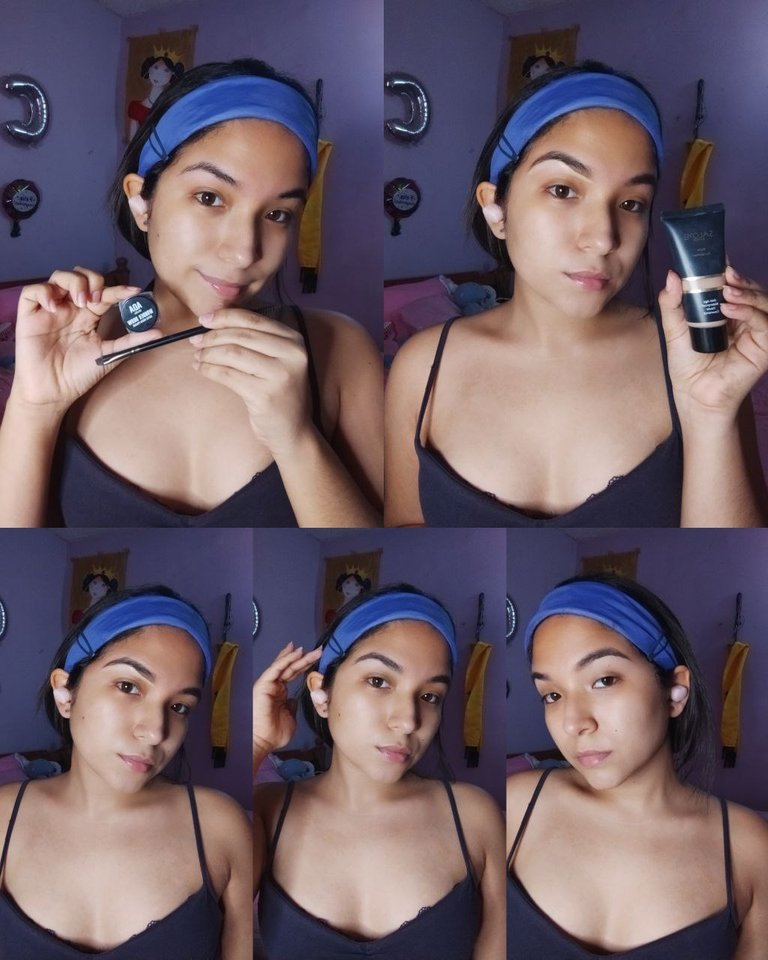
Lo primero a realizar en cuanto al maquillaje fueron las cejas; esta vez estuve aplicando la técnica en bloque pero al momento de rellenar lo hice de forma sutil; para corregir use en la parte de abajo el correcto Salome en el tono 1 y en la parte de arriba Base Salome en mi tono 4; esto lo estoy haciendo de una tiempo para acá y me gusta mucho, corregir en la parte de arriba con base, hace que las cejas se vean muy naturales y con forma.
As you know I never start a makeup without preparing the skin, here I have it freshly washed with cleanser, I apply toner and moisturizer; a basic routine but that makes the difference.
The first thing to do in terms of makeup was the eyebrows; this time I was applying the block technique but at the time of filling in I did it in a subtle way; to correct the bottom part I used the correct Salome in tone 1 and the top part Salome Base in my tone 4; I have been doing this for a while now and I really like it, correcting the top part with base, it makes the eyebrows look very natural and with shape.
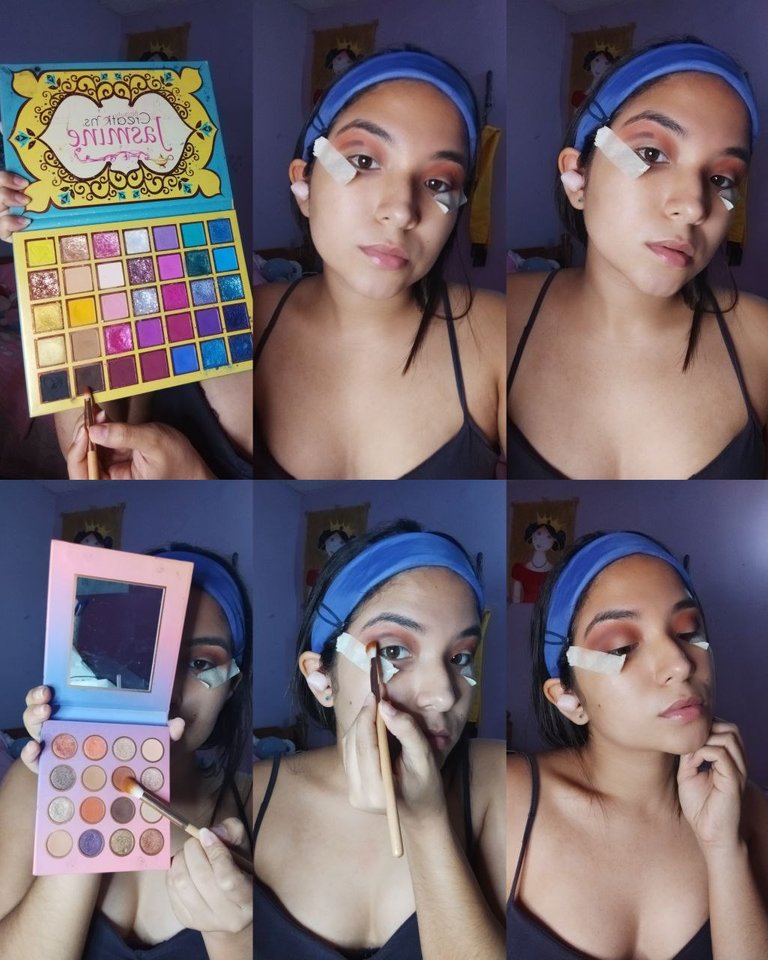
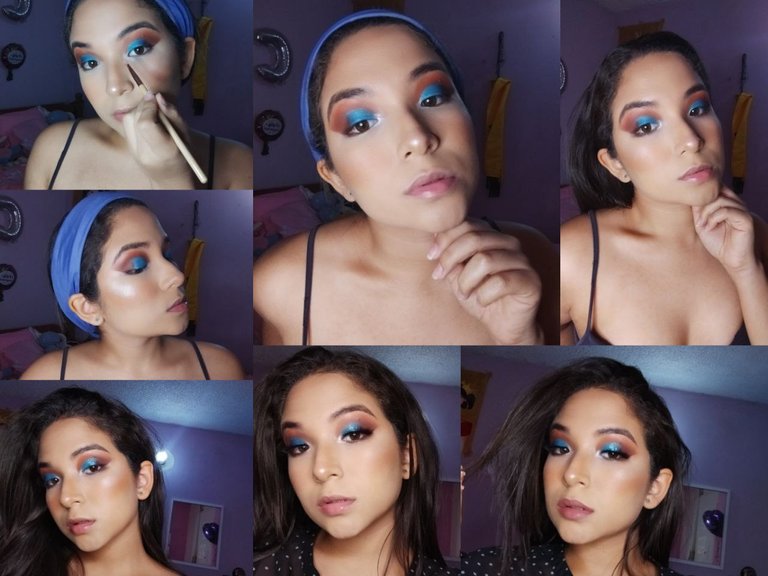
En el trabajo de sombras; comencé con mi paleta habitual de Bh, tomando un naranja, lo primero es posicionar y luego difuminamos; para dar más dimensión con la misma paleta pero con un marrón más cálido esta vez y una brocha para difuminar, integre por todo el párpado; difuminando muy bien en el proceso. Para dar oscuridad tome un pincel de balita y la Paleta que me enamora: Jasmine de Beauty Creations que @lucianav me presto para este maquillaje; el caso es que aquí tome un marrón bastante oscuro y frío, colocándolo solo en la parte del hueso del parpado, aquí me arme de paciencia para difuminar este color tan complicado. Cuando lo vi bien difuminado complete con el marrón cálido en la esquina exterior; integrando mejor todo el trabajo anterior.
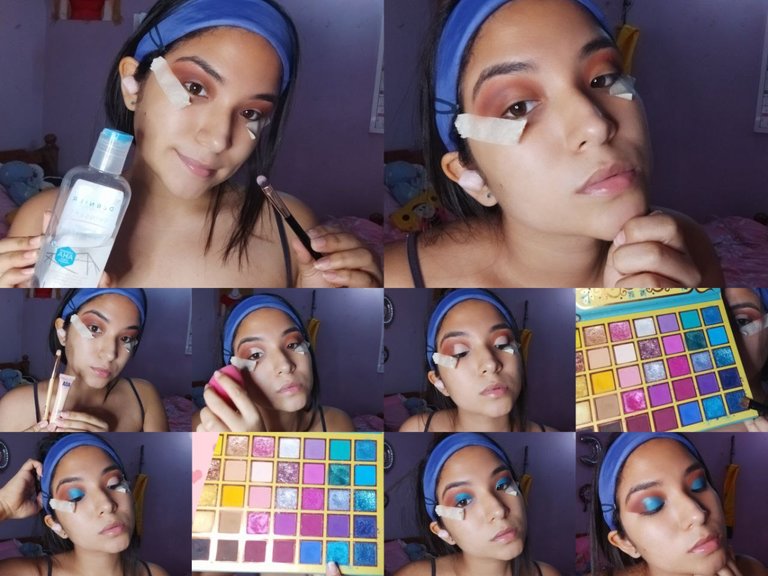
Para el corte primero limpie con una brocha lengua de gato y la Solución limpiadora de Dernier; luego tomando el corrector de AOA y otra brocha lengua de gato, hice un semi corte de cuenca… Para sellar este producto tome una brocha para depositar color y un metálico azul marino, para el resto del corte elegí un azul más claro.
In the shadow work; I started with my usual Bh palette, taking an orange, the first thing is to position and then blur; to give more dimension with the same palette but with a warmer brown this time and a brush to blend, integrate throughout the eyelid; blending very well in the process. To give darkness I took a ball brush and the palette that I love: Jasmine from Beauty Creations that @lucianav lent me for this makeup; the case is that here I took a rather dark and cold brown, placing it only in the bone part of the eyelid, here I arm myself with patience to blend this color so complicated. When I saw it well blended I completed with the warm brown in the outer corner; integrating better all the previous work.
For the cut I first cleaned with a cat tongue brush and the Dernier Cleansing Solution; then taking the AOA concealer and another cat tongue brush, I did a semi cut of the socket... To seal this product I took a brush to deposit color and a navy blue metallic, for the rest of the cut I chose a lighter blue.
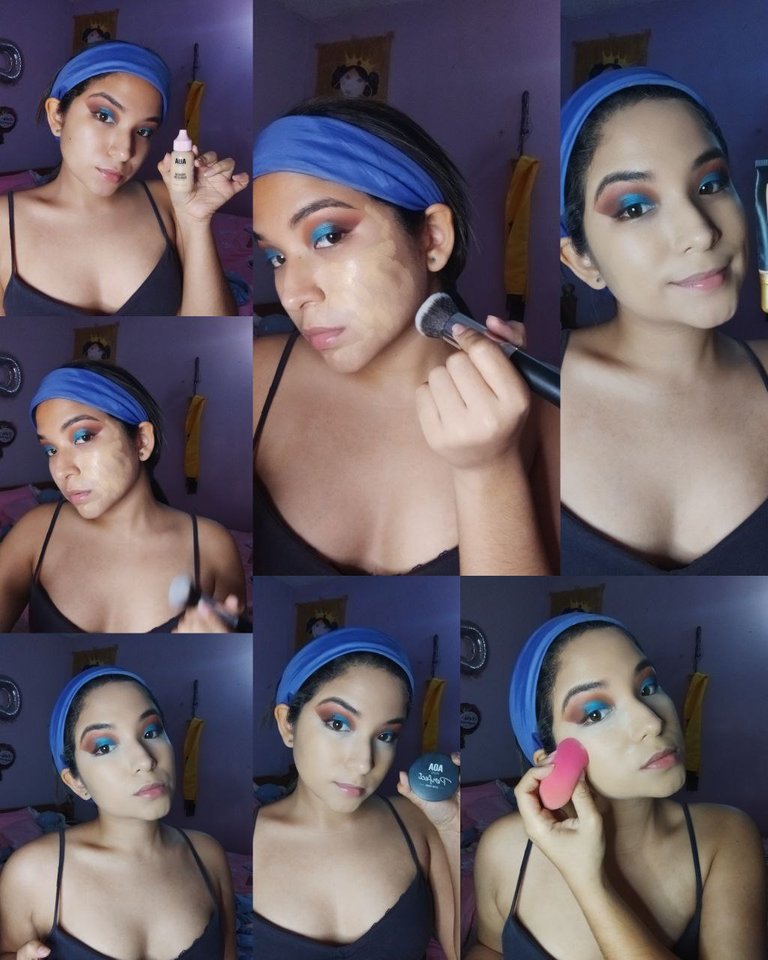
Para comenzar con mi piel, tome la base AOA Paw Paw; yo la trabajo por partes ya que ella es bastante matte y seca rápido; luego corregí mis ojeras y selle con polvo suelto. Los contornos del rostro los hice un poco más llamativos que últimamente porque quería compensar el maquillaje cargado de ojos, igualmente también me puse más rubor del que acostumbro (en cámara no se ve tan obvio, porque la cámara se come un poco los colores). Para iluminar mi rostro, primero refresque con la Bruma Tonificadora de Dernier, y con la piel húmeda aplique iluminador.
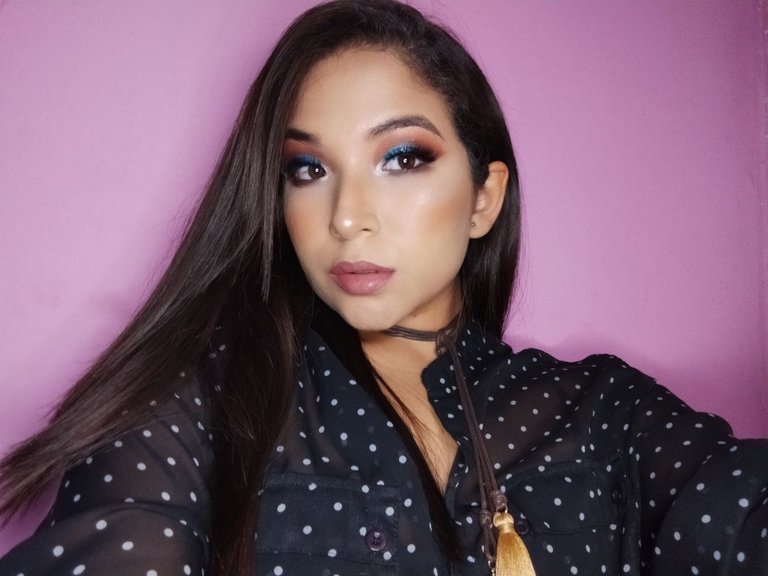
Para cerrar el maquillaje, me ilumine con la sombra perlita de la paleta Jasmine el lagrimal y con una mezcla entre marrón y naranja maquille el parpado inferior. Aplique pestañas postizas y un labial nude.
To start with my skin, I took the AOA Paw Paw foundation; I work it in parts since it is quite matte and dries fast; then I corrected my dark circles and sealed with loose powder. I made the contours of my face a bit bolder than lately because I wanted to compensate for the heavy eye makeup, but I also applied more blush than I'm used to (on camera it doesn't look so obvious, because the camera eats the colors a bit). To illuminate my face, I first refreshed with Dernier's Toning Mist, and with damp skin I applied highlighter.
To close the makeup, I used the pearl eye shadow from the Jasmine palette to illuminate the tear trough and with a mix of brown and orange I made up the lower eyelid. I applied false eyelashes and a nude lipstick.
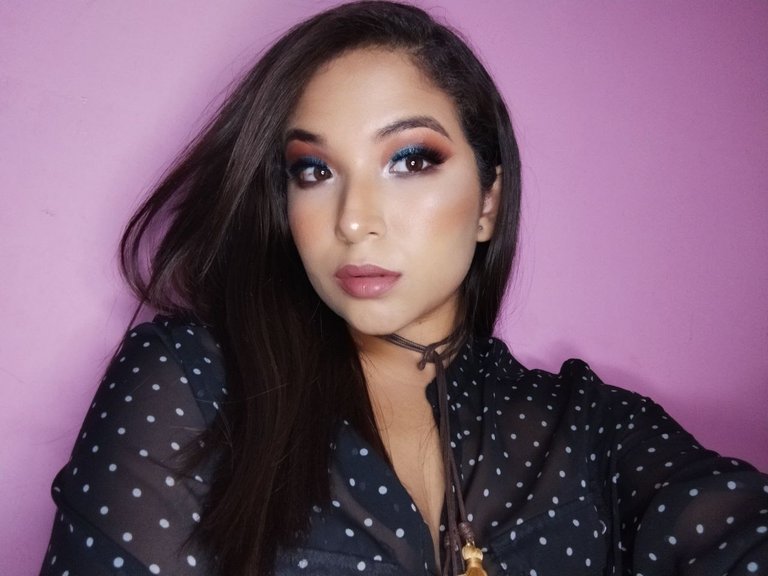
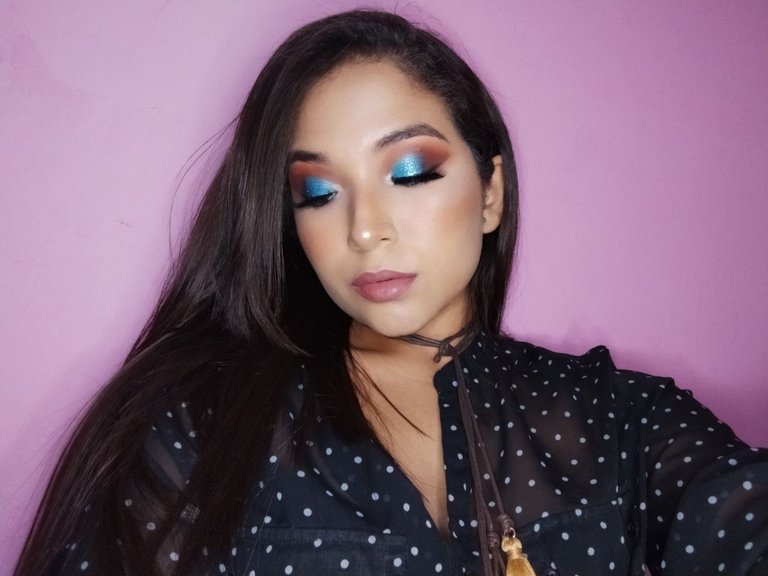
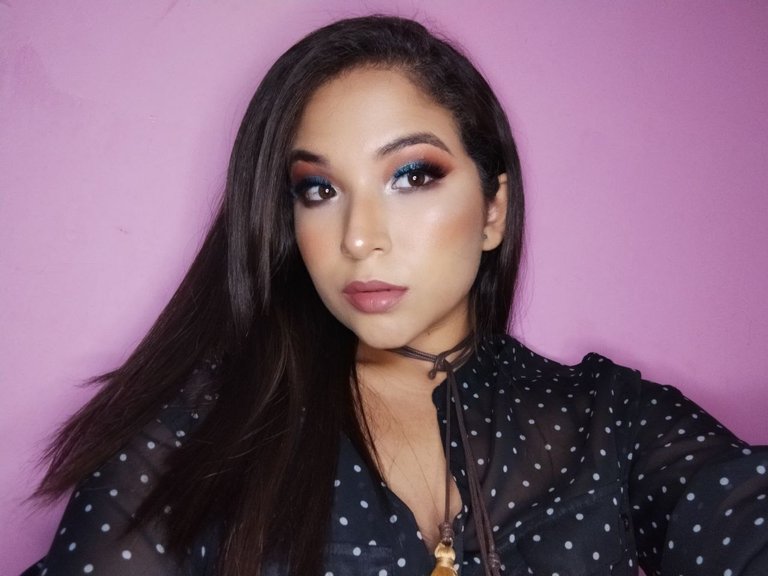
Este maquillaje simplemente me encanto; estuve 3 horas trabajando en él pero me siento orgullosa del resultado; hice algunos retoques en el maquillaje de ojos como aplicar glitter azul en el centro del corte de cuenca y un poco de negro en la esquina exterior. La verdad es que me sorprendí a mí misma con este resultado.
I simply loved this makeup; I spent 3 hours working on it but I am proud of the result; I did some touch ups on the eye makeup like applying blue glitter in the center of the eye socket cut and a little bit of black on the outer corner. The truth is that I surprised myself with this result.
It looks really great! Love all the progress photos!
Thank you so much, it took hours of makeup but it was worth it. Greetings ❤️
Te quedó hermoso!! Felicidades.. Es delicado pero arriesgado ❤️