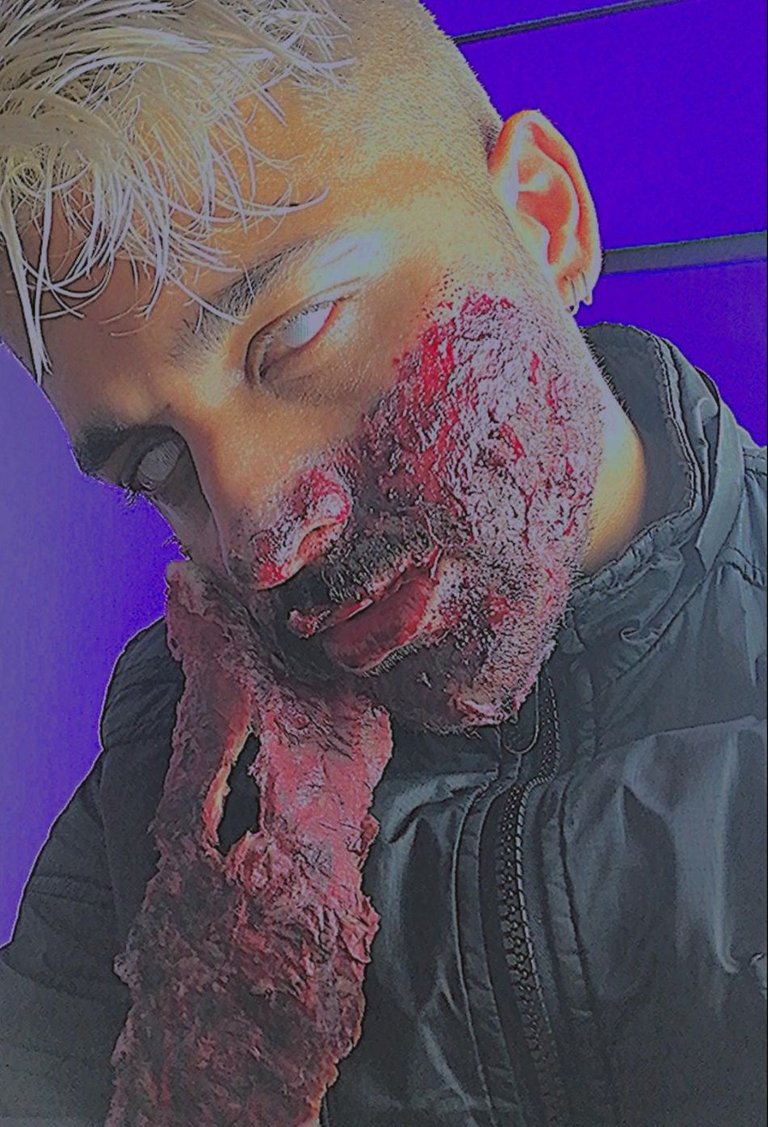
Hello friends, today I want to show you and more than that I want to teach you how to make wounds for your makeup in this spooky season of October, my favorite. It's been a while since I posted in this community because I have not practiced much with respect to makeup, although I have not had canvases to do it because I always want to have the truth, but with respect to the special effects of makeup is something that I am very passionate about and that's why I look forward to this time, and this time I want to show you how I do these effects, super easy so you can do it yourself at home, I wanted to simulate the torn skin or as if it were a zombie.
Hola amigos, el día de hoy quiero mostrarles y mas que eso enseñarles a como hacer heridas para sus maquillajes en esta temporada tenebrosa de Octubre, mi favorita. Hace bastante tiempo que no publicaba en esta comunidad porque no he practicado mucho con respecto al maquillaje, aunque no he tenido lienzos para hacerlo porque ganas siempre tengo la verdad, pero con respecto a los efectos especiales de maquillaje es algo que me apasiona mucho y por eso espero con tantas ganas esta época, y en esta oportunidad les quiero enseñar como hago yo estos efectos, super fácil para que tu mismo lo puedas hacer en casa, quise simular la piel desgarrada o como si fuese un zombie.

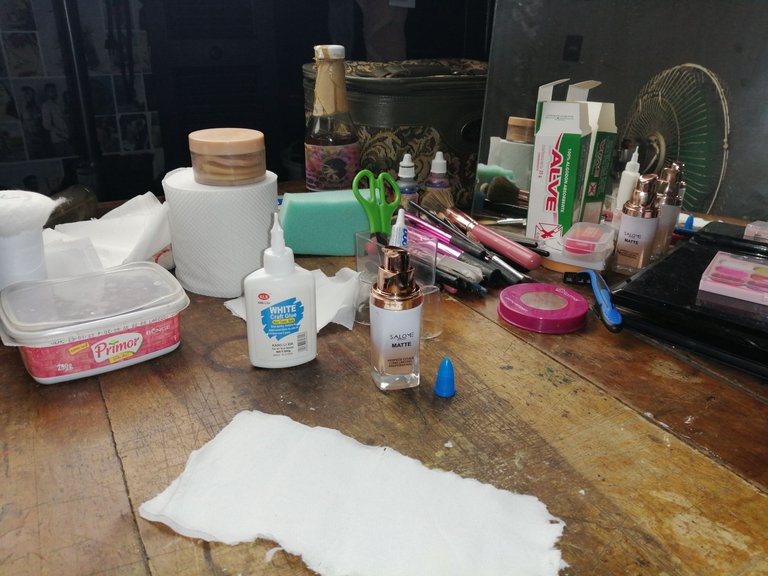
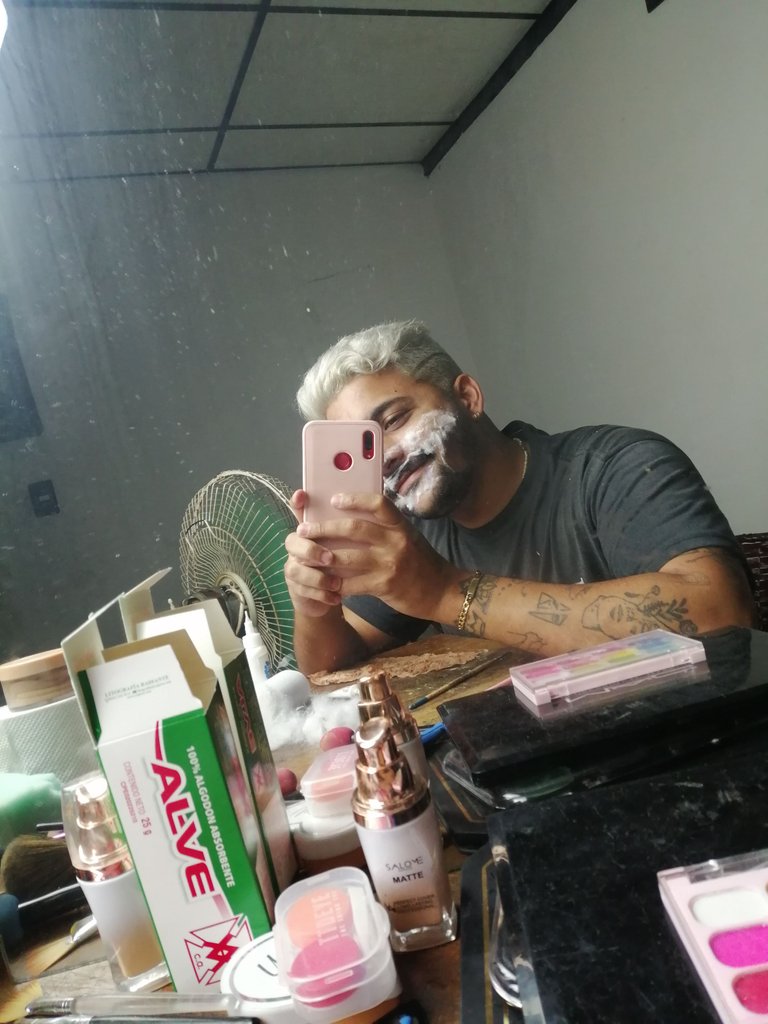
To get a result like this, these are the materials that we will use, in the picture you can see many more things but in reality the important thing is the toilet paper, white glue, base of your skin color, eyelash glue, black shadow, brushes or brushes, cotton and artificial blood. All this with things that you have at home or that are easy to get, the most complicated thing can be the blood but I will also teach you how to make it and make it look very real, let's start.
Para conseguir un resultado asi, estos son los materiales que utilizaremos, en la foto se ven muchas mas cosas pero en realidad lo importante es el papel higiénico, pega blanca, base de tu color de piel, pega de pestañas, sombra negra, pinceles o en su defecto brochas, algodón y la sangre artificial. Todo esto con cosas que tienes en casa o que son fáciles de conseguir, lo mas complicado puede ser la sangre pero también te enseñare a como hacerla y que se vea muy real, empecemos.
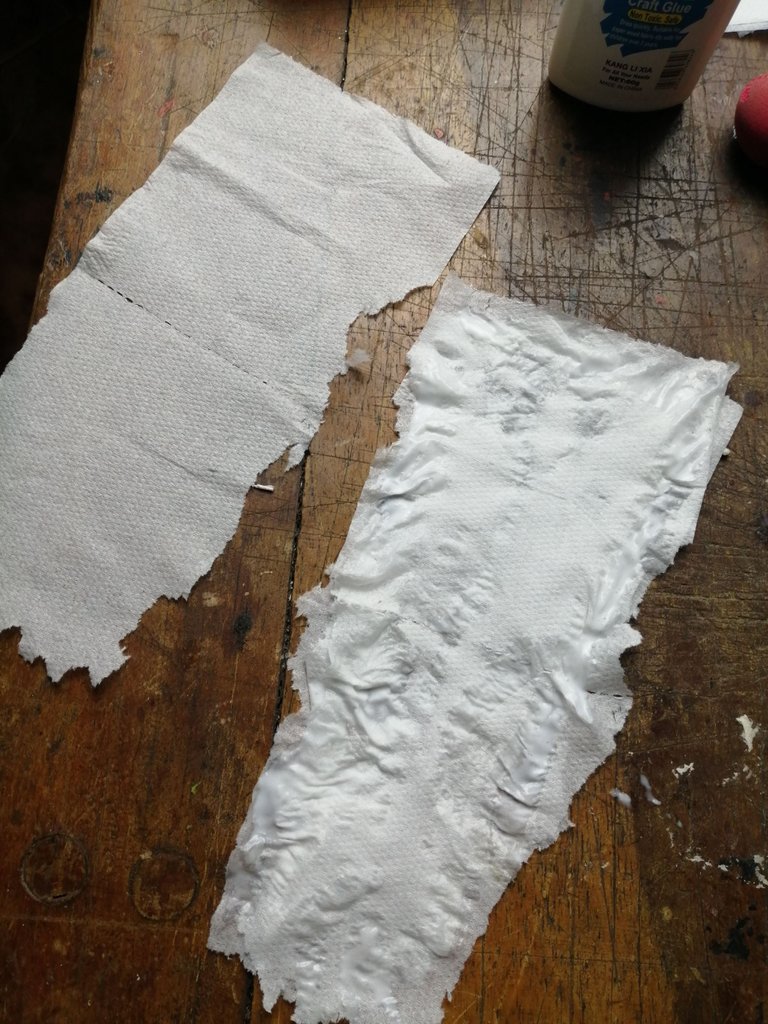
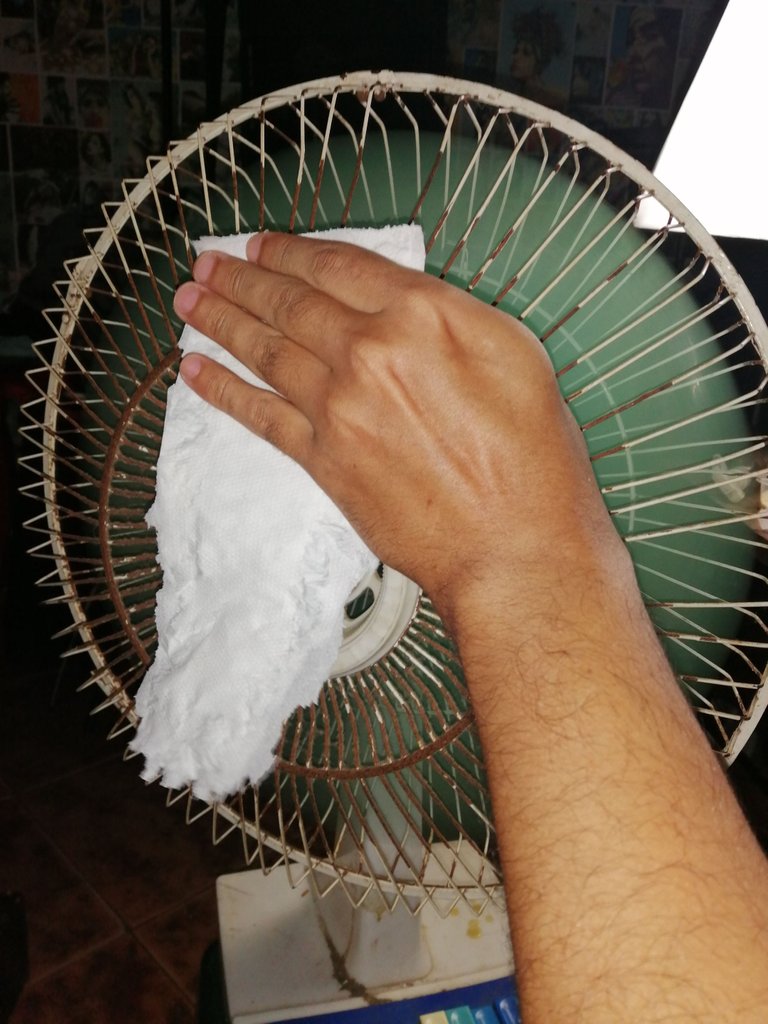
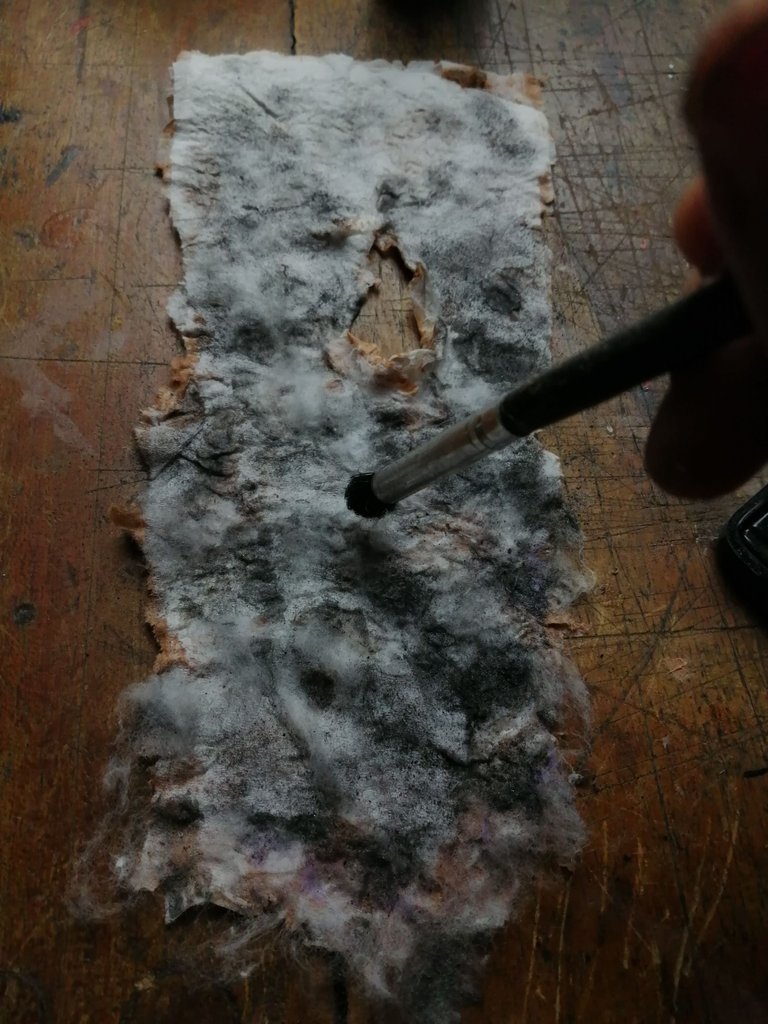
The first thing to do is to know the size of the wound that we are going to make and as in my case I wanted to simulate the detached skin, my skin simulation will be the toilet paper, so I cut it in the shape and size I wanted and to give it a more realistic appearance cut all the ends with your hands so that it is not uniform or straight, it looks torn, I cut 4 layers of paper, to the first one with a brush I apply the glue and on top another layer of paper, so on and so forth until you complete the layers or thickness you want and with a hair dryer I sew it with hot air and that takes 1 minute, but as just days ago my mom damaged her hair dryer I had to do it with the fan and that took more than 20 minutes, but well the point is to solve and not give up friends.
Lo primero que debemos hacer en saber el tamaño de la herida que vayamos a realizar y como en mi caso quise simular la piel desprendida, mi simulación de piel sera el papel higiénico, asi que lo corte en la forma y tamaño que quería y para darle una apariencia mas real cortan todas las puntas con las manos para que no quede uniforme o recto, que se vea desgarrado, yo corte 4 capas de papel, a la primero con un pincel le voy aplicando la pega y encima una otra capa de papel, asi sucesivamente hasta completar las capas o grosor que quieras y con un secador de cabello lo cecas con el aire caliente y en eso tardas 1 minuto, pero como justo días atrás a mi mama se le daño su secador tuve que hacerlo con el ventilador y en eso tarde mas de 20 minutos, pero bueno el punto es resolver y no darse por vencido amigos.
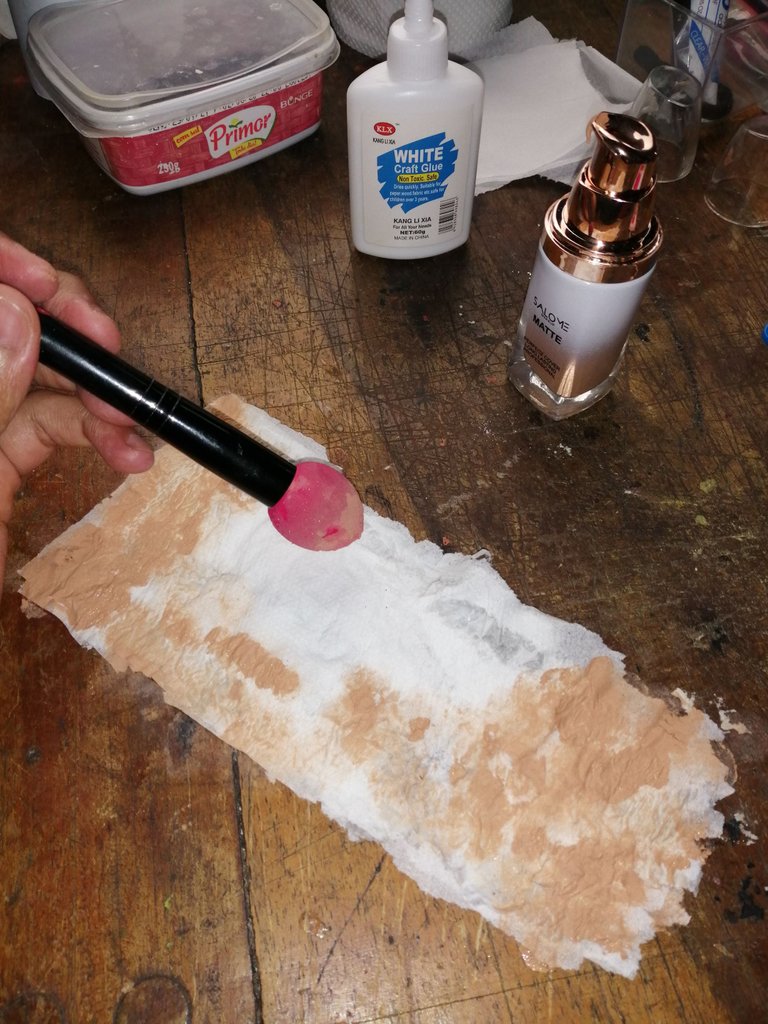
Once it is dry, we apply base of the color of our skin or of the foot of the person to whom we are going to do it, in the form of stippling so as not to break the paper, it is important that it is not perfect, with perfect I mean to hide all the white of the paper and without much product so that it is not too soft.
Una vez este seco, aplicamos base del color de nuestra piel o de la pie de la persona a la que se lo vayan a hacer, en forma de punteo para no romper el papel, es importante que no quede perfecto, con perfecto me refiero a ocultar todo lo blanco del papel y sin mucho producto para que no quede muy blando.
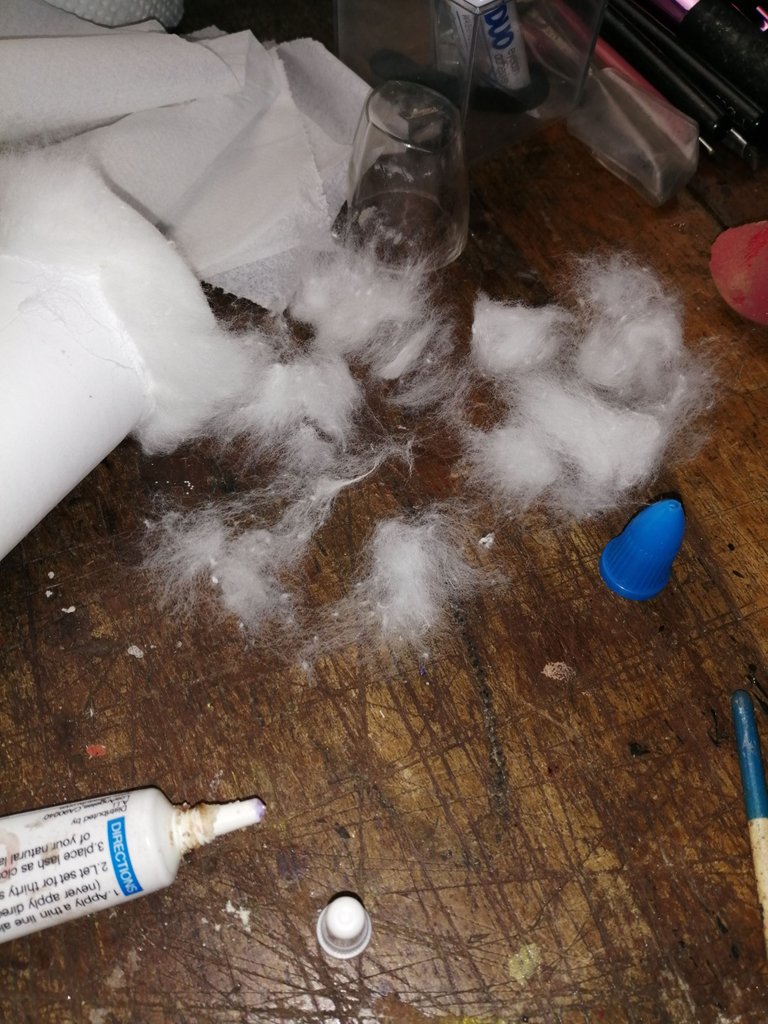
While we let our torn skin dry, we will crumble the cotton in small pieces, this is for the area where it is under the skin and throughout that area we will gradually apply the eyelash glue on our skin to stick the small pieces of cotton, I repeat little by little so that it sticks well and this procedure will also be done with the prosthesis of toilet paper.
Mientras dejamos secar nuestra piel desgarrada, vamos desmenuzando en algodón en pequeños trozos, esto es para la zona donde queda debajo de la piel y por toda esa zona poco a poco vamos aplicando la pega de pestaña en nuestra piel para pegar los pequeños trozos de algodón, reitero poco a poco para que se pegue bien y este procedimiento también lo haremos con la prótesis de papel higiénico.
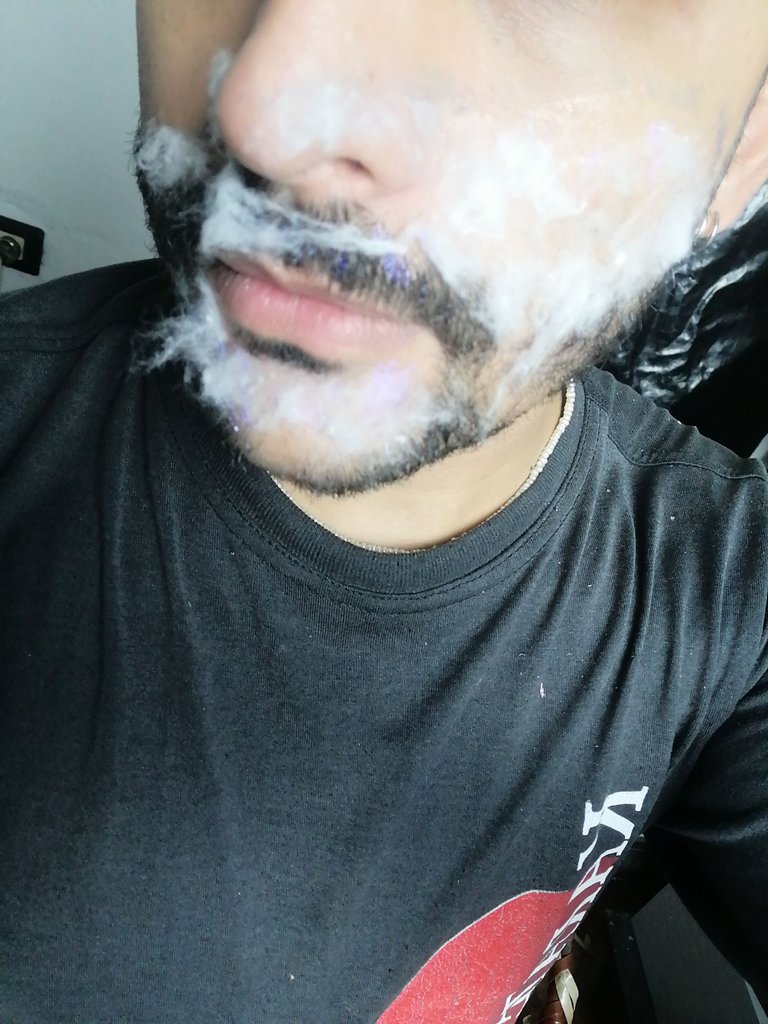
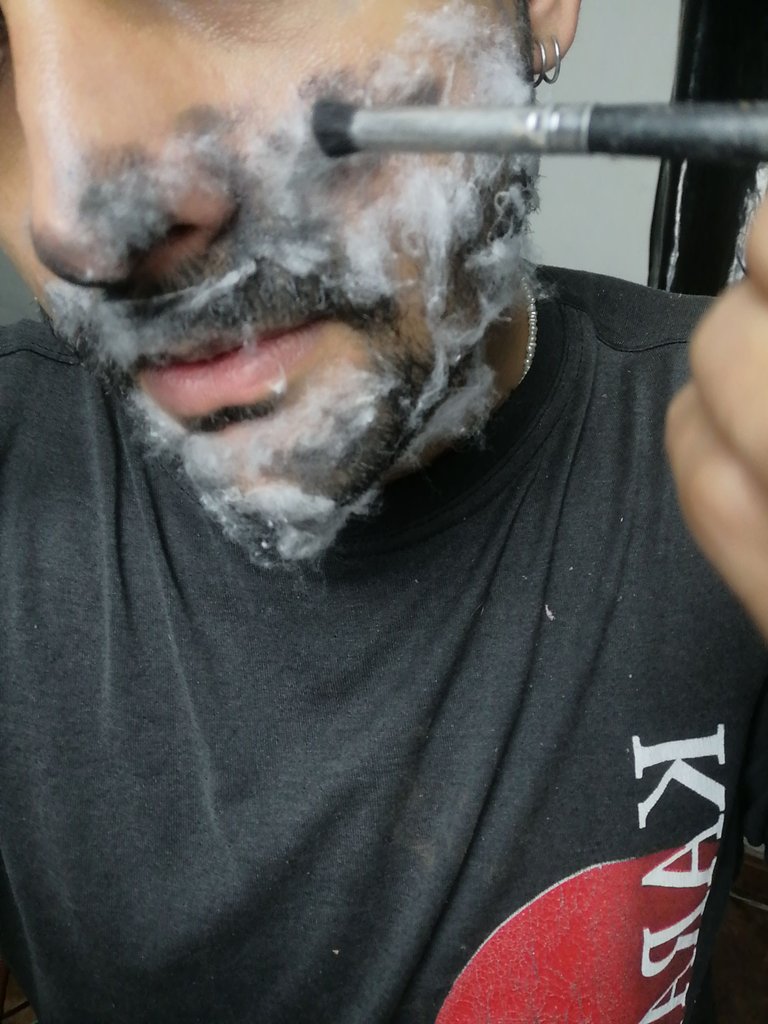
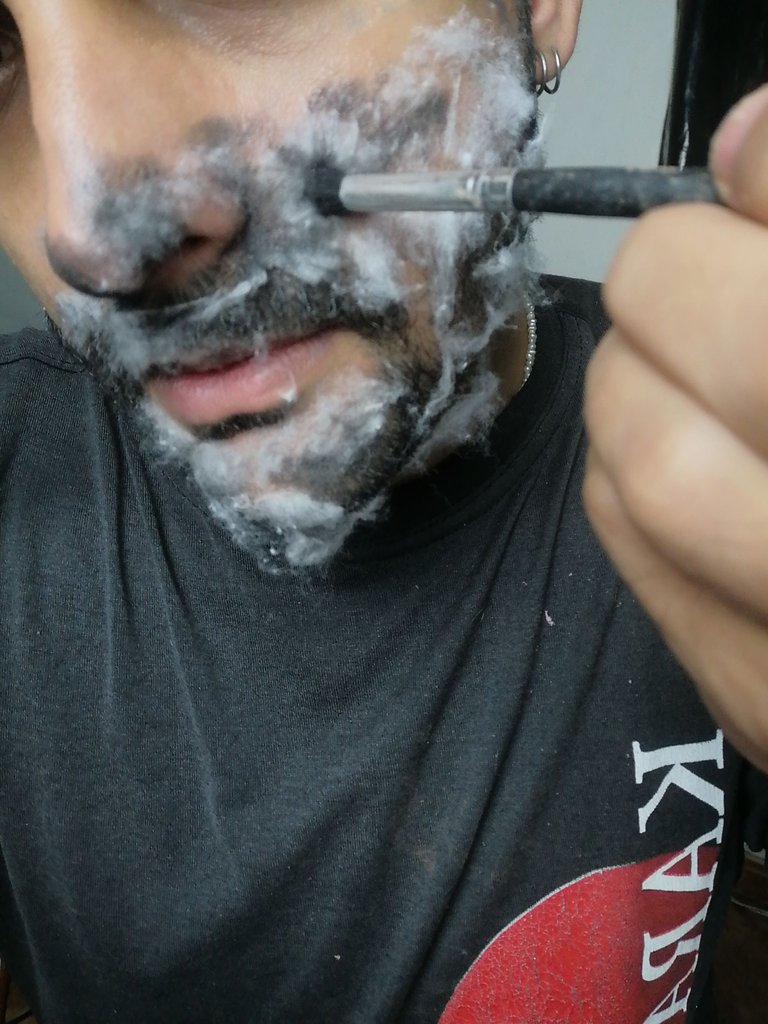
After we have everything glued all over the area with a brush and black shadow we apply in the form of stippling to give depth to the next step, little by little we apply until there are some black spaces, it is not everywhere, it is for different areas and should not be all black and all this is also done with the prosthesis of toilet paper.
Luego de que tengamos todo pegado por toda la zona con una brocha y sombra negra vamos aplicando en forma de punteo para dar profundidad al siguiente paso, poco a poco vamos aplicando hasta que quede algunos espacios negros, no es por todas partes, es por diferentes zonas y no debe quedar todo negro y todo esto también lo hacemos con la prótesis de papel higiénico.
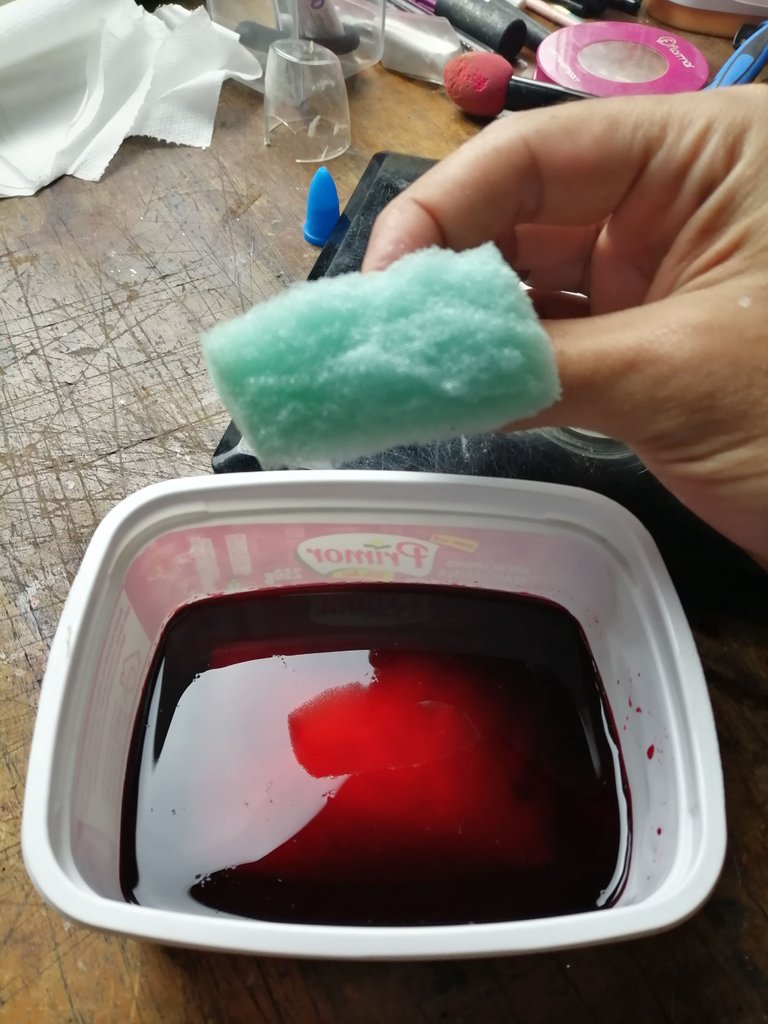
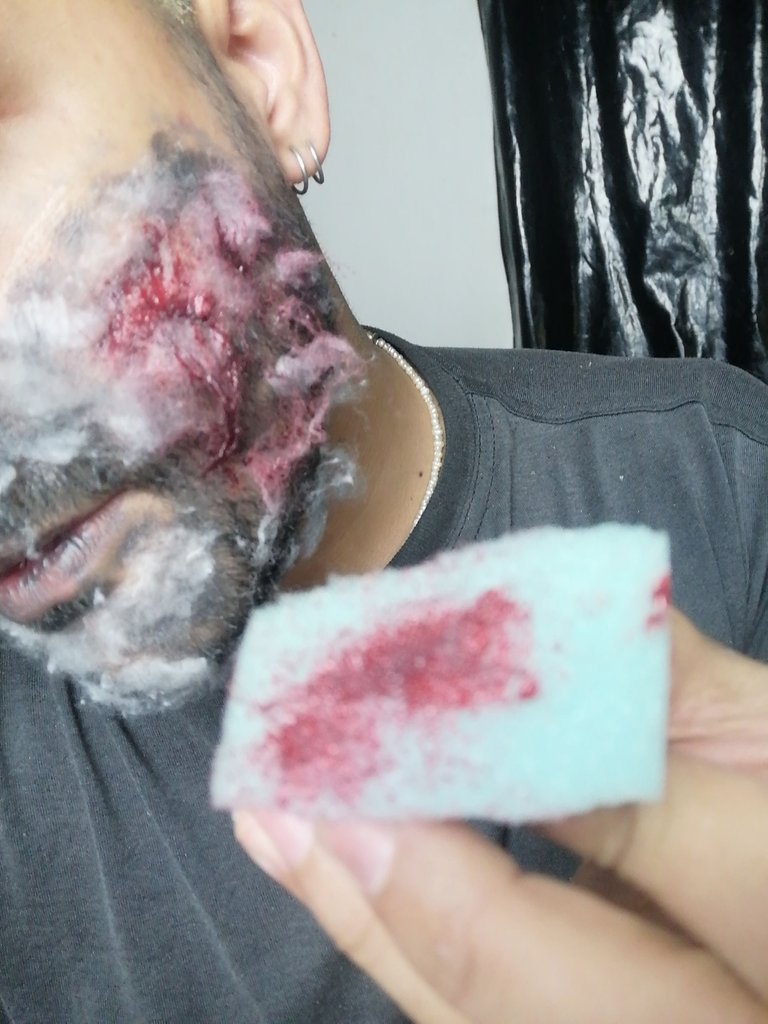
With a sponge, cut with the hands so that the cut is with volume and imperfect, we are going to wet it a little bit in the blood, which in my case I did with honey and red edible coloring to get the color that I liked, little by little in the form of stippling I am applying the blood by the zones of the wounds, little by little so that it is with that touch of realism.
Con una esponja, cortada con las manos para que el corte quede con volumen e imperfecto, vamos a mojarlo poquito en la sangre, que en mi caso hice con miel y colorante comestible rojo hasta conseguir el color que me gustaba, poco a poco en forma de punteo voy aplicando la sangre por las zonas de las heridas, poco a poco para que quede con ese toque de realismo.
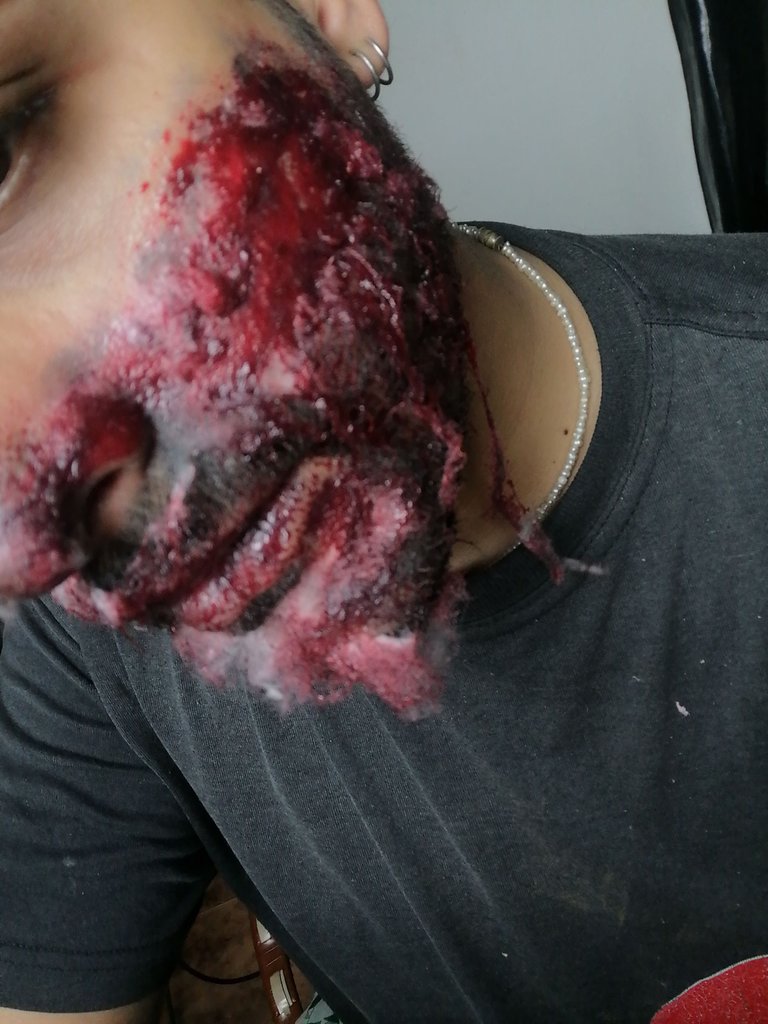
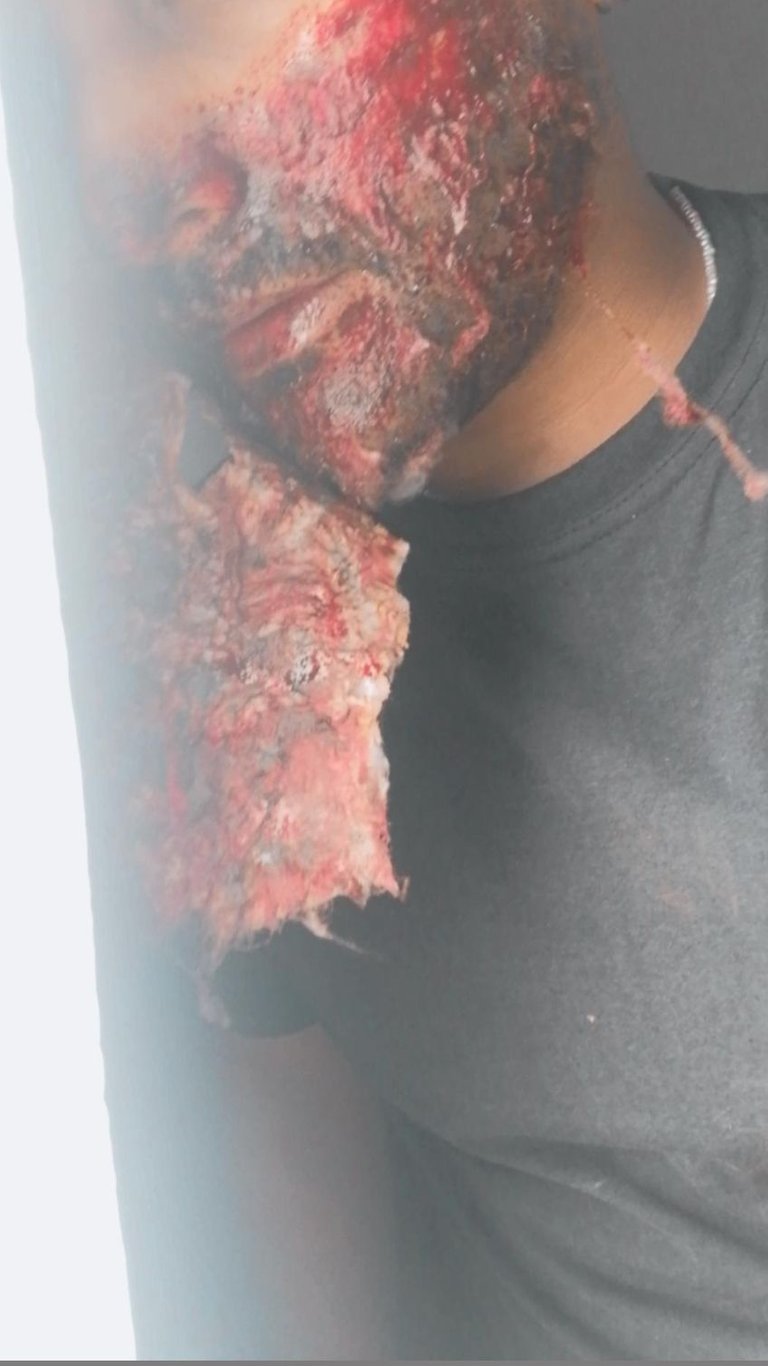
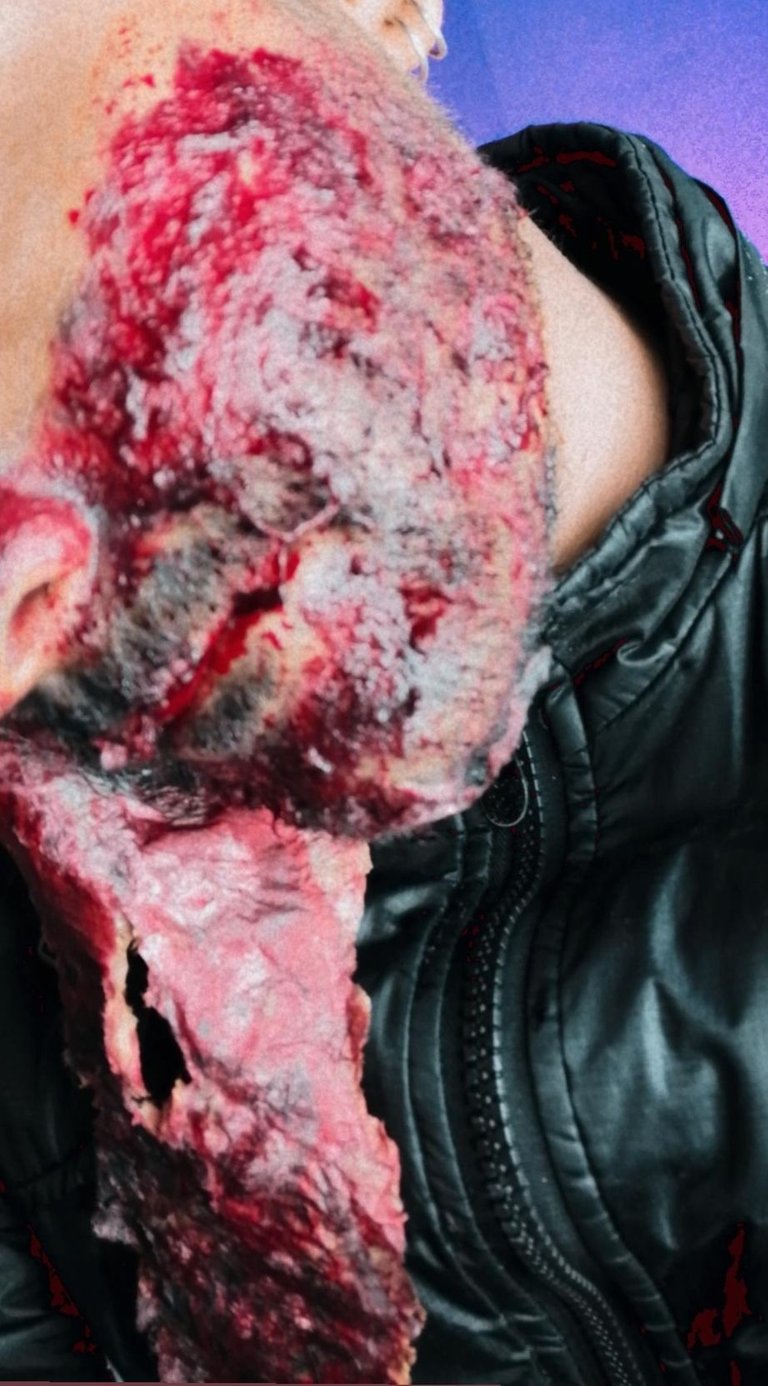
And almost all the work is done friends, according to me the rest is to perfect the small details to cover the spaces that have not been covered and give more depth to the spaces that look very clear with the black shadow and of course, glue the prosthesis to give the illusion that it is torn, I glued it with eyelash glue because it sticks and dries faster and resisted the weight.
Y ya casi todo el trabajo esta hecho amigos, según yo ya el resto es perfeccionar los pequeños detalles ir tapando los espacios que no se hayan cubierto y dar mas profundidad a los espacios que se vean muy claros con la sombra negra y por supuesto, pegar la prótesis para dar la ilusión de que esta desgarrado, yo lo pegue con pega de pestaña porque pega y seca mas rápido y resistió el peso.
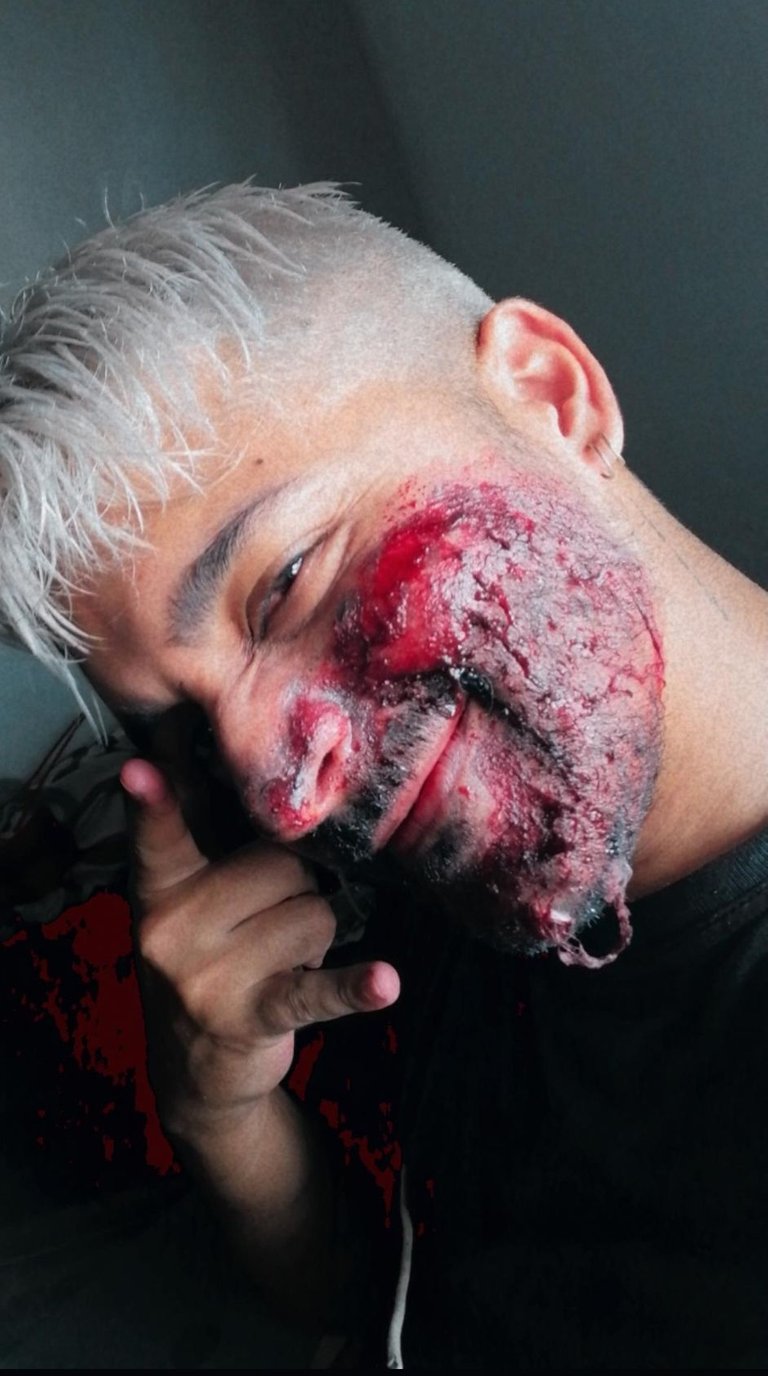
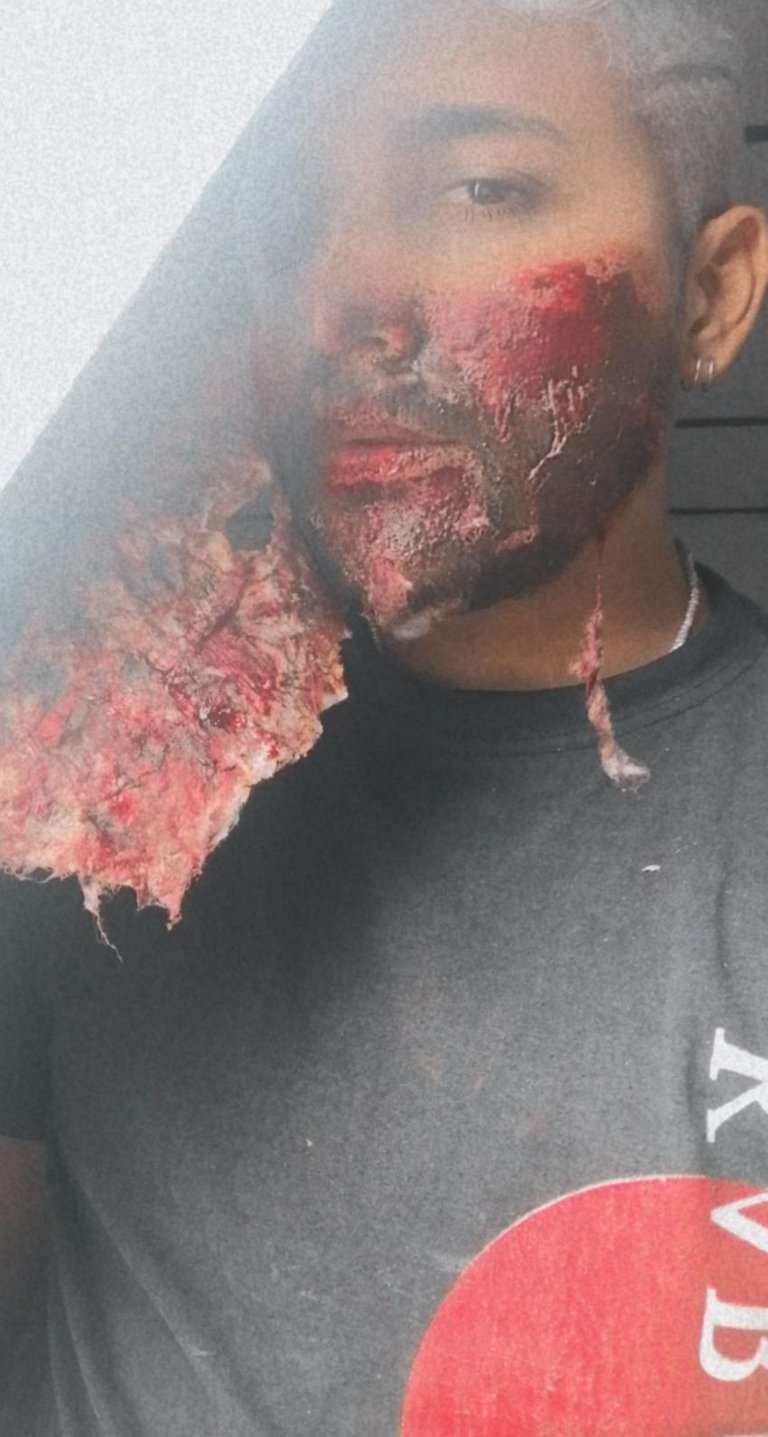
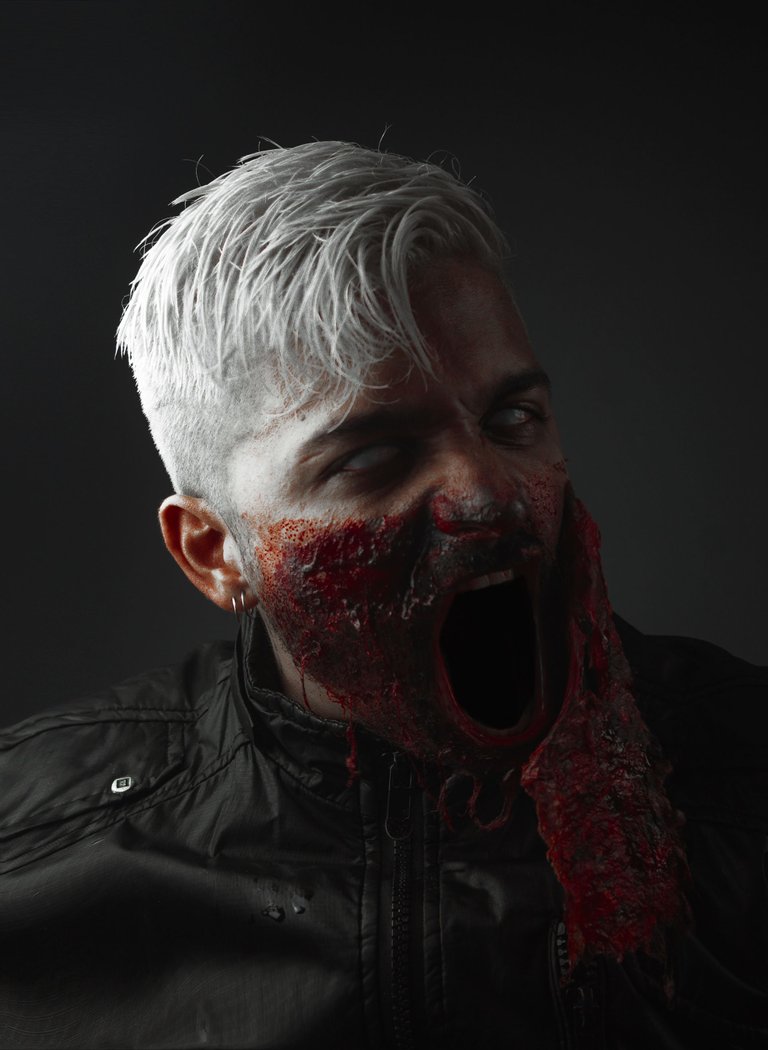
And well friends, that's all and believe me the result will fascinate you, it will be super real and you can take pictures, content or scare your friends and family, I had a visit from an aunt at the time I finished making this and I wanted to try if it looked realistic and you can not imagine the scare she got, it was super funny, I really hope you like it and that it inspires you if you like these themes and creations like me, thanks for watching and reading, see you in a next occurrence, xoxo.
Y bueno amigos, eso es todo y créanme que el resultado les va a fascinar, quedara super real y podrán hacer fotos, contenido o asustar a sus amigos y familiares, yo tenia una visita de una tía e el momento que termine de hacer esto y quise probar si se veía realista y no imaginan el susto que se llevo, fue super gracioso, de verdad espero que les guste y que los inspire si estos temas y creaciones les gustan como a mi, gracias por ver y leer, nos vemos en una próxima ocurrencia, xoxo.

Oye me encanta este maquillaje
Muchísimas gracias.
Me dio miedo, te quedo espectacular tu maquillaje, algún día aprenderé a hacer este tipo de cosas, saludos @jlphotographyart
Bueno esa es la idea, que bueno entonces. Y ojala que si, practicando salen cosas super geniales, saludos.