
Hello friends very good morning!!! I hope you are very well, I announce my return to my beloved platform, after a few months without being able to publish, due to my professional and personal studies for my development in my future, for that reason I have not been able to publish or interact in hive, but today we start with good mood and lots of attitude, I bring you an artistic makeup that I had not done for a long time, I had fun as ever playing with my shadows and brushes <3, so with much love the step by step of how to achieve this look so without further ado, let's start <3....
Acompáñenme por este hermoso makeup.
Come with me for this beautiful makeup.
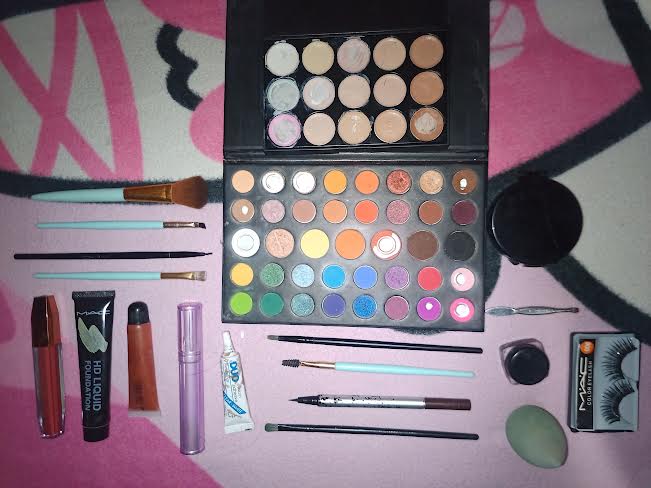
ELEMENTOS A USAR// ELEMENTS TO BE USED:
- Base.
- Sombra: verde (claro y oscuro) , negro, marrón y amarillo.
- Pomada para cejas.
- Esponja.
- Delineador negro y amarillo fluorescente.
- Pintura labial: brillo y rojito.
- Rizador de pestañas.
- Iluminador.
- Brochas.
- (Entre otros elementos).
- Base.
- Shade: green (light and dark), black, brown and yellow.
- Eyebrow ointment.
- Sponge.
- Black and fluorescent yellow eyeliner.
- Lipstick: gloss and reddish.
- Eyelash curler.
- Illuminator.
- Brushes.
- (Among other elements).
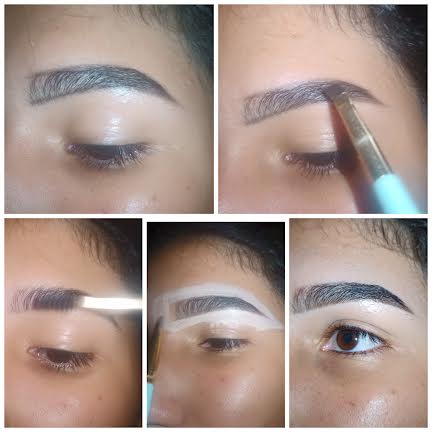
1 PASO: CEJAS// 1 STEP: EYERBROWS
We start by making our eyebrow, we make a line, above and below our eyebrows we paint from the middle to the end and after that we blur the lines well combing up and down the eyebrows, we comb a little at the beginning and we will finish with our base blending it very well.
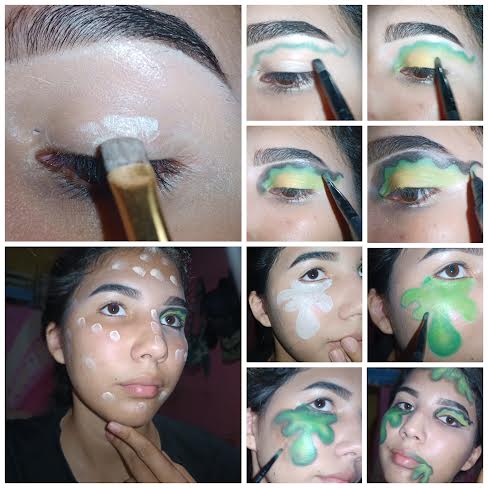
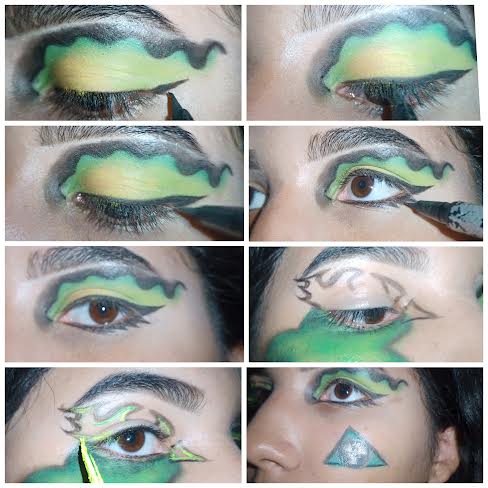
2 PASO: MAQUILLAJE// 2 STEP: MAKEUP
Luego para el segundo ojo aplique base a mi cara y luego con corrector blanco dibuje en la parte posterior de mí parpado un charco para luego pintarlo de verde, contrastado con verde oscuro, negro, marrón, y en los puntos de luz toques de amarillo. Así hice tres zonas radioactivas.
We continue with our makeup, apply foundation / concealer throughout the eyelid and distribute it well, with a fine brush we mark a green line in dark tone to divide into two areas, in the first one from the marked line we degrade with lighter green and on the beginning of the eyelid to the basin we add the yellow tone, expand a little and finish with the same light green, then from the line to the top we draw with black shadow, an arc as shown in the image.
Then for the second eye I applied foundation to my face and then with white concealer I drew on the back of my eyelid a puddle and then painted it green, contrasted with dark green, black, brown, and in the highlights touches of yellow. This way I made three radioactive zones.
3 PASO: DELINEADO. // 3 STEP: DELINEATION.
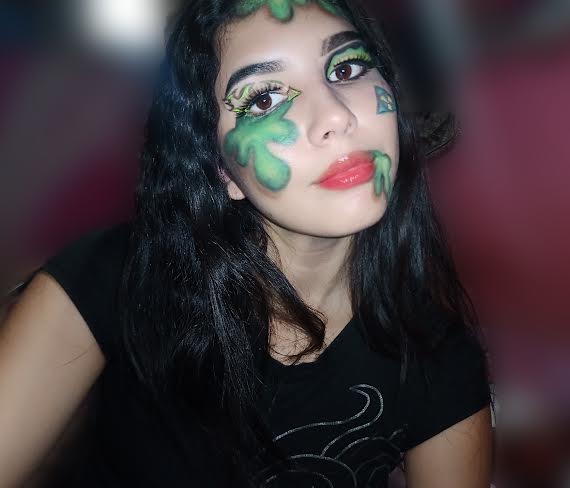
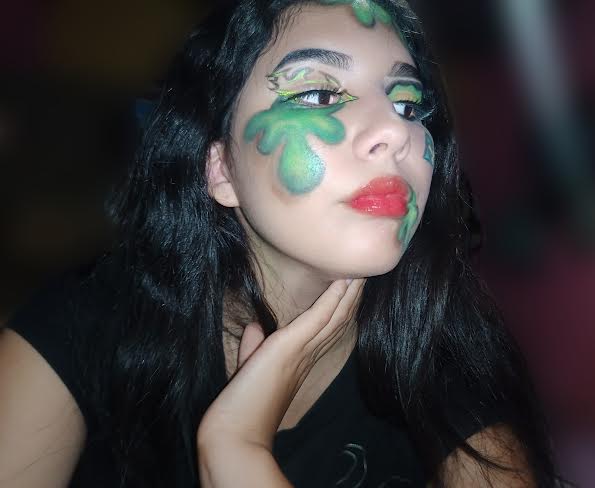
Let's go with the eyeliner!!! We made an eyeliner on the first eye a normal eyeliner with false lower lashes, this to give a more extended illusion to the eye, for the second one I traced a figure like flames to add the other eyeliner and make it more striking, I finish with a small detail on my cheek, which is the radioactivity icon to give more context to the look and ready!!!! <3.
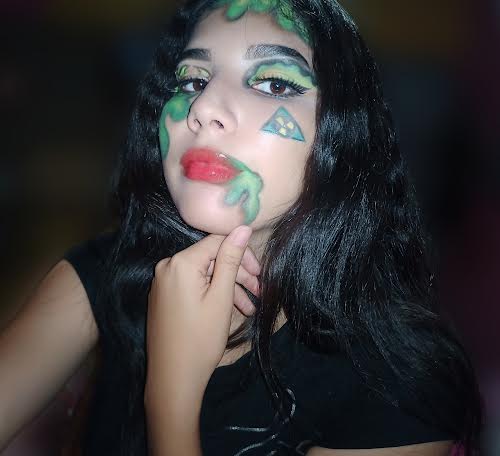
este fue nuestro resultado.
This was our result.
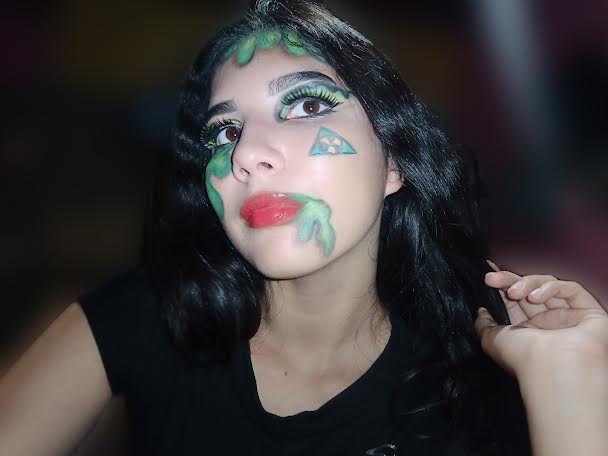
RESULTADO// RESULT:
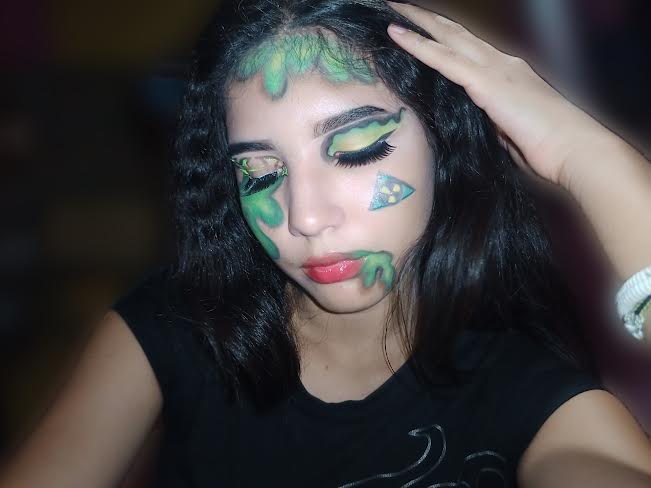
Gracias por acompañarme en este recorrido espectacular, espero lo hayan disfrutado tanto como yo, que se hayan divertido mucho, cuídense mucho, si saldrán usen su cubre bocas, y si no quédense en casita realizando maravillosos estilos de maquillaje , los quiero mucho y sin más que decir me despido. Adiós.!!
Thank you for joining me on this spectacular tour, I hope you enjoyed it as much as I did, I hope you had a lot of fun, take care of yourselves, if you are going out use your mouth cover, and if not stay at home doing wonderful makeup styles, I love you very much and without more to say I say goodbye. Good bye!!
Un maquillaje totalmente creativo 🥰