Hola una vez más amigos de Hive, en esta oportunidad me gustaria enseñar el paso a paso para un maquillaje un poco cargado, pero sencillo, para ir de fiesta o, algun evento especial, usando colores ya sean frios o neutros.
Hello once again friends of Hive, in this opportunity I would like to show you the step by step for a makeup a little bit loaded, but simple, to go to a party or, some special event, using either cold or neutral colors.
A veces nos provoca maquillarnos de manera llamativa y bonita, para vernos y sentirnos especialemente elegantes y ser un centro de atencion para otros, asi que les traigo este corto tutorial, todo menos profesional, para que logren su cometido.
Sometimes we want to do our makeup in a flashy and pretty way, to look and feel especially elegant and to be the center of attention for others, so I bring you this short tutorial, anything but professional, to help you achieve your goal.
A continuación, el paso a paso.
Here is the step by step.

Paso 1
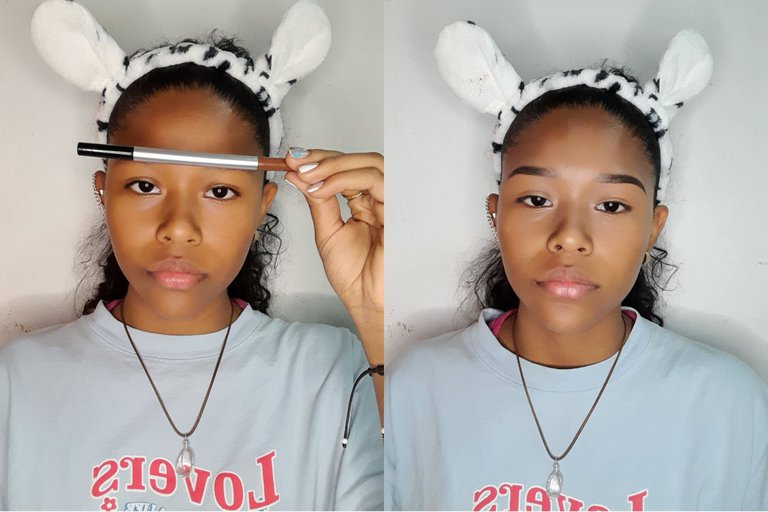
Las Cejas: Puedes hacerlas como normalmente las haces, en mi caso trate de que se vieran mas oscuras como del tono de mi cabello, para así dar mejor contraste al resto del maquillaje.
The eyebrows: You can do them as you normally do them, in my case I tried to make them look darker like the tone of my hair, to give a better contrast to the rest of the makeup.
Paso 2

El color en la cuenca del ojo y parpado fijo: Primeramente tome un azul mas claro y difumine de afuera hacia adentro para que quedara uniforme, luego hice lo mismo, pero con un color azul mas oscuro para que se notara marcado.
The color in the eye socket and fixed eyelid: First I took a lighter blue and blurred from the outside to the inside to make it uniform, then I did the same, but with a darker blue color to make it more noticeable.
Paso 3
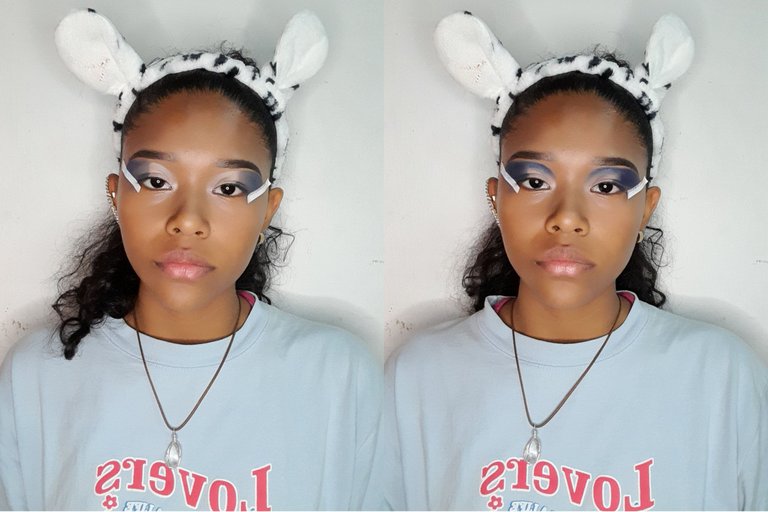
Desde mi lagrimal a mi parpado móvil: Luego limpie el parpado con un corrector varios tonos mas claros que mi piel, y volvi a llevar la sombra azul oscura de adentro hacia afuera, desde la cuenca al lagrimal sin tocar el parpado movil.
From my tears to my mobile eyelid: Then I wiped the eyelid with a concealer several shades lighter than my skin, and I applied the dark blue shadow from the inside out, from the socket to the tear trough without touching the mobile eyelid.
Paso 4
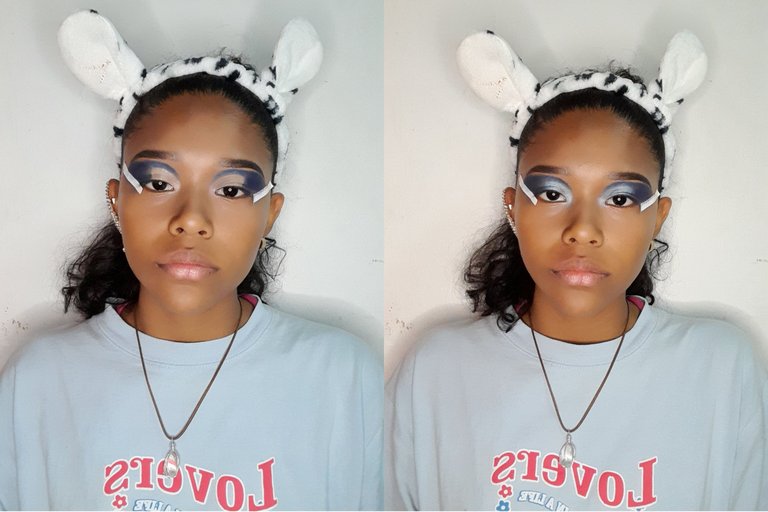
Parpado movil y mas sombras: Limpie nuevamente mi parpado movil con corrector, sin pasar mas alla de la mitad del ojo, y sin cruzar la linea de cuenca y parpado fijo. Luego aplique una sombra azul clara y mas brillante en la zona anteriormente limpiada, desde el lagrimal, hasta mitad de ojo.
Mobile eyelid and more shadows: Clean again my mobile eyelid with concealer, without going beyond the middle of the eye, and without crossing the socket line and fixed eyelid. Then apply a lighter and brighter blue shadow on the previously cleaned area, from the tear trough to the middle of the eye.
Paso 5
Sombras en la zona del parpado inferior de pestañas: Utilice los mismos colores en el parpado inferior, esto con la finalidad de dar profundidad al ojo. También se pueden agregar pestañas, mas rubor y por supuesto iluminador.
Shadows in the area of the lower eyelid of eyelashes: Use the same colors in the lower eyelid, this in order to give depth to the eye. You can also add eyelashes, more blush and of course highlighter.
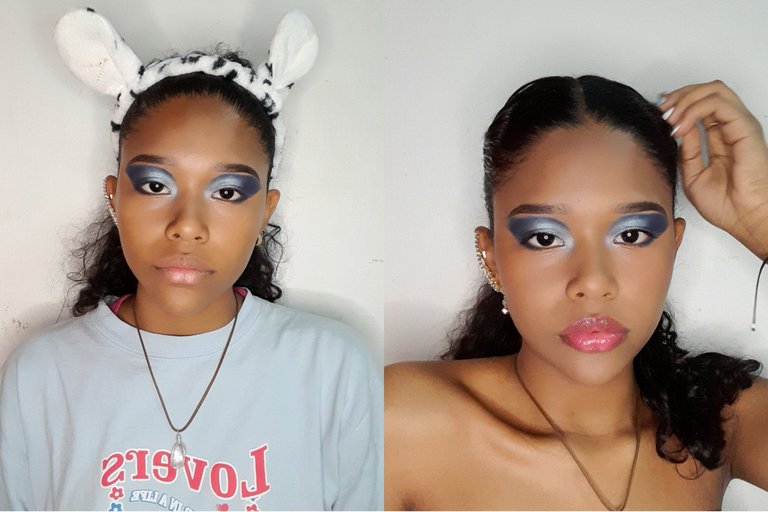
Completar rostro: Y para culminar nuestro maquillaje, terminamos rostros con nuestra respectiva base y polvo para sellar (Si aman y usan el contorno, por supuesto pueden hacerlo, recuerden darle su propio toque). También podemos aplicar un poco de labial y algo de brillo. No te olvides del rubor.
Complete face: And to finish our makeup, we finish our faces with our respective foundation and sealing powder (If you love and use contouring, of course you can do it, remember to give it your own touch). We can also apply a bit of lipstick and some gloss. Don't forget the blush.
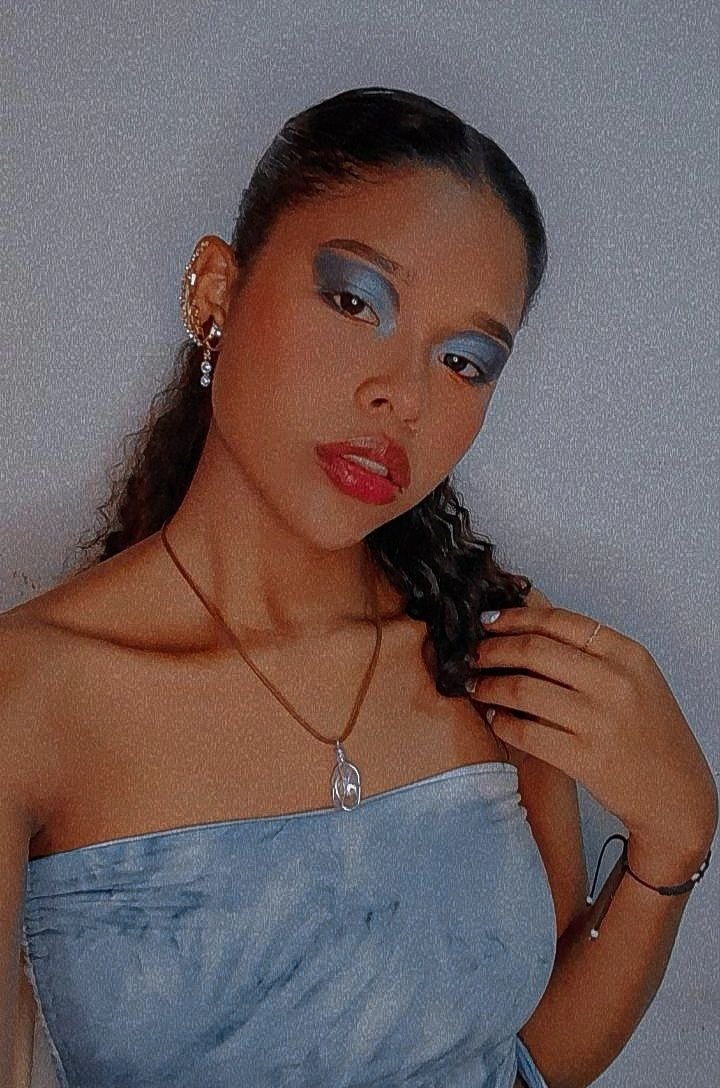
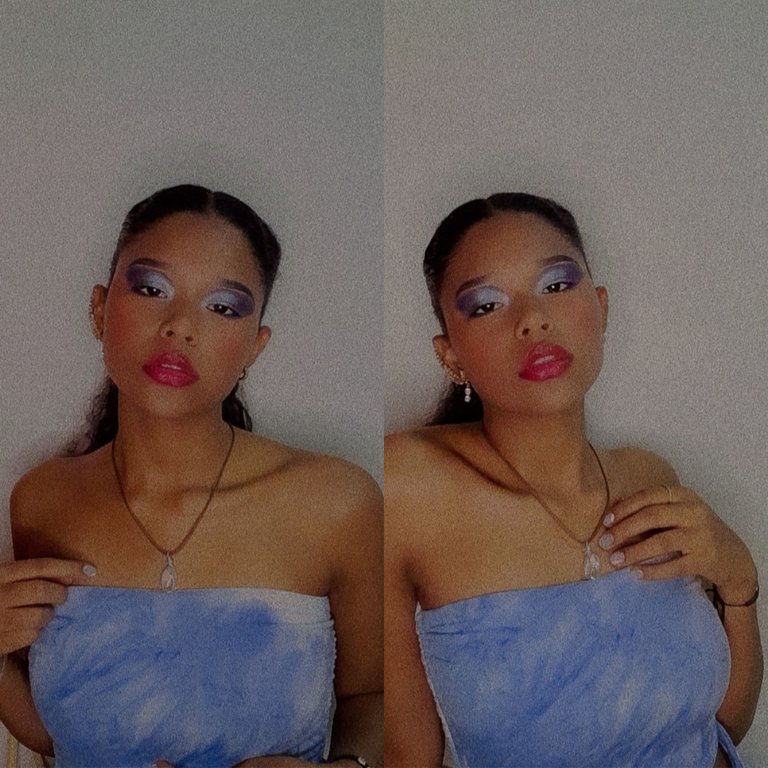
RESULTADOS:
RESULTS:
Espero que te haya gustado mi publicación, déjame saberlo en los comentarios.
Hasta la próxima publicación.
IG: @mariafeersg
TWTT: @mariafeersg
I hope you liked my post, let me know in the comments.
See you next time.
IG: @mariafeersg
TWTT: @mariafeersg