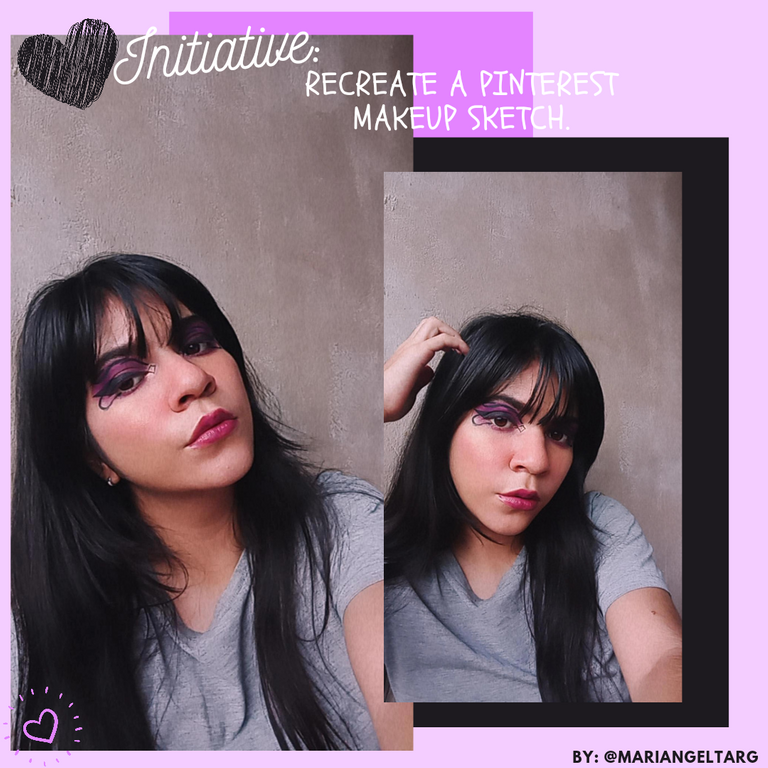
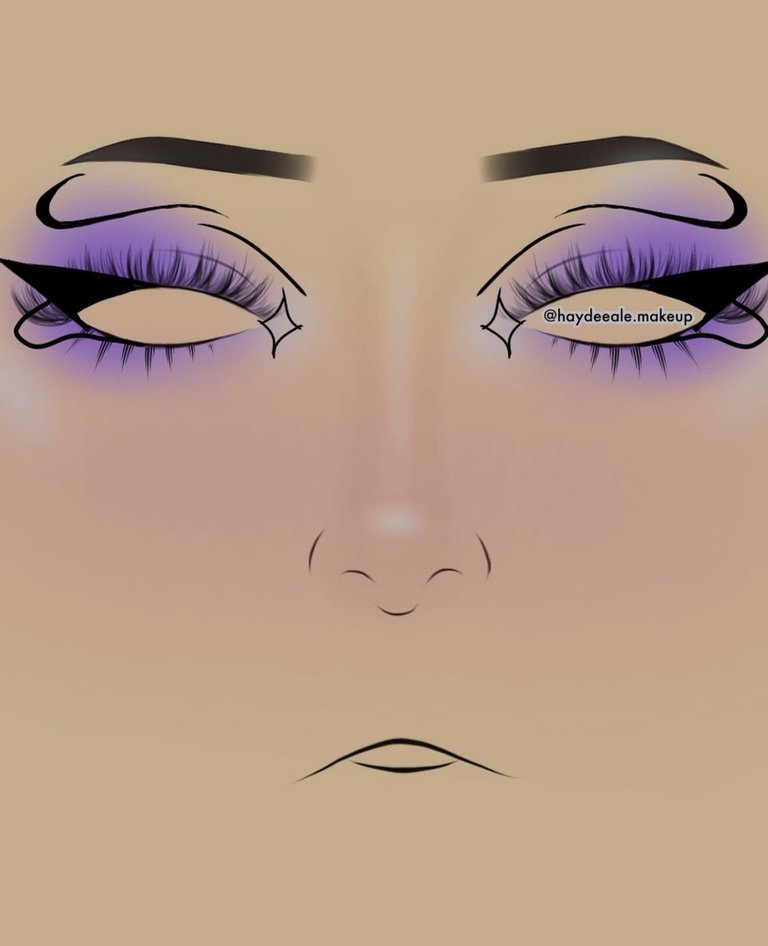
¡Hola hola Hive! Hoy vengo con un maquillaje para una iniciativa que ví hace unos días y que me llamo mucho la atención creado por @mayllerlys, me encanta participar en las iniciativas o tags referentes al maquillaje y este no fue la excepción, trata de recrear un maquillaje encontrado en Pinterest, aunque yo lo conseguí allí también lo ví en el instagram de su creadora asi que colocaré el link de la fuente directamente a su perfil.
Hello hello Hive! Today I come with a makeup for an initiative that I saw a few days ago and that caught my attention created by @mayllerlys, I love to participate in initiatives or tags related to makeup and this was no exception, it tries to recreate a makeup found on Pinterest, although I got it there I also saw it on the instagram of its creator so I will post the source link directly to her profile.

Materiales / Materials:
- Tónico / Toner.
- Jabón facial / Facial soap.
- Primer / Primer.
- Crema hidratante / Moisturizing cream.
- Protector solar / Sunscreen.
- Pomada de cejas / Eyebrow ointment.
- Corrector / Concealer.
- Pigmentos / Pigments.
- Delineador / Eyeliner.
- Base / Base.
- Paleta de sombras / shadows palette.
- Polvo suelto / Loose powder.
- Beauty blender / Beauty blender.
- Brochas / Brushes
- Contorno / Contour.
- Rubor / Blush.
- Iluminador / highlighter.
- Brillo labial / Lip gloss.
- Lápiz labial morado / Purple lipstick.
Procedimiento / Procedure:
ESPAÑOL
Paso 1:
Tras limpiar mi rostro para eliminar cualquier impureza que haya podido optener a través del día, lave muy bien mi rostro con jabón facial neutro, luego de esto coloque primer, crema hidratante y protector solar para así obtener una preparación completa y colocar correctamente el maquillaje.
Paso 2:
Al comenzar mis cejas las peine muy bien con un cepillo y procedi a realizar su forma con un pincel y pomada, primero hice una línea en la parte inferior de la ceja, seguido de esto agregue pomada dentro de la ceja para así rellenar los espacios y que quedara de manera uniforme, luego la difumine muy bien con un cepillo, limpie los bordes y agregue corrector en la parte inferior de la ceja para terminar de perfeccionar su forma.
ENGLISH
Step 1:
After cleansing my face to remove any impurities I may have picked up throughout the day, wash my face very well with neutral facial soap, then apply primer, moisturizer and sunscreen to get a complete preparation and correctly apply makeup.
Step 2:
When I started my eyebrows I combed them very well with a brush and proceeded to make their shape with a brush and pomade, first I made a line at the bottom of the eyebrow, followed by this I added pomade inside the eyebrow in order to fill in the spaces and make it look uniform, then I blurred it very well with a brush, cleaned the edges and added concealer at the bottom of the eyebrow to finish perfecting its shape.

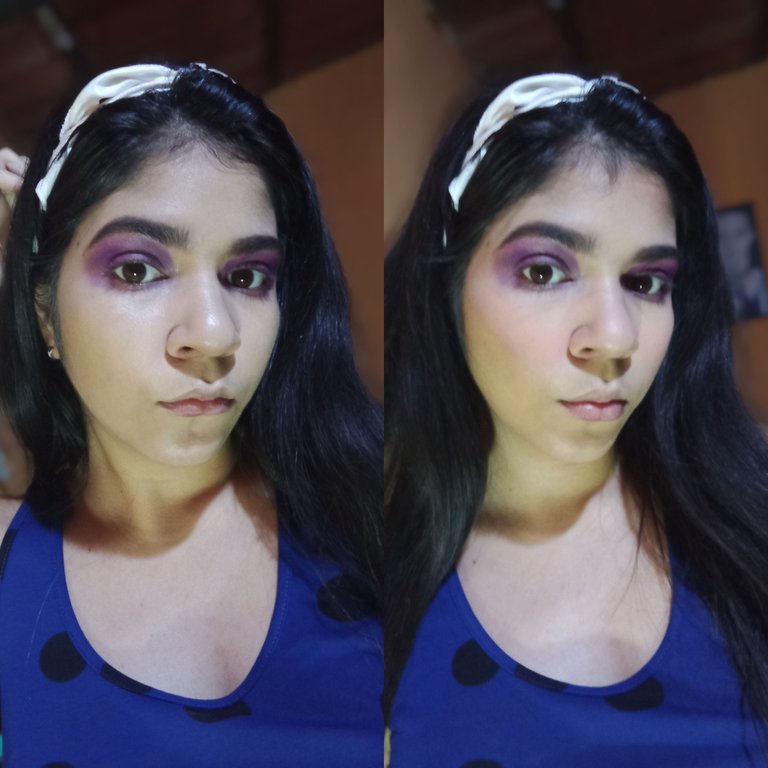
Paso 3:
Agregue corrector en mis párpados y lo difumine para así obtener una mejor pigmentación, comencé al principio de mi ojo colocando una sombra morada en un tono un poco más suave, luego de esto agregue pigmento morado desde el final hasta la mitad de mi párpado en movimientos circulares y lo fui difuminando poco a poco.
Luego de esto agregue sombra morada debajo de mis ojos y también lo difumine.
Paso 4:
Coloque corrector en mis ojeras y en otros puntos específicos de mi rostro para tapar las imperfecciones, luego agregue base y la esparcí con un Beauty blender.
Con una brocha agregue contorno en mis pomulos siguiendo la línea del hueso de mi oreja, luego de esto sellé todo con polvo suelto, agregue una línea suave debajo del contorno para así resaltarlo un poco más.
Tome una brocha y agregue rubor un poco más arriba de mis pomulos y también lo fui difuminando.
Step 3:
I added concealer on my eyelids and blended it out to get better pigmentation, I started at the beginning of my eye by placing a purple shadow in a slightly softer shade, after this I added purple pigment from the end to the middle of my eyelid in circular motions and blended it out little by little.
After this I added purple shadow under my eyes and blended it as well.
Step 4:
I placed concealer on my dark circles under my eyes and other specific spots on my face to cover imperfections, then added foundation and spread it with a Beauty blender.
With a brush I added contour on my cheekbones following the line of my ear bone, after this I sealed everything with loose powder, I added a soft line under the contour to highlight it a little more.
I took a brush and added blush a little above my cheekbones and blended it out as well.
Paso 5:
Con mi delineador comencé a hacer los cat eyes, dado que los quería un poco gruesos los hice más grandes, agregue una línea desde el final de mi ojo hasta el final de la cola de mi ceja, luego coloque otra línea hasta donde comienza el pliegue de mi ojo, lo lleve hacia abajo y comencé a rellenar y terminar de perfeccionarlo.
Luego de esto agregue la línea desde un poco más arriba de mi lagrimal y la rellene, seguida de este un poco más arriba de esta agregue otra línea que al final termina con un pequeño espiral.
Agregue el pequeño diamante en mis lagrimales y debajo de la forma del cat eye agregue la línea curva y también lo rellene.
Paso 6:
Agregue iluminador con una brocha en mis lagrimales y también en mis pomulos, luego de esto agregue un poco de brillo labial en mis labios, en el medio agregue un poco de labial morado y lo sellé con sombra morada para darle un poco más de color ¡Y listo! Maquillaje completado.
Step 5:
With my eyeliner I started making the cat eyes, since I wanted them a little thick I made them bigger, I added a line from the end of my eye to the end of the tail of my eyebrow, then I placed another line to where the crease of my eye starts, I took it down and started to fill in and finish perfecting it.
After this I added the line from a little above my tear trough and filled it in, followed by a little above this I added another line that at the end ends with a small spiral.
I added the small diamond on my tear trough and below the cat eye shape I added the curved line and filled it in as well.
Step 6:
I added highlighter with a brush on my tear troughs and also on my cheekbones, after this I added some lip gloss on my lips, in the middle I added some purple lipstick and sealed it with purple shadow to give it a little more color And that's it! Makeup completed.
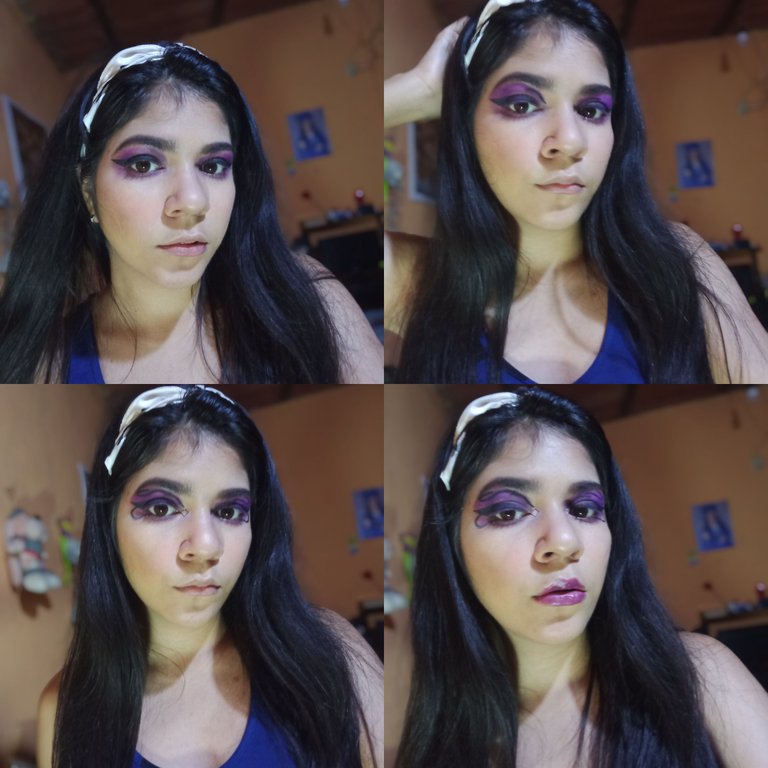
El resultado / The result:
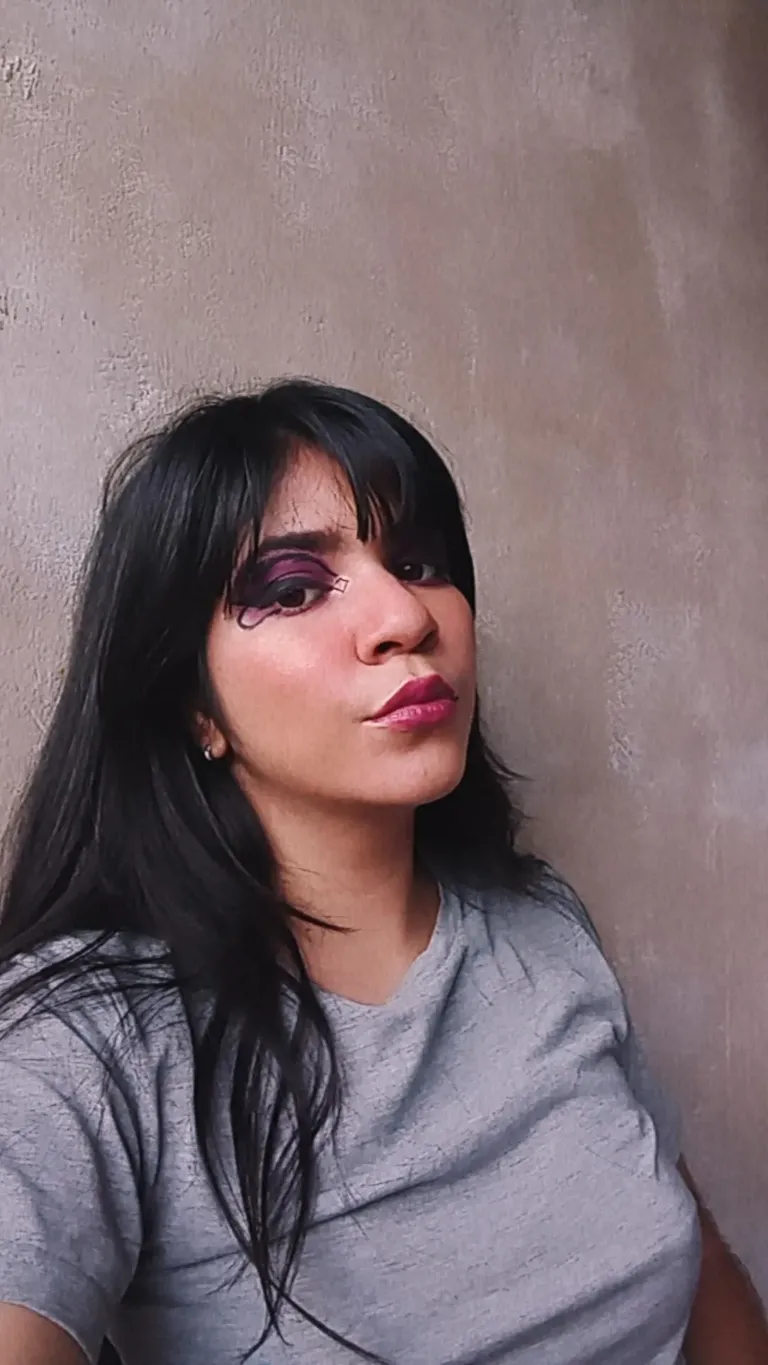
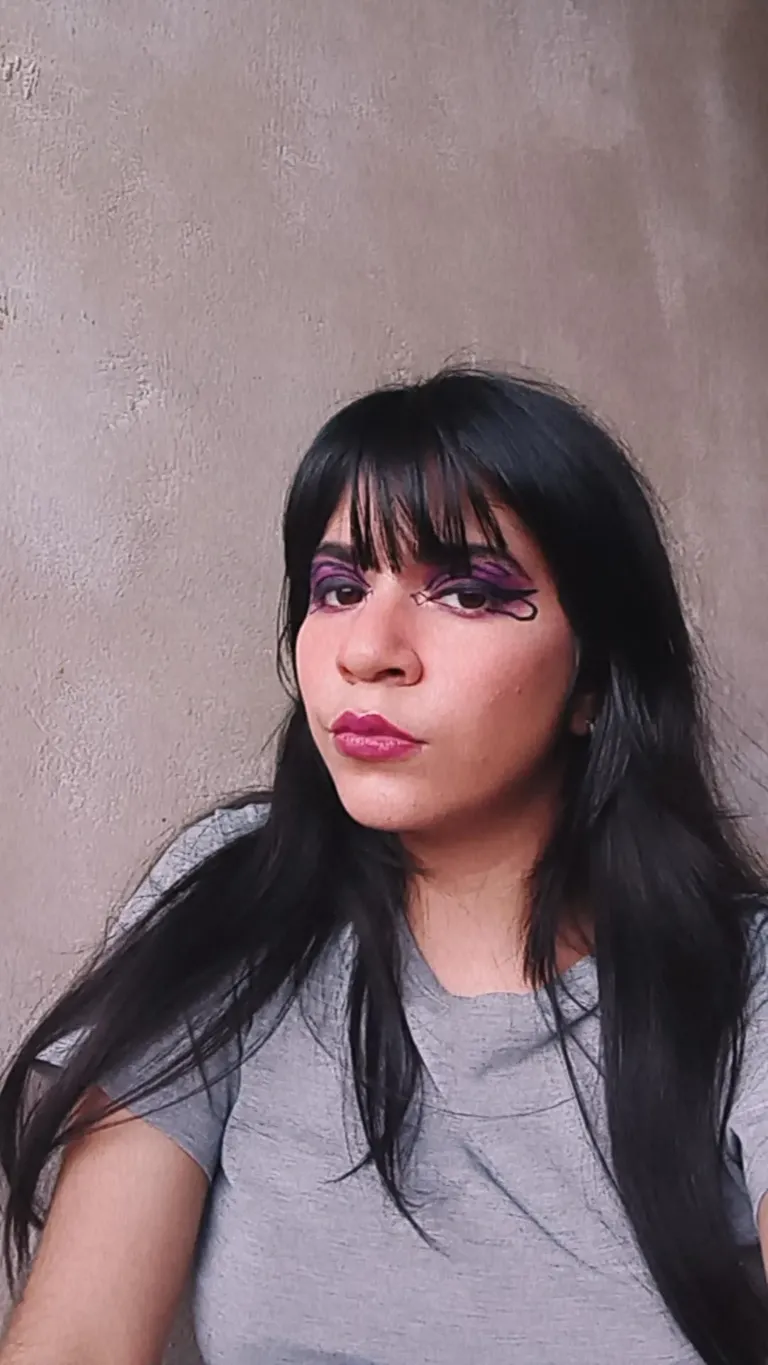
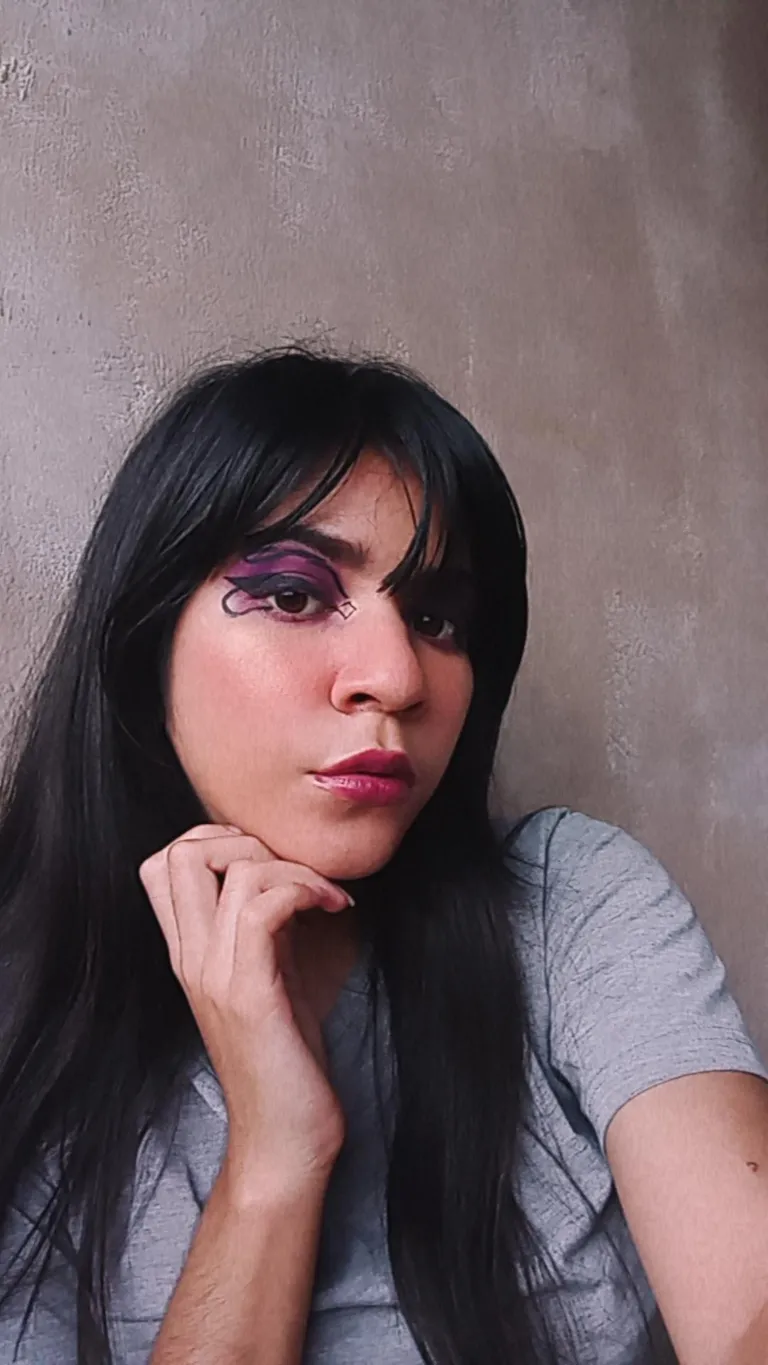
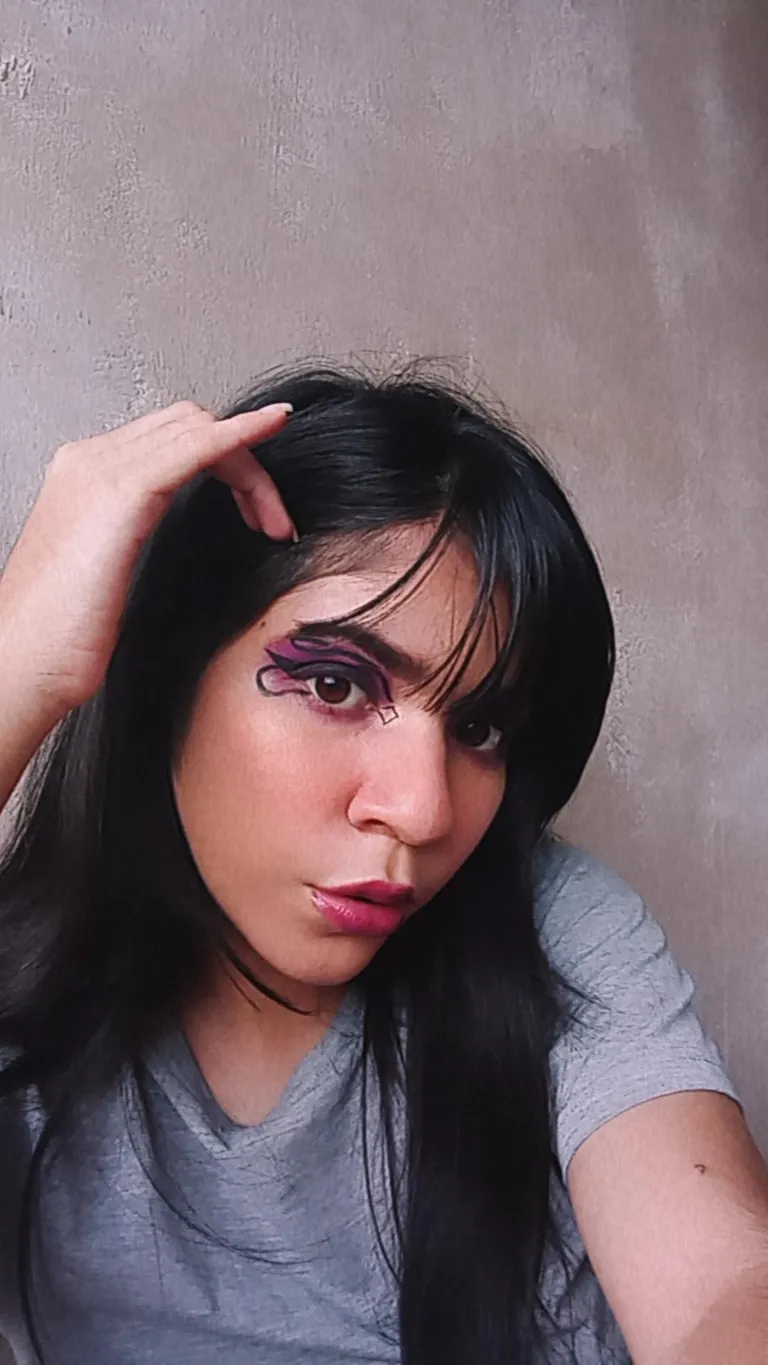
¡Muchas gracias por leer mi post! Aunque se ve muy fácil el maquillaje se me complico un poco el delineado y me estrese algo JAJAJA pero el resultado me encantó! ¡Nos leemos pronto! XOXO.
Thank you so much for reading my post! Although the makeup looks very easy, I got a little complicated with the eyeliner and I got a little stressed HAHAHAHA but I loved the result! See you soon! XOXO.
Cover created in: Canvas.
Text translated with: DeepL.
Dividers edited with: PicsArt.
All photos of the procedure are my own.
Congratulations @mariangeltarg! You have completed the following achievement on the Hive blockchain and have been rewarded with new badge(s) :
Your next target is to reach 100 posts.
You can view your badges on your board and compare yourself to others in the Ranking
If you no longer want to receive notifications, reply to this comment with the word
STOPTo support your work, I also upvoted your post!
Hola hermosa, excelente tu participación en la iniciativa, me gustó tu resultado. Gracias por unirte a ella y por la mención hacia mi persona.!! Muchas bendiciones para ti ✨
¡Muchas gracias! Me encantó participar en tu iniciativa, gracias por crearla✨✨