ESPAÑOL
¡Hola hola mis amores de Hive! He vuelto con mis maquillajes de anime (obvio de Jujutsu Kaisen) un anime que me encanta y del que me he vuelto muy fanatica, a tal nivel de que he leído el manga.
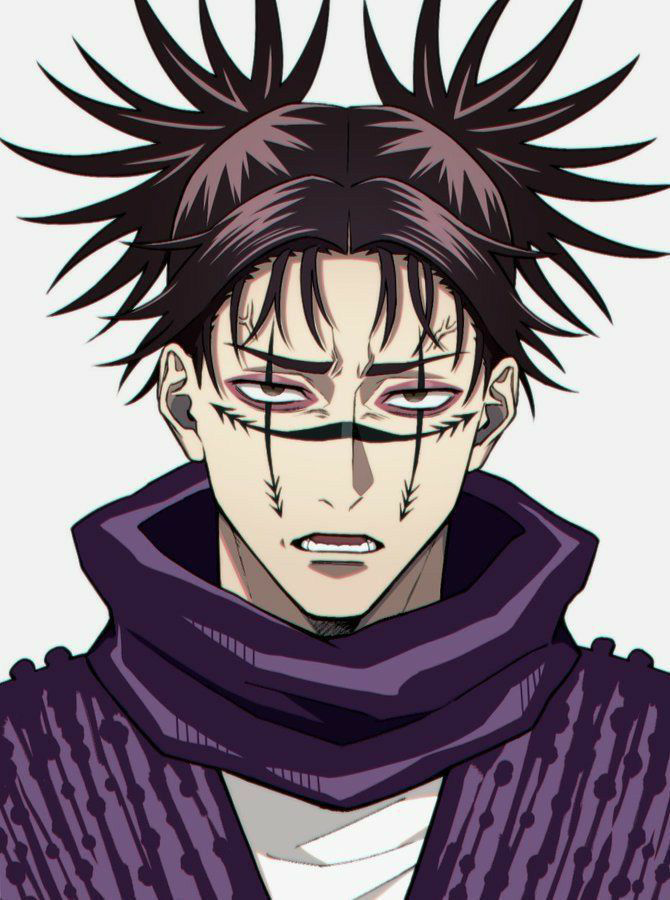
En el anime aún se ve poco de Choso, es un personaje el cual es un espíritu maldito considerado de grado especial.
La madre de Choso podía dar a luz maldiciones, cuando fue a pedir ayuda a un templo y Noritoshi Kamo se aprovechó de esto y ligo su sangre con la de los fetos, es por esto que Choso puede manejar la técnica de manipulación de sangre, la cual es heredada en el Clan Kamo.
Choso es un híbrido humano que fue despertado por Mahito (otra maldición) tiene una apariencia humana pero en el puente de su nariz tiene una línea que a veces destila sangre.
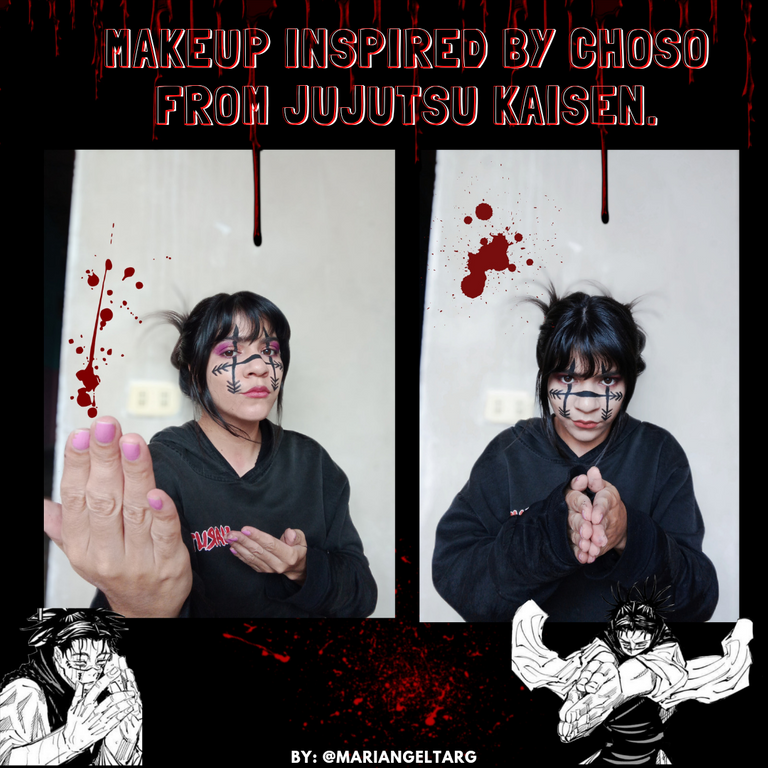
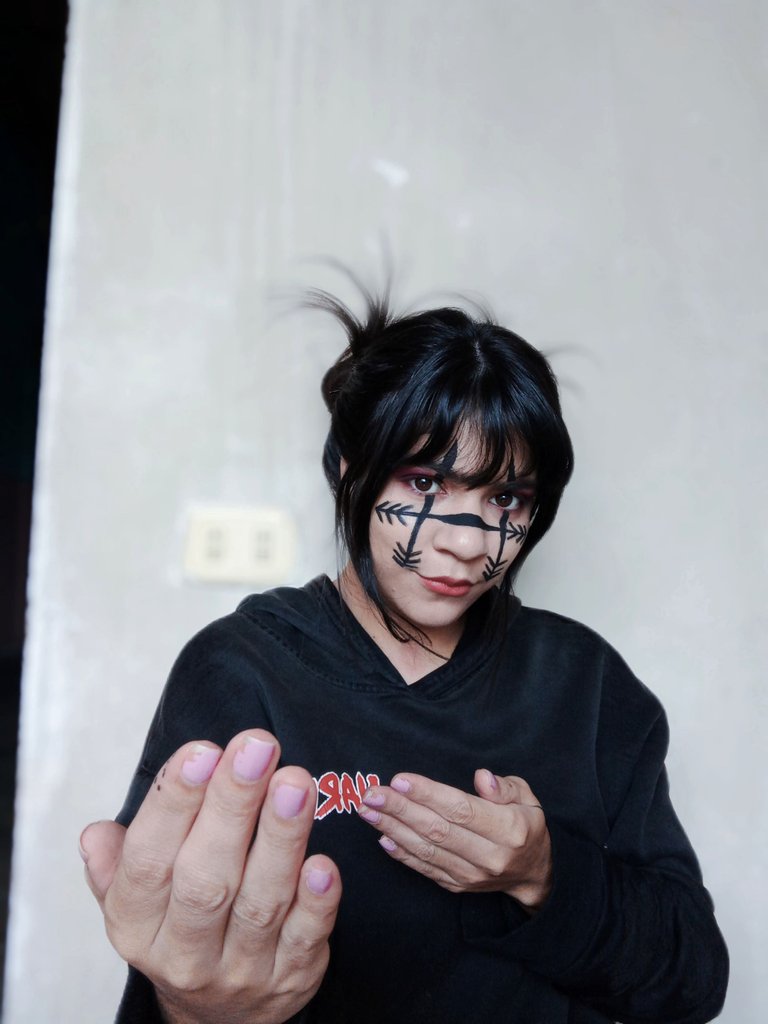
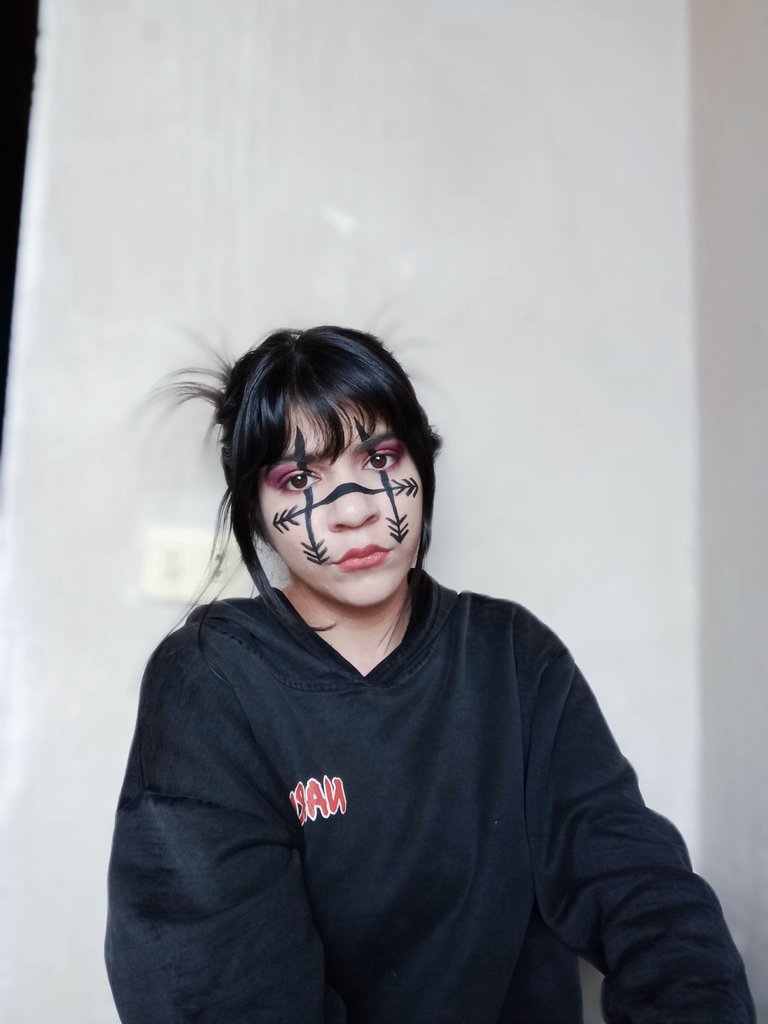
Al utilizar su técnica maldita, a Choso se le dibujan unas líneas con flechas en su rostro, está fue la parte que quise recrear del maquillaje y hacer algo más completo.
ENGLISH
Hello hello my Hive loves! I'm back with my anime makeovers (obviously Jujutsu Kaisen) an anime that I love and I've become very fanatic about, to such a level that I've read the manga.
In the anime we still see little of Choso, he is a character which is a cursed spirit considered of special grade.
Choso's mother could give birth to curses, when she went to ask for help to a temple and Noritoshi Kamo took advantage of this and linked her blood with that of the fetuses, this is why Choso can handle the technique of blood manipulation, which is inherited in the Kamo Clan.
Choso is a human hybrid that was awakened by Mahito (another curse) he has a human appearance but on the bridge of his nose he has a line that sometimes distills blood.
When using his cursed technique, Choso gets lines with arrows drawn on his face, this was the part I wanted to recreate the makeup and make something more complete.
Materiales / Materials:
- Tónico facial / Facial tonic.
- Jabón facial neutro / Neutral facial soap.
- Primer / Primer.
- Crema hidratante / Moisturizing cream.
- Protector solar / Sunscreen.
- Corrector / Concealer.
- Pintura negra / Black paint.
- Pomada de cejas / Eyebrow pomade.
- Paleta de Sombras / Shadow Palette.
- Pigmento morado / Purple Pigment.
- Delineador / Eyeliner
- Base / Foundation.
- Beauty blender / Beauty blender.
- Polvo suelto / Loose powder.
- Pinceles / Brushes.
- Brillo labial / Lip gloss.
- Pintura labial rojo / Red lipstick.
Procedimiento / Procedure:
Primer paso:
Algo que hago siempre antes de empezar cualquier maquillaje, es preparar mi rostro, es por eso que primero lo limpio con tónico facial para así eliminar cualquier impureza que haya adquirido, luego de esto lavo mi cara con jabón facial neutro, luego aplicó primer, crema hidratante y protector solar.
Segundo paso:
Comencé realizando mis cejas, así que las peine hace arriba y con un pincel delgado y pomada hice pequeñas rayas siguiendo la forma de mi ceja, luego lo difumine con un cepillo y limpie los bordes con tónico, luego aplique corrector y lo difumine para así definir la forma de la ceja, dejando un tono más natural y no tan oscuro.
First step:
Something I always do before starting any makeup, is to prepare my face, that's why I first clean it with facial toner in order to remove any impurities it may have acquired, after that I wash my face with neutral facial soap, then I applied primer, moisturizer and sunscreen.
Second step:
I started by doing my eyebrows, so I combed them up and with a thin brush and pomade I made small stripes following the shape of my eyebrow, then I blurred it with a brush and cleaned the edges with toner, then I applied concealer and blended it in order to define the shape of the eyebrow, leaving a more natural tone and not so dark.

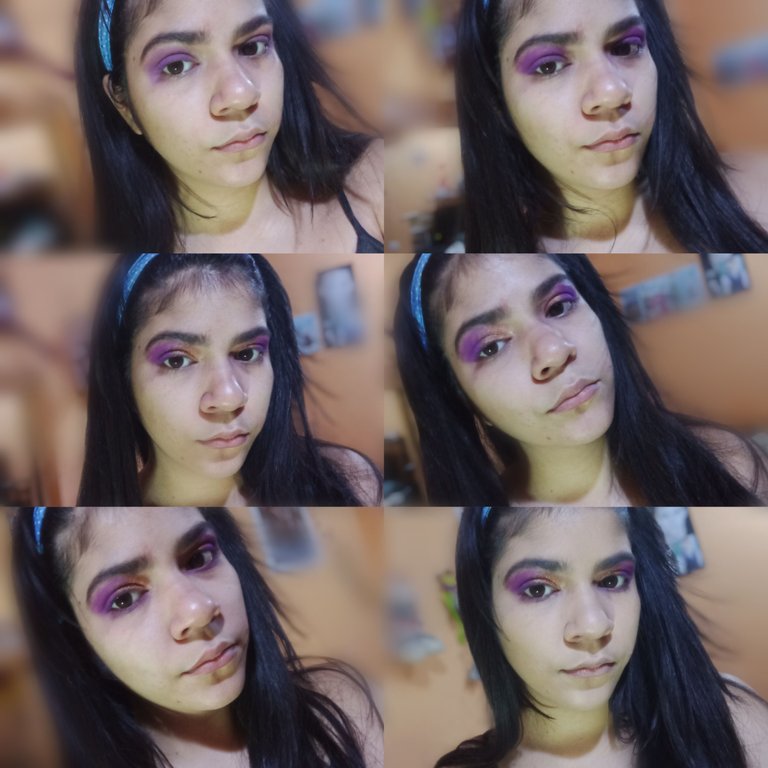
Tercer paso:
Aplique corrector en mis párpados y lo difumine para crear una mejor pigmentación, tome un pincel y sombra morada como base, la aplique en la parte final de mi ojo en movimientos circulares hasta cubrir todo mi párpado y la parte superior.
Luego de esto tome pigmento morado y aplique en la última parte de mi ojo tambien en movimientos circulares, luego lo difumine por la parte superior.
Tras terminar con el tono morado, aplique un poco de corrector al principio de mi ojo y luego lo sellé con sombra dorada para resaltar mis ojos y el color.
Luego con un pincel pequeño agregue sombra morado claro debajo de mis ojos.
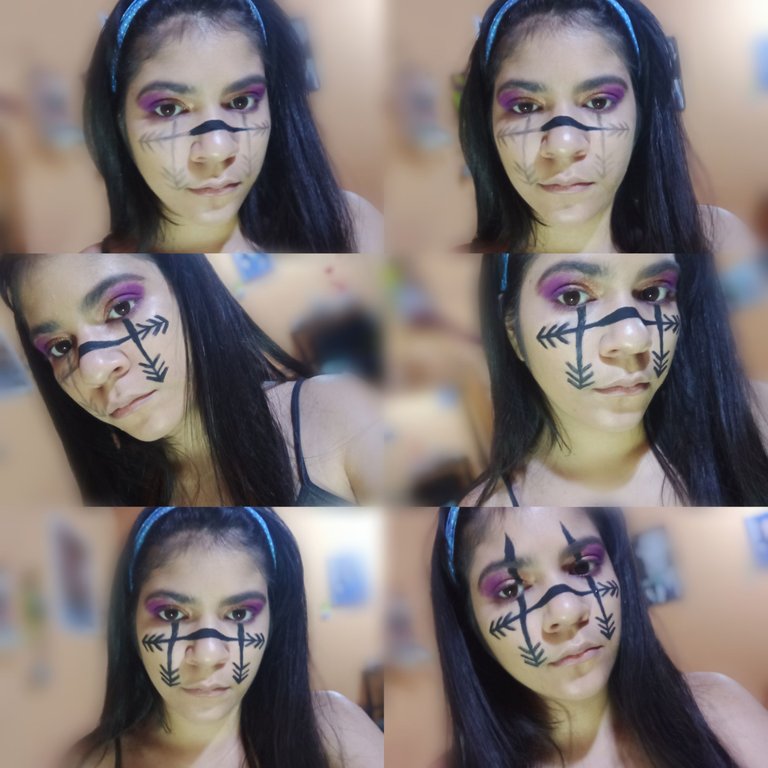
Cuarto paso:
Coloque pequeños puntos de base en mi rostro y comencé a difuminarlo con mi Beauty blender, luego de esto sellé todo con polvo compacto.
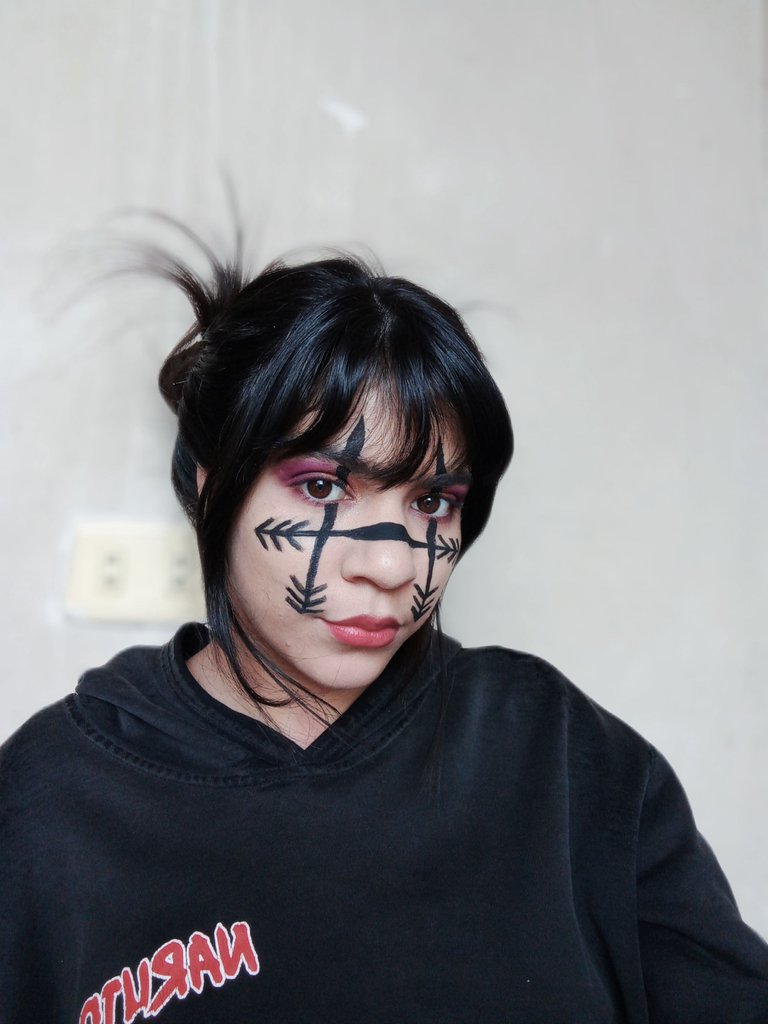
Luego con un pincel delgado y sombra negra cree el patrón del maquillaje, primero hice la línea en el puente de mi nariz, luego continúe hacia los lados creando tres flechas en cada uno, luego una línea debajo de cada ojo que llegara hasta la comisura de mis labios, y hacia los lados dibuje las flechas.
Third step:
Apply concealer on my eyelids and blend it to create better pigmentation, take a brush and purple shadow as a base, apply it on the end of my eye in circular motions until it covers my entire eyelid and top.
After this I took purple pigment and applied it on the last part of my eye also in circular movements, then I blended it on the upper part.
After finishing with the purple shade, I applied some concealer at the beginning of my eye and then sealed it with gold shadow to highlight my eyes and color.
Then with a small brush I added light purple shadow under my eyes.
Fourth step:
I placed small dots of foundation on my face and started to blend it with my Beauty blender, after that I sealed everything with pressed powder.
Then with a thin brush and black shadow I created the makeup pattern, first I made the line on the bridge of my nose, then I continued to the sides creating three arrows on each one, then a line under each eye that reached the corner of my lips, and to the sides I drew the arrows.
Quinto paso:
Tras tener el patrón listo, tome un pincel muy delgado y la pintura negra y comencé a rellenar el patrón, a medida que fui pintando el maquillaje fue tomando forma, rellenando las flechas y las líneas.
Sexto paso:
Tras rellenar todas las líneas, continúe con la parte superior en mis ojos, con delineador dibuje una línea en mis párpados las cuales conectaban con las líneas en la parte inferior de mis ojos, estás mismas lines de mis párpados iban hacia arriba (hacia mi ceja) y terminaban en la parte superior con una punta afilada.
Luego de finalmente terminar todas las líneas, agregue brillo labial en mis labios y luego labial rojo para resaltar esta parte de mi rostro, me hice dos pequeñas cebollas con mi cabello en la parte superior de mi cabeza y dejé un poco de cabello suelto y de manera punteaguda para hacerlo más parecido posible ¡Y listo, maquillaje terminado!
Fifth step:
After having the pattern ready, I took a very thin brush and the black paint and started to fill in the pattern, as I painted the makeup took shape, filling in the arrows and lines.
Sixth step:
After filling in all the lines, continue with the upper part on my eyes, with eyeliner I drew a line on my eyelids which connected with the lines on the lower part of my eyes, these same lines on my eyelids went upwards (towards my eyebrow) and ended at the top with a sharp point.
After finally finishing all the lines, I added lip gloss on my lips and then red lipstick to highlight this part of my face, I made two small onions with my hair on the top of my head and left some hair loose and in a spiky way to make it as similar as possible. And that's it, makeup finished!
El resultado / The result:
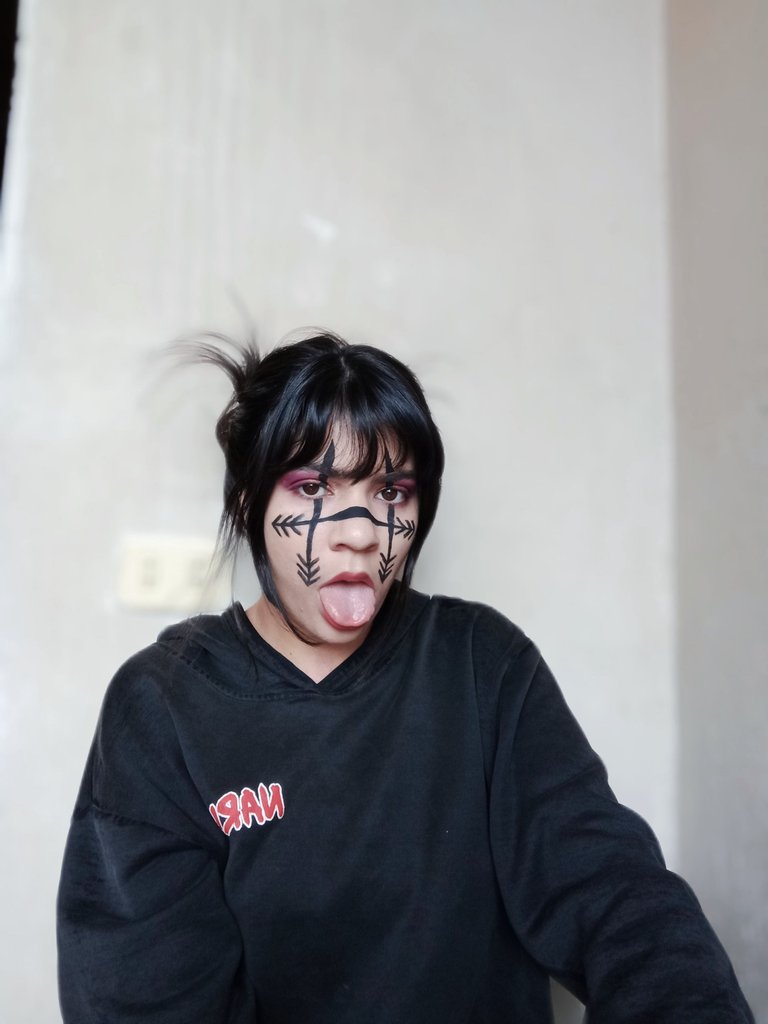
¡Muchas gracias por leer mi post! Voy a confesar que con este maquillaje me tarde mucho, (al rededor de 2 horas) y de que en un punto me desespere, hacer líneas (aunque no quedan perfectas) puede resultar difícil si no tenemos paciencia (como en mi caso) por un momento el maquillaje no me convencía, pero luego de agregar el peinado quedé ENCANTADA, de verdad no sé si mi favorito es este o el de sukuna, pero con ambos me encantó el resultado final.
Thank you so much for reading my post! I'm going to confess that with this makeup it took me a long time, (about 2 hours) and at one point I got desperate, making lines (although they are not perfect) can be difficult if we do not have patience (as in my case) for a moment the makeup did not convince me, but after adding the hairstyle I was ENCHANTED, I really do not know if my favorite is this or the sukuna, but with both I loved the final result.
Cover created in: Canvas and PicsArt.
Text translated with: DeepL.
All photos of the procedure and results belong to me.
A nivel de contenido, eres una pro. Me encanta esta comunidad,. porque siempre encuentro post tan buenos como este. Hasta ahora no conozco nada de animé, pero me gustan. Y este me llamó mucho la atención gracias a ti, porque desarrollasnuna reseña de el origen de el personaje, además de eso el tutorial de el maquillaje y todo en un Performa perfecto. Disculpa la intensidad pero es un excelente trabajo el que has hecho aquí.
Por ahí vienen unos buenos votos por tu excelente trabajo... 😊
¡Muchas muchas gracias! Este tipo de comentarios me animan mucho, saber que les gusta mi trabajo y esfuerzo es algo que motiva! ✨✨✨