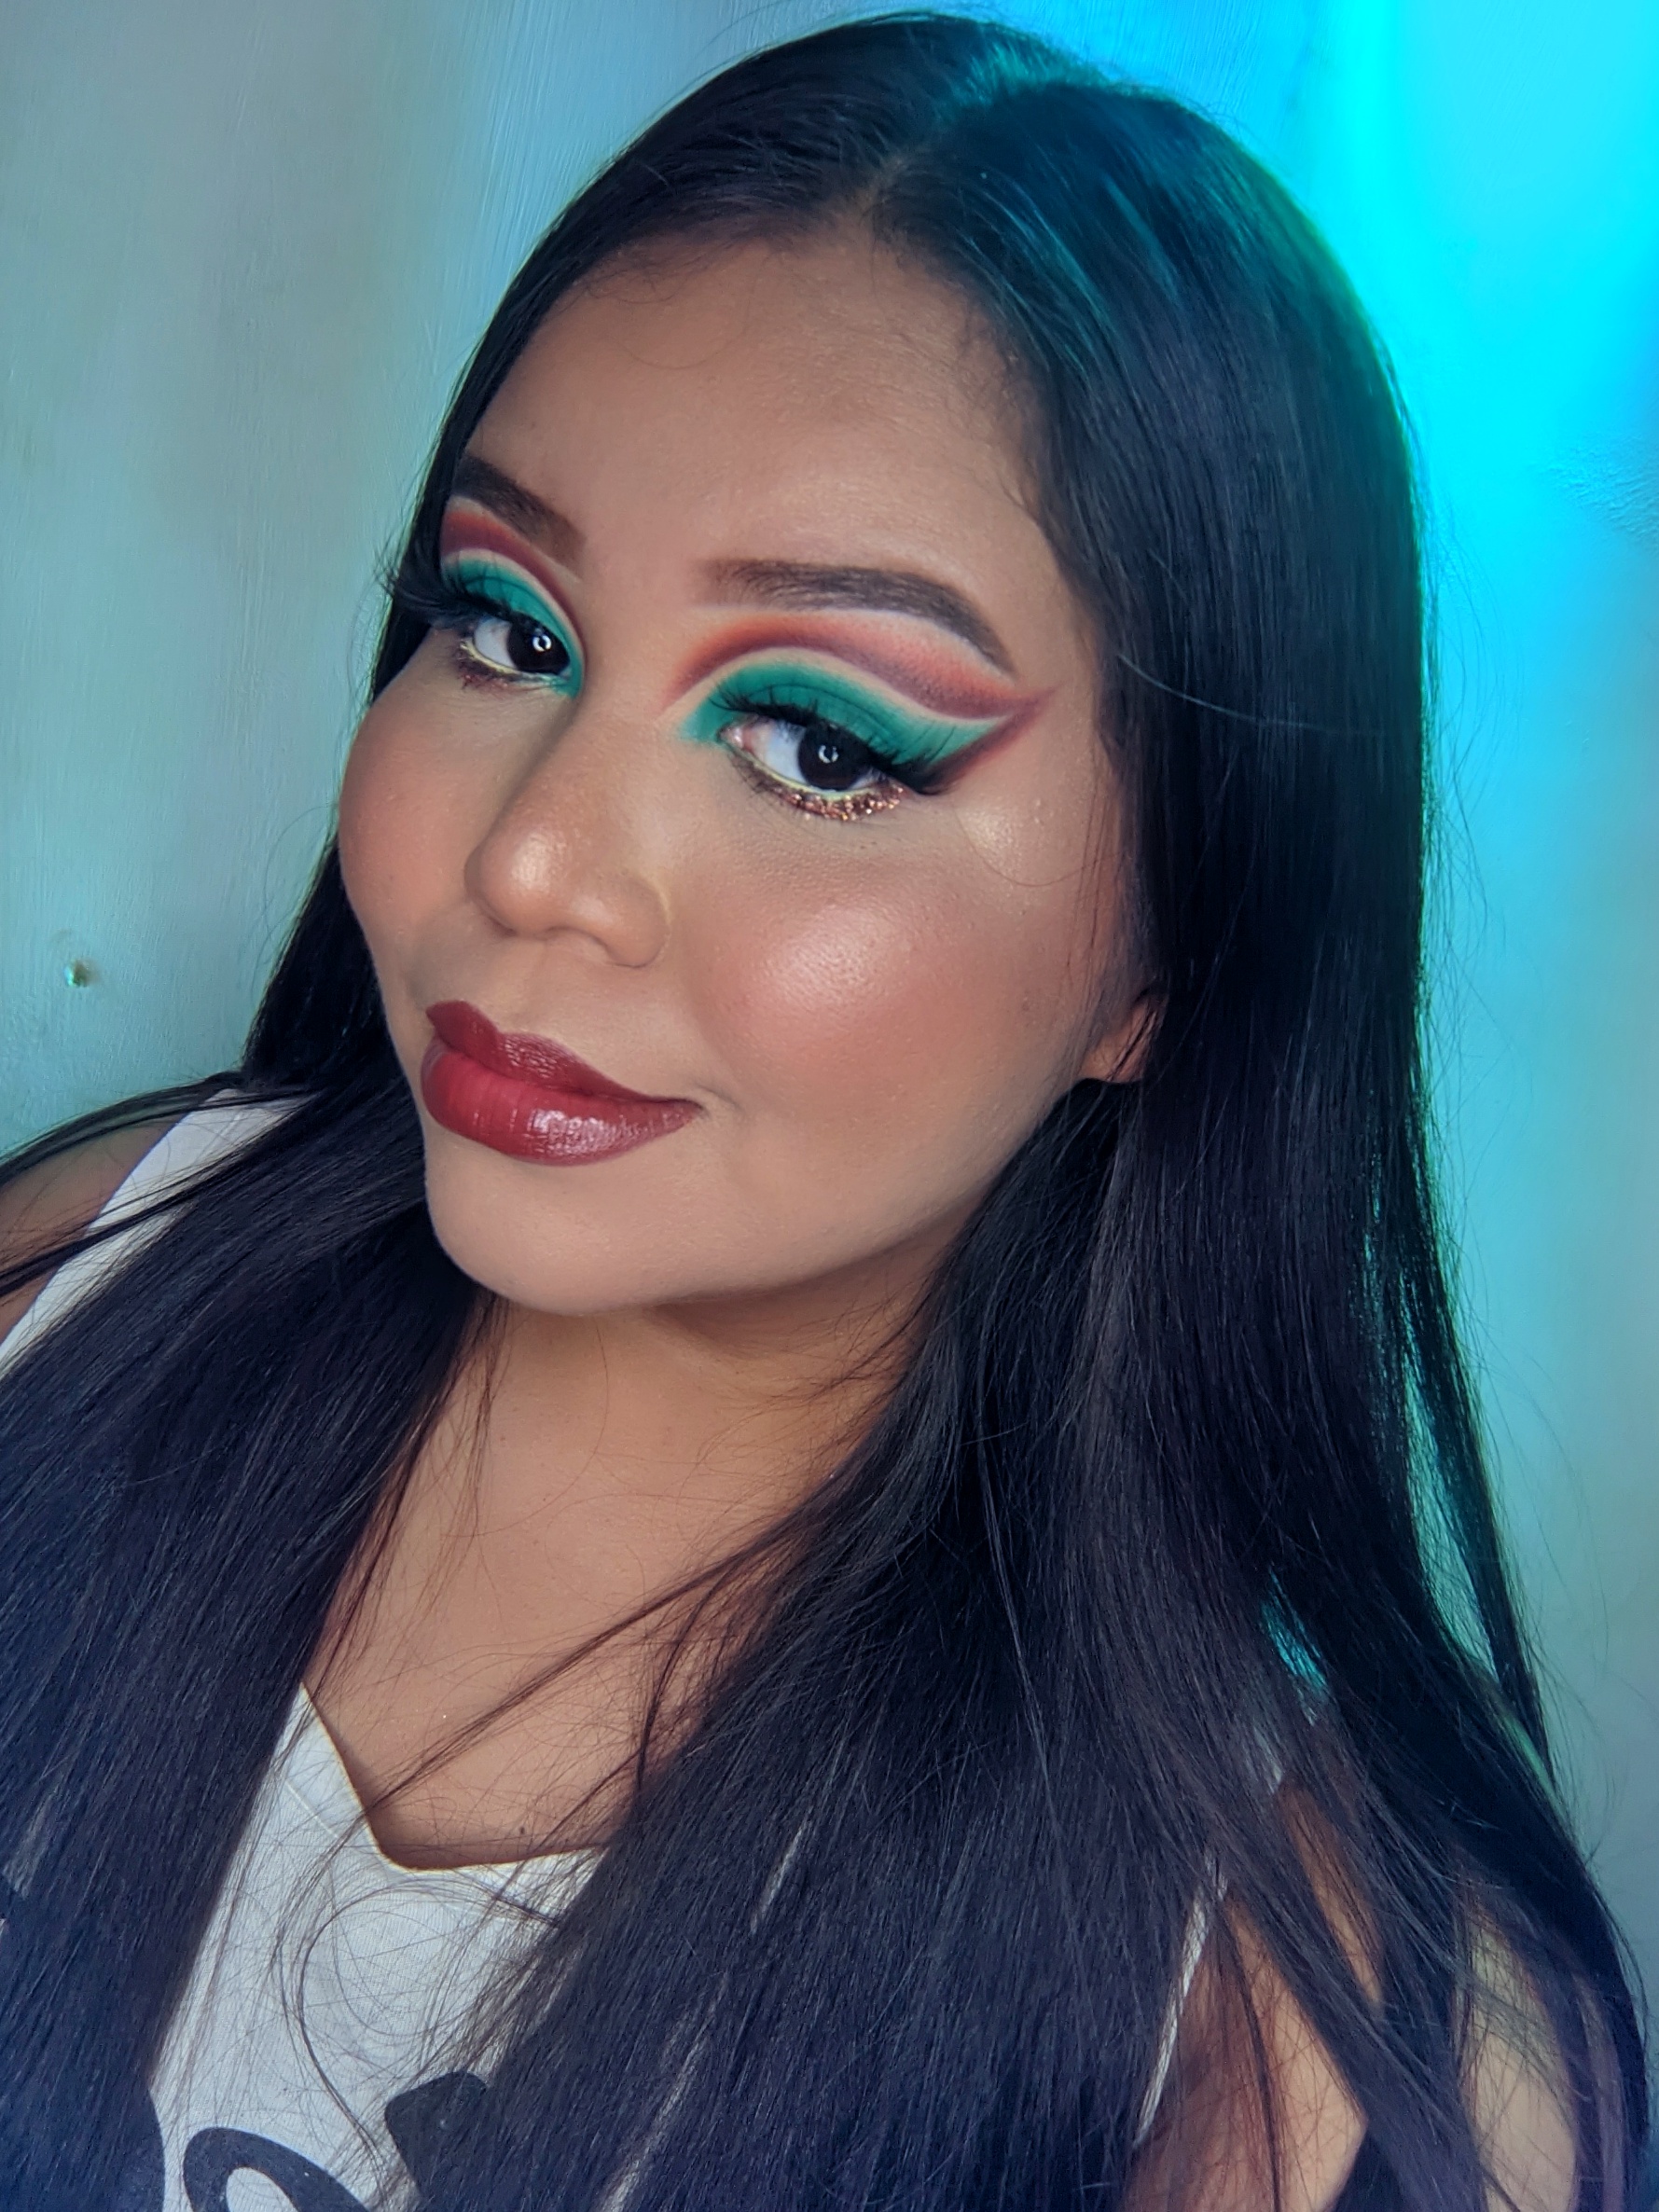
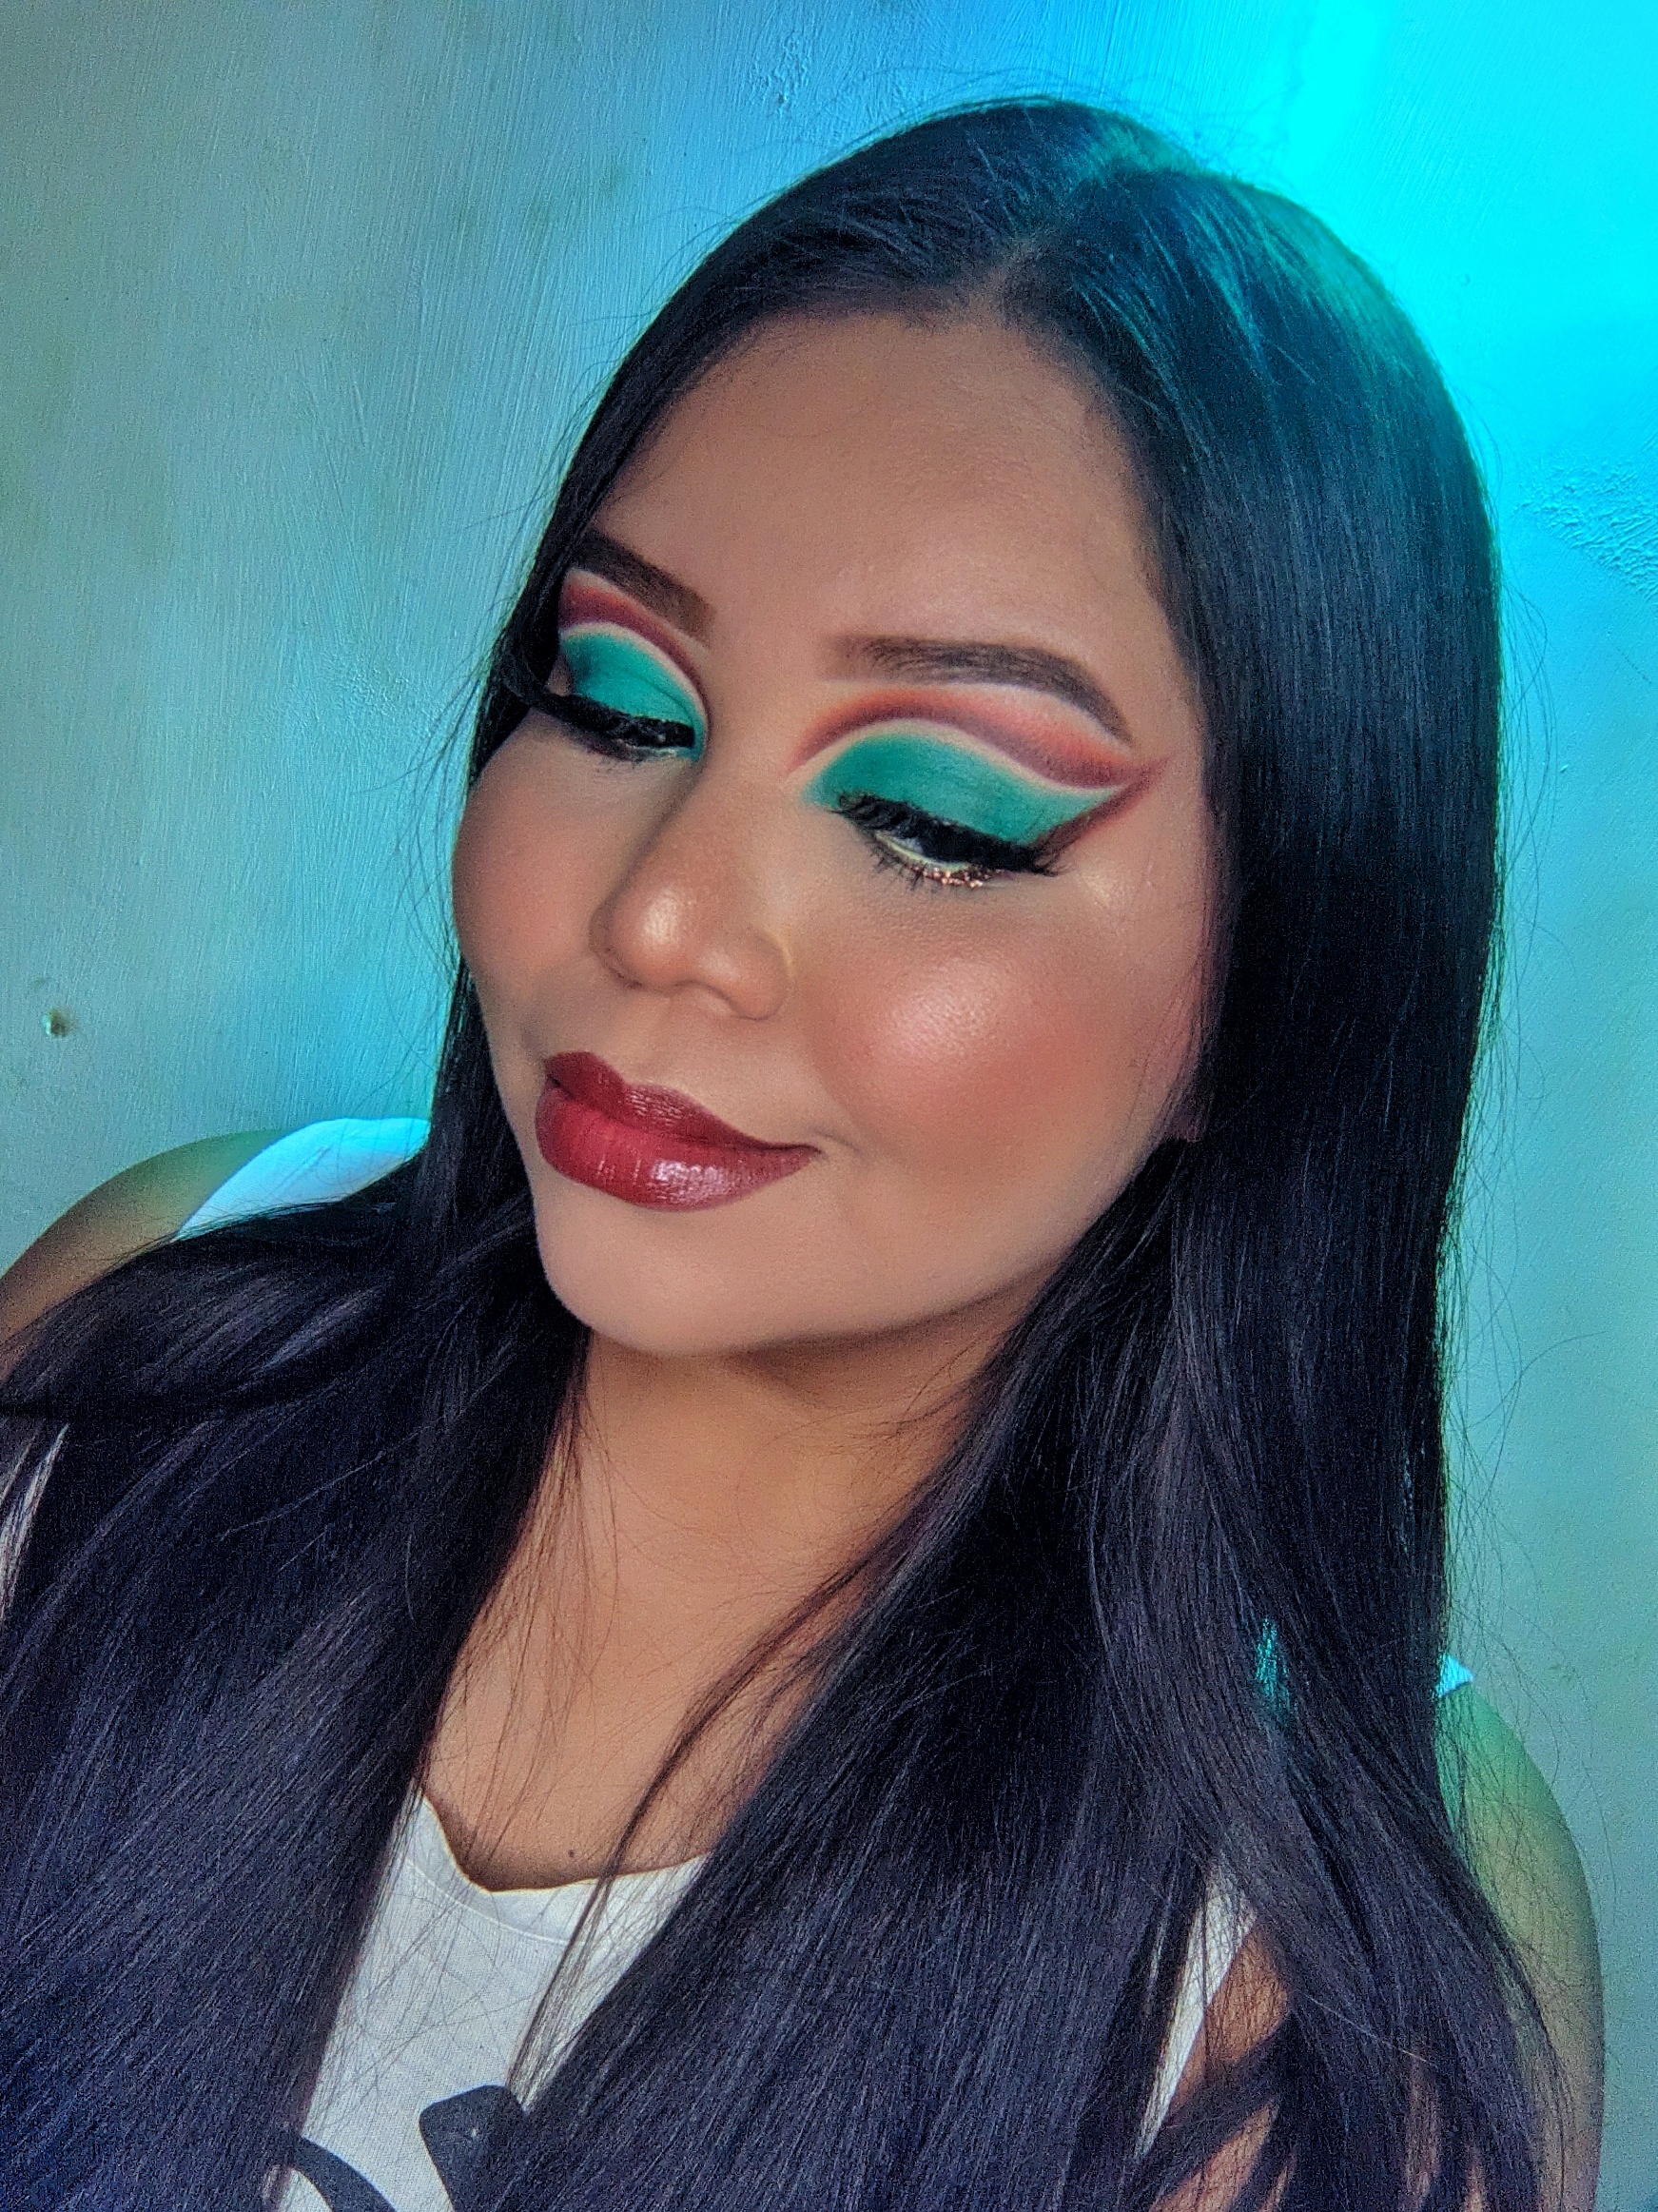
¡Feliz Viernes, queridas amigas de Makeup Power! Hoy estoy muy emocionada de compartirles este look inspirado en la Princesa Jasmine de Aladdin ya que lo realicé especialmente para participar en esta que es mi primera iniciativa, de muchas en la que espero participar 😋💖
Happy Friday, dear friends of Makeup Power! Today I'm really excited about sharing with you this makeup look inspired on Jasmine Princess from Aladdin, which is my favorite, that I've specially did to participate in this initiative, that is my first one💖
💚 Paso a paso | Step by Step 💚
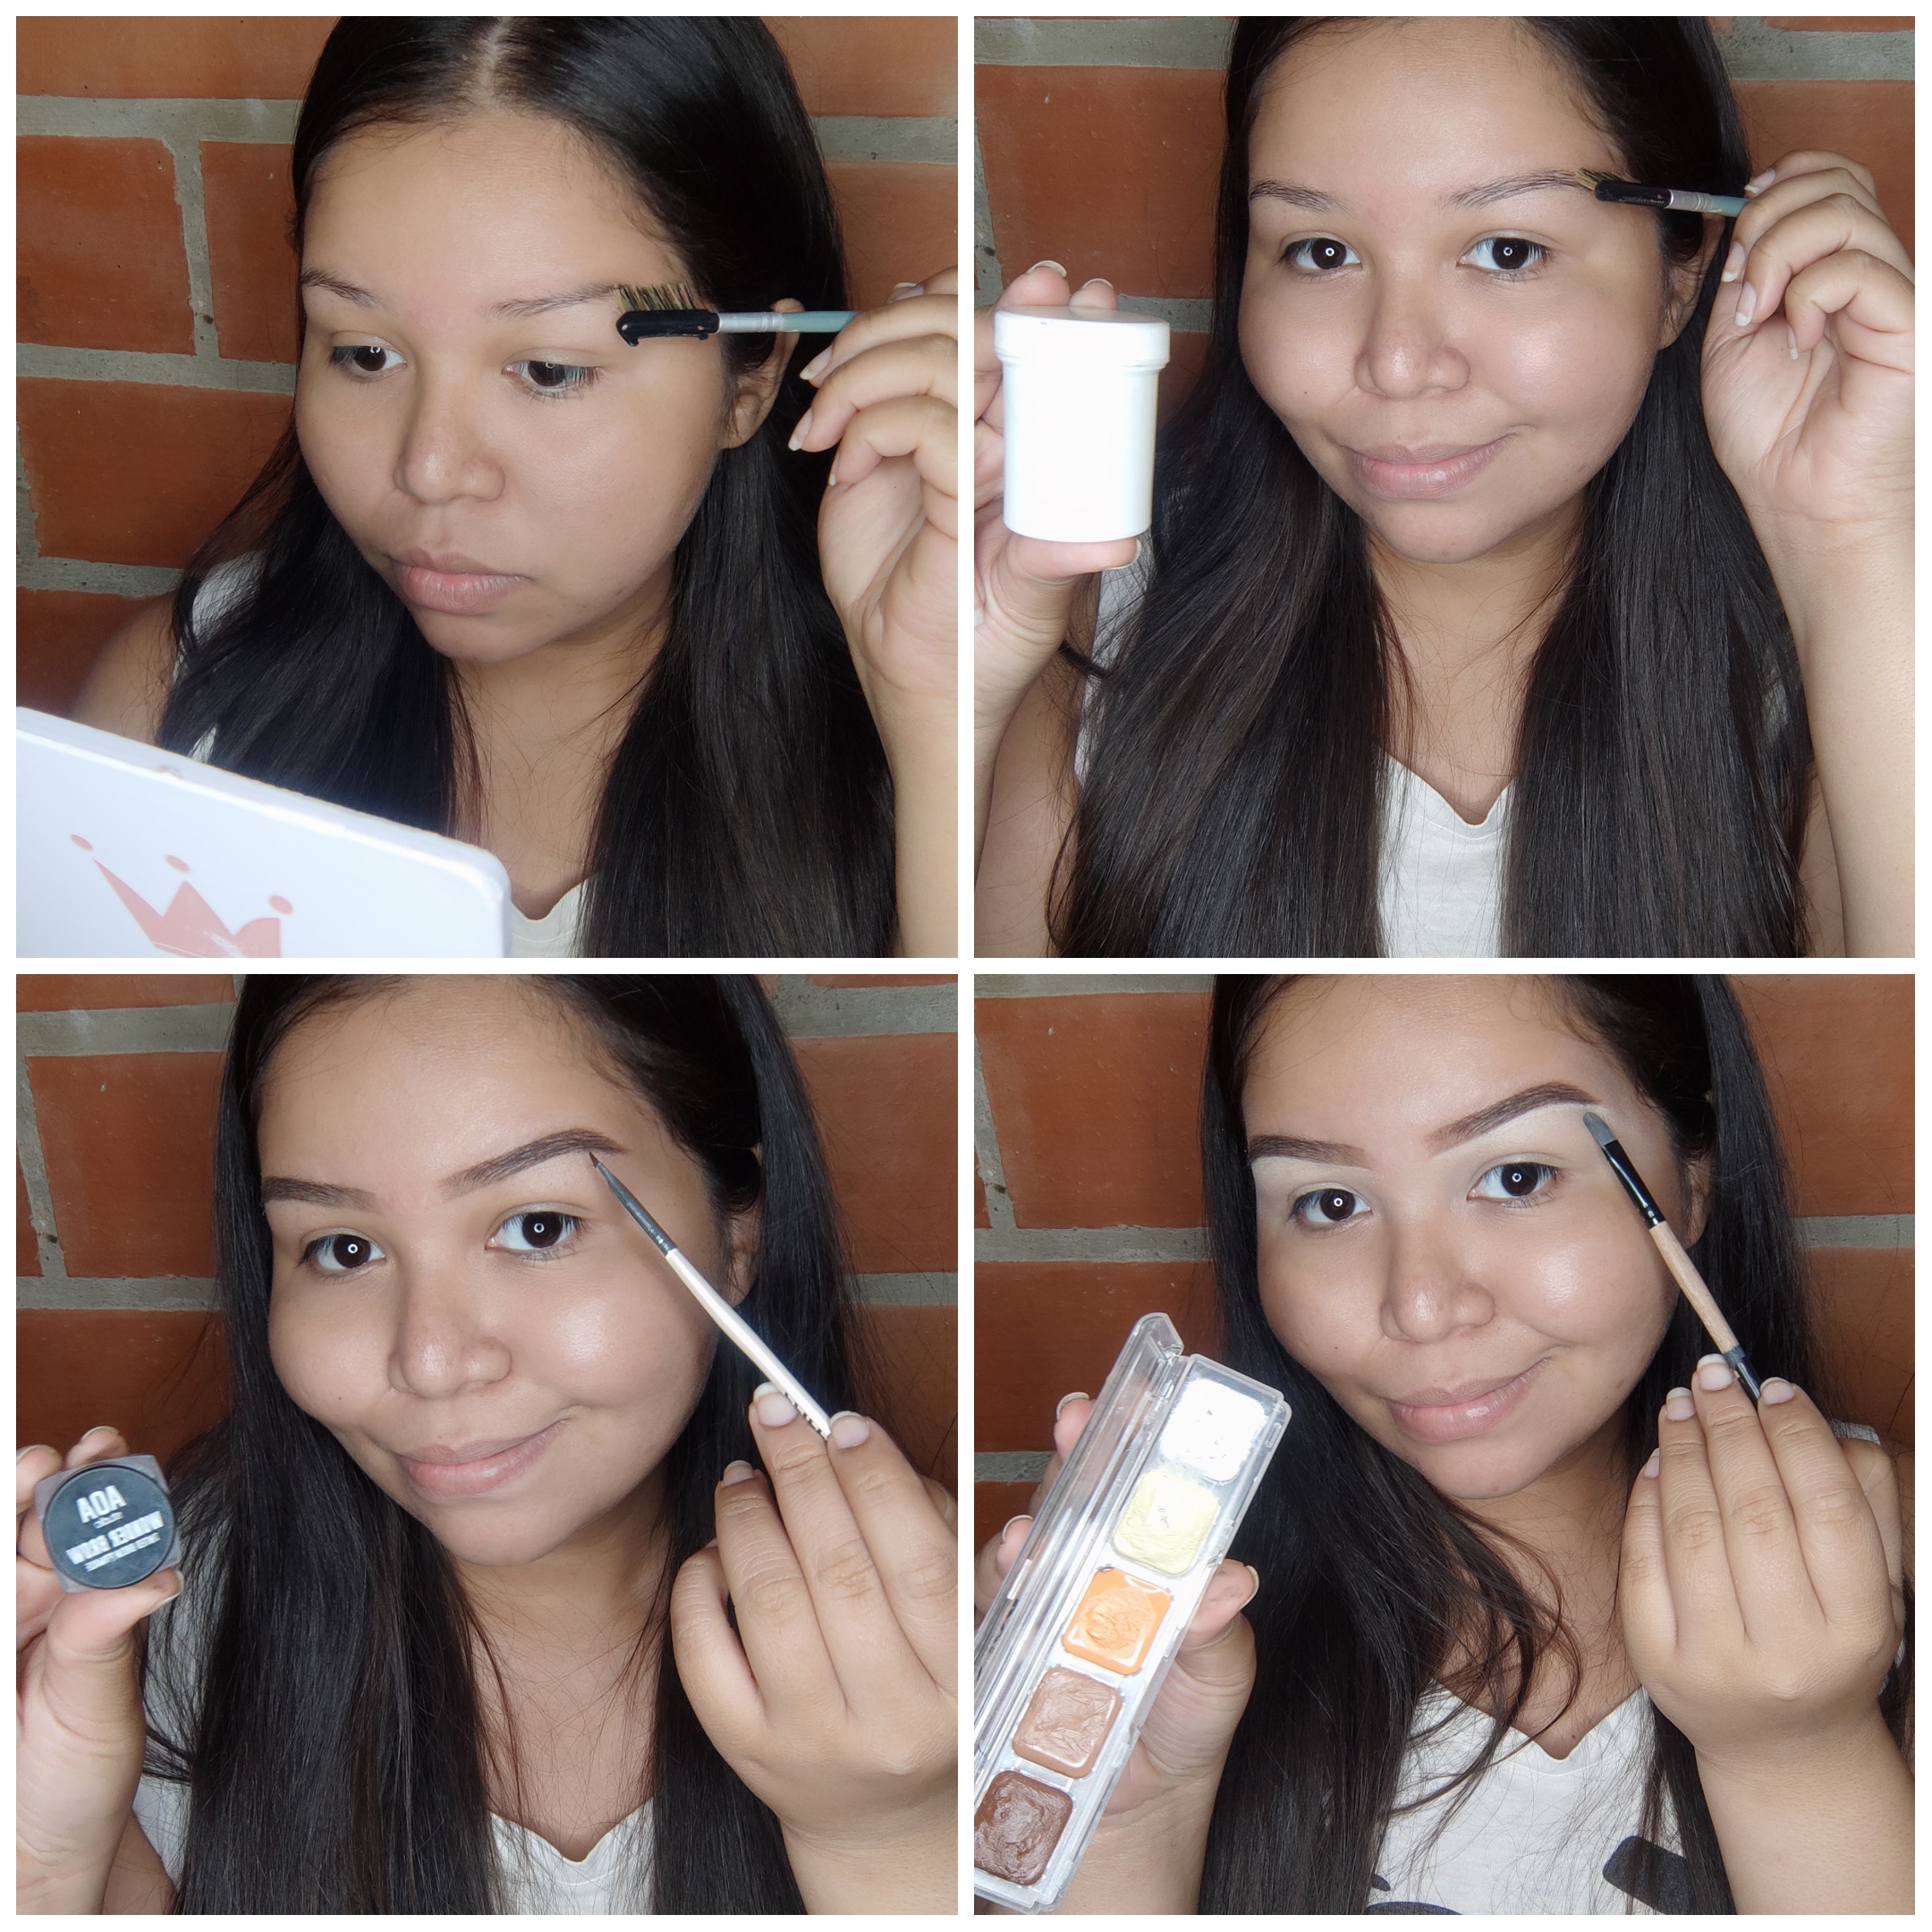
Con nuestro rostro limpio y preparado, empezaremos a realizar nuestras cejas, las cuales fijaremos peinándolas con gel para el cabello sin alcohol, rellenando los espacios vacíos con pomada y definiéndolas con corrector:
With our face clean and hydrated, we're going to start with our eyebrows brushing them with some styling gel, filling their spaces with pomade and defining their shape with concealer:
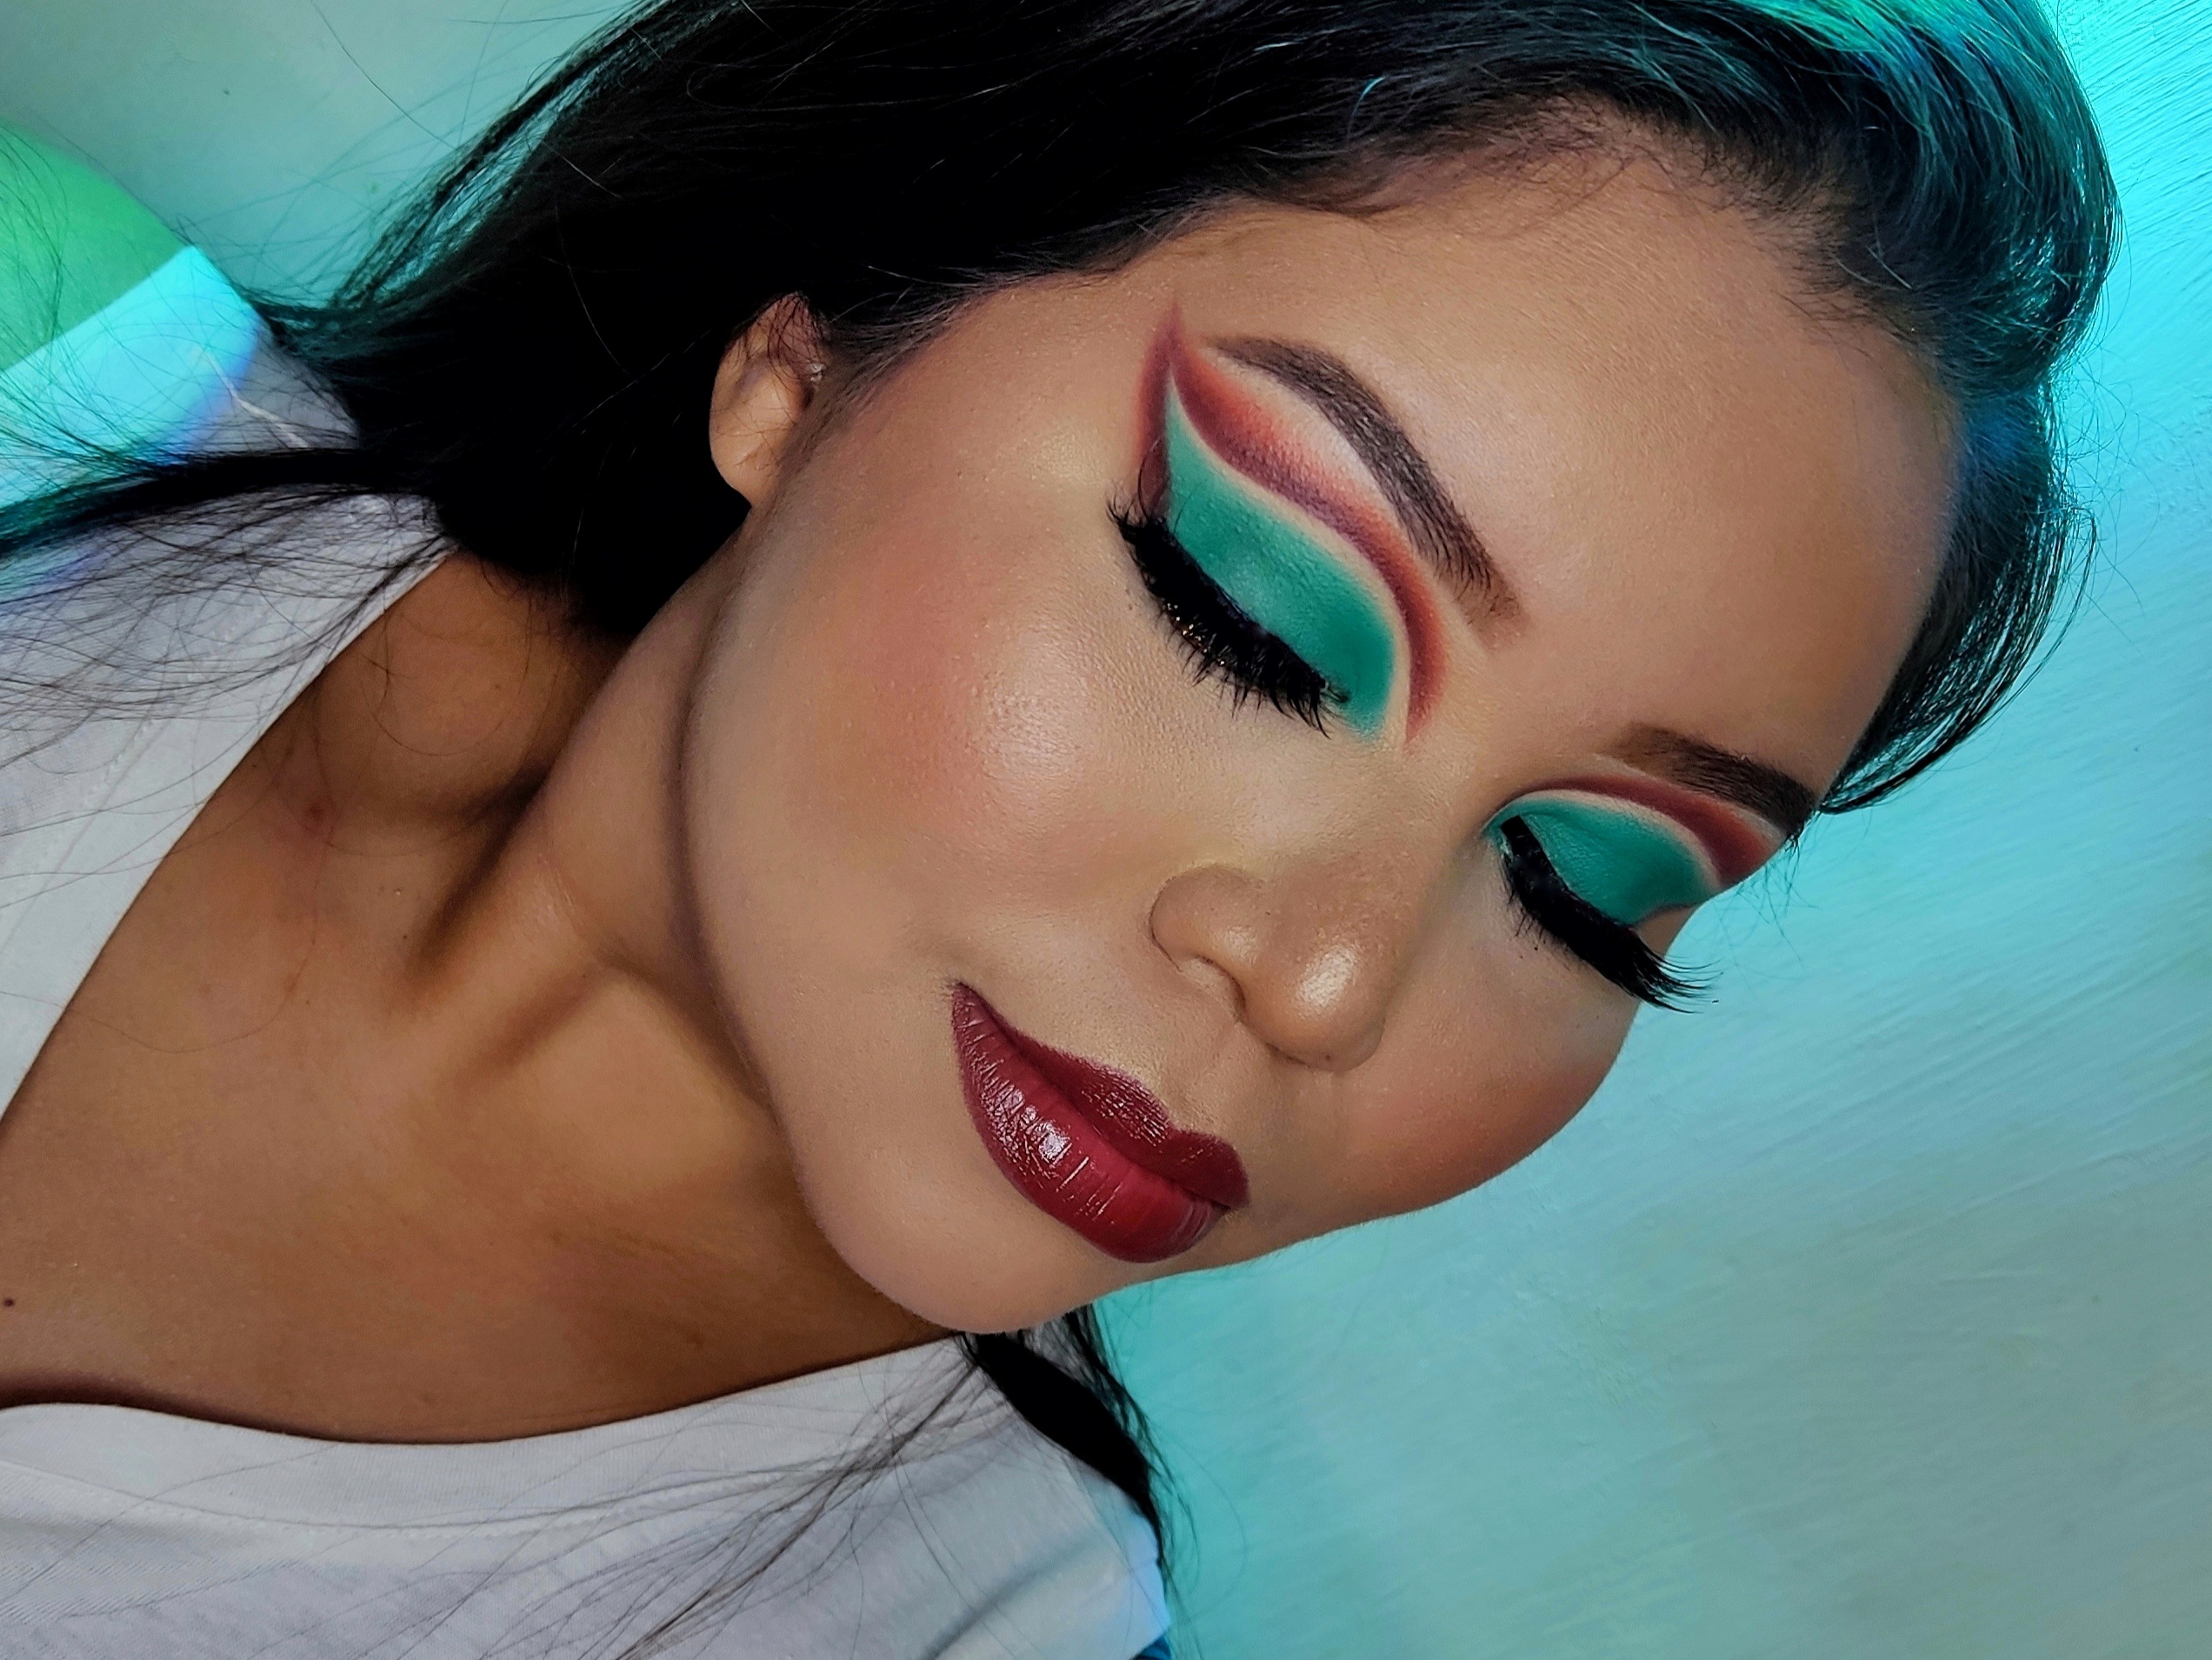
Para empezar con nuestros ojos, aplicamos corrector y luego con una sombra marrón empezamos a dibujar una línea fina sobre nuestra cuenca, y difuminamos su borde externo con sombra naranja:
To start with out eyes, we're going to apply concealer and then with a brown shade, we're going to draw a fine line over our crease and then, blending their outer edge with a orange shade:
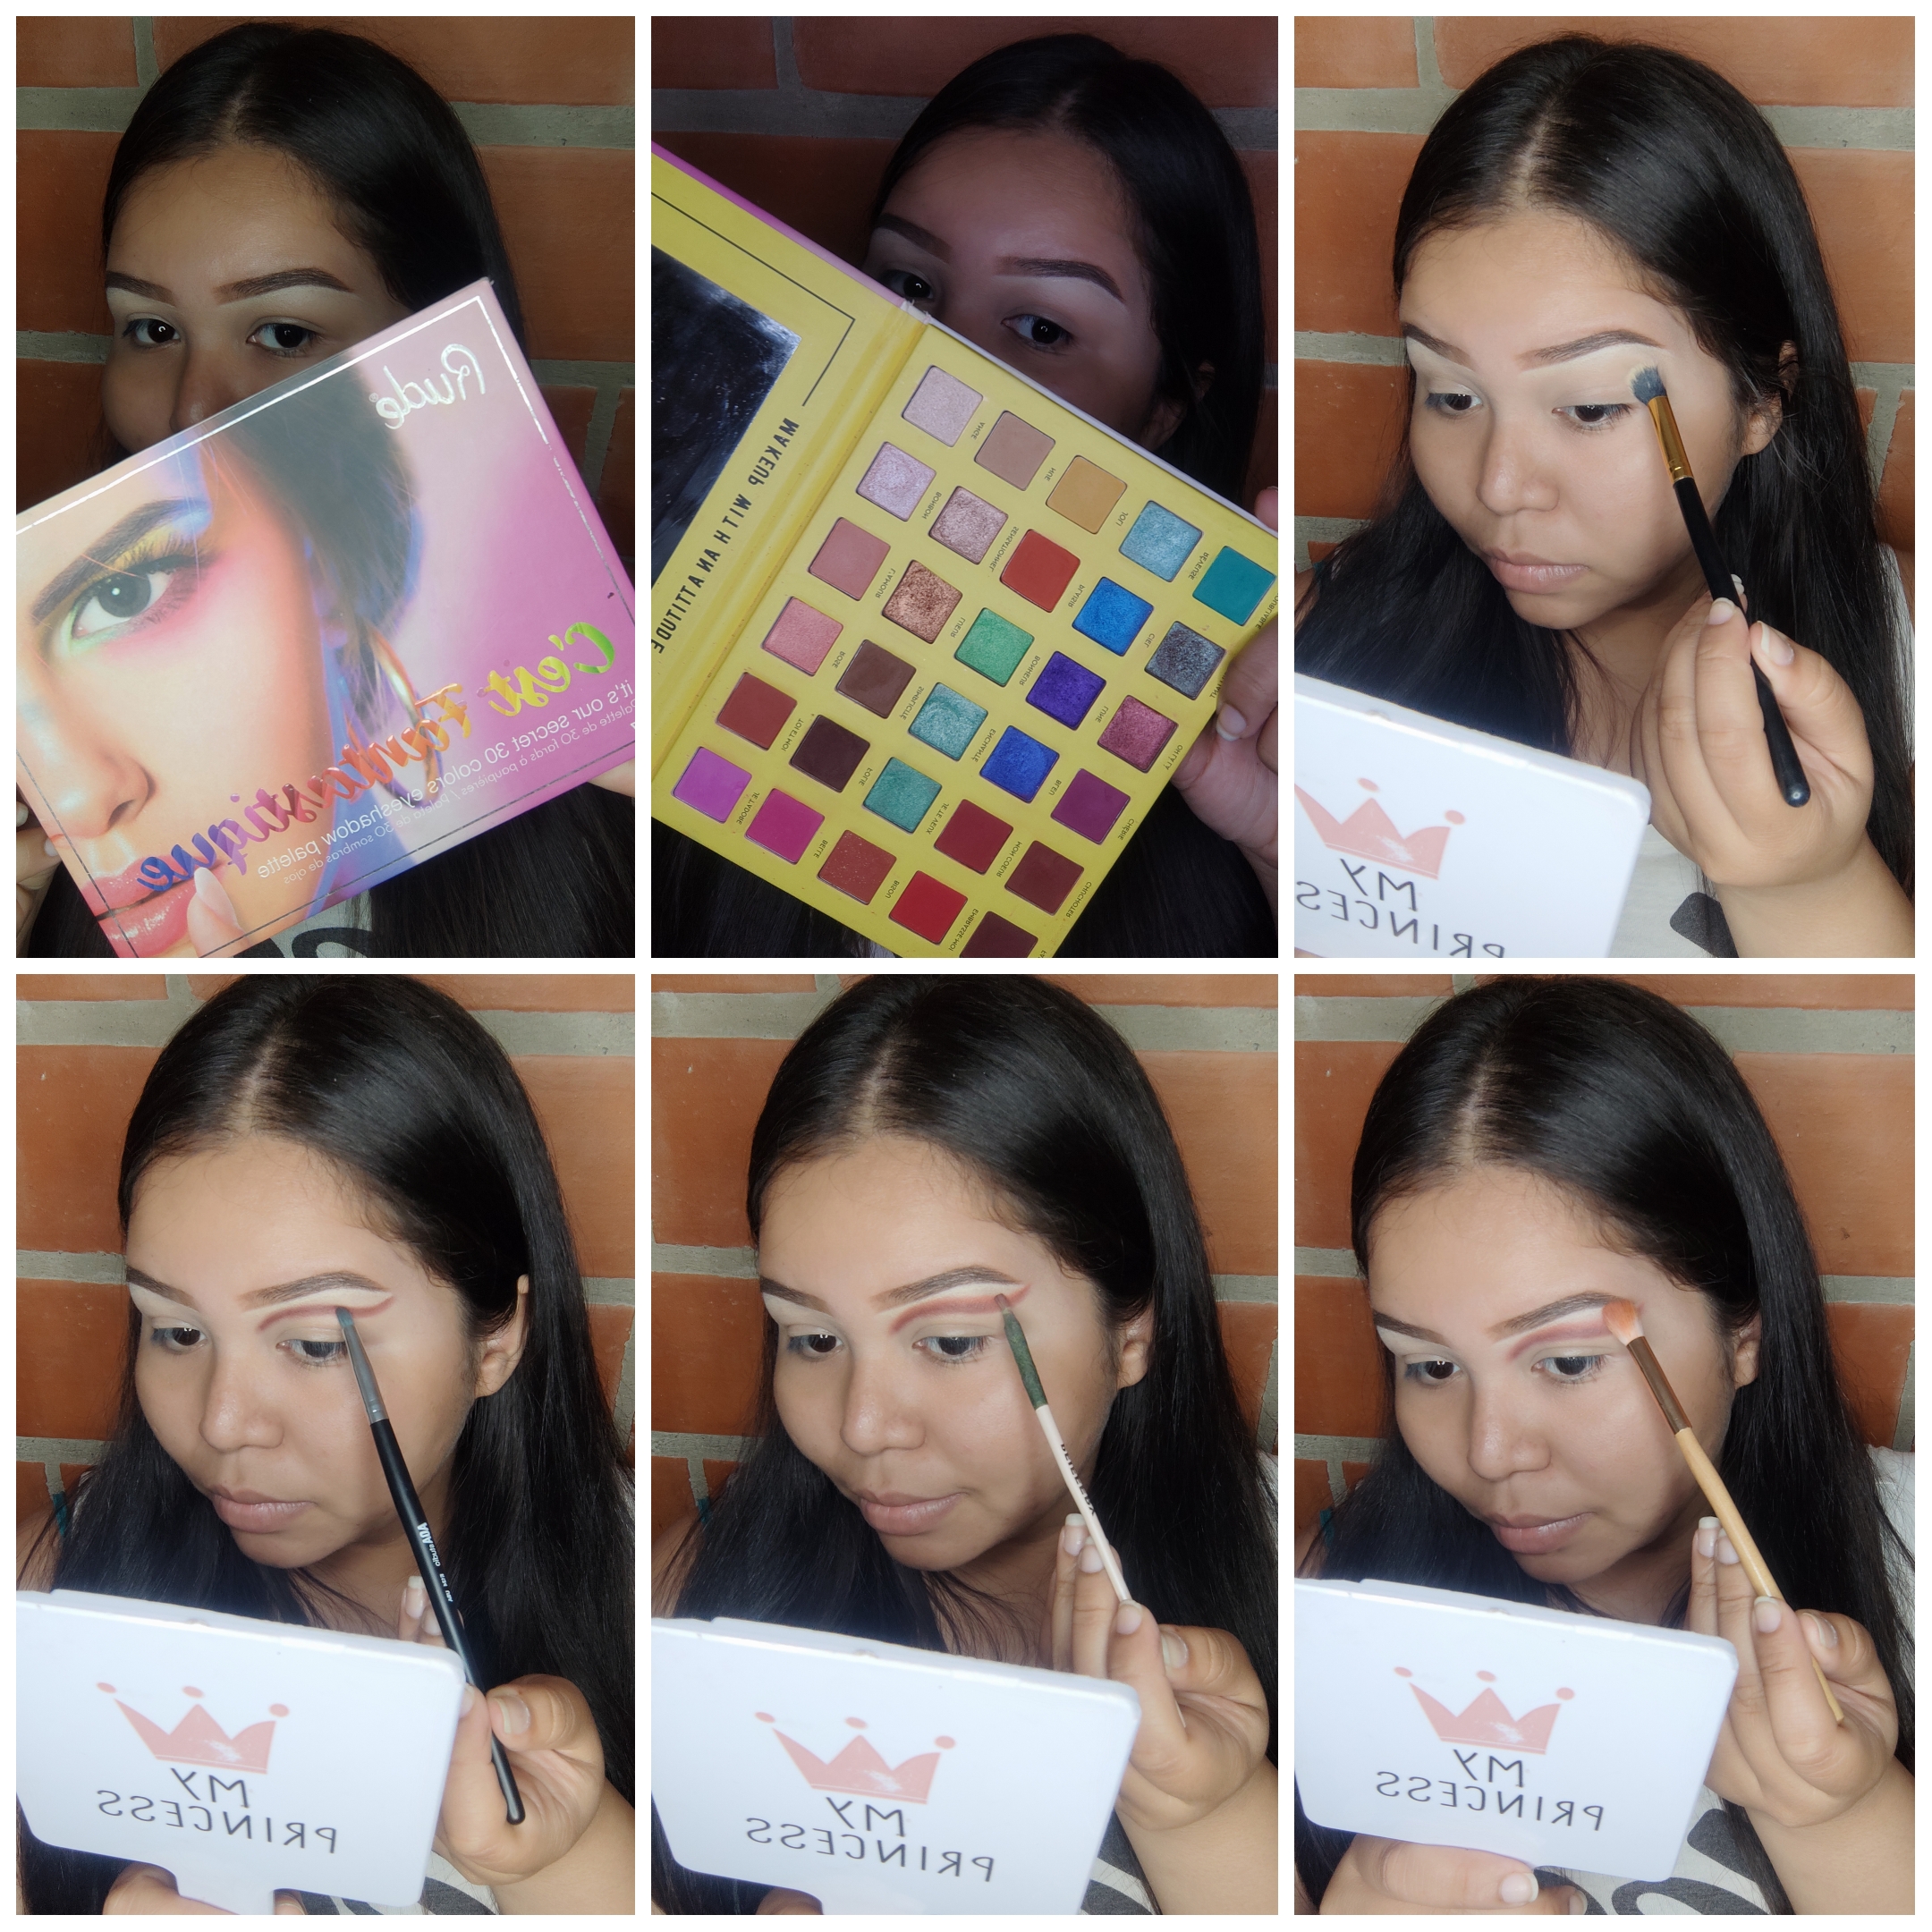
Ahora definiremos su parte inferior con corrector y sellamos su borde con una sombra clara. Luego, aplicaremos una sombra turquesa de forma angular para finalmente, conectar una línea marrón desde la esquina externa de nuestro ojo hasta el final de nuestro corte, la cual difuminaremos con la sombra naranja:
Now we're going to define that line with concealer and then, setting their edge with a light shade. Then, we're going to apply a turquoise shade and finally, I'll be connecting the outer corner of my eye with end of the cut crease, doing a brown line that we're going to smudge with a orange shade:
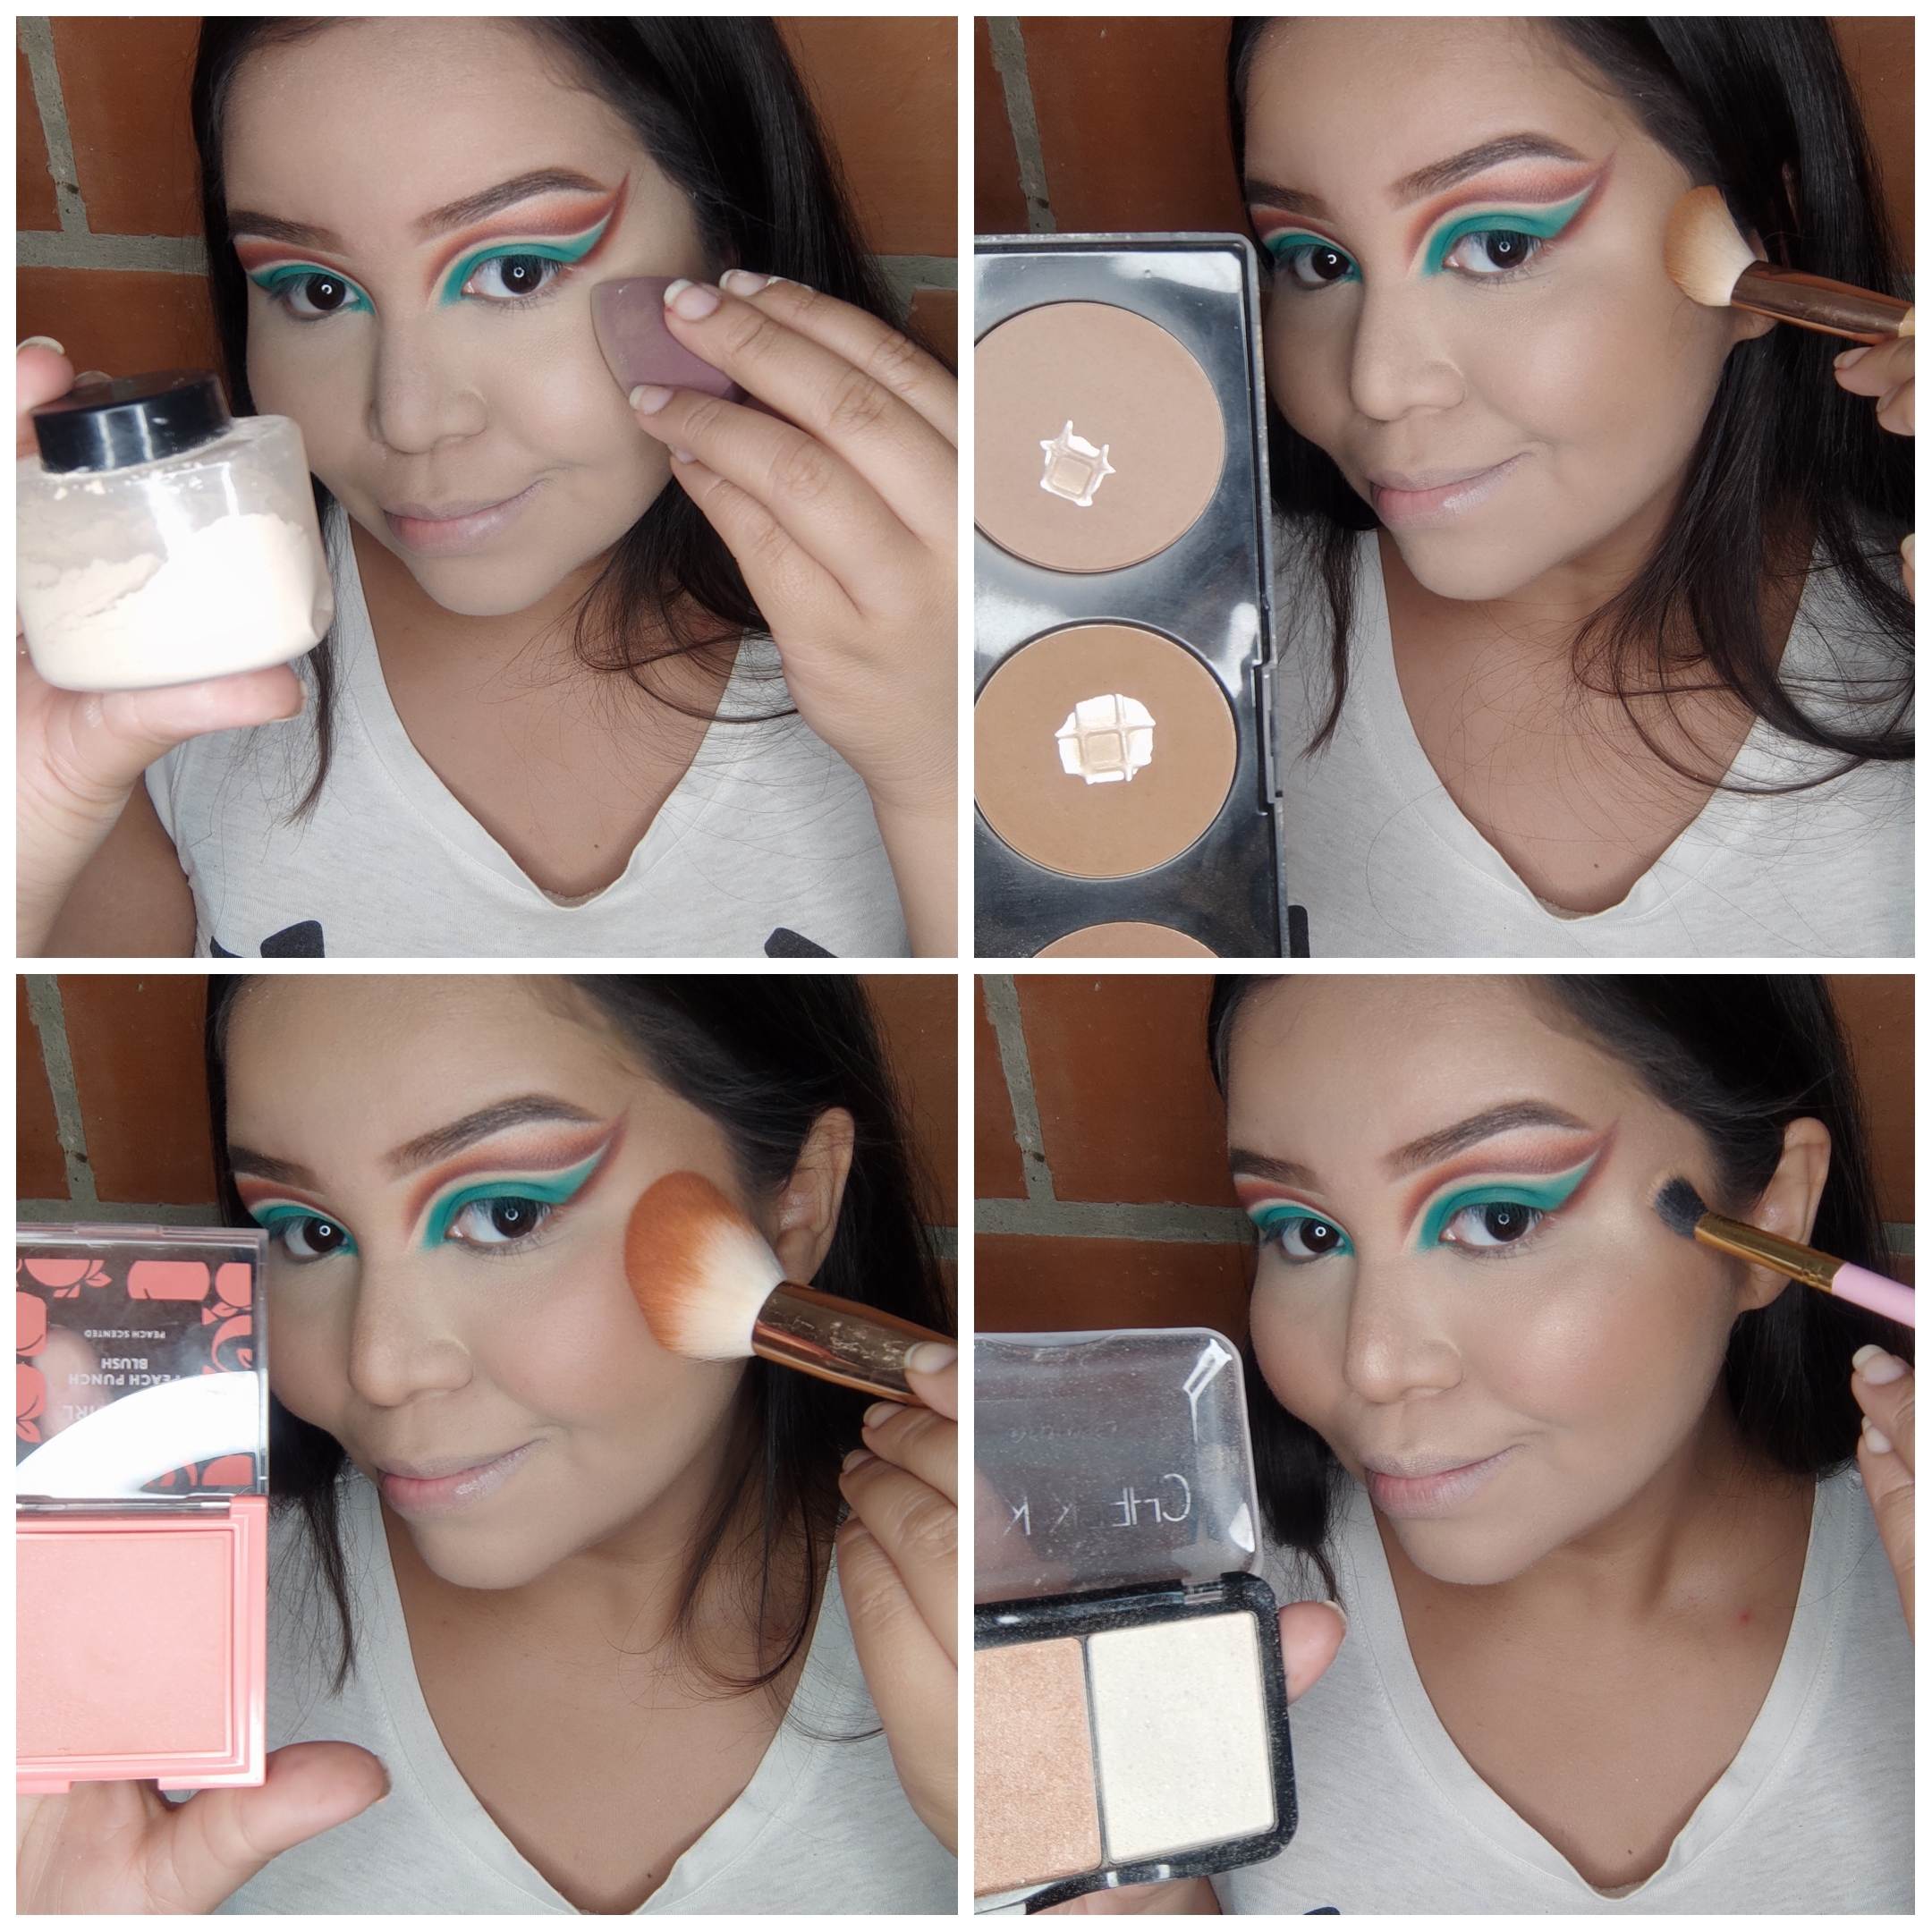
Es tiempo de empezar con nuestro rostro así que hidrataremos, prepararemos y aplicaremos nuestra base y corrector, difuminando a toques:
Now it's time to do our face and we'll be hydrating, preparing and applying our foundation and concealer, while blending carefully:

Terminaremos nuestro rostro sellando nuestras cremas con polvo suelto y aplicando bronceador, rubor e iluminador:
We'll be finishing with our face setting our creams with loose powder and applying bronzer, blush and highlighter:
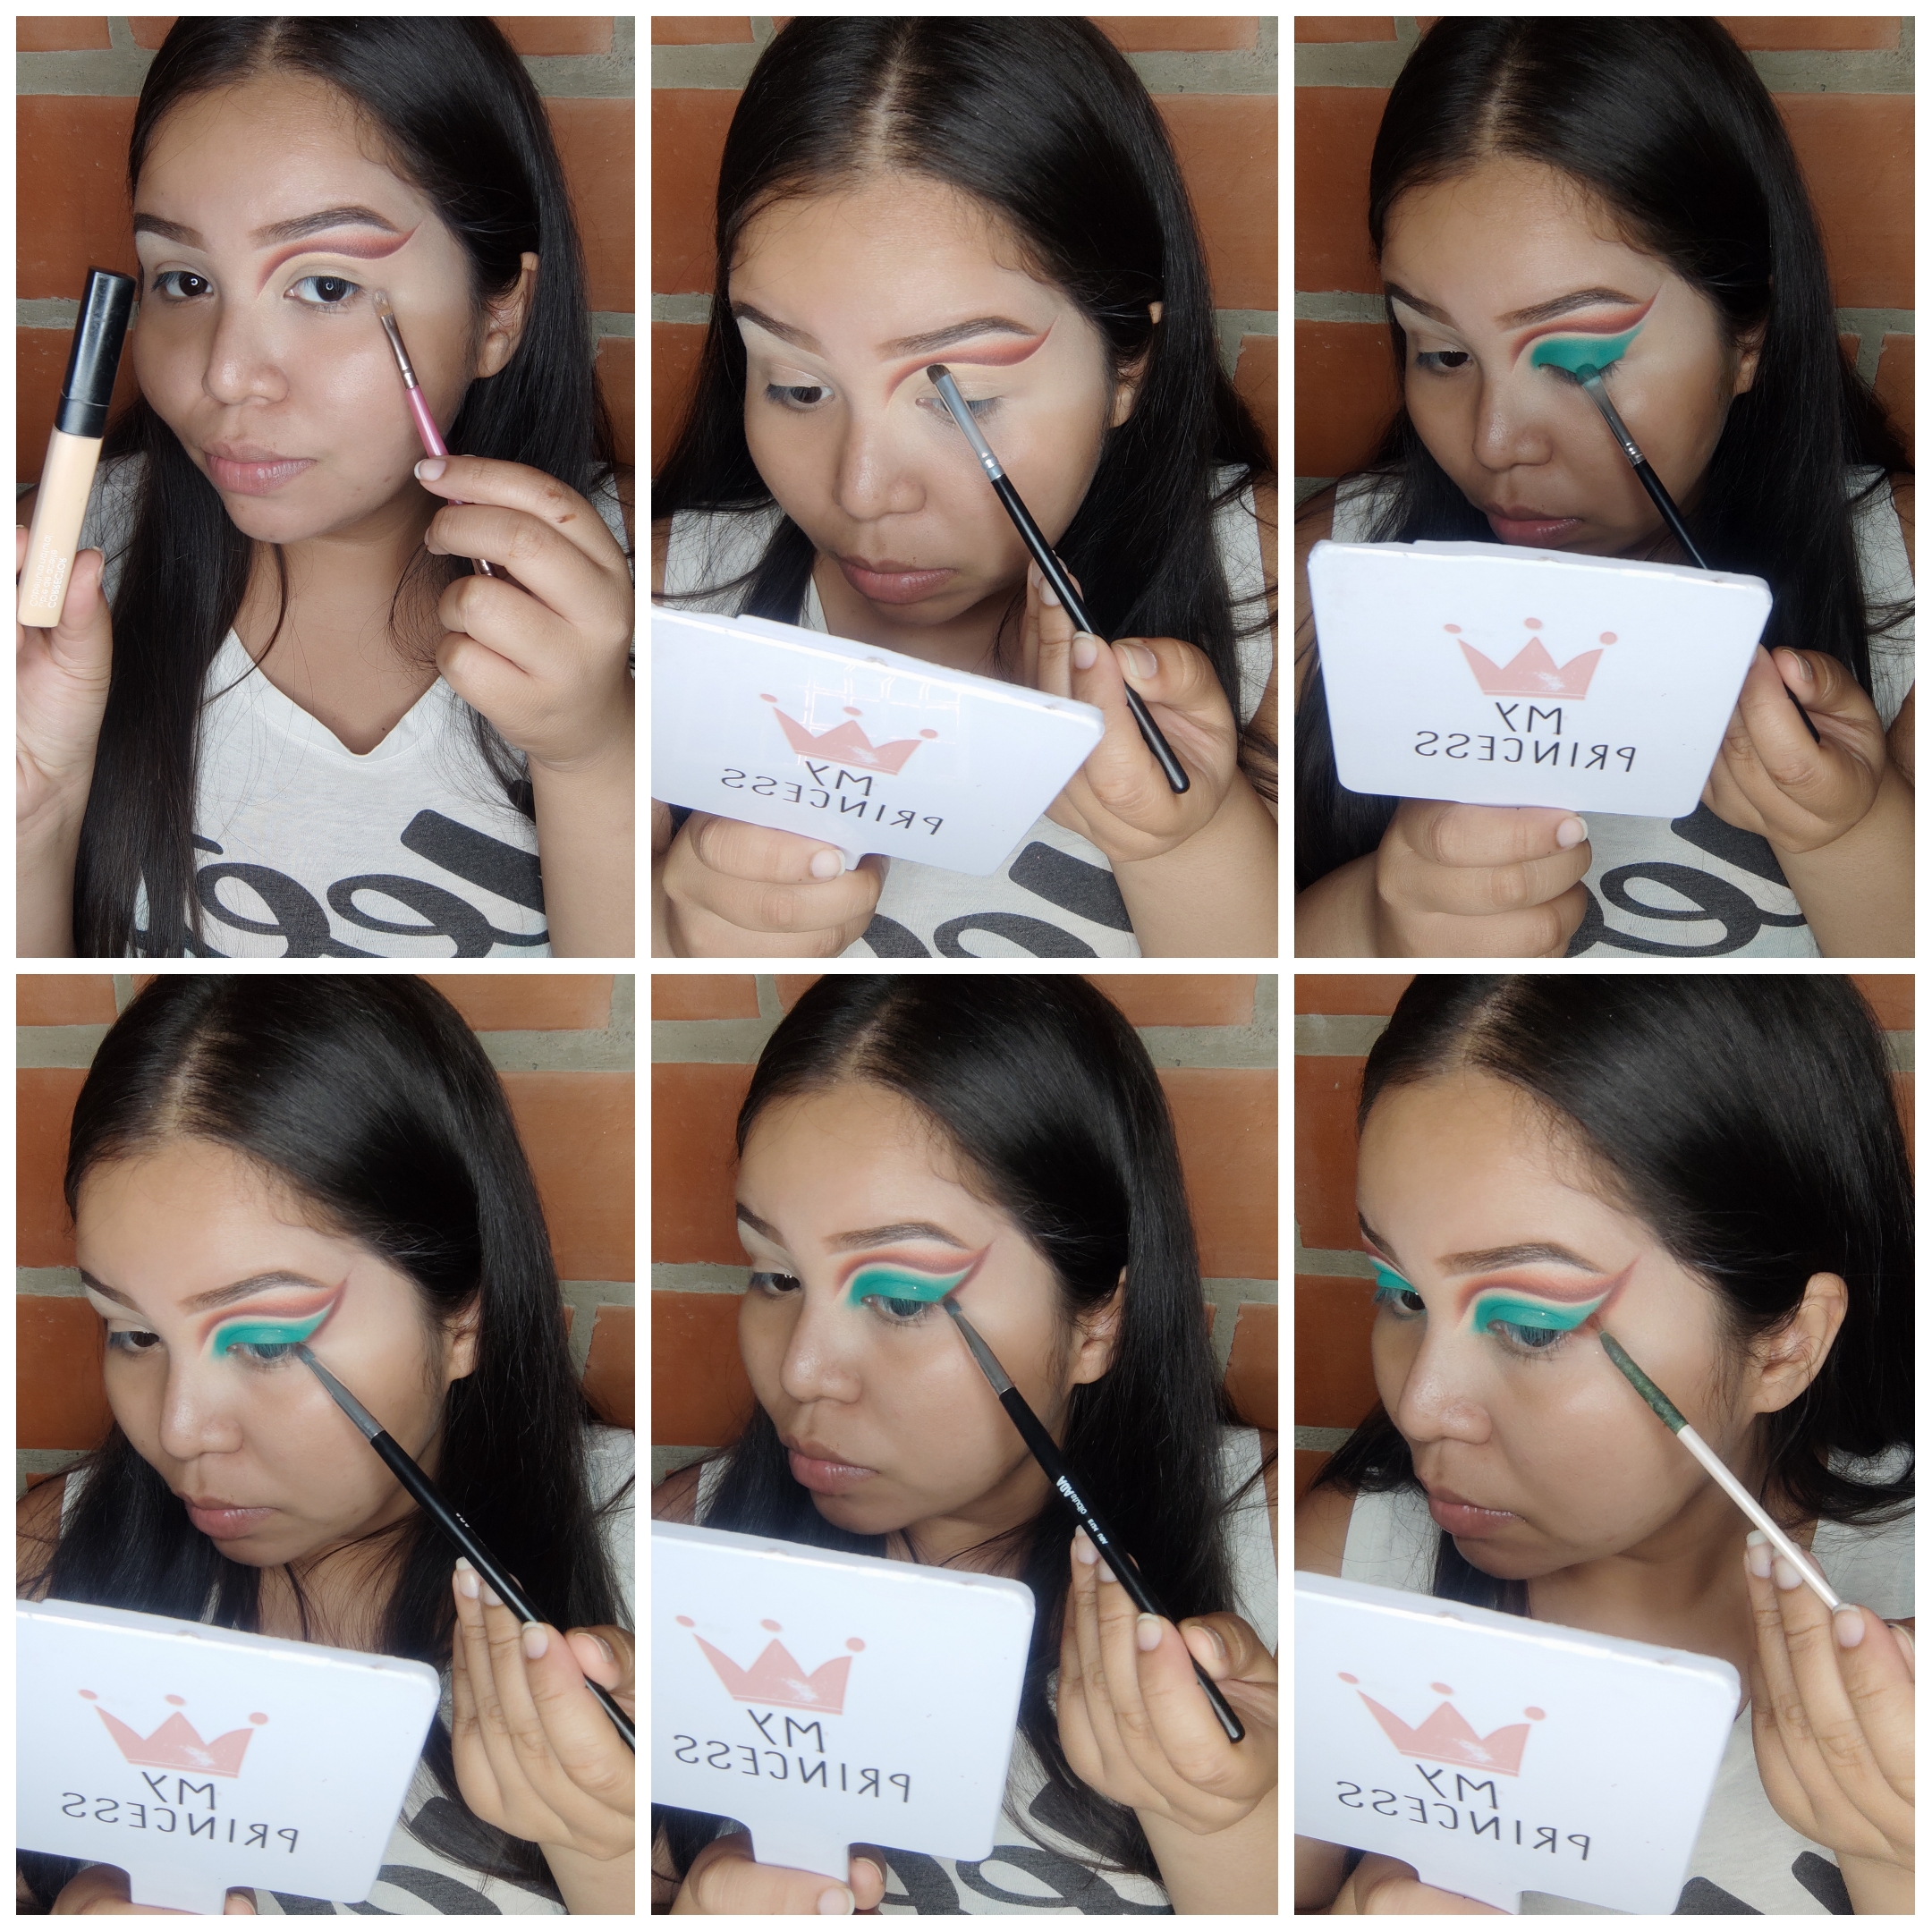
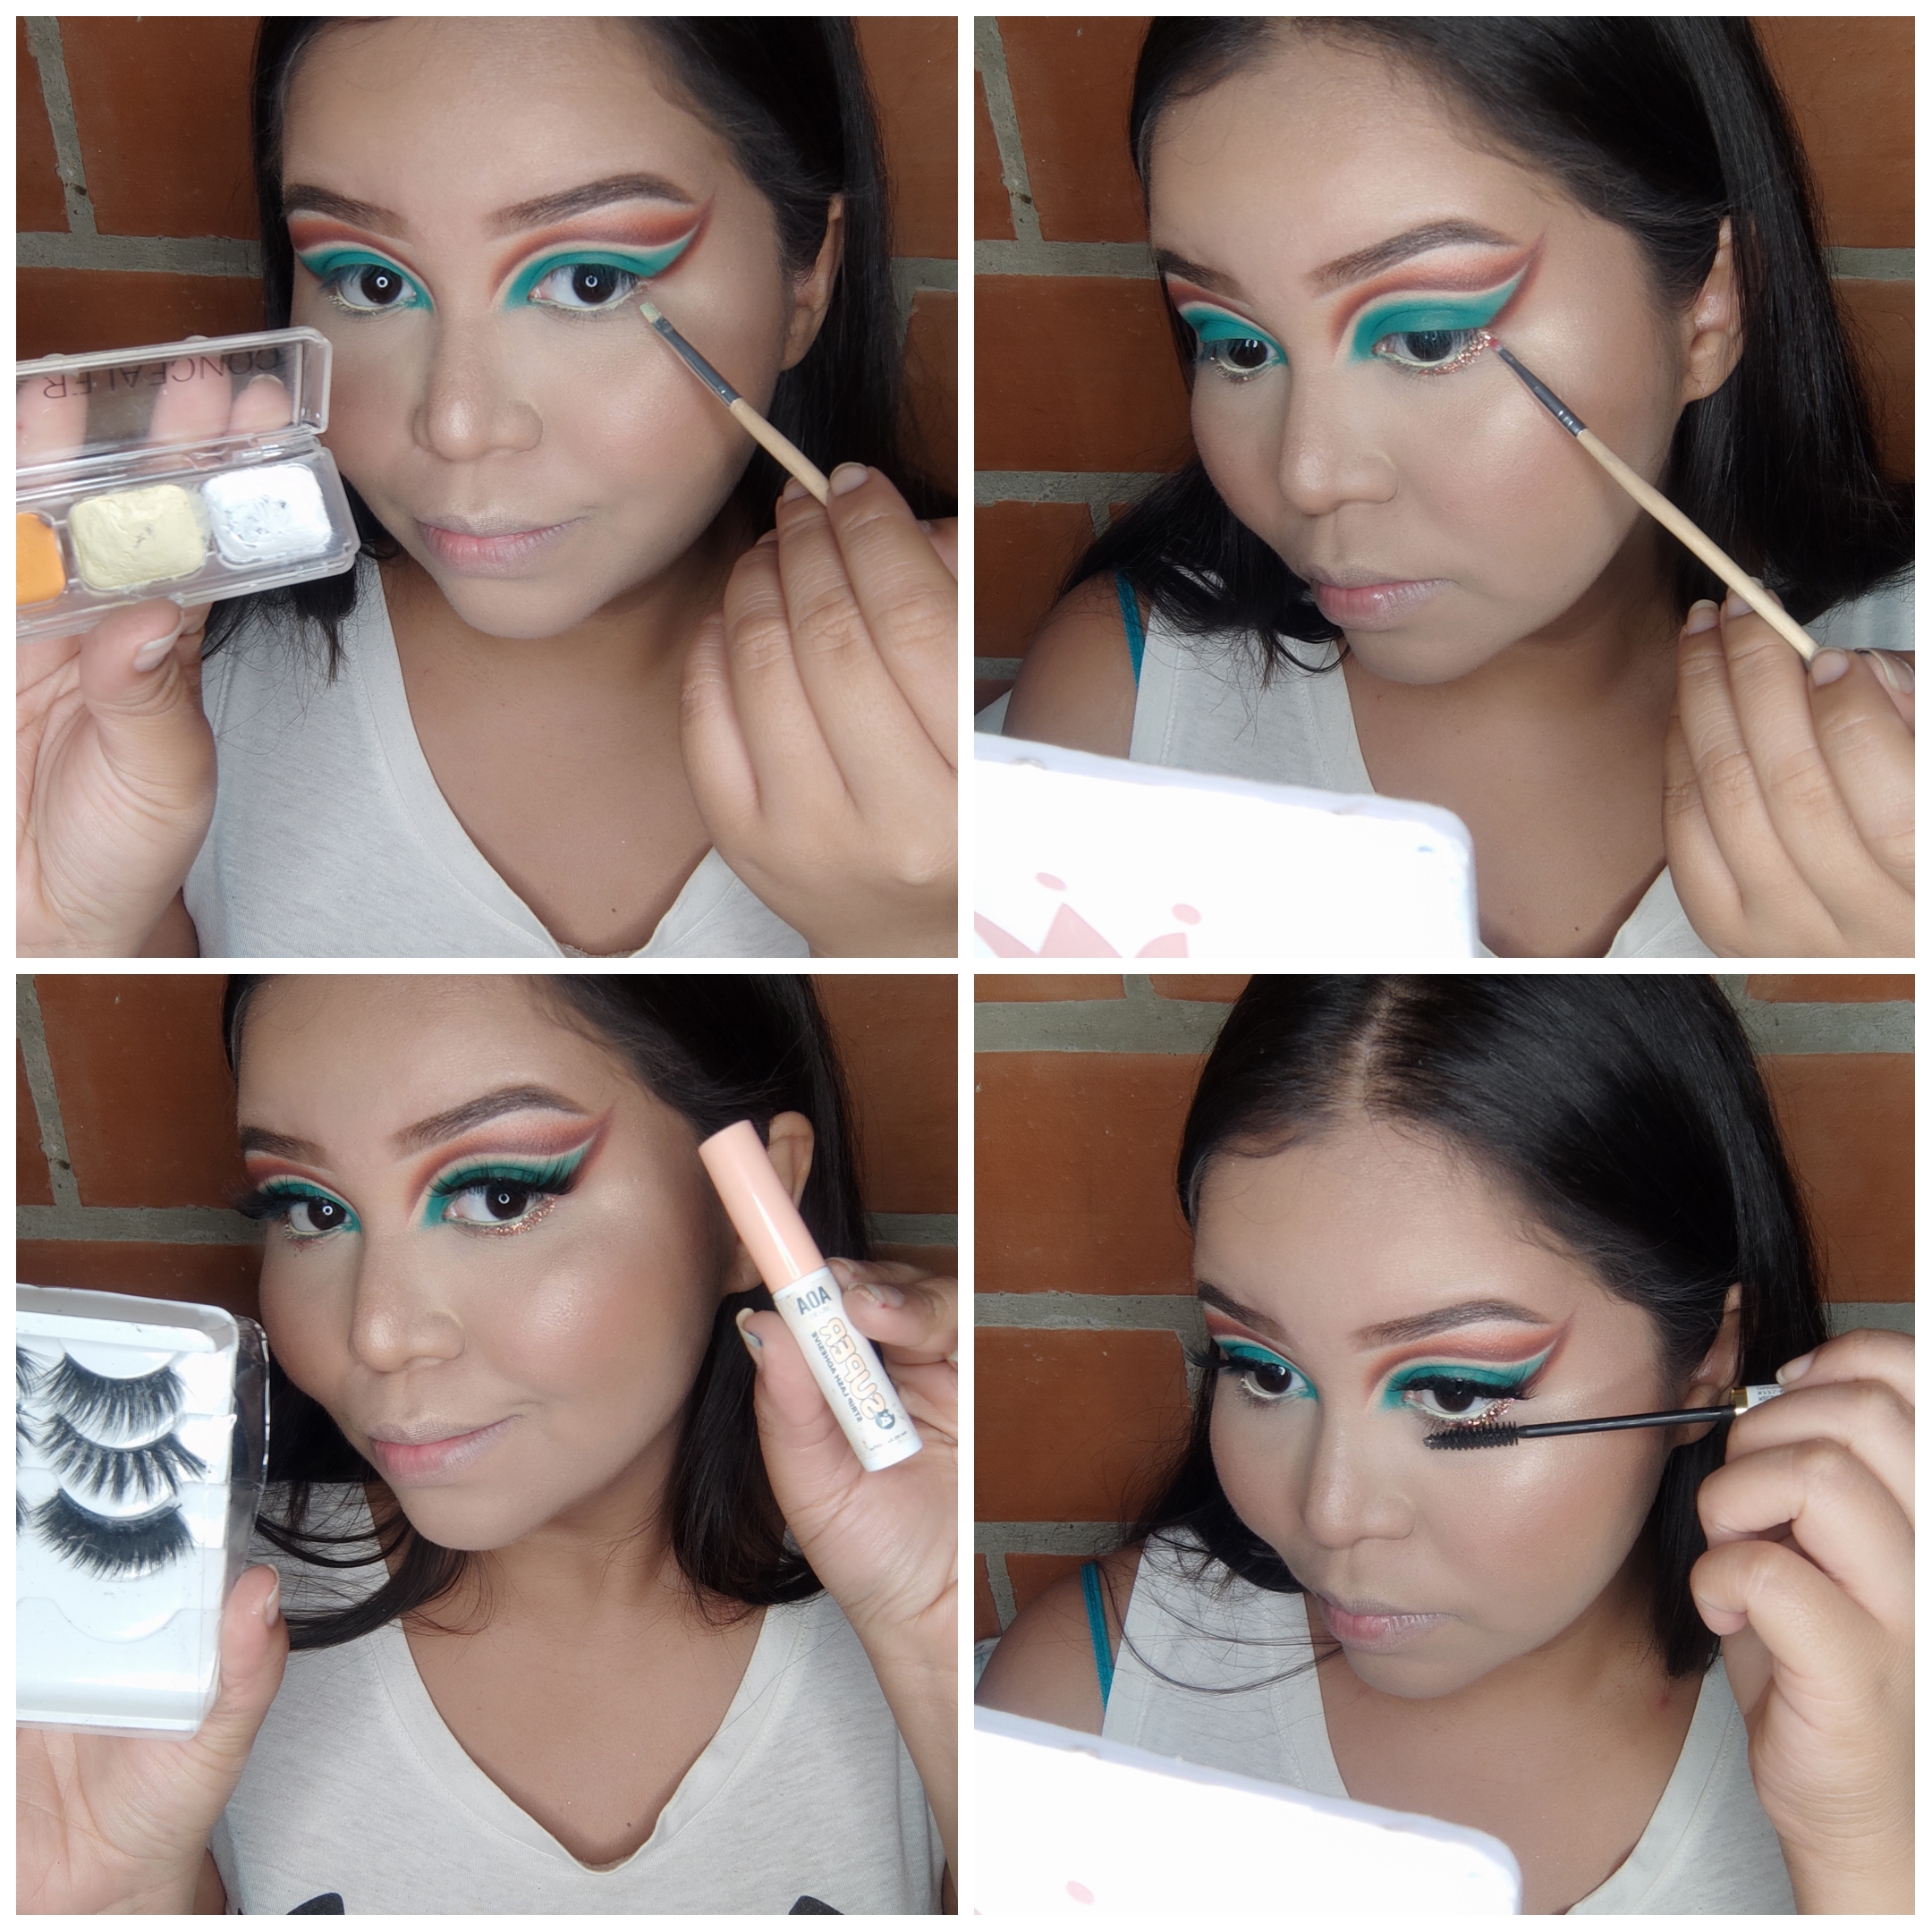
Ahora es turno de finalizar nuestros ojos y para ello, aplicaremos corrector beige en nuestra línea de agua, glitter dorado en el párpado inferior, añadiremos pestañas postizas y máscara de pestañas en las pestañas inferiores:
Now it's time to finish our eyes, so let's apply some light concealer over our water line, golden glitter over our lower lid, add some fake lashes and apply a little of Máscara over our lower lashes:
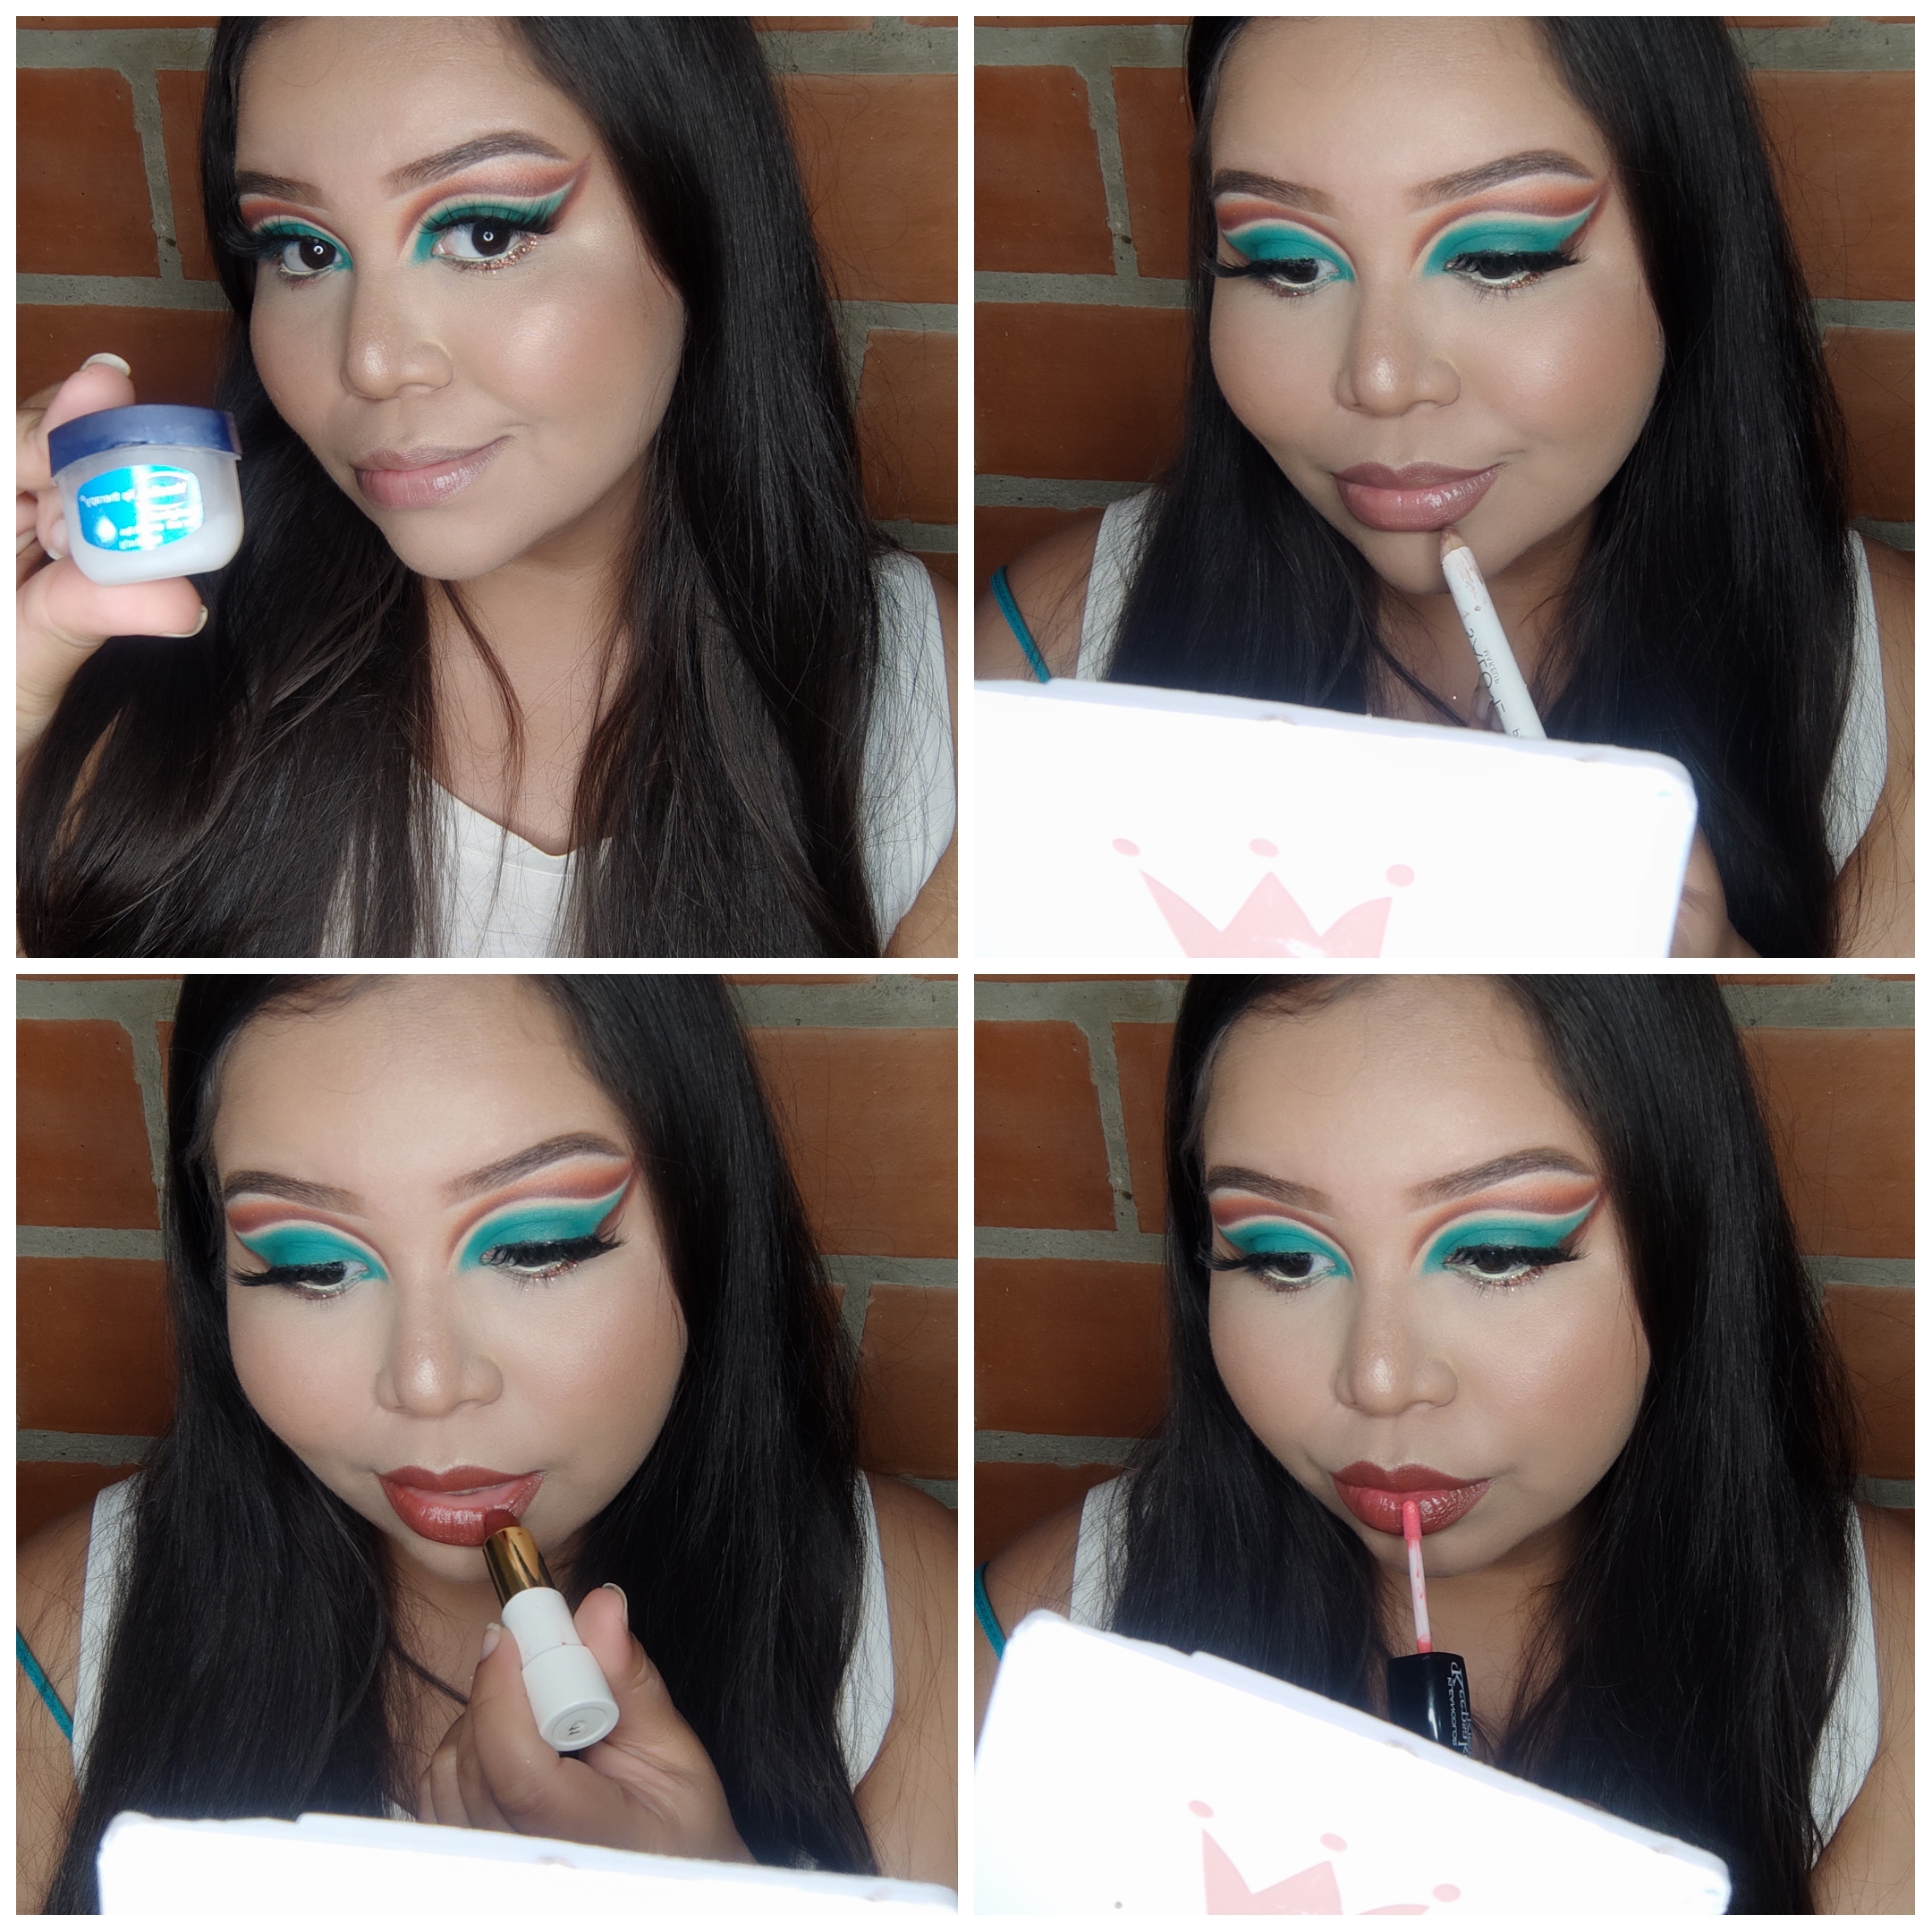
Para finalizar este look sólo faltan los labios, los cuales delinearemos con un lápiz marrón y rellenaremos con un labial marrón con un toque naranja, finalizando con un toque de gloss:
To end with this look there's only our lips left, so let's define them with a brown pencil and fill them with a orangy brown lipstick, ending with some lips gloss:
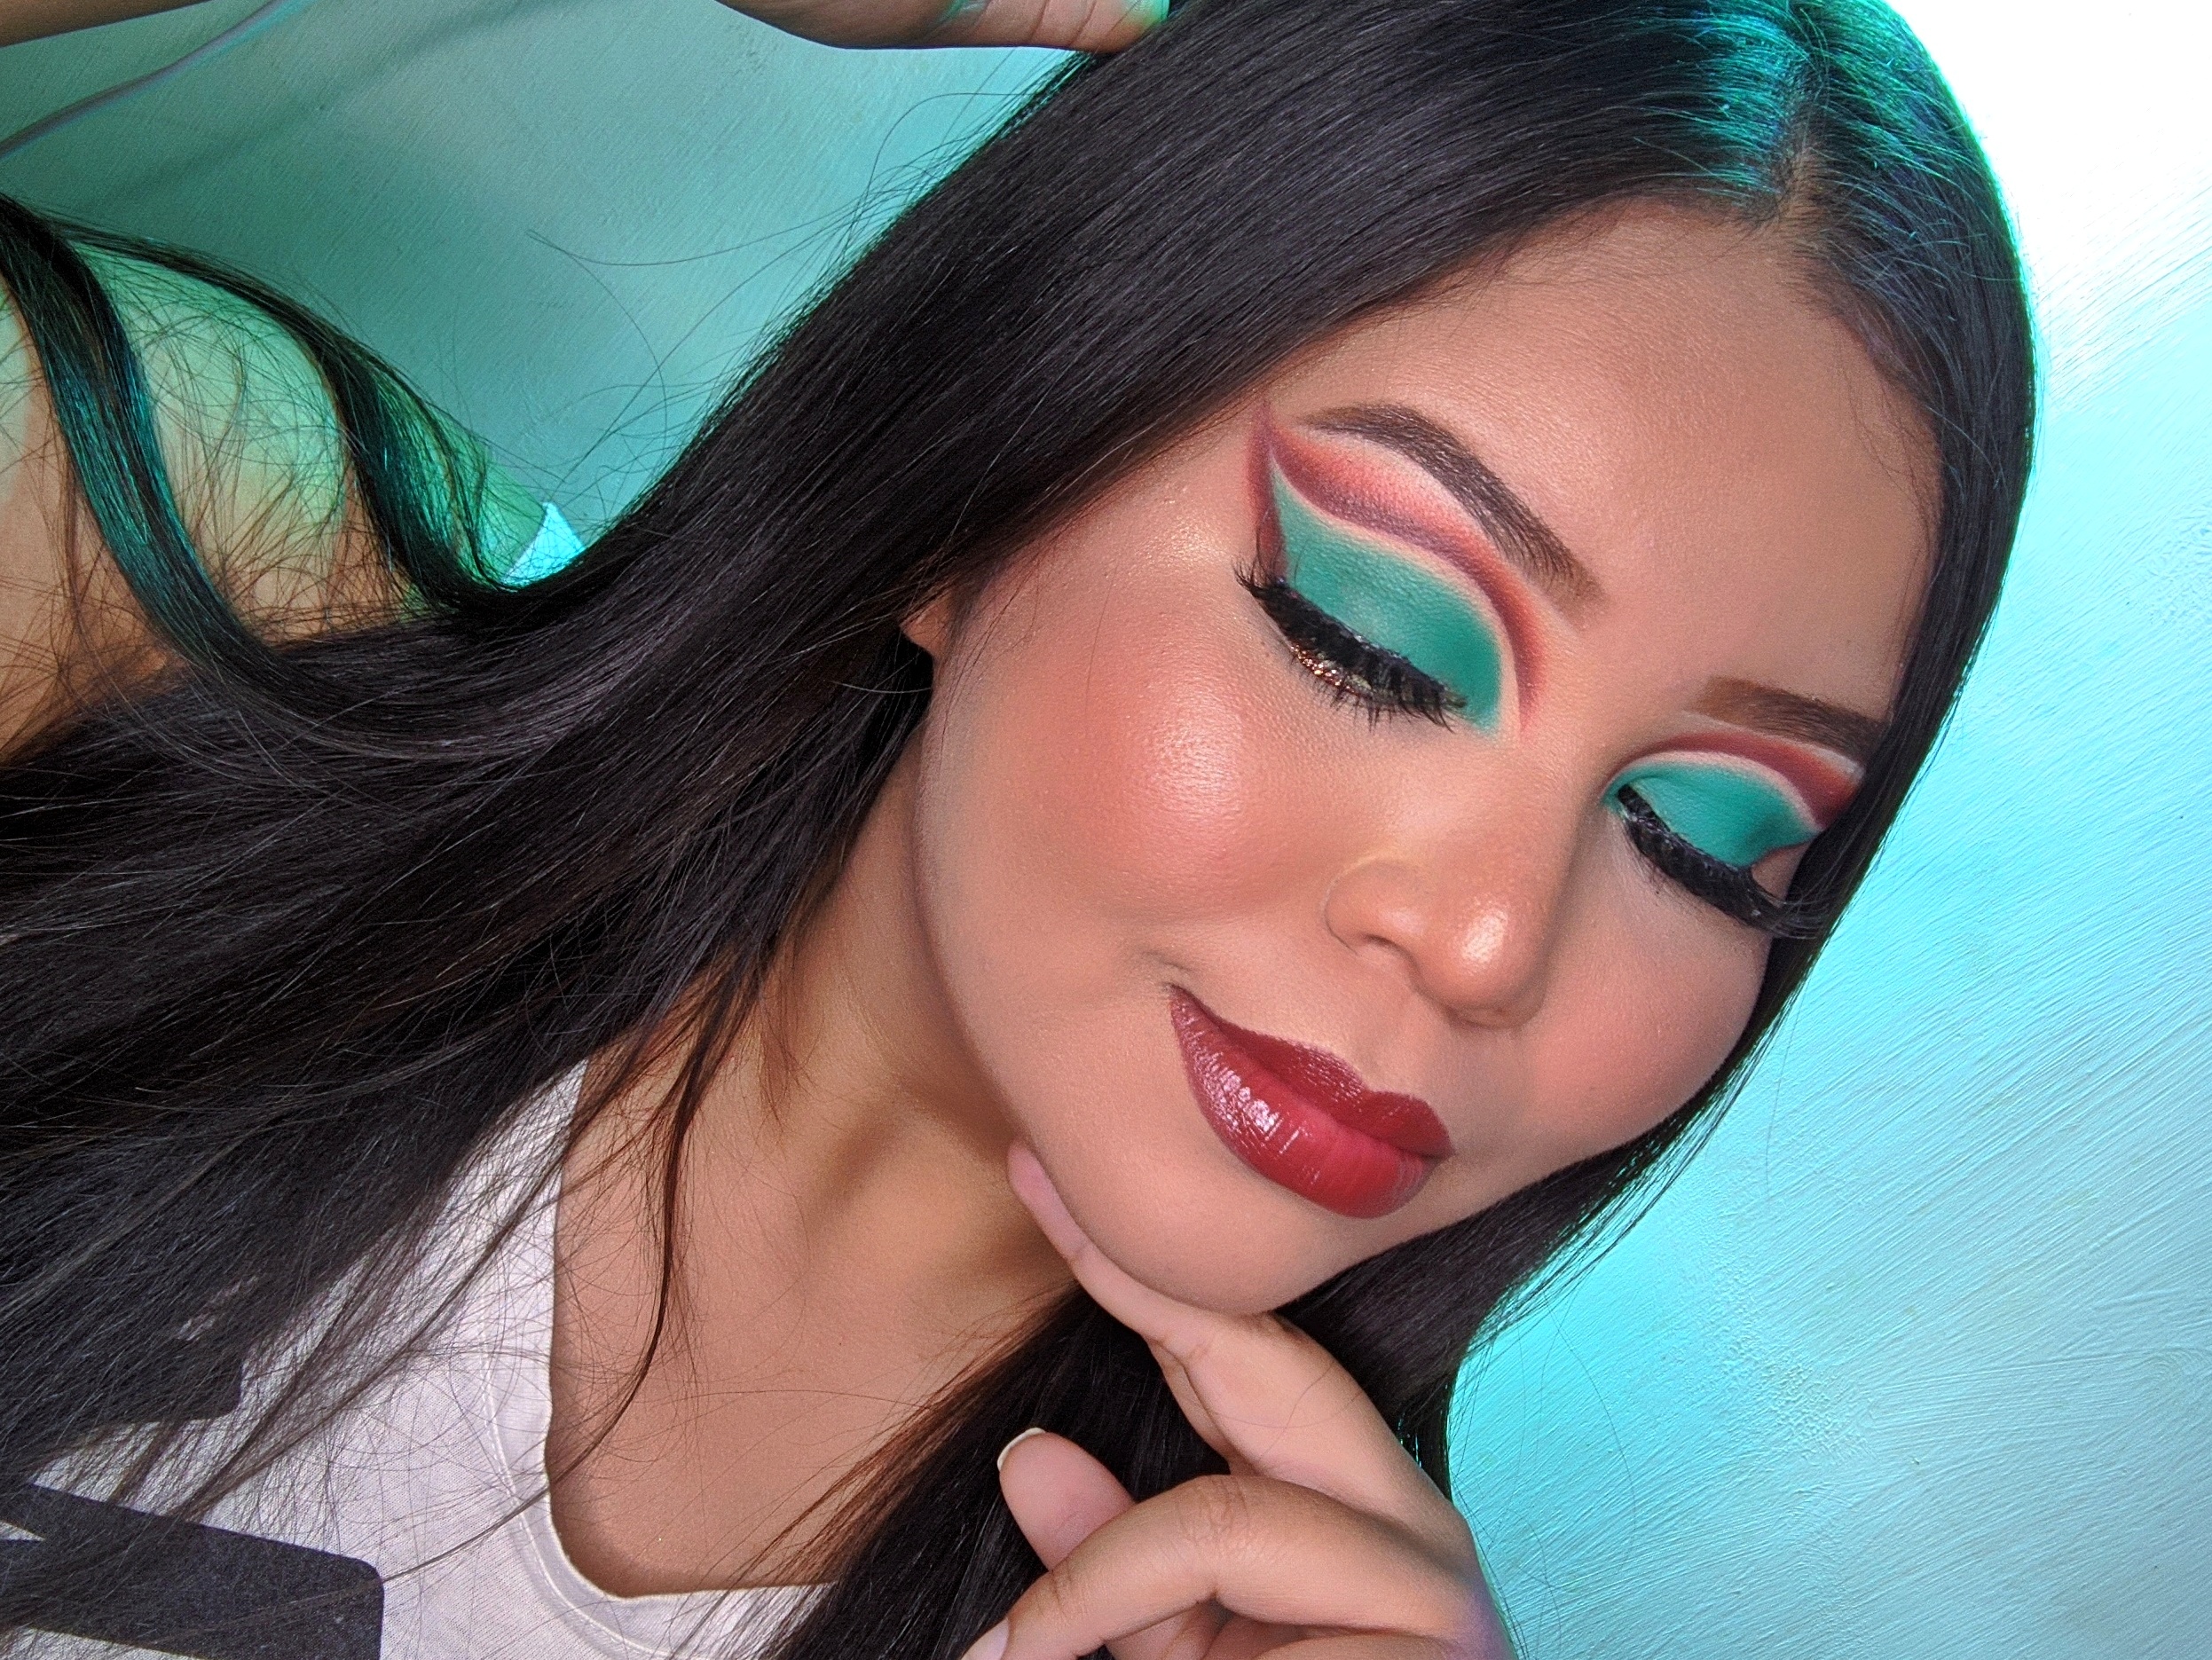
Ahora sí estamos listas para lucir nuestro hermoso look, inspirando en la princesa Jasmine💚
Now we're ready to rock this beautiful look, inspired on Jasmine Princess💚

Espero les haya gustado mucho este tutorial pero sobre todo, que hayan aprendido algo nuevo o diferente💖Yo como siempre, estoy muy contenta de compartirles este contenido que tanto disfruto realizar 😁 Nos vemos en el próximo 💞
I hope you enjoy this tutorial but most of, I hope you learn something new or different. I'm, as always, really happy about sharing this content that enjoy to create 😁 See you in the next one💖
The rewards earned on this comment will go directly to the person sharing the post on Twitter as long as they are registered with @poshtoken. Sign up at https://hiveposh.com.
Congratulations @marilegny! You have completed the following achievement on the Hive blockchain and have been rewarded with new badge(s):
Your next target is to reach 200 upvotes.
You can view your badges on your board and compare yourself to others in the Ranking
If you no longer want to receive notifications, reply to this comment with the word
STOPCheck out the last post from @hivebuzz:
Support the HiveBuzz project. Vote for our proposal!
Quedó precioso!
Muchas gracias hermosa 💖
Thank you for sharing this amazing post on HIVE!
Your content got selected by our fellow curator @priyanarc & you just received a little thank you via an upvote from our non-profit curation initiative!
You will be featured in one of our recurring curation compilations and on our pinterest boards! Both are aiming to offer you a stage to widen your audience within and outside of the DIY scene of hive.
Join the official DIYHub community on HIVE and show us more of your amazing work and feel free to connect with us and other DIYers via our discord server: https://discord.gg/mY5uCfQ !
If you want to support our goal to motivate other DIY/art/music/homesteading/... creators just delegate to us and earn 100% of your curation rewards!
Stay creative & hive on!