Hola amigos! Hoy vengo a enseñarles esta poderosa técnica de maquillaje para realzar los rasgos del rostro, en especial el 'parpado caído' o 'parpado encapotado'. Un rasgo muy común que nos sabotea muchas veces el resultado del maquillaje. Si quieres saber como se hace, sigue leyendo!
Hi friends! Today I come to teach you this powerful makeup technique to enhance facial features, especially the 'droopy eyelid' or 'hooded eyelid'. A very common trait that often sabotages the result of makeup. If you want to know how to do it, keep reading!
Paso #1// Step #1
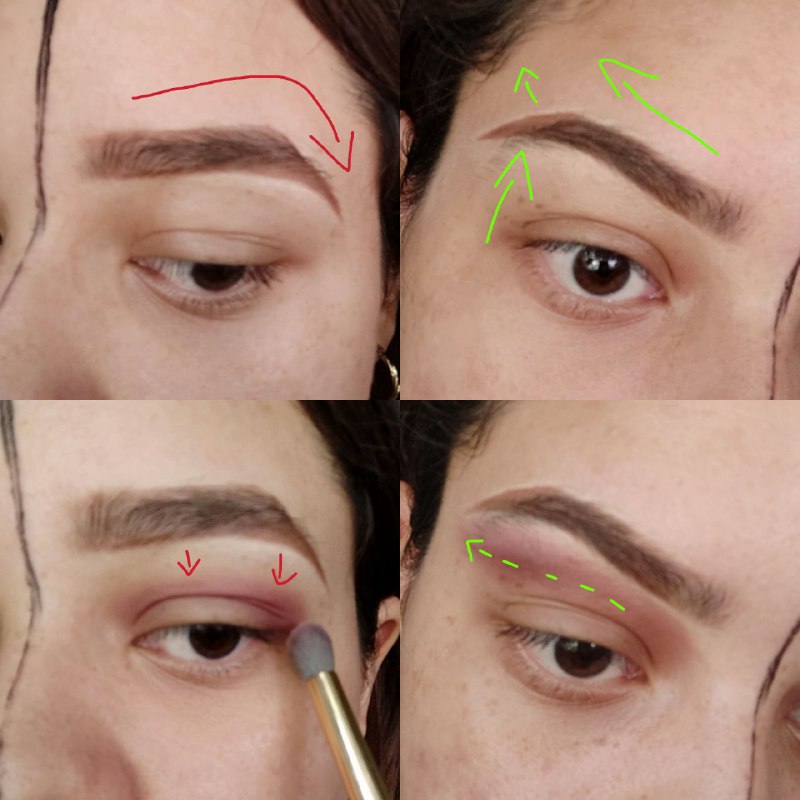
Lo primero que vamos a corregir es la forma en la que nos hacemos las cejas. En muchas estéticas tienden a realizar este diseño de forma cuadrada y en pico en la ceja, la cual no está mal pero no favorece a todo tipo de rostro. Para dar una ilusión de rostro y parpado más levantado, debemos diseñar la forma de la ceja con la punta en dirección más ascendente, dejando la curva de la ceja más recta pero siempre en dirección hacia arriba.
Naturalmente puede que el pico de la ceja sea más abajo, podemos decidir si queremos taparlo con corrector o depilar ese final.
Procedemos a poner la sombra que dará la profundidad. En vez de ponerlo justo en la cuenca del ojo, simula que tienes la cuenca más arriba. No acumules el producto en la esquina externa del ojo, hazlo en la esquina externa de la cuenca que simulamos, y si quieres puedes terminarlo en forma de V.
First that we are going to correct is the way in which we do the eyebrows. In many aesthetics they tend to make this design square and peak in the eyebrow, which is not bad but does not favor all types of face. To give an illusion of a more raised face and eyelid, we must design the shape of the eyebrow with the tip in a more upward direction, leaving the curve of the eyebrow more straight but always in an upward direction.
Naturally, the peak of the eyebrow may be lower, we can decide if we want to cover it with concealer or wax that end.
We proceed to put the shadow that will give the depth. Instead of putting it right in the eye socket, pretend that you have the socket higher up. Do not accumulate the product in the outer corner of the eye, do it in the outer corner of the basin that we simulate, and if you want you can finish it in a V shape.
Paso #2 // Step#2
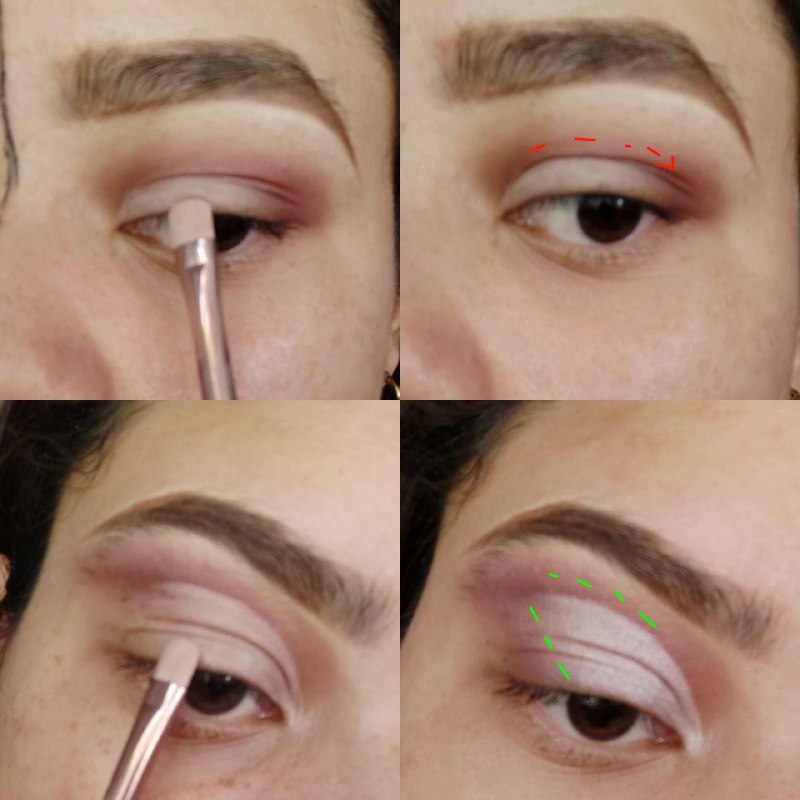
Realizamos un semi cut-crease sutil, y aplicamos una sombra clara satinada. Recuerda simular que tu cuenca está más arriba de lo que en realidad está y procura hacer una forma de V angular.
We do a subtle semi cut-crease, and apply a light satin shadow. Remember to pretend that your basin is higher than it actually is and try to make an angular V shape.
Paso #3 // Step#3
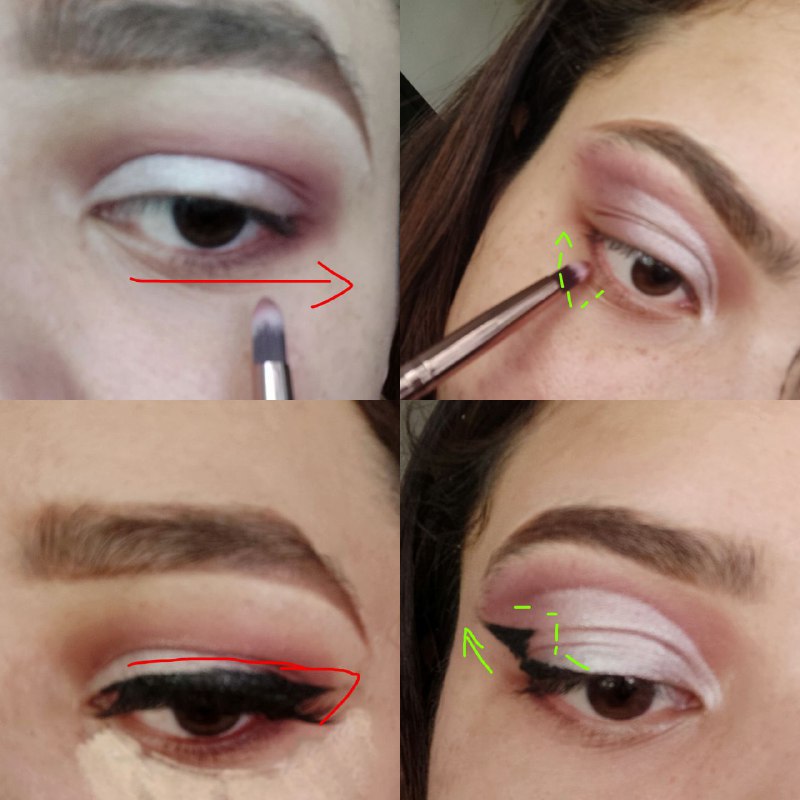
Cuando vayas a poner sombra en la línea inferior de las pestañas, procura que sea de la mitad hacia afuera y siempre de manera ascendente. No uses colores muy oscuros en esa zona.
When you go to put shadow on the lower lash line, make sure it is from the middle outwards and always in an upward direction. Don't use very dark colors in that area.
El delineado es algo super importante, porque es la cosa con la que más batallamos las que tenemos el parpado de esta manera. Lo que vamos hacer es delinearnos con el ojo totalmente abierto, con la cara paralela frente al espejo, sin cerrarlo, sin poner la cabeza en ángulo. Cuando terminemos debe quedar en forma de escalón.
The eyeline is something super important, because it is the thing that we struggle with the most those of us who have the eyelid in this way. What we are going to do is delineate ourselves with the eye totally open, with our face parallel to the mirror, without closing it, without putting our head at an angle. When we finish it should be in the form of a step or scale.
Paso #4 // Step #4
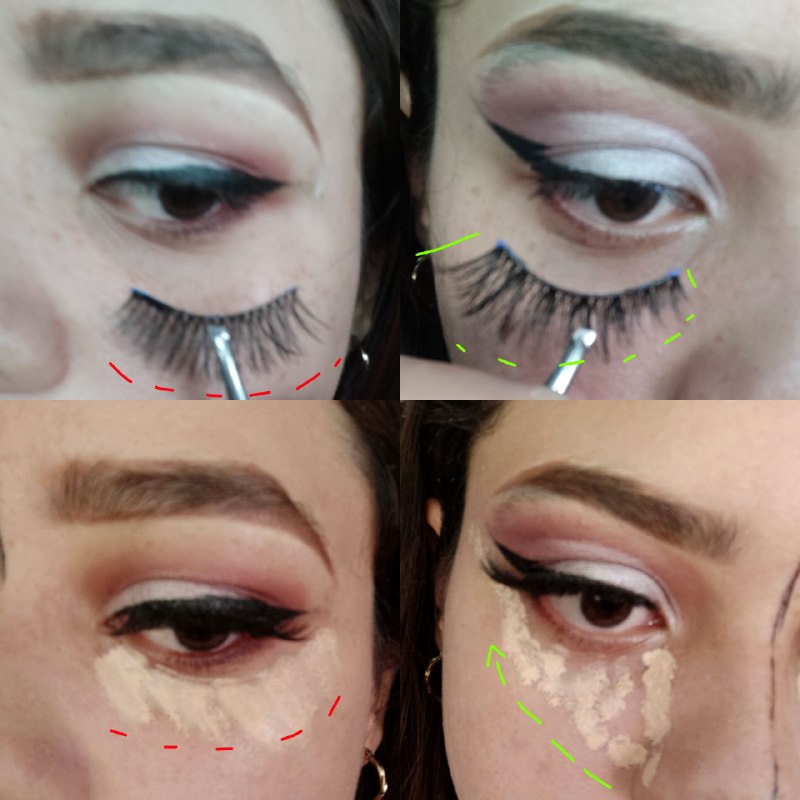
Las pestañas postizas preferiblemente deben ser de poco volumen en el medio y angulares. Tratemos de elegir unas que tengan las pestañas más largas en el exterior, a veces incluso se recomienda no poner pestañas en la zona interior del ojo sino solo del medio hacia afuera. Para los rasgos del rostro, el corrector debe ir en triangulo invertido como en la foto.
False eyelashes should preferably be low volume in the middle and angular. Let's try to choose ones that have the longest eyelashes on the outside, sometimes it is even recommended not to put eyelashes in the inner area of the eye but only from the middle to the outside. For facial features, the concealer should be in an inverted triangle as in the photo.
Paso #5 // Step #5
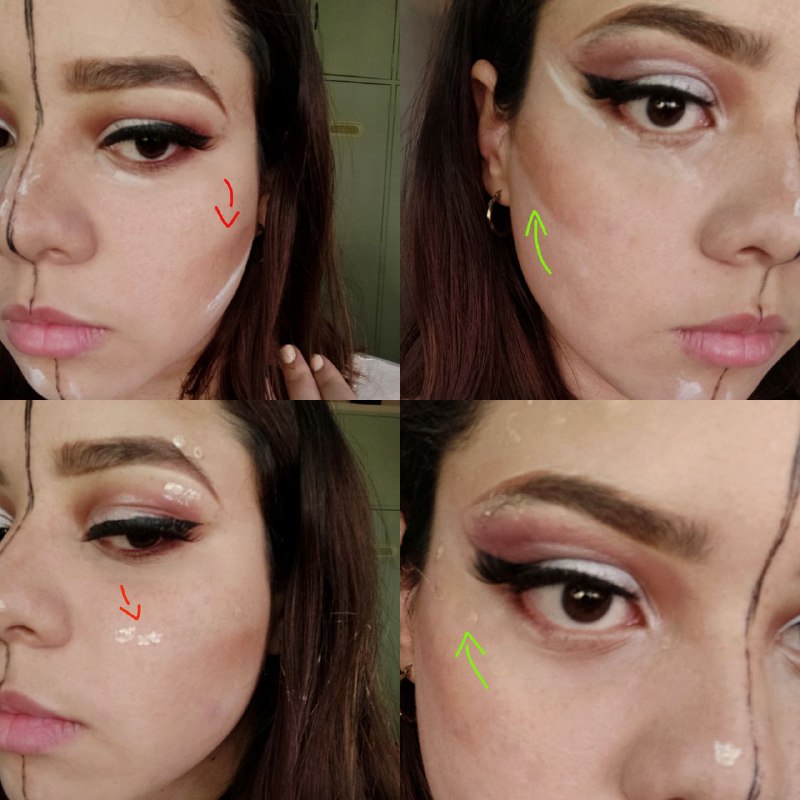
Cuando queremos un rostro más realzado o levantado, necesitamos aplicar el bronzer de manera estratégica. Es muy común ponerlo donde los cachetes se hunden cuando hacemos boca de pez, pero hazlo más arriba en forma diagonal y veras la gran diferencia. Lo mismo pasa con el iluminador el cual no debe ir en la mejilla sino más arriba, casi abajo del ojo.
When we want a more enhanced or lifted face, we need to apply the bronzer strategically. It is very common to put it where the cheeks sink when we make a fish mouth, but do it higher diagonally and you will see the big difference. The same happens with the highlighter which should not go on the cheek but higher, almost below the eye.
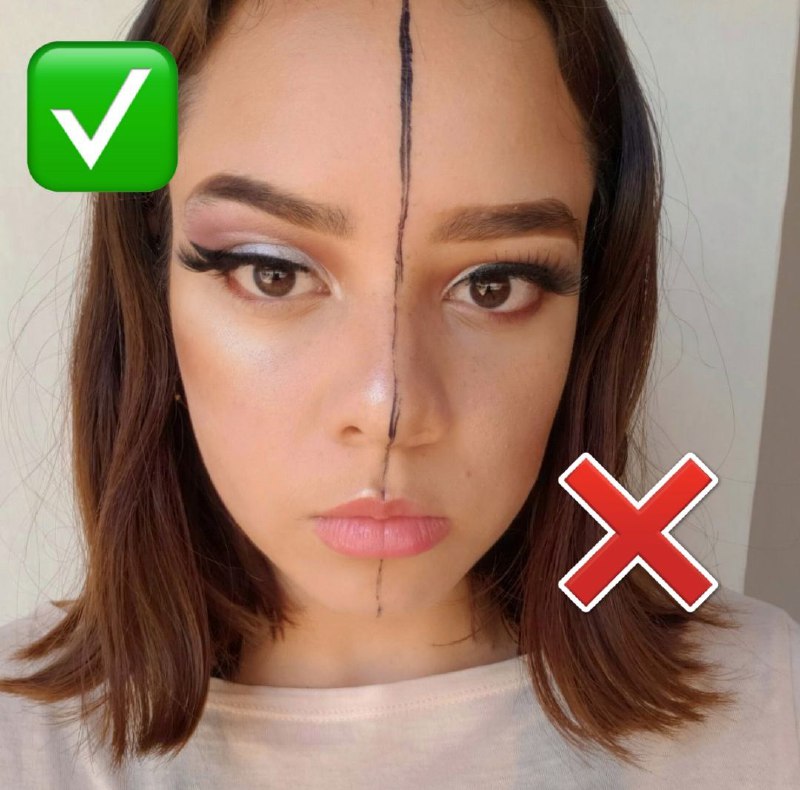
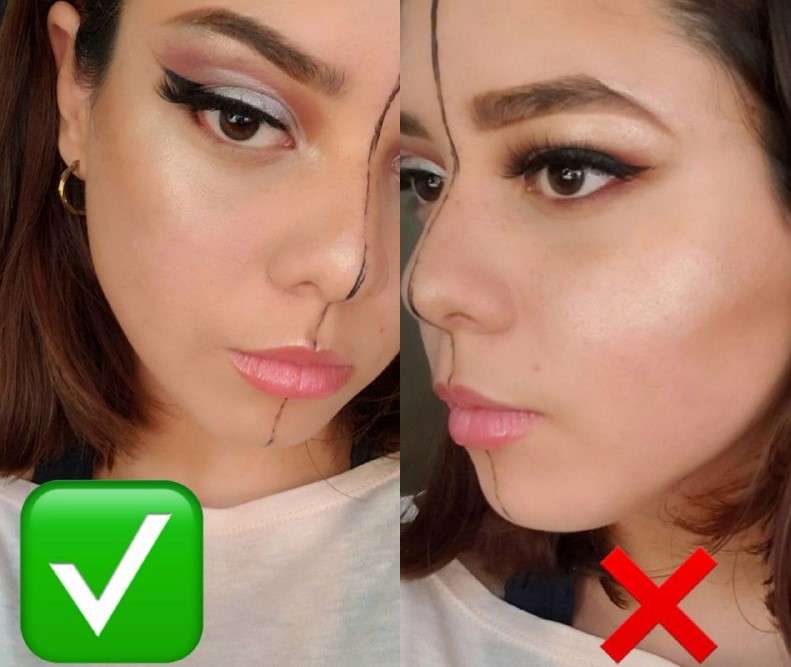
Resultado final! // Final result! 🎉

Muchas gracias por leer este post! Si tienes alguna sugerencia hazla saber en los comentarios. Feliz inicio de semana ❤
Thank you very much for reading this post! If you have any suggestions let them know in the comments. Happy start of the week ❤