Saludos mis queridos geekers, hoy les presento un acercamiento al trabajo con vectores en el programa Adobe Illustrator. Crear vectores es un asunto un poco complicado, pero con la debida practica podemos crear asombrosos efectos e ilustraciones. Pero primero vamos a ver la diferencia entre un vector y una imagen de bits.
Según la página web Arkiplus un vector se define por:
Podemos decir que el significado de un vector o una imagen vectorizada (también se denomina gráfico) es completamente distinto a lo que conocíamos hasta ahora como imagen de mapa de bits. La diferencia principal es que al utilizar vectores, la imagen puede sufrir modificaciones de cualquier tipo (tamaño, giro, movimiento, estiramientos) que no perderá calidad.
Por lo tanto los vectores puede ser editados, modificados, estirados, le podemos aplicar filtros y todo esto sin perder calidad, lo que lo hace muy beneficioso a la hora de hacer ilustraciones, o alguna otra imagen que tengamos que agrandar sin que esta pierda su resolución y calidad en el proceso. Es el formato que se utiliza para la creación de logos.
Según la la página web Definición, una imagen en mapa de bits se caracteriza por:
Se trata de aquellas imágenes que se forman a partir de puntos, llamados píxeles dispuestos en un rectángulo o tabla, que se denominada raster. Cada píxel contiene la información del color, la cual puede o no contener transparencia, y ésta se consigue combinando el rojo, el verde y el azul.
Esta imagen al estar compuesta de pixels, y estos que son finitos, al agrandarse pierden la resolución y la calidad ya no es la misma, cuando agrandamos una imagen rasterizada esta se vuelve borrosa y sus bordes difusos.
Greetings my dear geekers, today I present to you an approach to working with vectors in Adobe Illustrator. Creating vectors is a bit tricky business, but with proper practice we can create amazing effects and illustrations. But first let's look at the difference between a vector and a bit image.
According to the Arkiplus website a vector is defined by:
We can say that the meaning of a vector or a vectorized image (it is also called a graphic) is completely different from what we knew until now as a bitmap image. The main difference is that by using vectors, the image can undergo modifications of any kind (size, rotation, movement, stretching) that will not lose quality.
Therefore vectors can be edited, modified, stretched, we can apply filters and all this without losing quality, which makes it very beneficial when making illustrations, or any other image that we have to enlarge without losing its resolution and quality in the process. It is the format used for the creation of logos.
According to the web page Definition a bitmap image is characterized by:
It is those images that are formed from points, called pixels arranged in a rectangle or table, which is called raster. Each pixel contains the color information, which may or may not contain transparency, and this is achieved by combining red, green and blue.
This image being composed of pixels, and these being finite, when enlarged they lose resolution and the quality is no longer the same, when we enlarge a raster image it becomes blurred and its edges fuzzy.

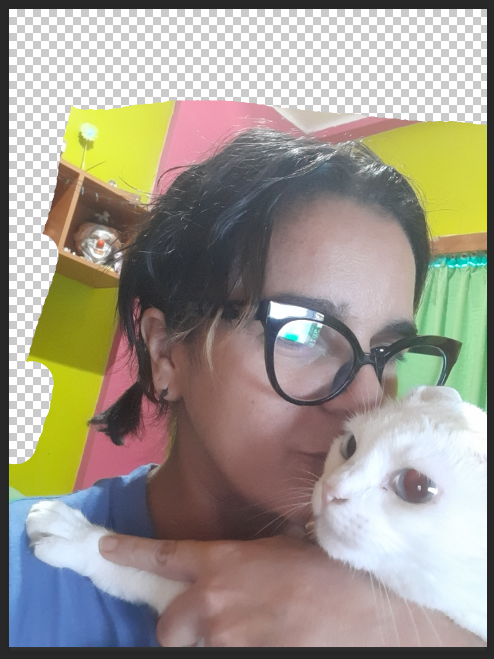
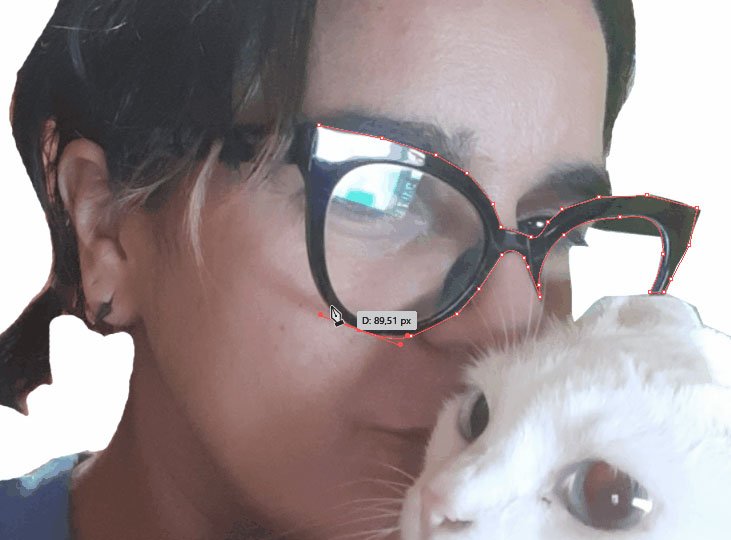
Para mostrar el proceso primero voy a ir a Photoshop a preparar mi imagen, para esto voy a utilizar una selfie que me hice con la gata de mi casa (La Gatirucia) y a partir de esta foto construiré todo el tutorial.
Lo que voy a hacer es borrar el fondo de la imagen, para crear un vector limpio y información de más. Esto porque voy a mostrar dos maneras de crear vectores y no necesitamos la información extra para ninguno de los procesos. también borré lo que se ve a través de mis lentes. Ustedes deciden lo que quieran preservar de la imagen o lo que necesiten borrar.
To show the process first I will go to Photoshop to prepare my image, for this I will use a selfie that I took with the cat of my house (La Gatirucia) and from this photo I will build the whole tutorial.
What I'm going to do is to erase the background of the image, to create a clean vector and extra information. This is because I am going to show two ways to create vectors and we don't need the extra information for any of the processes. I also erased what you see through my lens. You decide what you want to preserve from the image or what you need to delete.
 |  |
|---|
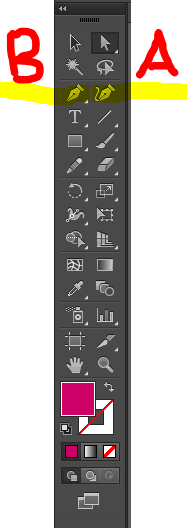
La segunda opción es la manera tradicional de crear vectores con un 100% de precisión, ya que tenemos más opciones, también podemos seguir el dibujo de la foto que estamos calcando o crear un trazado a partir de una idea preestablecida.
To create our vectors manually Illustrator offers us two options, in the image I identified them with A and B. These are the Pen tool. The first one we will talk about is the A, and this tool consists of making a vector path of which we do not have much control, since it makes a curved vector from the points that we make in the plane. To show this more graphically I prepared a gif, so that the explanation is more accurate.
The second option is the traditional way to create vectors with 100% accuracy, since we have more options, we can also follow the drawing of the photo we are tracing or create a path from a preset idea.
 |  |
|---|

 |  |
|---|
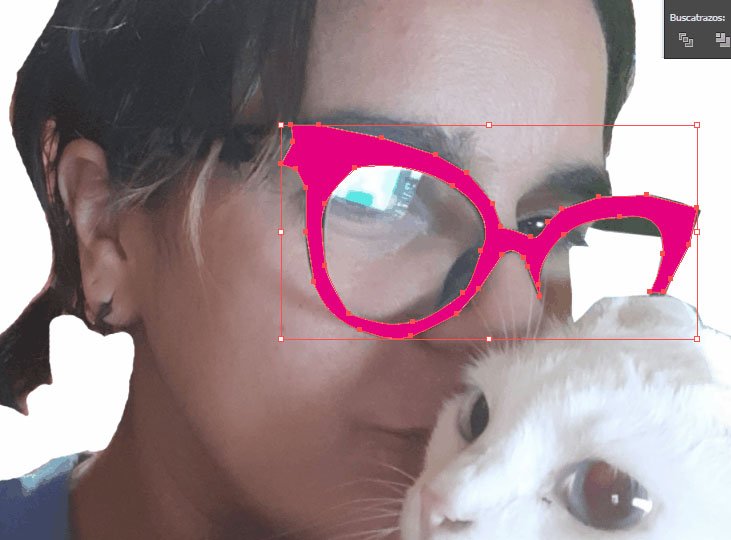
La segunda manera, que anteriormente mencionamos como al opción B en la manera de crear vectores, es mucho más complicada, pero más divertida, ya que tenemos todo el control del proceso y podemos cambiar y hacer curvas a nuestro antojo.
Para crear las curvas usando la Pluma B solo debemos dejar presionado el clic del ratón mientras situamos el siguiente punto donde queremos que vaya, sin dejar de presionar el clic, así se sitúa la curva y disponemos de un juego, que depende de donde volvamos a hacer otro clic, se crea la curva, pero al principio este proceso no es sencillo, tenemos la ventaja que con solo CTROL+Z de deshace ese punto, o nodo y podemos volver a intentar colocarlo de nuevo.
The second way, which we previously mentioned as option B in the way of creating vectors, is much more complicated, but more fun, because we have full control of the process and we can change and make curves at will.
To create the curves using the Pen B we just have to leave the mouse click pressed while we place the next point where we want it to go, without releasing the click, so the curve is placed and we have a set, depending on where we make another click, the curve is created, but at first this process is not easy, we have the advantage that with only CTROL+Z undo that point, or node and we can try to place it again.

El texto también puede ser convertido en vectores con el programa Adobe Illustrator, esta es una enorme ventaja a la hora de hacer logos, o alguna otra opción como editar y dar efectos a la tipografía. Todos saben que no es posible aplicar degradados a las letras, pero con solo hacer contornos de ellas, ya es posible aplicar un sin número de efectos y colores que nuestra frase no admitiría siendo solo texto. Pero una vez convertido en vector, es posible todo.
The text can also be converted into vectors with Adobe Illustrator, this is a huge advantage when making logos, or any other option such as editing and giving effects to typography. Everyone knows that it is not possible to apply gradients to the letters, but just by making outlines of them, it is possible to apply a number of effects and colors that our phrase would not admit being only text. But once converted into vector, everything is possible.

Ahora que pensarías si te digo que existe una manera en la que puedes crear vectores, a partir de una fotografía o una imagen en mapa de bits automáticamente? El programa Illustrator pone a nuestra disposición una herramienta con la que lo podemos lograr sin tanto esfuerzo.
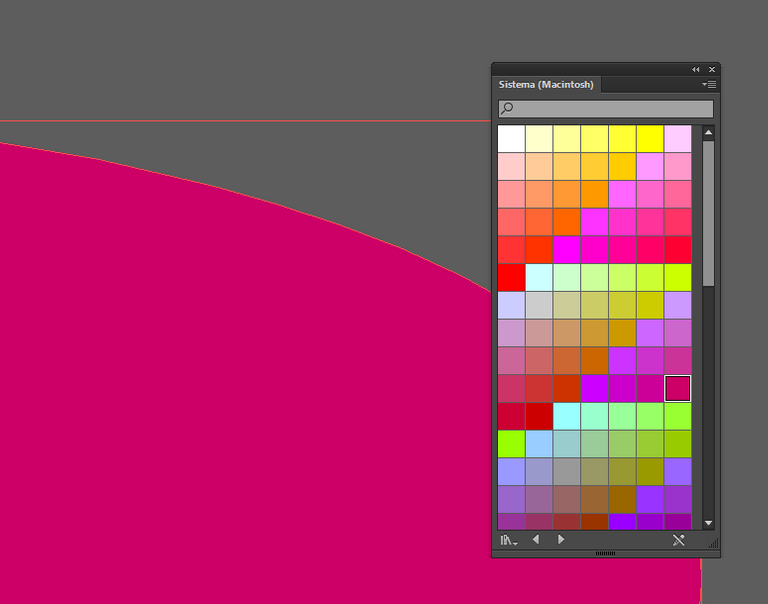
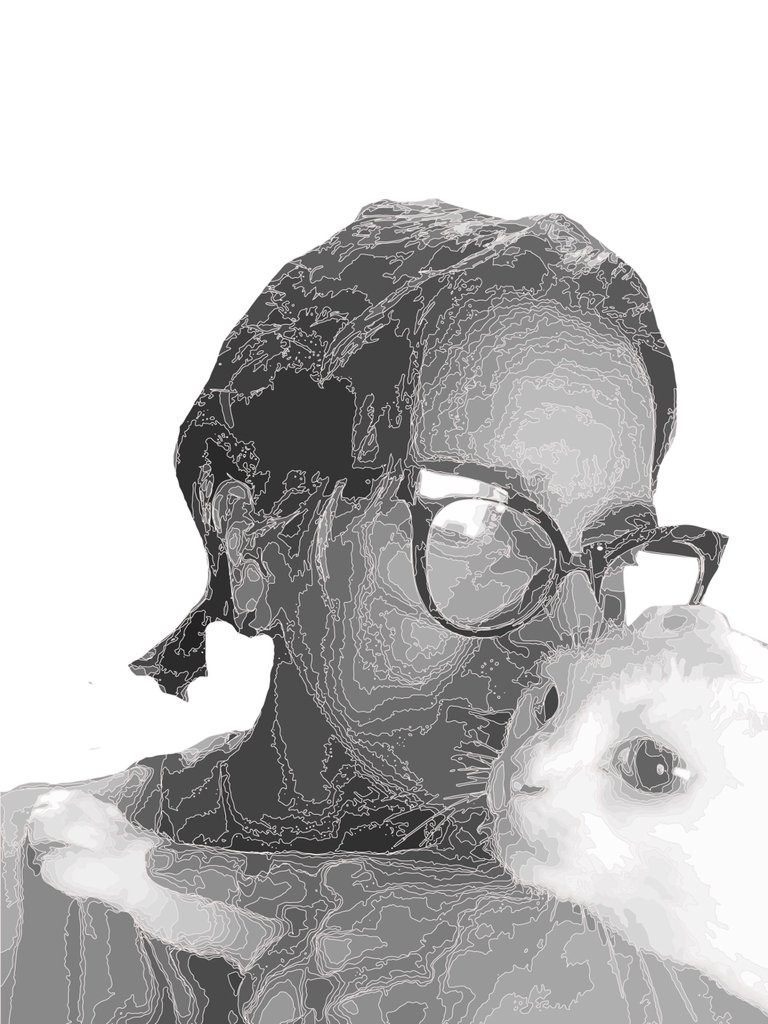
Con la herramienta calco de imagen es el primer paso para lograrlo. lo primero que hago siempre es reducir el tamaño de la imagen, para que no sea tan pesada al realizar el calco, esto no hace mella en la calidad de la imagen, ya que al volverla un vector, tendremos la posibilidad de agrandarlo luego sin perder calidad.
With the image tracing tool is the first step to achieve it. The first thing I always do is to reduce the size of the image, so that it is not so heavy when making the tracing, this does not make a dent in the quality of the image, since when turning it into a vector, we will have the possibility of enlarging it later without losing quality.
Esta herramienta la encontramos en la pestaña Ventana, y tiene muchas opciones con las que puedes jugar y así ver cual es la que mejor mejor se adapta a nuestras necesidades.
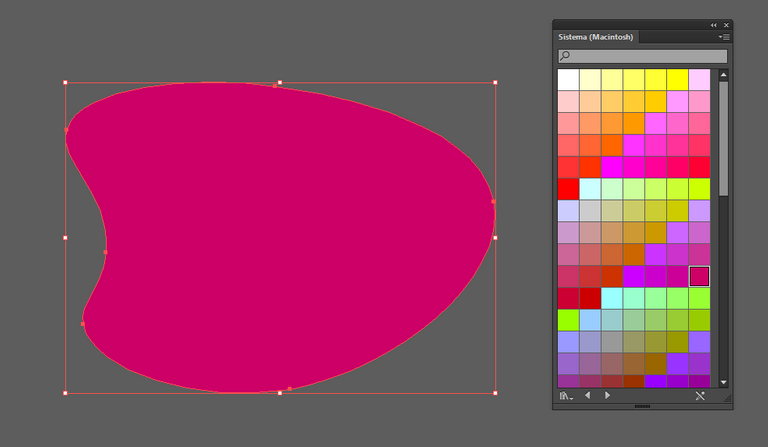
Una vez realizado el calco, el programa ha establecido los parámetros y las fronteras entre los colores, con lo que al EXPANDIR, lograremos convertir cada apartado de color en un vector.
Una vez vectorizado podemos agrandar nuestra imagen y editarla como mejor nos parezca. En esta imagen, apliqué color blanco a todas la líneas del trazado.
This tool can be found in the Window tab, and has many options that you can play with to see which one best suits your needs.
Once the tracing is done, the program has established the parameters and the borders between the colors, so by EXPANDING, we can convert each color section into a vector.
Once vectorized we can enlarge our image and edit it as we see fit. In this image, I applied white color to all the lines of the tracing.
 |  |
|---|
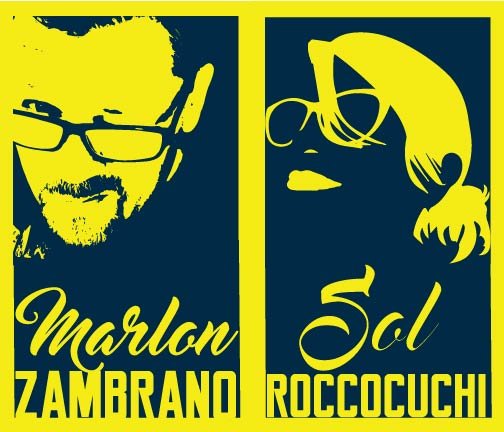
Así hemos llegado al fin de este tutorial, espero sus comentarios por si se presenta alguna duda. Estoy presta a aclararlas. También les dejos un ejemplo de las dos maneras que aprendimos a crear vectores, La imagen de la derecha es hecha con la herramienta pluma, y la de la izquierda con Calco de imagen.
So we have reached the end of this tutorial, I look forward to your comments in case there are any doubts. I am ready to clarify them. I also show you an example of the two ways we learned to create vectors, the image on the right is made with the pen tool, and the one on the left with the image tracing tool.

El contenido aquí presentado es de mi autoría.
Las fotografías fueron tomadas con mi teléfono.
La imagen de portada fue editada en Illustrator con una de mis fotos.
Los separadores y banner fueron hechos por mi en Illustrator
The content presented here is my own.
The photographs were taken with my phone.
The cover image was edited in Illustrator with one of my photos.
The separators and banner were made by me in Illustrator.
Tu lectura es un gran honor para mi
Your reading is a great honor for me
Follow me


The rewards earned on this comment will go directly to the people( @caracasprin ) sharing the post on Twitter as long as they are registered with @poshtoken. Sign up at https://hiveposh.com.
¡Genial!, los vectores son mejor para evitar perder calidad con nuestros diseños, personalmente, he llegado a hacer un montón en PSD, creo que respecto a Illustrator se trabaja algo parecido, aunque creo que esta herramienta es más eficaz, estoy como quien dice retomando andares con el diseño, lo había abandonado por más de un año, recordar muchas cosas no es fácil, pero en algún momento estaré a tono de nuevo. Que genial sería si en algún momento puedes compartir este tipo de contenido en formato de video, me agrada la forma en la que puntualizas cada arista del proceso, un saludo, bendiciones!
Yo traté de hacer un video, pero al final todo el proceso dio como resultado un archivo tan pesado que me fue imposible subirlo, pero prometo mejorar los recursos para lograrlo!!
Hi @caracasprin
Do you know you could have used #diy tag for this post to earn some BUIDL tokens in addition to Hive crypto?
In case you are not aware, read this post to know the kinds of content, among others, you could post using #diy tag.
You could also use the #diy tag when you share content showcasing your DIY skills.
When you use #diy tag your posts will also appear on https://built-it.io website, giving you wider exposure.
Because most people are not aware of the potential of BUIDL token, it can still be bought at very cheap price now.
Thank you very much for your support!
Justamente un amigo hoy me recomendó este programa, pero yo no he querido meterme con eso todavía, pienso ir poco a poco, porque aún no manejo del todo Photoshop, sé que aún me falta mejorar, esto del diseño es todo un mundo, y cada día se aprende algo nuevo, hace un tiempo practique un poco la parte de vector izar una imagen, pero no lo he vuelto a intentar.
Te felicito por este tutorial, muy bien explicado, me gusto los videos gif, como lo hiciste jeje, bueno como dije tantas cosas por aprender, allí vamos, un abrazo, éxitos y bendiciones para ti, saludos.😍
Como diseñadora te puedo decir que una vez que aprendes a manejar Illustrator ya no quieres volver a Photoshop, ya que tienen funciones bien diferenciadas. pero te entiendo perfectamente, la primera vez que entré a illustrator salí de allí completamente aterrada! jajajaja, no entendía como hacer nada!!