| content sources | ||
|---|---|---|
| - Translation of the text: | https://www.deepl.com | |
| - Separator taken from: | Here | |
| - Photo and video: | Picsart pro. YouCut. Samsung Galaxy j6 plus. | |
| - Source and authorship of the content: | @josuerr29 | |
| - Video intro made by @josuerr29: | YouCut app. | |
| - Music of the video Without copyright: | soundcloud | |
| Logo 1 | Design by https://studio.3espeak.tv | |
| Logo 2 | Design by https://hive.blog | |
| Logo 3 | Design of the geek zone meal | |
| Equipment used for video example | Samsung j2 prime | |
| Recording equipment | Samsung j6 + | |
| Setup for recording | Tripod for can-i820 cameras |
Spanish
Hello geek zone friends, how are you?
I'm Daniel, how's it going?
This time I bring a very interesting content for all the geeks, it is a content for all those people who like to disassemble and assemble things, I think it particularly stood out to me Why my blog was full of repair and fix tutorials and it is what you I bring now.
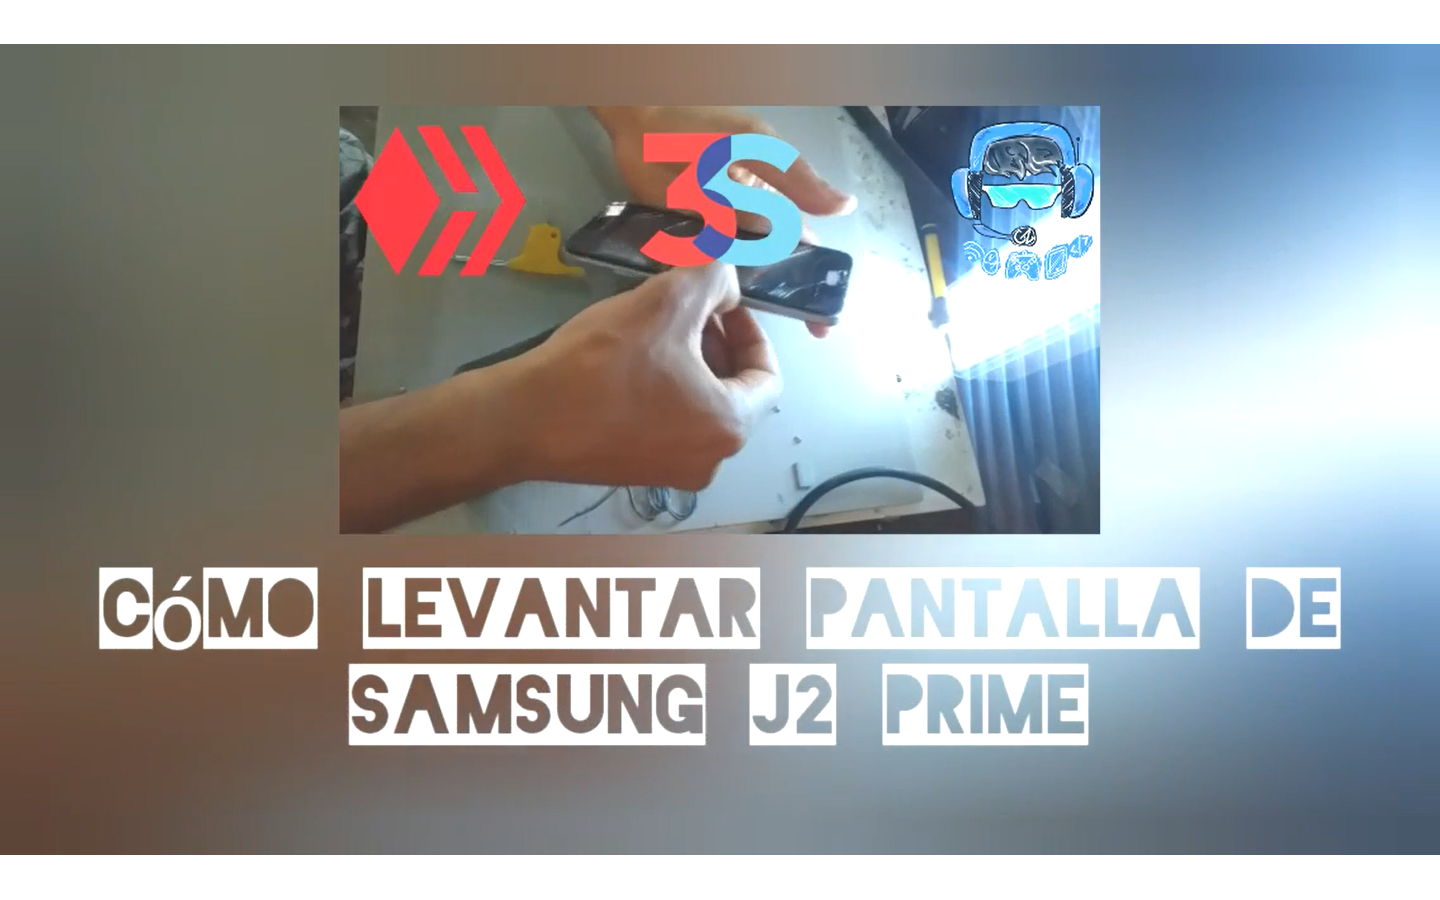
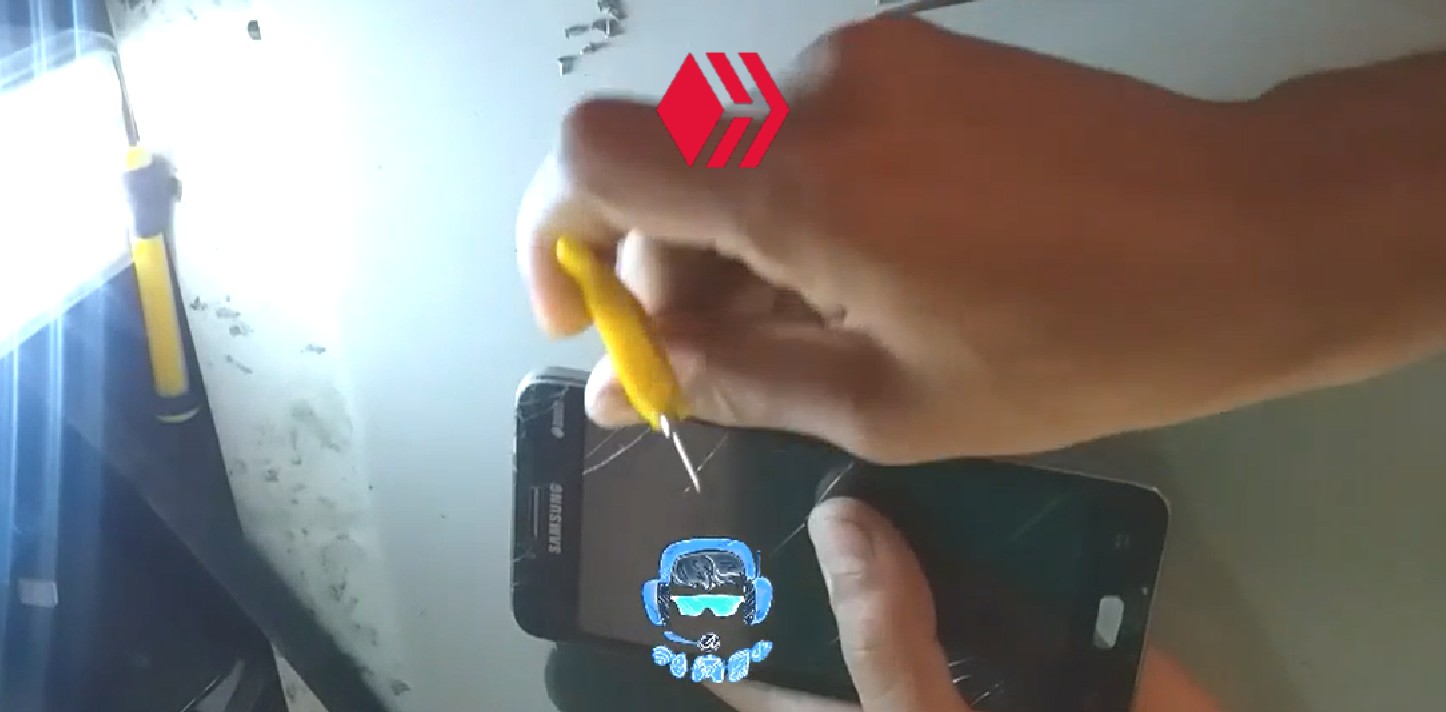
A j2 Prime has arrived in my workshop with the screen broken into pieces.
This screen arrives broken because the client made a bad move and did not realize he had a pencil and a sharpener in his back pocket, the right one, and he put the phone in his pocket to what the pencil and the sharpener were hitting with the screen of the equipment and it is not enough to be scratched but when he sat down, all 3/4 of the equipment ended up splitting and it has arrived at my workshop for repair.
The client wishes that I leave him the same screen and the same touch screen AND that I do not put anything new on him, only repair it.
Let me tell you friends that this is impossible, a screen with broken glass and the touch screen with broken glass does not have repairs, only the spare parts that are bad are changed. And in this case it is the screen and the touch screen.
After talking for a while with the client we were able to reach an agreement and it was that I had to mount the new parts and that's it, and that's what I dedicated myself to.
For this we will need isopropyl alcohol, a spatula taken from an x-ray plate, a slotted screwdriver, a bladed screwdriver, a lot of patience, and a heating station.
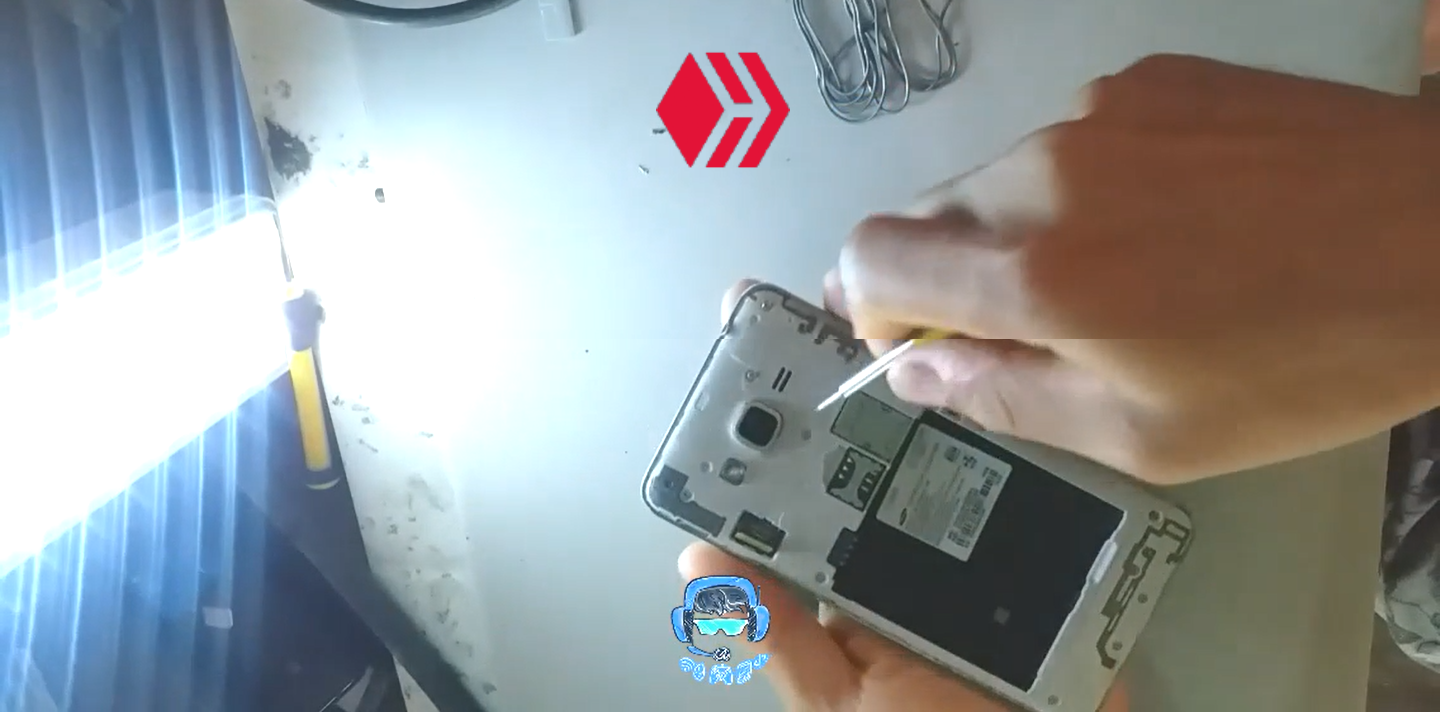
We will start by disassembling each screw, it is not totally necessary, but if we want to do the job well, then we will do it since we do not want the screen to come out to bring the bezel part of the equipment and have to break it if we remove the screws normally and it does not come apart. any.
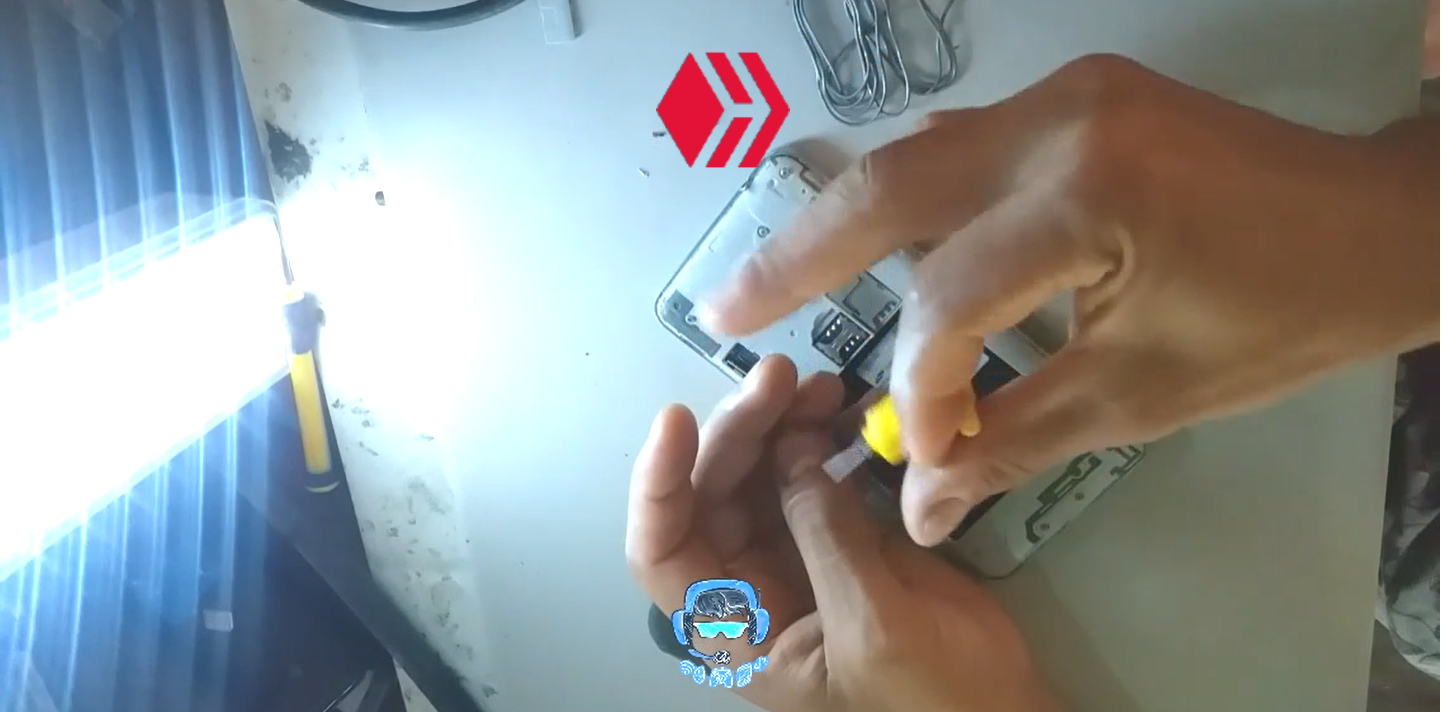
We will remove these screws with a steel screwdriver first to loosen each screw And then an iron screwdriver to finish removing it, we will also need a pliers to pull the screws that sometimes stay strong without wanting to come out.
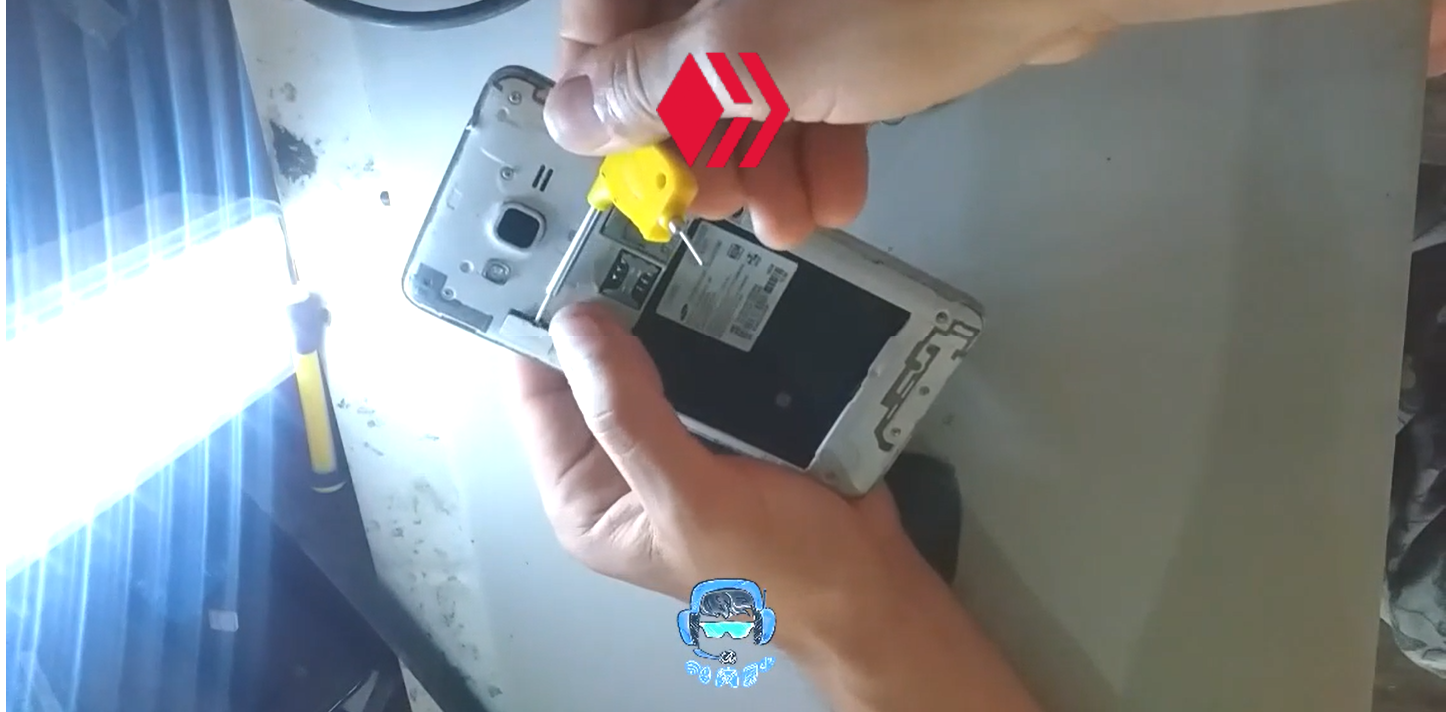
After having removed each screw we need to lift the plastic cover that protects the screen flex on the back of the equipment when we have done it we have to unplug the screen flex to avoid damaging any component inside or damaging our spatula for colliding with this screen flex.
After this we have to leave our phone with hot air for approximately 3 minutes so that the heat station is hitting it without moving approximately 50 gds for 3 minutes.
.jpg)
After this we have to use our spatula spliced in isopropyl alcohol to go through the lateral sides of the screen very carefully, do not forget to place transparent adhesive on the screen to prevent breaks from that glass from hurting you.
.jpg)
We will go around the entire bezel of the equipment with this spatula. Remember that every so often when it dries we have to wrap it again with isopropyl alcohol so that the glue comes off very easily and our work is much faster.
Only by using heat our glue becomes easier to remove and when we add isopropyl alcohol our work is much faster.
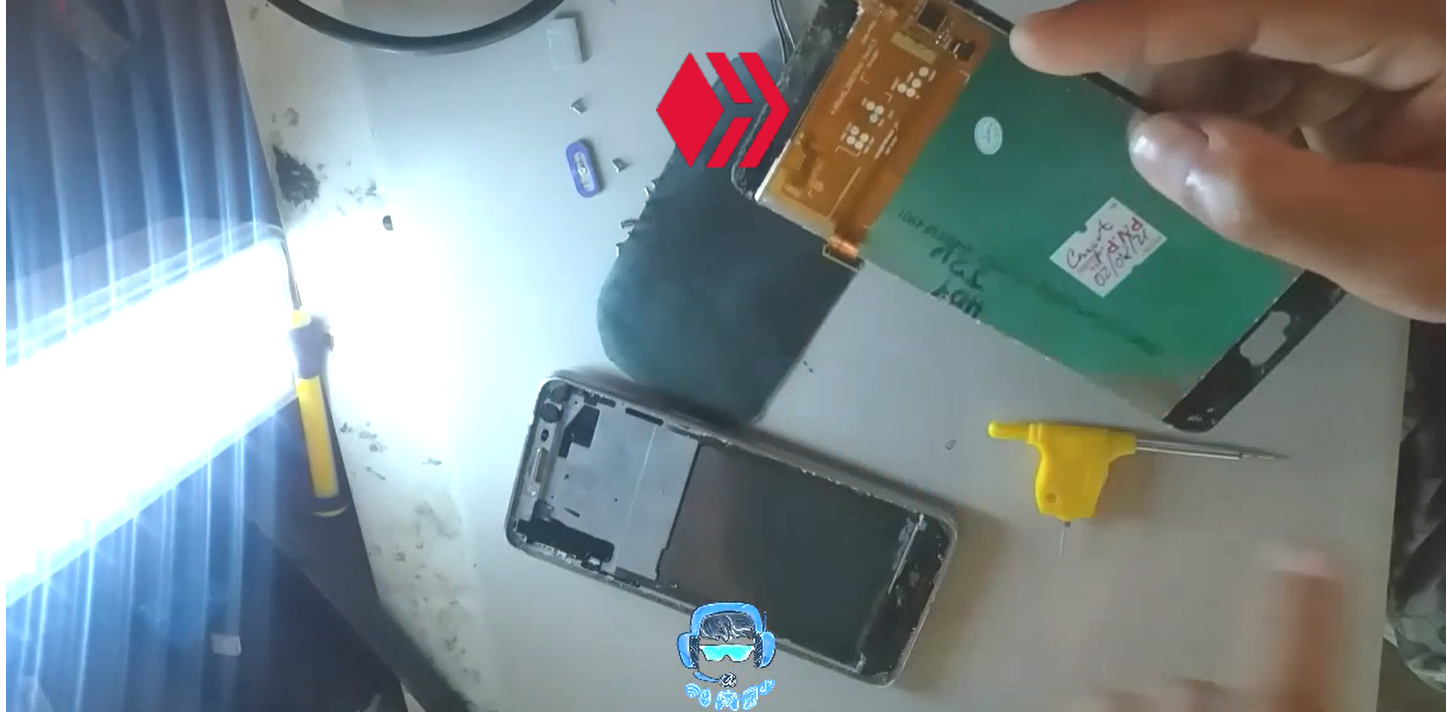
After doing all these procedures and what we have to do is lift our screen very carefully, we have to be careful not to damage the home button or damage the flexes of the buttons near Home to keep them fully functional.
Finish the process with the screen by the team we already have our team out Thank you very much for the video
Español
Hola amigos de geek zone ¿cómo están?
Soy Daniel cómo les va.
En esta oportunidad traigo un contenido bien interesante para todos los geek es un contenido para toda aquella persona que le gusta desarmar y armar cosas, creo particularmente que me destacó Por qué me blog aste a lleno de tutoriales de reparación y arreglos y es lo que te traigo ahora.
Ha mi taller ha llegado un j2 Prime con la pantalla partida en pedazos.
Esta pantalla llega partida porque el cliente hizo una mala jugada y no se dio cuenta tenía dentro de su bolsillo trasero, el derecho un lápiz y un saca punta y metió el teléfono a su bolsillo a lo que el lápiz y el saca punta estaban pegando con la pantalla del equipo y no basto con ser rayada sino que cuando él se sentó se terminó de partir todo el 3/4 del equipo y a mi taller ha llegado para su reparación.
El cliente desea que yo le dejé la misma pantalla y el mismo táctil Y qué no le coloque Nada nuevo solamente lo repare.
Déjenme decirle amigos que esto es imposible una pantalla con el vidrio roto y el táctil con el glass roto no tiene reparaciones solo se hace cambio de los repuestos que están malos Y en este caso es la pantalla y el táctil.
Luego de conversar un rato con el cliente pudimos llegar a un acuerdo y era que yo tenía que montarle los repuestos nuevos y listo y a eso Me dediqué.
Para esto necesitaremos alcohol isopropílico una espátula sacada de una placa de rayos x, destornillador de estría un destornillador de paletas mucha paciencia y una estación de calor.
Comenzaremos desarmando cada tornillo no es totalmente necesario, pero si queremos hacer el trabajo bien Entonces lo haremos ya que no queremos que la pantalla al salir se traiga la parte del bisel del equipo y tenga que partirlo si le quitamos los tornillos normalmente y no se parte nada.
Estos tornillos se lo quitaremos con un destornillador de acero primero para aflojar cada tornillo Y luego un destornillador de hierro para terminarlo de sacar también necesitaremos una pinza para halar los tornillos que a veces se quedan fuerte sin querer salir.
Después de haber sacado cada tornillo necesitamos levantar la tapa de plástico que protege el Flex de la pantalla por la parte trasera del equipo cuando lo hayamos hecho tenemos que desenchufar el Flex de pantalla para evitar que se dañe algún componente de adentro o se dañe nuestra espátula por chocar con este Flex de pantalla.
Luego de esto tenemos que dejar aproximadamente 3 minutos con aire caliente nuestro teléfono que la estación de calor le esté pegando sin moverse aproximadamente unos 50 gds por 3 minutos.
Después de esto tenemos que utilizar nuestra espatula empalmada en alcohol isopropílico ir metiendo por los lados laterales de la pantalla con mucho cuidado no te olvides de colocarle adhesivo transparente a la pantalla para evitar que partiduras de ese vidrio te hagan daño.
Iremos recorriendo todo el bisel del equipo con esta espátula, Recuerden que cada cierto momento cuando se seque tenemos que envolverla otra vez con alcohol isopropíli es para que la pega se suelte muy fácil y nuestro trabajo sea mucho más rápido.
Solo utilizando el calor nuestra pega se vuelve más fácil de sacar y cuando agregamos el alcohol isopropílico nuestro trabajo es mucho más rápido.
Después de hacer todos estos procedimientos y a lo que tenemos que hacer es levantar nuestra pantalla con mucho cuidado tenemos que estar pendiente de no dañar el botón de home ni tampoco dañar los Flex de los botones cerca de Home para mantenerlos totalmente funcional.
Terminar el proceso con la pantalla por el equipo ya tenemos nuestro equipo fuera Muchas gracias por el vídeo
| fuentes del contenido | |
|---|---|
| - Traducción del texto: | https://www.deepl.com |
| - Separador tomado de: | Aqui |
| - Foto y video: | Picsart pro. YouCut. Samsung Galaxy j6 plus. |
| - Fuente y autoría del contenido: | @josuerr29 |
| - Intro del video realizada por @josuerr29: | app YouCut. |
| - Musica del video Sin derecho de autor: | soundcloud |
| Logo 1 | Diseño de https://studio.3espeak.tv |
| logo 2 | Diseño de https://hive.blog |
| Logo 3 | Diseño de la cominida de geek zone |
| Equipo usado para el ejemplo del vídeo | Samsung j2 prime |
| Equipo de grabacion | Samsung j6 + |
| Setup de grabacion | Tripode para camaras can-i820 |


▶️ 3Speak
Buen tutorial, si bien es un teléfono que ya está desfasado en la época actual, saludos y un abrazo.
Ven hermano en el país donde me encuentro Venezuela en otros países ya están súper actualizados pero aquí en mi país todos estamos un poco atrasados Así que te diré que este j2 Prime todavía es actual en este lugar
Soy de Venezuela y vivo en ella, No, no es actual. Inclusive Digitel y Movistar estan hablando de cerrar las bandas a los modelos J de plano, y rechazar que usen sus lineas... Asi que preparate xD