As a bit of a tech nerd... I tend to hoard most of our old electronics, which means that I have a bit of a stash of old laptops, phones, tablets and old RAM slabs... and don't even get me started on that nightmarish box of old cables! Well, you will never know when one of these things will come in handy! (My wife has kept an eye on it... and her estimation is that they come in handy about once ever then years... if I'm lucky!).
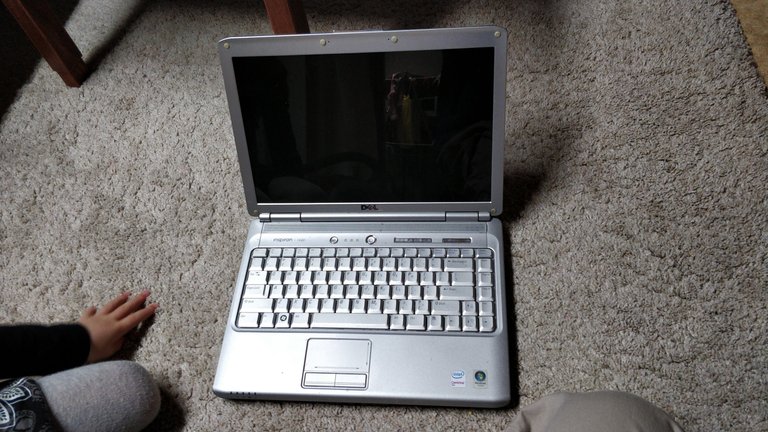
So, this particular Dell Inspiron laptop from about a decade ago was one of the laptops that was sitting on a laptop pile in the attic. I was planning to re-purpose it as a kids laptop for Netflix and Zoom (for the online school classes...). However, on booting it up, I discovered that the screen was completely bust. So, this meant I had two options... order a screen replacement part (for a decade old laptop...) or just accept that it was dead enough and dismantle it with extreme prejudice as a learning experience for my older daughter!
The destructive side won out... after all, I had other laptops that I could re-purpose instead, and this one was really too old to be worth repairing and saving. That said, after the careful dismemberment of the laptop, I would take it to the e-waste and recycling so that someone else might be able to use the components if they really wanted (except for the Hard Drive, which I would be extracted and destroying).
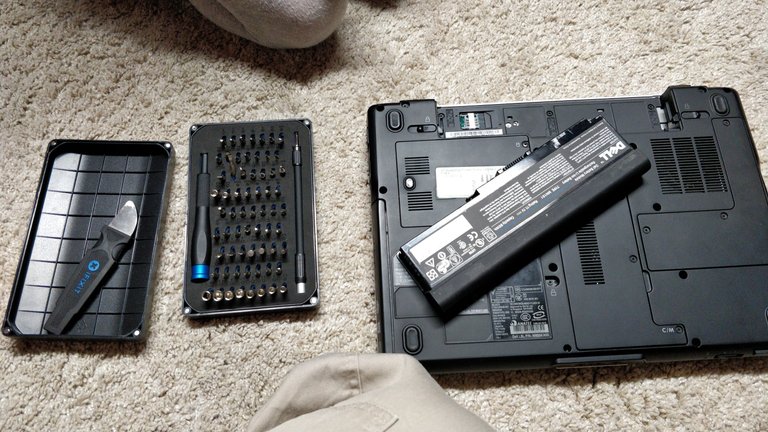
So, armed with my trusty little iFixit precision tools with every possible screw-head that you would possible need for electronic based repairs, my daughter and I were prepared to take the little guy apart for her enlightenment about how computers look on the inside. Also, in the iFixit kit is a metal pry tool, great for levering out panels and components instead of using a sharp knife (or breaking fingernails...).
Now, first things first... battery out. You don't want to take your chances on puncturing a battery cell (although, you would have to be stupidly unlucky to do that... or trying really hard...)... but more importantly, you don't want to accidentally discharge a charged capacitor on the circuit board. Those things can pack a punch on a desktop computer... I'm not sure that they have the same kick on a laptop... but I'm not going to test out that theory on my first born child. Perhaps with the second one...
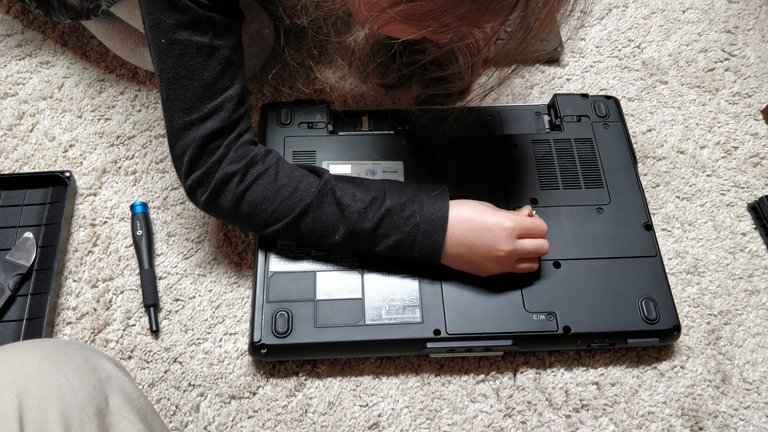
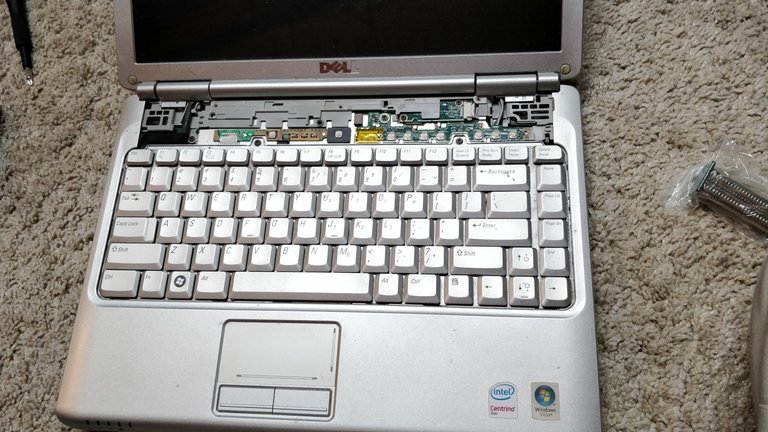
Now, Dell is pretty damn friendly with the way that they have sealed up their laptops. Pretty standard screw shapes and no funny business. So, it is just a matter of matching up and finding the right size and shape. For most of this dismantlement I was just taking a talking and guiding role... my daughter was the one doing all the hard work!
I love these iFixit tools, strong and well made... and the screwdriver is the right design for confined spaces of computer cases. The entire process can be done easily with one hand, as the screwdriver core rotates independently of the housing, which means you only need a bit of pressure on the top to keep it stable, and then turn the housing.
Seeing as we were not really repairing but dismantling, we just undid all the screws without bothering to keep track of locations, so this was all the access panel screws and the ones holding the back-plate of the laptop as well.
Normally, we would be tracking where each screw came from... you will notice that they are subtly different in length if you look closely, and when you put them all back together, there is nothing more annoying that realising that the screws are not properly holding as you have mixed them all up!
Often, I do use the back of the iFixit box to hold the screws. There are segmented compartmenments to keep the screws apart, but it is my one main complaint of the screwdriver kit. I separator walls are not high enough to stop the screws mixing when it is bumped, so I would have hoped for a magnetic tray to hold the screws in place!
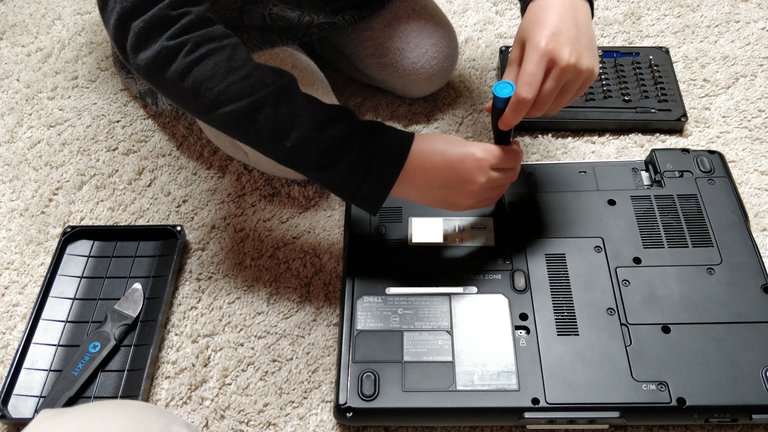
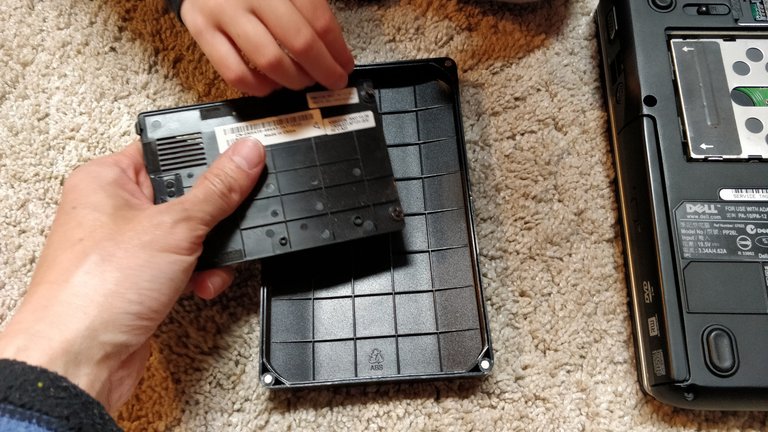
So, you can see the metal pry/shiv come into use getting these access hatches off. The screwdriver is magnetic, so you can get some traction on the screws to try and help pull up the panel, but generally the screw falls out rather than pulling out the panel. So, you need to have something to shiv in between the panel and backplate... and this tool is perfect, thin and sturdy... although, it is made of metal, so you do need to take some care if you don't want to scratch a surface. In this case you have no need to be careful as it is housing and not a screen!
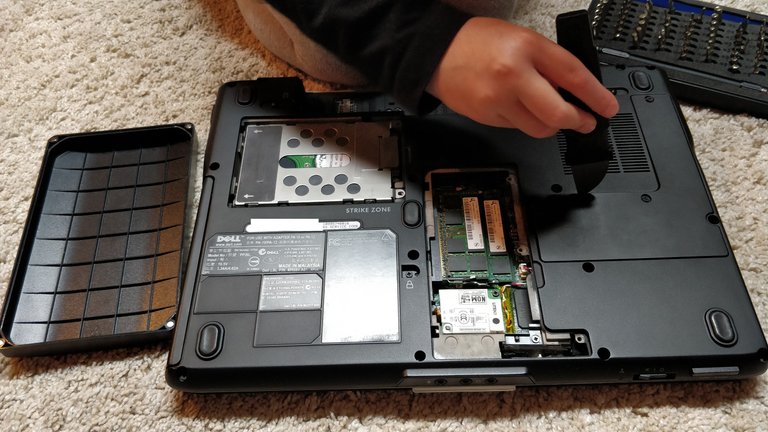
So, here we have the back of the laptop with all the access panels removed, but with the backplate still attached. In the top left, we have the 2.5 inch Hard Drive bay... with an old mechanical spinning Hard Drive of low capacity (compared to modern standards). This is the part that I do want to remove before sending the entire scrap to the e-waste/recycling.... I have no memory (haha...) of what is actually on the hard drive, but it is better to be safe than sorry!
In the middle, you have the RAM sticks (two in a dual channel configuration) on the top and beneath that, the Lite-On module (I think this is for the CD/DVD controller). Finally, on the right... you have the copper heat-sink that covers the CPU (an old Centrino setup, I think it was one of the old Core Duo Intel chips) and wicks away the heat to the grill assembly in the far right (with the fan blower to the left, blowing outwards).
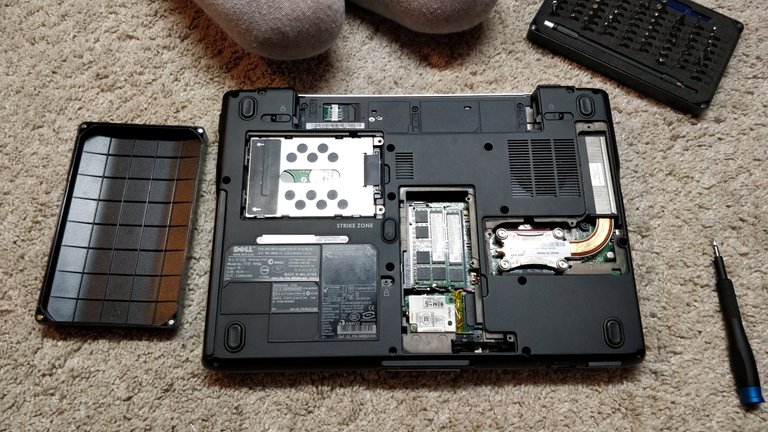
Now, it is interesting to note that all of these things are within easy user access... you only need to unscrew the access panels... this was something that was much more common with older laptops, however, in the pursuit of thinness, OEMs have had to remove a lot of that accessibility to achieve a more integrated design. Still, for nerds like me, the accessibility and repeatability of internal components is always a consideration in the computers that I purchase for myself.
Popping out the RAM modules is easy... remember the days when they weren't soldered in place! From memory (ha ha...), I had bought the lowest RAM configuration from Dell for this laptop and had just installed my own RAM sticks. An easy way to get better performance and save cash! I ended keeping these... despite the fact that the likelihood of requiring SODIMM sized RAM sticks of decade old vintage being relatively small... almost zero!
Busting off the speaker grill on the top side of the laptop reveals the speaker components as well as some of the display cables and also the Wifi antennae.

Using the pry-tool, we levered out the keyboard. Normally, this is something that you really want to avoid doing at all costs as the keyboard ribbon (under the keyboard) is quite easy to break (or disconnect accidentally...). Even if it isn't broken, it can be hard to place it back without accidentally squashing it (and breaking it... ) or having a weird lump under the keyboard.
That said, some manufacturers have their RAM modules (or other components) accessible only via the keyboard side of the motherboard... which means this is a necessary, tedious and annoying step to accessing those internal bits.
However, we are destroying this laptop... no need to be careful for once!
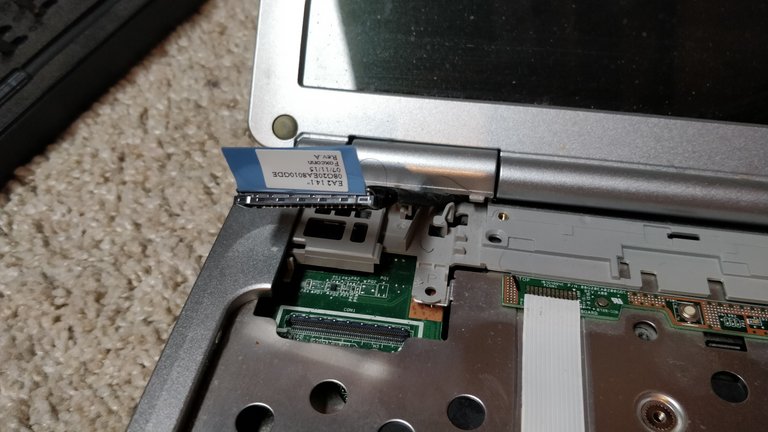
Disconnecting the display and Wifi radio antennae means is a simple matter of unplugging them from their respective motherboard headers...
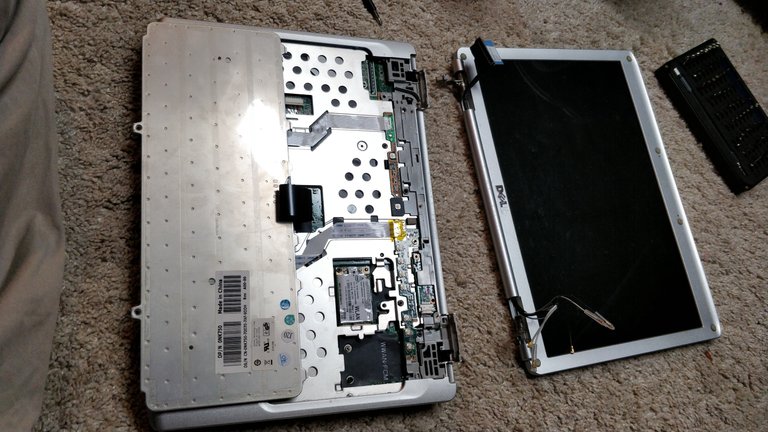
... which allows us to properly decapitate the laptop and detach the screen half of the clamshell. Now, if you were replacing the screen (as I was briefly tempted to do...), you would be opening up the screen housing and sliding in a new panel. But not today!
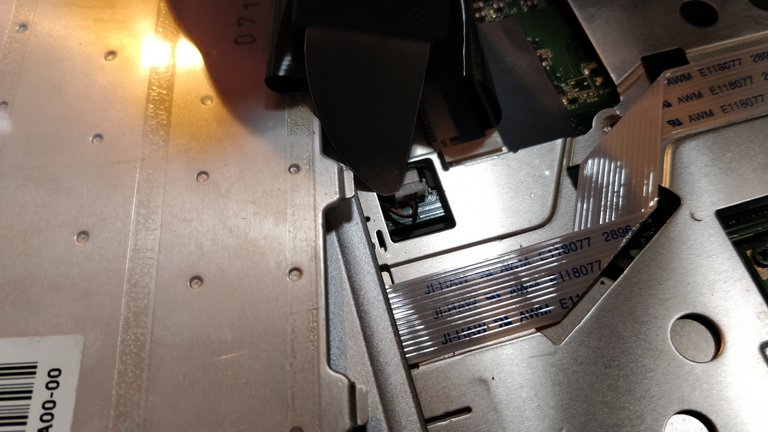
Now, you can also see that we had not yet disconnected the keyboard and mousepad ribbons, the white wide strips running down the middle of the non-display half of the laptop.
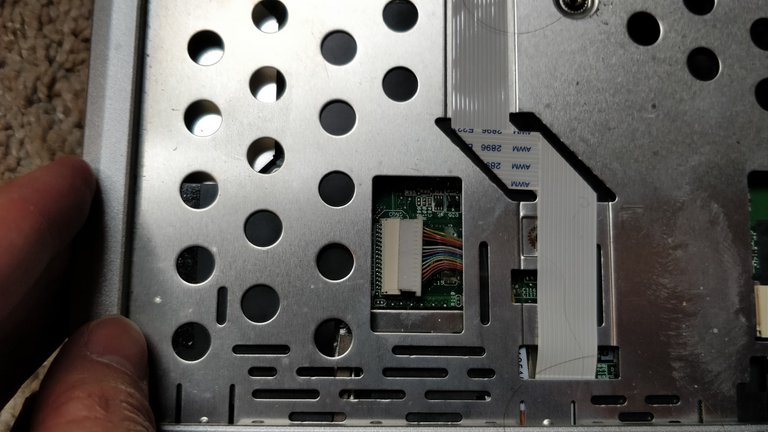
... you can see how finicky they are! Hence, my overwhelming reluctance to touch them if I was just repairing and not destroying a laptop. They have a nice little twist that packs them under the keyboard, but the ribbons themselves are really very delicate. At the bottom, you can see them feeding in, under the the metal hatching then folding back to connect to the header in the middle of the photograph.
You can see that that isn't the sort of thing that you want to replicate by disconnecting and pulling out the keyboard and mousepad ribbons. So, the cardinal rule of laptop disassembling... if you want it to work again.. NEVER NEVER... disconnect these ribbons! Leave them in place, and work around them... but just leave them connected!
... but I'm not aiming to have a working laptop afterwards... so, we disconnected the ribbons from the motherboard header!
So, this is the back of the keyboard tray... yep... you don't want to try and do this again!
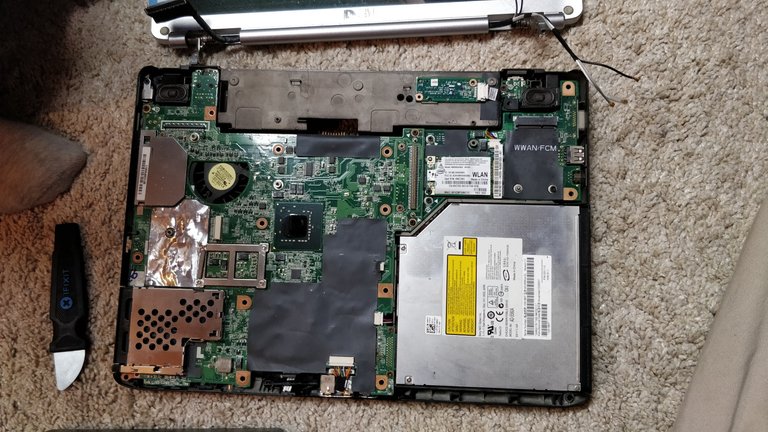
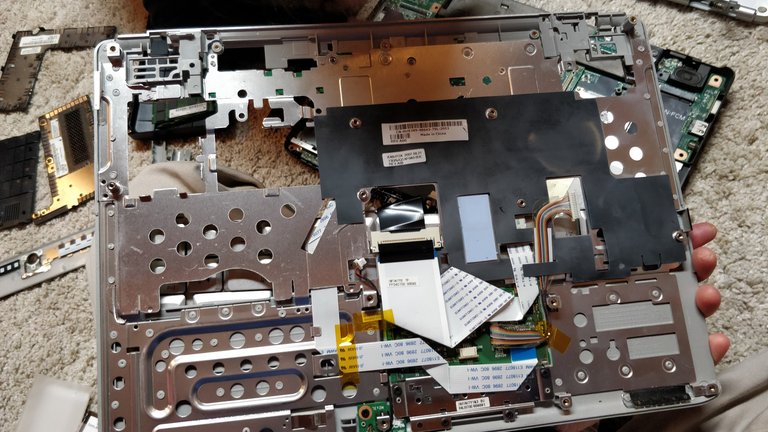
... with the keyboard tray disconnected fully and out of the way, we can see the other side of the motherboard. Most of this is what we had already seen on the other side... but there are some bits that weren't easily accessible on the opposite side. The CD/DVD tray and module is on the bottom left, and the WWAN/WiFi modules are just above that... those were the bits that we had disconnected the antennae from earlier in the dismantling.
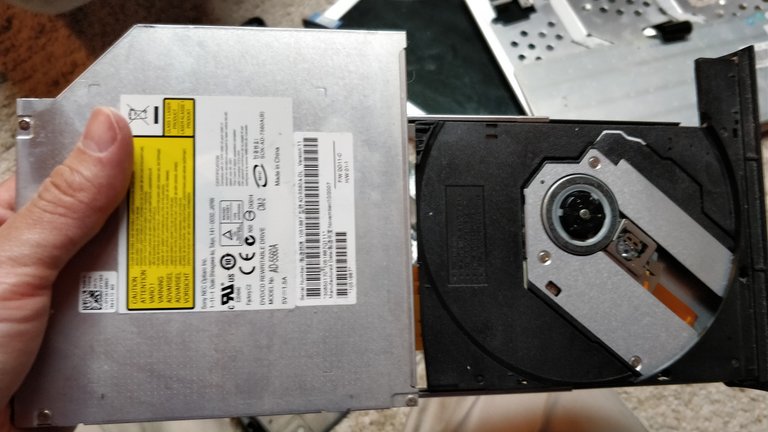
... so a CD/DVD tray... one of these things that have existed long past their prime... you generally won't see one of these in a laptop build anymore, as they just take up too much space that you can better use for other things. Does anyone use CD/DVDs anymore? I have one on one of my desktops... but that is more for emergencies and it is a bit of an old build as well. For real emergencies, I have a USB connected external tray... as well as a floppy disk drive!
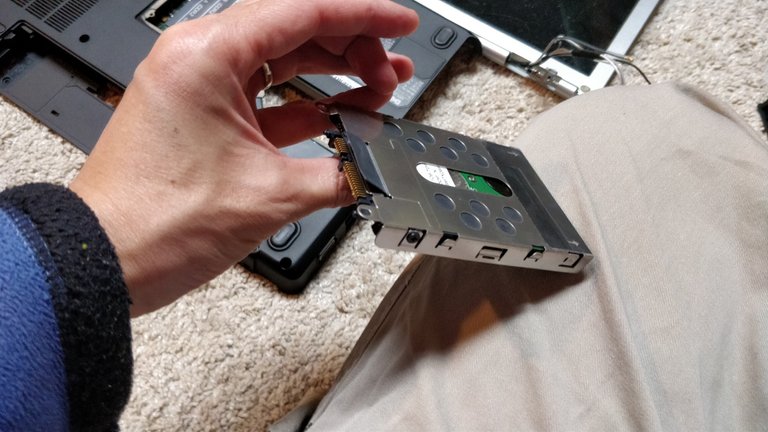
So, the elusive HDD tray which was the target of the dismantling and evisceration of the laptop. Of course, there was a much easier and less destructive way to get to this little guy, but that wasn't the point of the excercise!
My daughter and I had a great deal of fun breaking this machine up, and seeing what all the little bits and pieces did! I'm just thankful that we don't have to put it back together again!
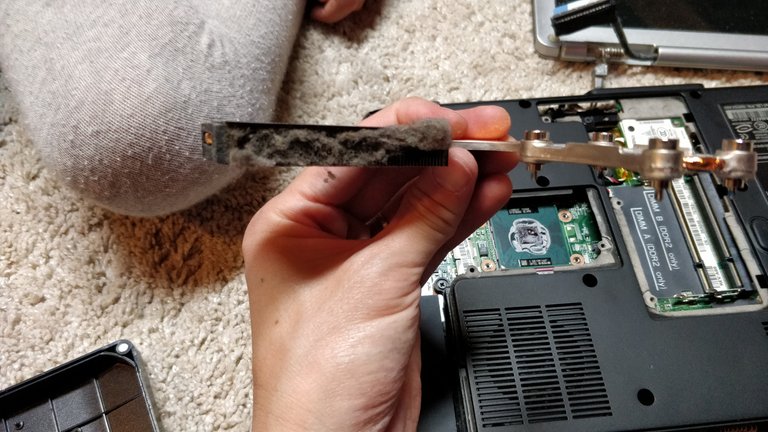
... clean your fan grills people. Overheating is a real cause of laptop death!... speaking of which, I need to open up my wife's laptop to do this! I have no idea what she does with her laptop, but they always seem to attract dust internally at about 10 times the rate of every other machine in our house!


Account banner by jimramones


lol the “destructive” side won hahahahaha
Anyways it’s always nice to disassemble those old jewels and keep those parts, they may be useful of course and you never know when.
Old machines that accomplished their mission despite our bad behaviours many times, exposing them to dust hence high temperatures and long hours of work maybe downloading not so legal stuff or making calculations that where not intended for them...
R.I.P old Dell Inspiron 😭
Haha... it is so rare that we can have the okay to completely destroy something, so it was nice to indulge that side! I did feel a bit bad, it was a machine that was pretty useful when we were using it!
Cool DIY project and indeed the dust is the cause for many laptop deaths and is why we never charge at night. I am afraid that something will happen
Have a great summer time holiday as af yesterday we have holiday aswell
Thanks, have a great holiday! School finished last week for Den Haag... we have a nice summer to look forward to!
Boxes of cables indeed! I've taken to hanging mine so I can find the ones I need quicker. Of course, I might need an obscure one maybe once a year, but when the time comes, I have it!
Ha... great idea! That way the don't get tangled as well!
Interesting!
I have an old laptop but I want to get it refurbished for when we are traveling.
I'll have it done by professionals though for I'm not familiar enough with the workings of the computer.
Great lesson for your daughter - thanks for sharing!
Definitely worth it... it is all too easy to mess these things up and then be down a laptop if you don't know what you are doing!
That is such a great idea! Thanks for putting this all together for us too. A very informative post, as always.
Thanks, glad you enjoyed it! It was a nice way to indulge a child's (mine and my daughter's) curiosity!
What a fantastic learning experience that must have been for your daughter! Bravo! 😃
It was a great time that we had destroying the laptop to learn how it worked!
Wow! That's so cool that you are teaching your daughter that early. If ever I'd have a kid, I would teach that too. Gotta start em early hehe. Thank you so much for sharing us a very detailed experience. After seeing your fan grill, it makes me want to open my gf's laptop too.
Stay safe always!
Take care opening it up like this, if you just want to clean out the grill... compressed air blowing out of the laptop would work best. Doing like this you will need to be careful with the copper heat sink and also clean and repaste the CPU/GPU surfaces.
This post was shared in the Curation Collective Discord community for curators, and upvoted and reblogged by the @c-squared community account.
If you are a community leader and/or contest organizer, please join the Discord and let us know you if you would like to promote the posting of your community or contest.
@c-squared runs a community witness. Please consider using one of your witness votes on us here
Thank you for the support and curation!
Cool adventure! I always love taking apart machines.
How do you clean fan grill?
For this particular laptop (and most others), you need to find the copper heat sink that leads to the grill (see the photo in the post). Unfortunately, it isn't easy to do properly... perhaps it is possible to use some compressed air to blow the dust out (stop the fan from spinning as the air might spin it too fast).
To do it properly, you need to remove the whole sink array... which means removing the sink from the CPU/GPU... carefully, as it can bend which will render it much less effective. That means you can remove it like I have and just clean it properly with a cloth.
However, this means that you need to replace the whole heat sink, which means that you will need to clean the thermal surface (heat spreaders) on the CPU/GPU interface and then repaste with thermal compound.
You probably should do this anyway if you know how, as the factory applications can be a bit too thick and use bad quality thermal paste.
It sounded easy at first.
Once you do it once (or twice...) it is easy enough to do... if you have the time and patience!
Ooo I am sure this was so much fun! Great activity to have with a kid😊
It was heaps of fun! It's always much more fun when you don't need to be careful as you know that it doesn't need to be put back together again!
Oh I admire your ability to dismantle this! No wonder you are so good with this, music is as complicated as a laptop, even more lol.
I think your daughter loved this. Such a quality time! You set an example of how parents should spend their time with their kids. Very constructive! Congratulations, I can see you have a good time management. You make time for music, for kids, for yourself. Good job!
We have a decent work-life balance... something that I've been really happy about... although, with COVID... there is much less work... still, that does leave more time for family, but still... some work would be nice before it gets too tricky!
Family time is always the most important! I am sure things will work out, they always do
GREAT POST!!!
Thank you for publishing it to our community feed!
Compliments of the PHC founder @jaynie...
We have tweeted, upvoted and reblogged it for you.
❤ MWAH!!! ❤
JOIN OUR DISCORD COMMUNITY
SUBSCRIBE TO OUR COMMUNITY FEED
FOLLOW US ON TWITTER
Thank you for the support and curation!
Great way to learn your daughter how to be careful with a laptop. When she knows what it inside she'll understand a lot better how it works. Ah the dust ... it IS a real problem for many laptops for sure, and many users also have no clue about how to clean it. I think there should be proper instructions when you buy a laptop about how you have to do your maintenance.
I think most people shouldn't really mess around with the insides of the laptop... a proper clean (removing, cleaning and repasting the thermal surfaces without damaging the copper piping) is asking a bit for trouble! However, it is more than possible to use a can of compressed air to clean out the dust (although, you need to be careful not to damage the fans with the speed of the air).
I agree with you on that ... but most people don't even know that it's needed to clean the dust from the inside. And that's where it often goes wrong.
Thats very cool, it takes me back, well I didn't have a parent who knew anything about tech. We grew up with not much but getting my first desktop and ripping it apart putting in new parts I could get and messing around with it I had so much fun. I just couldn't share what I learned with anyone lol
Eventually I was able to monetise it after figuring things out, I would fix other peoples computers or get them the software they needed for a fee. It became a profitable little business in my high school days.
I think you've giving your kid a really good primer for whats to come, when they're willing t break open things and learn, that's when they learn the best. I mean this eventually lead me into coding and well living off of what I learned back then
Yes, the curiosity that you have when you take things apart to see how things work is something quite special! It's great that you were able to harness your curiosity into a way to make a living!
That is so incredibly cool that you shared that adventure with your daughter. WoooHooo.
I am reminded that I need to take the hard drive out of an ancient HP (with a very much upgraded HD) and make it a thumb drive. It's on my list/
I have a $1000 dollar box in my house (it's actually in the living room. It's an old wooden shotgun shell box that is on display) that is just loaded with my failed attempts at putting a usable stereo on a motorcycle. I'm really sure what not to do. Wireless earbuds seem to be the current answer...
Haha... the endless list!
Wow, an actual open air stereo on a motorcycle??!?!?... My brother had the idea to try and do something similar, but in the end opted for wireless audio as well.
!discovery 30
Thank you for the support!
you are welcome!
This post was shared and voted inside the discord by the curators team of discovery-it
Join our community! hive-193212
Discovery-it is also a Witness, vote for us here
Thank you for the curation and support!
Wow, so beautiful! :) I hope to do it with my children one day too!
It is a great way to spend time with your kids... indulging their curiosity!
Anytime we get to spend some personal time with the kids is time well spent. It almost doesn't matter what you're doing. That said, I may have to return to this post if I ever endeavor to dismantle one of our laptops. 😁
Oh... don't use this as template for dismantling a laptop if you want to put it back together again. If you want a non-destructive method, you really should look for a guide on iFixit. There are specific ways and orders that you should remove things... I didn't need to preserve the laptop, so I was pretty brutal!
Lol. I wouldn't have the skills to put it back together. Maybe to destroy the hard drive though. :)
I hate that most modern laptops are difficult or impossible to work on. What is even worse is that in the effort to make them ever thinner and lighter, you usually don't get full performance out of those high end cpus and gpus. In most modern laptops, they throttle if you push them too hard because of heat or even current issues.
Yep... all in the pursuit of thin and light! Still, there is a bit of a re-balancing towards efficiency over power and that is helping a bit!