Hello friends!!
Hola Amigos!!
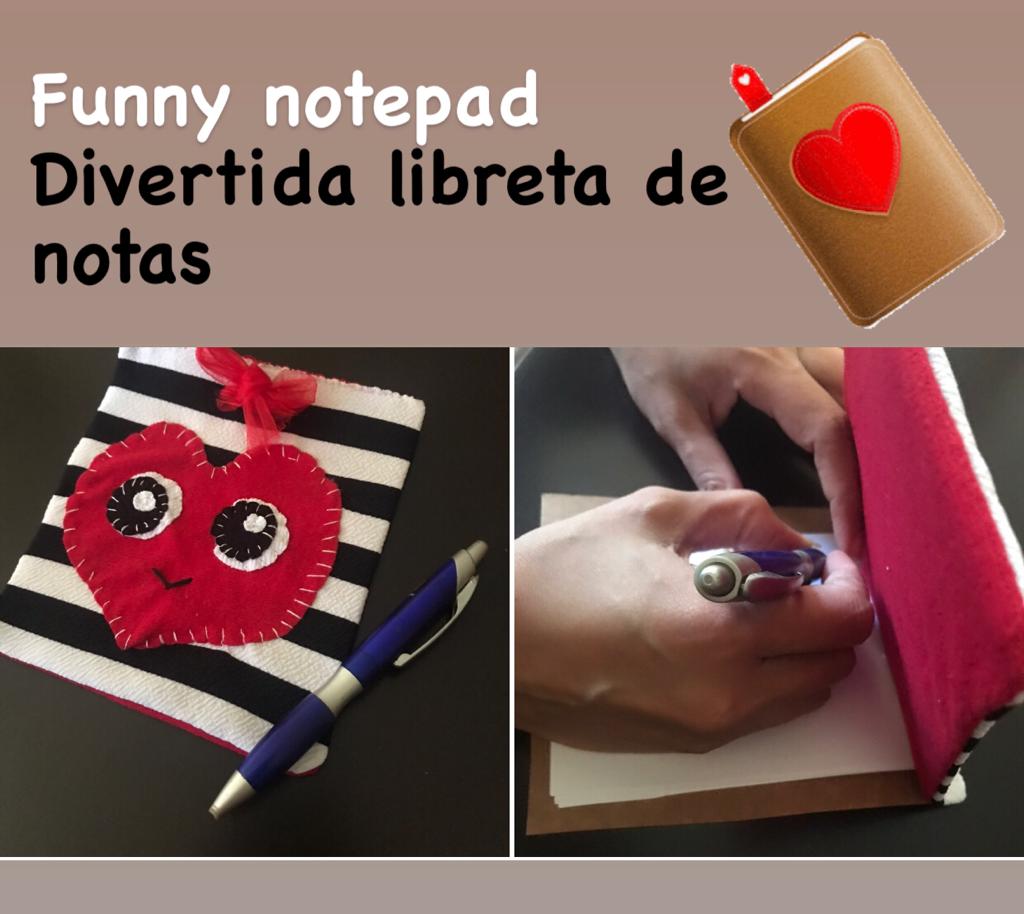
Sometimes we need to write down a message and we do not have on hand where to do it. Today I want to show you how to make a beautiful, practical and fun notebook, with few and simple materials.
En ocasiones necesitamos anotar algún mensaje y no tenemos a la mano donde realizarlo. El día de hoy quiero mostrarles como elaborar una hermosa, práctica y divertida libreta de notas, con pocos y sencillos materiales.
They will need:
Necesitarán:
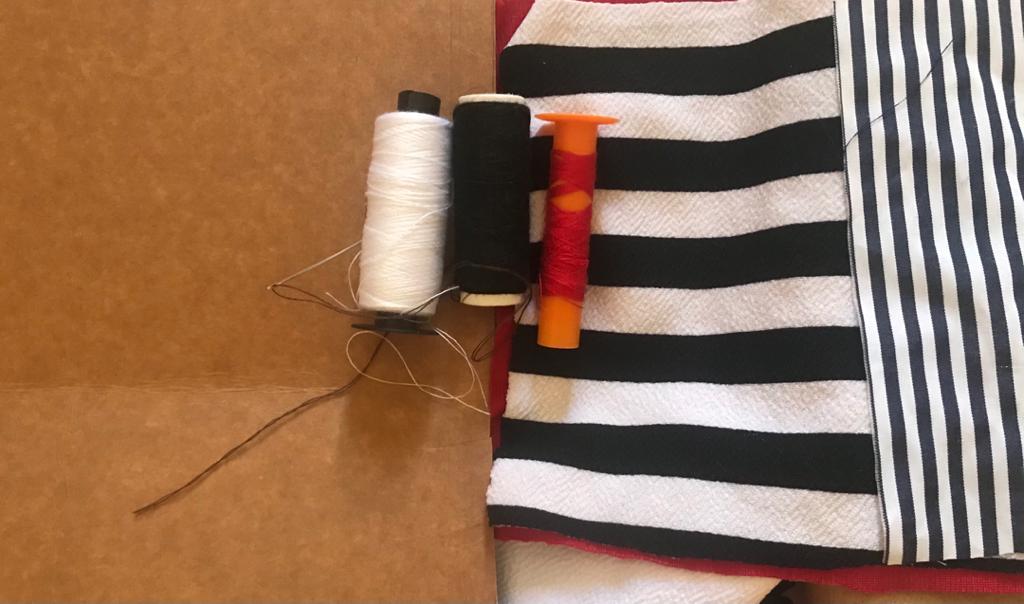
•Paperboard.
•White sheets.
• Red, patterned fabrics.
• Black and white patchwork.
•Headband.
• Needle and threads.
•Scissors.
•Cartón.
•Hojas blancas.
•Telas roja, estampada.
•Retazos blanco y negro.
•Cinta.
•Aguja e hilos.
•Tijera.
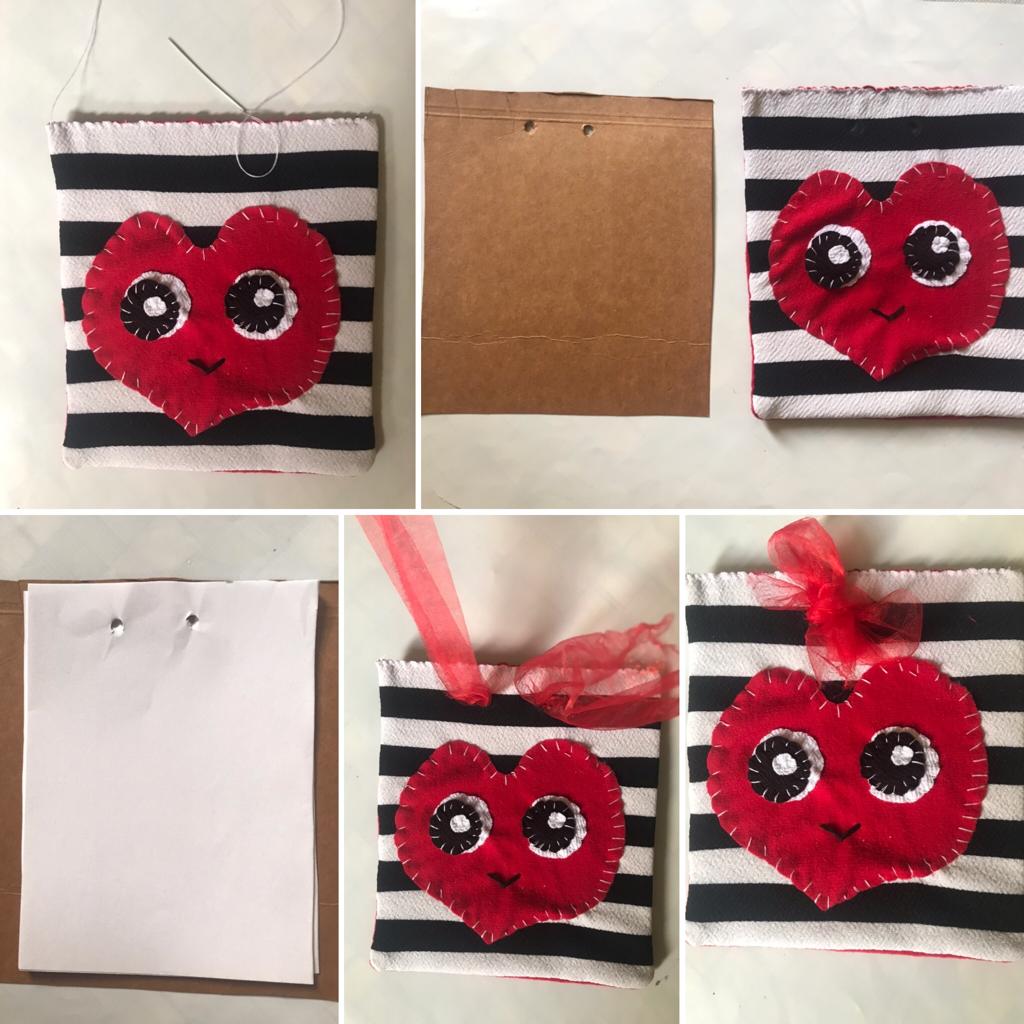
We start by cutting two rectangles 16 centimeters long and 15 centimeters wide out of cardboard. Then we cut rectangles with the same measurements in the printed fabric and in the unicolor; cut the figure of our preference in the fabrics, I select a cute design of a heart.
Iniciamos cortando en un cartón dos rectángulos de 16 centímetros de largo y 15 centímetros de ancho. Luego cortamos en la tela estampada y en la unicolor rectángulos con las mismas medidas; cortar la figura de nuestra preferencia en las telas, yo seleccione un lindo diseño de un corazón.
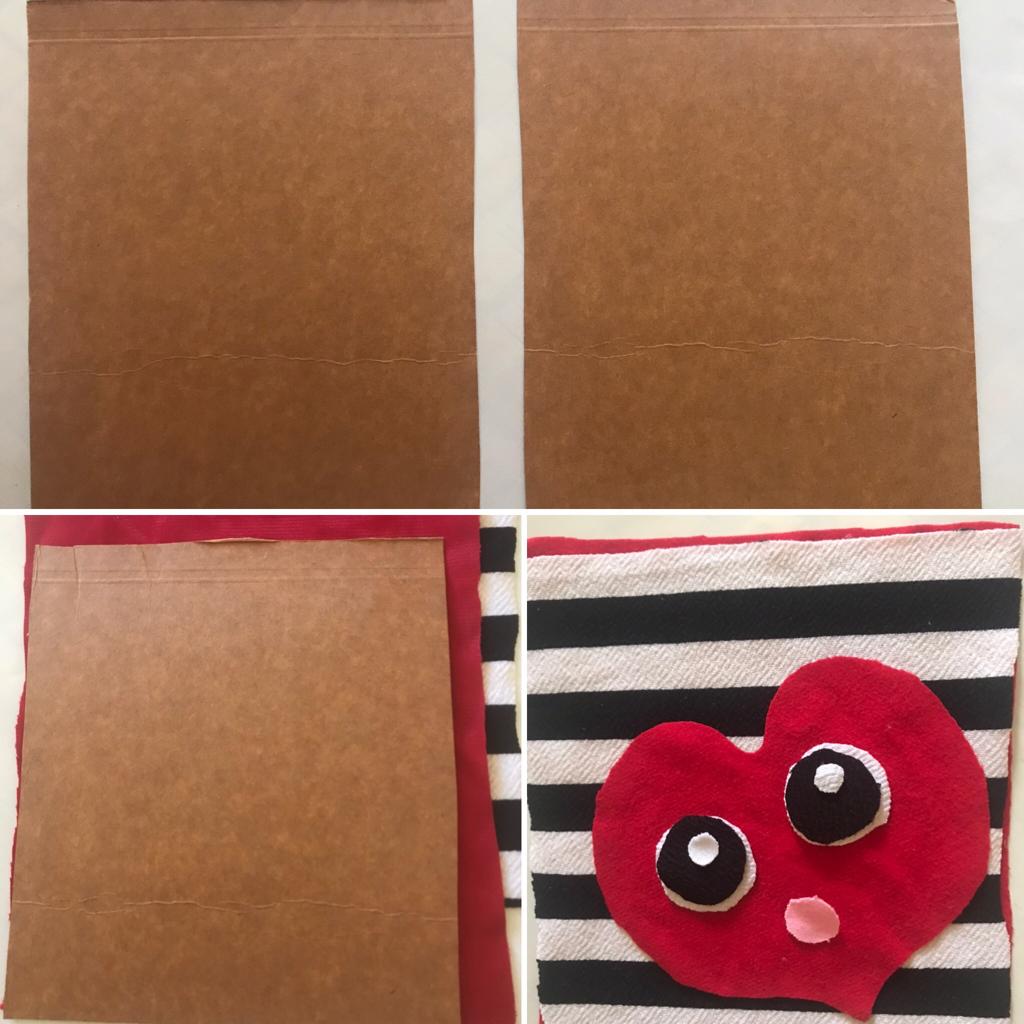
In the stamped fabric we sew each of the parts of the design, as shown in the figure, at the end we join the fabric with the design and the unicolor rectangle, we sew on the reverse side to the sides and at the bottom end, we turn the seam and we put one of the cardboard rectangles inside the cover with the design.
En la tela estampada cosemos cada una de las partes del diseño, tal como se observa en la figura, al terminar juntamos la tela con el diseño y el rectángulo unicolor, cosemos por el reverso a los lados y en el extremo inferior, damos vuelta a la costura y pasamos unos de los rectángulos de cartón dentro de la funda con el diseño.
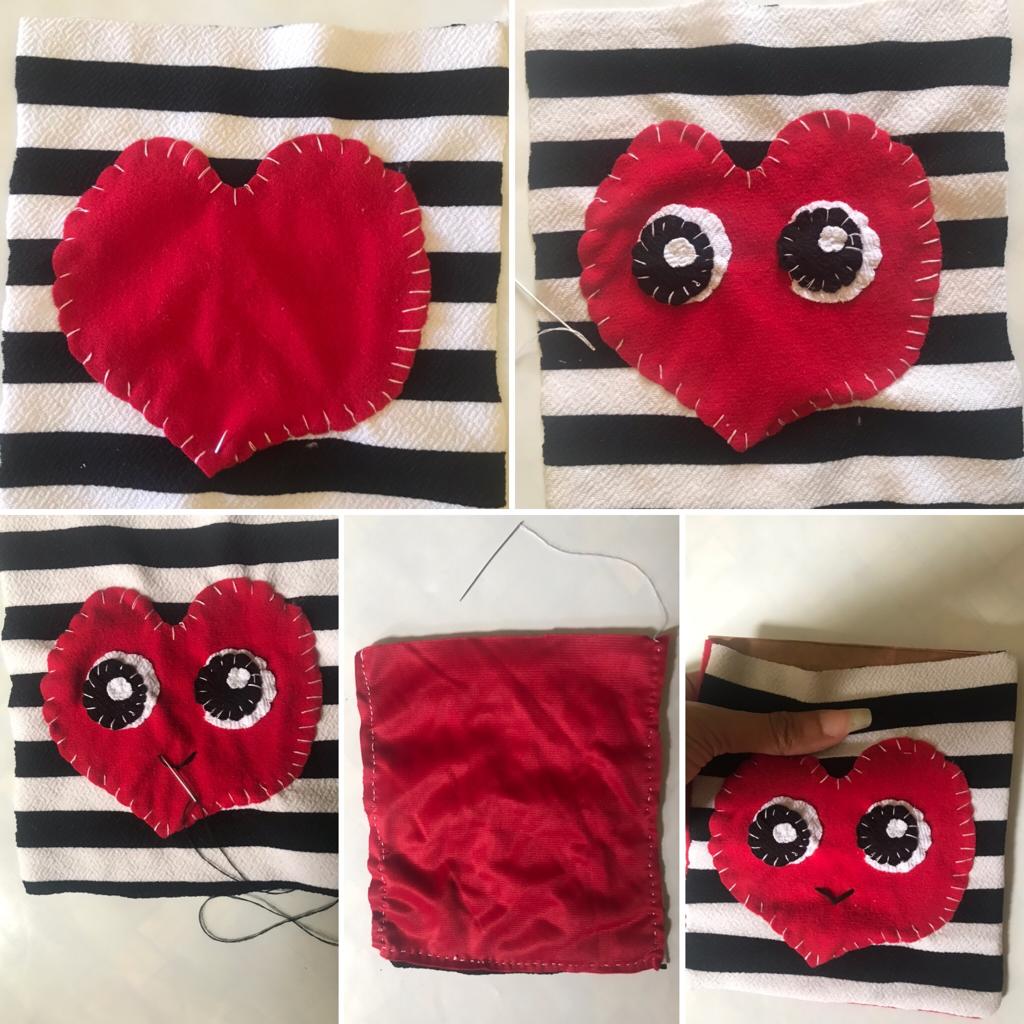
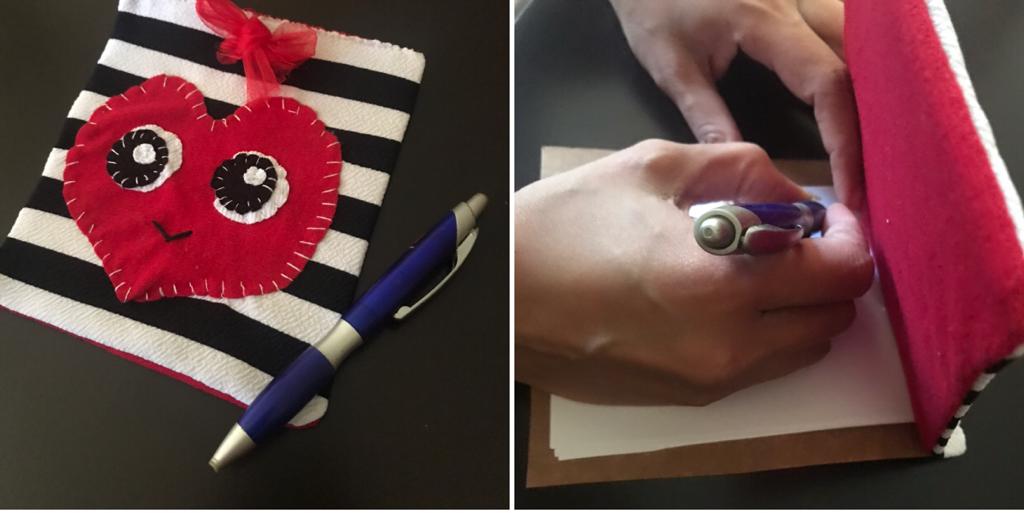
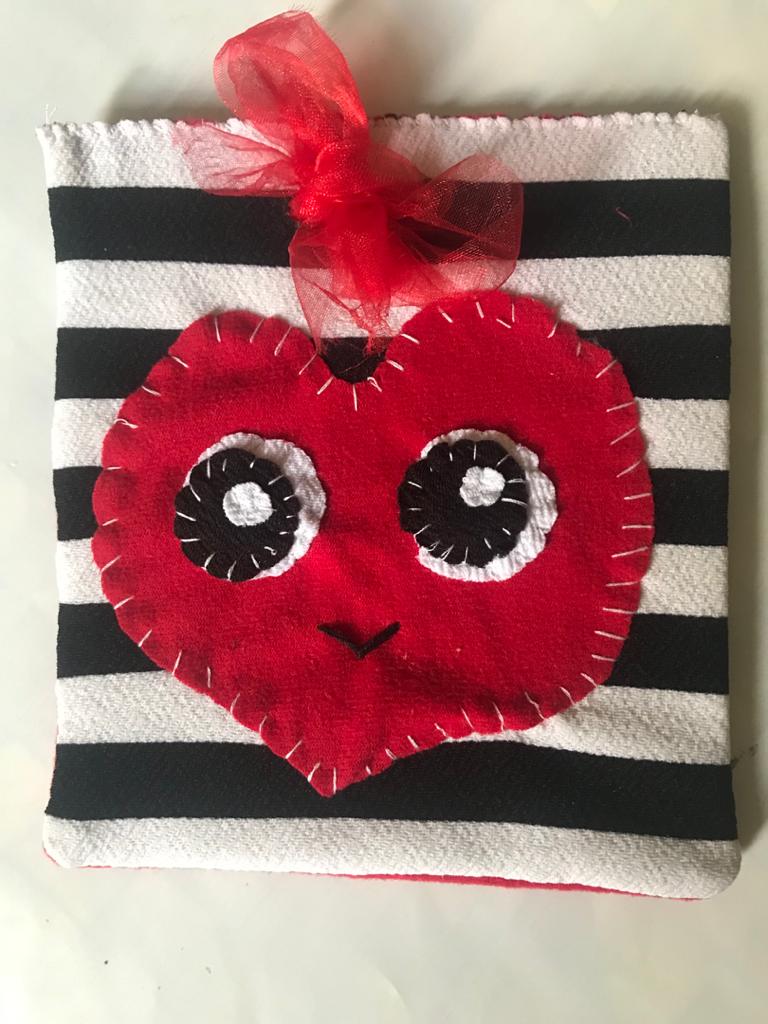
We continue sewing the upper end of the cover, we mark 2 holes as seen in the figure, in the upper part of the cover, in the other rectangle and in the sheets that we will place inside. We open the hole. We position the rectangle, the leaves and finally the beautiful lid; to finish we pass the ribbon through the holes and make a nice bow. So we are done.
Continuamos cosiendo el extremo superior de la funda, marcamos 2 orificios tal como se observa en la figura, en la parte superior de la tapa, en el otro rectángulo y en las hojas que colocaremos en su interior. Abrimos los orificio. Posicionamos el rectángulo, las hojas y por último la hermosa tapa; para terminar pasamos la cinta por los orificios y realizamos un lindo lazo. Así hemos terminado.
Friends, if you need to have on hand a useful tool that allows you to make pending notes or other important information, this easy, simple and beautiful notepad is a great and fun idea.
Amigos si necesitan tener a la mano una herramienta útil que les permita realizar notas pendientes o alguna otra información de importancia esta fácil, sencilla y hermosa libreta de notas es idea genial y divertida.
Until next time.
Hasta una próxima oportunidad.
Muy bonito bella
That's really neat! It's easy to identify, too. Personally, I am constantly losing and misplacing my notepads. That one would be easier to keep track of due to the uniqueness of it. Nice!
THANK YOU VERY MUCH !!!!