I haven't talked about it much, but a new chicken tractor has been on my wish list for a long time. My first chicken tractor is in need of a few repairs, and is a bit too heavy to really move around frequently on this hillside. I've been wanting something lighter and more maneuverable so I can let the chickens 'roam' around the yard, while still keeping them safe from predators, and my gardens safe from the chickens.
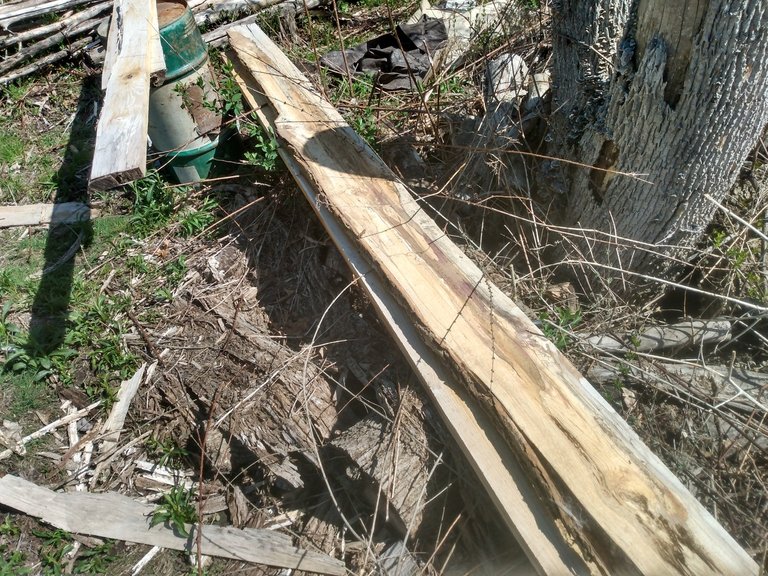
I didn't have any fancy plans to follow this time, just an idea of what I wanted, and a bunch of extra boards from running the new sawmill. My minimum cut height is about 1.5", so every log I cut up leaves me a nice board at the end, approximately 1.5" thick. I'll use these to make lumber for framing the new chicken tractor.
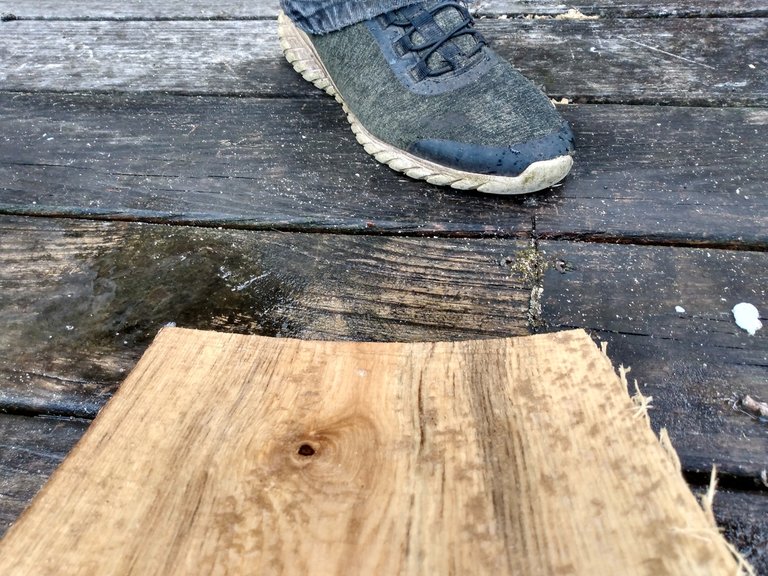
My first step is to cut the boards to the desired size. I believe that 1.5" x 1.5" will support the weight of this design, and I want to keep all the board dimensions as small as possible, to keep the weight down.

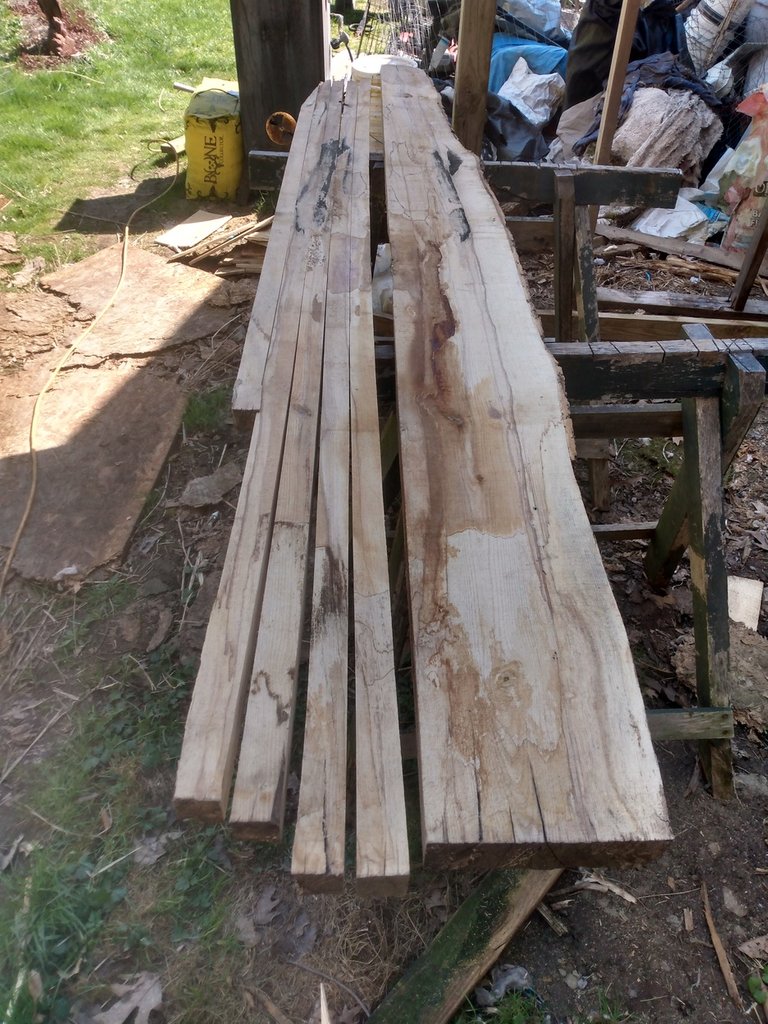
Next, I'll square up all the ends on one side of my lumber, taking care to remove any spots that are split or rotted. It's important that all the ends of the lumber are good and sturdy, because I'll just be screwing the ends together when I build my frame.
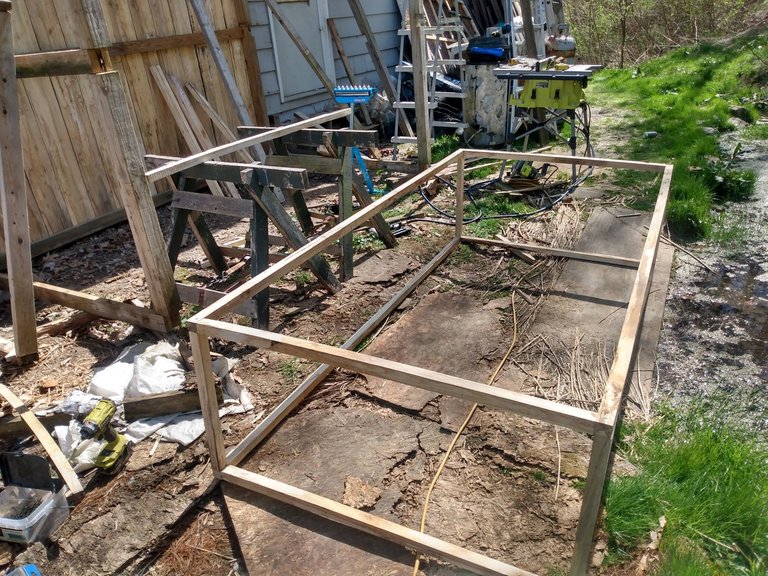
After I have one end square, I begin cutting the lumber into the dimensions I'll need for my frame, and assemble that. This new chicken tractor has an 8'x4'x2' base. Half of this will be enclosed with wire, and half will have a roof and siding with perches inside, so the chickens can get out of the sun or the rain when they want to.
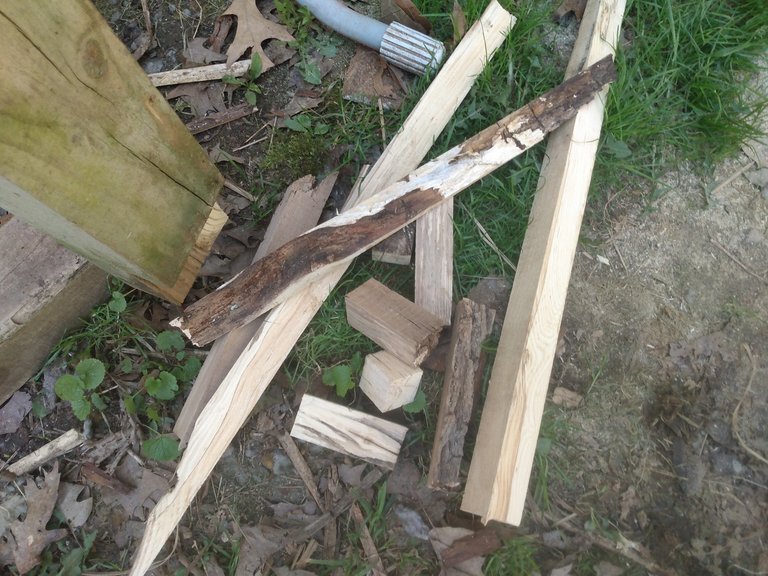
Because my smallest board length is 21", all of my scrap pieces are smaller than that. The small pile above is all the scrap lumber I had from the framing boards. This will make nice kindling for our first outdoor fire this year.
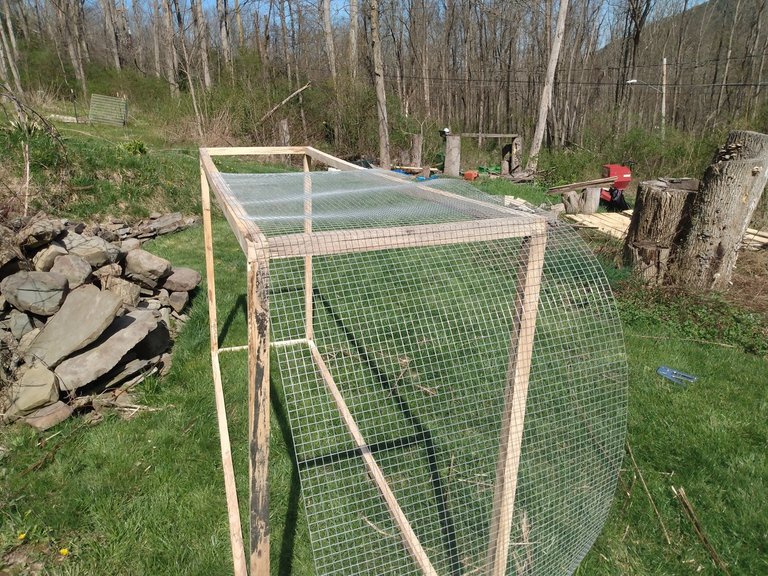
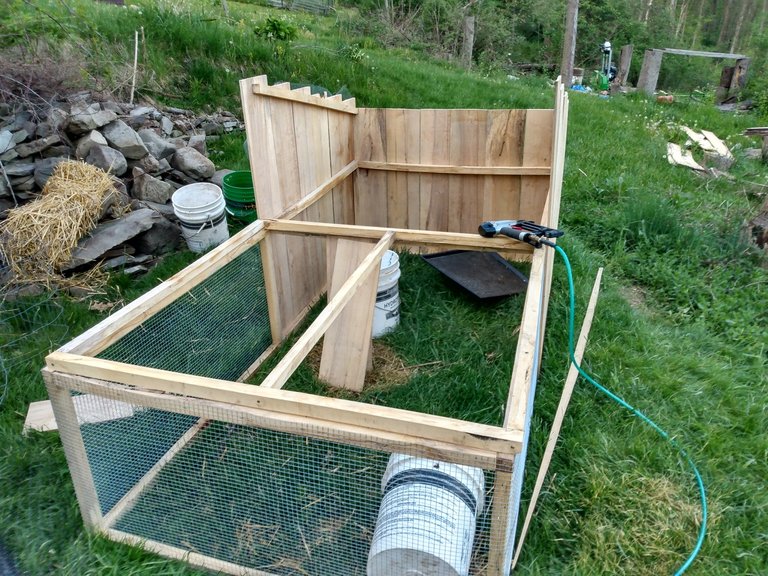
Some predator, likely a weasel, was managing to get inside the welded wire fencing I had on the old chicken enclosures, so for the new chicken homes, I picked up some wire mesh with .5" square holes. I figure that anything that can fit through the holes in this will be small enough that the chickens can eat it.
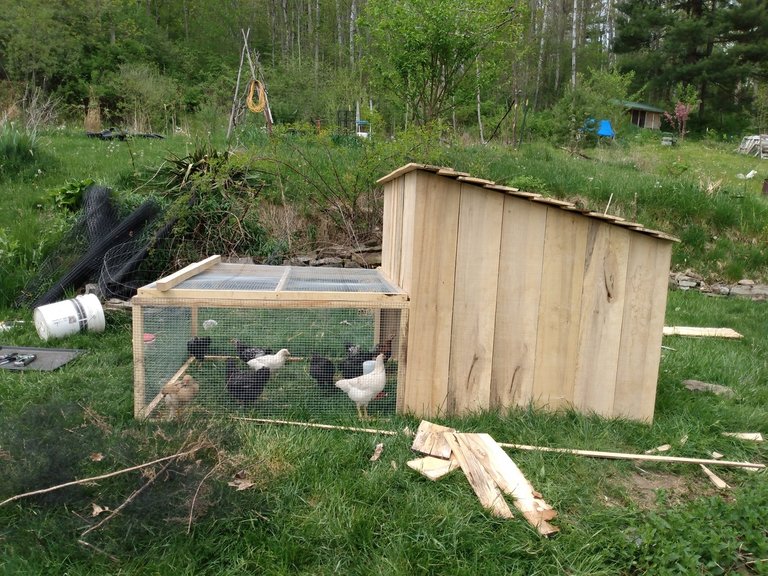
The chickens were getting impatient to try out the new space, and I had to saw up some more lumber for siding, so I threw some deer netting over the unfinished half. This worked well enough to keep the chickens in so they could enjoy the outdoors while I slaved away in the hot sun trying to get their new temporary home built.
Part of the delay in getting the tractor finished was that the sunny days had caused some serious warping and cupping on the siding boards that were on top of the pile. I had to wet down the cupped side, then turn the bowed side toward the sun, and wait for them to flatten out enough that I was able to run them through the table saw.
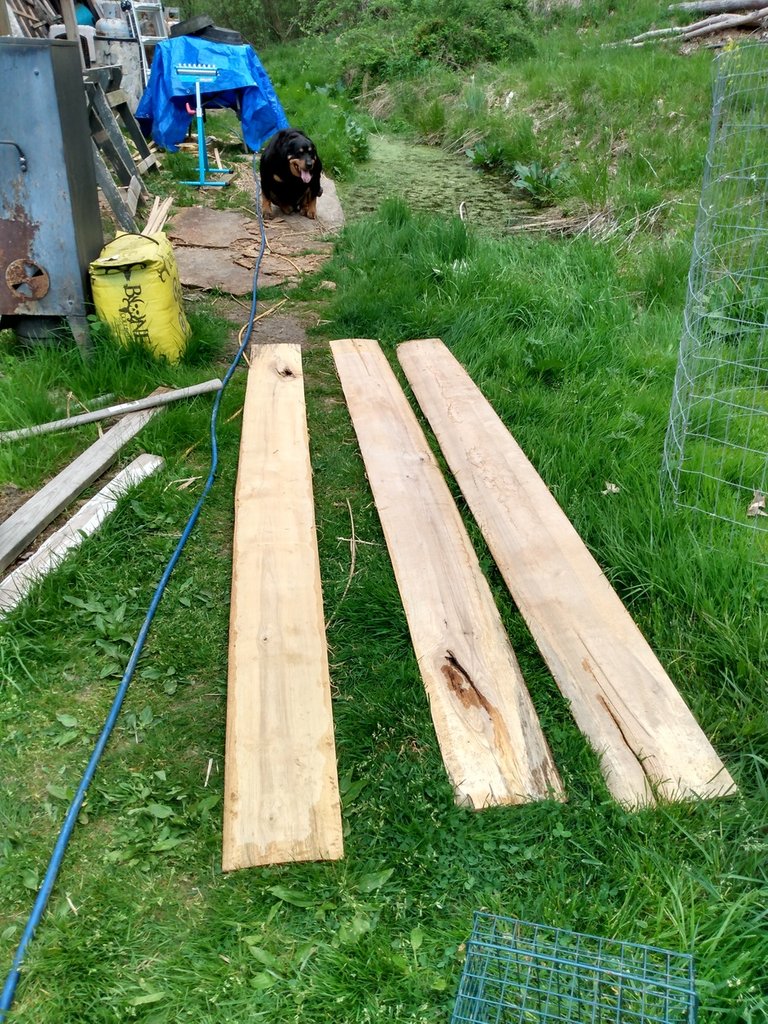
It was just these three boards that were needing the extra attention, and by the time I was done cutting up all the other pieces, they had flattened back out well enough. The dog tried really hard to 'stare' them straight for me, but I don't think it helped. 😁
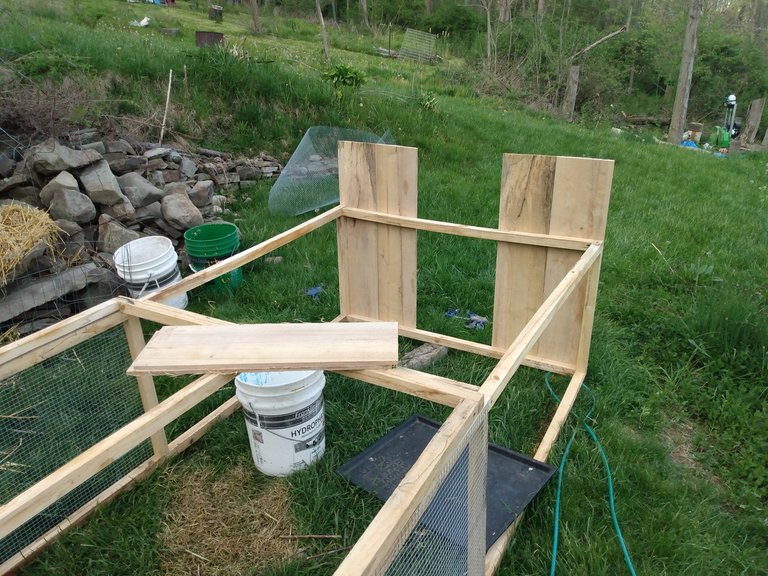
The enclosed half will be 4' tall in the middle of the tractor, and taper down to 3' tall in the back. I'll fasten two perches inside that run the entire 4' width, one at 1' high and the other one at 2' high.
I add a little extra 'framing' on each side and across the front and back, for attaching the roofing to. I used spalted siding lumber for the roof, just for now. I'll eventually pick up some steel roofing to cover this with, to help keep it low maintenance. The wooden roof has already warped, and leaks a little in a hard rain.
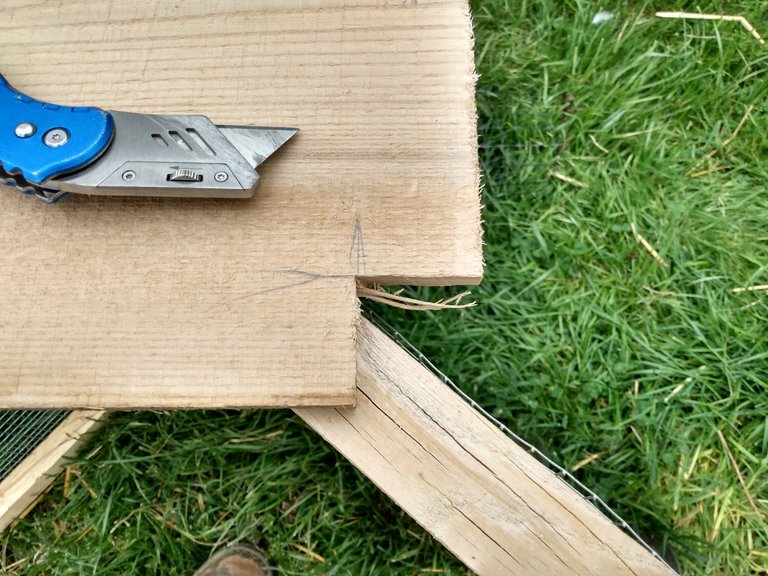
The only fancy cuts I had to make for this whole project were two little notches, at the bottom of the outside siding boards that I used on the face of the enclosure in the middle of the tractor.
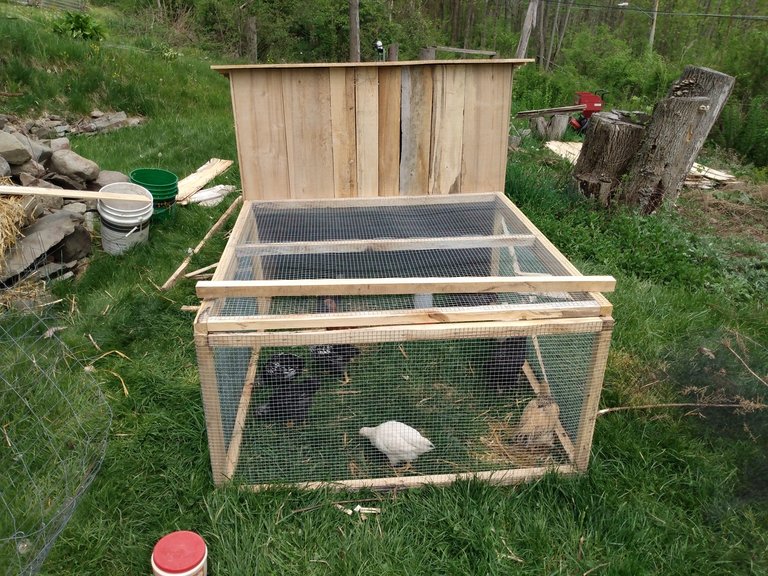
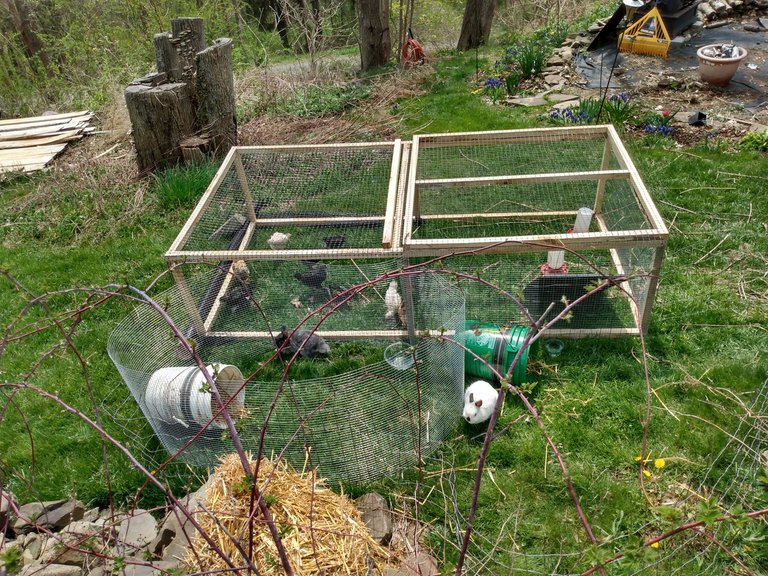
Here you can see it basically finished. The screened top opens up, allowing me to climb right inside to fill up food and water dispensers, or to round up the chickens when it's time for them to move to the new coop. For now it just rests on top, but I plan on adding hinges later. I may also add a door that allows me to lock them into the enclosed part at night, but I hope that won't be necessary.
I have two wheels fastened to a 2"x4" board, a little over 4' long, that I can slip under the frame on the enclosed end. This allows me to move the tractor around really easily on flat ground, but I still need help to move it up the steeper hills. I could probably fix this with some better wheels and handles, but this will work for now, while I finish the new coop. Once that is done, I'll put the finishing touches on the new tractor. In the future, this will probably be where I grow the birds that I intend to slaughter.
My only cost for this was really the wire mesh, which was about $40. The cost of the screws, staples, and wire nails used to hold it together, as well as the gasoline to run the sawmill, totaled well under $3. Used chicken tractors sell pretty fast in the local classified ads, and I may build one or two more of these to sell, to cover the cost of the metal roofing I want to buy.
Well friends, it feels like an abrupt end, but I guess this post will end here. These always feel so much harder to put together when I'm in 'work mode'. I have some time off for the holiday weekend, and I really hope I can get my head in 'writer mode' long enough to get a few posts arranged and scheduled for the summer.
Wish me luck, and if you don't hear from me soon, you'll definitely hear from me later!
We started out with a wheeled chicken tractor, but even with a fairly level area it can get quite awkward to move around and we'd just end up lifting it everywhere, anyway. It probably didn't help that we don't have much space. We ended up dismantling it and building a smaller, lighter one without the wheels. We still need two to move it most of the time, but it's much easier to do.
This one moves easily for me on flat ground, but the size does still make it a chore to maneuver in tight spots. I will probably attach some lift handles to both ends of this, so that I can do a two-person lift with it during the difficult moves.
What a great post! My grandad had these on the farm when I was a kid, mostly in the orchard for keeping the brooding hens and chicks safe until they grew up. I never knew it was called a chicken tractor! Possibly not in the UK as I just heard them referred to as 'runs' but you're never too old to learn!
One we thing we do have a name for in the UK is the wire mesh, which surprisingly or not is commonly called 'chicken wire'! Makes sense!
Great post, the result looks fantastic and best wishes :-)
I'm always fascinated with the differences in language from place to place...
Here in the US, we call it a 'run' when it's a fenced in area that doesn't move. We also have chicken wire, but only use that term for the stuff with the hexagonal holes in it.
Thanks for the well wishes, happy I could take you on a little trip down memory lane!
No thank you, I come to read and this style of post is exactly what I enjoy reading. I love what you're doing there and wish you nothing but success and happiness :-)
Dear @paradoxtma, we need your help!
The Hivebuzz proposal already got an important support from the community. However, it lost its funding few days ago and only needs a few more HP to get funded again.
May we ask you to support it so our team can continue its work this year?
You can do it on Peakd, ecency,
https://peakd.com/me/proposals/199
Your support would be really helpful and you could make the difference! Thank you!
Looks pretty heavy to move frequently....
It's still kinda heavy to drag up the hill, but with the wheels under the enclosed end, they take all the weight.The wire end lifts very easily, as though it only weighs 10-15 lbs, and it's really easy to push on flat ground.
The uneven ground around here is more of a problem, as the long frame tends to drag going over the hills. A bigger set of wheels would help a lot with this. Ideally, I would get wheels at all four corners, then I could pull it around like a wagon.
Here's how we fixed the problem of moving:
https://steemit.com/homesteading/@goldenoakfarm/new-wheel-system-for-moving-coops
The wheels with the levers is something I had originally meant to try on this one, and may in the future. I don't have a problem with the wheels and axles bearing the weight... the entire weight of this chicken tractor is under 60 lbs.
One thing I like about the smaller diameter wheels is that with them, I don't need a floor in the chicken tractor. The space at the bottom isn't enough for them to get out, even when I'm moving it, and when it's on flat ground I leave the wheels in place.
When I do the repairs on the old chicken tractor, I will probably set up a wheel system for that more like you have in the link above. The wheels on the new chicken tractor came from the old one, but they were definitely too small for the old one, and practically useless on it. The old one weighs a LOT more, though, close to 200 lbs, and it would push those little wheels right into the mud.
We found the airless fat tires to be the best in high grass and mud. The ones with air rot out pretty quickly and go flat. But neither are cheap. :((
I've managed to salvage some airless wheelbarrow tires over the years that I'm hoping will do the trick. I'm definitely using airless, I've found that having a soft tire on these slopes can be disastrous!
Congratulations @paradoxtma! You received a personal badge!
Wait until the end of Power Up Day to find out the size of your Power-Bee.
May the Hive Power be with you!
You can view your badges on your board and compare yourself to others in the Ranking
Check out the last post from @hivebuzz:
Congratulations @paradoxtma! You received a personal badge!
Participate in the next Power Up Day and try to power-up more HIVE to get a bigger Power-Bee.
May the Hive Power be with you!
You can view your badges on your board and compare yourself to others in the Ranking
Check out the last post from @hivebuzz: