Heeeyho Readers! We are almost there with the chicken coop!
Bloody hell! It's been two years that I left the UK, but UK's weather seems to have followed me. Rainy, windy, and boggy. Jokes aside, an extratropical cyclone of sorts has brought raging winds and rain to southern Brazil, delaying tasks at the ranch. Sometimes we have to accept and stay indoors enjoying a good book and writing posts.
Speaking of the ranch: the two previously reported missing chicks appeared. Uff. Little bastards learned to walk deep inside the woods ― as if there wasn't food at home ― and won't come back before night. At least we've got the wire fence and soon will have an enclosed area for the poultry just next to the Mother Bunker of a Chicken Coop.
Have you checked the last update? Off to the Ranch #4: Concrete Slab & Quality Compost | The Mother Bunker of a Chicken Coop
In this Off to the Ranch, we'll frame the roof, sort and wash the old tiles, frame the sides, and begin closing the walls. I hope you enjoy!
We had arranged with a local lumberer to come and collect wood from our eucalyptus trees. He agreed to cut the trees and provide all the necessary planks, on a 60/40 proportion (60% is his payment for the services and 40% ours). Unfortunately, it appears his truck broke down. Dad and I were anxious to continue building, so we ended up paying another lumberer for the wood instead of cutting down our own.
For the roof framing we used:
- 5 x 7 cm (4,5 m) for the rafters
- 2,5 x 2,5 cm (4,5 m) for the battens
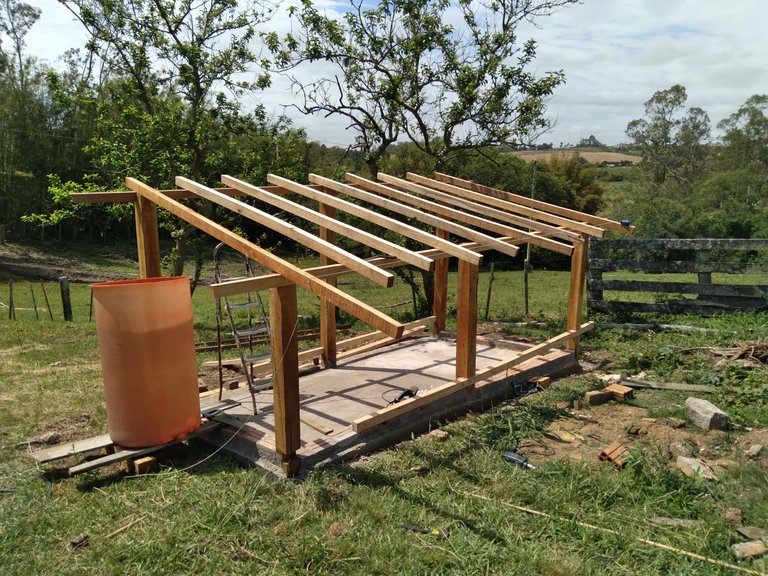
Here are the rafters before cutting and bolting into place. Some of the 5 by 7 were twisted, but we managed to pick the best ones. The same timber served for the wall structure, where we'll bolt the planks later on. On top of the rafter goes the battens (2,5 x 2,5) where the tiles lay on. We left the excess until placing the tiles to make sure no mistakes were made.
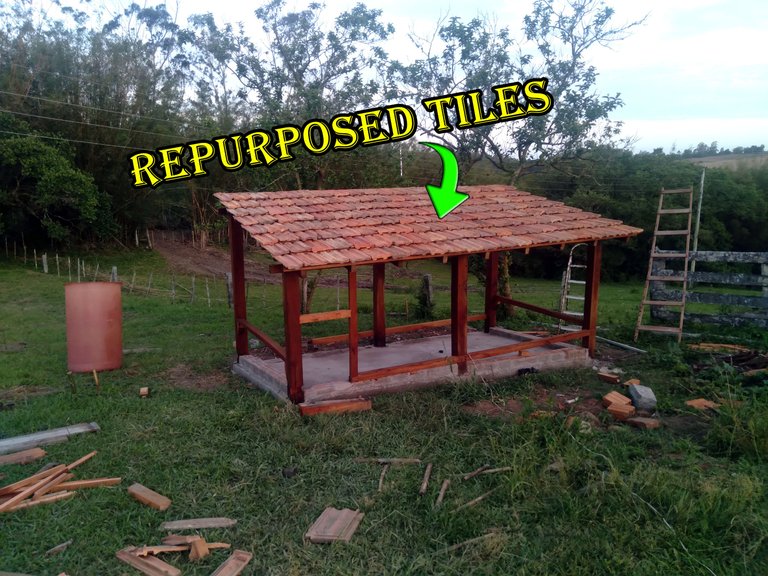
Repurposed tiles
If you remember the first Off to The Ranch, I'd retrieved a bunch of old tiles from various places. Some of them were buried near the shed. Most of them turned out usable; we only had to clean them.
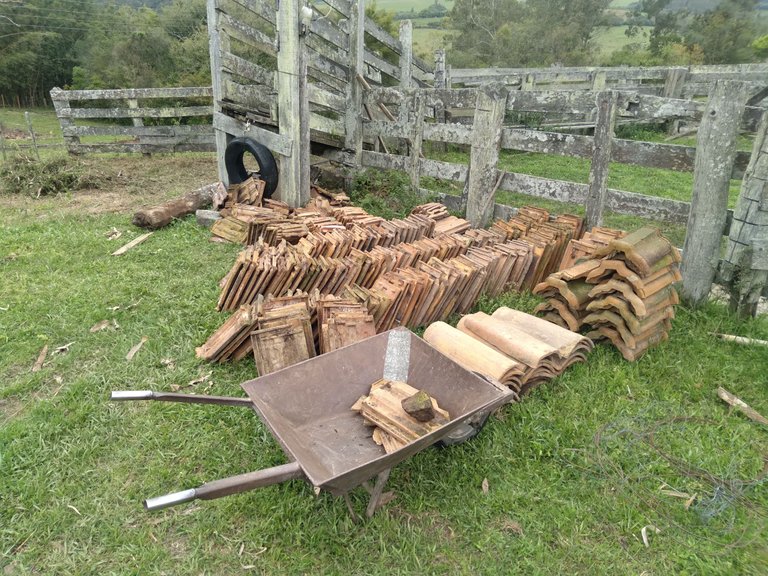
A neighbor came by to lend his pressure washer (ours broke down). We found out two tile sizes in the pile, which felt kinda worrying since a total of 160 was necessary to cover the roof. The pictures below illustrate how a good clean-up can turn trash into usable items. These French tiles (as we call them) are not expensive... but why spend money when we can repurpose them?
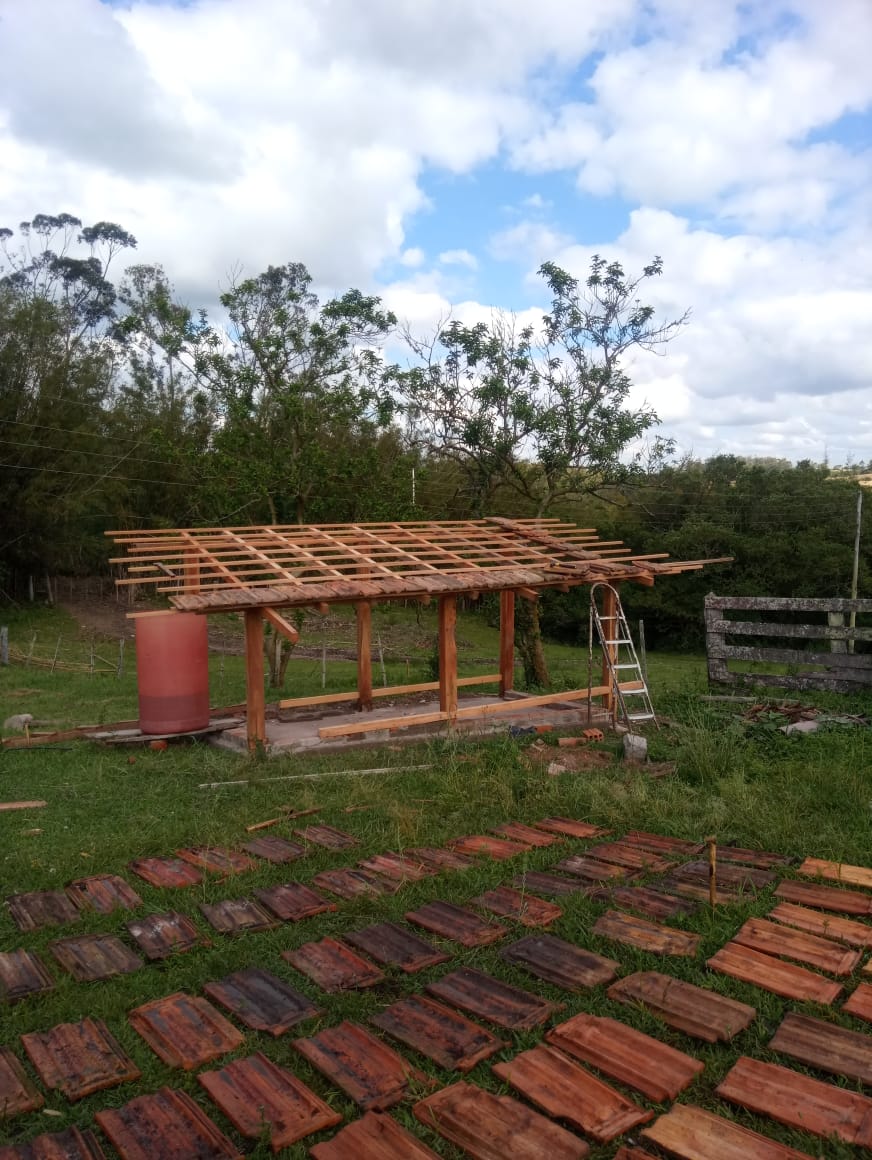
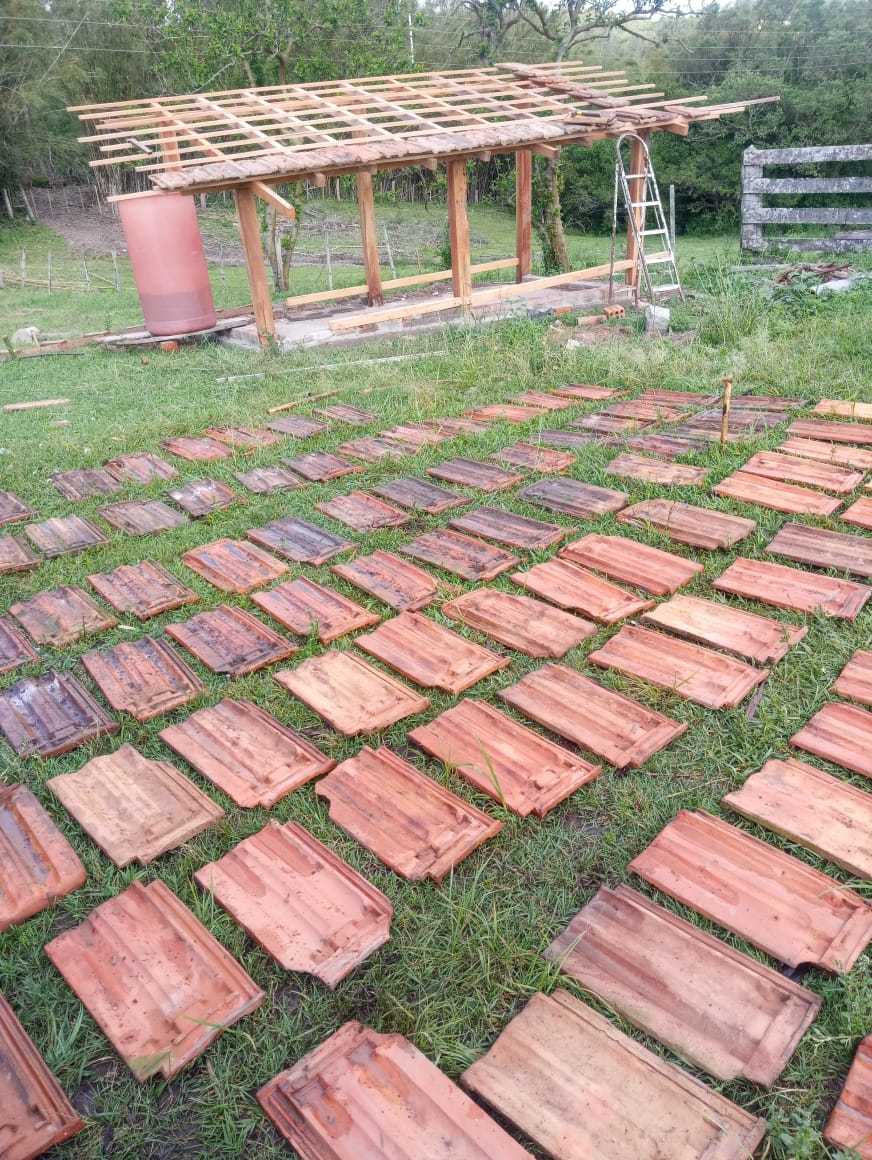
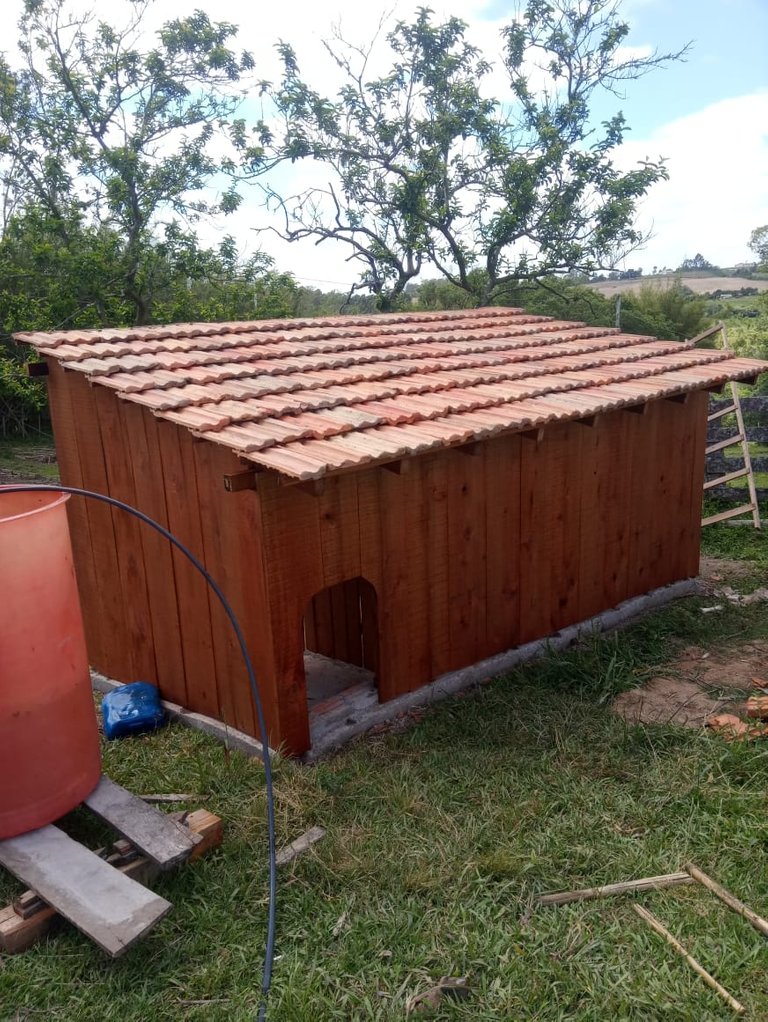
You can see the chicken coop in the background with rafters and battens installed. There's no secret to building a roof, but it does require back-and-forth measuring. French tiles are not bolted or anything; all it requires is a bit of patience to connect them to each other.
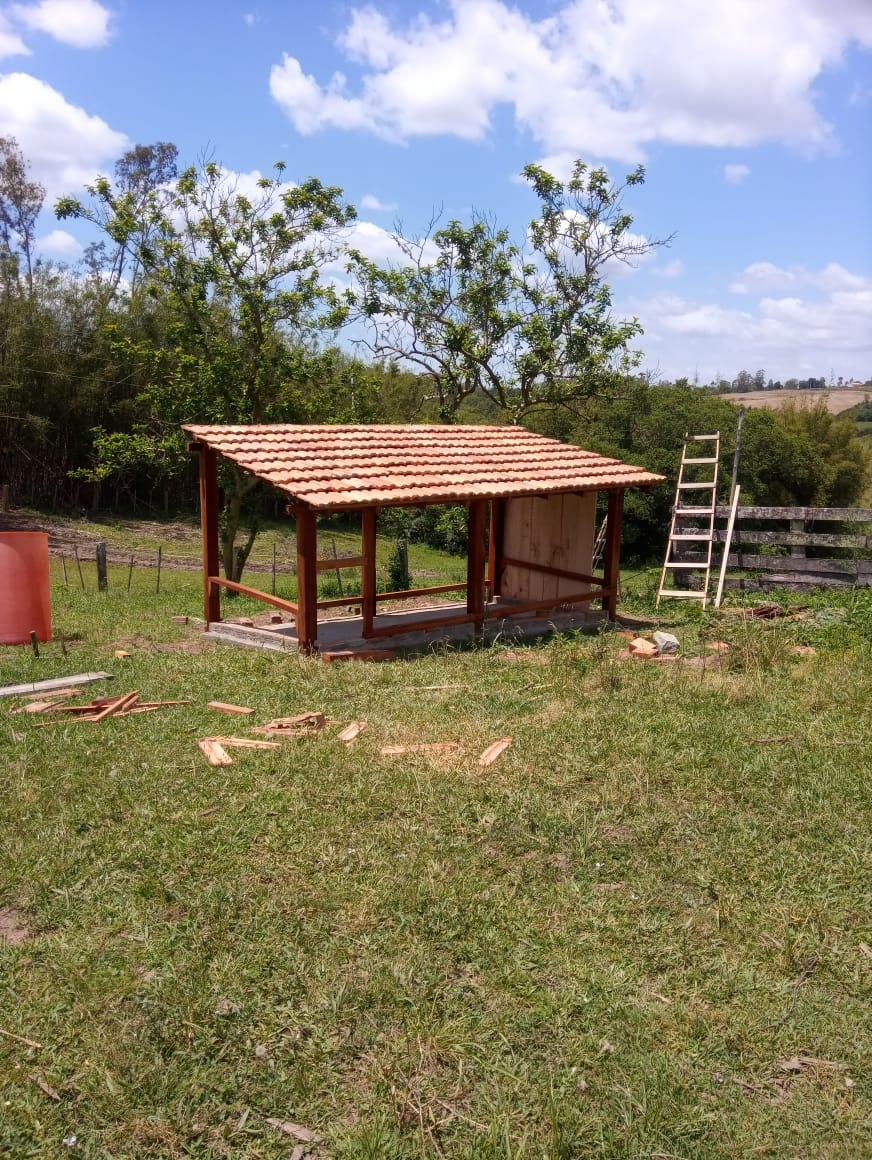
The result is on the thumbnail, as you may have noticed. I'm so glad about the result that here it is again.
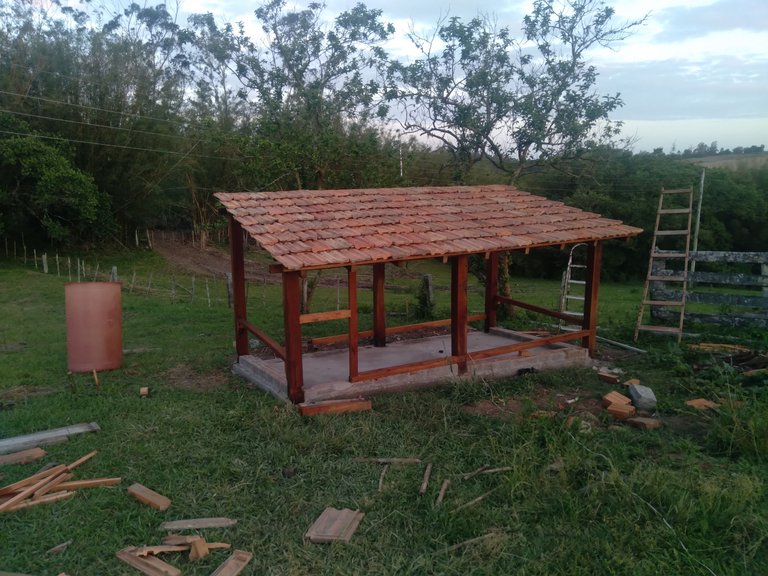
It took a whole afternoon to assemble the roof. Dad and I observed the result from a distance while drinking beer. "It's a shame we have to close the walls," he said. The structure turned out so neat. "Looks great to place a hammock underneath," I added. After chattering we both agreed in building a second structure in a similar fashion, but larger, to serve as a summer barbecue area.
The next day I had to return home whilst dad continued building on his own. So, if the pictures are not perfect, blame him!
For the walls we used:
- 30 cm eucalyptus planks
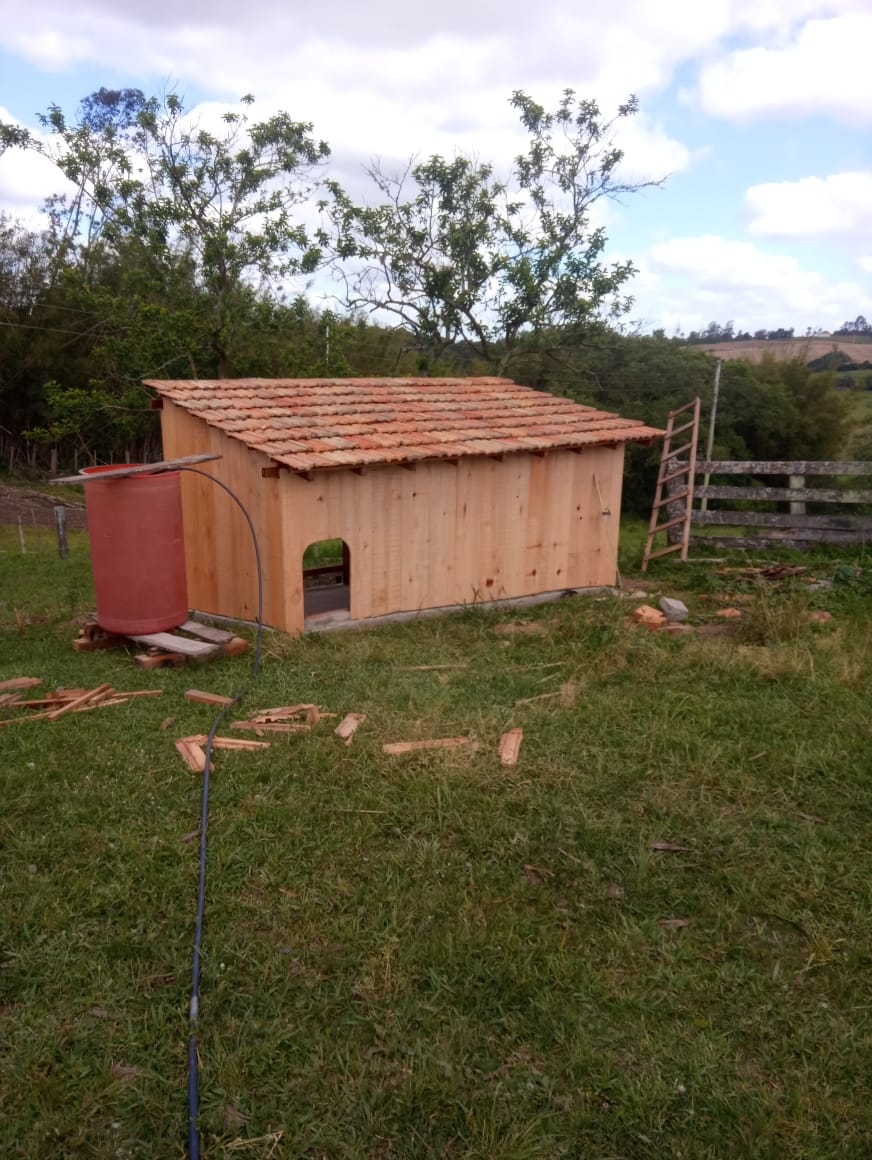
The kennel is on the left. It's about a meter in length and separated internally from the poultry area. As you can see, this is the back portion of the chicken coop, which is facing the house. I'd rather have the front facing the house, so we can see what the heck those gangster chicks are doing. Buuuuut, there's an explanation: the wind. The strongest winds in our region come from NE, thus, will hit this part of the structure. The other part will be wire-fenced instead of closed with planks.
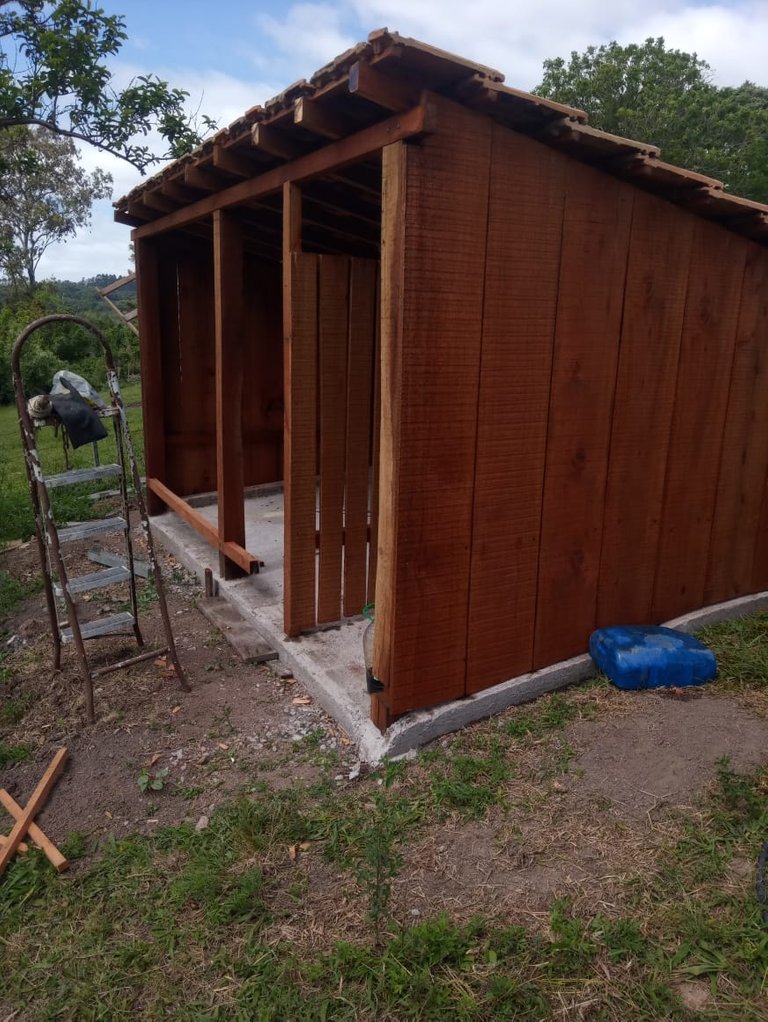
The Mother Bunker of a Chicken Coop is starting to look like one. The paint used here is a mix of diesel and anti-termite. Once the eucalyptus soaks the mix we'll be ready to apply a repurposed heavy-duty paint. Repurposed paint is industry surplus (generally tractor industry) repurposed into a general use paint; it's cheap and lasts forever. Is it overkill for a chicken coop? Most likely yes, but we are building something to last a couple of dozen years.
If you have any questions regarding our chicken coop project, drop me a message and I'll be more than glad to elucidate and provide details.
The next Off to the Ranch post will be a continuation, and most likely the end, of our Mother Bunker of a Chicken Coop. The last step includes fencing the front, building the doors and fencing the front area, where the dogs will stay.
I hope you have enjoyed today's post.
Peace.
Did you know that I have a book out? Check this!
Access Link: https://www.amazon.com/dp/6500272773?

If you enjoyed this post consider leaving your upvote for a hot coffee.
Find me on Twitter: https://twitter.com/mrprofessor_
~Love ya all,

Disclaimer: The author of this post is a convict broke backpacker, who has travelled more than 10.000 km hitchhiking and more than 5.000 km cycling. Following him may cause severe problems of wanderlust and inquietud. You've been warned.

OH my god - you coudl live in that! That's too good for chickens! ARe you mad!
\o\o\o\ I know! It's made to last some 50 years or so. It turned out so nice that we're gonna build another one but bigger for the barbecue area
This is really good work bro. Not only is the weather following you, it almost even looks like a British countryside landscape there :)
Yooo, thanks for the comment!
You think so? There's lots of green and when it rains... {puke}
This particular place, the town nearby the ranch, is all German--not sure when they settled there. It deserves a post one day.
LOL. Yes I hear there's a massive German settlement in Brazil. That place probably reminded them of Germany :)
The rewards earned on this comment will go directly to the person sharing the post on Twitter as long as they are registered with @poshtoken. Sign up at https://hiveposh.com.
Congratulations @mrprofessor! You have completed the following achievement on the Hive blockchain and have been rewarded with new badge(s):
Your next target is to reach 5000 replies.
You can view your badges on your board and compare yourself to others in the Ranking
If you no longer want to receive notifications, reply to this comment with the word
STOPCheck out the last post from @hivebuzz: