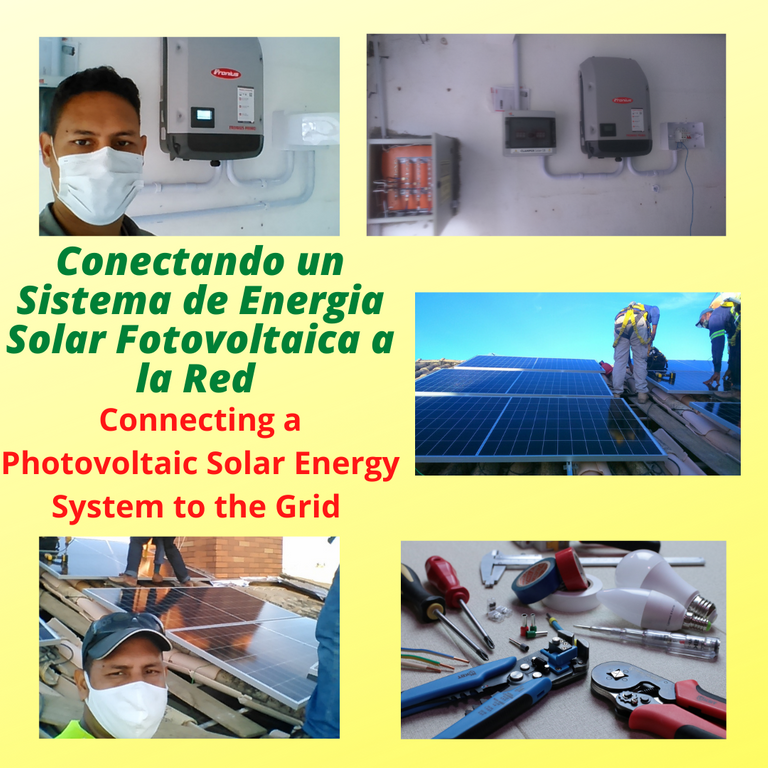
Hola nuevamente amigos de la comunidad amantes de la Tecnología y la Naturaleza.
Hoy quiero compartir un Post hablando de como ponemos a funcionar un Sistema de energía solar Fotovoltaico, centrándonos en cómo se conecta el conjunto de placas solares a la red para que pueda mandar energía a la red doméstica y el sobrante de energía a la red pública.
Voy a tratar de detallar lo más que pueda y a explicar cómo se conecta el sistema a cada aparato.
Hello again friends of the community lovers of Technology and Nature.
Today I want to share a post talking about how we put to work a Photovoltaic solar energy system, focusing on how the set of solar panels is connected to the network so that it can send energy to the domestic network and the surplus energy to the public network.
I will try to detail as much as I can and explain how the system is connected to each device.
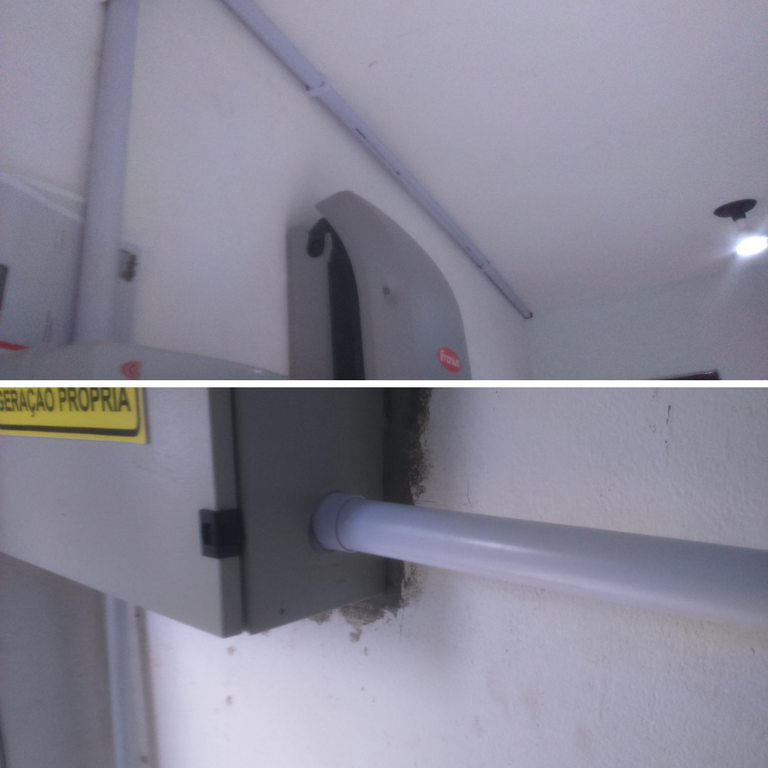
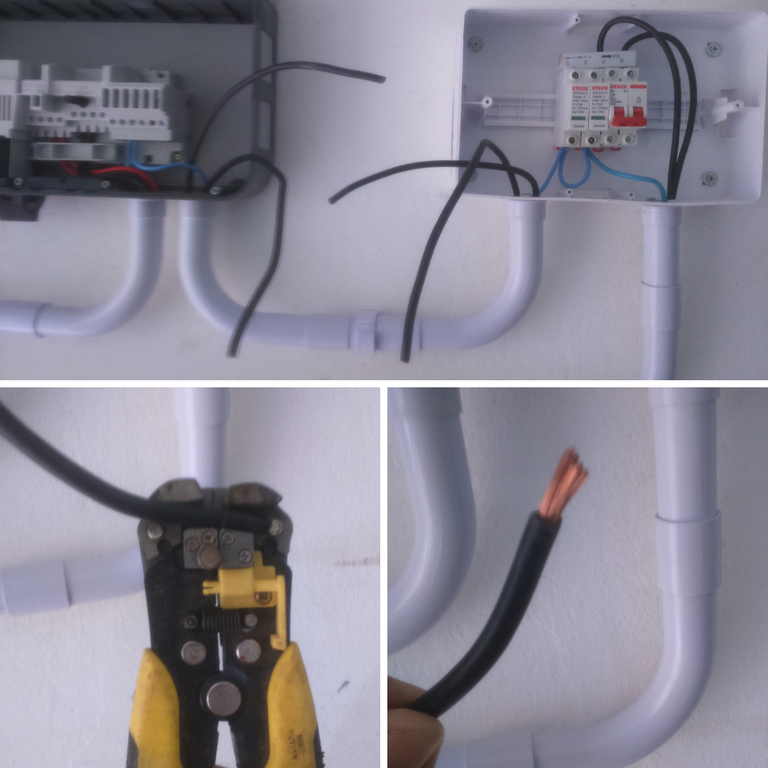
Después que instalamos las placas solares, la conectamos y aterramos, se colocan dos cables solares de 4 o 6 milímetros. El color de los cables es rojo para el polo positivo y negro para el polo negativo. También colocamos un cable de color verde o azul del mismo grosor o menor para el aterramiento.
Los cables van a descender desde la parte superior como es nuestro caso embutido en tubos de PVC de 1 pulgada.
After the solar panels are installed, connected and grounded, two 4 or 6 mm solar cables are placed. The color of the wires is red for the positive pole and black for the negative pole. We also place a green or blue wire of the same thickness or less for grounding.
The wires will go down from the top as in our case embedded in 1 inch PVC pipes.
Los cables van a llegar a la primera caja llamada String Box compuestos por un sistema de dps de protección donde conectamos los cables solares. El rojo en la entrada positiva, el negro en la entrada negativa y el verde en la entrada tierra. Este dispositivo cuenta con entrada para dos conjuntos de placas. Ósea que si el sistema cuenta con 30 placas solares podemos conectar dos series de 15 placas independientes una serie de la otra. Esta caja tiene una manilla que interrumpe el flujo de energía que viene de los paneles en caso de mantenimiento.
The cables will reach the first box called String Box composed of a system of protection dps where we connect the solar cables. The red one to the positive input, the black one to the negative input and the green one to the ground input. This device has an input for two sets of plates. So if the system has 30 solar panels we can connect two sets of 15 panels independent of each other. This box has a handle that interrupts the flow of energy coming from the panels in case of maintenance.
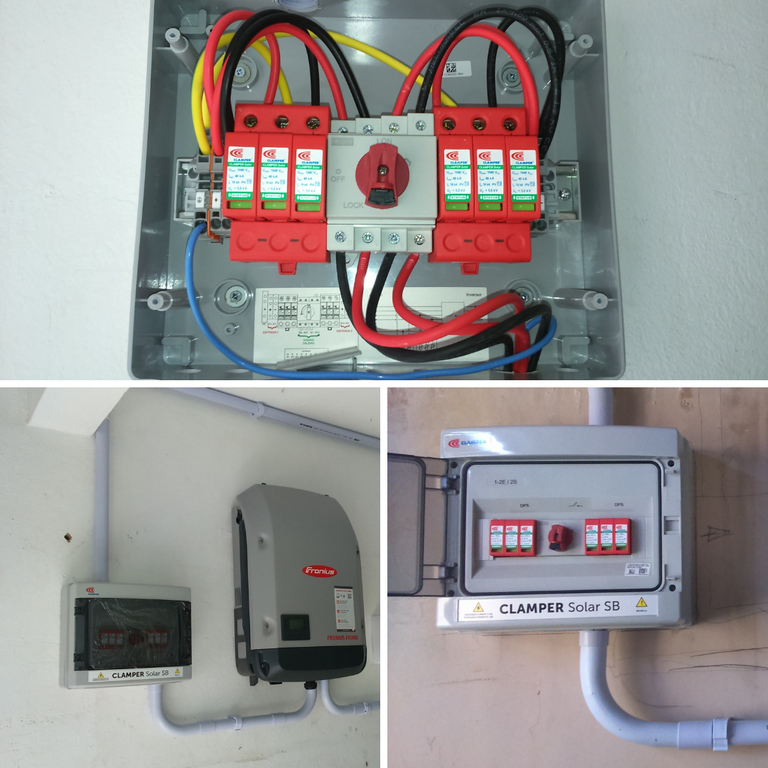
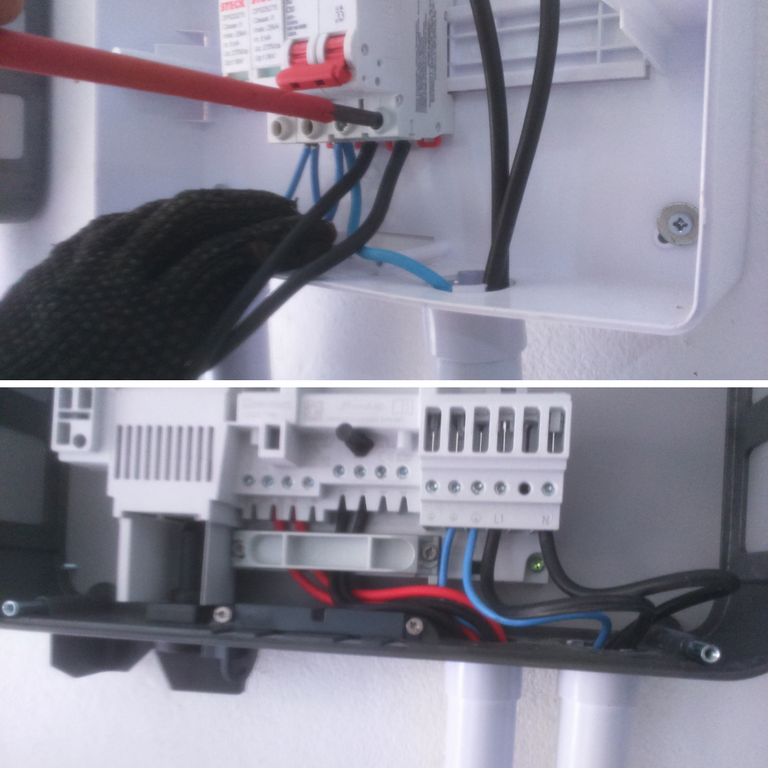
Luego de conectar todas las series en el String Box procedemos a pasar los cables (rojo, negro) al aparato llamado inversor. En nuestro caso son dos series de placas de 12 cada una, así que serán dos cables rojos y dos negros. En el inversor también conectaremos un cable de tierra y dos cables negros eléctricos que van para otra caja llamada “caja de protección.
After connecting all the strings in the String Box we proceed to pass the wires (red, black) to the device called inverter. In our case there are two series of plates of 12 each, so there will be two red and two black wires. In the inverter we will also connect a ground wire and two black electrical wires that go to another box called "protection box".
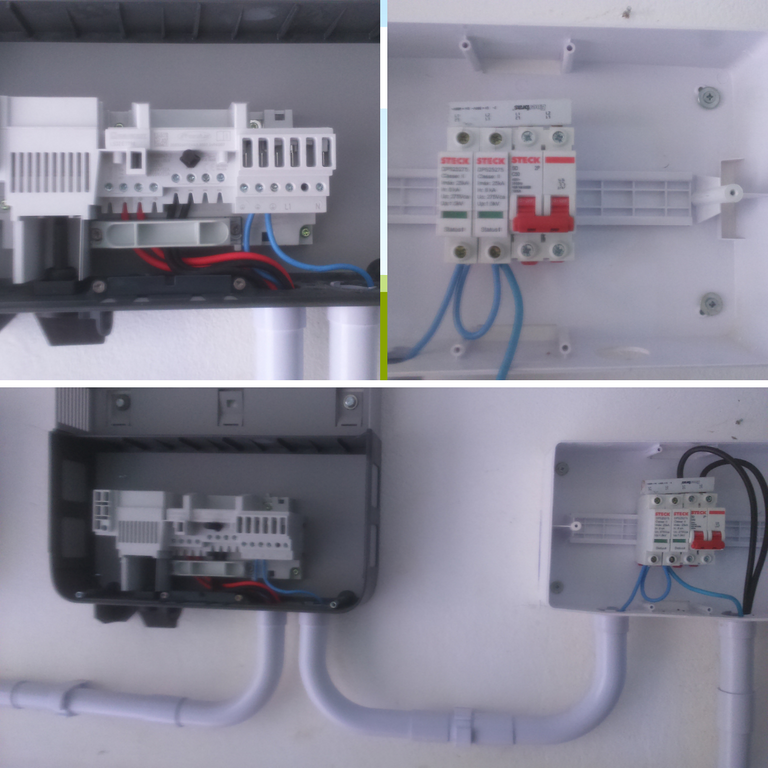
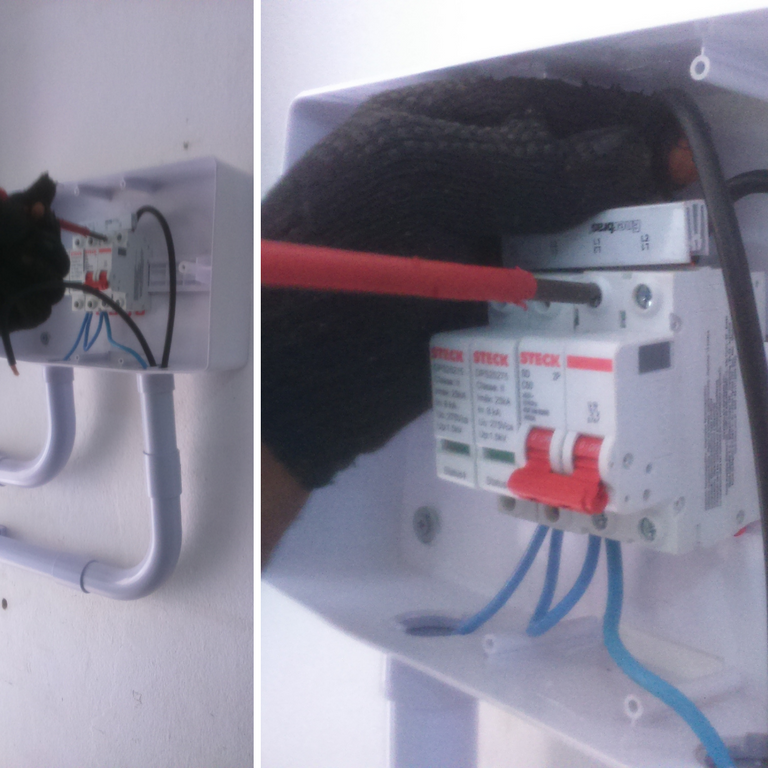
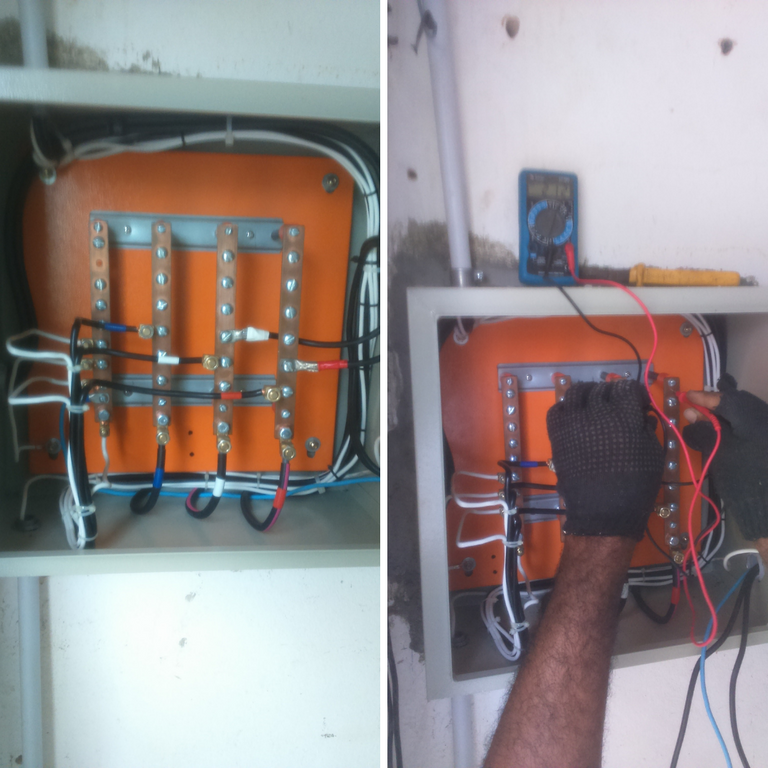
Esta caja es muy importante porque cuenta con breaker de Protección del sistema Fotovoltaico. Lo que garantiza que el sistema no se queme en casa de una descarga atmosférica. Aquí conectamos el cable verde o azul de tierra en los dos primeros breakers y los dos cables eléctricos que vienen del inversor en una entrada y otros dos que van para la red eléctrica. Esta conexión la hacemos en dos breakers eléctricos que van al lado de los breakers de Protección.
Conectamos los dos cables eléctricos al inversos junto con el cable de aterramiento.
This box is very important because it has a Photovoltaic System Protection breaker. This guarantees that the system will not burn in case of an atmospheric discharge. Here we connect the green or blue ground wire in the first two breakers and the two electrical wires coming from the inverter in an input and two others that go to the mains. This connection is made in two electrical breakers that go next to the Protection breakers.
We connect the two electrical cables to the inverter together with the grounding cable.
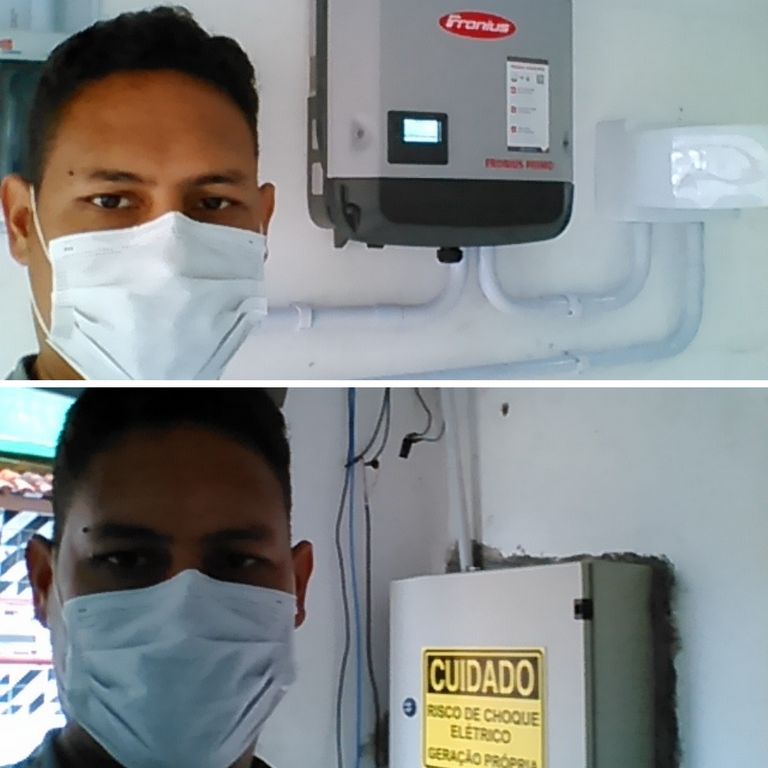
El inversor es un aparato que recibe la energía que viene de los paneles solares (energía continua) y la transforma en energía aprovechable (energía alternada) tanto para la red domestica (Tv, equipos de sonido, refrigerador, aire acondicionado entre otros) y el sobrante de lo producido en la res publica.
The inverter is a device that receives the energy coming from the solar panels (continuous energy) and transforms it into usable energy (alternating energy) both for the domestic grid (TV, sound equipment, refrigerator, air conditioning among others) and the surplus of what is produced in the public res.
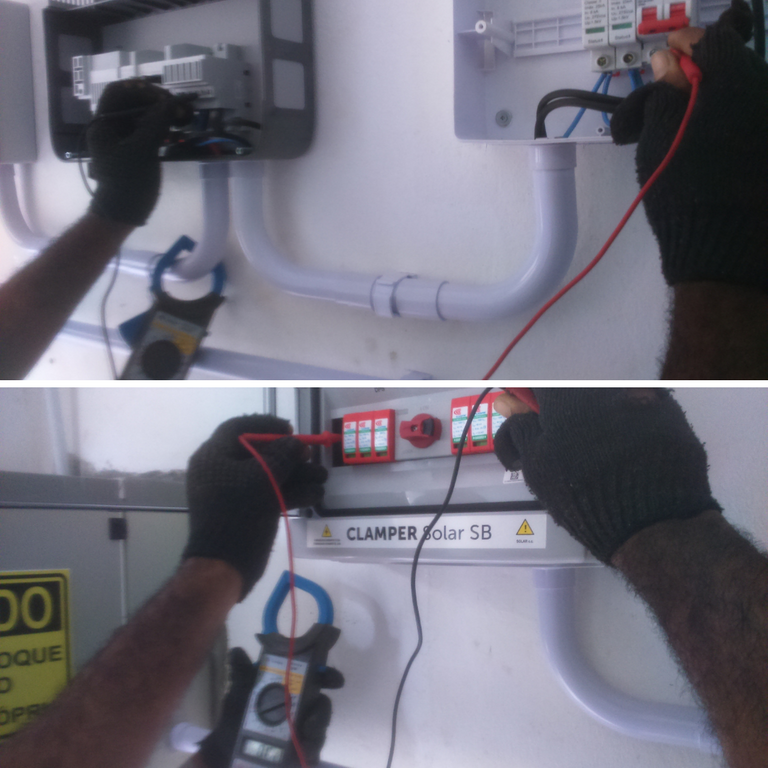
Por último, conectamos los dos cables que en este caso son negros al tablero eléctrico principal y medimos los voltajes a ver si están correctos. Este tablero como ya mencioné mandará electricidad a la red doméstica y el sobrante a la red pública. Para conectar los cables se apaga el breaker principal que alimenta la red doméstica.
Finally, we connect the two wires, which in this case are black, to the main electrical panel and measure the voltages to see if they are correct. As I mentioned before, this board will send electricity to the domestic network and the surplus to the public network. To connect the wires we turn off the main breaker that feeds the domestic network.
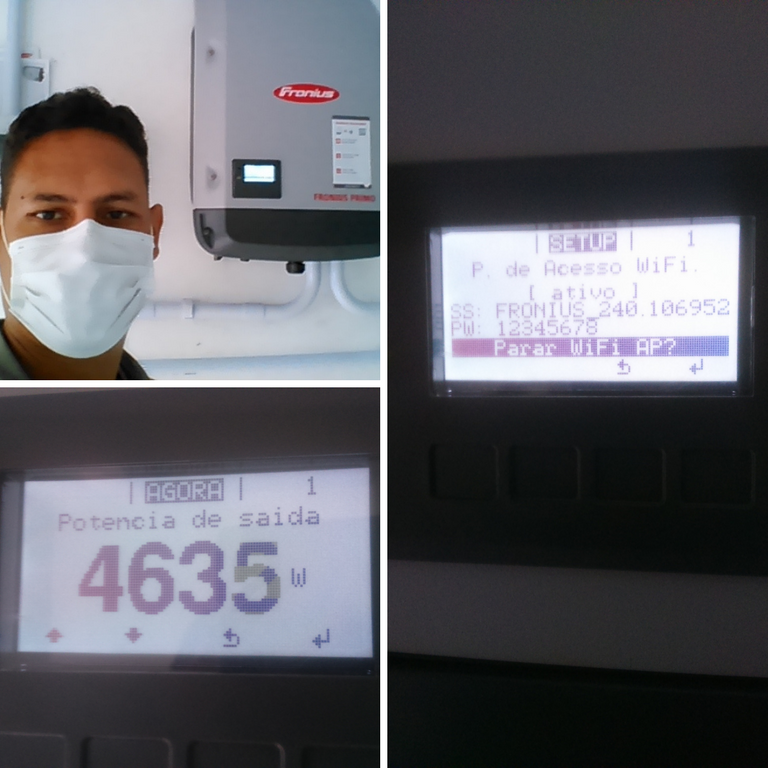
Cuando la conexión esta lista llega la hora de configurar el inversor. Lo que hacemos es presionar el botón de encendido y de inmediato comenzará a funcionar un panel led que trae en la parte inferior izquierda. Allí en la pantalla se nos presenta una serie de opciones que nos permitirán configurar nuestro dispositivo. El sistema nos pide el país donde estamos, el voltaje que se utiliza según las normas eléctricas y la fecha de configuración. Después colocar estos datos es solo esperar a que el aparato configure el sistema. Luego de configurar aparece en la pantalla la cantidad de voltios que está produciendo en tiempo real. Este sistema que fue configurado tiene la capacidad de producir 15000 voltios en días con bastante sol. Como se aprecia en la foto que tome de la pantalla apenas tiene una producción de 4635 voltios tomando en cuenta que era un día nublado y lluviosos.
When the connection is ready, it is time to configure the inverter. What we do is to press the power button and immediately an LED panel on the lower left side will start working. There on the screen we are presented with a series of options that will allow us to configure our device. The system asks us for the country where we are, the voltage used according to electrical standards and the date of configuration. After placing these data is only wait for the device to configure the system. After configuring, the amount of volts it is producing in real time appears on the screen. This system that was configured has the capacity to produce 15000 volts on days with enough sun. As can be seen in the photo I took of the screen it has a production of 4635 volts taking into account that it was a cloudy and rainy day.
Bueno amigos espero que les sirva de provecho y publicación de como conectar un sistema Fotovoltaico a la red. Espero seguir aprendiendo más acerca de este tipo de energía sustentable que ayuda a la preservación de nuestro planeta ya que es una energía limpia. Nos leemos en otro Post.
Well friends I hope you find it useful and publication of how to connect a photovoltaic system to the network. I hope to continue learning more about this type of sustainable energy that helps the preservation of our planet as it is a clean energy. See you in another post.
Las fotos fueron tomadas con mi teléfono Sony Xperia.
Todas las imágenes fueron editadas en canva.
The photos were taken with my Sony Xperia phone.
All images were edited in canva.
Translated with www.DeepL.com/Translator (free version)

Congratulations @rocaxel! You have completed the following achievement on the Hive blockchain and have been rewarded with new badge(s) :
Your next target is to reach 7000 upvotes.
You can view your badges on your board and compare yourself to others in the Ranking
If you no longer want to receive notifications, reply to this comment with the word
STOPCongratulations, your post has been upvoted by @dsc-r2cornell, which is the curating account for @R2cornell's Discord Community.