
Español:
¡Bienvenidos una vez más a otro tutorial de bordado!
El día de hoy decidí aplicar una técnica llamada "Needle paiting" la que ir que consiste usar sólo una hebra con puntadas largas y cortas para "colorear" todo el diseño, es una técnica bastante laboriosa, pero si se usan los tonos adecuados, puede dar efectos realistas y con degradado de colores muy hermosos. Al final, está técnica es algo libre y no se requiere seguir al pie de la letra la puntada, pero conviene aprender la teoría y entender como funciona, así que ¡Vamos a ello!
English:
Welcome once again to another embroidery tutorial!
Today I decided to apply a technique called "Needle paiting" which consist in only use one strand with long and short stitches to "color" the entire design, it is a rather laborious technique, but if you use the right tones, it can give realistic effects and very beautiful color gradient. At the end, this technique is somewhat free and you are not required to follow the stitch in a in a strict way, but it pays to learn the theory and understand how it works, so Let's get to it!
~ Los colores ~
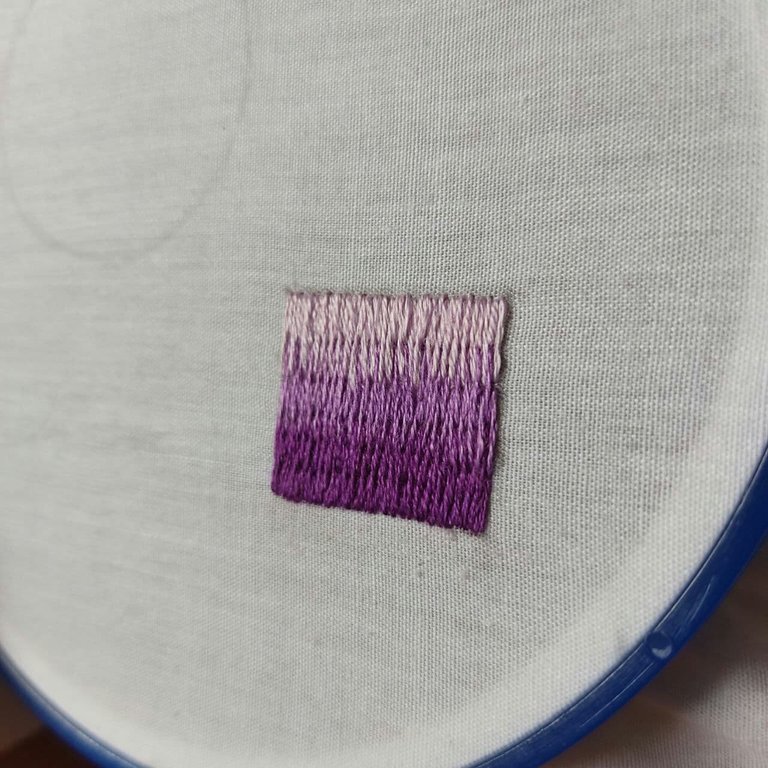
Para el tutorial de hoy, estaré usando 3 tonalidades de hilo morado, el más oscuro es DMC código 552, el tono medio es de Anchor código 110, y el más claro es de Anchor código 108.
~ Colors ~
For today's tutorial, I will be using 3 shades of purple yarn, the darkest is DMC code 552, the medium shade is from Anchor code 110, and the lightest is from Anchor code 108.

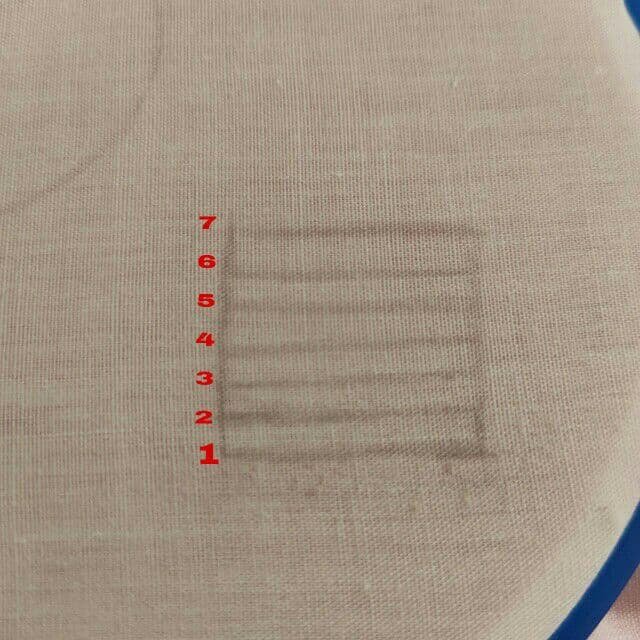
~ Como realizar la puntada larga y corta ~
Este procedimiento sólo se hace al principio, después puedes variar la puntada si así deseas.
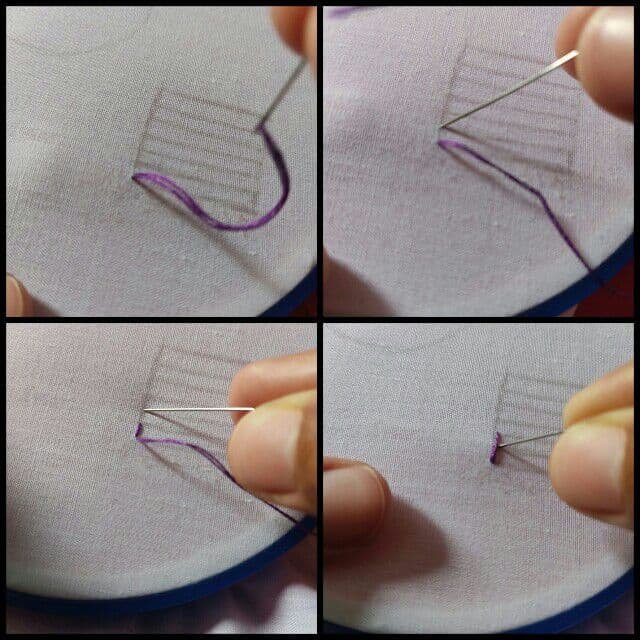
1- Sal con la aguja y el hilo por uno de los extremos del rectángulo, saliendo exactamente por la línea 1. Seguido de esto, introduce la aguja por la línea 2.
2- Saca la aguja de nuevo por la línea uno e introdúcela por la línea 3.
3- Saca la aguja por la línea 2 e introdúcela por la línea 1.
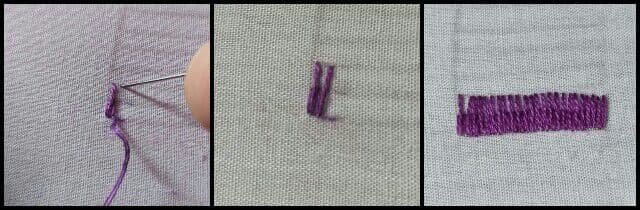
Ya con este procedimiento tendrás una puntada corta, seguida de una larga y luego una corta. Ahora sólo debes repetir el proceso hasta llegar al otro extremo de el rectángulo.
~ How to perform the long and short stitch ~
This procedure is only done at the beginning, afterwards you can vary the stitch if you wish.
1- Step out with the needle and yarn through one end of the rectangle, exiting exactly on line 1. After that, insert the needle through line 2.
2- Pull the needle back out through row 1 and insert it through row 3.
3- Take the needle out through row 2 and insert it through row 1.
With this procedure you will have a short stitch, followed by a long stitch and then a short stitch. Now just repeat the process until you reach the other end of the rectangle.

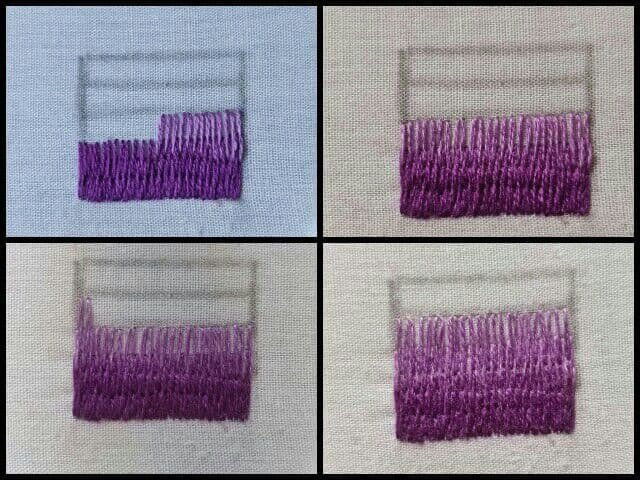
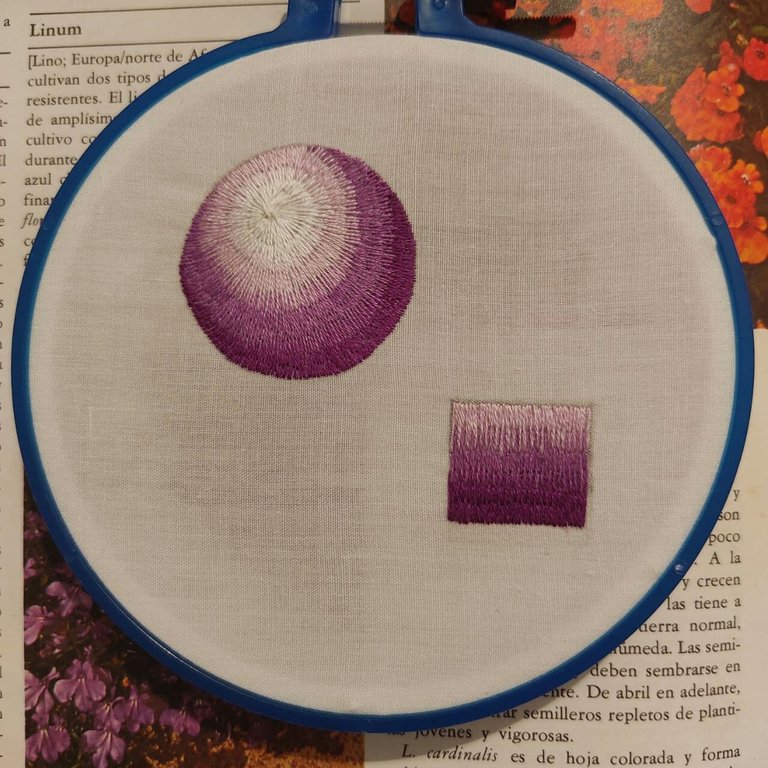
Aquí ya pasé al tono más claro para cerrar el rectángulo, ¿Puedes ver la degradación?

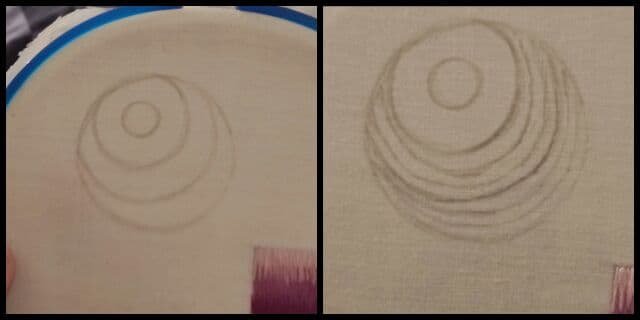
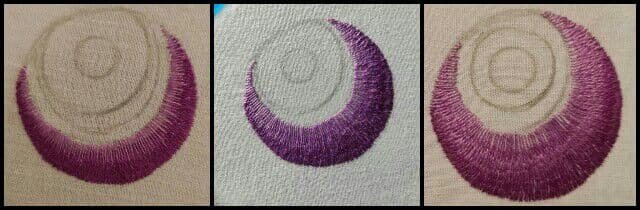
En general el proceso de esta puntada es muy sencillo, lo complicado es saber dirigir las puntadas hacía la dirección correcta, para que la figura adquiera profundidad a medida que vas bordando. Para hacer una demostración de esto, hice esta esfera con los mismos tonos.
In general the process of this stitch is very simple, the complicated thing is to know how to direct the stitches in the right direction, so that the figure acquires depth as you go embroidering. To demonstrate this, I made this sphere with the same tones.
Aquí la cosa ya está un poco más complicada. Primero marco donde quiero que esté la luz (el circulo más pequeño) y la sombra iría en los costados de abajo de la esfera. Recomiendo mucho que uses fotografías como referencia a la hora de marcar la luz y las sombras en la tela donde bordarás.
Primero separé la esfera en 4 secciones, en cada sección se supone que resaltará un tono (los tres que hemos estado usando más un color blanco). Luego separé esas secciones con más líneas, 2 en cada una.
Here the thing is already a little more complicated. First I mark where I want the light to be (the smaller circle) and the shadow would go on the bottom sides of the sphere. I highly recommend that you use photographs as a reference when marking the light and shadows on the fabric where you will embroider.
First I separated the sphere into 4 sections, each section is supposed to highlight a tone (the three we have been using plus a white color). Then I separated those sections with more lines, 2 in each.
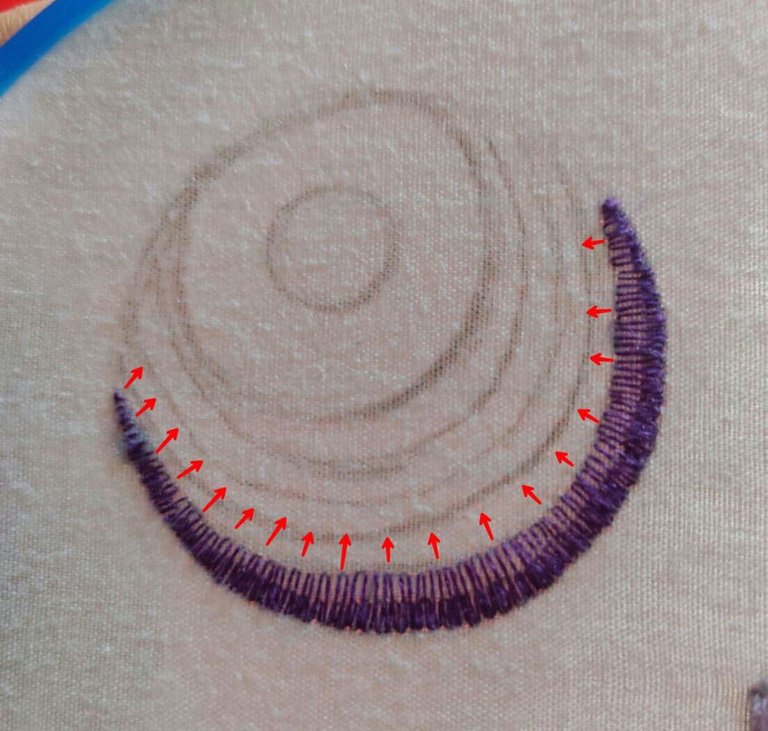
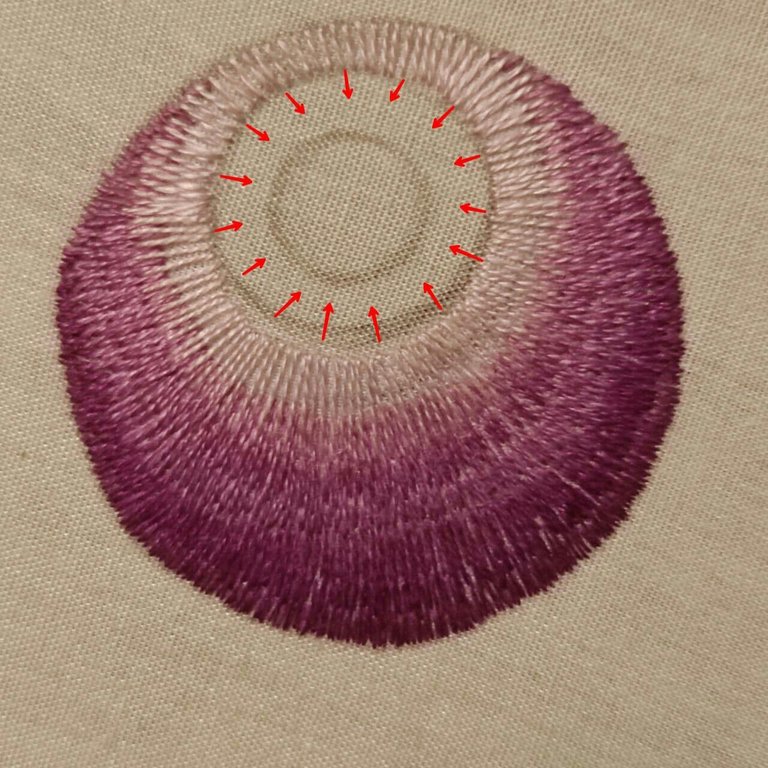
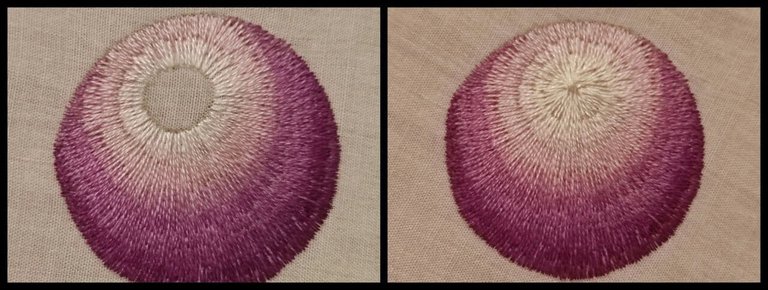
I start with the dark tone trying to follow the guide lines. Sometimes I don't know why I do them if I always end up embroidering where I feel it's right, maybe having those guide lines gives me some security even though I never want to follow them 100%.
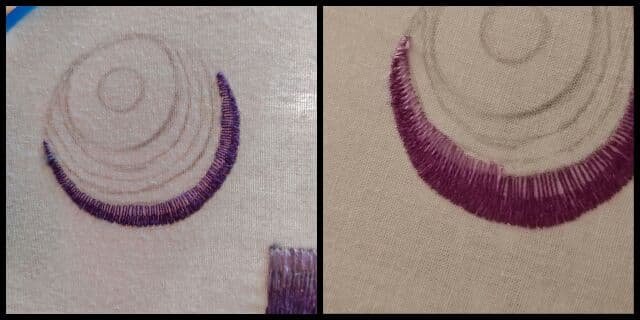
Here you can see how the stitches are directed towards the center of the circle, or rather, towards the point where there is light.
En esta parte ya relleno la parte que le corresponde al tono medio.
Me disculpo por la variación de luz en las fotos, pero este proceso toma algo de tiempo realizarlo y las fotografías fueron tomadas en diferentes horas.
In this part I fill in the part that corresponds to the middle tone.
I apologize for the light variation in the photos, but this process takes some time and the pictures were taken at different hours.
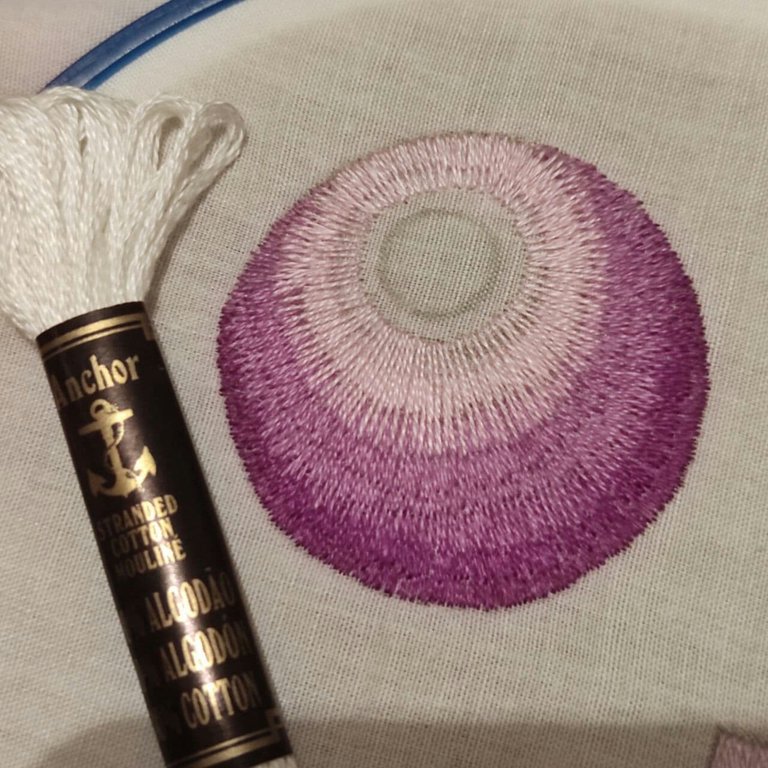
Ya casi terminada la esfera, bordando con el tono más claro, el cual sirve de transición para el hilo blanco.
The sphere is almost finished, embroidering with the lighter shade, which serves as a transition for the white thread.

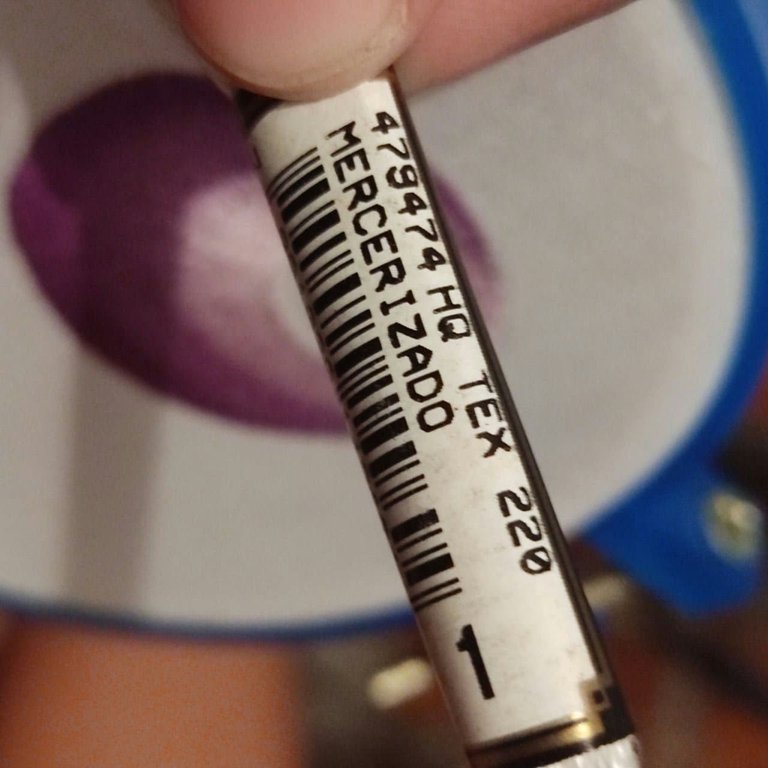
The sphere is almost ready! All that's missing is the light, which is the white color ❤️ which is Anchor brand.
A funny thing happened to me, I was looking for the code in this thread, I spent quite a while digging around for what the code would be since I couldn't get it, until I realized that the code is 1. On second thought, it makes sense, since it's a simple white color.
Poniendo en practica esta puntada, escogiendo los colores adecuados y señalando bien la dirección de las puntadas, estoy segura de que podrás hacer grandes obras usando la técnica del needle paiting ♥️
By putting this stitch into practice, choosing the right colors and pointing out the direction of the stitches, I am sure you will be able to make great works using the needle paiting technique ♥️
By putting this stitch into practice, choosing the right colors and pointing out the direction of the stitches, I am sure you will be able to make great works using the needle paiting technique ♥️
Muchas gracias por leer, espero haya sido de tu agrado.
Si llegas a intentar esta técnica, me pondría muy feliz si dejaras alguna foto en los comentarios.Thank you very much for reading, I hope you enjoyed it.
If you get to try this technique, I would be very happy if you leave some pictures in the comments.¡Nos vemos la proxima!❤️
All photographs were taken by me and belong to me. The text was translated from Spanish to English using Deepl translator.
Congratulations @bunnysneedle! You have completed the following achievement on the Hive blockchain and have been rewarded with new badge(s) :
Your next payout target is 500 HP.
The unit is Hive Power equivalent because your rewards can be split into HP and HBD
You can view your badges on your board and compare yourself to others in the Ranking
If you no longer want to receive notifications, reply to this comment with the word
STOPThis technique is beautiful. The degradation gives it so much more depth and a realistic look. It makes it more fun and interesting to look at. You just keep showing us new embroidery techniques which I love!
Minus taking the photos how long did it take you to fill in the sphere?
Keep up the great work ~
Thanks for passing by! I will say that I spend around 3 and a half hours filling the sphere
You’re welcome.
I love the dedication and determination you show when doing needlework :)
Thanks for being an inspiration to the community ~
Oooh this is so beautiful, I love it. Going to have to try this with my embroidery. I love the color gradiation!
Oh, esto es tan hermoso, me encanta. Tendré que probar esto con mi bordado. ¡Me encanta la gradación de color!
!BEER
¡Gracias! Si llegas a intentarlo, dejalo en los comentarios, o etiquetame para poder verlo 😊
No sé como funciona eso de la cerveza, pero gracias! Jajaja
¡Ah! Si vas a tu Hive-Engine, cada vez que alguien te haya dado un! escriba token en un comentario o ha ganado algo votando en publicaciones con la etiqueta relevante, encontrará todos sus tokens diferentes que se suman a Hive.
Ah! If you go to your Hive-Engine, any time someone has given you a ! type token in a comment or you've earned some by voting on posts with the relevant tag, you will find all your different tokens that are in addition to Hive.
esta hive-engine.com
View or trade
BEER.Hey @bunnysneedle, here is a little bit of
BEERfrom @phoenixwren for you. Enjoy it!Learn how to earn FREE BEER each day by staking your
BEER.Muy lindo y prolijo tu trabajo. Los colores que usaste para el degradado son hermosos ideal para una cartera, franela, hasta lo veo en un jeans
Muchas gracias. Sería genial aplicarlo en unas flores para un bluejean 😍
Te ha quedado hermoso 🤩 me encanta este tipo de trabajo y admiro a las personas que lo elaboran porque no es sencillo y acá has explicado muy bien y el resultado ha sido genial 🔥
Gracias por la apreciación y el apoyo ♥😊
Wow Wow wow!!!!! Like I'm speechless. Great job.
Thanks 💕