ENGLISH:
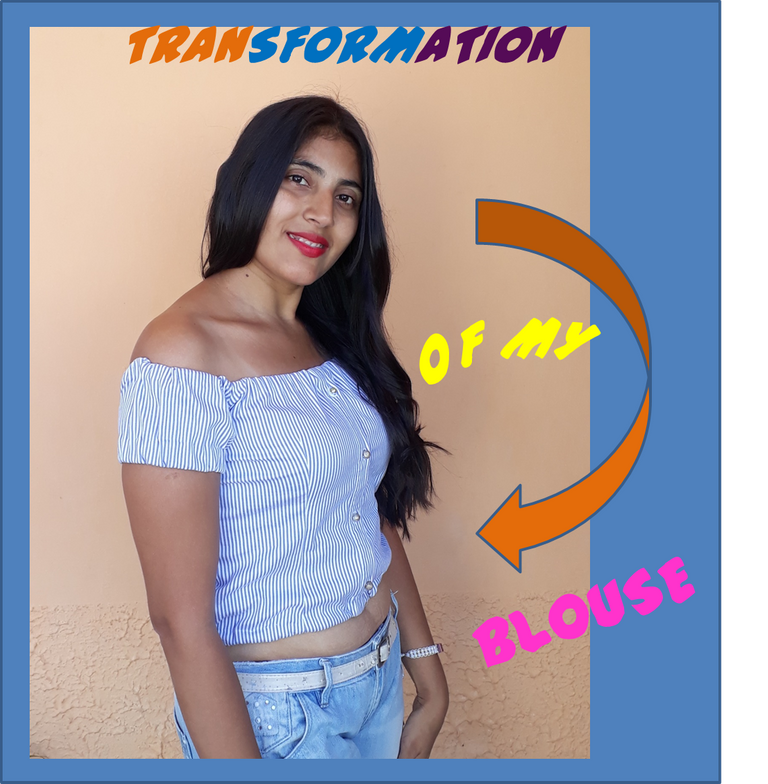
Greetings, my people of Hive, especially this community, this is my first publication in the community and I feel really happy and content because this is the first time that I dare to make this incredible transformation with one of my clothes.
For some months I had been noticing that in my closet I have clothes that I don't wear, simply because I don't like them or they don't fit me very well. So I had been thinking about taking them to my husband's grandmother who is a seamstress but honestly, I always forget and I remember is when I open my closet and see the garments there.
Seeing the clothes hanging there, especially blouses caused me a bit of worry and stress; I wanted to fix them to put them to use. One day I came across an internet video where they gave very good tutorials on how to fix some pieces of clothing and they really looked very nice, however as much as it encouraged me, it discouraged me since I am not a seamstress nor much less I have a sewing machine to say that I will try. In short, I couldn't do anything but set aside some of my time and take the garments to her to be mended.
Before I continue, I tell you that the times I dared to cut a piece of my clothes, I did not succeed, everything was a disaster and I admit that fear did not let me do it freely.
Until thinking and thinking I made the decision to open my closet and take one of those blouses and risk losing it or fix it, I didn't wear it.
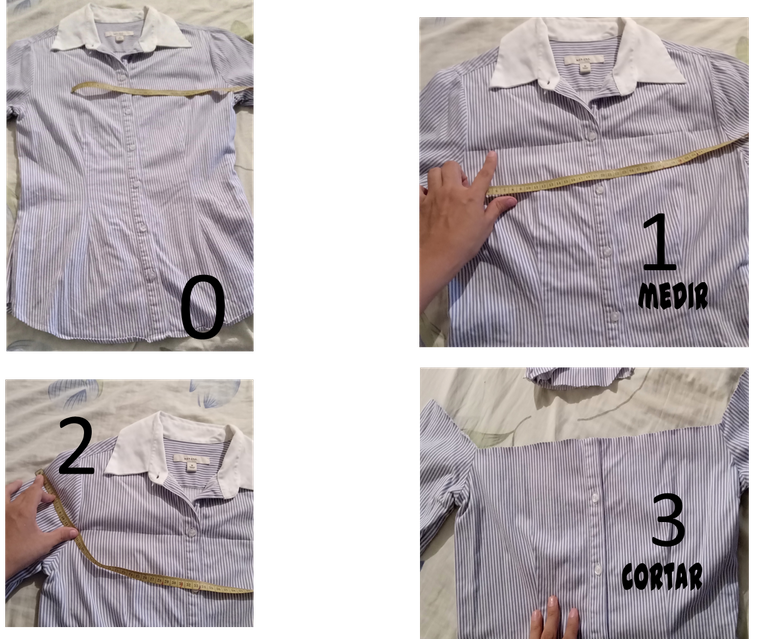
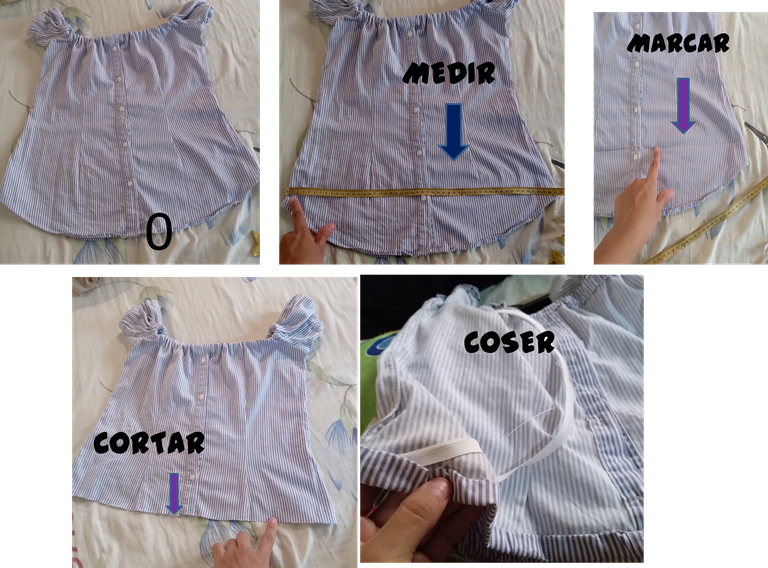
So I took this shirt, stretched it and placed it very well to see how I was going to transform and cut it. The first thing I did was to find a tape measure to get the right measurement.
Then I started to measure and with a pencil; I marked where I was going to cut. I measured very well each side as you can see in the pictures: shoulders, waist, neck, etc. Then I proceeded to cut very carefully the neck part and then the shoulders.
Once cut I turned it inside out and measured the part where I would start sewing. Then I started with the sewing until it was finished and finally I left a small space without sewing to introduce a rubber band and finally sew.
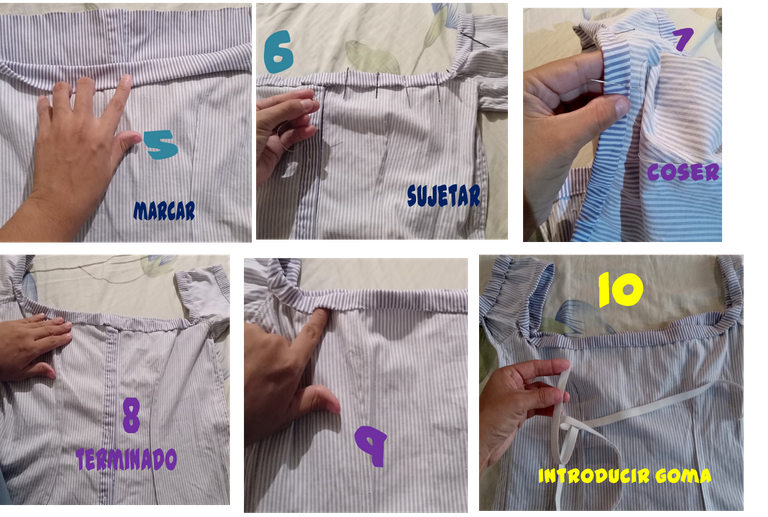
and ready this was our first step for me it looked very good. now we proceed to the next step.
I measured the bottom part to cut and sew. We can see in the pictures the step by step that I did. After I sewed it, I also inserted a piece of elastic so that it would be ruffled, both at the top and at the bottom.
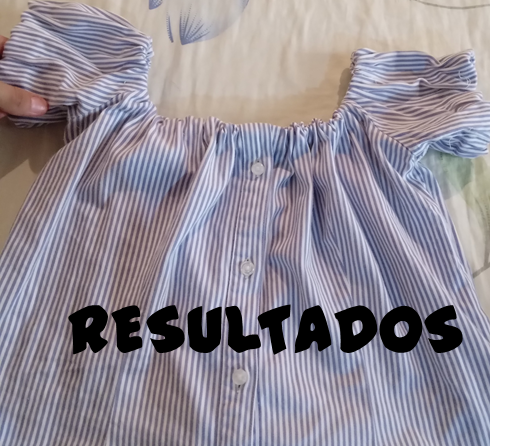
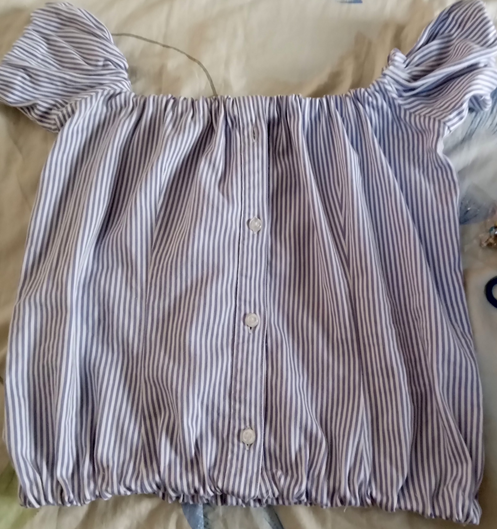
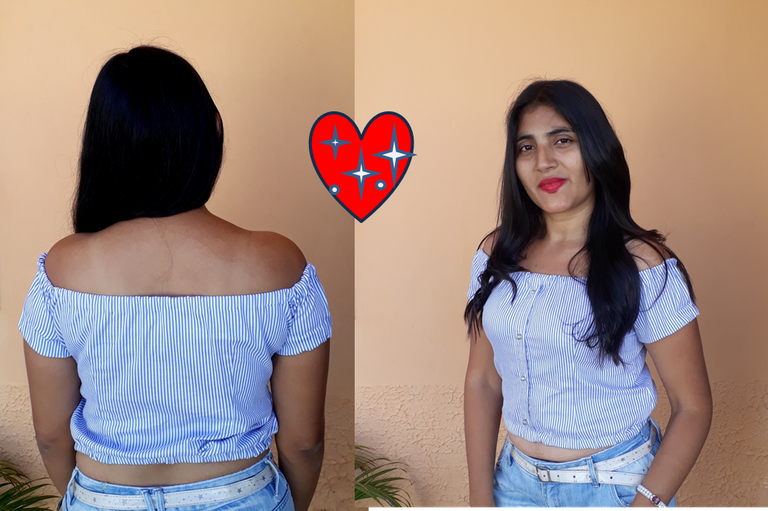
This is how the blouse looked on me.
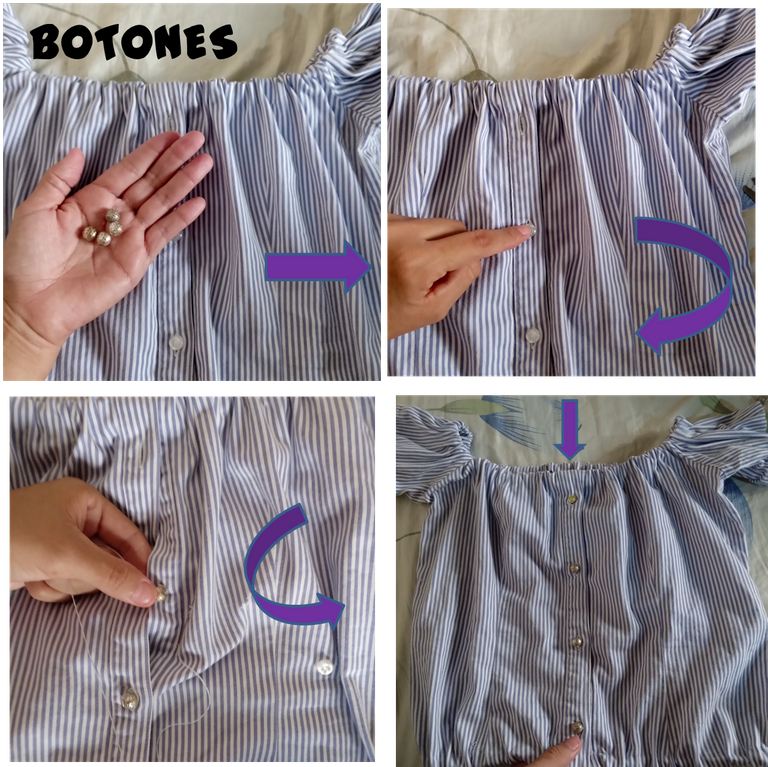
I like the way it looks, it really fit me well, just the way I wanted it. It looks very elegant ideal for going out and showing it off. But that's not all, even though it looks very nice I wanted to change the buttons for some more elegant and decorative ones; in my opinion these give a special touch to the garment.
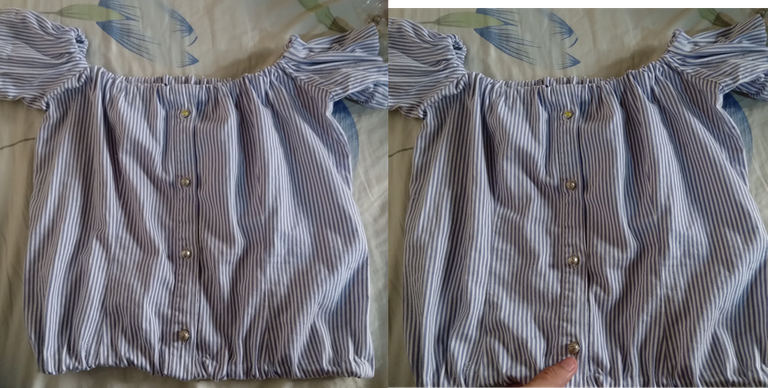
Here we have our blouse an amazing and total transformation that left the family amazed with the changes I made to it.

I loved doing this, I really felt excited and exhilarated, now who can stand me sewing all the clothes I have left to fix! ha ha ha ha.
If you are like me and have garments that you don't wear because they don't fit or you don't like the pattern, I encourage you to dare to create them yourself and you'll see that you'll love it and you'll be encouraged with the results you'll get. If you are learning I recommend that the changes you use for the blouse are simple and easy to do.
I am happy with my new blouse, I thought I couldn't do it but these are the results, when we want we can.
ESPANISH
Saludos, mi gente de Hive, en especial esta comunidad, esta es mi primera publicación en la comunidad de y me siento realmente muy feliz y contenta porque esta es la primera vez que me animo a realizar esta increible transformacion con una de mis prendas de ropa.
Desde hace algunos meses había estado notando que en mi closet tengo prendas que no uso, simplemente porque no me gustan o no me quedan muy bien. Así que había estado pensando en llevárselas a la abuela de mi esposo que es costurera pero honestamente, siempre se me olvida y me recuerdo es cuando abro mi closet y veo las prendas allí.
Ver las prendas allí colgadas, especialmente blusas me causaba un poco de preocupación y estrés; quería arreglarlas para darle uso. Un día me encontré con un video de internet donde daban tutoriales muy buenos de como arreglar algunas piezas de ropa y realmente quedaban muy bonitas, sin embargo así como me animaba, me desanimaba ya que no soy costurera ni muchos menos cuento con una máquina de coser para decir que lo voy a intentar. En pocas palabras, no podía hacer nada sino apartar un poco de mi tiempo y llevarle las prendas para que me las arreglaran.
Antes de continuar les comento que las veces que me atrevía a cortar alguna pieza de mi ropa, no lo lograba nada todo era un desastre y reconozco que el miedo tampoco me dejaba hacerlo con libertad.
Hasta que pensando y pensando tome la decisión de abrir mi closet y tomar una de esas blusas y arriesgarme a perderla o arreglarla, total no la usaba.
Así que tomé esta camisa, la estiré y coloqué muy bien para ver cómo la iba a transformar y cortar. Lo primero que hice fue buscar un metro (cinta métrica) para tomar la medida correcta.
Seguidamente empecé a medir y con un lápiz; marcaba por donde cortaría. Medí muy bien cada lado como lo ven en las imágenes: hombros, cintura, cuello, etc. Luego procedí a cortar con mucho cuidado la parte del cuello y seguidamente los hombros.
Una vez cortado le di la vuelta y medí la parte donde empezaría a coser. Etonces inicie con el cosido hasta terminarlo y por último le dejé un pequeño espacio sin coser para introducir una goma y al final coser.
y listo este fue nuestro primer paso para mi quedo muy bien. ahora procedemos al siguiente paso.
Medí la parte de abajo para cortar y coser. Podemos ver en las imágenes el paso a paso que realicé. Luego de haber cosido a esta, también le introduje un pedazo de goma para que me quedara arruchado, tanto arriba, como abajo.
Así me quedó la blusa.
Me gusta como se ve, realmente me quedó muy bien, justo como la quería. Se mira muy elegante ideal para salir y lucirla. Pero eso no es todo a pesar que se ve muy bonita quise cambiarle los botones por unos más elegantes y decorativos; a mi parecer estos le dan un toque especial a la prenda.
Aquí tenemos nuestra blusa una increíble y total transformación que dejó a la familia sorprendida con los cambios que le hice.
Me fascinó hacer esto, realmente me sentí emocionada y animada. ¡Ahora quién me aguanta cosiendo todas las prendas que me quedan por arreglar! ja ja ja.
Si eres como yo que tienes prendas que no usas porque no te quedan o no te gusta el modelo, te animo a que atrevas a crearlas tú misma para veas que te encantará y te animaras con los resultados que obtendrás. Si estás aprendiendo te recomiendo que los cambios que uses para la blusa sean sencillos y fáciles de hacer.
Estoy feliz con mi nueva blusa, creí no poder hacerlo pero estos son los resultados, cuando queremos podemos.
💖Esto ha sido todos mis queridos amigos, gracias por visitar mi blog.💖
💖This has been all my dear friends, thank you for visiting my blog.💖
Saludos💖
Ensayo y error. Así es que vamos aprendiendo. Hay que ser atrevido y cortar sin miedo. Como dices, más es lo que ganaste por arreglarla que lo que hubieras perdido. Ahora a sacar mudas para acomodar y estrenar 🥳👏☺️
Así es amiga, a estrenar de ahora en adelante. Realmente todo es cuestión de intentarlo y ver que pasa.
Me gustaron los resultados que obtuve, ahora tengo deseos de arreglar otras que me quedan y estrenar.
Gracias por tu visita.
Well done, looks great.
Que buen cambio, te quedo una hermosa blusa, me encanto, felicidades.
Gracias querida, por tu comentario lo aprecio mucho.
Hmm beautiful transformation it looks good on you.
Gracia querida.
Fue bueno que se arriesgase, le luce bastante bien su trabajo. Ya debería tener más ánimo para hacer más arreglos de este tipo.