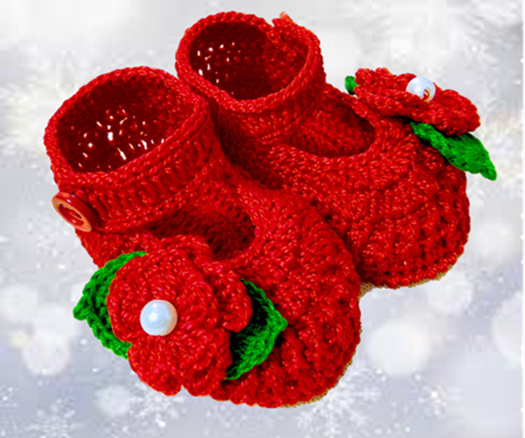
A pair of shoes for Christmas❄
Hello my dear friends Hive Creativos, since days I'm thinking about all the things I want to do for Christmas, although it seems a little early to be thinking about it, I confess I could not stand to do them when I got them on the Internet.
These shoes can not only be for Christmas, if we see the color is what really identifies with Christmas but the pattern of the shoe can be used for the whole year. Without more than writing we will go into the subject because the tutorial something long to explain.

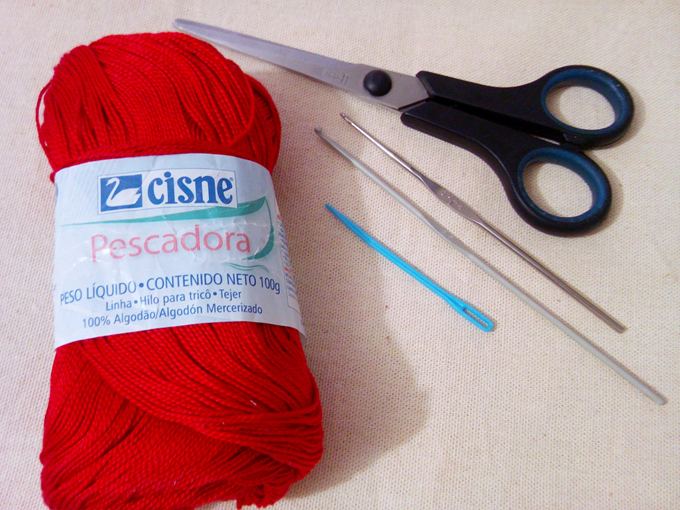
Materials we are going to use:
Processing time:
It took me two days to make these shoes, but now I can make them in one day after taking out the pattern as it was on the web.
Difficulty: medium.
Step by step
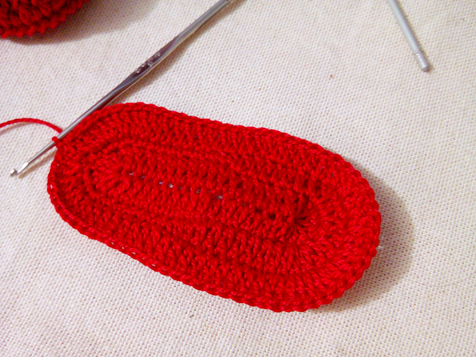
1st turn: We are going to start by making 21 chains, then we take a loop and we get a high stitch in the fourth chain, in that same stitch we are going to knit a high stitch, we continue with 16 high stitches, one for each base stitch, in the last stitch we have left we knit 5 high stitches in that same stitch. We continue with 16 high stitches and on the last stitch we have left, we knit 2 high stitches and close this stitch on the third chain stitch.
2nd lap: Let's weave a chain that is equivalent to our first low stitch and immediately we mark with a hook thread or special marker, I advise you not to stop marking please, because terrible mistakes can be made that make you lose work and time. In the next base point we make a low point increase and we repeat another increase in the next point, we continue with 7 low points, 2 medium high points, 7 high points, when we reach the end we make 5 high point increases. We return with 7 high points, 2 medium high points and 7 low points, we continue with 2 low point increments and on the slipped stitch of the previous turn we weave a low point, we close this turn with slipped stitch on the starting chain without removing the marker.
3rd row: Weave 3 chains that are equivalent to our first high stitch, then we weave 4 high stitch increments, one for each base stitch, we continue with 16 high stitches and we get to where the 5 increments of the previous row are, in that place we make 10 high stitch increments, 16 high stitches and four high stitch increments as we did in the beginning of this row; in the last base stitch that we have left we make a high stitch alone and we close with slipped stitch on the third starting chain. We must be molding our sole so that it takes shape but without stretching.

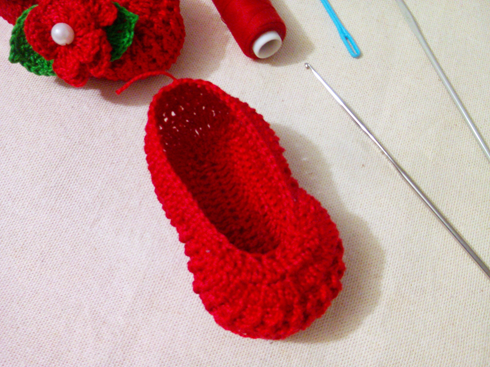
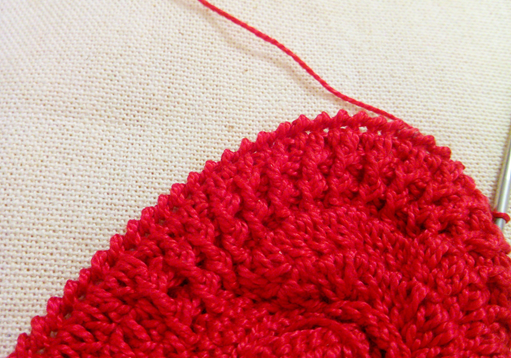
4th turn for the top of the shoe: We knit 70 high stitches by inserting the needle only in the back thread at each base stitch, we close this turn with a stitch slipped into the third starting chain.
5th row: Weave 3 chains, which is equivalent to our first high stitch, and knit 14 more high stitches for a total of 15. Then knit a relief stitch, that is, one high stitch in front and another high stitch in back, in total 40 high stitches in relief; continue with 15 normal high stitches and close the row with a stitch slipped on the third starting chain.
8th lap: We repeat the same procedure of the previous lap.
9th lap: We weave a chain that is equivalent to our first low point and 19 more low points for a total of 20, we continue with 15 high point decreases and again 20 low points to close the lap with a slipped stitch on the first starting chain.
10th lap: We do 20 low points, a half high point and then 7 high point decreases, a half high point, we finish this lap with 19 low points, we close the slider stitch lap in the first starting chain. and we cut the thread.

To form the handle of the right foot:
To make it completely straight we do the following: we are going to count 8 points from where we made the high half point of the previous turn backwards, there we are going to place the marker and on the other side we do the same. After we count we remove the marker and put the strand in with a slipped stitch right where the mark on the number 8 point was. We weave 3 chains and knit high stitches up to the other marker, then we weave 21 chains, take the thread and get into the fifth chain and continue with high stitches until we finish this strip.
To form the handle on the left foot:
We take the shoe by the same place as seen in the previous image having counted the 8 stitches as we did in the previous step, we put the needle with a slipped stitch and we knit 21 chains, we put the thread in the fifth chain and continue with high stitches until finishing this strip, we continue with high stitches until we have the marker.
We are already finishing our shoe, we just need to make a point slipped around the contour of the shoe. To make a good finish on the bottom of the shoe you can make crab stitch. If you like you can get crab stitch videos on the internet.

As I told you before, this shoe is not only suitable for Christmas, but you can also combine it with any red dress all year round.
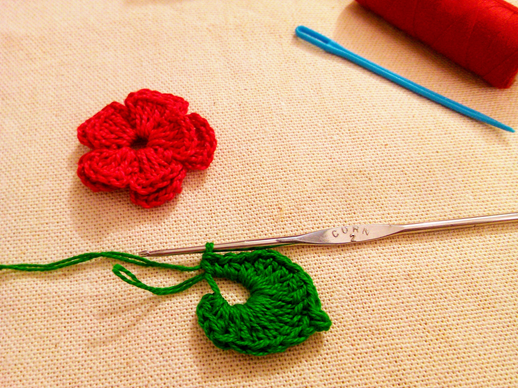
To decorate you can choose any model of flower and leaf you like. I hope you liked my project today, it's a pleasure for me to bring you this kind of work that makes my life easier.

❄Unos zapatos para navidad❄
Hola mis queridos amigos Hive Creativos, desde hace días estoy pensando en todas la cosas que quiero hacer para la navidad, aunque parezca algo pronto para estar pensando en eso, confieso que no me aguante en hacerlos cuando los conseguí en internet.
Estos zapatos no solo pueden ser para navidad, si nos ponemos a ver el color es el que realmente identifica con la navidad pero el patrón del zapato puede ser utilizado para todo el año. Sin más que escribirles vamos a entrar en materia porque el tutoriales algo largo de explicar.
Materiales que vamos a utilizar:
Tiempo de elaboración:
Tardé en elaborar estos zapatos dos días, pero ahora ya puedo hacerlos en un día luego de haber sacado el patrón tal cual estaba en la web.
Dificultad: media.
Pasito a pasito
1ra vuelta: Vamos a empezar haciendo 21 cadenas, luego tomamos lazada y nos metemos con un punto alto en la cuarta cadeneta, en ese mismo punto vamos a tejer un punto alto, continuamos con 16 puntos altos, uno para cada punto de base, en el último punto que nos queda tejemos 5 puntos altos en ese mismo punto. Continuamos la vuelta con 16 puntos altos y en el último punto que nos queda tejemos 2puntos altos y cerramos esta vuelta en la tercera cadeneta de inicio con un punto deslizado.
2da vuelta: Tejemos una cadeneta que equivale a nuestro primer punto bajo y de inmediato marcamos con un gancho hilo o marcador especial, te aconsejo que no dejes de marcar por favor, ya que se pueden cometer errores terribles que te hacen perder trabajo y tiempo. En el siguiente punto de base hacemos un aumento de puntos bajos y repetimos otro aumento en el punto siguiente, continuamos con 7 puntos bajos, 2 medios puntos altos, 7 puntos altos, al llegar al extremo hacemos 5 aumentos de puntos altos. Nos devolvemos con 7 puntos altos, 2 medios puntos altos y 7 puntos bajos, seguimos con 2 aumentos de puntos bajos y sobre el punto deslizado de la vuelta anterior tejemos un punto bajo, cerramos esta vuelta con punto deslizado sobre la cadeneta de inicio sin quitar el marcador.
3ra vuelta: Tejemos 3 cadenetas que equivalen a nuestro primer punto alto, luego tejemos 4 aumentos de puntos altos, uno para cada punto de base, continuamos con 16 puntos altos y llegamos a donde están los 5 aumentos de la vuelta anterior, en ese sitio hacemos 10 aumentos de puntos altos, 16 puntos altos y cuatro aumentos de puntos altos como lo hicimos en el inicio de esta vuelta; en el último punto de base que nos queda hacemos un punto alto solo y cerramos con punto deslizado en la tercer cadena de inicio. Debemos ir moldeando nuestra suela para que vaya tomando forma pero sin estirar.
4ta vuelta para la parte superior del zapato: Tejemos 70 puntos altos insertando la aguja solo en la hebra trasera en cada punto de base, cerramos esta vuelta con un punto deslizado en la tercera cadeneta de inicio.
5ta vuelta: Tejemos 3 cadenetas que equivale a nuestro primer punto alto y tejemos 14 puntos altos más para un total de 15. Luego tejemos punto relieve, es decir hacemos un punto alto por delante y otro punto alto por detrás, en total debemos tejer 40 puntos altos en relieve; continuamos con 15 puntos altos normales y cerramos la vuelta con un punto deslizado en la tercera cadeneta de inicio.
8va vuelta: Repetimos el mismo procedimiento de la vuelta anterior.
9na vuelta: Tejemos una cadeneta que equivale a nuestro primero punto bajo y 19 puntos bajos más para un total de 20, continuamos con 15 disminuciones de puntos altos y nuevamente 20 puntos bajos para cerrar la vuelta con punto deslizado en la primera cadeneta de inicio.
10ma vuelta: Hacemos 20 puntos bajos, un medio punto alto y luego 7 disminuciones de puntos altos, un medio punto alto, termino esta vuelta con 19 puntos bajos, cerramos la vuelta con punto deslizado en la primer cadeneta de inicio. y cortamos la hebra.
Para formar el asa del pie Derecho:
Para que nos quede completamente derecho hacemos lo siguiente: vamos a contar 8 puntos desde donde hicimos el medio punto alto de la vuelta anterior hacia atrás, ahí vamos a colocar el marcador y del otro lado hacemos lo mismo. Luego que contamos quitamos el marcador y metemos la hebra con un punto deslizado justo donde estaba la marca del punto número 8. Tejemos 3 cadenas y tejemos puntos altos hasta el otro marcador, luego tejemos 21 cadenetas, tomamos la hebra y nos metemos en la quinta cadeneta y continuamos con puntos altos hasta terminar esta tira.
Para formar el asa del pie Izquierdo:
Tomamos el zapato por el mismo sitio como se ve en la imagen previo haber contado los 8 puntos como lo hicimos en el paso anterior, metemos la aguja con un punto deslizado y tejemos 21 cadenetas, metemos la hebra en la quinta cadeneta y continuamos con puntos altos hasta terminar la tira, continuamos con puntos altos hasta donde tenemos el marcador.
Ya vamos terminando nuestro zapato, solo nos faltaría realizar un punto deslizado por todo el contorno del zapato. Para realizar un buen acabado en la parte de abajo del zapato pueden elaborar punto cangrejo. Si gustan pueden conseguir videos de punto cangrejo en internet.
Como les dije antes este zapato no solo sirve para navidad sino también puedes combinar con cualquier vestido rojo durante todo el año.
Para decorar puedes escoger cualquier modelo de flor y hoja que gustes. Espero que les haya gustado mi proyecto de hoy, es para mí un gusto traerles este tipo de trabajos que me alegran la vida.


Te felicito, quedaron espectaculares!
Abrazos! @carolinacardoza
Muchisimas gracias, eso me emociona mucho saber que te gustaron
Hola, están preciosos, mi hija uso muchos de esos cuando era bebe, a mi madre y mi tía les encanta tejer. Este modelo quedó bellísimo y ese hilo rojo hace que se vean aun mejor.
Te cuento que ya me las encargaron en blanco, vamos a ver que tal me quedan, de repente las publico tambien.
Están preciosas esas zapatillas, te felicito :)
Muchisimas gracias por el piropo.
Congratulations, your post has been upvoted by @dsc-r2cornell, which is the curating account for @R2cornell's Discord Community.
Enhorabuena, su "post" ha sido "up-voted" por @dsc-r2cornell, que es la "cuenta curating" de la Comunidad de la Discordia de @R2cornell.
Oh they are cute. Well done.
Muy hermosos de ensueño, el hilo es un rojo como nacarado, así lo percibo en la foto. A cualquier beba que los luzca, le van a quedar muy lindo.
Estanbellisimo Carolina, a mi me encanta tejer, anotado el modelo, gracias por compartir.
Realmente hermosos, muy prolijos y ese color es precioso. Puede ser usado en cualquier momento. ¡Buen trabajo! Te felicito ❤️