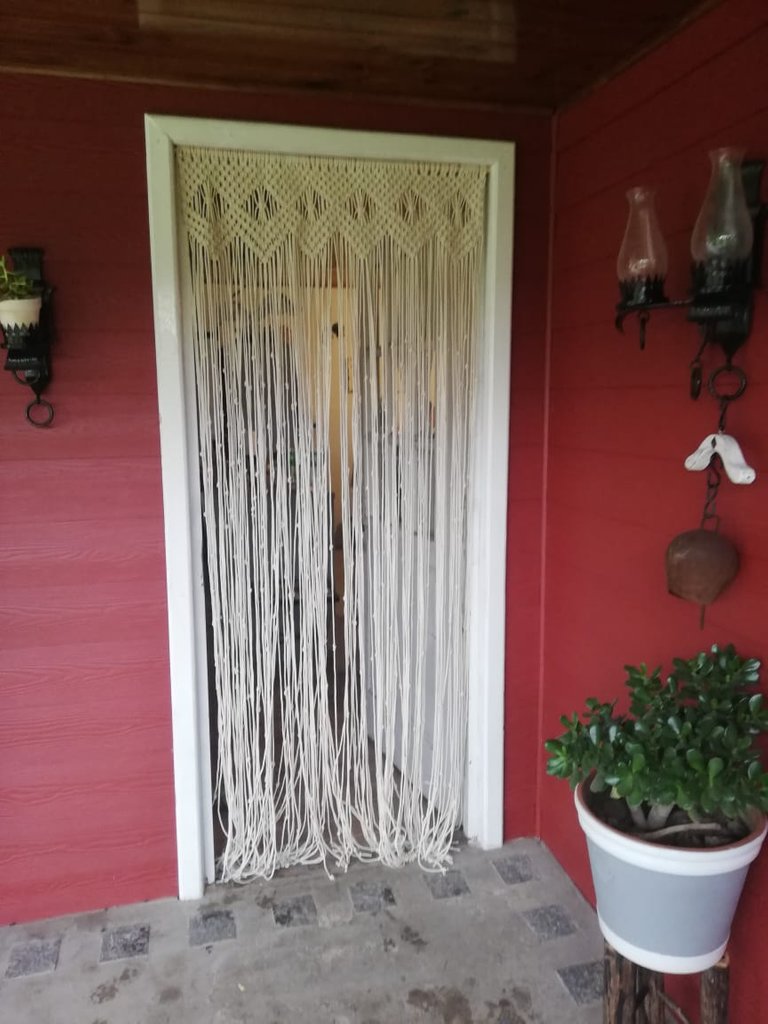
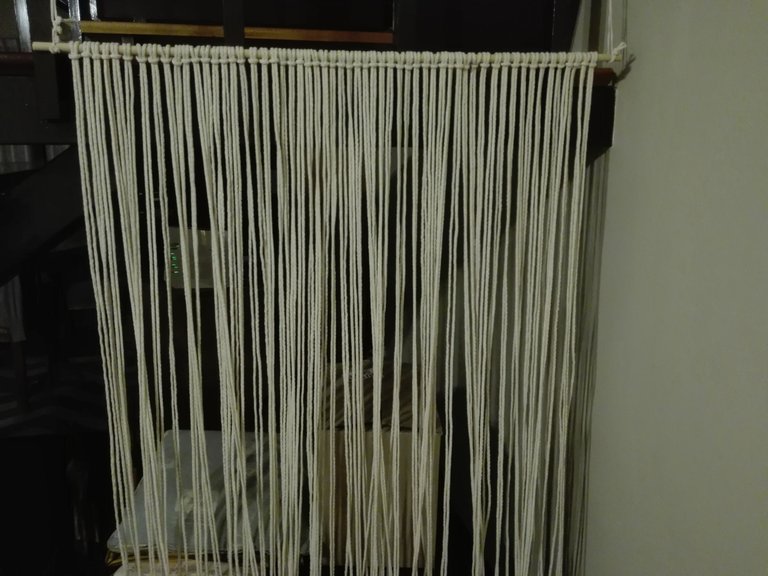
Good Monday to the entire Hive community !! What is promised is a debt, today I am going to show you the step by step to make this macramé curtain.
Muy buen Lunes a toda la comunidad de Hive!! lo prometido es deuda, hoy les voy a mostrar el paso a paso para hacer esta cortina en macramé.
Materials needed for a curtain d 2.00 m high x 80 cm wide:
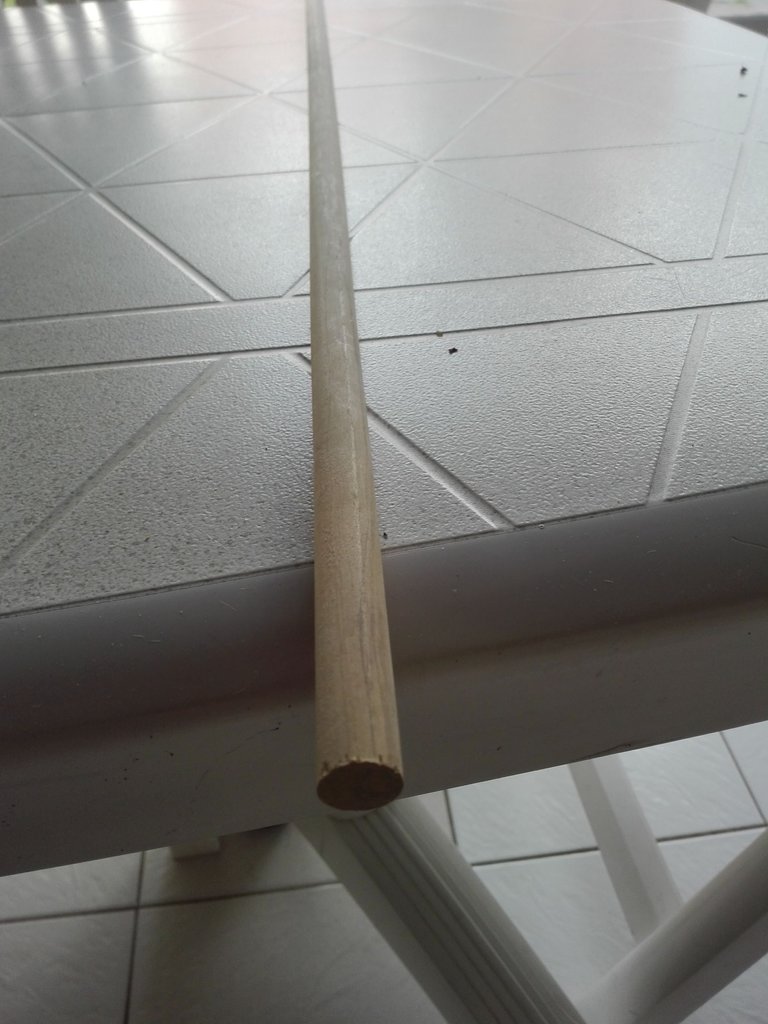
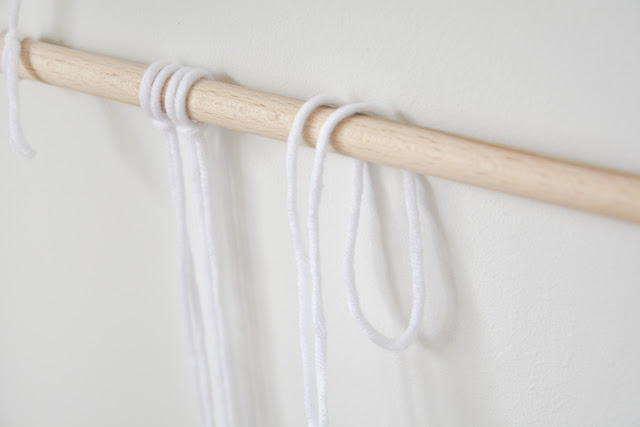
1 wooden rod at least 88 cm wide (it may be more depending on the width of the door)and 16-20 mm in diameter.
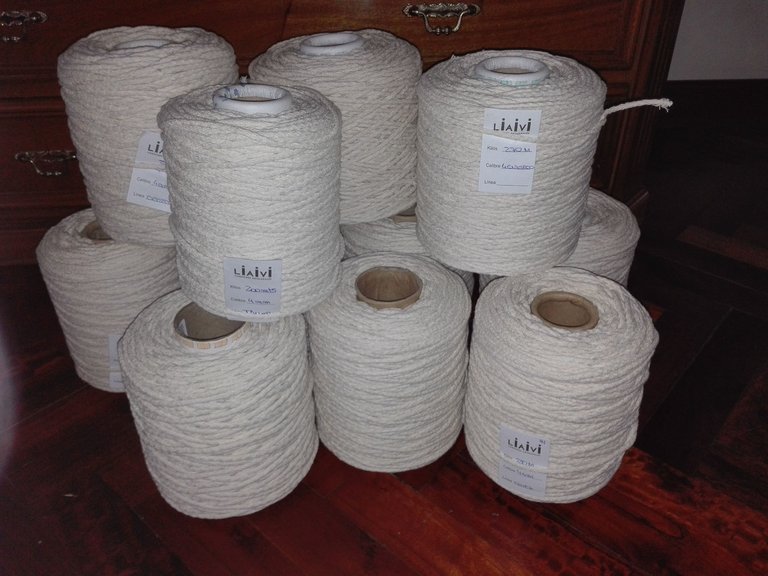
50 strips of 6 m each of 4 mm cotton cord thread (if you have a finer thread, there will be more strips, with a thicker thread less).
Materiales necesarios para una cortina d 2,00 m de alto x 80 cm de ancho:

* 1 varilla de madera de al menos 88 cm de ancho (puede ser más depende del ancho de la puerta) y de 16-20 mm de diámetro.
* 58 tiras de 6 m c/u de hilo cordón de algodón de 4 mm (si tienen un hilo mas fino, serán más tiras, con un hilo mas grueso menos).
I recommend not cutting all the strips and tacking, because they will have a tangle of threads tangled on all sides, it is better to cut and mount on the rod.
Recomiendo no cortar todas las tiras y montar, porque van a tener una maraña de hilos enredados por todos lados, mejor es cortar y montar sobre la varilla.
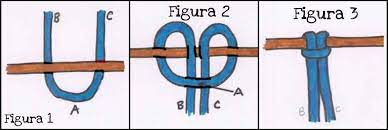
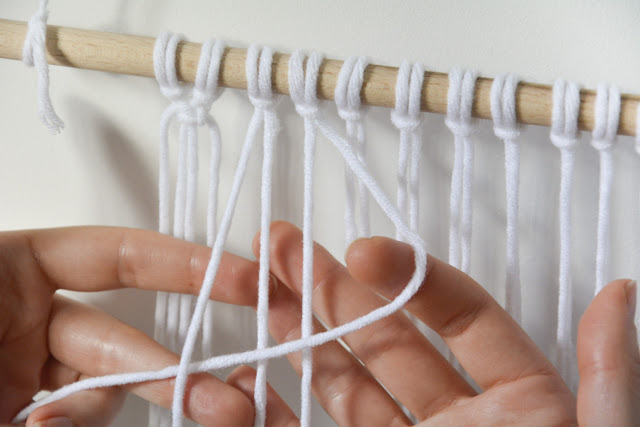
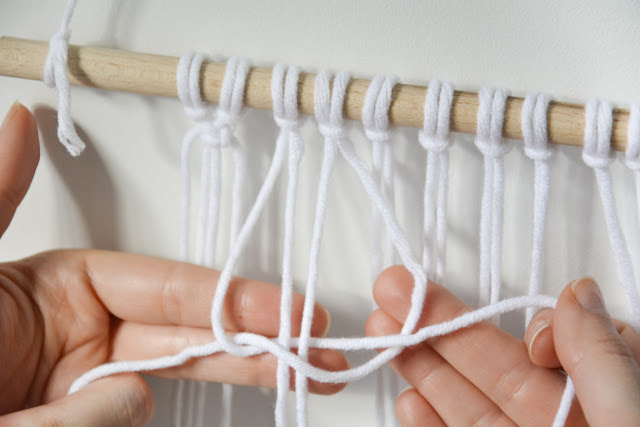
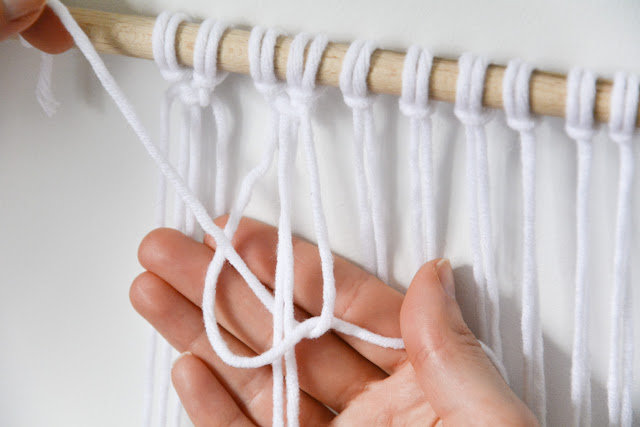
To assemble the threads, they must fold them in half, put the closed part on the rod and pass the ends through the bow (this is the ALONDRA KNOT):
Para montar los hilos, deben doblarlos a la mitad, poner la parte cerrada sobre la varilla y pasar los extremos por el arquito (este es el NUDO ALONDRA):
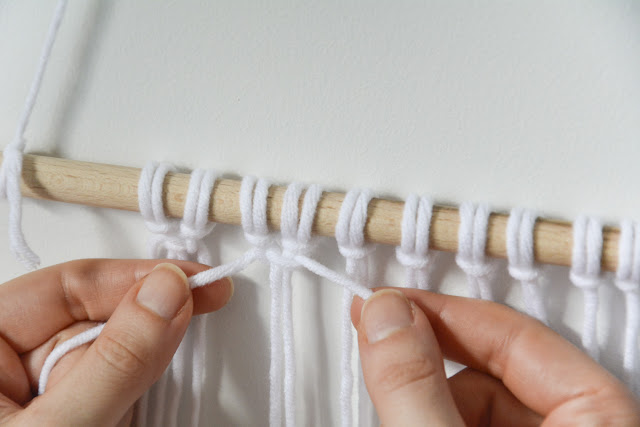
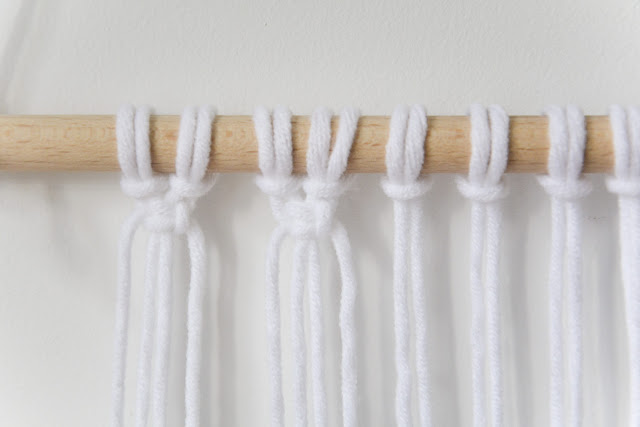
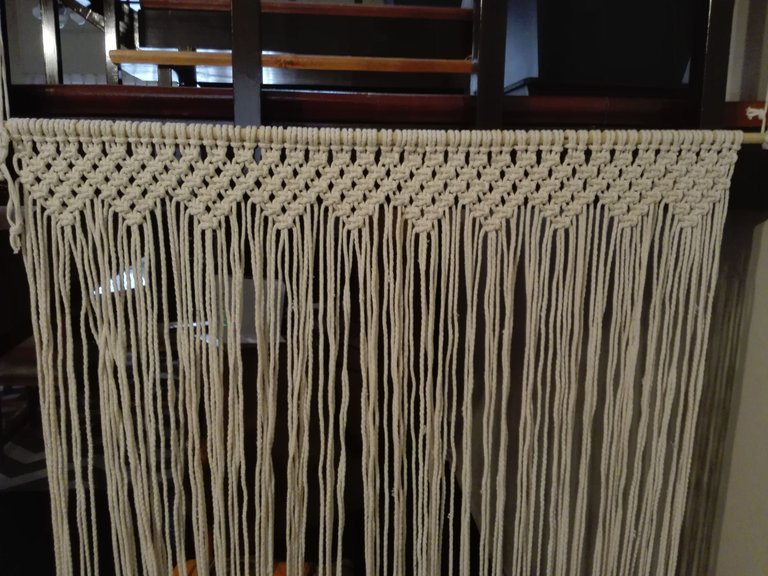
When they finish mounting all the strips on the rod, you have to have this:
Cuando terminen de montar todas las tiras sobre la varilla les tiene que quedas esto:
Then we begin to knit the FLAT KNOT or SQUARE KNOT. We start from one of the ends taking 4 threads, the 2 in the middle are the guide and only the ends move as shown in the drawing:
Luego comenzamos a tejer el NUDO PLANO o NUDO CUADRADO. Comenzamos desde uno de los extremos tomando 4 hilos, los 2 del medio son la guía y solo se mueven los extremos como muestra el dibujo:
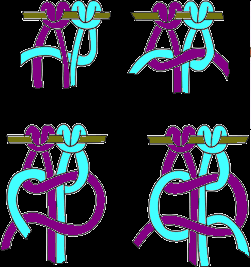
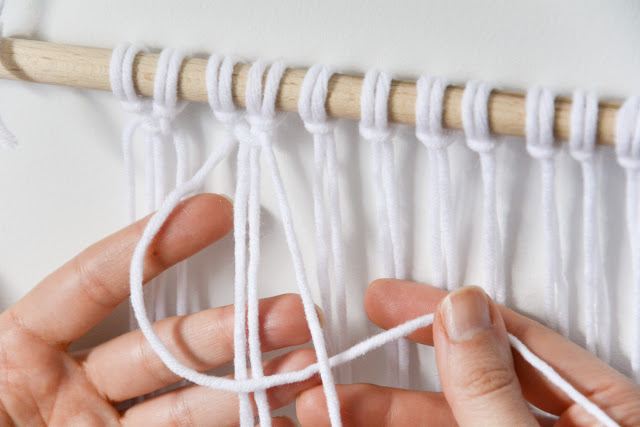
We take the rope most to the right and pass it over the two central ones and under the one on the left.
Tomamos la cuerda de más a la derecha y la pasamos por encima de las dos centrales y por debajo de la de la izquierda.
Now we take the rope on the left, we pass it under the others and we take it out above the first.
Ahora tomamos la cuerda de la izquierda, la pasamos por debajo de las demás y la sacamos por encima de la primera.
We raise it to the top and tighten it a little, but not too much, so that the knots are beautiful. We have already made half a knot.
Lo subimos hasta arriba y lo apretamos un poco, pero no demasiado, para que los nudos queden bonitos. Ya llevamos hecho medio nudo.
The other half of the knot is made the same but on the other side. That is, we take the rope on the left, we pass it over the two central ones and under the last one on the right. Then, we take the one on the right, pass it under the others and take it out above the last one and press.
La otra mitad del nudo se hace igual pero del otro lado. Es decir, tomamos la cuerda de la izquierda, la pasamos por encima de las dos centrales y por debajo de la última de la derecha. Después, tomamos la de la derecha, la pasamos por debajo de las otras y la sacamos por encima de la última y apretamos.
And this is how we have the complete flat knot. So we repeat the whole row until the end.
Y así es como nos queda el nudo plano completo. Repetimos así toda la fila hasta llegar al final.
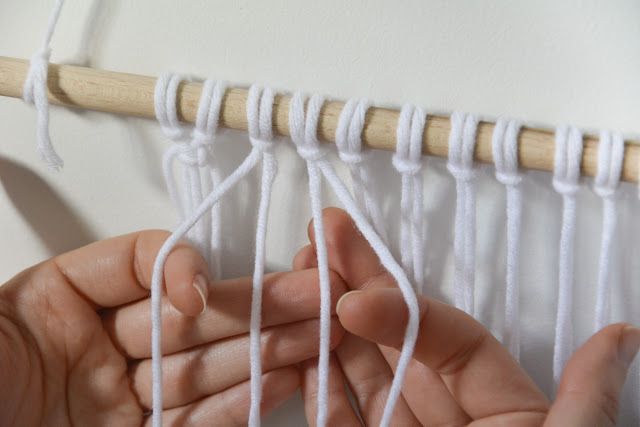
To start the second row, which will also have all the knots, we will start by leaving two ropes free at the beginning. We take the next four, two from the first knot and two from the second, and we make a flat knot like the ones we have done before.
Para empezar la segunda fila, que también va a tener todos los nudos, vamos a empezar dejando dos cuerdas libres al principio. Tomamos las cuatro siguientes, dos del primer nudo y dos del segundo, y hacemos un nudo plano como los que hemos hecho antes.
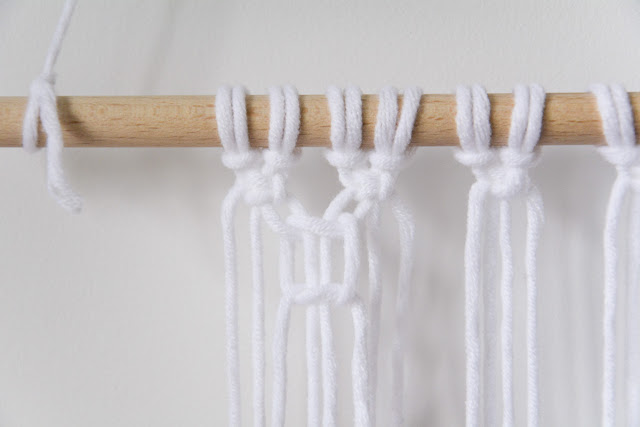
It should look like this, with the knots interspersed.
Así debe quedar, con los nudos intercalados.
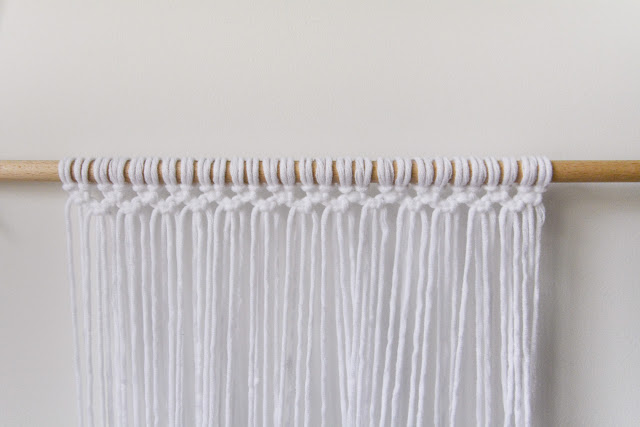
The third row is equal to the first, the fourth equal to the second.
In the fifth row, we do not make the first knot that we should do, if we do 2 more and then one without knitting, and so I repeat. In this way we begin to create a triangle with the tip down.
The fifth row is only tied in a knot in the middle of the two in the previous row.
La tercer fila es igual a la primera, la cuarta igual a la segunda.
En la quinta fila, no hacemos el primer nudo que deberíamos hacer, si hacemos 2 mas y luego uno sin tejer, y así repito. De esta forma comenzamos a crear un triángulo con la punta para abajo.
La quinta fila solo se hace un nudo en el medio de los dos de la fila anterior.
Come on, it seems very difficult but it is not so difficult! you have to practice, there is no other ...
Tomorrow I will tell you how to follow the step by step! thanks for following me and reading this post! Kisses
Vamos que parece muy difícil pero no lo es tanto!! hay que practicar, no queda otra....

Mañana les cuento como sigue el paso a paso! gracias por seguirme y leer este post! besos
Ohhh this is really cool! I am sorely tempted, but it would also become a cat toy in this home. 😂
Hello, yes, it is not an economical technique because the threads are expensive, but it is a good job opportunity, because it weaves quickly.
Simplemente espectacular, con esta publicación me llevaste a cuando tenía 12 años, para un día de la madre en la escuela nos enseñaron a hacer materos, luego de hacer el del regalo de mi mamá hice unos cuantos para mis tías. Es un principio similar al que nos has compartido hoy.
Esta cortina luce espectacular, y ese color es de un sobrio y elegante.
Gracias por comaprtir.
Saludos
Hola, siii, yo aprendí en el colegio secundario también, pero ahora el macramé está muy de moda, y hay DE TODO para tejer con esta técnica.... hay que volver a cuando éramos niñas!!
Great work! I remember when macrame was very popular in the 1970s.
Yes, and like everything, it came back, now it is very popular too, you can do everything!
I have always thought this technique of knotting ropes was so beautiful. You do a really lovely job with this. That curtain is just so beautiful.
Thanks so much for sharing the steps as promised. Looking forward to the next part :)
I appreciate your bright and clear photos btw ~
Hi, thanks a lot!!
For sure!