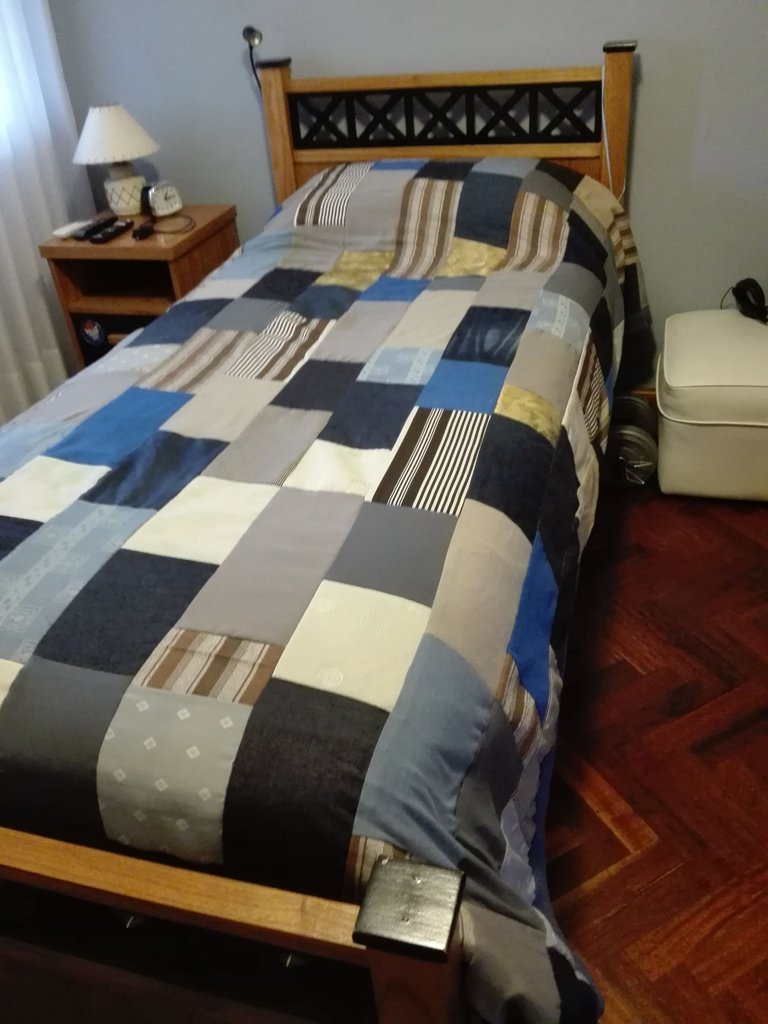
Hi Hive friends, good Monday to everyone, Daniela writes to you from Argentina. Today I want to tell you how I made this padding for my son.
Hola amigos de Hive, buen Lunes para todos, desde Argentina les escribe Daniela. Hoy les quiero contar como hice este acolchado para mi hijo.
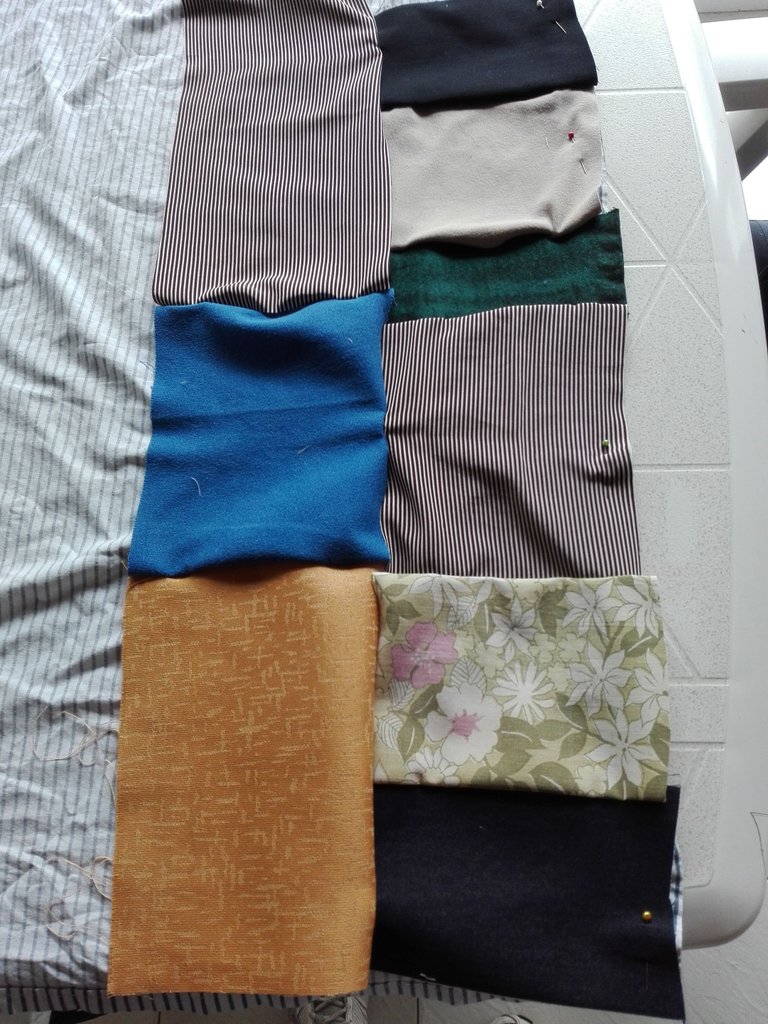
The materials we need are: pieces of fabric of different colors, 2 fabrics the size of the quilt (you can use sheets or tablecloths for example) and fabric of the same color for the entire border.
Los materiales que necesitamos son: retazos de tela de distintos colores, 2 telas del tamaño del acolchado (pueden usar sábanas o manteles por ejemplo) y tela de un mismo color para todo el borde.
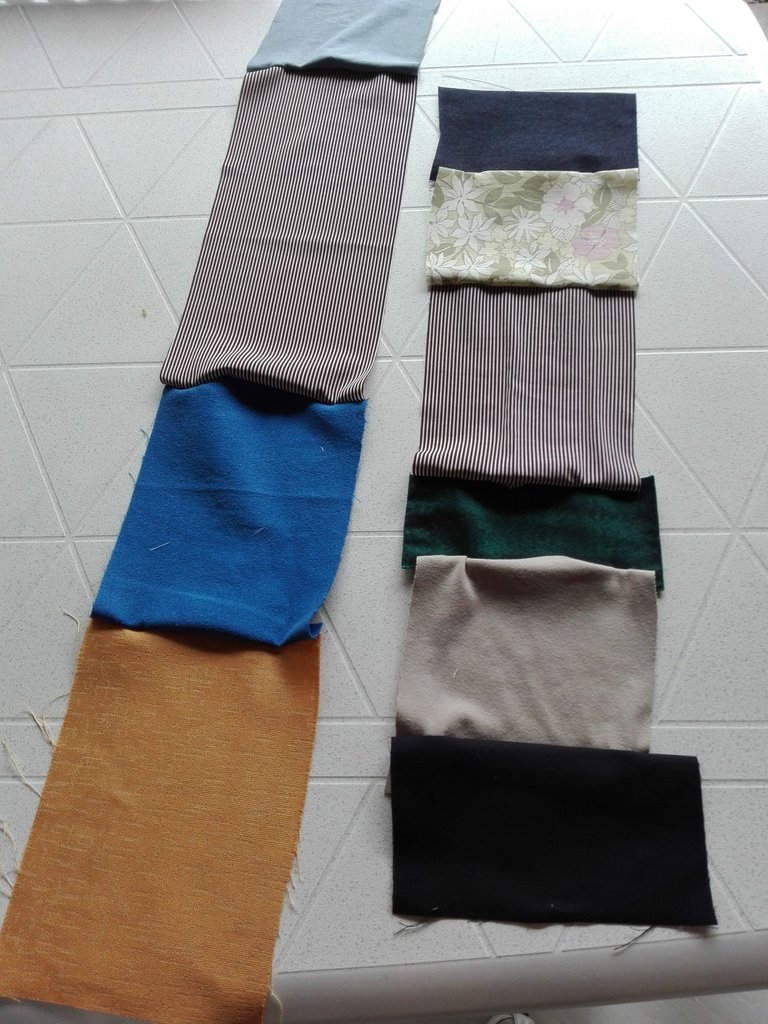
The first thing we must do (and the most difficult) is to choose the fabrics according to the color palette we want. In this case, I wanted blue tones but a combination with some brown, corn and cream tones seemed nice to me.
Lo primero que debemos hacer (y lo más difícil) es elegir las telas según la paleta de colores que queremos. En este caso yo quería en tonos azulados pero me pareció lindo una combinación con algún tono marrón, maíz y crema.
The fabrics can be of different types (jean, cotton, gabardine, etc.) and of different textures, no problem.
They must cut the same width for all the chosen tones, in this case I cut in 12 cm, and they must NOT have the same length, precisely to be able to achieve the pachwork design.
Las telas pueden ser de distinto tipo (jean, algodón, gabardina, etc) y de distintas texturas, no hay problema.
Deben cortar el mismo ancho para todos los tonos elegidos, en este caso yo corté en 12 cm, y NO deben tener el mismo largo, justamente para poder lograr el diseño pachwork.
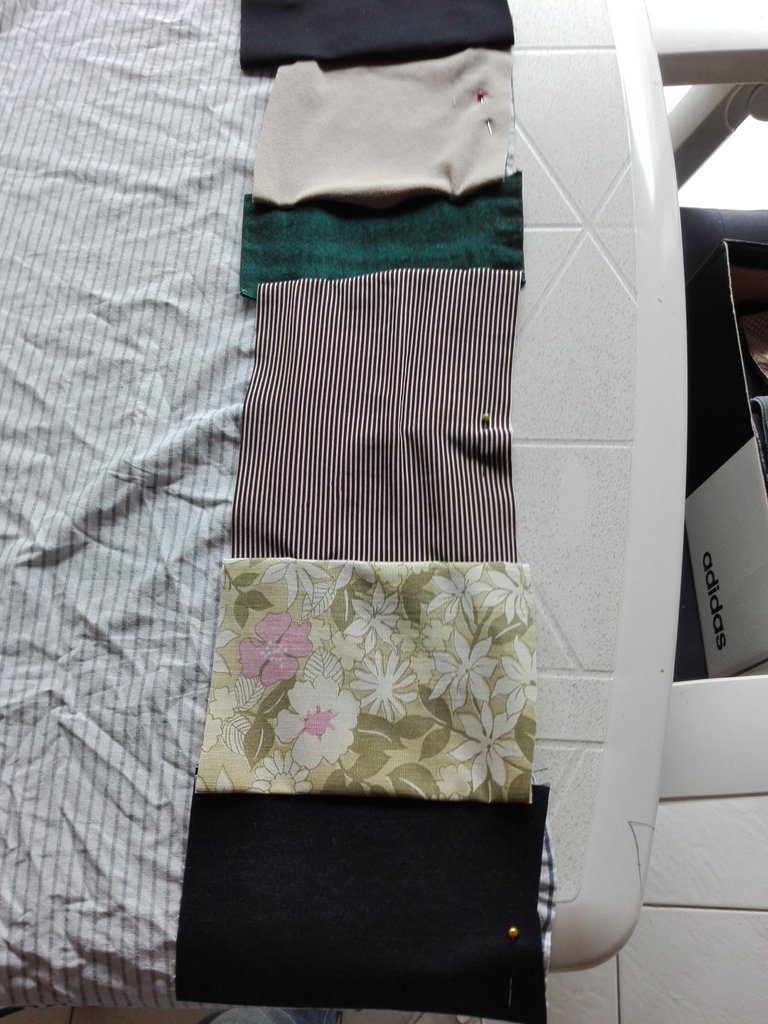
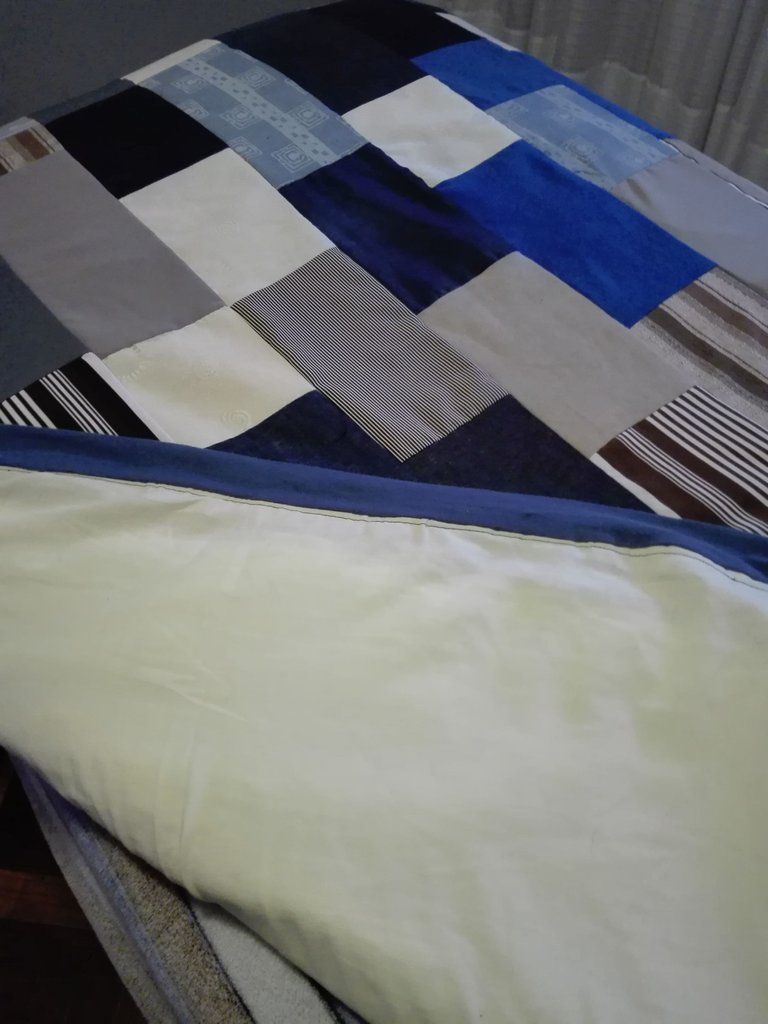
They must first join all the pieces, forming strips of the same length as we want the quilting. There they should alternate the colors, I put all of them in piles on the table and mixed, pinning them first and then sewing them by machine.
Primero debemos unir todas las piezas, formando tiras de la misma longitud del acolchado deseado. Allí deben alternar los colores, yo los puse todos en pilas sobre la mesa y los fuí mezclando, fijándolos primero con alfileres y luego cosiéndolos a máquina.
Once we have all the strips, we begin to sew them on 1 of the fabrics, the first with the view towards us, and from the second, facing the fronts and then fasten them well with pins before sewing the next.
1 strip is sewn, pinned, and then the next strip is faced pinning before sewing. This step is very important so that everything is even.
Una vez que tenemos todas las tiras, comenzamos a coserlas sobre 1 de las telas, la primera con la vista hacia nosotros, y a partir de la segunda, enfrentando los frentes para luego sujetar bien con alfileres antes de coser la siguiente.
Se cose 1 tira, se sujeta con alfileres y luego se enfrenta la tira siguiente sujetando con alfileres antes de coser. Ese paso es muy importante para que todo quede parejo.
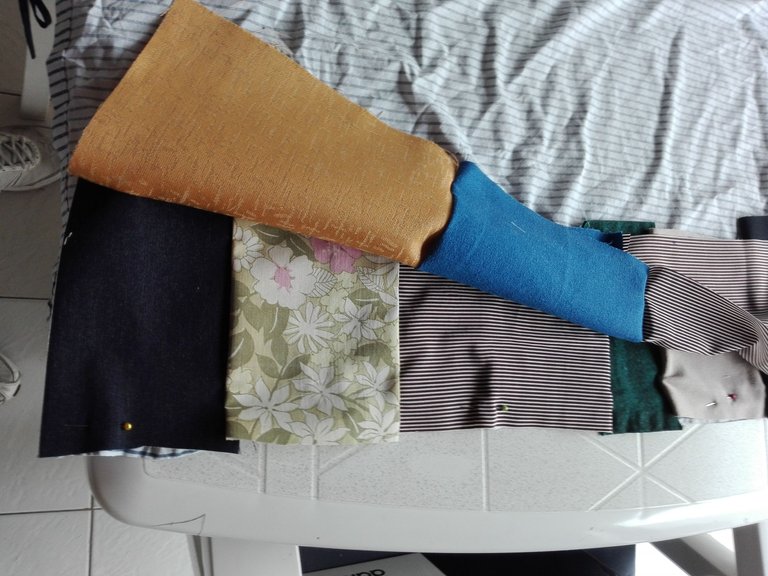
One trick that helped me was to have all the strips cooked beforehand, then when I was holding them with alpines over the previous one already cooked, if there were just equal pieces that were one next to the other, I used another strip or simply turned it over so that did not match.
Un truco que me sirvió, fue tener todas las tiras cocidas antes, entonces cuando ya las sujetaba con alfileres sobre la anterior ya cocida, si justo había retazos iguales que quedaban uno al lado del otro, usaba otra tira o simplemente la daba vuelta para que no coincidieran.
Once we have all the strips sewn in 1 of the fabrics, we sew the second fabric all over the edge of the back side ... simply so that the contact with the person is smooth and does not have the seams.
Una vez que tenemos todas las tiras cocidas en 1 de las telas, cocemos por todo el borda del lado de atrás, la segunda tela... simplemente para que el contacto con la persona sea suave y no tenga las costuras.
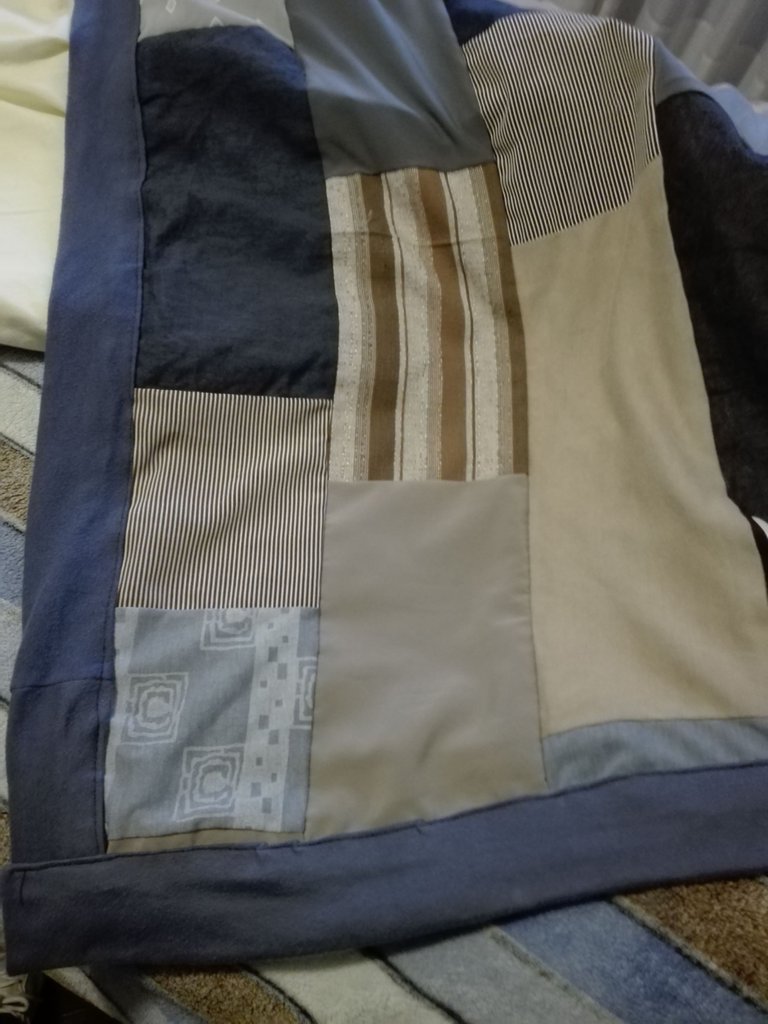
For the edge, I cut long strips 12 cm wide, I started by sewing on the back side of the quilt so that the seam is not noticeable, and then from the front I made a fold and cooked, first the sides and then the headboard and feet. .
Para el borde, corte tiras largas de 12 cm de ancho, comencé cociendo del lado d atrás de la colcha para que no se note la costura, y luego de adelante hice un doblez y cocí, primero los laterales y luego la cabecera y los pies.
I'm not a seamstress by any means, so I apologize to all those who read this post and find mistakes ... I just have a passion for doing productive things with patchwork.
No soy modista ni mucho menos, así que pido perdón a todas aquellas que lean este post y encuentren errores.... solo tengo pasión por hacer cosas productivas con los retazos.
I hope you can do this quilting and thanks for reading this post!
Espero que puedan hacer este acolchado y gracias por leer este post!
I enjoyed your post. It was nice seeing how you put this quilt together for your son. I like the colors you chose for this piece. Thank you for sharing the steps of your work with us :)
@crosheille ~
Hi, thanks to you guys for allowing me!
Congratulations @dru.munecas! You have completed the following achievement on the Hive blockchain and have been rewarded with new badge(s) :
Your next target is to reach 40 posts.
You can view your badges on your board and compare yourself to others in the Ranking
If you no longer want to receive notifications, reply to this comment with the word
STOPSupport the HiveBuzz project. Vote for our proposal!
Hola @dru.munecas me gustó mucho el diseño vertical que lograste con los retazos. La combinación de colores quedó muy bien. Gracias por compartir. Saludos.
Hola, gracias a vos por el comentario!
Hola @dru.munecas
Quedo enamorada, siempre he querido hacer algo así para regalar a un amigo muy querido, de hecho he ido reuniendo las telas, solo me falta armar. La combinación delirante. Me llevo el tip de primero unir todas las piezas, formando tiras de la misma longitud del acolchado que se desee realizar
Gracias por comparrtir
Que bueno!!! otro truco: hice algunas tiras usando solo algunas telas y otras tiras usando otras telas, siempre en la paleta elegida. Cuando cocía las tiras, alternaba una de cada tipo, entonces era bastante difícil que se encimaran 2 colores iguales.
Lleva tiempo pero es fácil de hacer, prolijidad y paciencia!
Well done! This is a wonderful way to reuse fabric. I'm sure your son is pleased.
Hi, as is! it is a way of doing something useful with the patchwork .... he is a teenager so the patchwork goes very well with his age.
Hermoso trabajo Daniela ❤❤ Te felicito ✨✨
Gracias Laura!!😍