A few years ago I came up with the idea of rescuing that leftover wick, washing it and using it again to knit. In this way I have managed to knit some things, mainly hats and doilies.
I saw the call for the Needlework Monday community contest, "Needlework your kitchen", made by friend @kattycrochet, and the interesting entries from @apunawu, @karolrodriguez y @itsostylish, so I decided to do something useful for the kitchen that would also help me to participate in the challenge. Here I am going to explain how I made a crocheted pot holder.
Hace algunos años se me ocurrió la idea de rescatar ese pabilo sobrante, lavarlo y usarlo otra vez para tejer. De esa manera he logrado tejer algunas cosas, principalmente gorros y pañitos.
Vi la convocatoria al concurso de la comunidad Needlework Monday, "Needlework your kitchen", hecha por la amiga @kattycrochet, y las interesantes participaciones de @apunawu, @karolrodriguez y @itsostylish, entonces me propuse hacer algo útil para la cocina que a la vez me sirva para participar en el reto.
Aqui les voy a explicar como hice un agarraollas tejido a ganchillo.
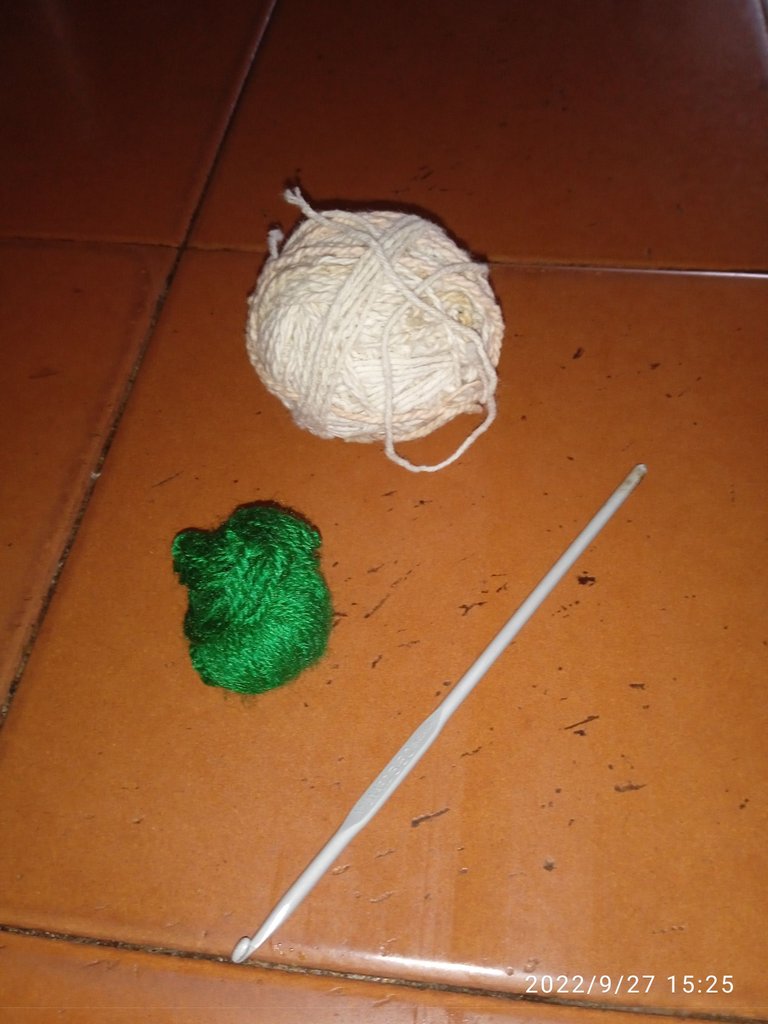
1)35 to 40 grams of wick
2)A little green yarn or another color you like
3)Crochet number 3.5
1)35 a 40 gramos de pabilo.
2)Un poco de estambre verde u otro color que te guste.
3)Ganchillo numero 3,5

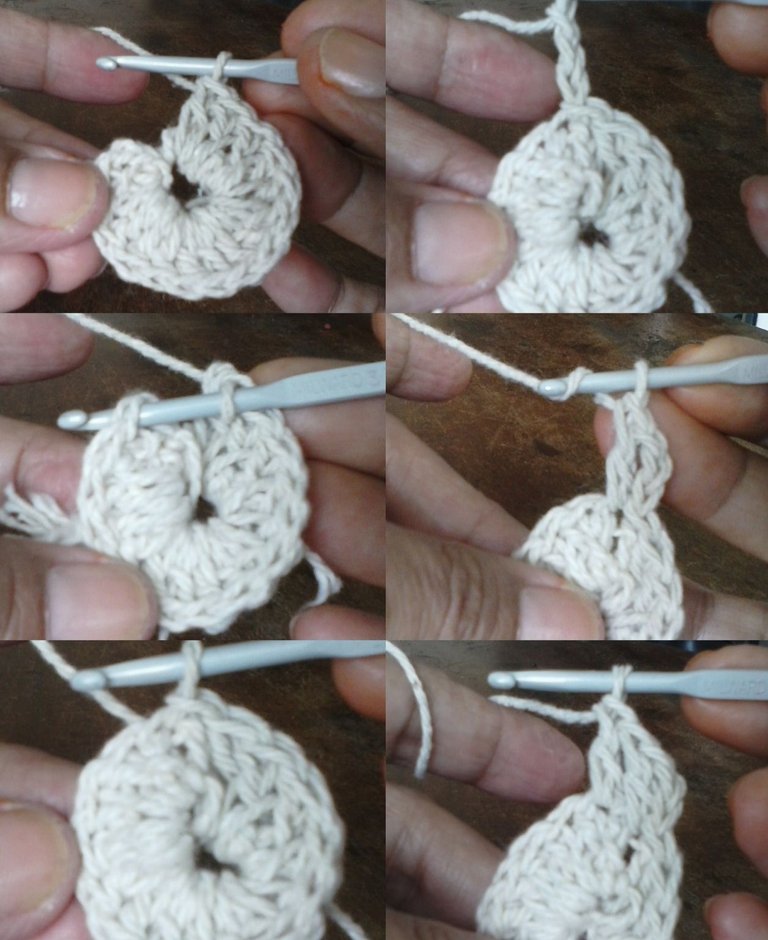
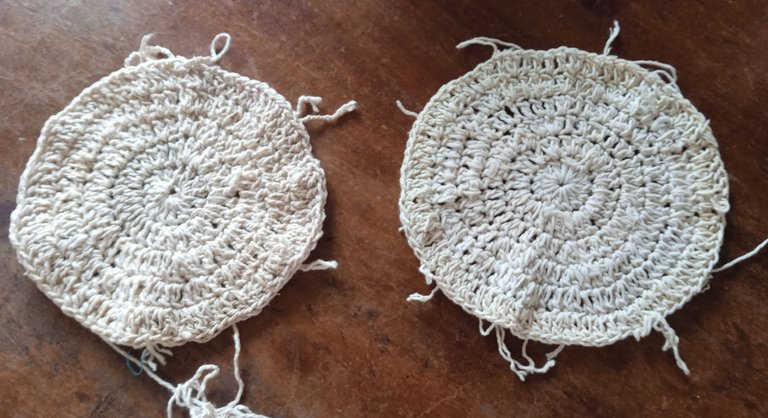
First of all, I gathered all the pieces of wick, tied them and made several ball-shaped skeins.
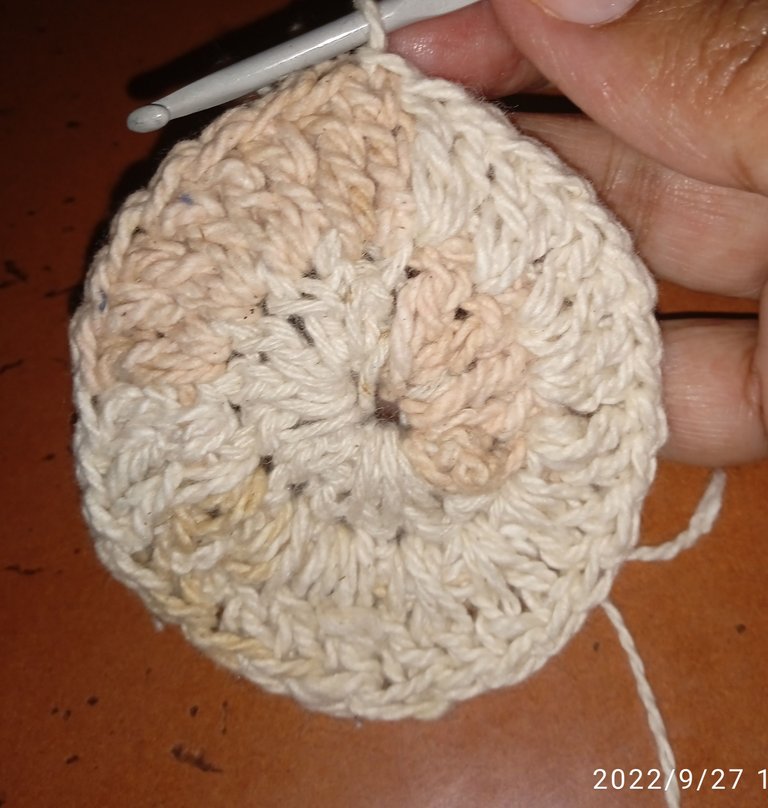
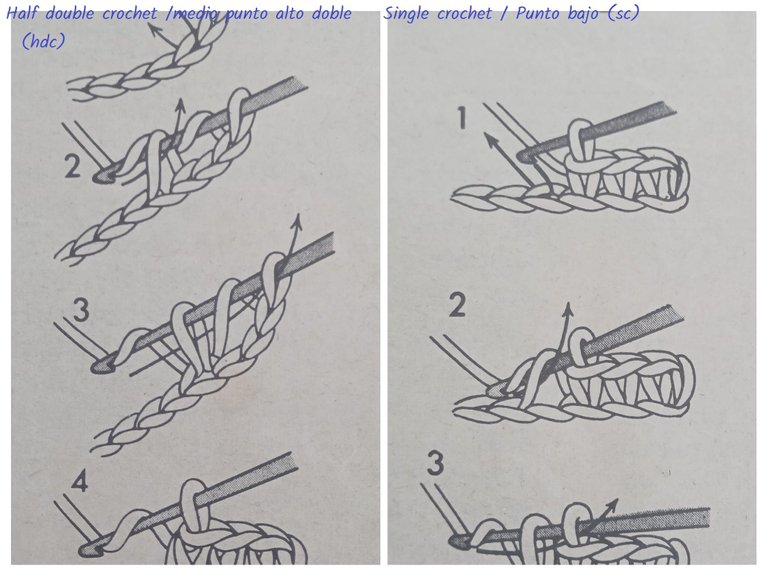
I started the work by making a magic ring on which I worked a first row of 16 half double crochets (hdc), replacing the first with 3 chain stitches.
Primero que todo reuni todos los pedazos de pabilo, los ate e hice varios ovillos en forma de bola.
Comencé la labor haciendo un aro mágico sobre el que tejí una primera hilera de 16 medios puntos altos dobles (hdc), sustituyendo el primero por 3 puntos de cadeneta.

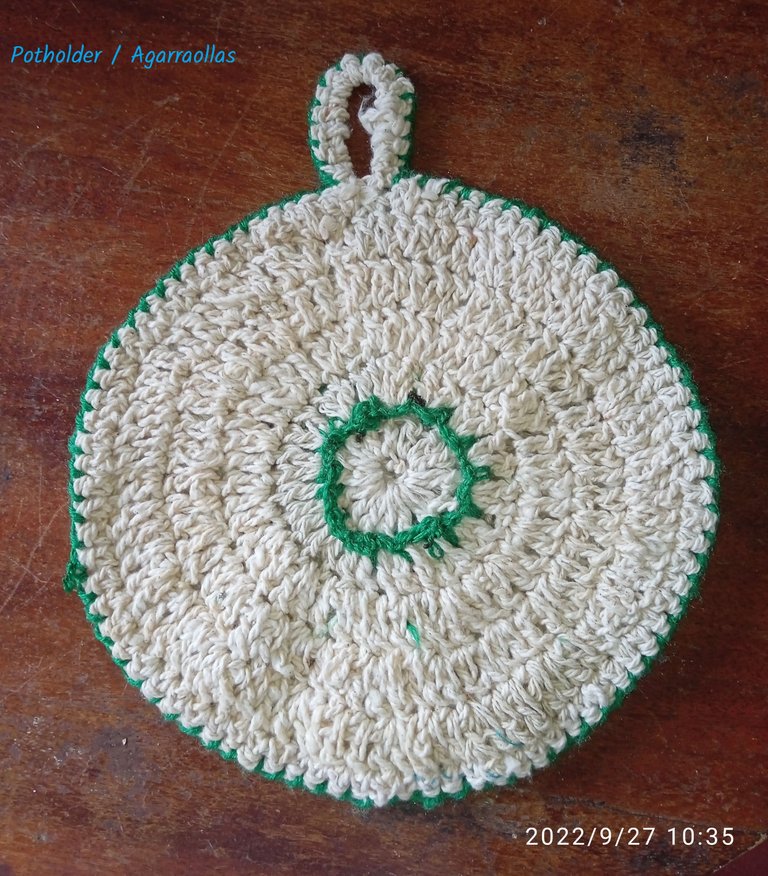
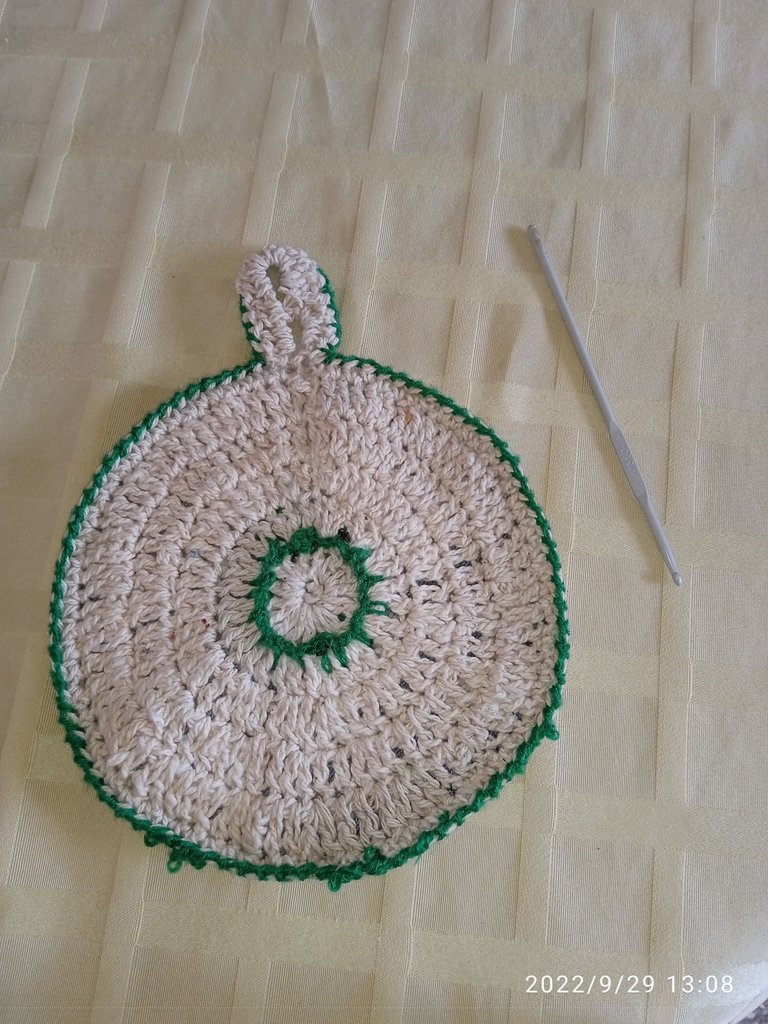
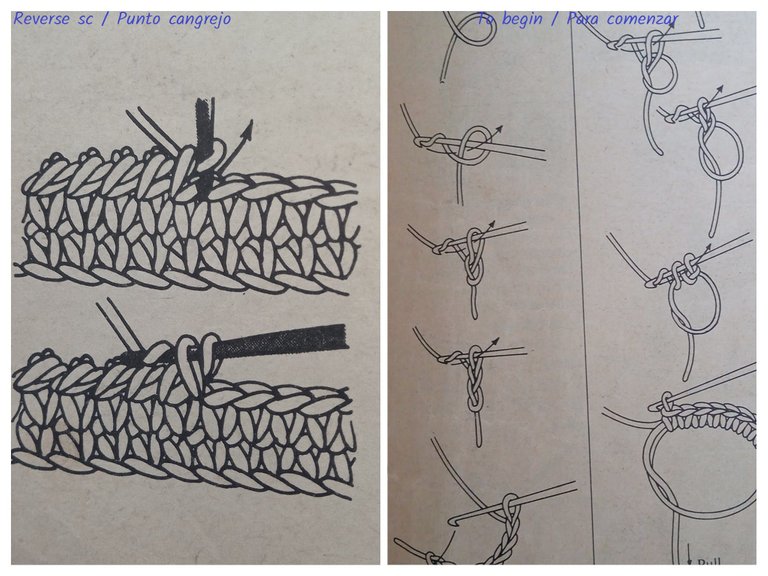
The result is a circle of about 15 centimeters. The pot holder is safer with two pieces joined with a row of single crochets (sc), and with thick heat proof fabric between them.
El resultado es un círculo de unos 15 centímetros. El agarrador queda más seguro con dos piezas unidas con una hilera de puntos bajos (sc), y con tela gruesa a prueba de calor en medio de ambas.

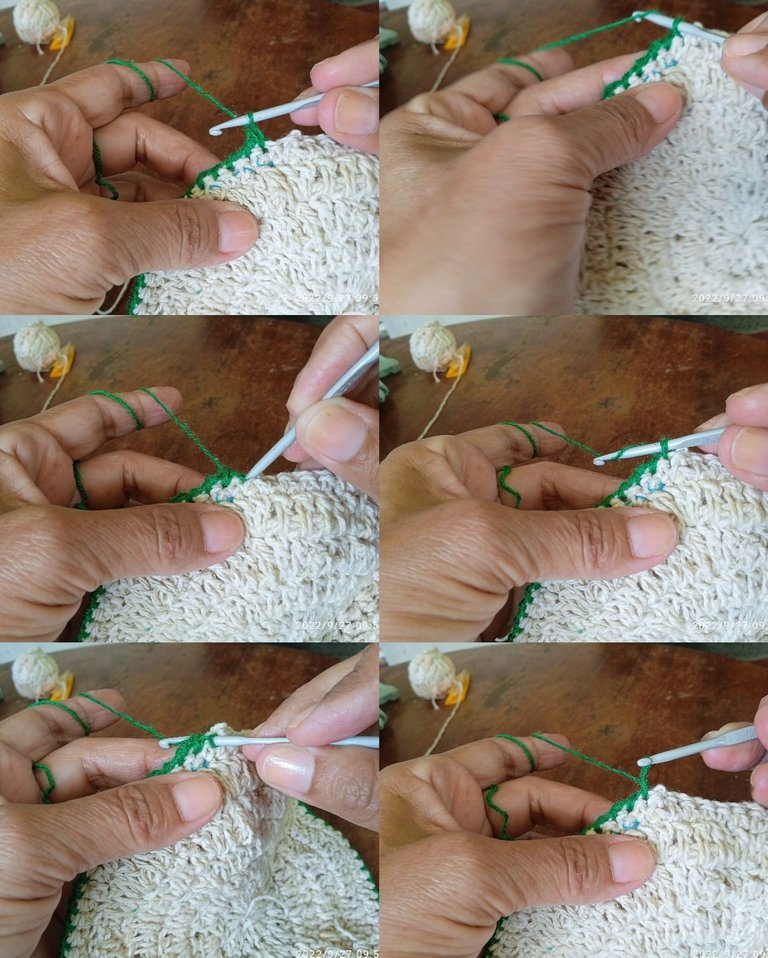
The loop to hang it is made by crocheting 16 hdc over a 16-chain loop that is knitted at the same time as the connecting row of the two circles.
El asa para colgarlo se hace tejiendo 16 hdc sobre un bucle de 16 cadenetas que se teje al mismo tiempo que la vuelta de unión de los dos círculos.


Thank you so much for stopping by and reading my post.
Muchas gracias por detenerse y leer mi publicación.

Gif made with / Gif hecho con Canva
Translated with / Traducido con: Google translator
The purple separators are courtesy of @ikasumanera for free use by HIVE users. /Los separadores color púrpura son cortesía de @ikasumanera para libre uso de los usuarios de HIVE.
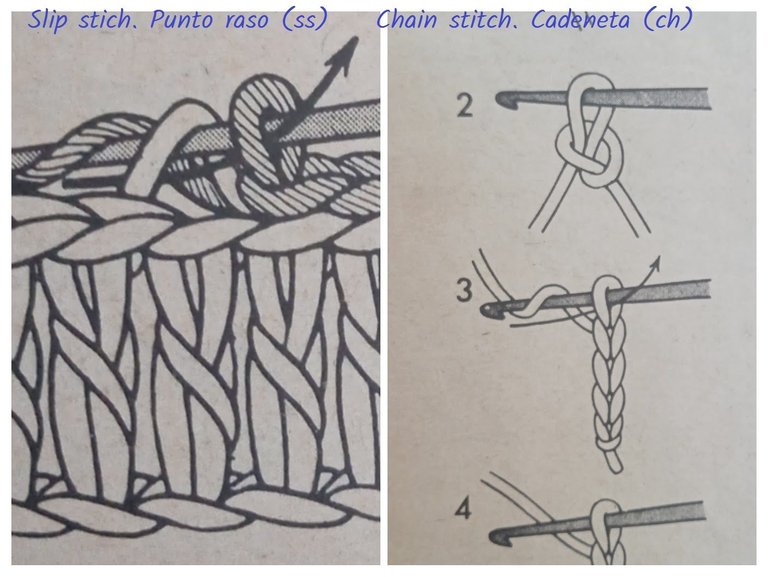
Diagrams and drawings of the stitches taken from "Crochet" and "Anna burda" magazines, and edited with Paint / Diagramas y dibujos de los puntos tomados de las revistas "Crochet" y "Anna burda", y editados con Paint.
References / Referencias: Kamakura Shobo Publishing Co., Ltd.'s "Crochet" magazine, number 19 of 1973, and "Anna burda", number 6, June 1980. Editorial Aenne Burda.
Thank you for sharing this amazing post on HIVE!
Your content got selected by our fellow curator @rezoanulvibes & you just received a little thank you via an upvote from our non-profit curation initiative!
You will be featured in one of our recurring curation compilations and on our pinterest boards! Both are aiming to offer you a stage to widen your audience within and outside of the DIY scene of hive.
Join the official DIYHub community on HIVE and show us more of your amazing work and feel free to connect with us and other DIYers via our discord server: https://discord.gg/mY5uCfQ !
If you want to support our goal to motivate other DIY/art/music/homesteading/... creators just delegate to us and earn 100% of your curation rewards!
Stay creative & hive on!
Thank you @diyhub!
Nice, you achieved that wonderful project and I'm even planning on presenting another Needleyourkitchen project by Monday. Greetings @elentogether
Good!. I did not know that several publications can be submitted to the contest. Thanks and greetings to you too.
I have not verified that but may be @Kattycrochet can explain more.
Quedó muy lindo y se ve super practico!!🌺🌺 me gusta ese refuerzo que le hiciste con la otra tela para que sea más seguro! gracias por compartirlo!!!
Muchas gracias a ti @imena
Hola @elentogether, bienvenida a la comunidad y gracias por unirte al concurso NeedleWork your kitchen.
El hilo pabilo es ideal para este tipo de proyectos porque es muuy fuerte y resistente.
Saludos!
Muchas gracias @kattycrochet, tenía tiempo queriendo participar aquí, pero fué hace días que pude ordenar un poco mis ideas para hacerlo.
De un simple pabilo a un hermoso posavasos, el crochet siempre será de mis artes preferidas, el trabajo que has hecho esta excelente.
Es cierto, a mi me encanta. Gracias por tu amable comentario @jennyzer
Me gusta que hayas hecho un agarra ollas, aunque me recuerda que yo también necesito uno.🙉
Es muy bonito, el tejido quedó prolijo y uniforme, has logrado bien su forma. Es un hermoso trabajo.
Muchas gracias @bleuclair, que bueno que te haya gustado!