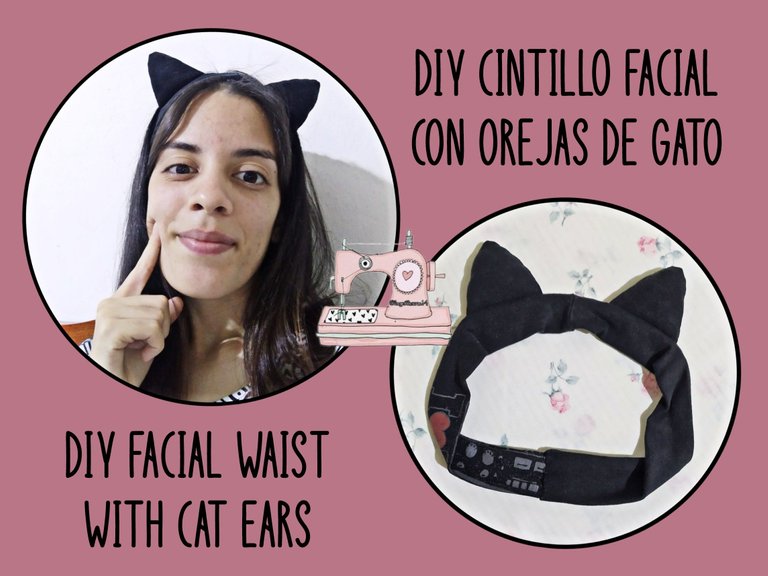

Hola amigos de esta creativa comunidad, en esta ocasión les traigo un mini tutorial de cómo hacer un cintillo facial con orejitas de gato.
Ideal para maquillaje o tus rutinas de ejercicio.
Además que está muy fácil de hacer, y utilicé materiales de provecho.
Hello friends of this creative community, this time I bring you a mini tutorial on how to make a headband with cat ears.
Ideal for makeup or your exercise routines.
It is also very easy to make, and I used useful materials.
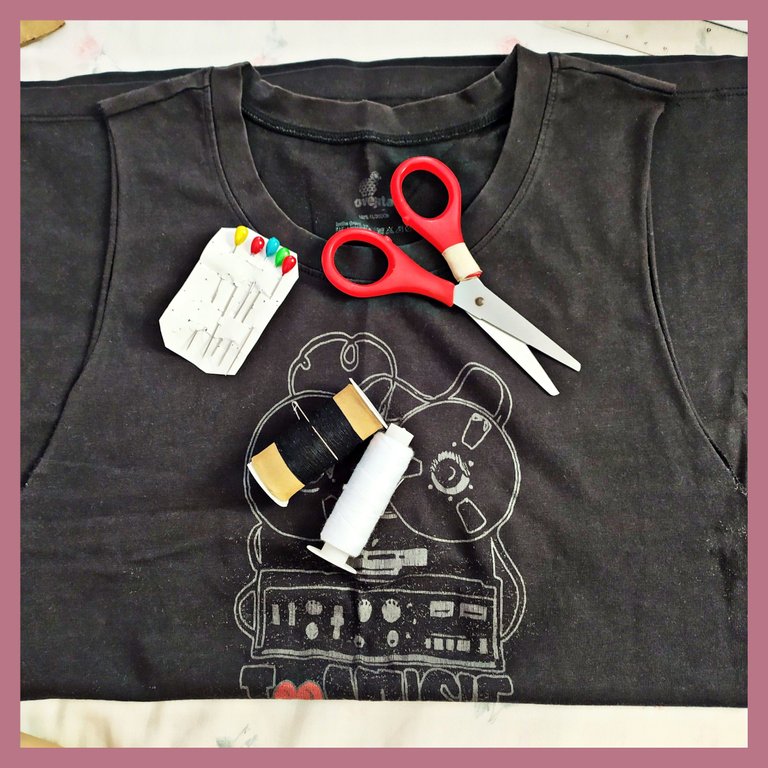
Los materiales que utilicé fueron:
- Tela elástica (Puede ser de una franela vieja)
- Hilo y aguja
- Relleno
- Tijeras
- Cartón para hacer el patrón
- Lápiz
The materials I used were:
- Stretchy fabric (Can be from an old flannel).
- Thread and needle
- Stuffing
- Scissors
- Cardboard to make the pattern
- Pencil
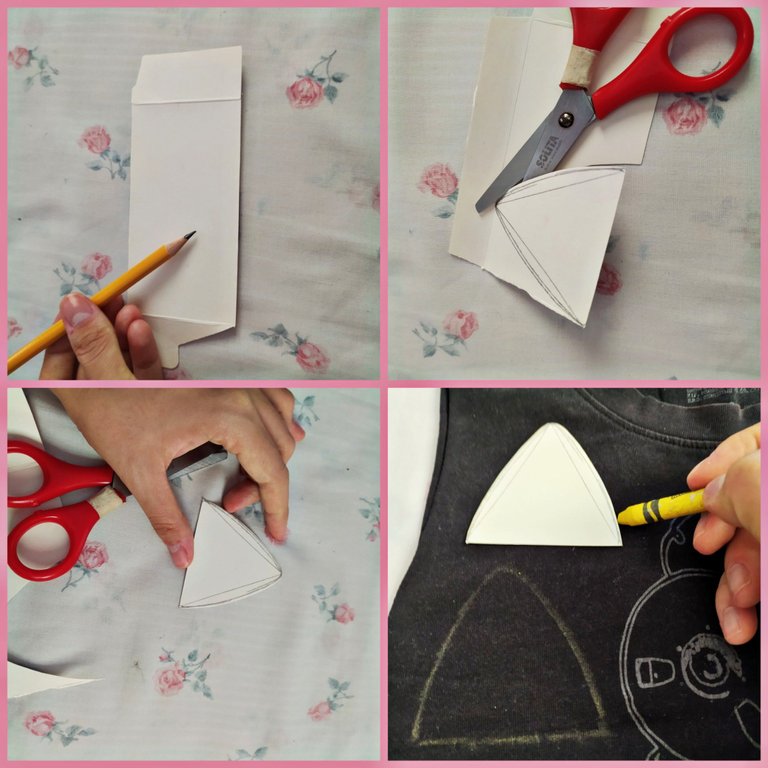
Lo primero que haremos es trazar la forma de una oreja en el cartón y recortarla, este será nuestro patrón. Luego ese patrón lo llevamos a la tela y sacamos 4 ejemplares.
Yo utilicé la tela de una franela que no utilizo, esta idea es excelente para reutilizar ropa vieja que tengamos en nuestro closet.
The first thing we will do is trace the shape of an ear on the cardboard and cut it out, this will be our pattern. Then we take that pattern to the fabric and cut out 4 copies.
I used the fabric of a flannel that I don't use, this idea is excellent to reuse old clothes that we have in our closet.
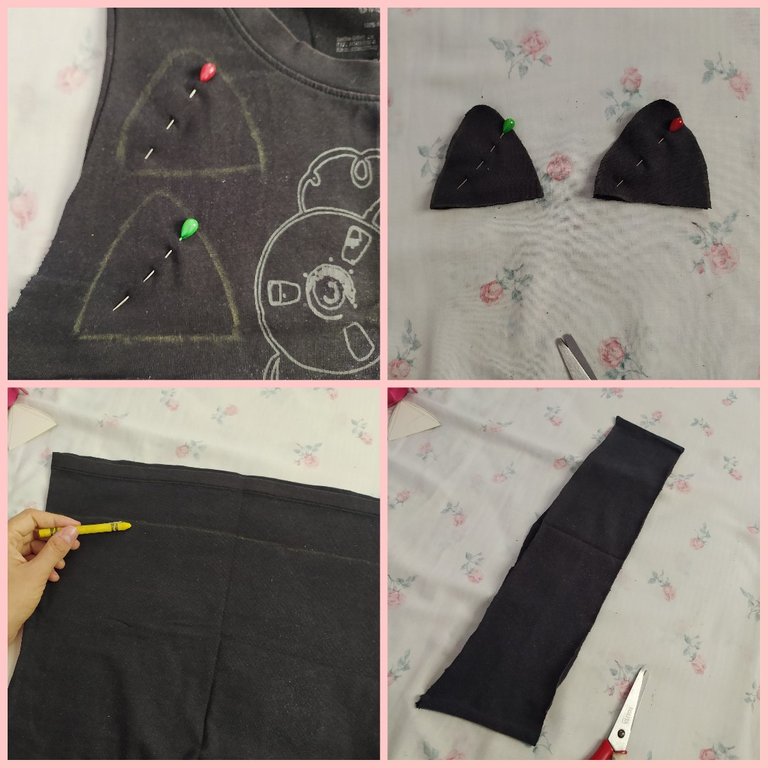
Después que trazemos el patrón en la tela vamos a recortar, y también recortaremos una tira de tela de 10 centímetros de ancho, y con el largo de nuestra cabeza para que quede a la medida.
After we trace the pattern on the fabric we will cut it out, and we will also cut a strip of fabric 10 centimeters wide, and with the length of our head so that it fits.
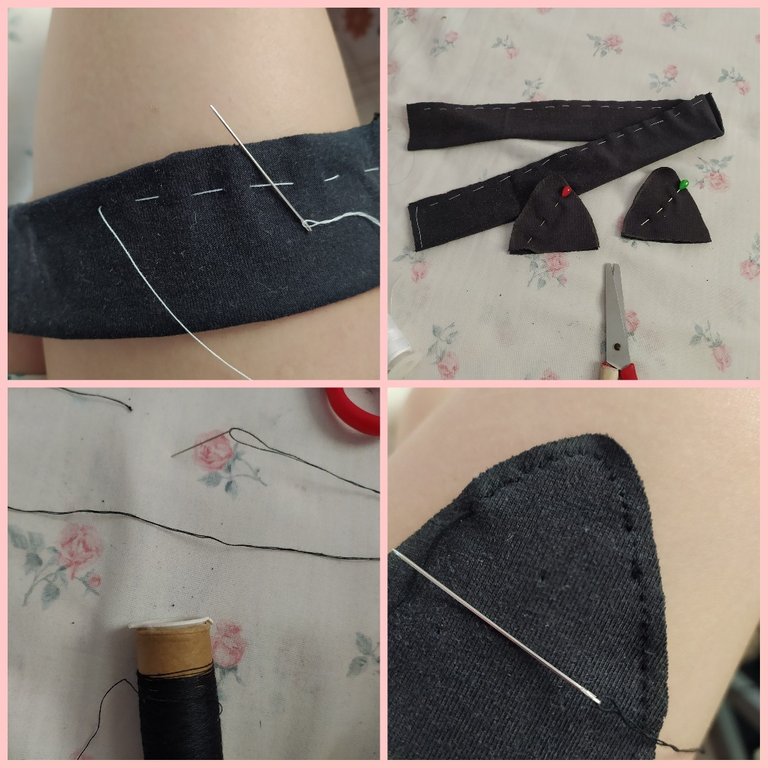
Luego, vamos a coser con un hilo de color llamativo la linea guía por donde irá la costura definitiva.
Cuando tengamos todo listo, empezamos a coser la tira y las orejitas.
Then, we will sew with a brightly colored thread the guide line where the final seam will go.
When we have everything ready, we start sewing the strip and the ears.
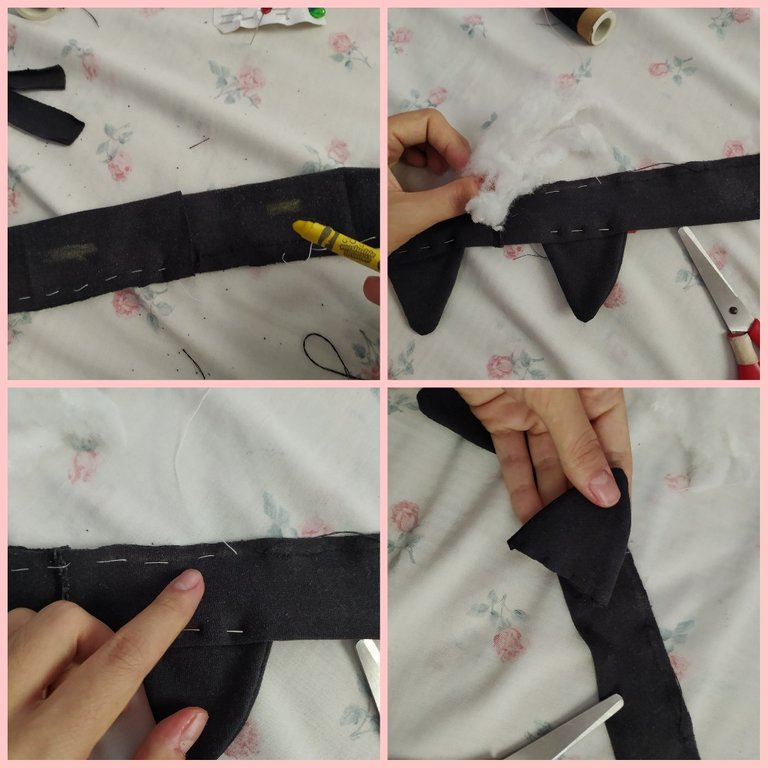
Cuando ya tengamos todas las piezas cosidas, vamos a ubicar las orejitas con alfileres en el lugar correcto, para tener la guía de donde irán.
When we have all the pieces sewn, we are going to place the ears with pins in the right place, to have the guide of where they will go.
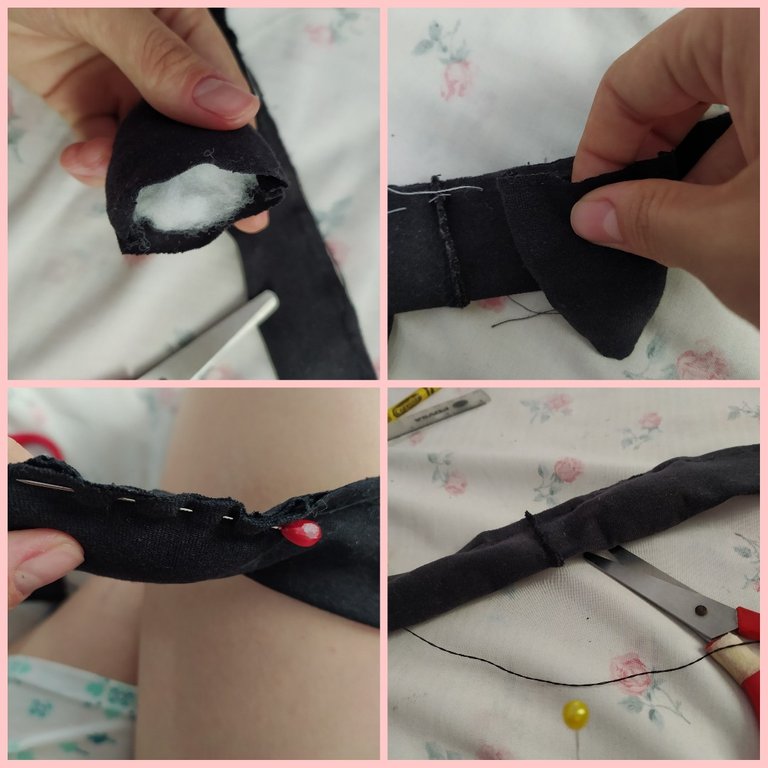
Luego vamos a rellenarlas y a coserlas por dentro de la tira, de manera que al voltearla la costura quede por dentro.
Then we are going to stuff them and sew them on the inside of the strip, so that when we turn it over, the seam will be on the inside.
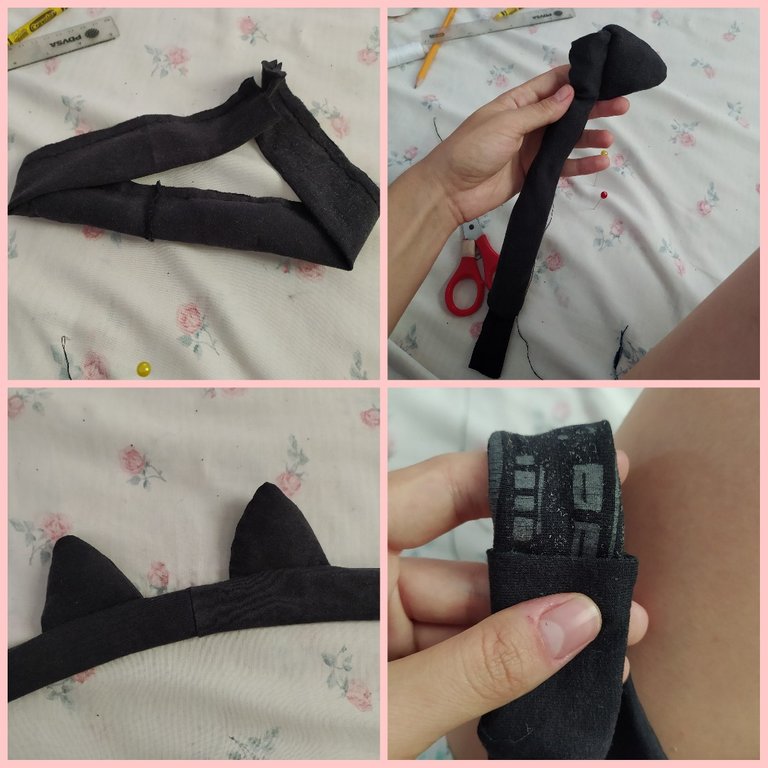
Finalmente, damos vuelta a toda la tira y cosemos los extremos. Y listo! Tendremos un lindo cintillo facial con orejitas neko.
Finally, we turn the whole strip inside out and sew the ends. And that's it! We will have a nice headband with neko ears.
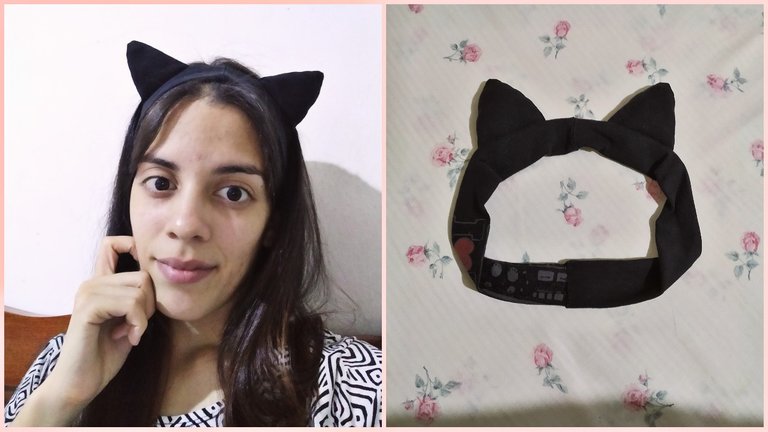
Este fue el resultado, espero les guste tanto como a mí.
This was the result, I hope you like it as much as I do.
♡
Un abrazo inmenso para cada uno de los que se tomaron el tiempo de leer y apreciar mi post.
Si te gustó este contenido, puedes dejar un comentario, y visitar mi perfil @emybaby para encontrar más contenido de manualidades, recetas, challenges y más.
A big hug to everyone who took the time to read and appreciate my post.
If you liked this content, you can leave a comment, and visit my profile @emybaby to find more content on crafts, recipes, challenges and more.
♡
Traducido con DeepL
Banner y ediciones con PicsArt y Cymera
Las fotos son de mi autoría
Translated with DeepL
Banner and editions with PicsArt y Cymera
The photos are of my authorship
#posh @ocd @ocdb @appreciator @blocktrades @curangel
The rewards earned on this comment will go directly to the person sharing the post on Twitter as long as they are registered with @poshtoken. Sign up at https://hiveposh.com.
Super lindos y te quedaron genial!
Graciaaas por leerme!!<3