
¡Hola Chicos!
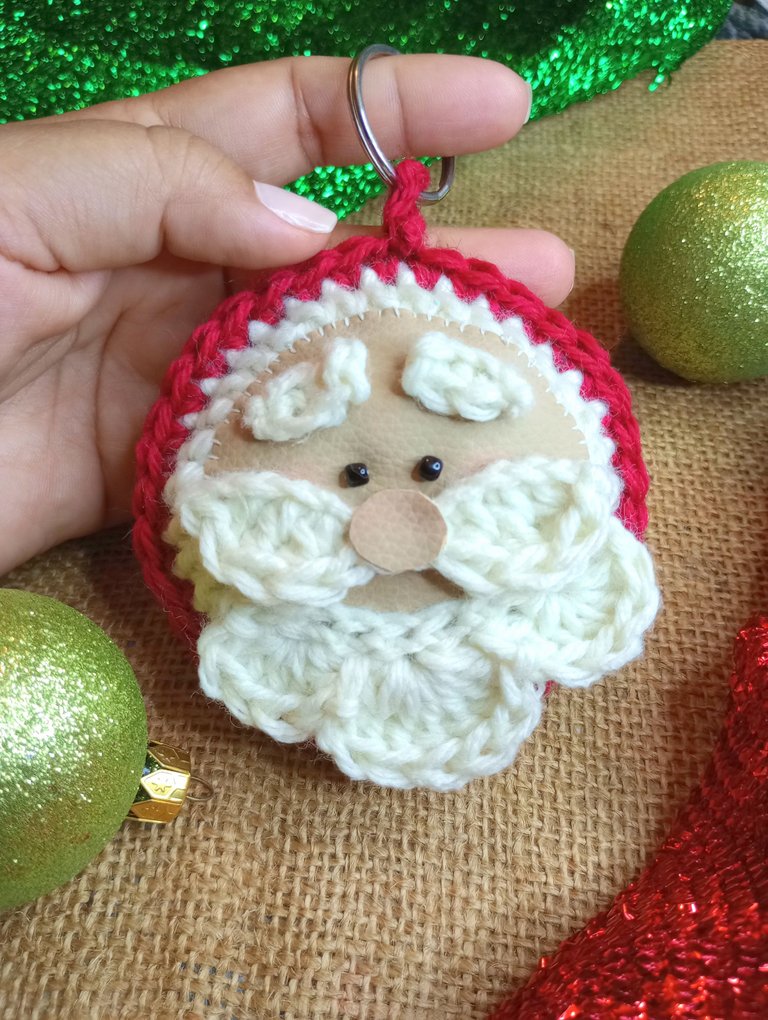
Continuamos con los adornitos navideños para llenar nuestra casa y nuestra vida de mucho color y espíritu festivo. Hoy quiero compartir con ustedes una manualidad bastante linda y significativa para mí. Se trata de un llavero con carita de santa.
Y les digo que es significativa porque no es la primera vez que lo hago. Hace varios años, estábamos pasando en casa por una situación bastante difícil.
No teníamos empleo y veíamos que todo se iba cuesta abajo. Yo dentro de ese empeño por hacer algo que nos ayudara económicamente, comencé a tejer prendas y manualidades para vender.
Estábamos cerca de la época navideña y recuerdo que en aquel entonces se me ocurrió la idea de hacer un llavero con la carita de santa.
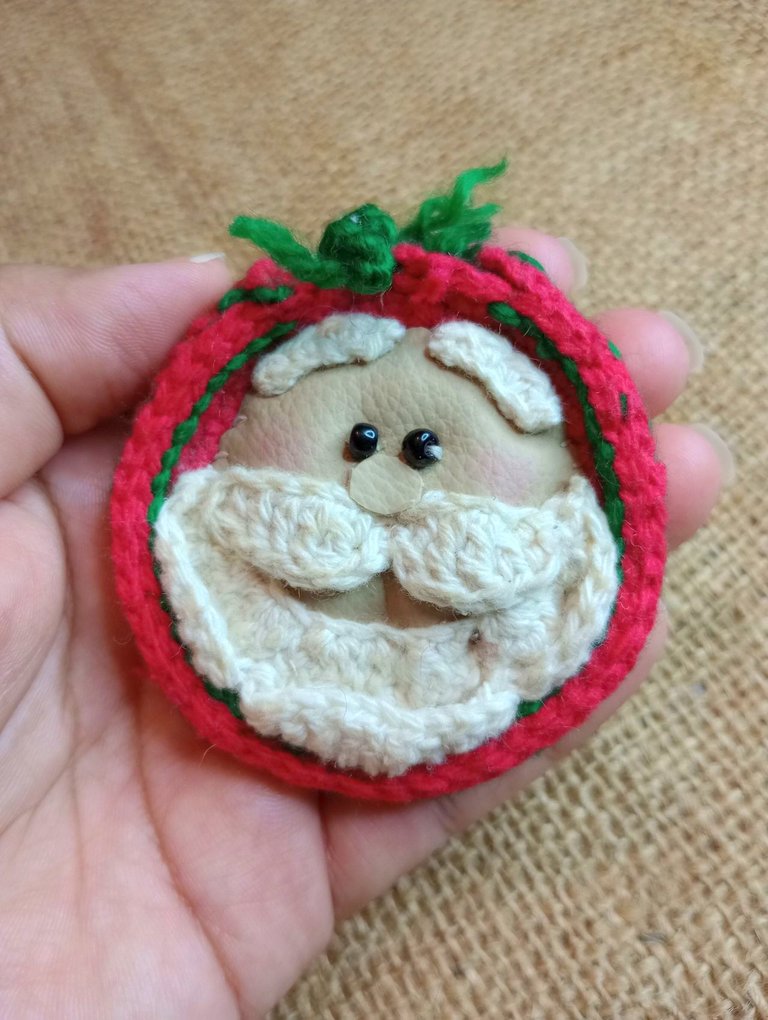
No tenía ningún patrón ni imagen de referencia porque en ese entonces no teníamos internet ni teléfono inteligente. Así que seguí mis instintos y logré crear este lindo Santa (que ya está algo sucio por el paso del tiempo).
En ese momento me di cuenta de que era capaz de crear cualquier cosa que me propusiera y aunque no se vendió, lo conservé con mucho cariño hasta ahora, pues representa esas ganas de salir adelante y esos momentos que, aunque fueron duros, nos enseñaron muchas cosas.
Quise replicar esta manualidad, adaptándola a los materiales con los que cuento ahora y por supuesto, documentar todo el proceso para que, si gustan, también lo puedan hacer ♥.
Hey guys!
We continue with the Christmas decorations to fill our house and our lives with lots of color and festive spirit. Today I want to share with you a pretty cute and meaningful craft for me. It is a keychain with a Santa face.
And I tell you it's significant because it's not the first time I've done it. Several years ago, we were going through a rather difficult situation at home.
We had no job and we saw that everything was going downhill. As part of this effort to do something that would help us financially, I began to weave clothes and crafts to sell.
It was close to Christmas time and I remember that at that time I had the idea of making a keychain with the face of Santa.
I didn't have any pattern or reference image because back then we didn't have internet or smartphone. So I followed my instincts and managed to create this cute Santa (which is already a bit dirty from the passage of time).
At that moment I realized that I was capable of creating anything I set out to do and although it was not sold, I have kept it with great care until now, because it represents that desire to get ahead and those moments that, although they were hard, taught us a lot. stuff.
I wanted to replicate this craft, adapting it to the materials I have now and, of course, documenting the entire process so that, if they like, they can do it too ♥.
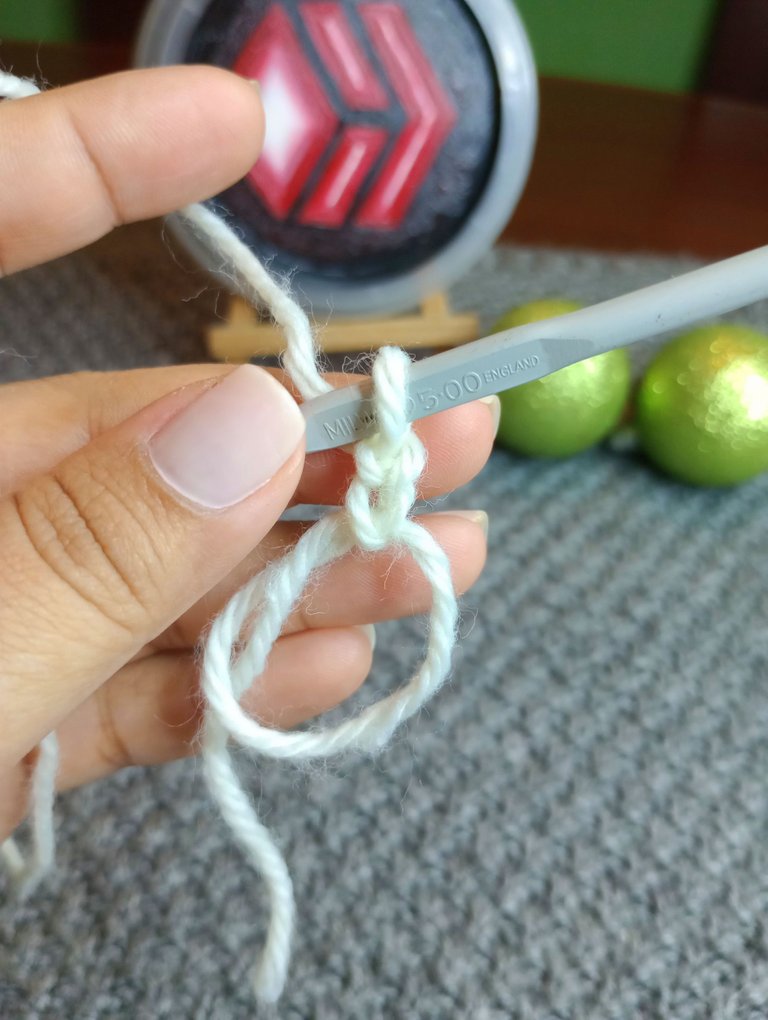
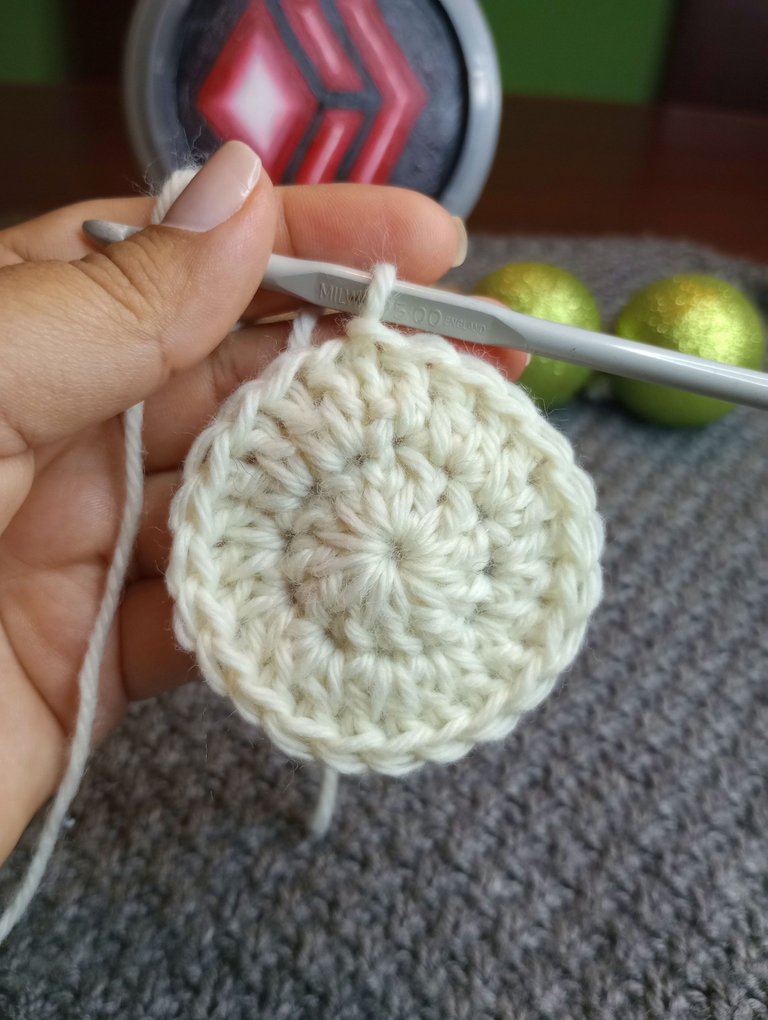
Para esta manualidad utilicé lana gruesa y una aguja de 5 mm.
Iniciamos haciendo un anillo mágico, y sobre él vamos a tejer dos cadenetas. Luego tejemos 11 puntos altos y finalizamos la vuelta con un punto deslizado.
For this craft I used thick wool and a 5mm needle.
We start by making a magic ring, and on it we are going to weave two chains. Then we crochet 11 double crochets and finish the round with a slip stitch.
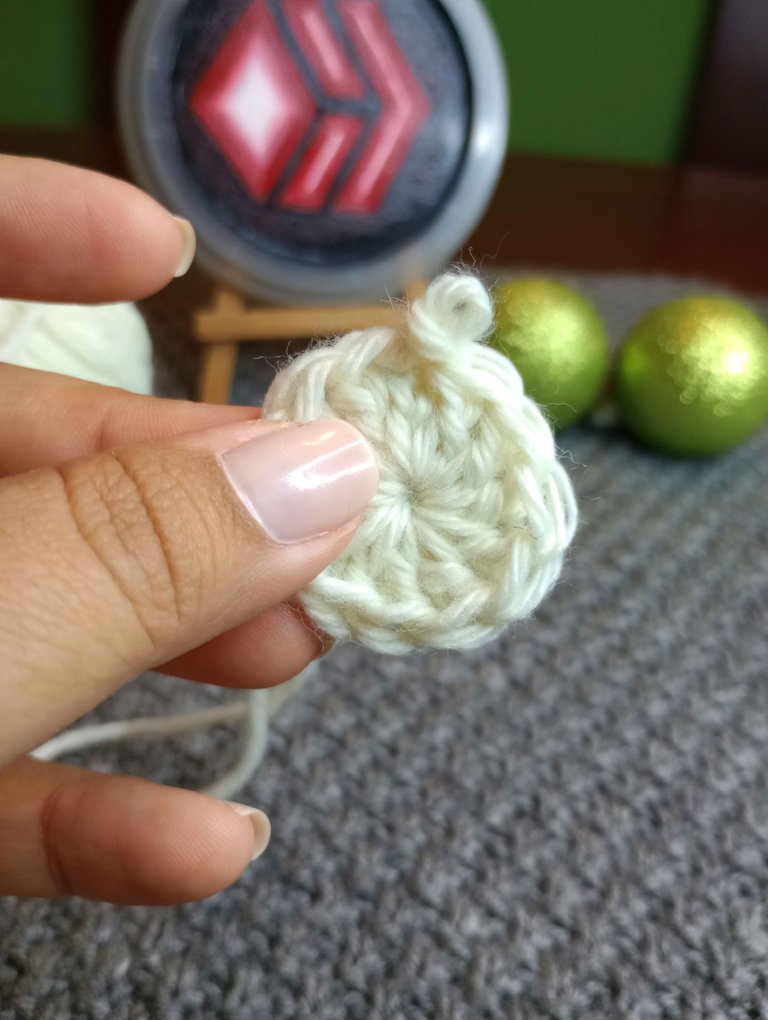
En la segunda vuelta tejemos un aumento por cada punto hasta lograr un total de 24 puntos altos.
Para la última vuelta tejeremos un aumento y un punto alto. Así terminaremos con un total de 36 puntos altos. Finalizamos la vuelta con un punto deslizado.
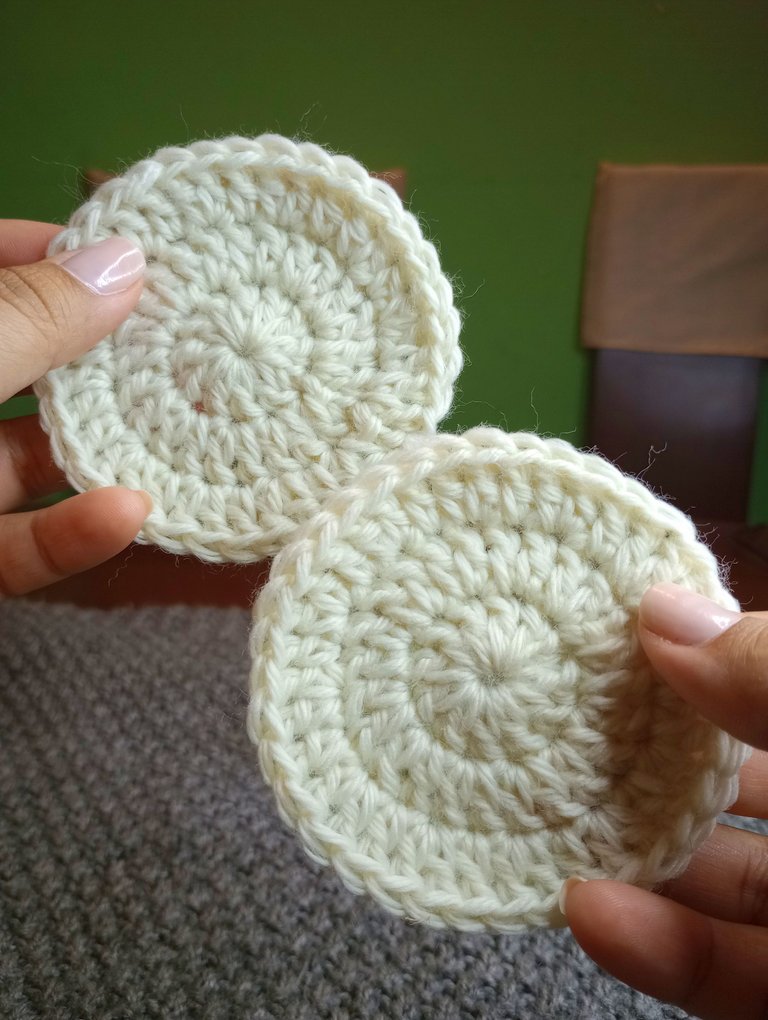
La idea es crear dos círculos que serán la estructura de nuestro llavero y la base del rostro de Santa.
Yo los he tejido ambos de color blanco, pero tú puedes variar los colores.
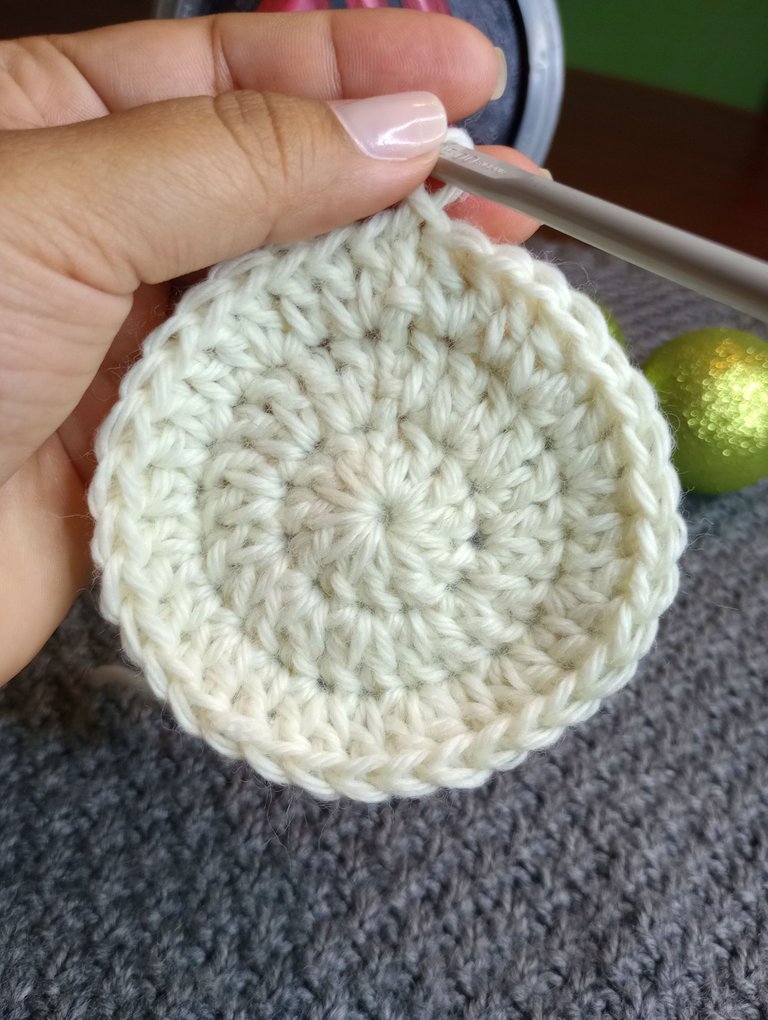
On the second round we knit an increase for each stitch until we have a total of 24 treble crochets.
For the last round we will crochet an increase and a double crochet. Thus we will end up with a total of 36 double crochet. We finish the round with a slip stitch.
The idea is to create two circles that will be the structure of our keychain and the base of Santa's face.
I have knitted them both in white, but you can vary the colors.
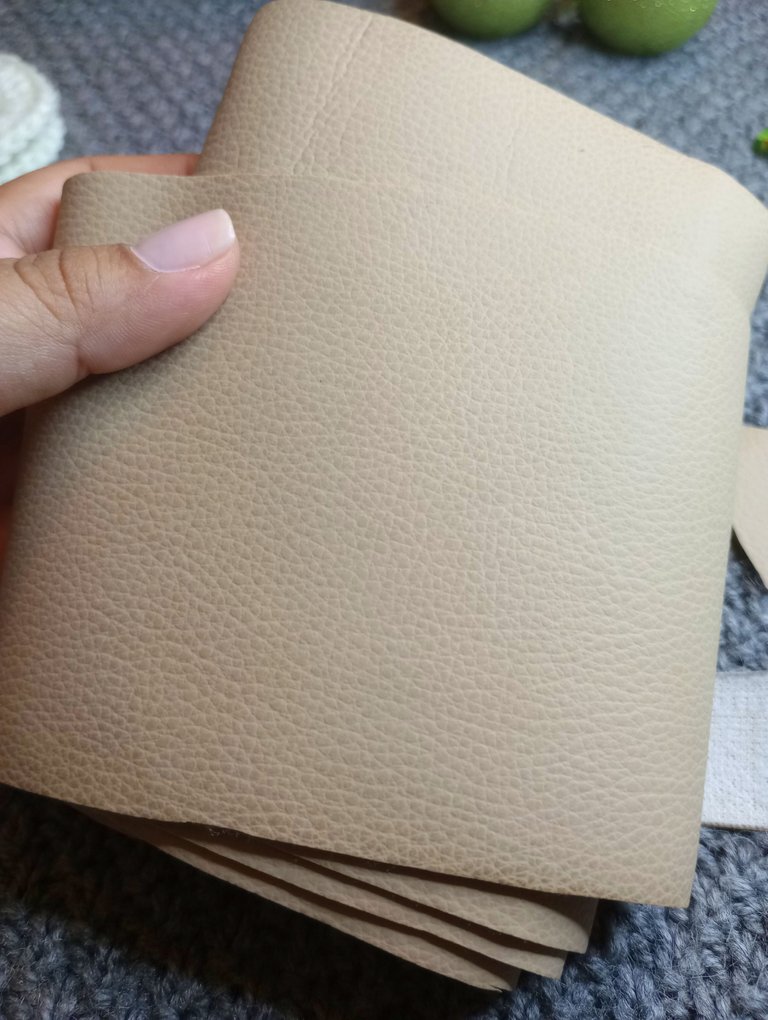
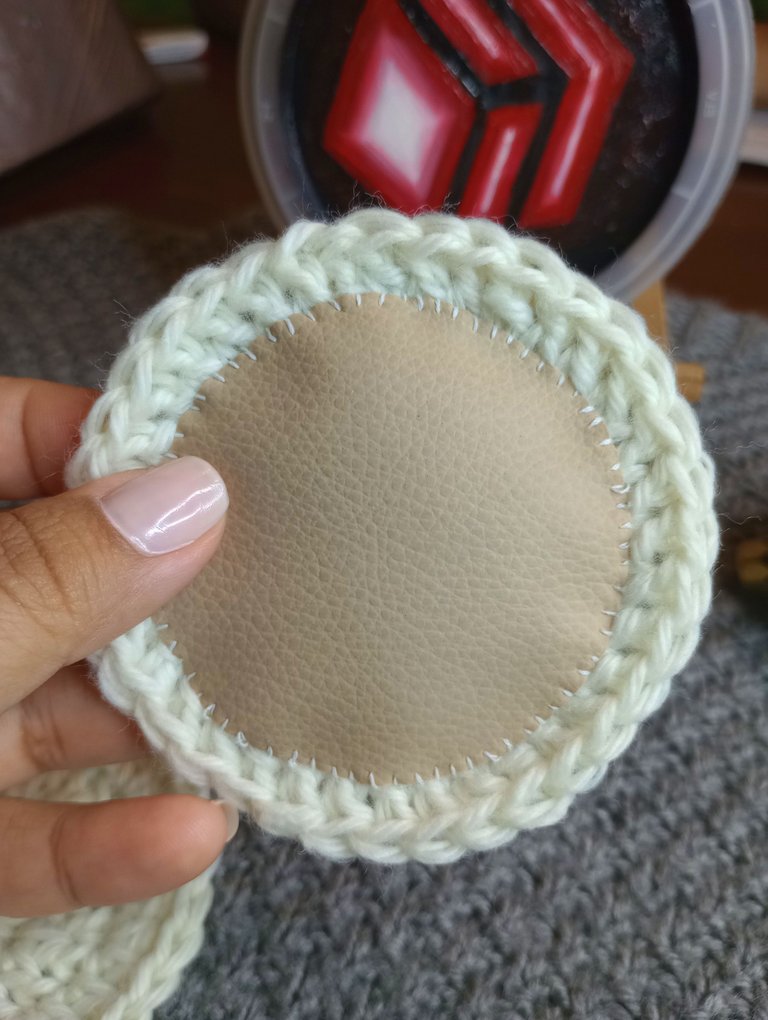
Para el rostro de Santa utilicé un material que me regalaron hace mucho tiempo, se trata de una especie de cuero con el que cubrían asientos de carro.
Este es de un tono beige y es el mismo material que utilicé en la primera versión que les mostré.
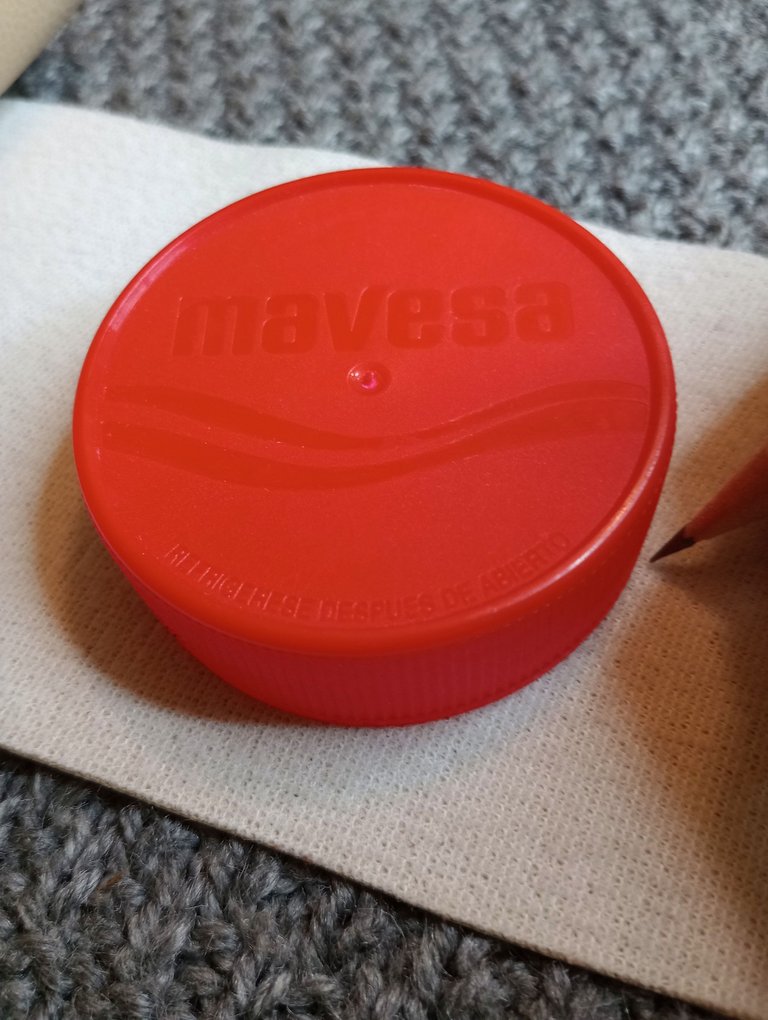
Con una tapa de plástico que medí previamente en el tejido, marqué un círculo en la parte trasera del material y luego lo corté.
Se me ocurre que si no cuentas con un material parecido puedes usar fieltro o alguna tela gruesa en el mismo tono.
For Santa's face I used a material that was given to me a long time ago, it is a kind of leather with which they covered car seats.
This one is in a beige tone and it is the same material that I used in the first version that I showed you.
Using a plastic cap that I previously measured on the fabric, I marked a circle on the back of the material and then cut it out.
It occurs to me that if you don't have a similar material you can use felt or some thick fabric in the same tone.

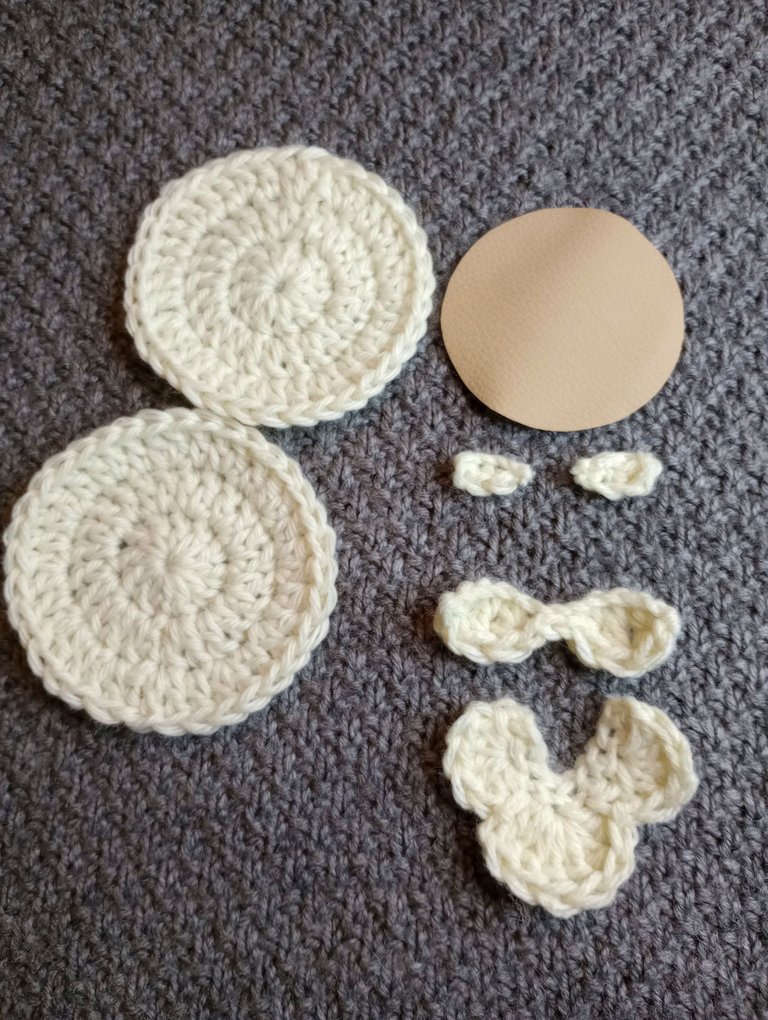
Estas son las piezas con las que armaremos el llavero. Contamos con los dos circulos de base, el rostro y tambien con un par de cejas, unos bigotes y la barba.
Estos ultimos elementos los he tejido de la siguiente forma:
Para las cejas teji 4 cadenas y sobre ellas dos puntos bajos.
Los bigotes tejí 10 cadenas, un punto deslizado, 3 puntos altos, dos puntos deslizados, 3 puntos altos y un punto deslizado.
Y la barba fueron una fila de puntos bajos, sobre ella tejí un grupo de 3 puntos altos, luego un grupo de 7 puntos altos dobles y otro grupo de 3 puntos altos.
Debo decir que improvisé mucho en la barba y por eso luce algo apretada, pero luce como lo esperaba.
Ahora vamos al armado.
These are the pieces with which we will assemble the keychain. We have the two base circles, the face and also a pair of eyebrows, a mustache and a beard.
I have woven these last elements in the following way:
For the eyebrows I knitted 4 chains and on them two single crochet.
The whiskers I made 10 chains, a slip stitch, 3 double crochet, two slip stitch, 3 double crochet and a slip stitch.
And the beard was a row of single crochet, on it I knit a group of 3 double crochet, then a group of 7 double crochet and another group of 3 double crochet.
I must say that I improvised a lot on the beard and that's why it looks a bit tight, but it looks as expected.
Now we go to the armed.
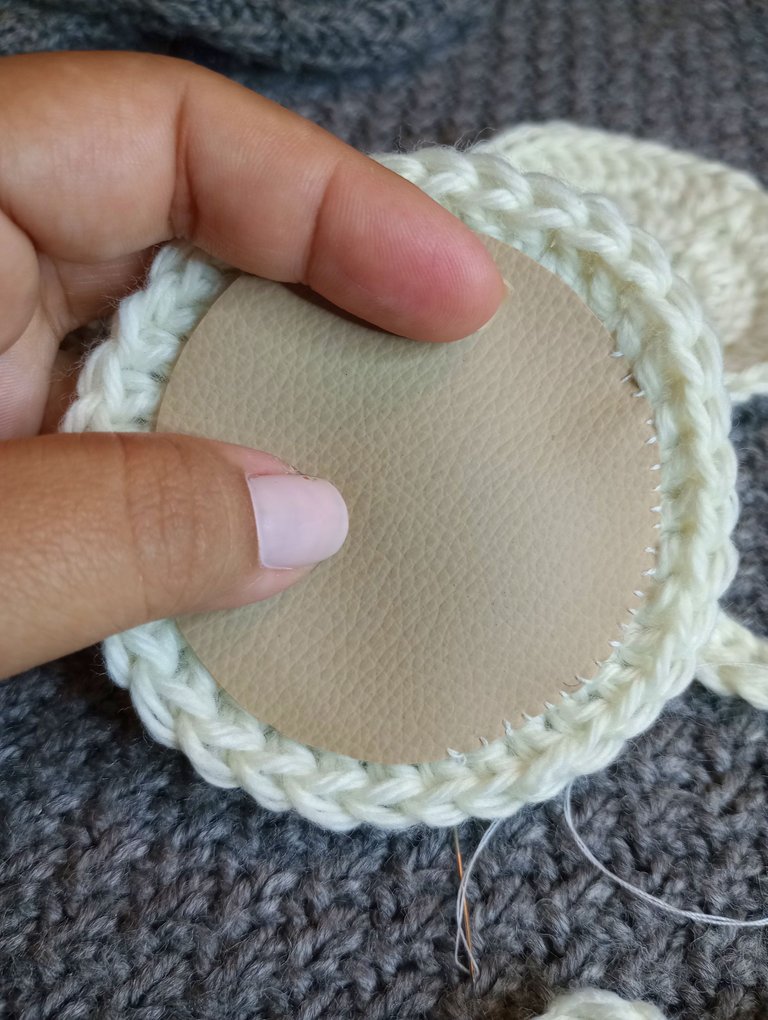
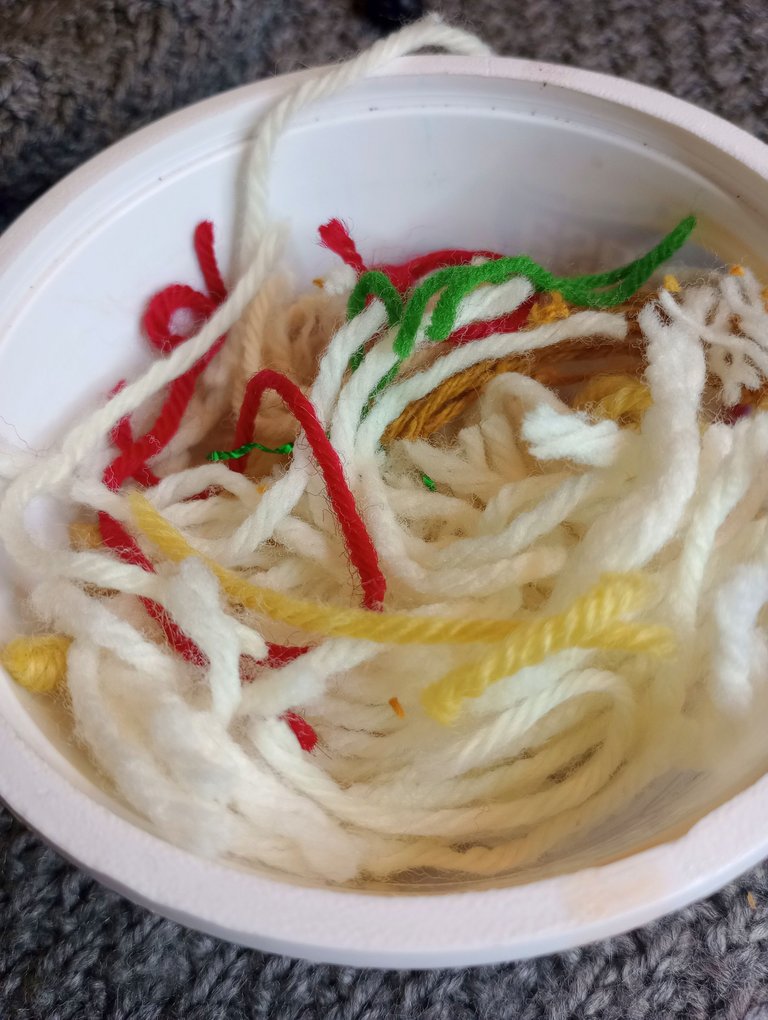
Con hilo y aguja cosí todo el borde del rostro a una de las tapas. Dejé un espacio sin coser y entre el rostro y la base coloqué de relleno los retazos de hilos que he guardado tras cada manualidad.
Luego cosí el resto y así quedo el rostro bien esponjocito.
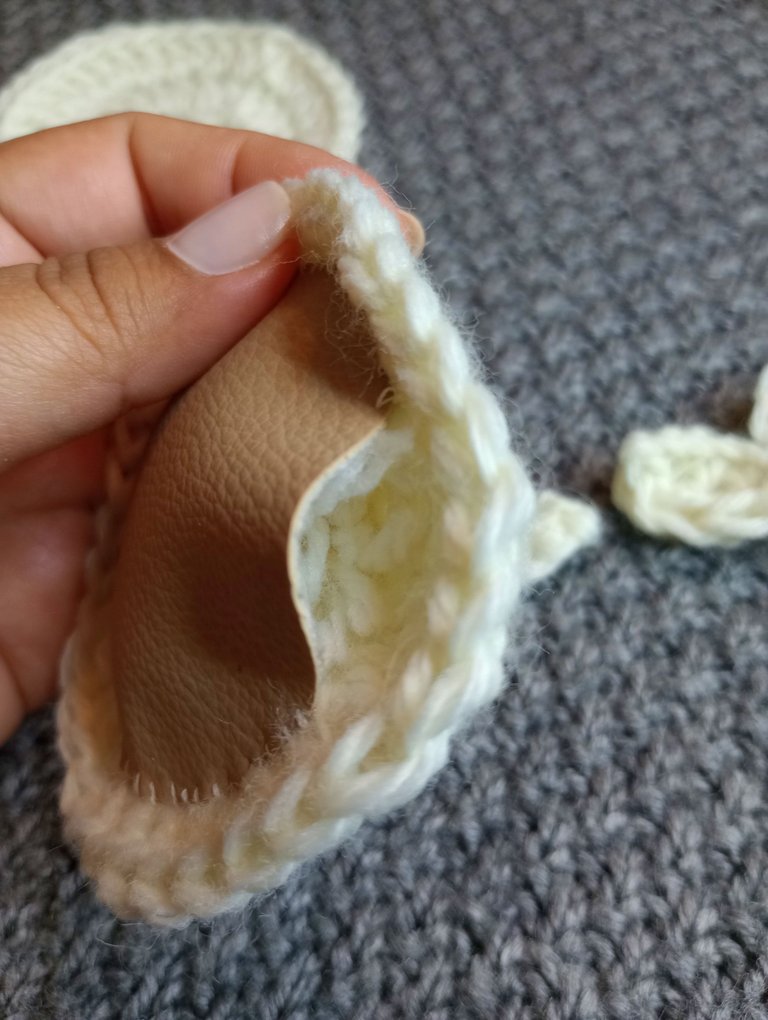
With a needle and thread I sewed the entire edge of the face to one of the lids. I left a space without sewing and between the face and the base I placed the scraps of threads that I have saved after each craft as a filler.
Then I sewed the rest and so the face was very fluffy.
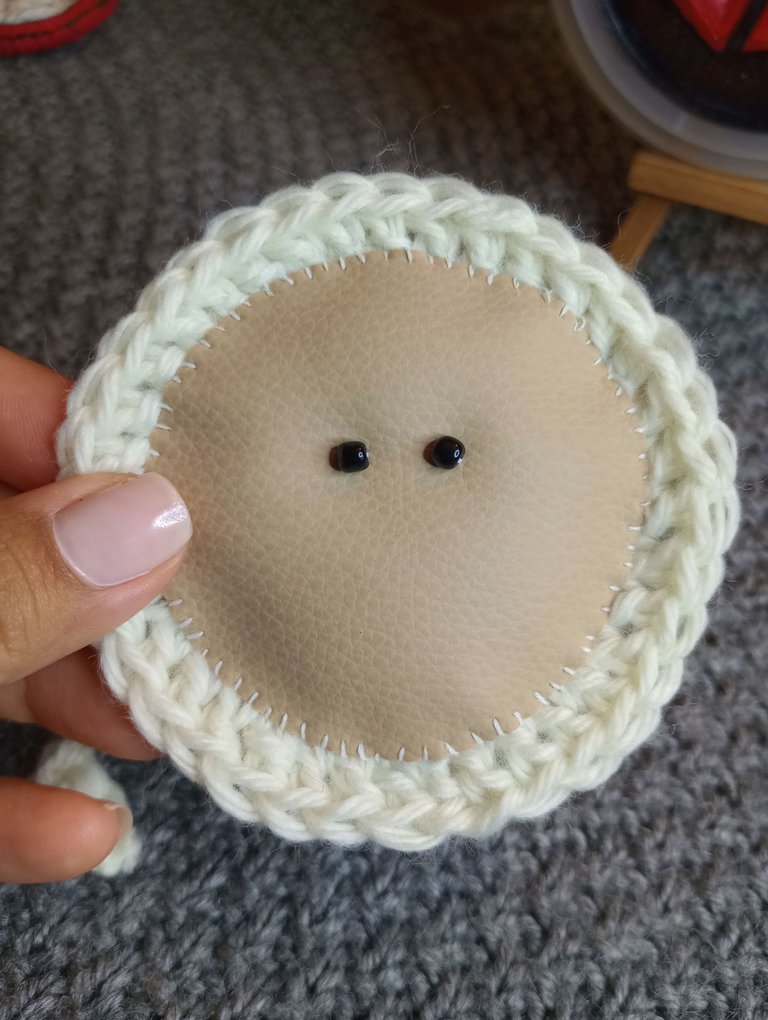
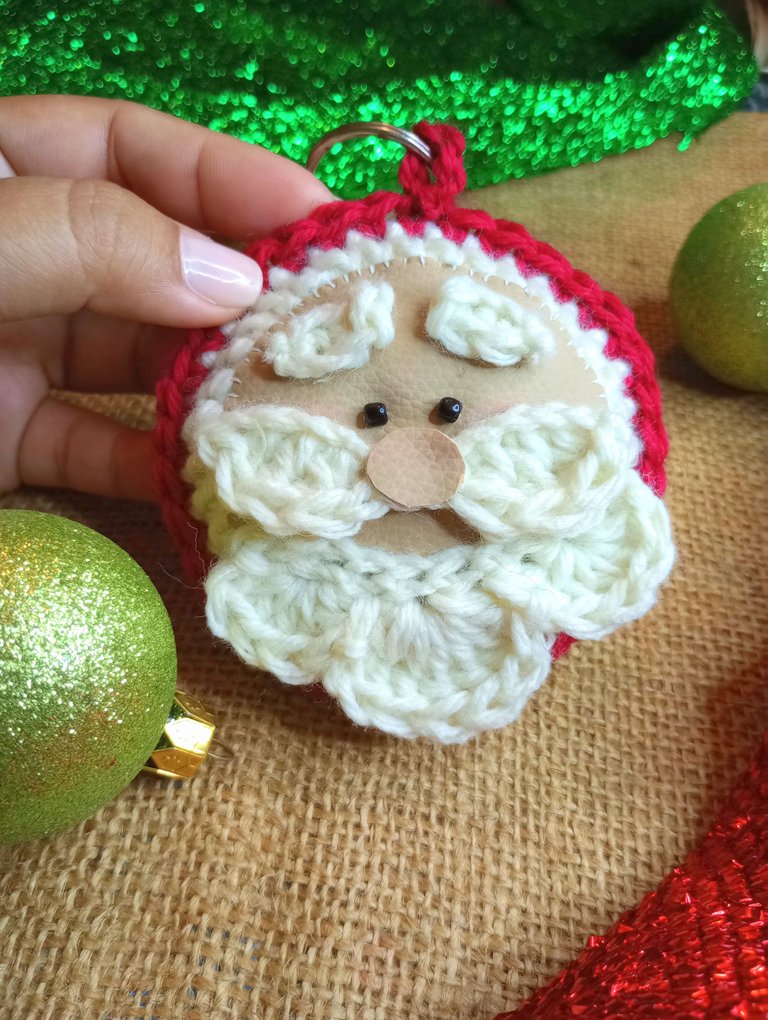
Con dos abalorios negros hice los ojos, los cuales cosí al rostro.
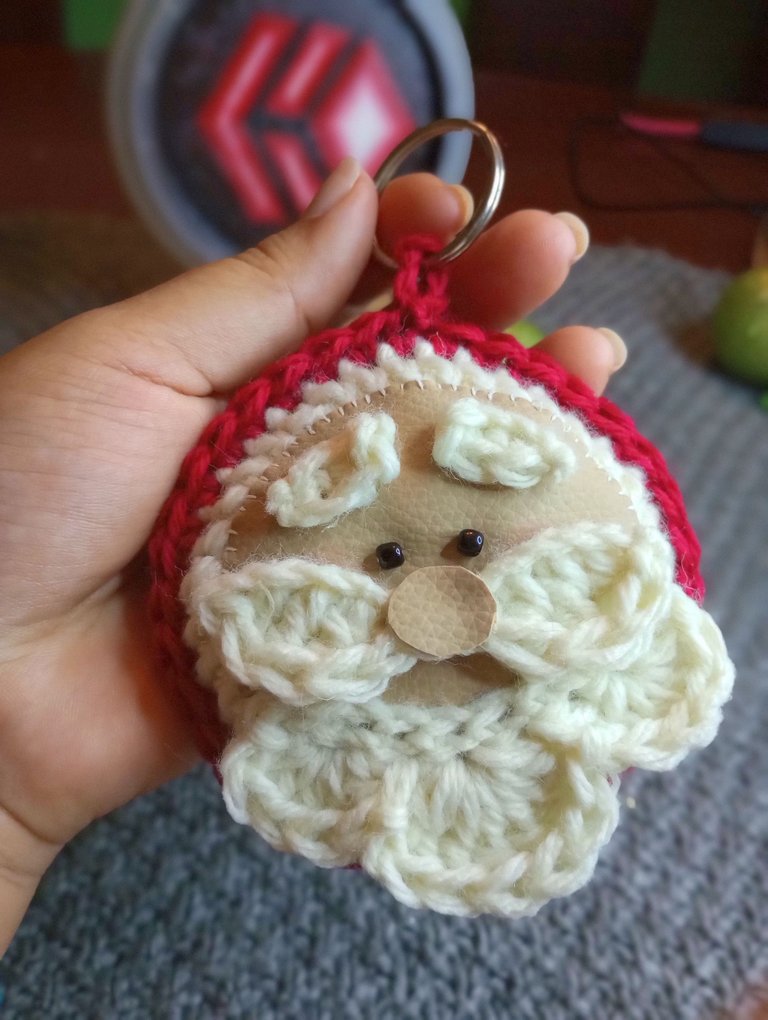
También pinté sus mejillas con un tono rosa utilizando pintura de acuarela y un trocito de algodón para que quedara difuminado.
La barba la pegué en la parte inferior del rostro con silicón.
With two black beads I made the eyes, which I sewed to the face.
I also painted her cheeks a shade of pink using watercolor paint and a cotton swab to blend it out.
I glued the beard to the lower part of the face with silicone.

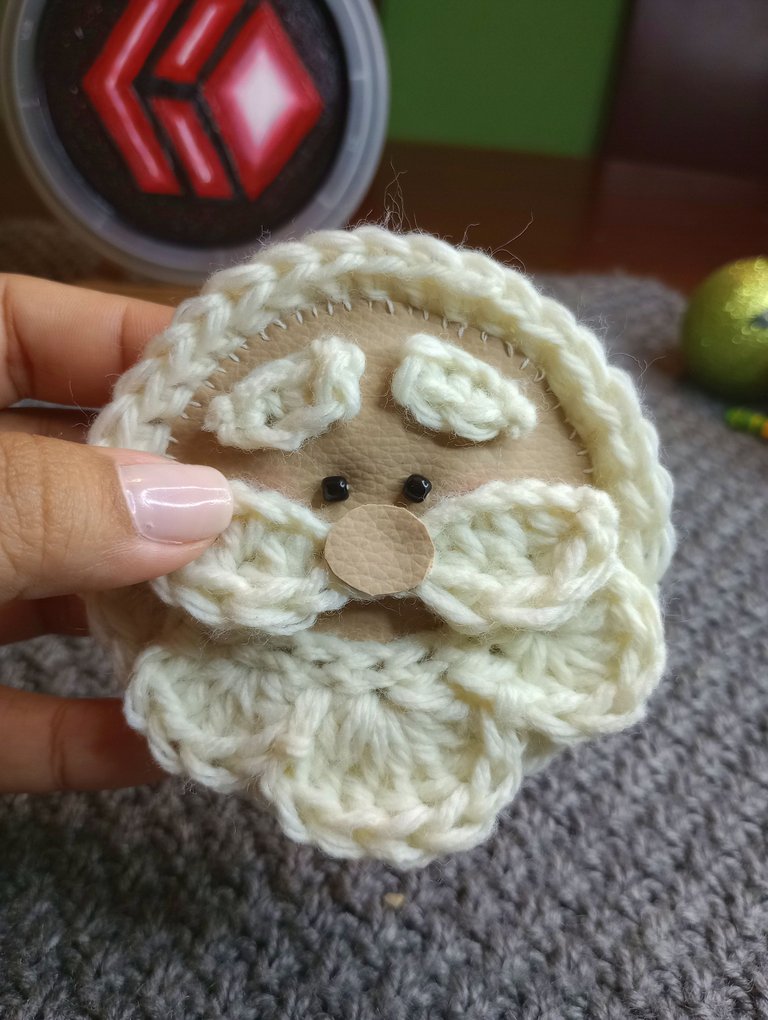
Luego procedí a pegar el bigote, las cejas y con un trozo del mismo material del rostro hice la nariz que pegué sobre el bigote.
Para unir las piezas de la base utilicé una lana de color ojo, para hacer referencia al traje de Santa y antes de sellarlas por completo, rellené con los retazos de hilo para que queda bien esponjoso.
Then I proceeded to glue the mustache, the eyebrows and with a piece of the same material from the face I made the nose that I glued on the mustache.
To join the pieces of the base I used an eye-colored yarn, to refer to the Santa suit and before sealing them completely, I stuffed them with the pieces of yarn so that it is very fluffy.
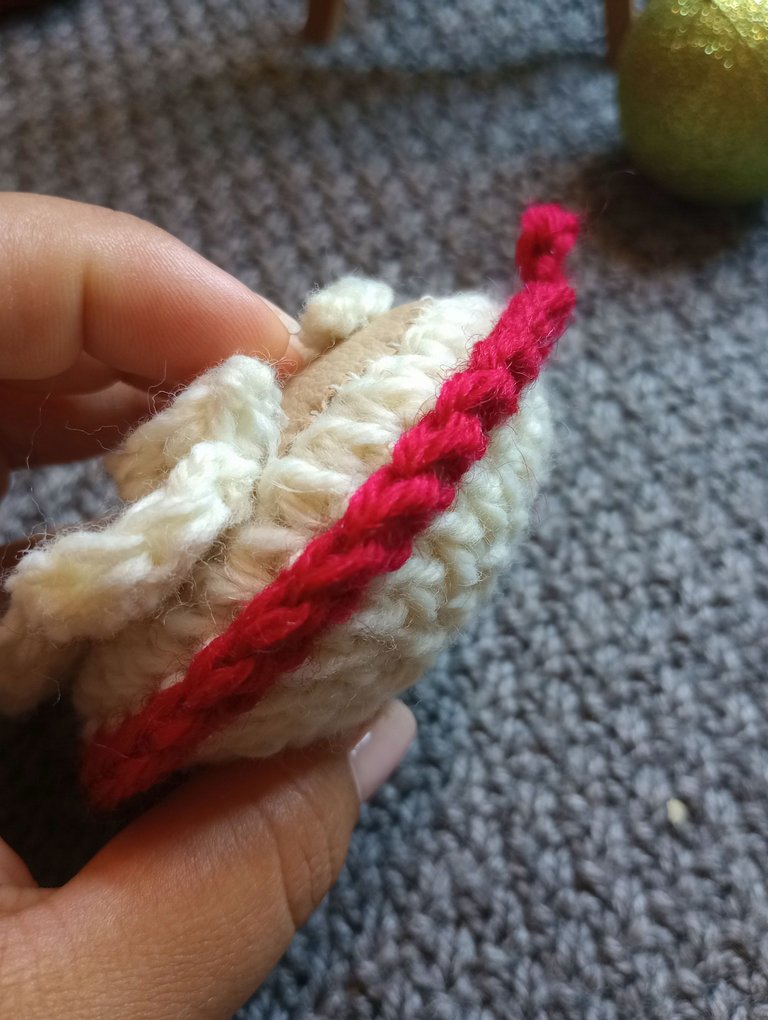
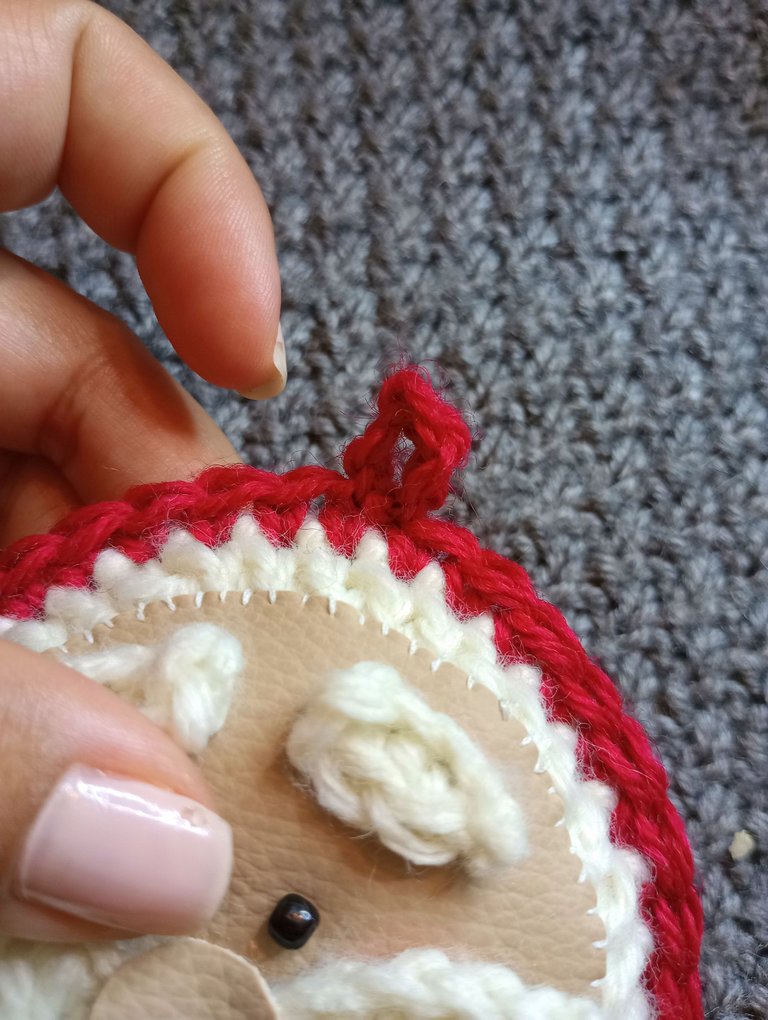
Finalmente en la parte superior tejí una argollita con el mismo hilo rojo para tener donde colocar la argolla del llavero.
Y así quedó listo el llavero de Santa. Esta manualidad también podemos adaptarla y utilizarla como adorno de arbolito. Solo habría que hacer la argollita superior más larga.
Espero les haya gustado tanto como a mi, y quisiera saber ¿qué otro personaje navideño les gustaría que hiciera? Los leo. ♥
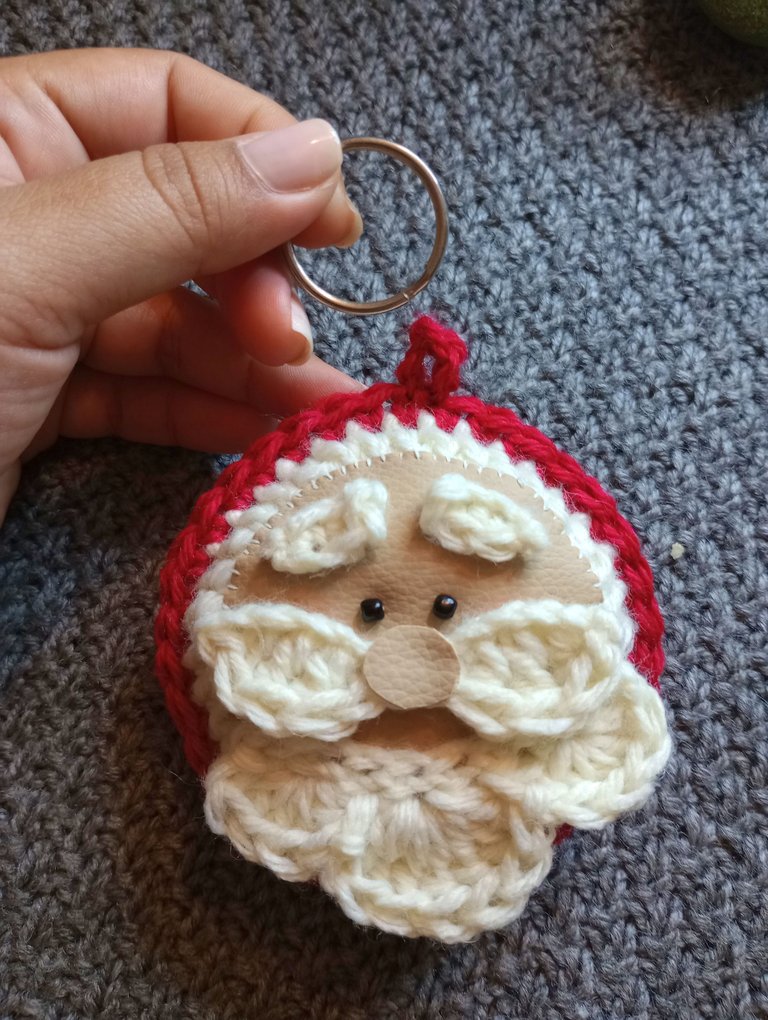
Finally, in the upper part, I knitted a small ring with the same red thread to have a place to place the ring of the keychain.
And so the Santa keychain was ready. We can also adapt this craft and use it as a tree ornament. It would only be necessary to make the upper ring longer.
I hope you liked it as much as I did, and I would like to know what other Christmas character would you like me to do? I read them. ♥

Espero haya sido de tu agrado y provecho.
Un gran abrazo a todos, y nos leemos en un próximo post
• Lakrearte en Hive •
Att: Estefania Garcia ♥

Imágenes y separadores de mi autoría
Portada editada en Canva
Fotografías tomadas con un Moto G31
Texto traducido en Google ImTranslate v.14.27
very nice and creative job , well done
Thank you so much 😊❤️✨
Wao, amiga te quedó muy lindo tu llavero, que mal que yo no sé tejer pero se ve que es fácil y rápido de realizar, lo voy a intentar hacer aunque yo no soy mi buena con las manualidades pero bueno jajaja ya quiero ver qué otras manualidades realizaras.
Jajaja 😊 no te preocupes que todo es equivocandonos, deshilachando y volviendo a tejer hasta lograr lo que queremos. Estoy segura que te quedará igual o más lindo ✨❤️ muchas gracias por pasarte a mi blog
Es una belleza gracias por compartir ❤️
Muchas gracias 😊✨
Hola amiga. Este Llavero de Santa me encanta. Es un modelo de Santa muy bonito, la combinación que hiciste con los materiales fue excelente y acorde con la imagen.
Muchas gracias! Me alegra que te haya gustado mi llaverito de santa 😊❤️🎅🏼
Que lindo, el material que usaste para el rostro se ve genial, seria lindo incluso para hacer como adorno para el árbol de navidad. Saludos
Sii. Sin duda en el arbolito se vería genial. Muchas gracias por tu comentario. Un abrazo 🤗✨❤️
Thank you for sharing this post on HIVE!
Your content got selected by our fellow curator hafizullah & you received a little thank you upvote from our non-profit curation initiative. Your post will be featured in one of our recurring curation compilations which is aiming to offer you a stage to widen your audience within the DIY scene of Hive.
Next time make sure to post / cross-post your creation within the DIYHub community on HIVE and you will receive a higher upvote!
Stay creative & hive on!
Thanks for your support ❤️😊
You're welcome. The Santa style keychain looks gorgeous. Keep up the good work. 😊
Yay! 🤗
Your content has been boosted with Ecency Points, by @stresskiller.
Use Ecency daily to boost your growth on platform!
Support Ecency
Vote for new Proposal
Delegate HP and earn more
Thanks for your support ❤️✨😊
Hola @estefania3, el santa te quedó muy hermoso, además de llavero de vería genial en el árbol de navidad, gracias por compartir.
Feliz día!
Sii. Yo como no tengo arbolito hice este llaverito, así llevo un poquito de navidad a dónde vaya. 😊 Muchas gracias por pasarte a mi blog ❤️
Me acabas de crear una necesidad, necesito este llavero en mi vida, que tierno papá Noel para mí sería un lindo regalo de navidad, gracias por compartir.
Jajaja qué chevere que te gustó. Me alegra saberlo. Te mando un abrazo 🤗 un santita pero virtual jaja 🎅🏼