Un feliz jueves tengan todos mis queridos Hivers amigos, estos día he sentido como poco a poco se va sintiendo ese frío decembrino que le da la bienvenida a la navidad, como costumbre en mi familia hoy es la noche de armar el árbol acompañado de un chocolate caliente, malvaviscos y villancicos.
A happy Thursday to all my dear Hivers friends, these days I have felt how little by little I have been feeling that december cold that welcomes Christmas, as a custom in my family today is the night to build the tree with hot chocolate, marshmallows and carols.
Como les comenté en el blog pasado, por años dejé que se perdiera esta tradición de armar y decorar el árbol de navidad, solo nos abocamos a la cena navideña y compartir en familia, creo esto no se debió solo a la enfermedad de mi madre, sino también a los chicos se hicieron hombres y ya no había niño Jesús que trajera regalos, esta es otra tradición que debemos recuperar.
As I told you in the last blog, for years I let this tradition of building and decorating the Christmas tree get lost, we only focus on the Christmas dinner and sharing with the family, I think this was not only due to my mother's illness, but also because the boys became men and there was no more baby Jesus to bring gifts, this is another tradition that we must recover.

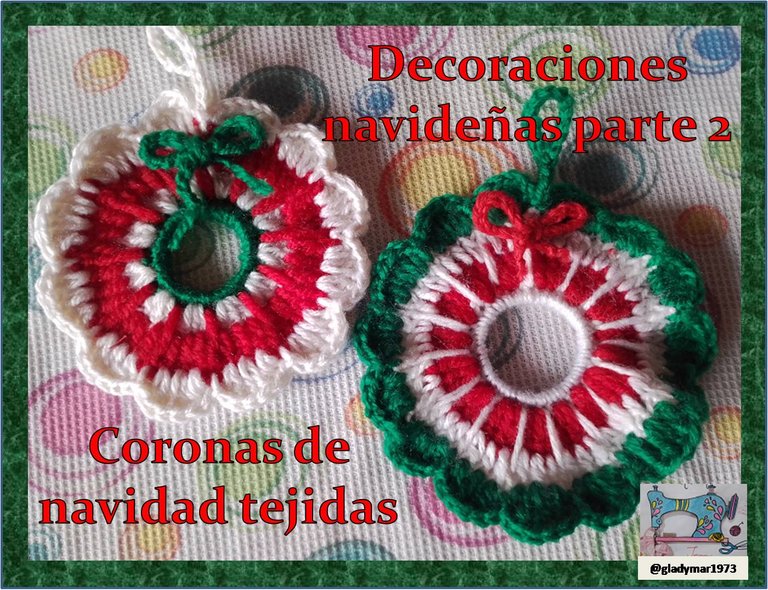
Bueno ahora siguiendo con mi deseo de recuperar tradiciones, hoy les comparto otra de mis creaciones en honor a estas fechas: unas coronas navideñas que bien nos sirven para colocarlas en el árbol o como parte de la decoración en la casa.
Well now continuing with my desire to recover traditions, today I share with you another of my creations in honor of these dates: Christmas wreaths that can be placed on the tree or as part of the decoration in the house.
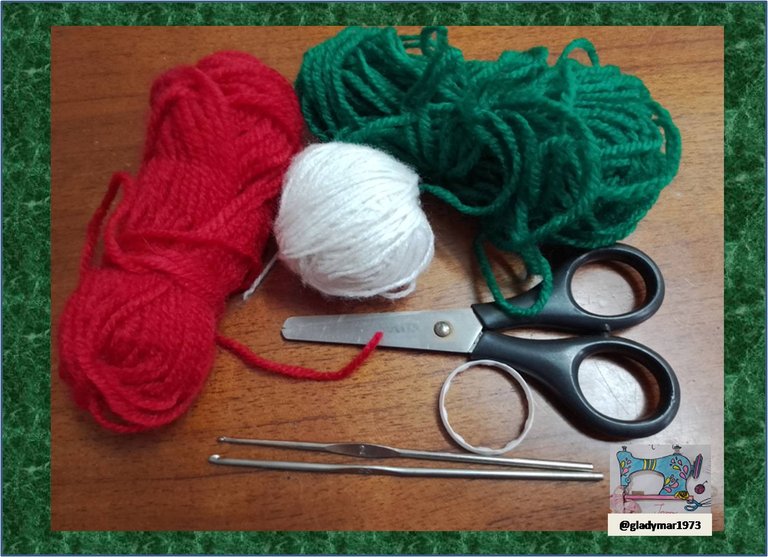
Para estas coronas necesitaremos:
-Aros desechables de los que traen los envases de refrescos o agua.
-Estambres rojo, verde y blanco.
-Ganchillo de 3 mm
-Tijera.
For these wreaths we will need:
- Disposable hoops that come with soda or water containers.
- Red, green and white stamens.
- 3 mm crochet hook
- Scissors.
Procedimiento:
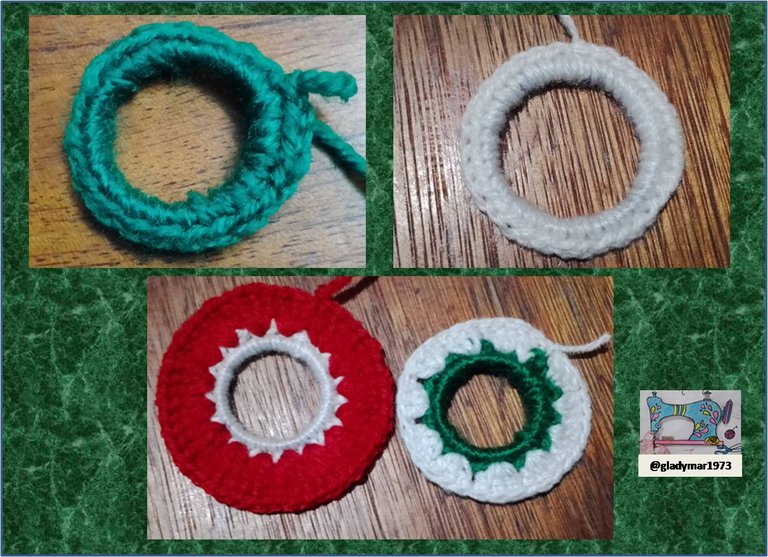
1ª vuelta: comenzamos tejiendo puntos bajos alrededor de nuestro aro finalizando con un nudo raso y cortamos el hilo, estos deben ser en números pares, yo para una tejí 30 puntos y para la otra 32 porque el estambre blanco era más delgado que los demás. Esta la tejí en color blanco en una corona y en verde en la otra.
2ª vuelta: para esta vuelta cambiamos de color yo a la de la base en blanco le coloqué rojo y a la de base en verde le blanco. Comenzamos nuestra vuelta tejiendo 3 cadenetas (que vendrían siendo mi primer punto alto) y 2 puntos altos, saltamos un punto de la vuelta anterior y en el siguiente punto tejemos 3 puntos altos, repetimos de * a * y finalizamos con un nudo raso y cortamos el hilo.
Procedure:
1st round: we start knitting low stitches around our hoop ending with a satin knot and cut the yarn, these should be in even numbers, I knitted 30 stitches for one and 32 for the other because the white stamen was thinner than the others. This one I knitted in white in one crown and in green in the other.
2nd row: for this row we change the color, I used red for the white base and white for the green base. We start our row knitting 3 chains (which would be my first double crochet) and 2 double crochets, * skip a stitch of the previous row and in the next stitch we knit 3 double crochets*, repeat from * to * and finish with a satin knot and cut the yarn.
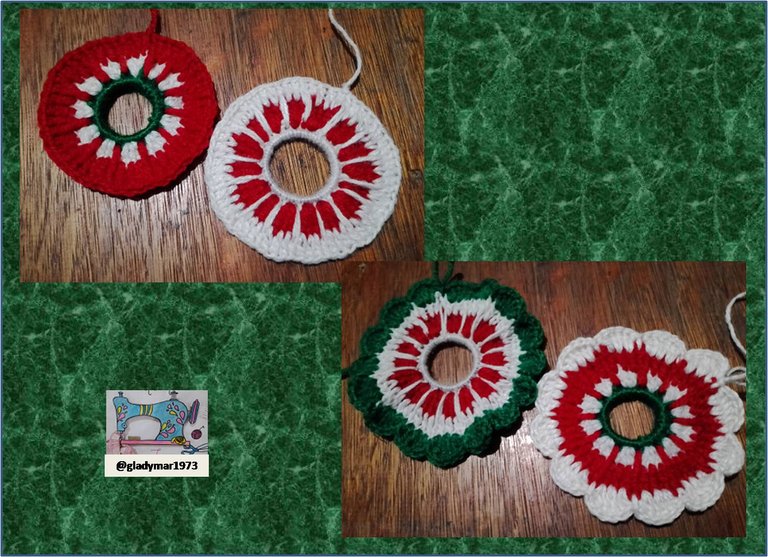
3ª vuelta: para esta vuelta volvemos a cambiar de color, a la de la base en blanco volví a retomar el color blanco mientras que la de la base verde le cambié al color rojo. Comenzamos tejiendo 3 cadenetas en la tercera cadeneta de las cadeneta de la vuelta anterior, y un punto alto en cada punto de los puntos restantes de este motivo, *seguido metemos la aguja por el punto que hemos dejado libre de la 1ª vuelta y hacemos un punto extra largo; tejemos nuevamente 1 punto alto en cada punto el motivo siguiente * y repetimos de * a * hasta culminar la vuelta en el último punto libre de la 1a vuelta, cerramos con un punto raso y cortamos.
4ª vuelta: nuevamente cambiamos el color o si los prefieren culminan la labor con el mismo color, yo cambie de colores para culminar una en blanco y la otra en verde; en esta vuelta tejemos 3 cadenetas y 1 punto alto en el mismo punto base haciendo así un aumento, en los siguientes 2 puntos hacemos 2 aumentos, para obtener en total 3 aumentos en cada motivo seguido por un punto raso en el punto extra largo de la vuelta anterior, repetimos y cerramos la vuelta con un nudo deslizable.
3rd row: for this row we change the color again, the one with the white base I returned to the white color while the one with the green base I changed it to the red color. We start knitting 3 chains in the third chain of the chain of the previous row, and a single crochet in each stitch of the remaining stitches of this motif, *next we put the needle through the stitch we left free from the 1st row and knit an extra long stitch; we knit again 1 single crochet in each stitch of the following motif * and repeat from * to * until we finish the row in the last free stitch of the 1st row, we close with a single crochet and cut.
4th row: again we change the color or if you prefer, finish the work with the same color, I changed colors to finish one in white and the other in green; in this row we knit 3 chains and 1 double crochet in the same base stitch making an increase, in the following 2 stitches we make 2 increases, to obtain a total of 3 increases in each motif followed by a single crochet in the extra long stitch of the previous row, we repeat and close the row with a slip knot.
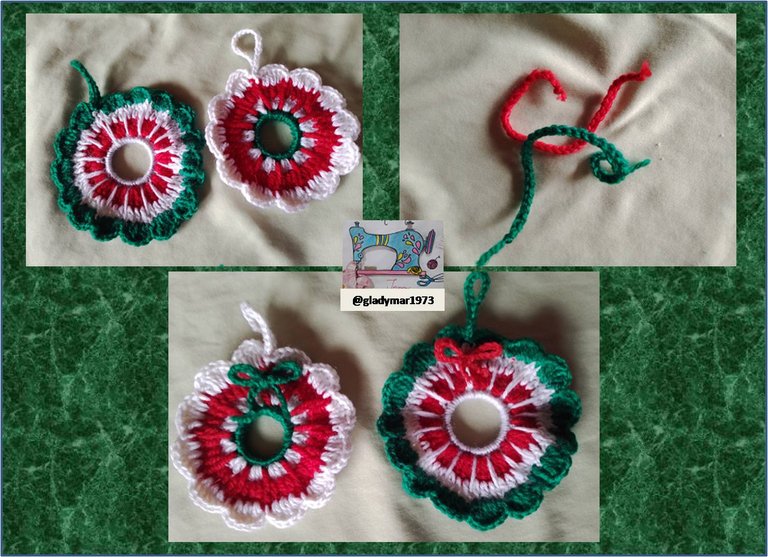
Para finalizar la corona tejemos una cadena de 16 a 20 cadenetas para colgarla, cerramos en el punto base con un punto raso y cortamos la hebra.
Para darle un toque especial tejemos una cadena de 35 cadenetas para realizar una lazo, este lo colocaremos en la 3ª vuelta debajo de nuestro cordón para colgar y listo hemos terminados nuestras coronas.
To finish the wreath we knit a chain of 16 to 20 chains to hang it, we close in the base stitch with a satin stitch and cut the strand.
To give it a special touch we weave a chain of 35 chains to make a loop, this we will place it in the 3rd round under our cord to hang it and ready we have finished our wreaths.

Gracias por llegar hasta aquí, espero les hayan gusta estas coronas y se animen a realizar sus propios adornos y arreglos para su hogar, que tengan un feliz y bendecido día.
Thank you for coming this far, I hope you have liked these wreaths and are encouraged to make your own decorations and arrangements for your home, have a happy and blessed day.
Contenido original.
Las fotos fueron tomadas con mi celular Moto E6I
La imagen principal fue capturada de la portada del libro y editada en PowerPoint.
Los banner fueron creados por mí en PowerPoint.
La traducción fue a través de www.DeepL.com,Translator (versión gratuita).
Original content.
The photos were taken with my Moto E6I cell phone.
The main image was captured from the book cover and edited in PowerPoint.
The banners were created by me in PowerPoint.
The translation was done through www.DeepL.com,Translator (free version).
Thank you for sharing this post on HIVE!
Your content got selected by our fellow curator jasonmunapasee & you just received a little thank you upvote from us for your great work! Your post will be featured in one of our recurring compilations which are aiming to offer you a stage to widen your audience within the DIY scene of Hive. Next time make sure to post / cross-post your creation within the DIYHub community on HIVE and you will receive a higher upvote ;) Stay creative & HIVE ON!
Please vote for our hive witness <3
Amiga que lindos proyectos, haces ver tan fácil tejer las formas están perfectamente definidas, y esos colores son clásicos de la navidad.
Gracias querida Jennyzer eso pasa cuando tejemos con amor, se transmite a traves de las fotos.
Gracias por tomar tu tiempo para leer el blog y feliz tarde
Hola Gladymar. Que lindos que se ven estos adornos tejidos, sirven para decorar el árbol o cualquier rincón de la casa. ¡Me gustó como quedó, gracias por compartirlo!
Saludos y que tengas un lindo día :)
Saludos Lauramica me alegra que te hayan gustado y ciertamente su uso es muy versatil a la hora de decorar.
Gracias por tomar tu tiempo para comentar
Saludos y fuerte abrazo
@gladymar1973 beautiful garlands,very easy and beautifully color combination.
Es increíble las cosas hermosas que se pueden hacer tejidas, la felicito este trabajo está demasiado bello, me gusta la navidad, su combinación de colores y sus coronas 🤗, gracias por compartir , saludos 🖖
This is really colourful
Muy hermosas!!🎄🎄 muchas gracias por este compartir este tutorial!!🌻🌹🌼🌸
Gracias a ti por comentar, 🌹✨✨🌲🌲☃️⛄❄️
Que lindas coronas @gladymar1973 además están fáciles, gracias por compartir 🤗
Me alegra que te hayan gustado
Saludos
Feliz tarde y un fuerte abrazo ✨🌹😘