¡Hola, espero la estén pasando muy bien!
Hi, I hope you are having a great time!
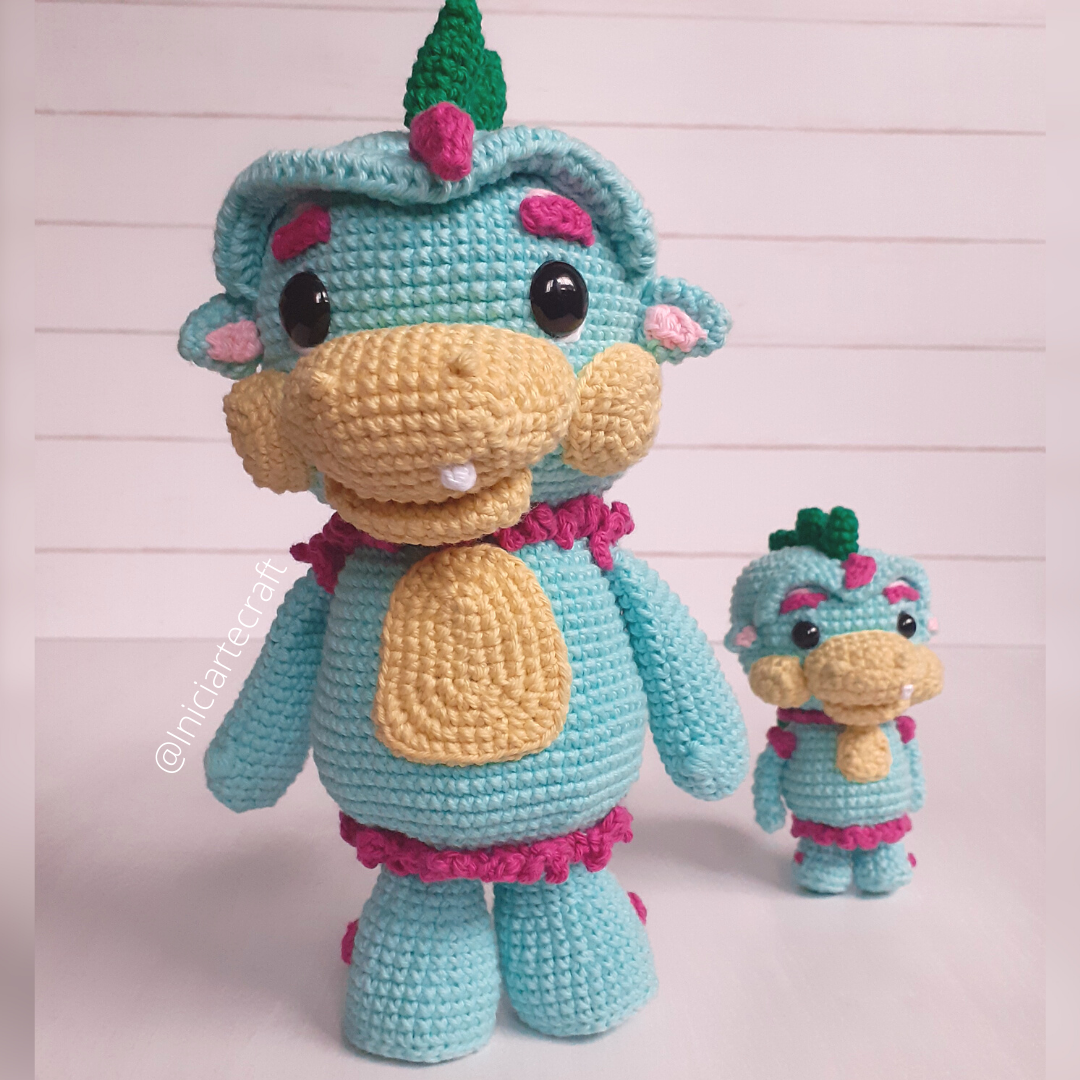
En la publicación anterior, explicamos un poco el uso del escalímetro para aumentar o reducir la escala del amigurumi. En este caso lo utilicé para aumentar el tamaño al doble. Si bien, me guié del patrón inicial, tuve que rediseñar varias partes. ¡Veamos cómo quedó el resultado!.
In the previous publication, we explained a bit about the use of the scalimeter to increase or decrease the scale of the amigurumi. In this case I used it to double the size. Although I was guided by the initial pattern, I had to redesign several parts, so let's see how the result turned out!
Continuamos tejiendo / we continue to weave
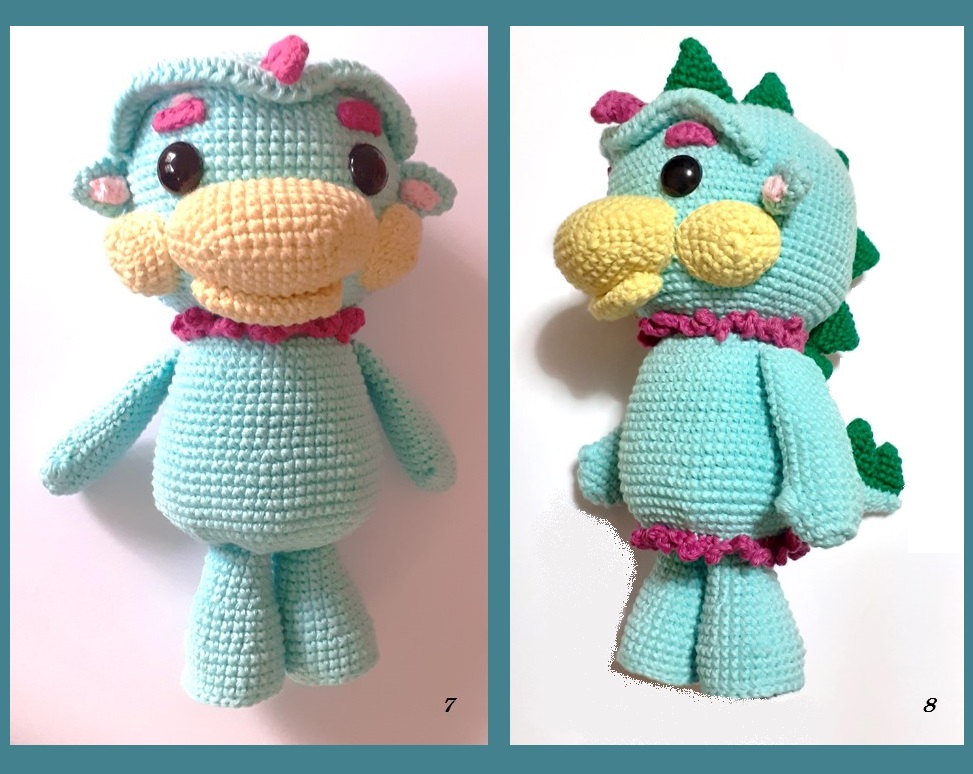
Para los brazos, sí me basé en la imagen referencial. Al ser un amigurumi de tamaño significativo, te da la ventaja de moldear varias formas a comparación de un tejido pequeño. Una vez tejidas las extremidades, se unieron al cuerpo (fig. 7). Las púas o espinas de la espalda, si fueron similares al patrón original. También se le agregó un borde rosado al finalizar el cuerpo (fig. 8).
For the arms, I did rely on the reference image. Being an amigurumi of significant size, it gives you the advantage of moulding various shapes compared to a small fabric. Once the limbs were knitted, they were attached to the body (fig. 7). The spikes on the back were similar to the original pattern. A pink border was also added at the end of the body (fig. 8).
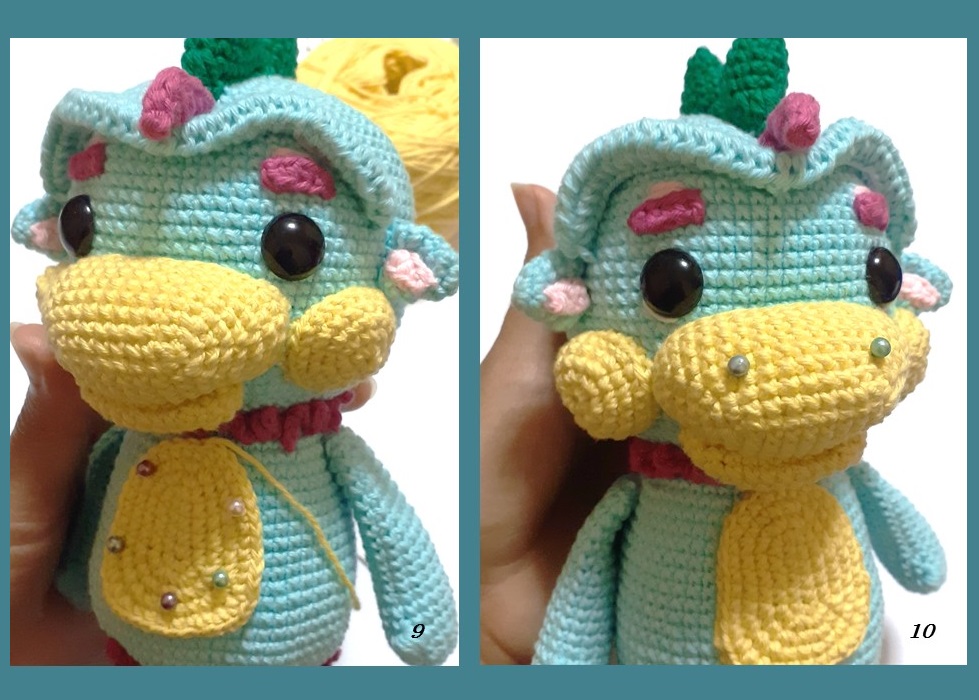
La figura del pecho fue distinto al patrón original. En esta pieza, se diseñó una forma como triangular ovalada. Antes de coserlo al cuerpo, se colocó alfileres para fijarlo, de esa manera será como una guía (fig. 9). Luego se bordó los orificios del hocico, para esto también se colocó alfileres antes de tejerlos (fig. 10).
The shape of the chest was different from the original pattern. On this piece, an oval triangular shape was designed. Before sewing it to the body, pins were placed to fix it, so that it will be like a guide (fig. 9). Then the holes of the muzzle were embroidered, for this also pins were placed before weaving (fig. 10).
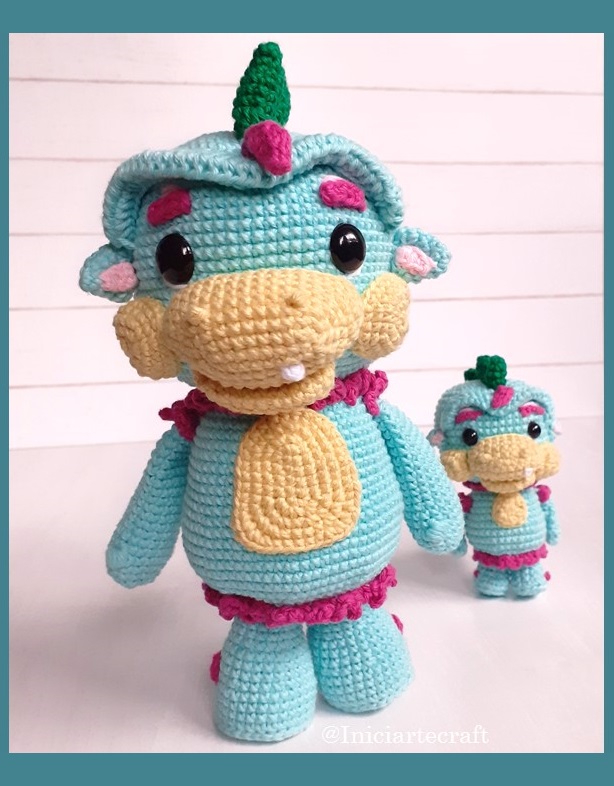
Creo que quedo bien el resultado, el escalímetro fue de gran ayuda al inicio, como para darnos una idea del tamaño a tejer. Luego ya se vuelve menos complejo. Como mencioné antes, cada diseño (grande o pequeño) tiene partes complicadas.
I think it turned out well, the scalimeter was a great help at the beginning, to give us an idea of the size to knit. Then it becomes less complex. As I mentioned before, every design (big or small) has complicated parts.
¿Te animarías a utilizar el escalímetro en algún proyecto?
Would you like to use the scalimeter in a project?
PD: estoy pensando en hacerle una parte III.
PS: I'm thinking of making a part III.
¡…Hasta la próxima!
See you next time!
Dato curioso: Si bien los diseños grandes son menos complicados, tenemos que tener en cuenta que se utilizará más material, por lo que a veces limita la imaginación, al menos para mí, quien me encanta tener una gama de colores a la mano / While larger designs are less complicated, we have to bear in mind that more material will be used, so it sometimes limits the imagination, at least for me, who loves to have a range of colours at hand.
►Encuéntranos en:
Creary
Your content has been voted as a part of Encouragement program. Keep up the good work!
Use Ecency daily to boost your growth on platform!
Support Ecency
Vote for Proposal
Delegate HP and earn more
Thanks very much! :D .
Hola @inici-arte , nunca he trabajado con un escalímetro, pero siempre hay una primera vez. Me gustó mucho tu trabajo! Siempre me sorprendes.
¡Gracias!. Al inicio creí que sería muy laborioso utilizarlo, luego cuando empecé desapareció lo laborioso, jaja. ¡Buenas vibras!.