Hi Hiveians! Today is my 3rd participation to the #Needleworkmonday challenge and I would like to show you how to make another Macrame keychain!
This is a great gift for friends and family. You can keep them or even sell them! :-)
This time I'm adding more pearls to my keychains. Here's a link to my last post with a diferrent tutorial on keychains!: https://peakd.com/hive-127911/@jadeaca/beauty-bomb-how-to-make-a-simple-and-beautiful-macrame-keychain-with-pearls
Let's dive in! 😀
Materials needed:
Carabiner ring (I didn't have one so I used a plastic ring)
Three straight pins
Five pearls with the color of your choice
A 45cm long yarn/wool with the color of your choice
Two pieces of 80cm yarn/wool with a different color than our 45cm yarn
Also, I highly recommend if you want to use wool for your project, don't mix it with a diferrent type of yarn. I mean, that if you use wool, don't use any other type of string for your keychain. Also if you use yarn, don't mix it with wool. I learned that if I did that, it wouldn't look very nice. On the right side of the image below, was my fail when trying to mix the diferrent types of string..
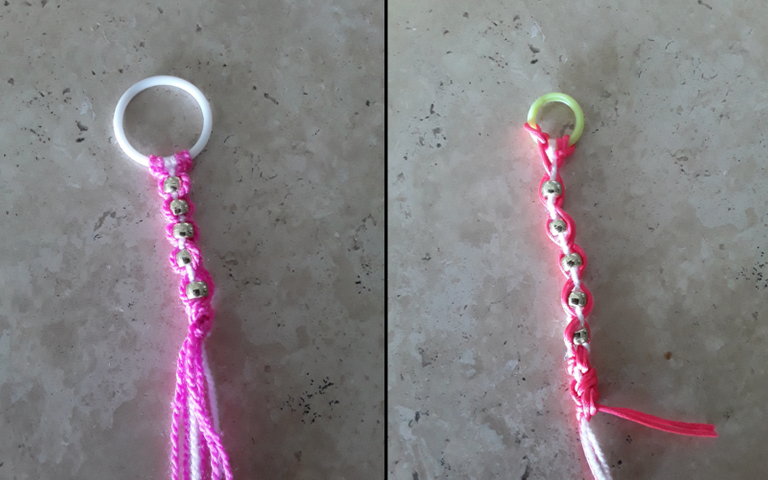
I made this so I can practice my Macrame and improve. I like to make these keychains alot. I learned the technique today and my goal is to make more. This tecnique is very pretty and it only took about two or three minutes. I've learned from my mistake that I made, but in the left hand side of the image above I figured out the correct way. I'm happy to share my failures and victories with you guys so you don't have to make the same mistake. 🙂
Process:
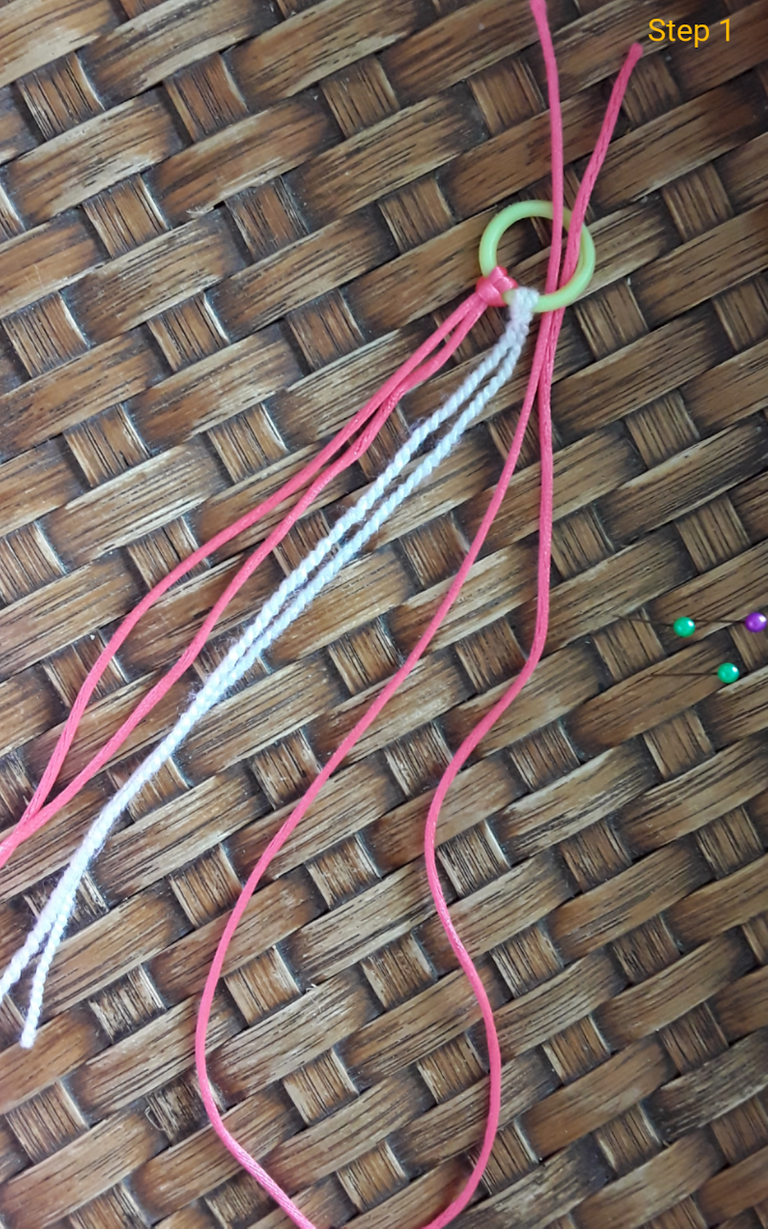
First, take the 80cm yarn and fold it the way shown in the image, then, slightly pull the ends out of the ring/carabiner ring.
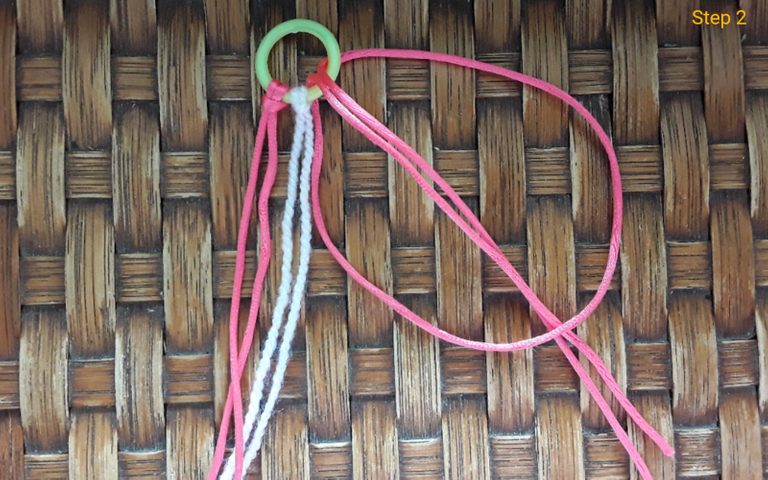
Then, put your hand through the loop from the bottom and grap the ends, then, pull it out until it's tight enough.
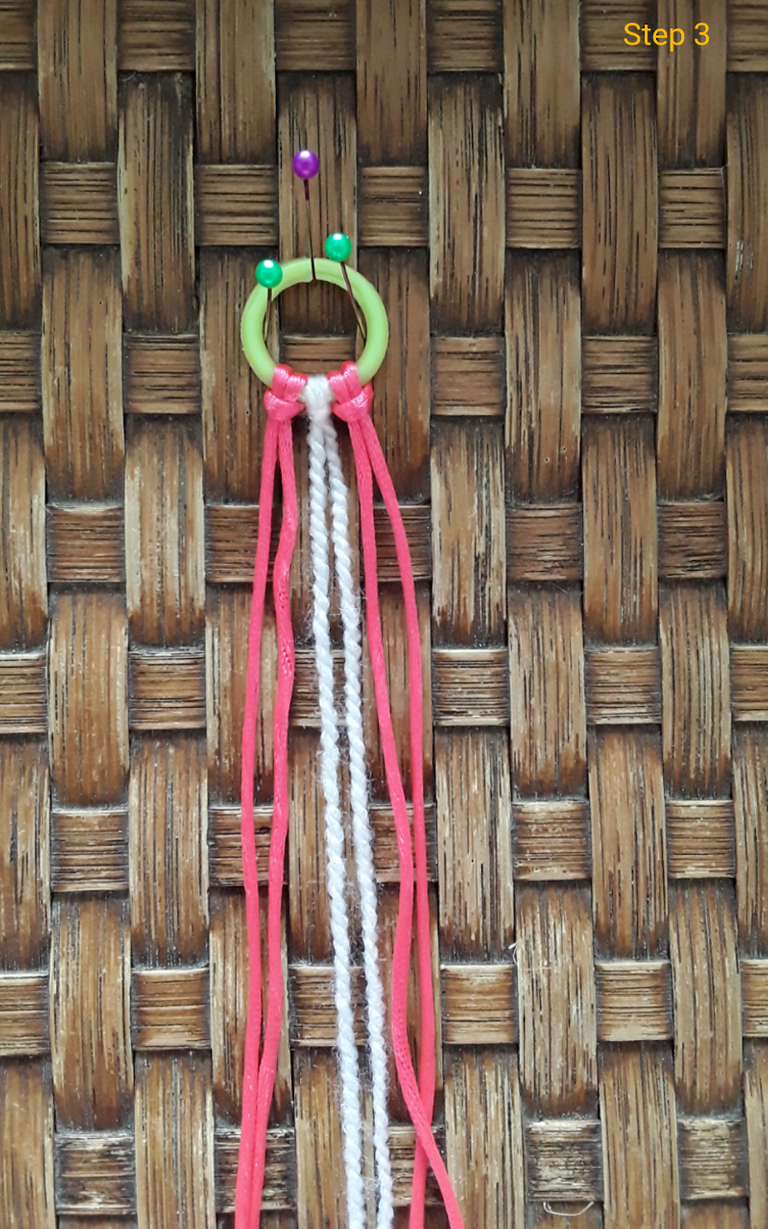
Repeat these steps with all three of them. The 45cm long string should be in the middle.
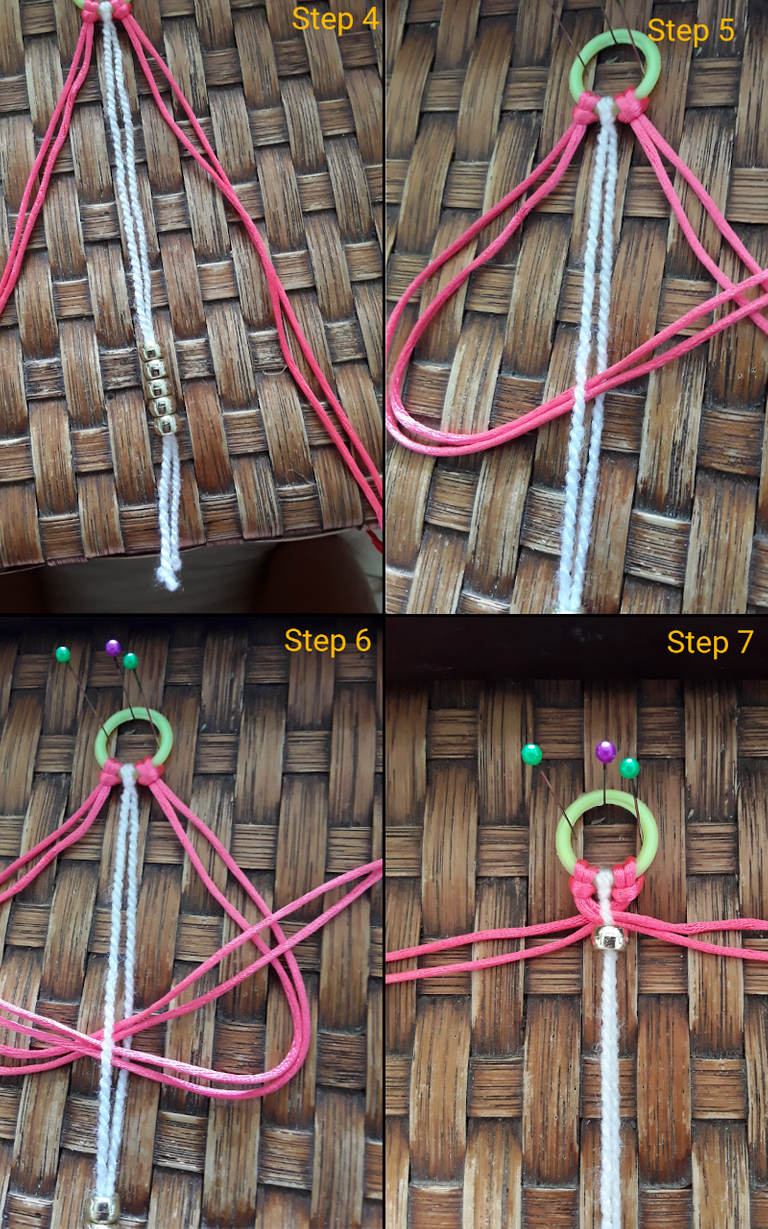
Then, push the five pearls onto the two white strands, but not all of the way yet. For step 5, pull the two left hand strands through the two white ones, the way shown in the image above. You can do that again, but with the right hand strands and pull. After that, you can put up one of the pearls.

Keep repeating those steps until you eventually run out of the five pearls you put on the two white stands. :-)

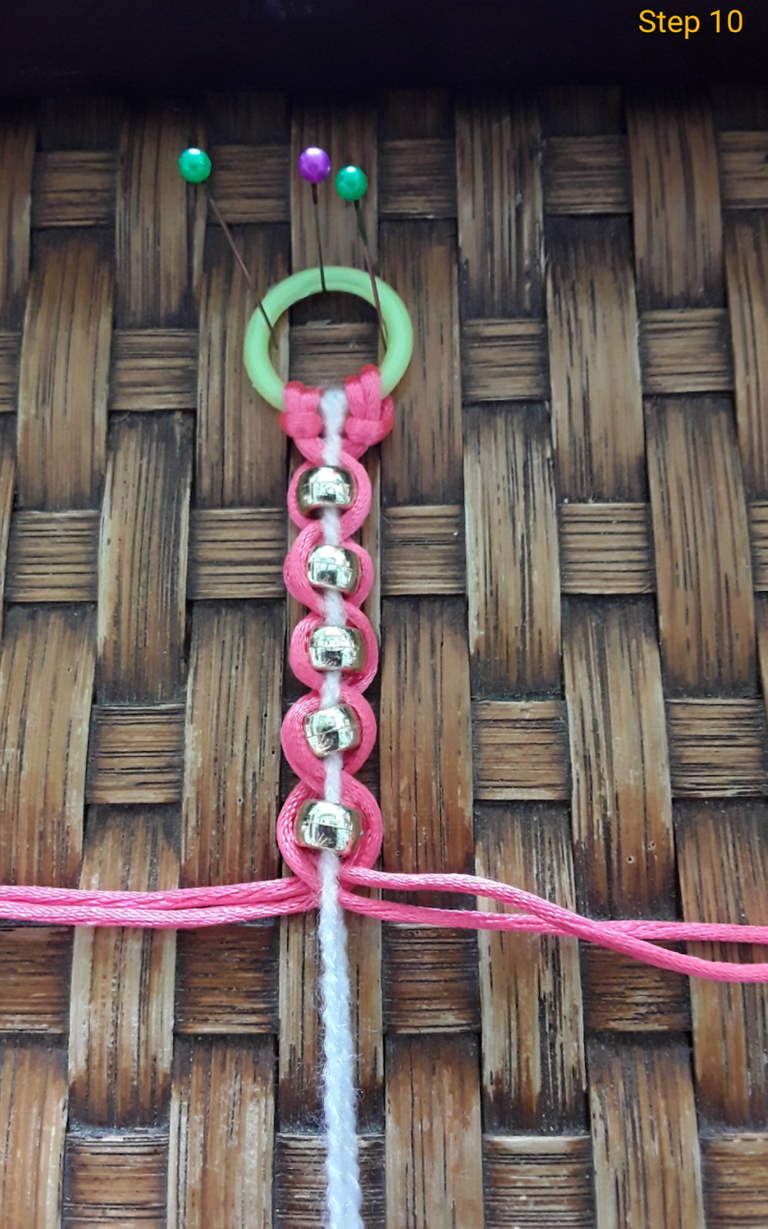
When you're finished with the pearls, tie a knot at the very bottom so your work does not open up. Sorry I didn't get a photo of that, because my parents told me that I shouldn't use too many images in a post or it'll be hard for all of them to upload onto your devices. Thanks.
When you tied the knot, you can cut off a little bit of the excess yarn hanging on the bottom to make them even. Then you're done! 😀
Making this made me feel happy today so I'll continue.
Thank you for viewing my post, I hope you enjoyed it and enjoy the rest of your day! :-)

Please like, share and comment below, let's make this world a better place! 😄😄😄
How beautiful this technique is, it reminds me that once I went to a crafts course when I was a child and they taught us how to make these knots... of course now they all disappeared from my mind 😂.
It's good to share the mistakes too, to get out of everything being so perfect always. There is always another opportunity to do better ❣️.
Lol. Thank you so much @lauramica! The most perfect things aren't always so perfect in the beginning. Ever since I was a baby, I remember my parents always telling me "practice makes perfect!" or my mama said in German: "Üben, üben, üben!" Which means "practice, practice, practice!" hehe. 😁
Congratulations @jadeaca! You have completed the following achievement on the Hive blockchain and have been rewarded with new badge(s):
Your next target is to reach 300 posts.
Your next target is to reach 4750 upvotes.
You can view your badges on your board and compare yourself to others in the Ranking
If you no longer want to receive notifications, reply to this comment with the word
STOPTo support your work, I also upvoted your post!
Support the HiveBuzz project. Vote for our proposal!