Hello creatives, today is Monday
This week I will present you my process of design and elaboration of a skirt made to my measurements.
I started three months ago a fashion design training, where I have learned, among other things to organize the sizing of the garments that I will make in each training module, several pieces will be made, as a closing activity.
This time I had to design and make a custom skirt.
Take the measurements of my body to make the skirt,
Waist circumference
Hip circumference
Hip length
And skirt length
These are the measurements to be taken to make the pattern.
Then with pencil, square and paper start tracing the pattern, this is traced only half so that the fabric is cut double.
So to trace half of the pattern.
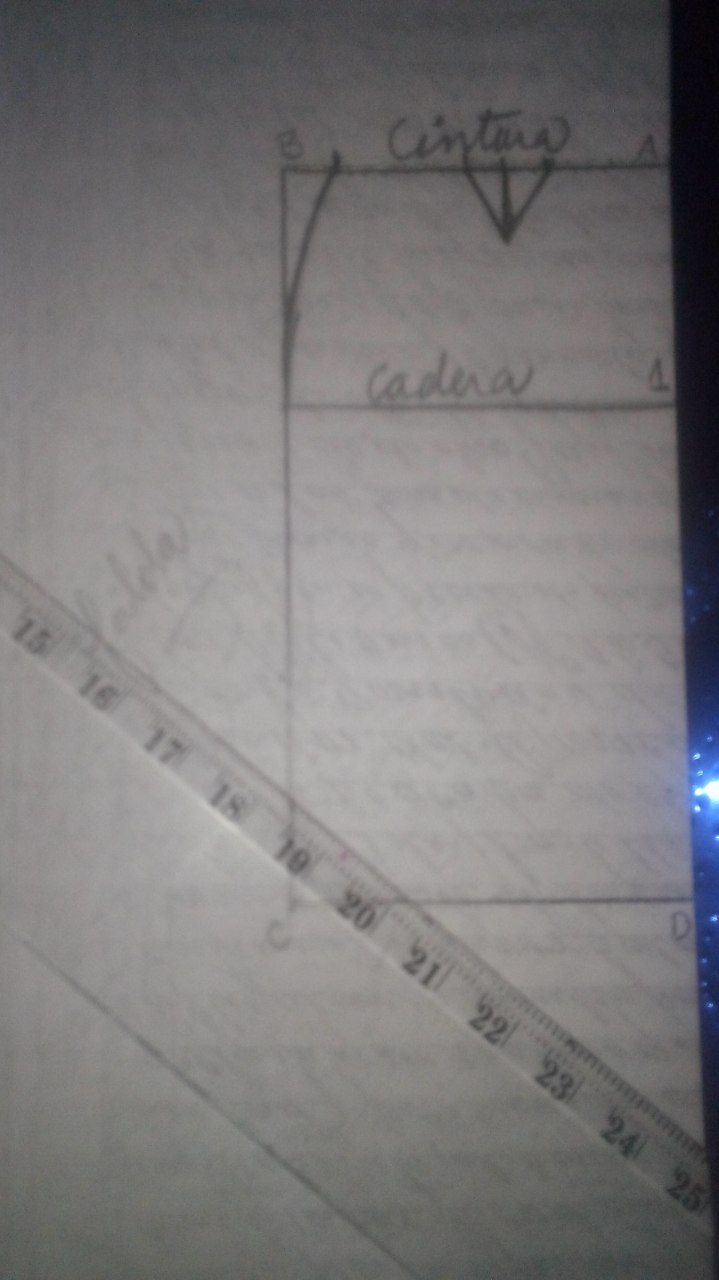
Half the hip circumference to give the width of the skirt, then half the waist circumference plus 3 centimeters to place the darts.
After tracing the pattern, it is transferred to the fabric, leaving 2 centimeters to join.
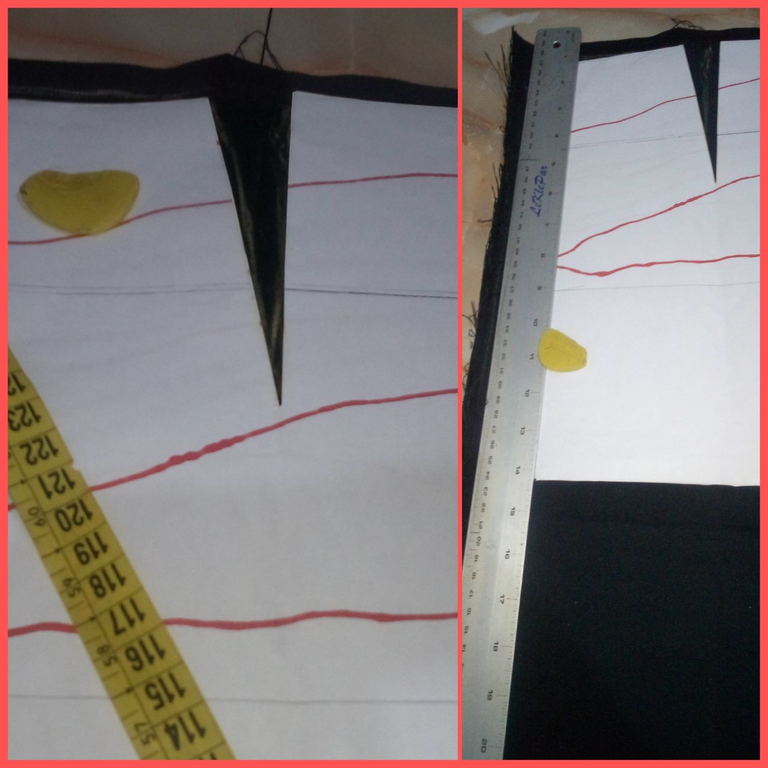
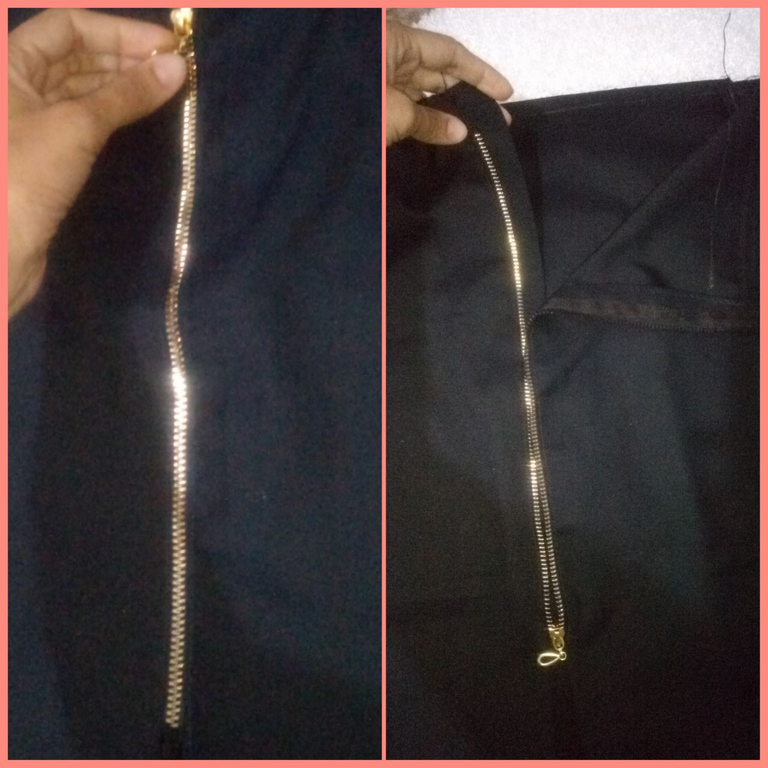
These skirts have a zipper on the right side of the skirt, so cut the pattern on the left side, leaving three centimeters to place the zipper.
Also leave one centimeter on top to attach the waistband.
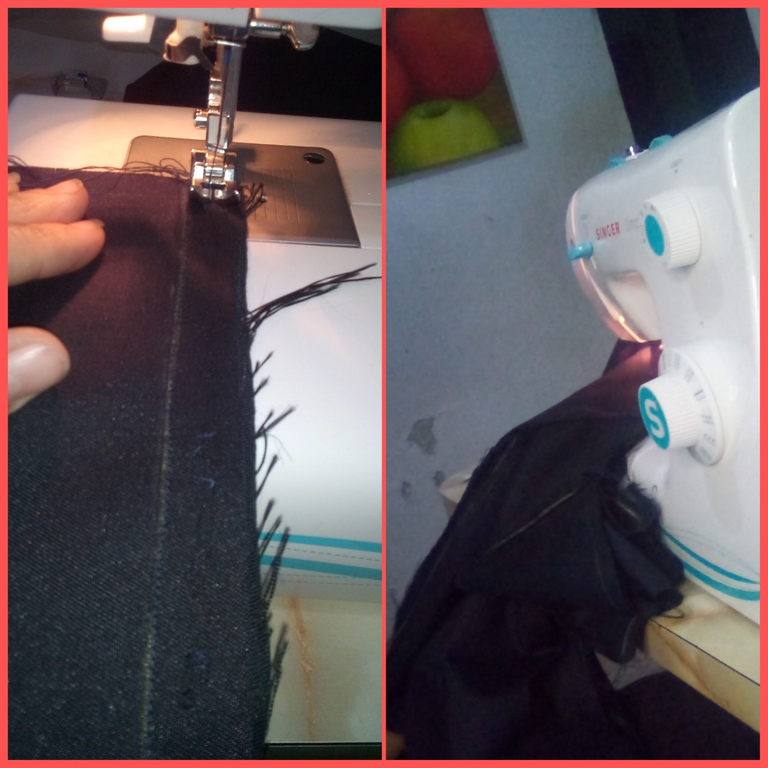
Start sewing
First place the super cute zipper on one side of the skirt, and place a fabric holder, which is a strip of fabric that is placed behind the zipper to prevent the zipper from hurting the skin.
2.- I sewed the darts and sides.
Place the waistband, measure a long strip of 10 centimeters wide, which will give the circumference of the waist.
4.- Sew the sides.
I also sewed the hem, the length of the skirt is 70 cm, reaching below my knees.
I confess that at first the skirt did not fit me, it was too big and I had to unpick and sew again, about twice.
At the time of cutting the fabric I was very insecure and left a lot of space to sew, which then added centimeters at the time of passing the machine, this allowed me to perfect the seam at each step.*

It is important to
When cutting a piece to be sure of what is being done, to achieve that the piece has an ideal cut, likewise, sew impeccably, a well elaborated seam is the success of the final piece, especially if it is a garment for another person.
In the case of the skirt, I had many mistakes that I later improved, it was my first time making this garment ....
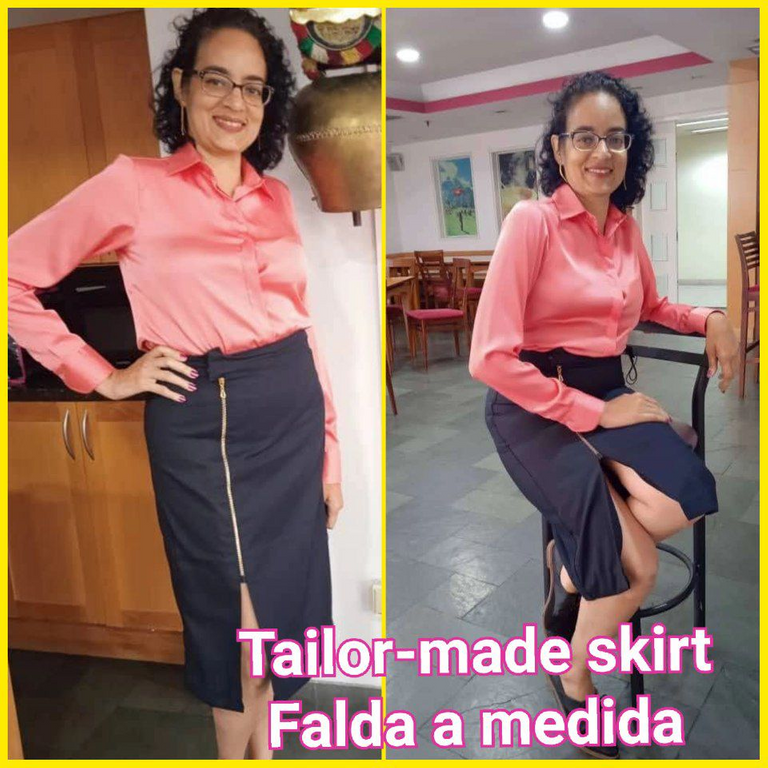
I feel happy and proud of the final result, so I wore it for the first time to attend an event that I organized, I matched it with a silk blouse that my design teacher made, so it looked spectacular.
Every day I am learning and improving my sewing skills.
Thanks for reading to the end, see you soon in my next idea.....

Translated with www.DeepL.com/Translator (free version)
Español
Hola creativos, hoy es lunes
Esta semana os voy a presentar mi proceso de diseño y elaboración de una falda hecha a mi medida.
Comencé hace tres meses una formación de diseño de moda, donde he aprendido, entre otras cosas a organizar el tallaje de las prendas que realizaré en cada módulo de formación, se realizarán varias piezas, como actividad de cierre.
Esta vez he tenido que diseñar y confeccionar una falda a medida.
Tomar las medidas de mi cuerpo para hacer la falda,
Circunferencia de la cintura
Circunferencia de la cadera
Largo de la cadera
Y el largo de la falda
Estas son las medidas que hay que tomar para hacer el patrón.
Luego con lápiz, escuadra y papel empezar a trazar el patrón, este se traza solo la mitad para que la tela se corte doble.
Así que para trazar la mitad del patrón.
La mitad de la circunferencia de la cadera para dar el ancho de la falda, luego la mitad de la circunferencia de la cintura más 3 centímetros para colocar los dardos.
Después de trazar el patrón, se transfiere a la tela, dejando 2 centímetros para unir.
Estas faldas tienen una cremallera en el lado derecho de la falda, por lo que hay que cortar el patrón por el lado izquierdo, dejando tres centímetros para colocar la cremallera.
Deja también un centímetro en la parte superior para colocar la cintura.
Empieza a coser
Primero coloca la cremallera súper bonita en uno de los lados de la falda, y coloca un soporte de tela, que es una tira de tela que se coloca detrás de la cremallera para evitar que la cremallera haga daño a la piel.
2.- Cosé las pinzas y los laterales.
3.- Colocá la cintura, medí una tira larga de 10 centímetros de ancho, que dará la circunferencia de la cintura.
4.- Cosé los laterales.
También cosí el dobladillo, el largo de la falda es de 70 centímetros, llegando por debajo de las rodillas.
Confieso que al principio la falda no me quedaba bien, era demasiado grande y tuve que descoser y volver a coser, unas dos veces.
Al momento de cortar la tela fui muy insegura y dejé mucho espacio para coser, que luego sumó centímetros al momento de pasar la máquina, esto me permitió perfeccionar la costura en cada paso.
Es importante
A la hora de cortar una pieza estar segura de lo que se está haciendo, para lograr que la pieza tenga un corte ideal, así mismo, coser impecablemente, una costura bien elaborada es el éxito de la pieza final, sobre todo si es una prenda para otra persona.
En el caso de la falda, tuve muchos errores que luego mejoré, era la primera vez que hacía esta prenda ....
Me siento feliz y orgullosa del resultado final, así que me la puse por primera vez para asistir a un evento que organicé, la combiné con una blusa de seda que hizo mi profesora de diseño, así que quedó espectacular.
Cada día estoy aprendiendo y mejorando mis habilidades de costura.
Gracias por leer hasta el final, nos vemos pronto en mi próxima idea.....
This is so unique and stylish, I like the idea of front zippers, it makes it classy and gorgeous.
Thanks for sharing @jennynas
Your outfit is lovely and the skirt fits you really good: not an easy endeavour as the skirt is so form-fitting. I like the zipper detail on the front <3
Beautiful made thanks for sharing @jennynas
Wow wow wow lovely thanks for sharing
Para ser la primera vez le quedo muy bien, la felicito
Para ser la primera vez le quedo muy bien, la felicito